Express mode: self-launching imaging on 25 drive ports
Self-launching imaging mode is a perfect solution when it comes to processing large amounts of data under time pressure, while still allowing gentle treatment of damaged media.
Express mode enables the automatic launch of multiple imaging sessions with predefined settings on all drive ports set to source, except the Extension port (25 in total). Once an examiner plugs drives into TaskForce 2, imaging sessions start automatically. Drive images are saved as a RAW, E01, or AFF4 file in a specified folder on the local server. Two 10Gb Ethernet ports of TaskForce 2 enable high data throughput.
Additionally, there is the option to group ports in Express mode and assign different imaging settings for each group. TaskForce 2 can be set to automatically diagnose all source drives before imaging and proceed only if diagnostics show no issues.
In this article, you will learn how to:
Configure Express mode
Before activating Express mode, you need to configure it first: specify the target folder, file image format, and other imaging details.
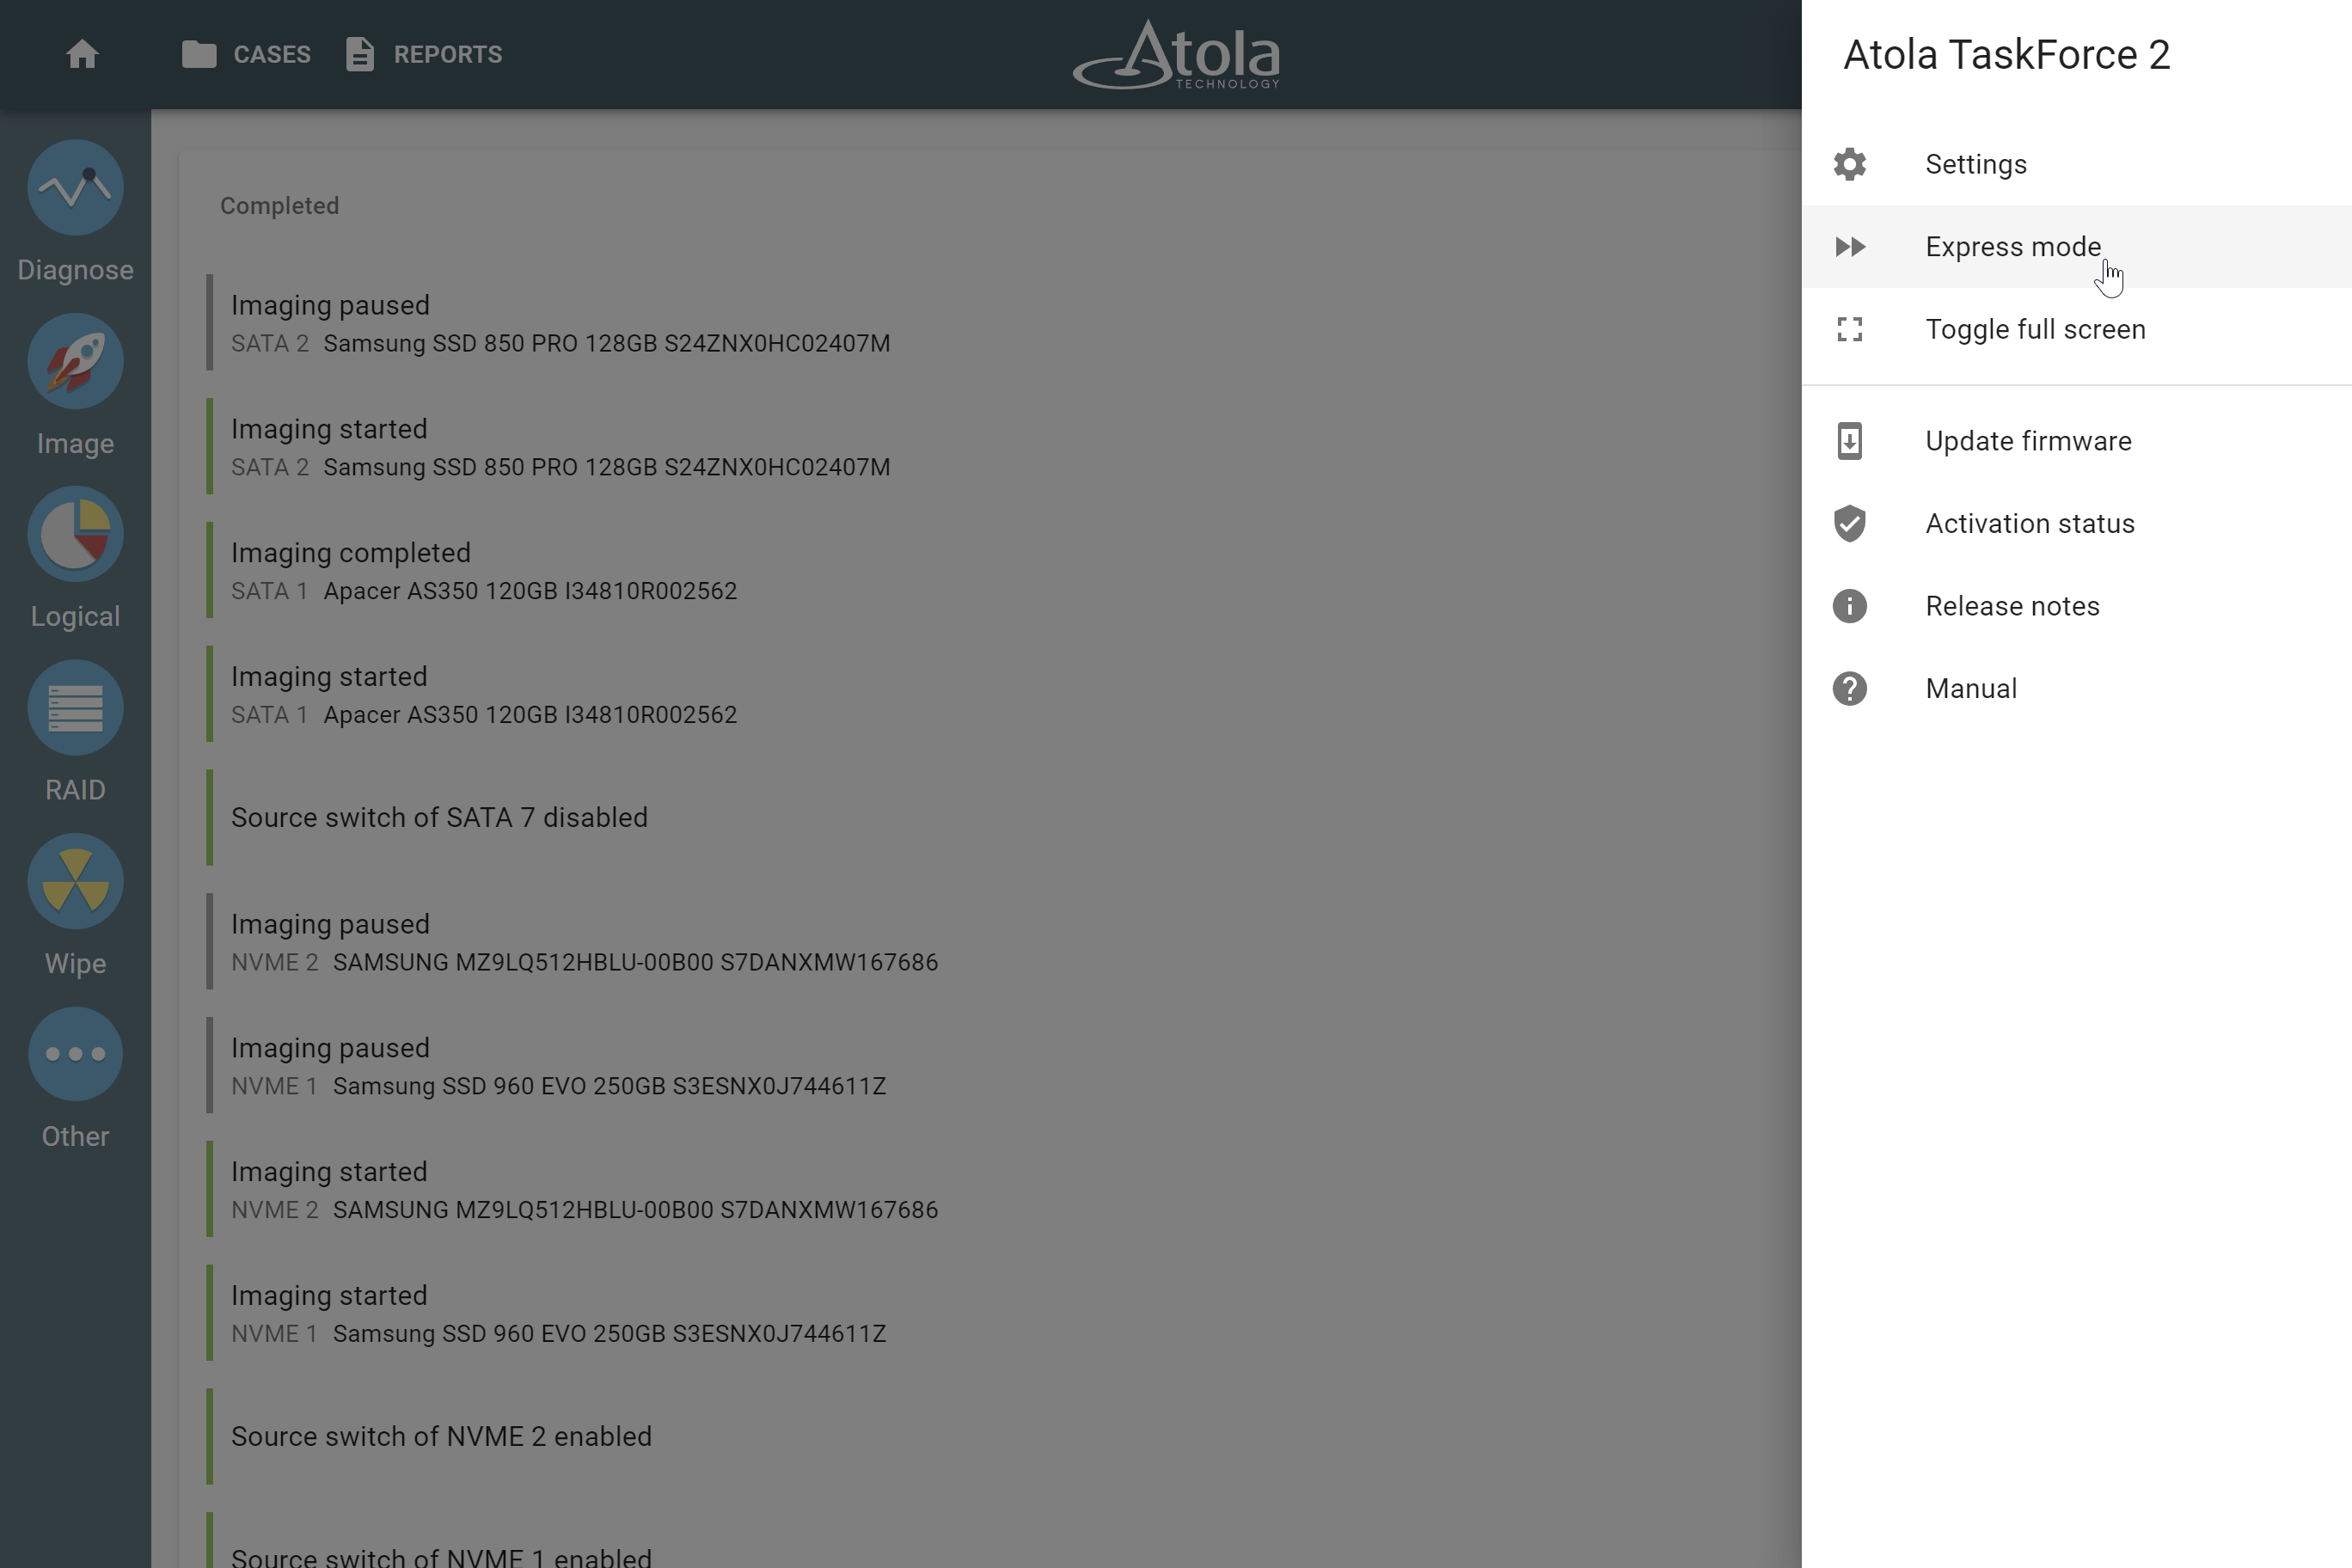
To open the Express mode settings page, click the Menu in the top right and select Express mode.
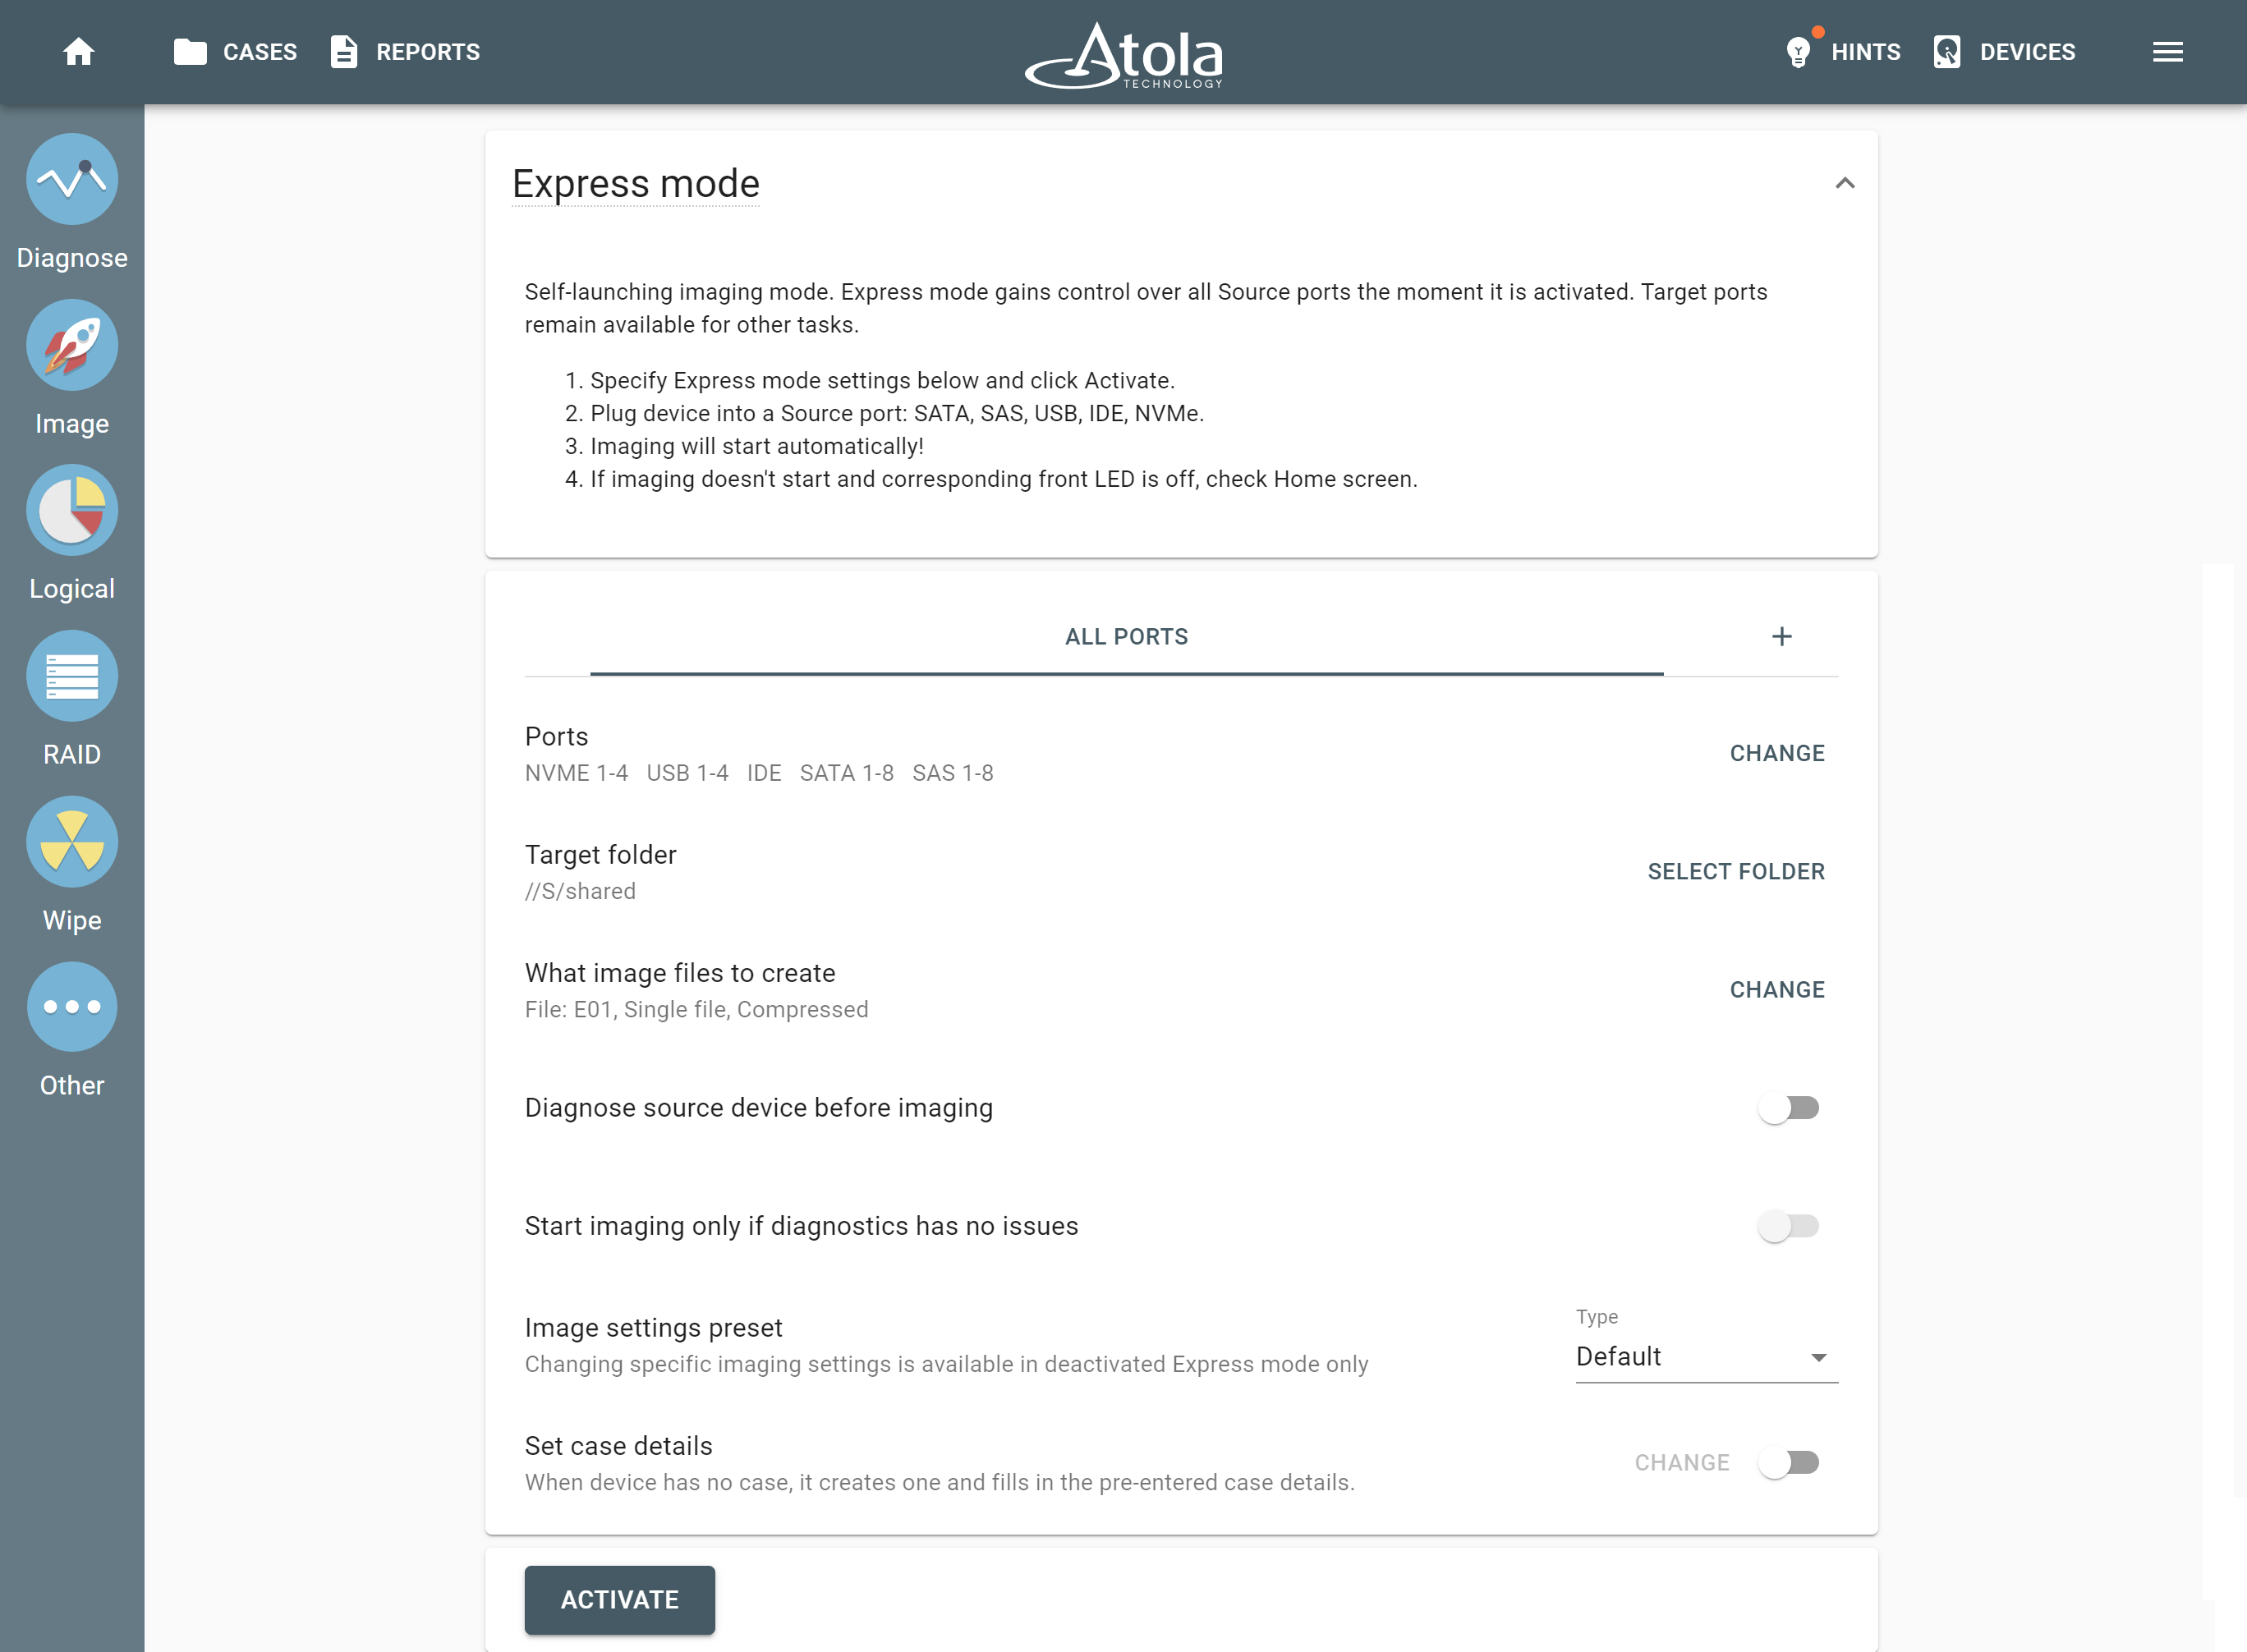
TaskForce 2 can process 25 self-launching imaging sessions in Express mode on almost all of its ports, except for the Extension slot. The ports that can be used for imaging in Express mode are:
- 4 NVMe M.2/U.2
- 8 SATA
- 8 SATA/SAS
- 4 USB
- 1 IDE
When activated, Express mode controls all source ports, leaving target ones available for other tasks. If a port is switched from target to source, it also becomes available for imaging in Express mode.
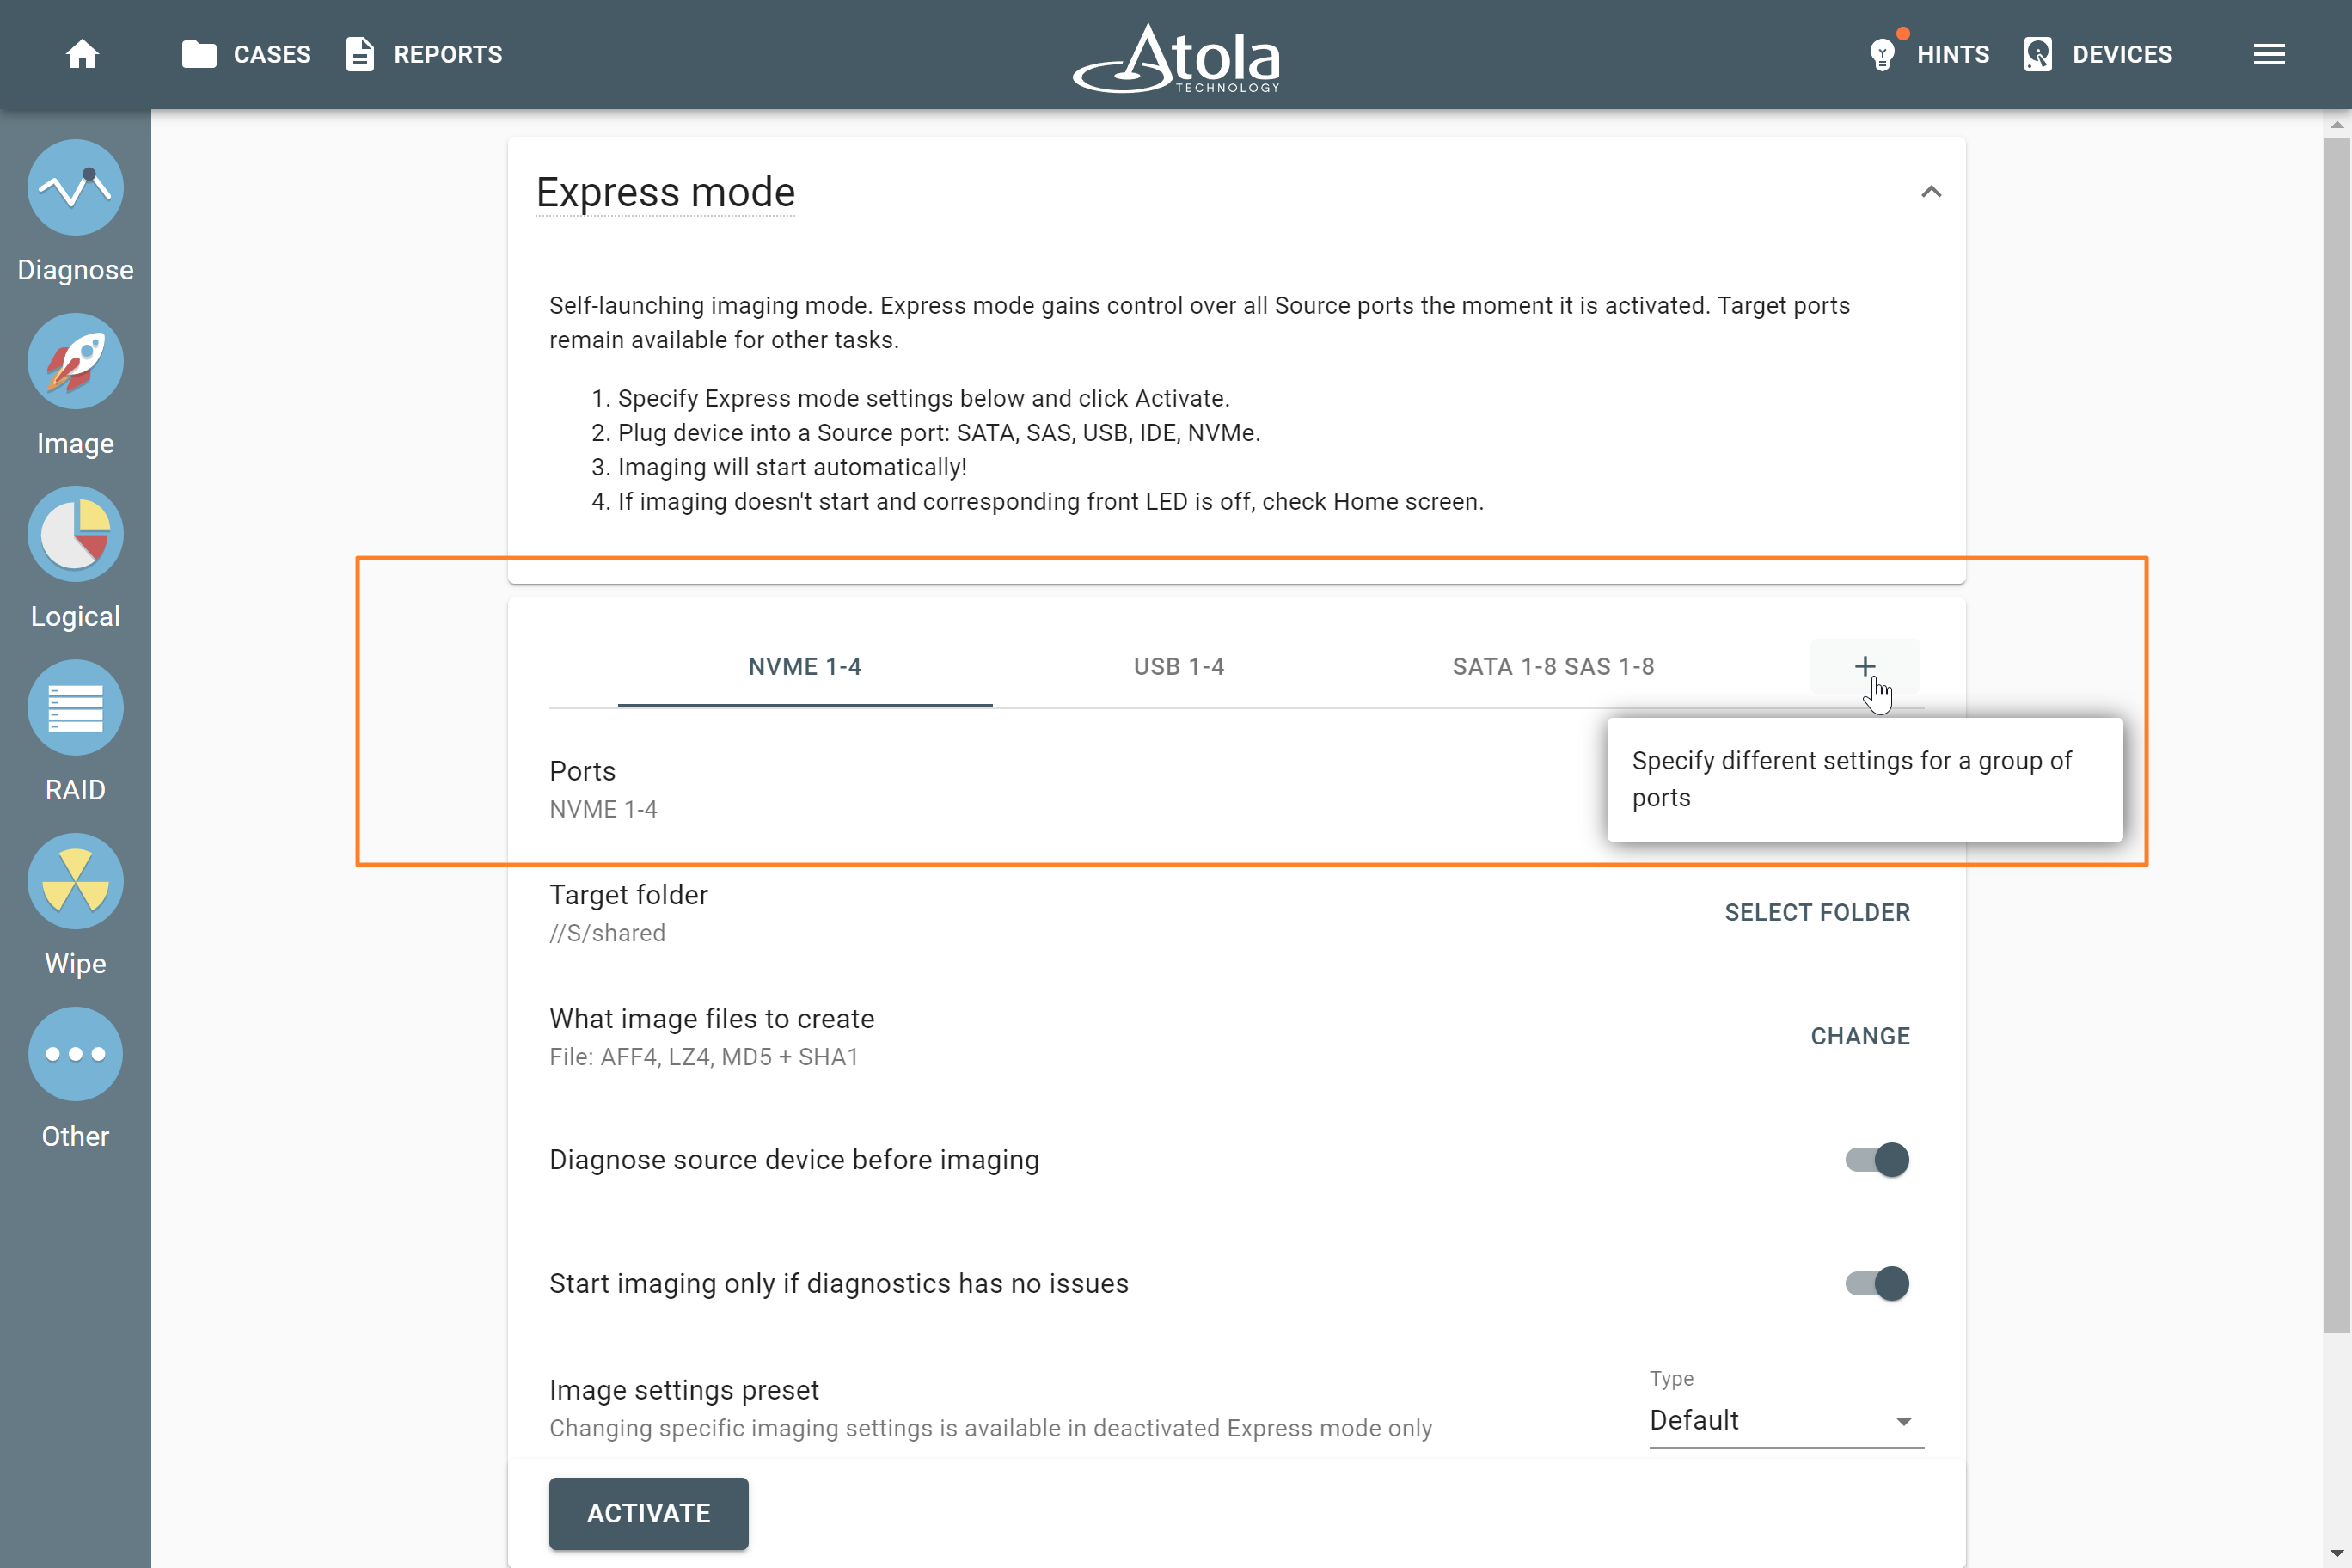
By default, Express mode settings are applied to all drive ports set to source. However, you can combine any number of TaskForce ports into a custom group with specific imaging parameters for Express mode. See Port groups for details.
Port groups
In cases where different types of drives require different approaches to image acquisition, you can assign specific imaging settings for certain groups of drive ports in Express mode.
For example, to balance image acquisition time, you can image new NVMe drives to your faster server and older/smaller SATA drives to slower storage. Or image healthy drives to the “Good” network folder and faulty ones to the “Bad” network folder to treat them differently later.
In Express mode, for each custom group of drive ports, you can specify:
- Network folder where to save an image file
- Which image file format to use
- Which type of hash to calculate
- Whether to diagnose the source device before imaging
- How to fill in case report fields: Case ID, Organization, Investigator
Add a new group of ports
By default, Express mode settings are applied to all drive ports set to source. Thus, the group tab on the Express mode settings page is named All ports. All the ports included in the group are listed in the Ports section.
To add a new group of ports:
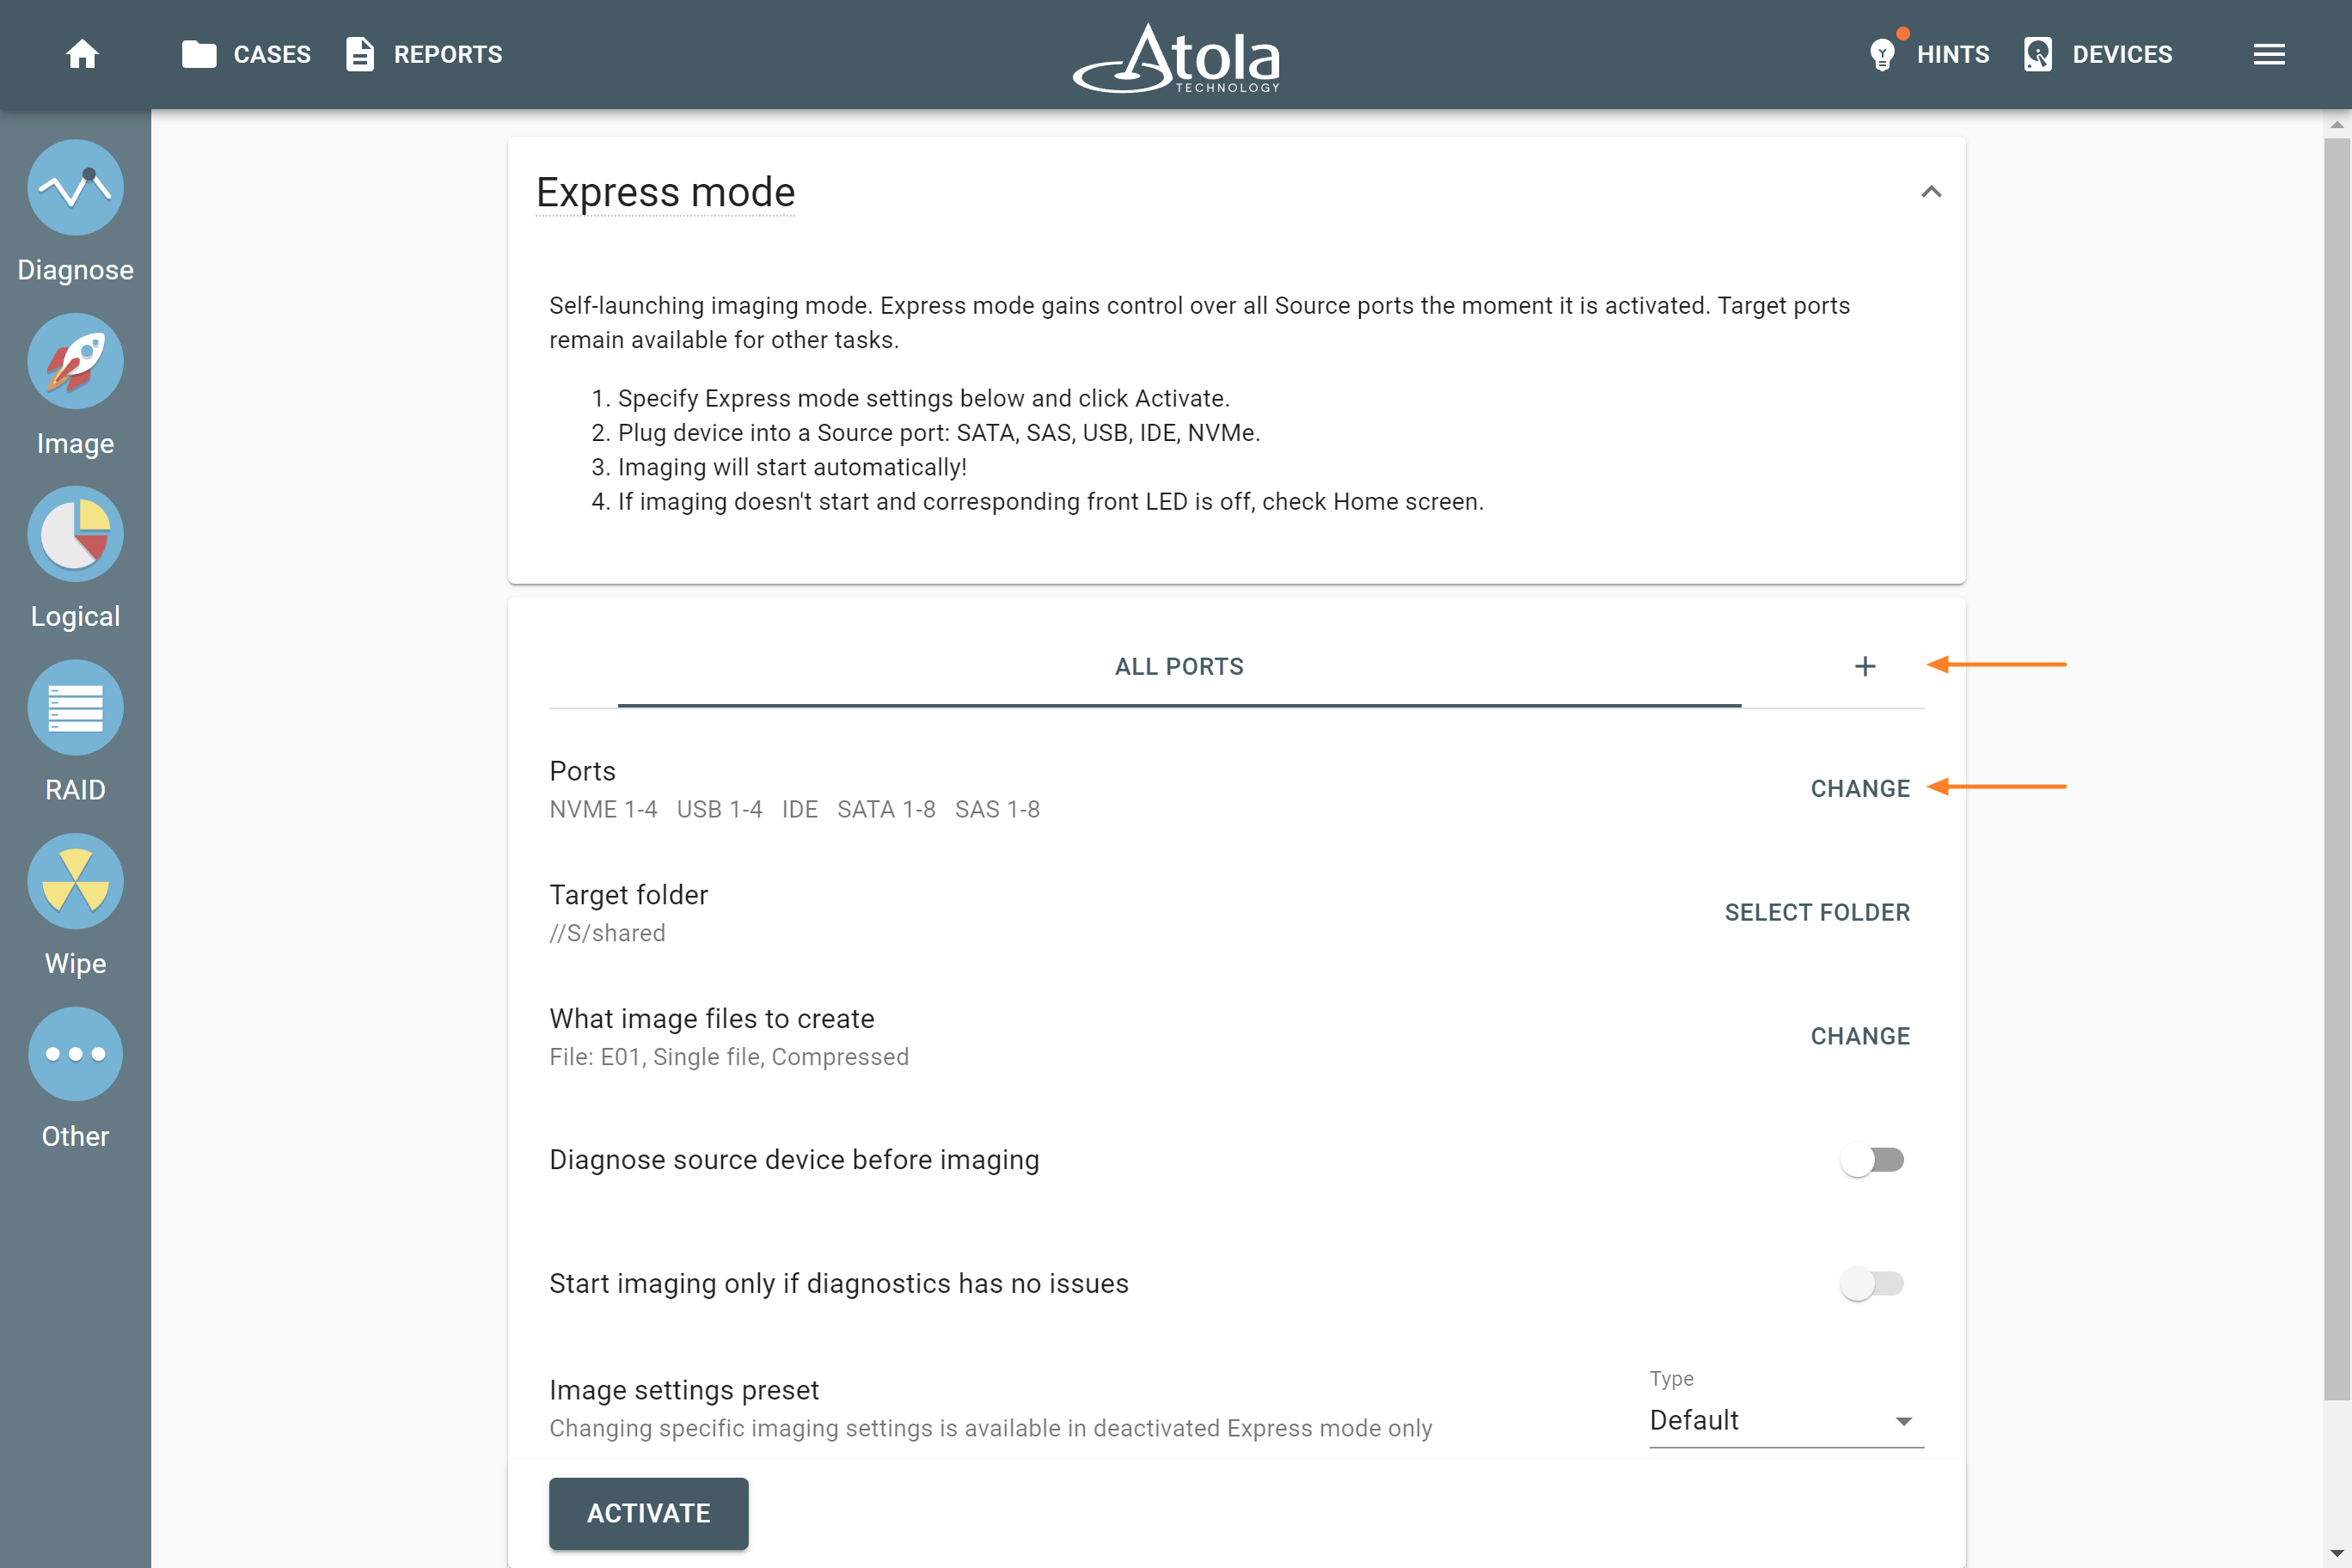
- Next to the All ports group tab, click the Plus icon.
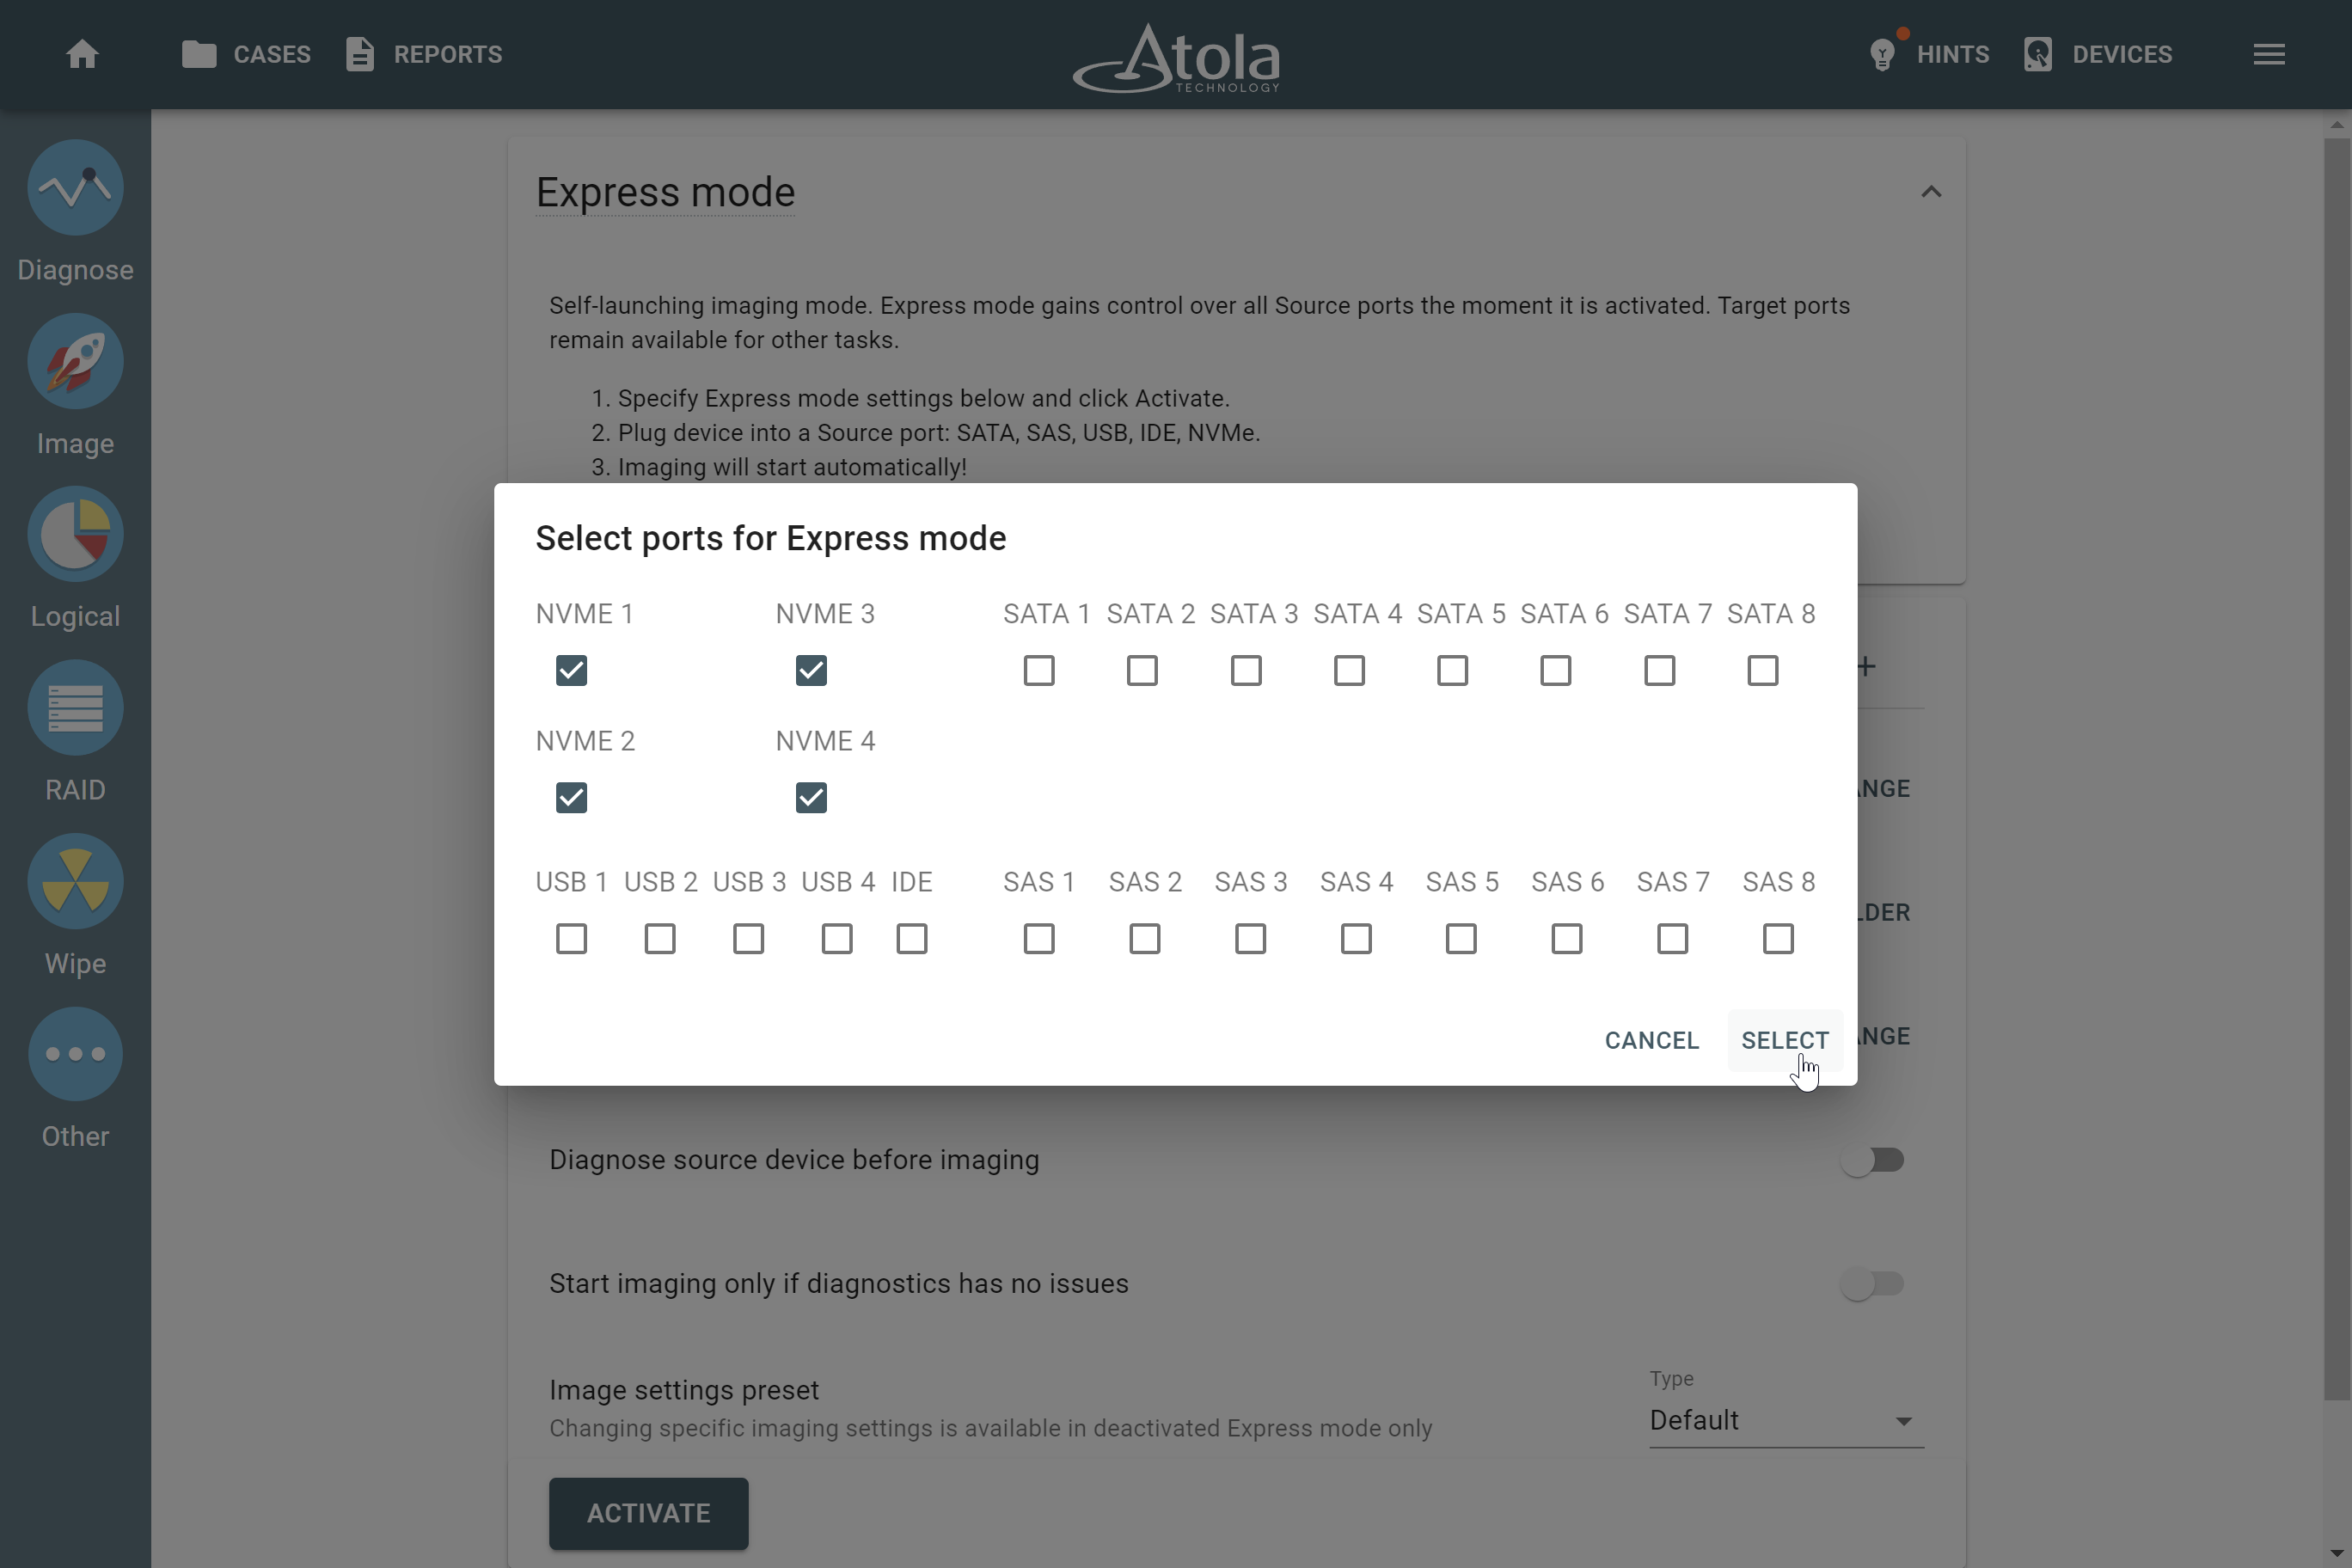
- In the dialog window, select ports for the new group.
-
Click Select.
To avoid confusion and accidental mistakes, TaskForce excludes selected ports from any existing groups and adds them to the new one. - The group name changes to clearly show port types and numbers included in it, for example, “NVME 1-4” or “SATA 1-8 SAS 1-8”. Switch between port groups by clicking the tab with the group name.
Now you can proceed with assigning different imaging settings in Express mode to different port groups.
Change a port group
To change the drive ports included in an existing port group:
- On the Express mode settings page, switch to the port group you want to change by clicking on the tab with its name.
- On the right, click Change.
- In the dialog window, select the drive ports you want to include in the group or deselect the drive ports you want to exclude.
- Click Select.
- The group name changes to clearly show port types and numbers included in it.
Target folder
In Express mode, TaskForce 2 stores drive images on a local server.
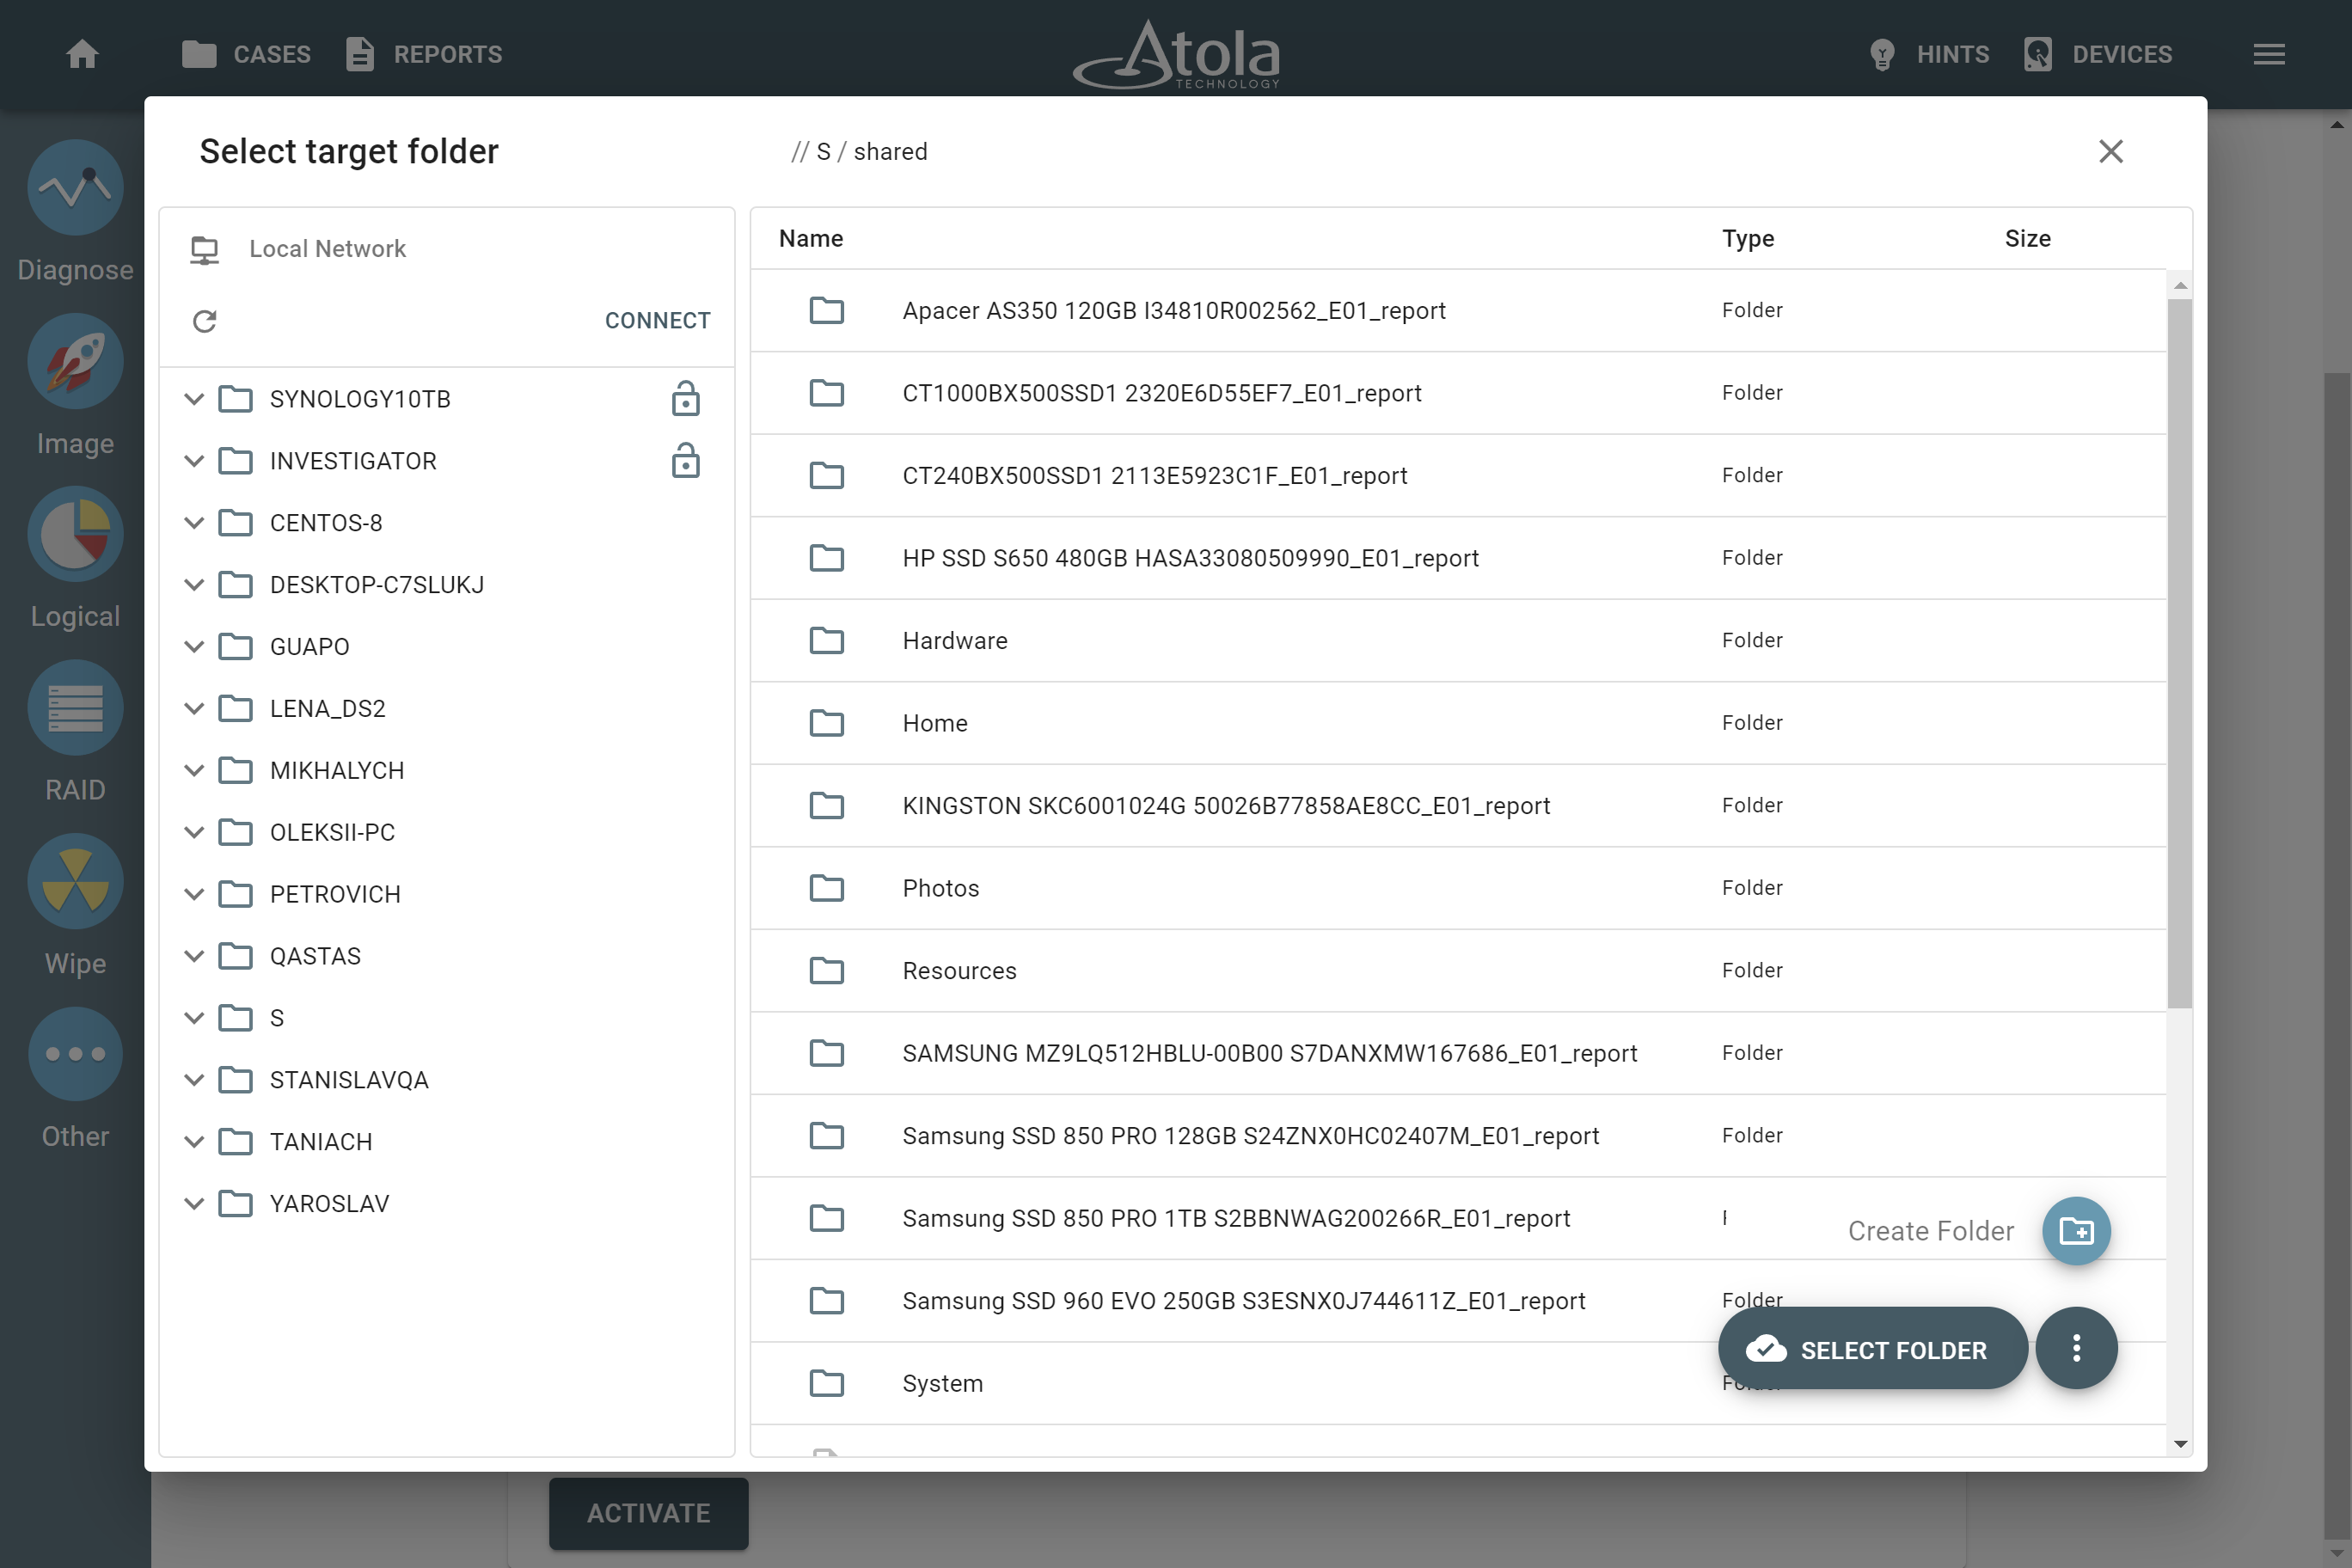
To activate Express mode, you need to specify a target folder on a local network to store drive images:
- On the Express mode settings page, find the Target folder section and click Select folder.
- In the Select target folder window, go to the existing folder and click the Select folder button. To create a new folder, click the icon with three dots and select Create folder.
What image files to create: type, compression, hash, templates and more
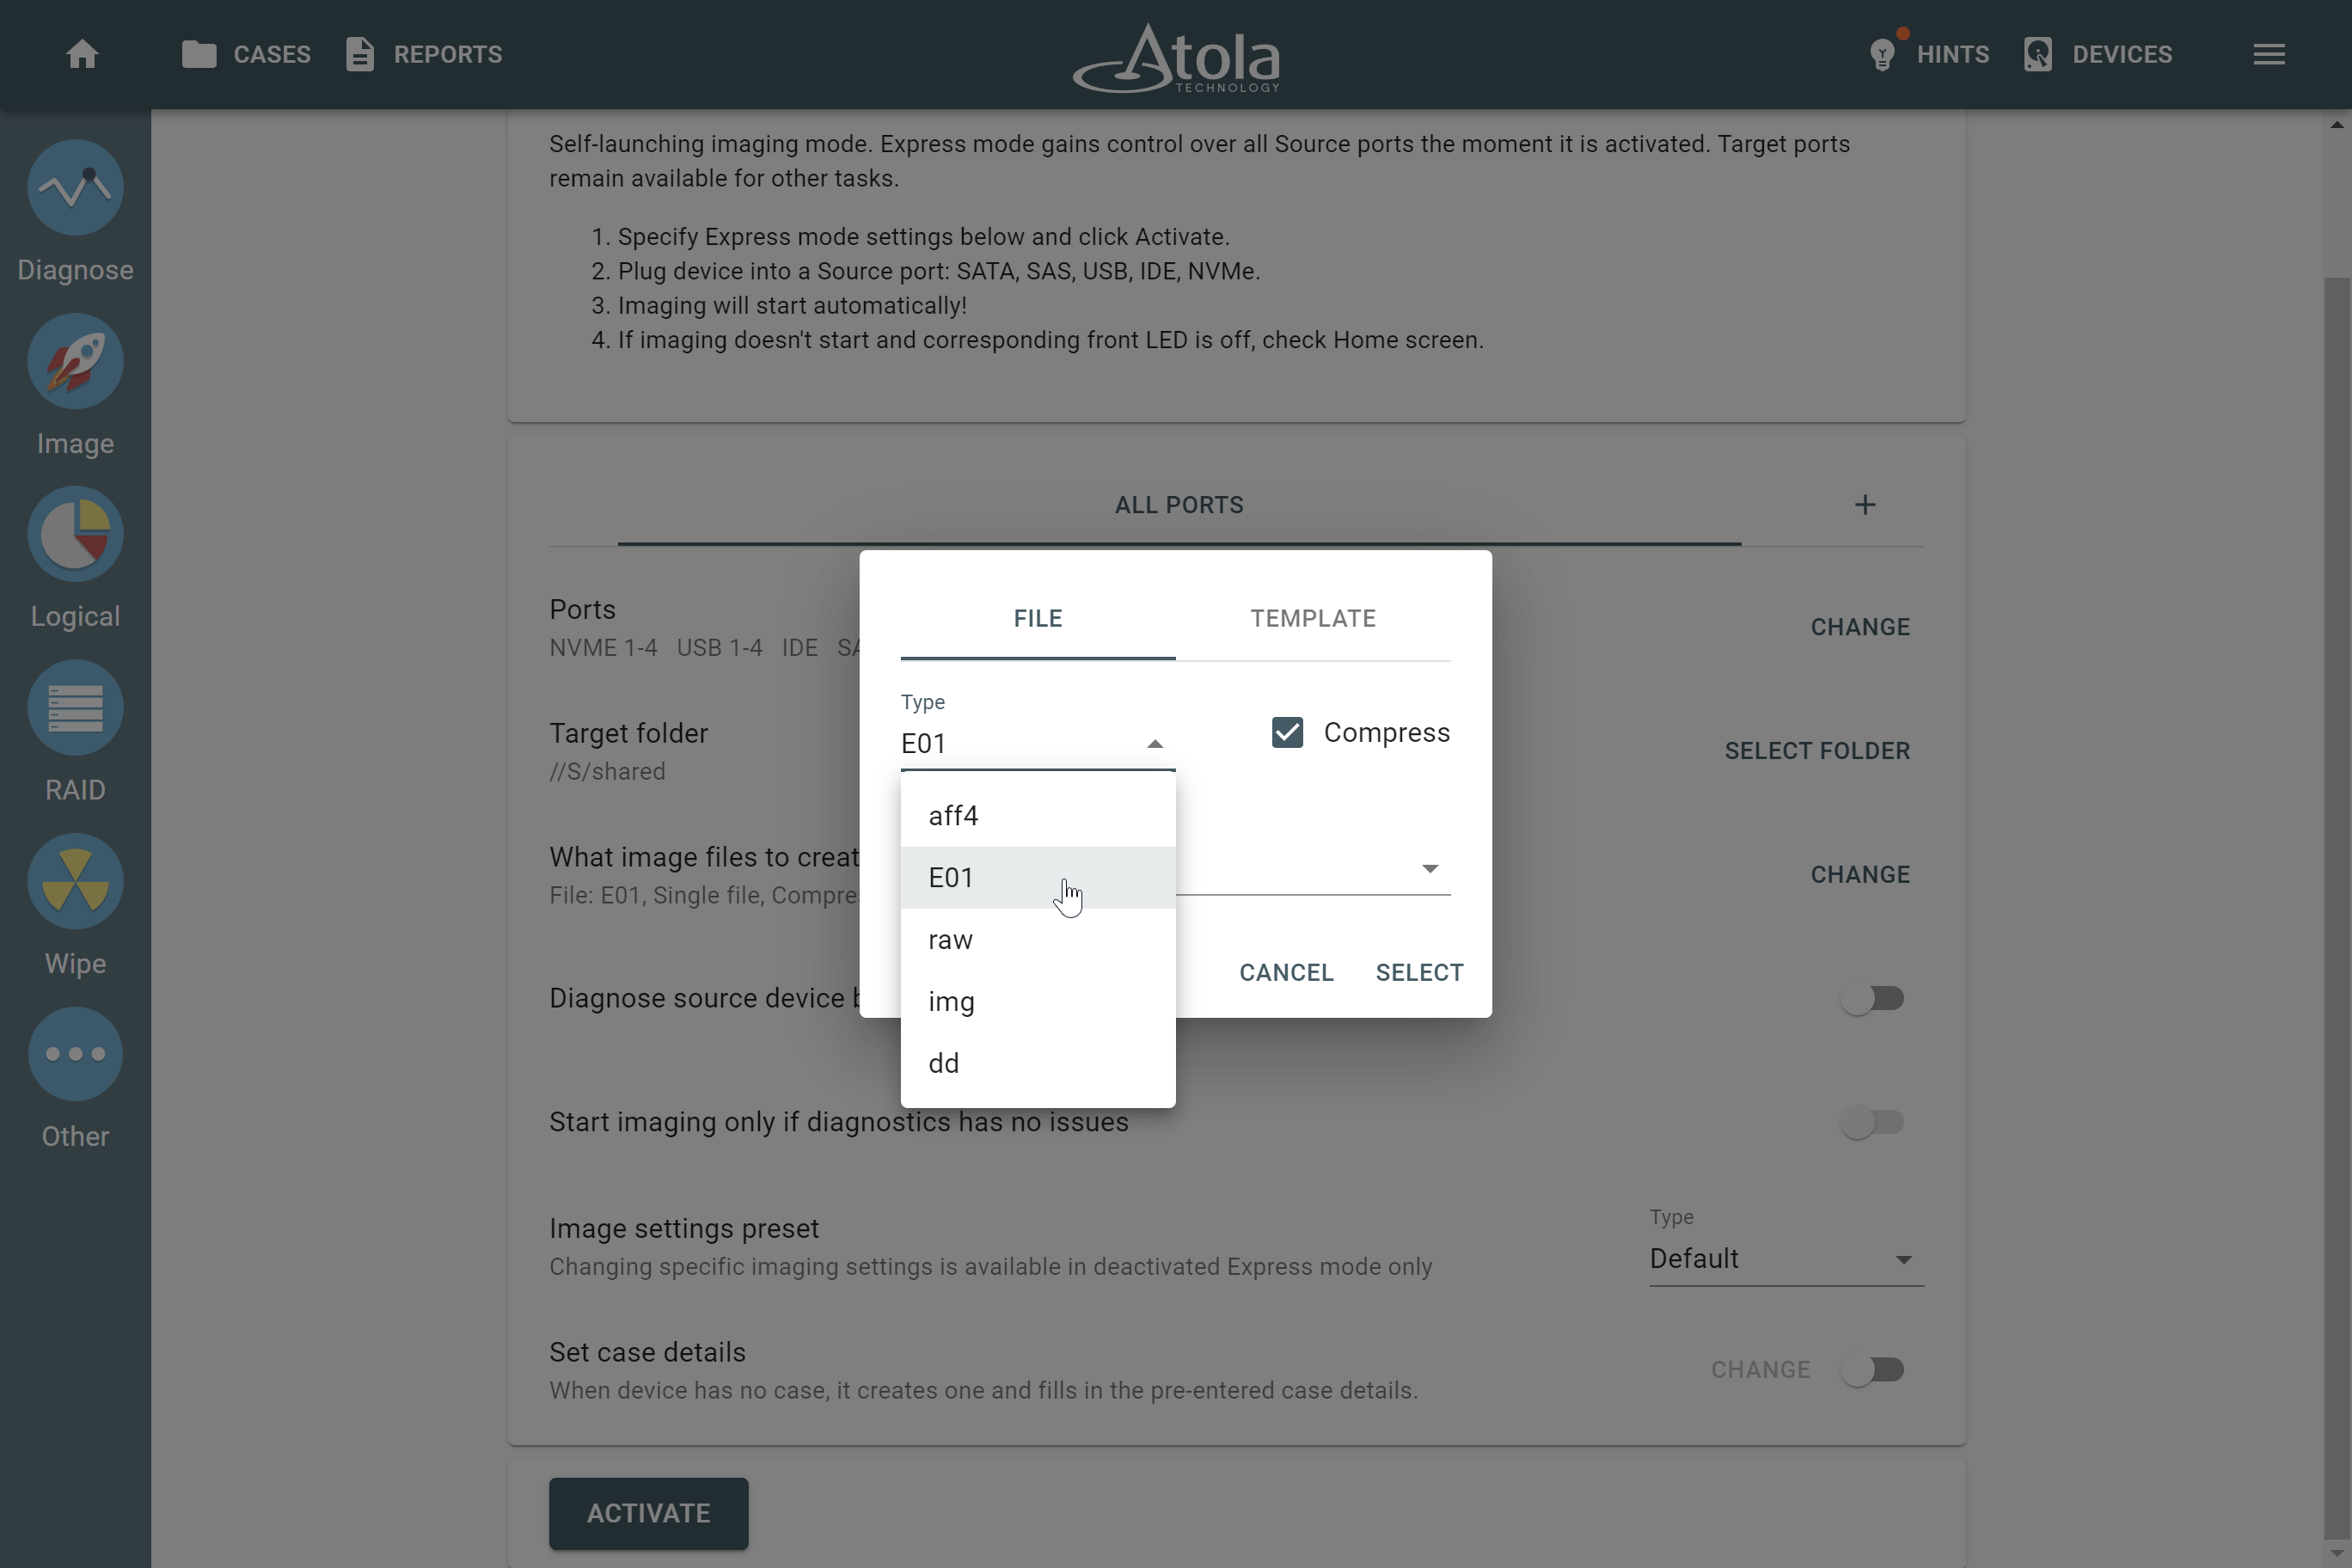
To set up the parameters of a target image file, such as file type, compression method, segment size, and hash type, on the Express mode settings page, find the What image file to create section and click Change.
Configuration dialog appears.
On the File tab of this dialog, configure the target image file.
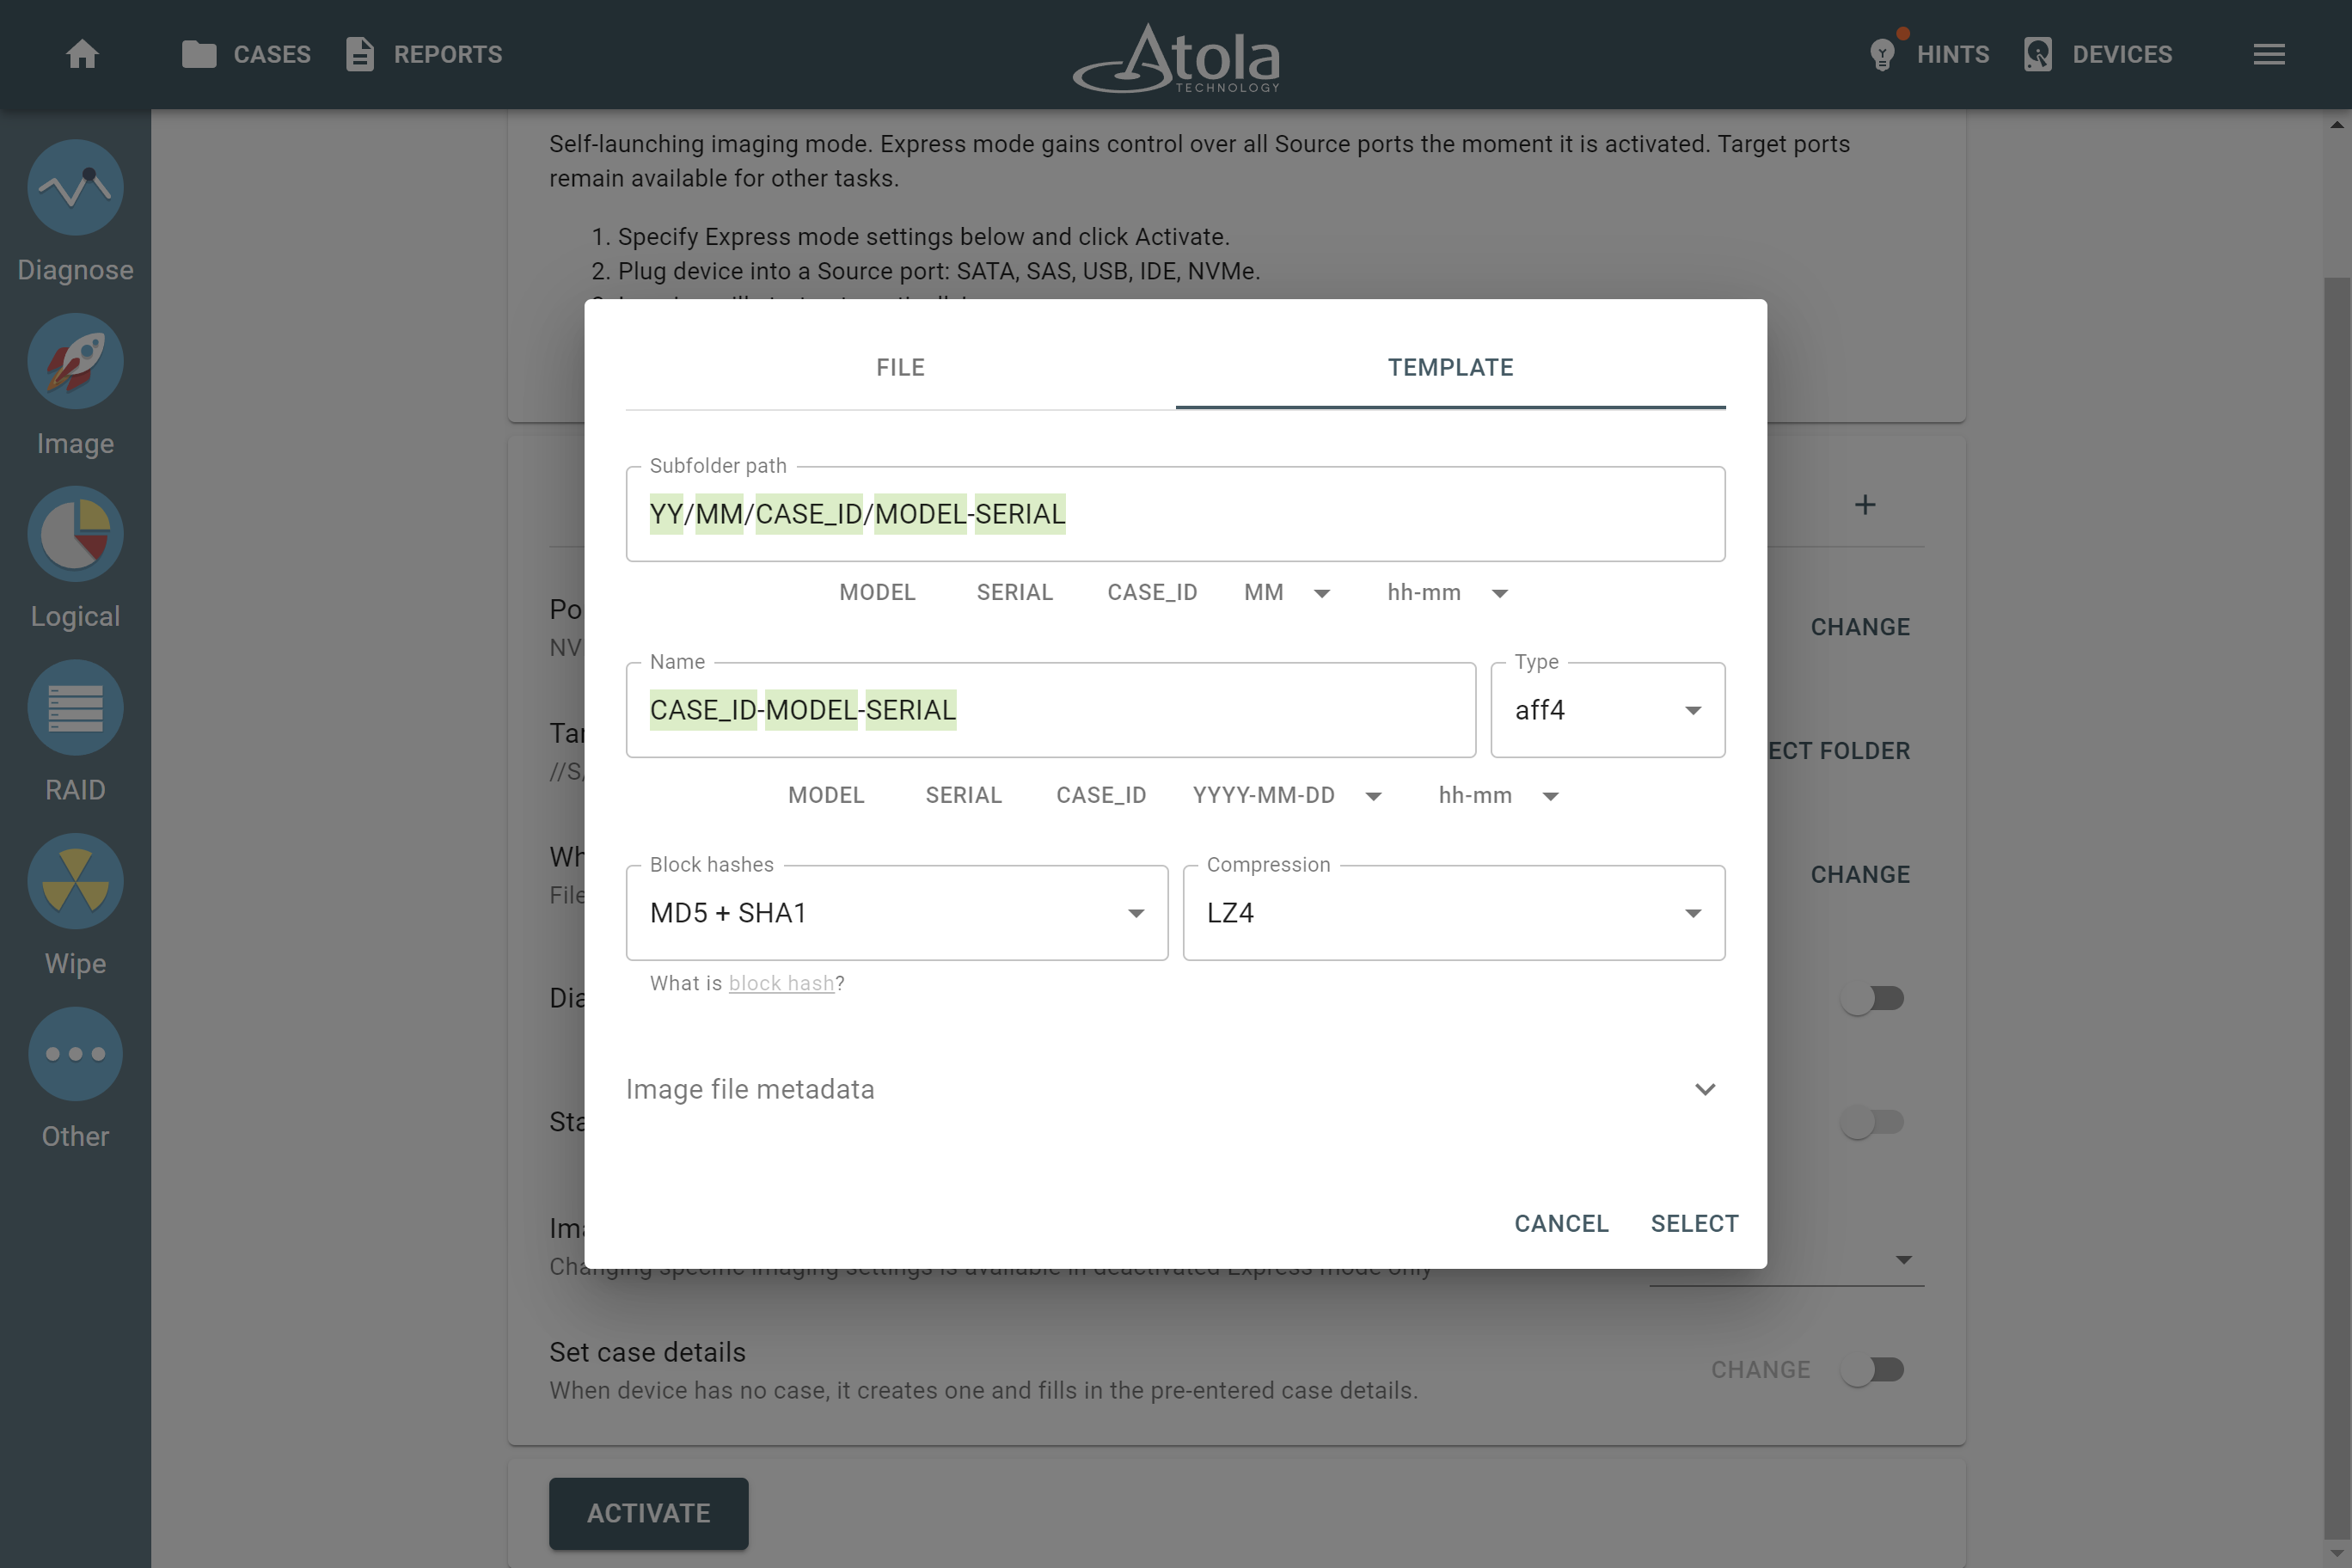
On the Template tab, you can also create the templates for image file names.
Selected parameters apply to an active port group only. Here are the details about each parameter.
Image file type
In Express mode, drive images can be saved as RAW, E01, or AFF4 files.
To change the target image file type for a specific group of ports, select it from the Type list on the File tab.
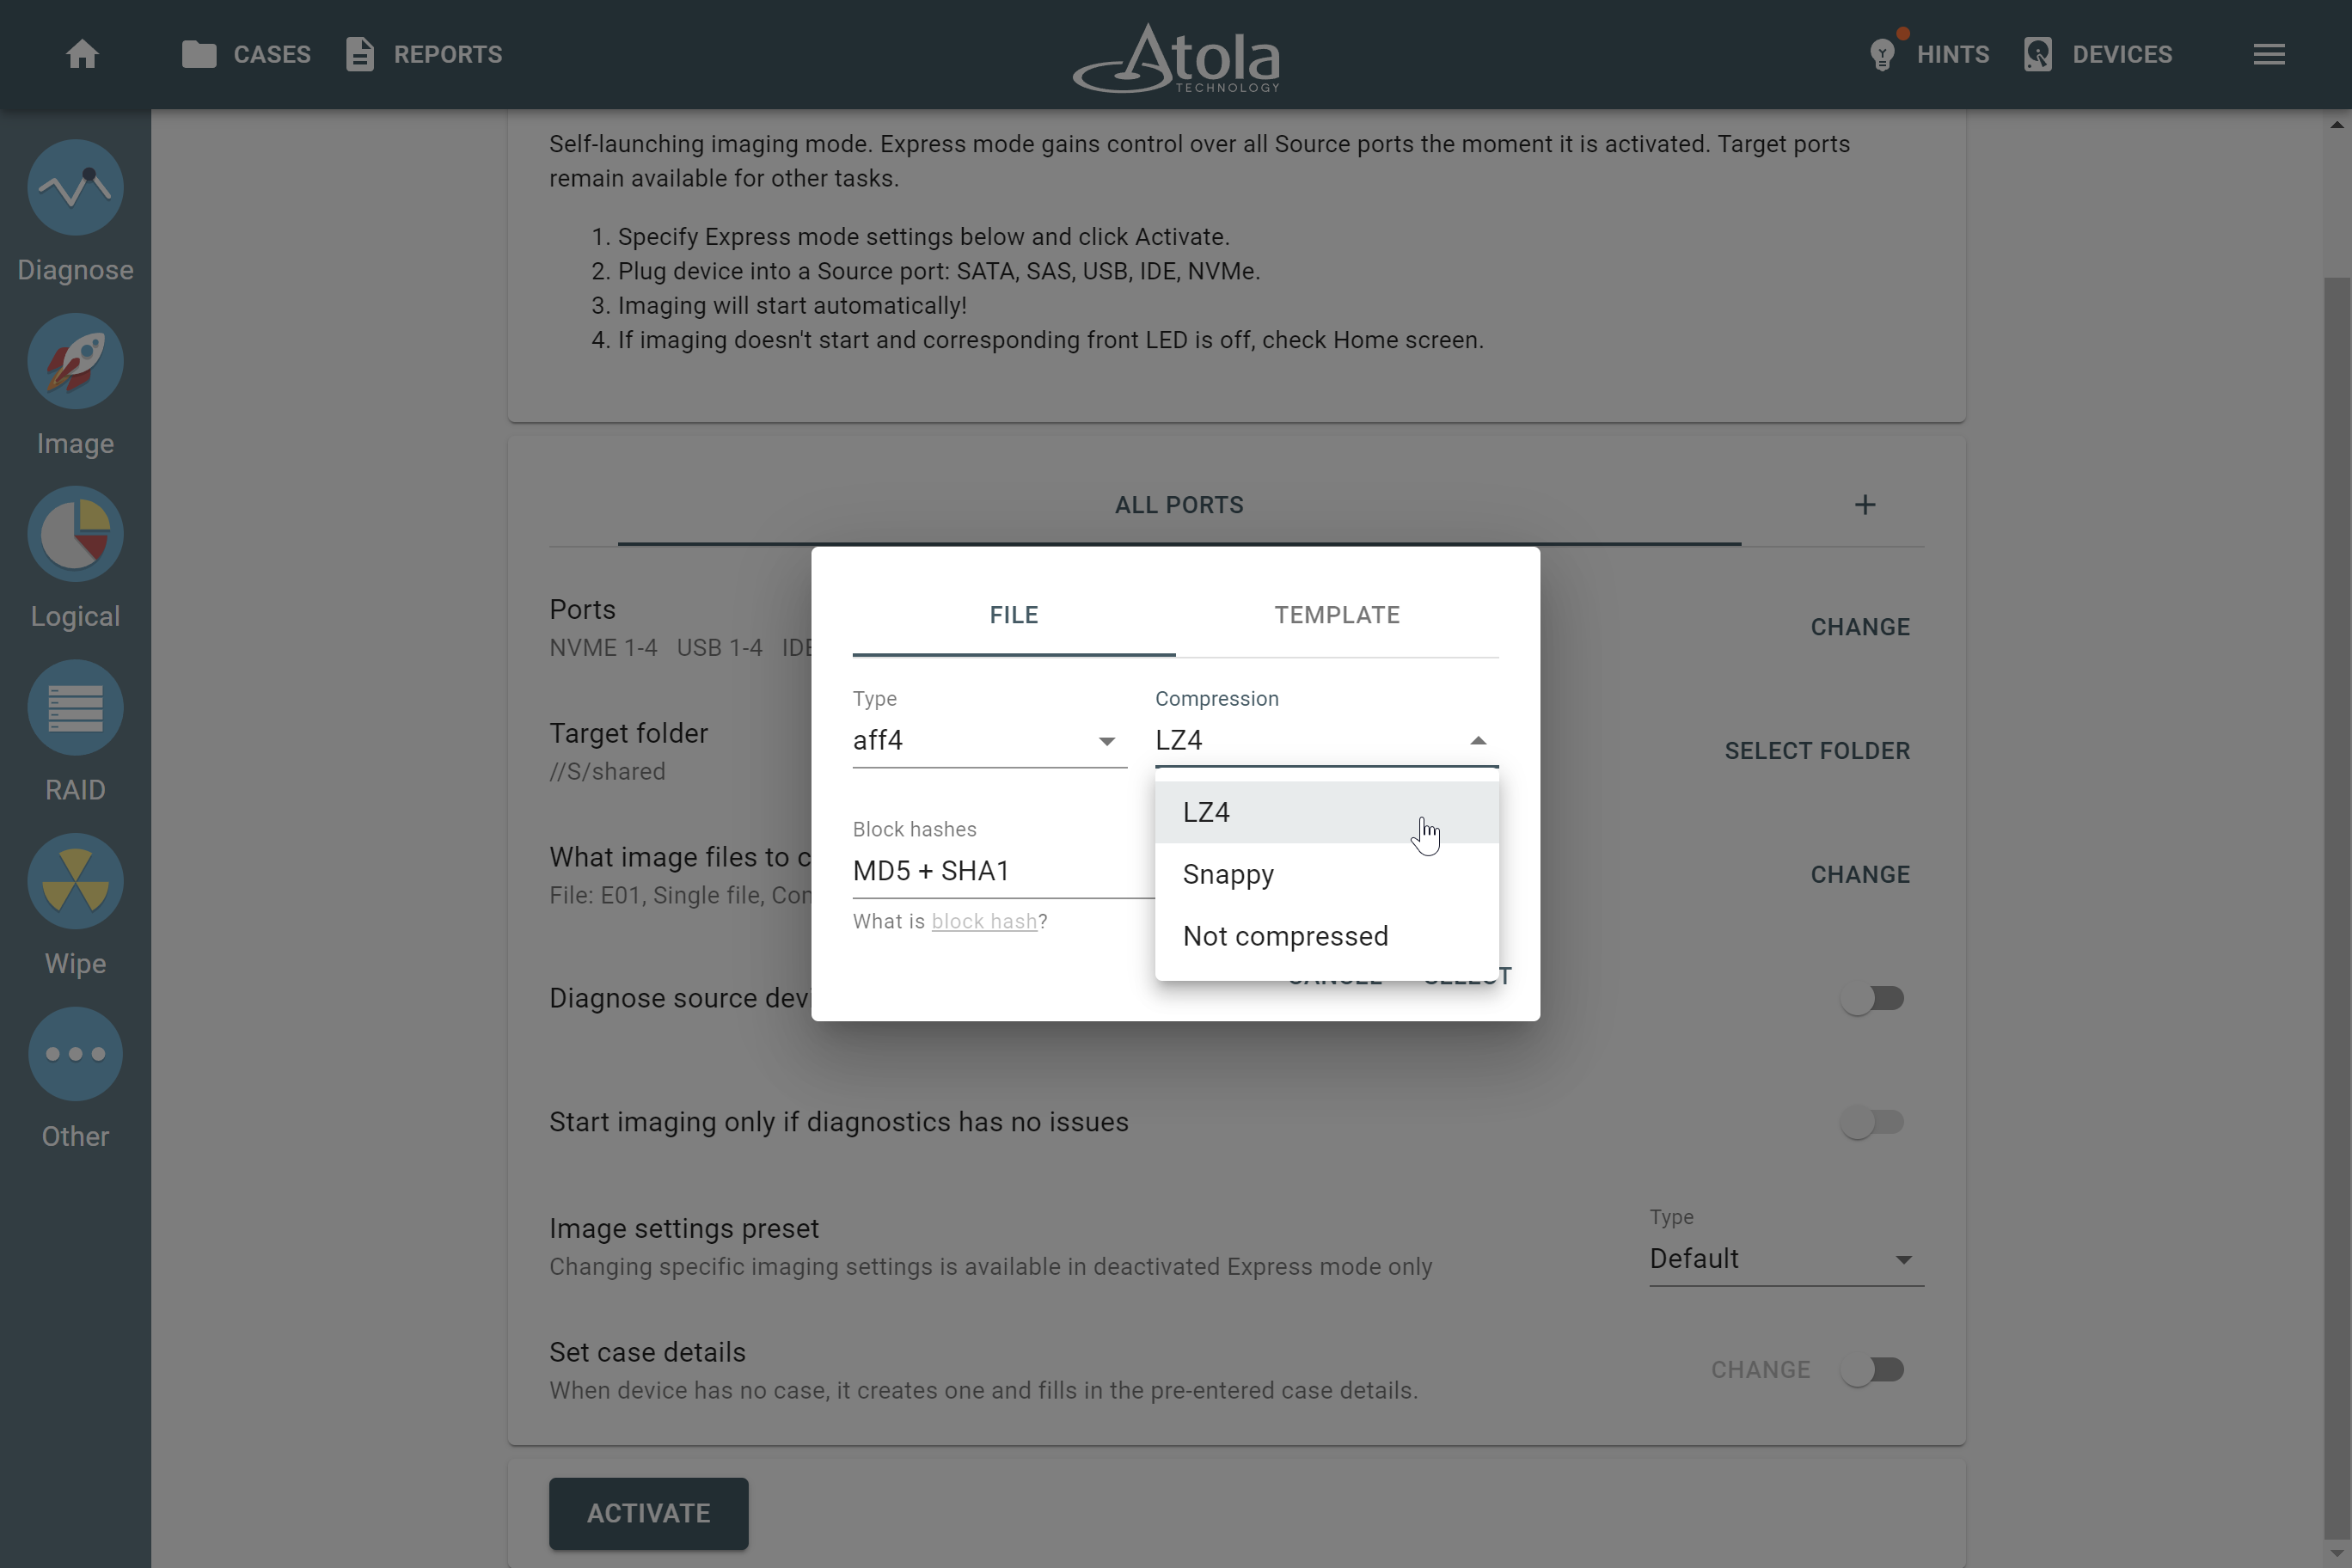
Compression
TaskForce 2 supports the default compression method for the E01 file format and LZ4 or Snappy compression methods for the AFF4 file format.
Choose the compression method from the respective list on the File tab. The Not compressed option is also available for both E01 and AFF4.
The RAW file format does not support compression.
Segment size
For the E01 file format, TaskForce 2 can split the target image into segments of predefined size. Each segment is stored in a specified folder as a separate file.
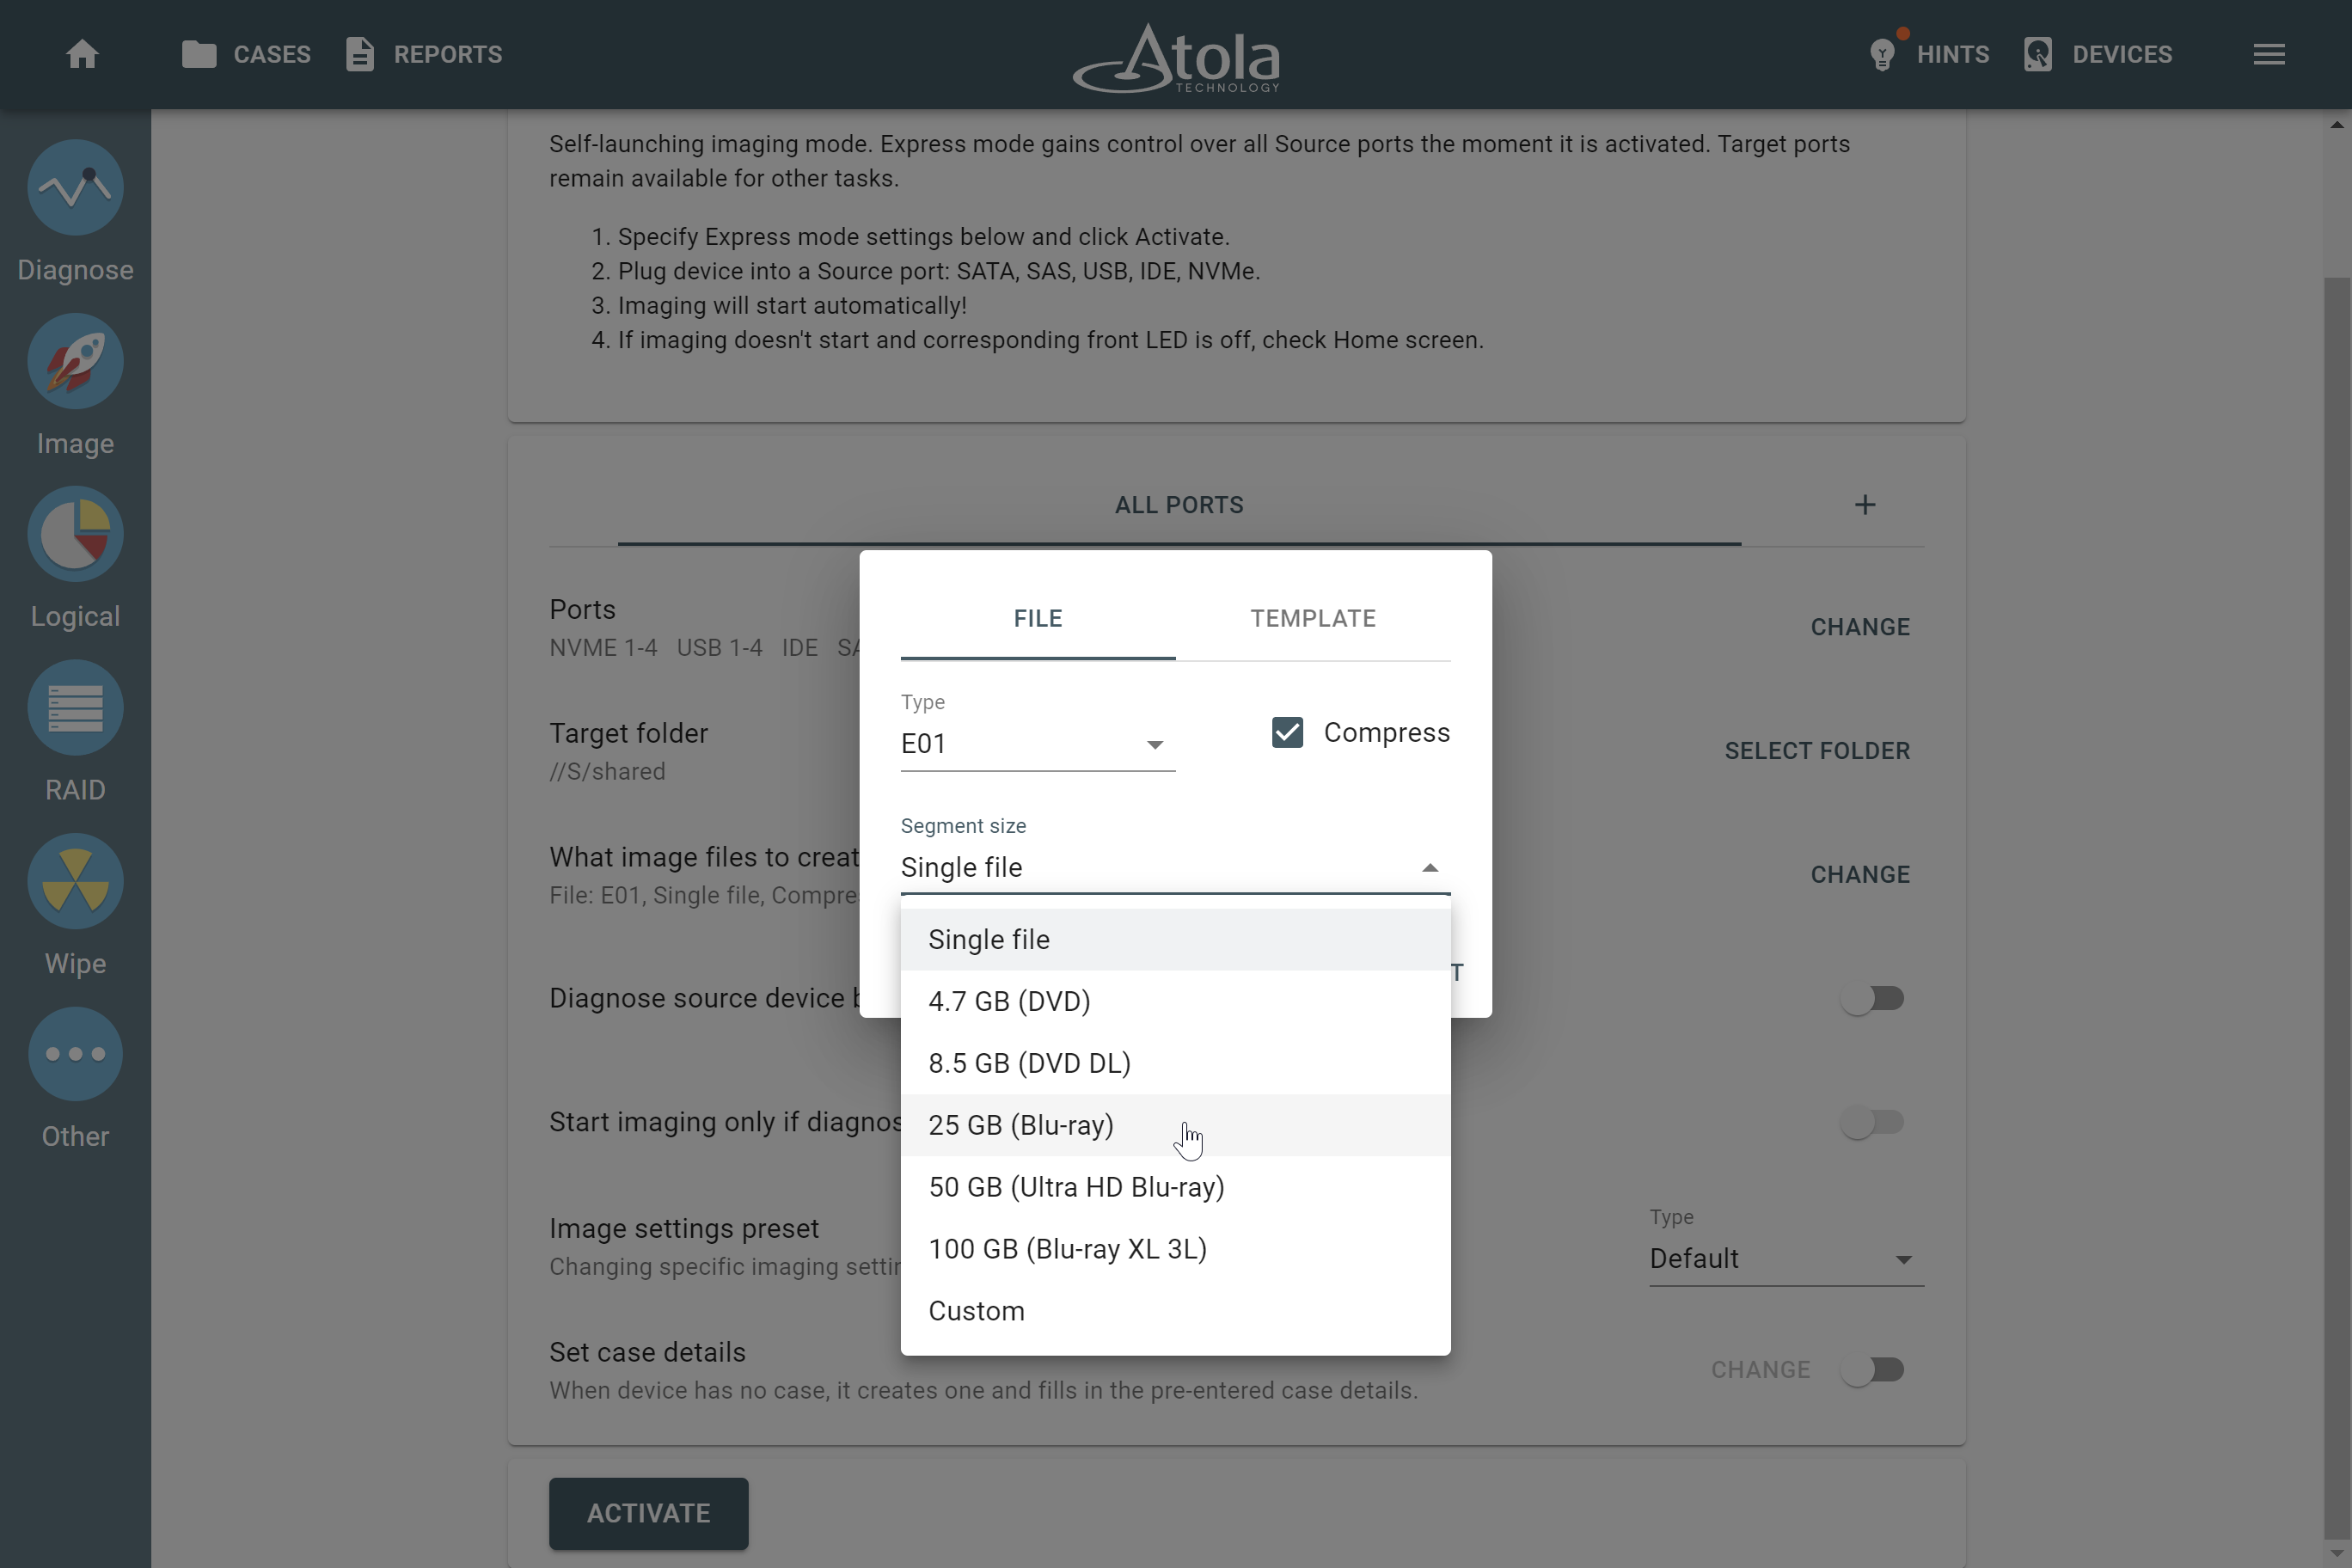
The Segment size list becomes available on the File tab when the E01 file type is selected. You can choose the segment size from the following options:
- Single file
- 4.7 GB (DVD)
- 8.5 GB (DVD DL)
- 25 GB (Blu-ray)
- 50 GB (Ultra HD Blu-ray)
- 100 GB (Blu-ray XL 3L)
- Custom (enter the segment size you want)
Hash type
For AFF4 file format, TaskForce 2 can calculate built-in block hashes during the imaging process in the Express mode.
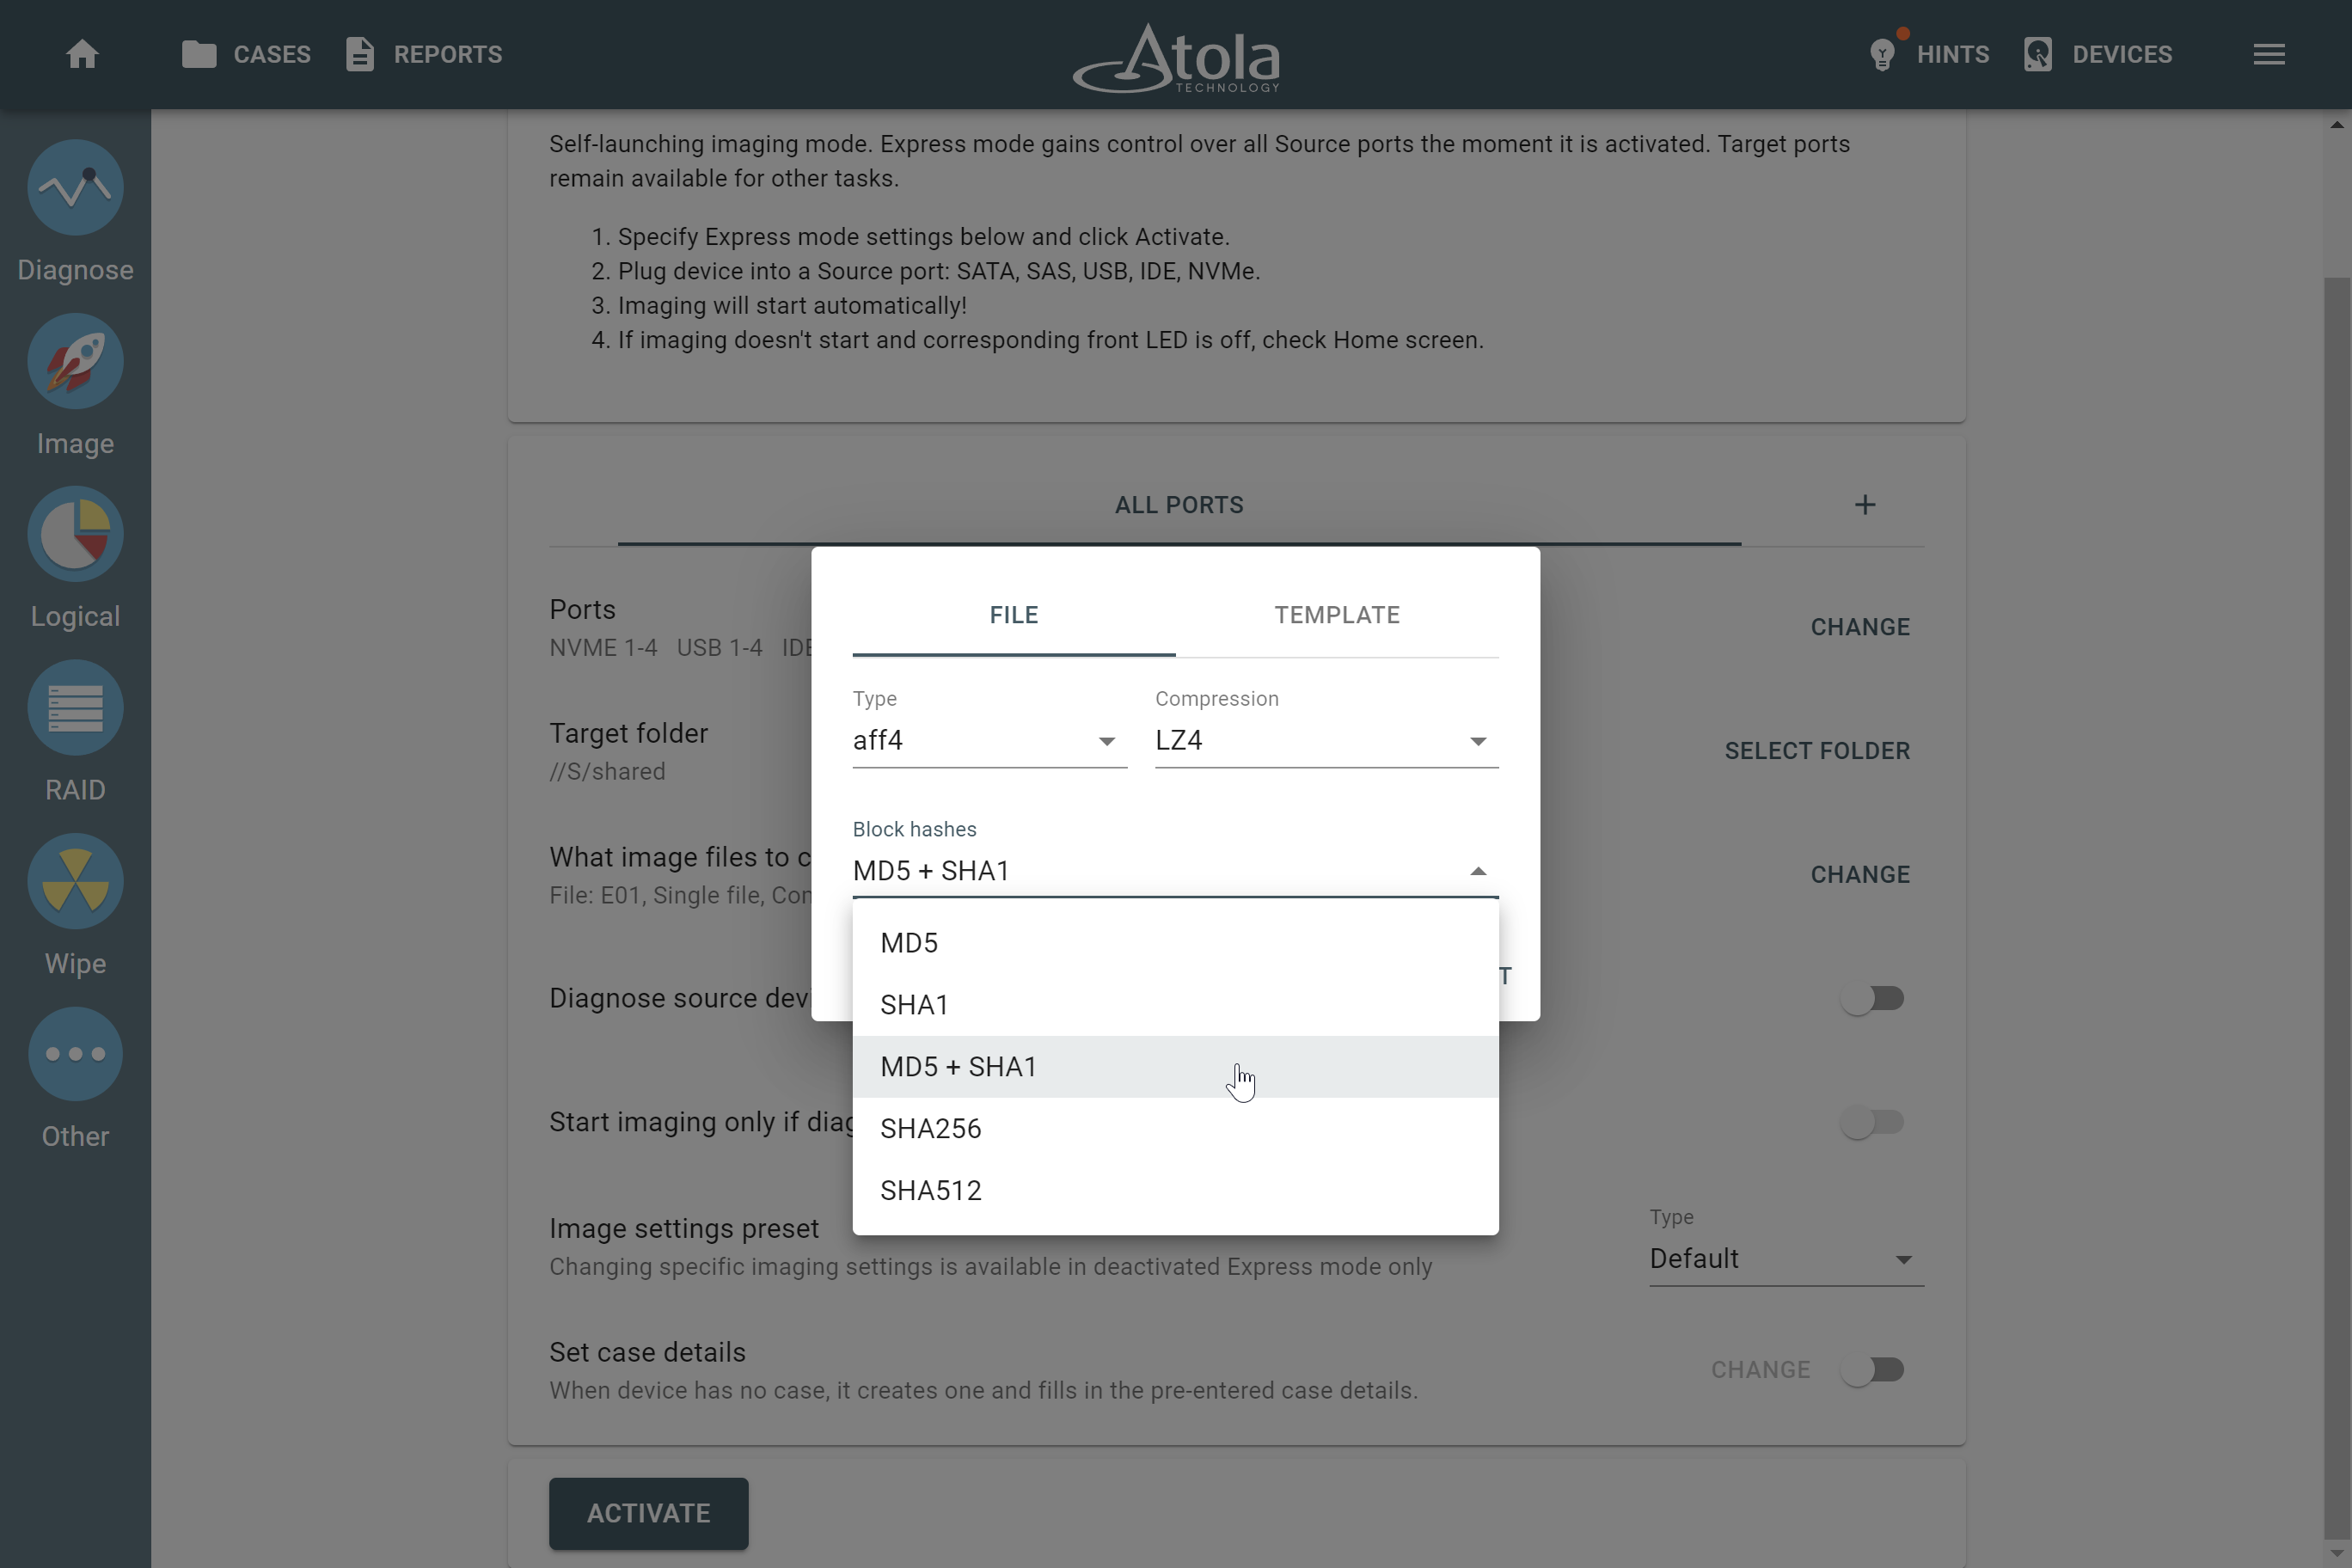
To select the hash type you want to calculate, use the Block hash list on the File tab. The available hashing options for the AFF4 file format are:
- MD5
- SHA1
- MD5+SHA1
- SHA256
- SHA512
Create template for image file names
To create a template for naming target subfolders and files according to your organization rules, find the What image file to create section, click Change, and switch to the Template tab. For details, see Target file templates.
Diagnose before imaging and Start imaging only if diagnostics has no issues
As essential as imaging speed is, the proper treatment of evidence drives remains a priority. That’s why we recommend that diagnostics is always performed as soon as a drive is connected to TaskForce 2 for the first time.
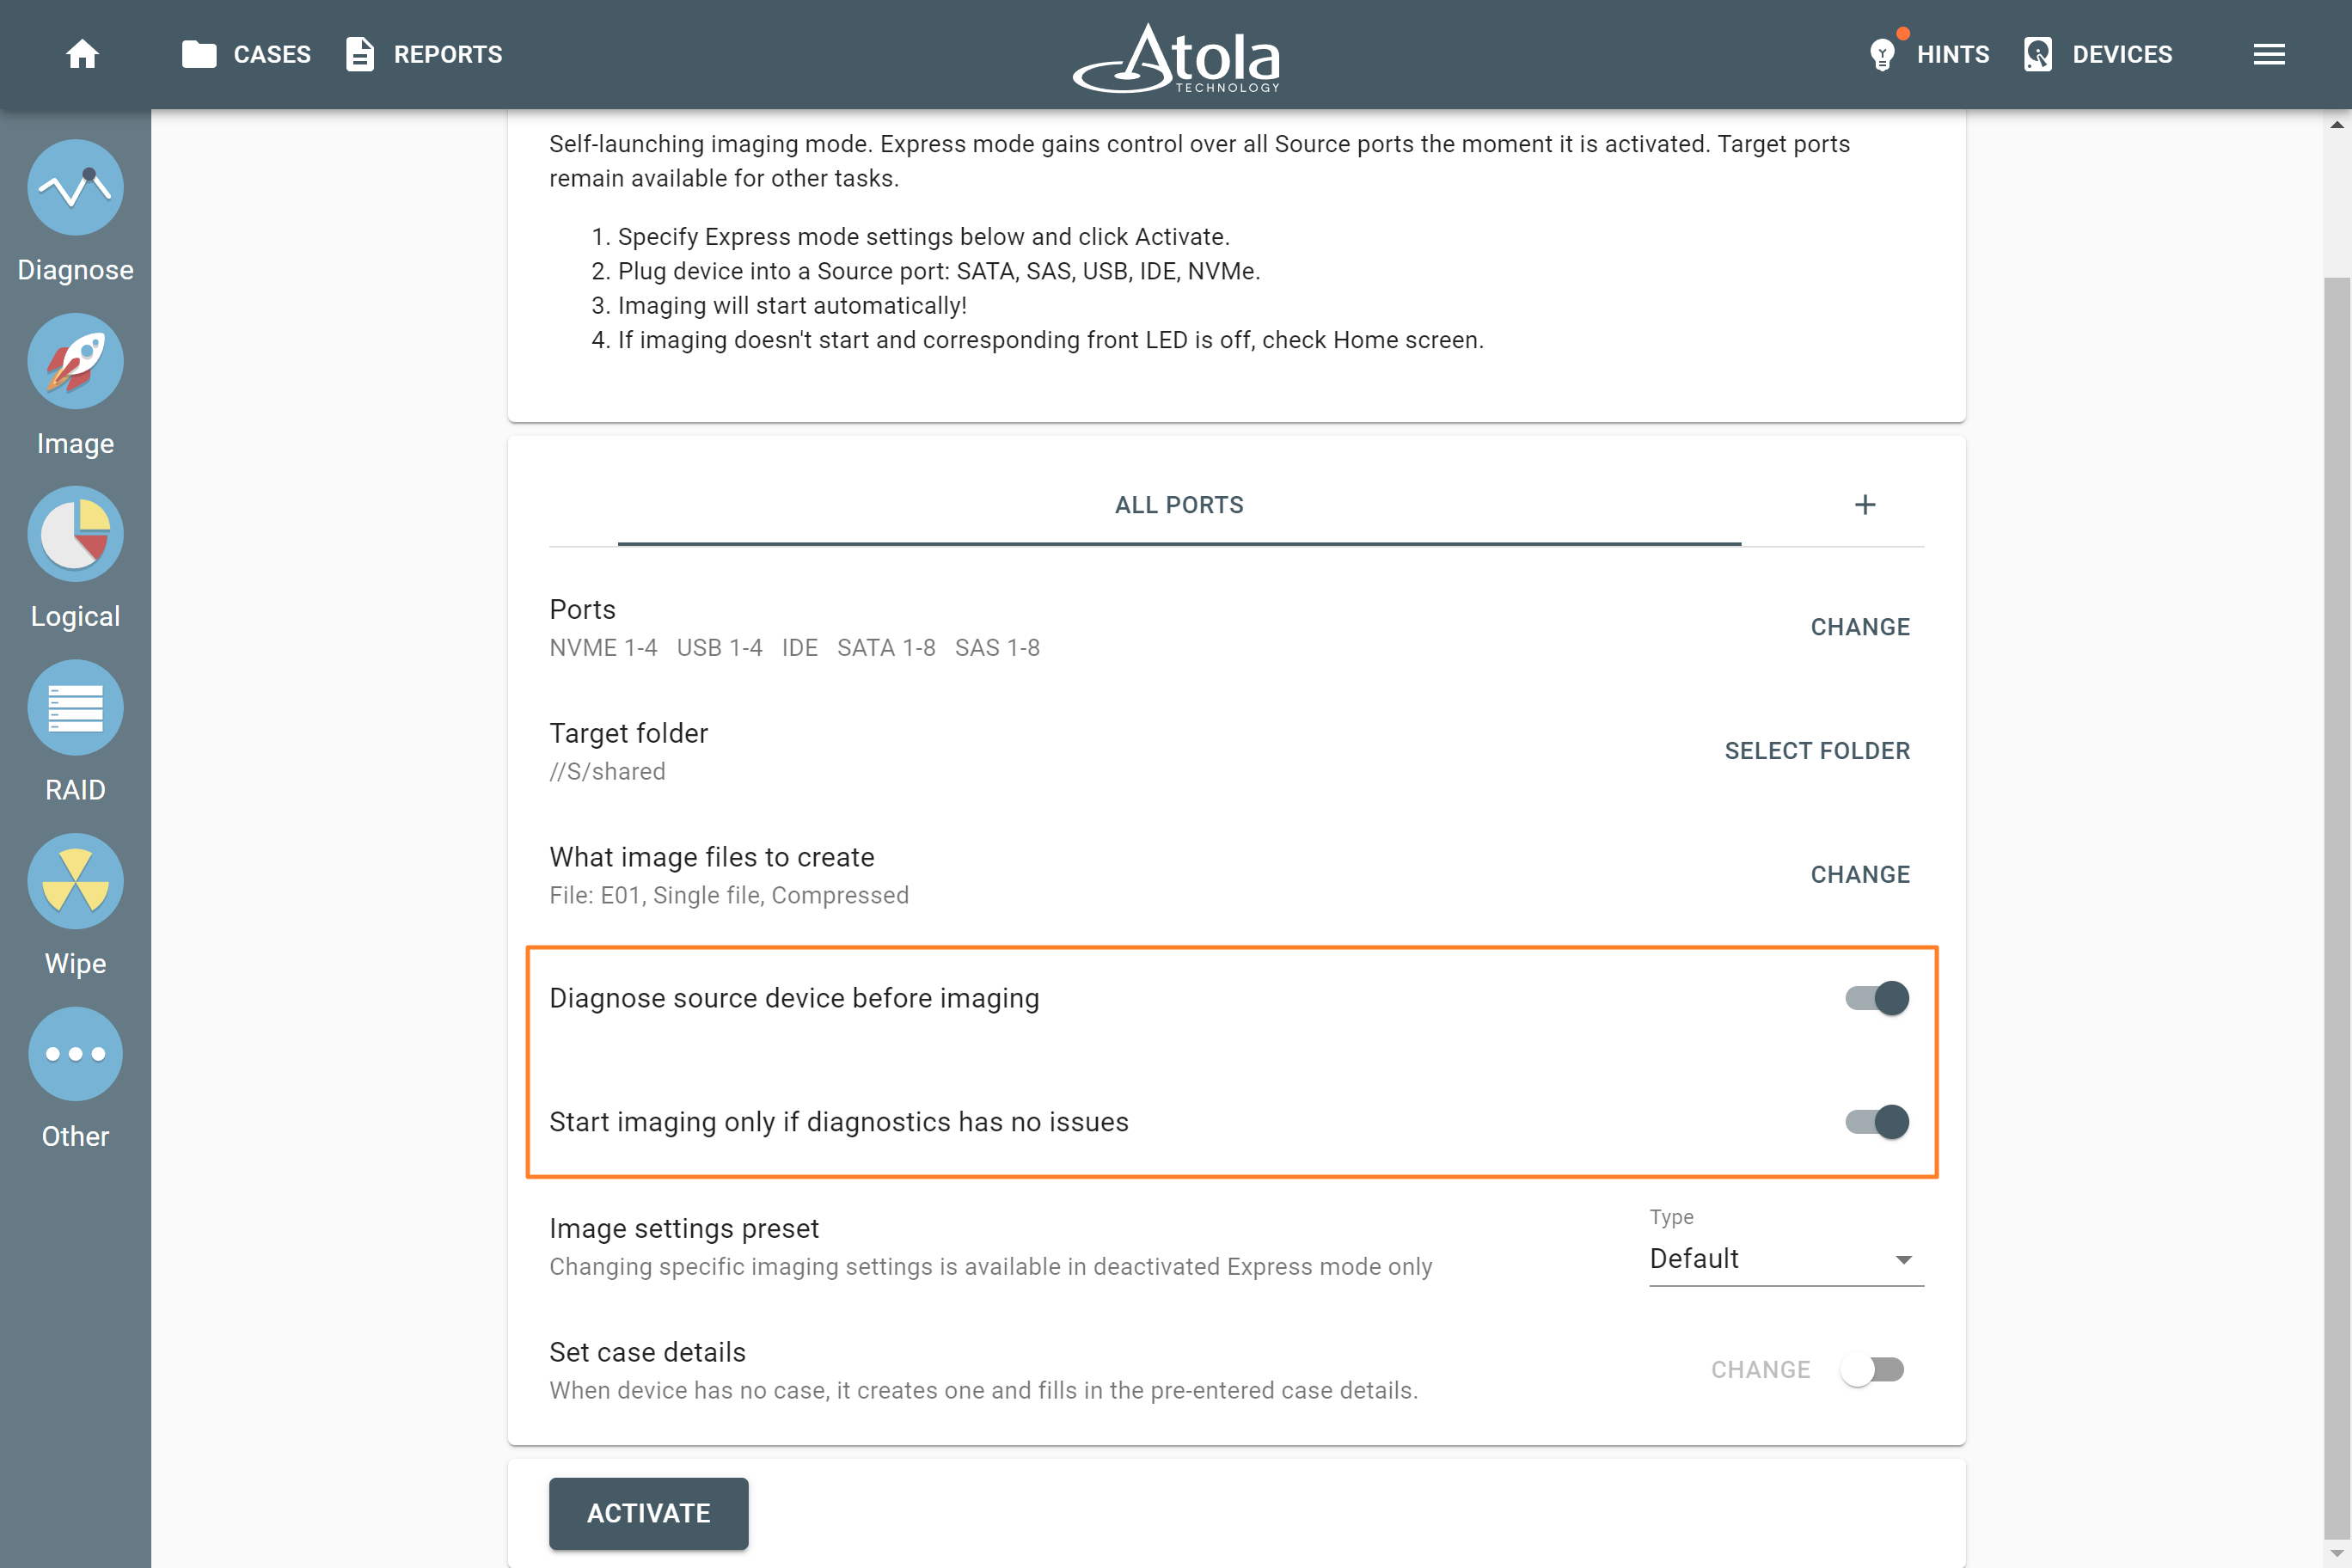
To enable the automatic launch of imaging of the healthy devices and avoid potential deterioration of drives in a shaky condition, the Express mode settings have two handy options:
- select Diagnose source drive before imaging so that diagnostics start automatically,
- then select Start imaging only if diagnostics has no issues.
When enabled in Express mode, Atola’s signature automated diagnostics module checks all drive systems:
- hard drive’s motor and electronics (PCB),
- head stack,
- media surface,
- all firmware/system areas,
- partitions and file systems.
For more information about TaskForce’s diagnostics module, see Diagnosing a drive with Atola TaskForce 2.
Imaging presets
To ensure that all imaging sessions in Express mode fit your organization’s demands and procedures, in Express mode you can use one of the preconfigured imaging presets.
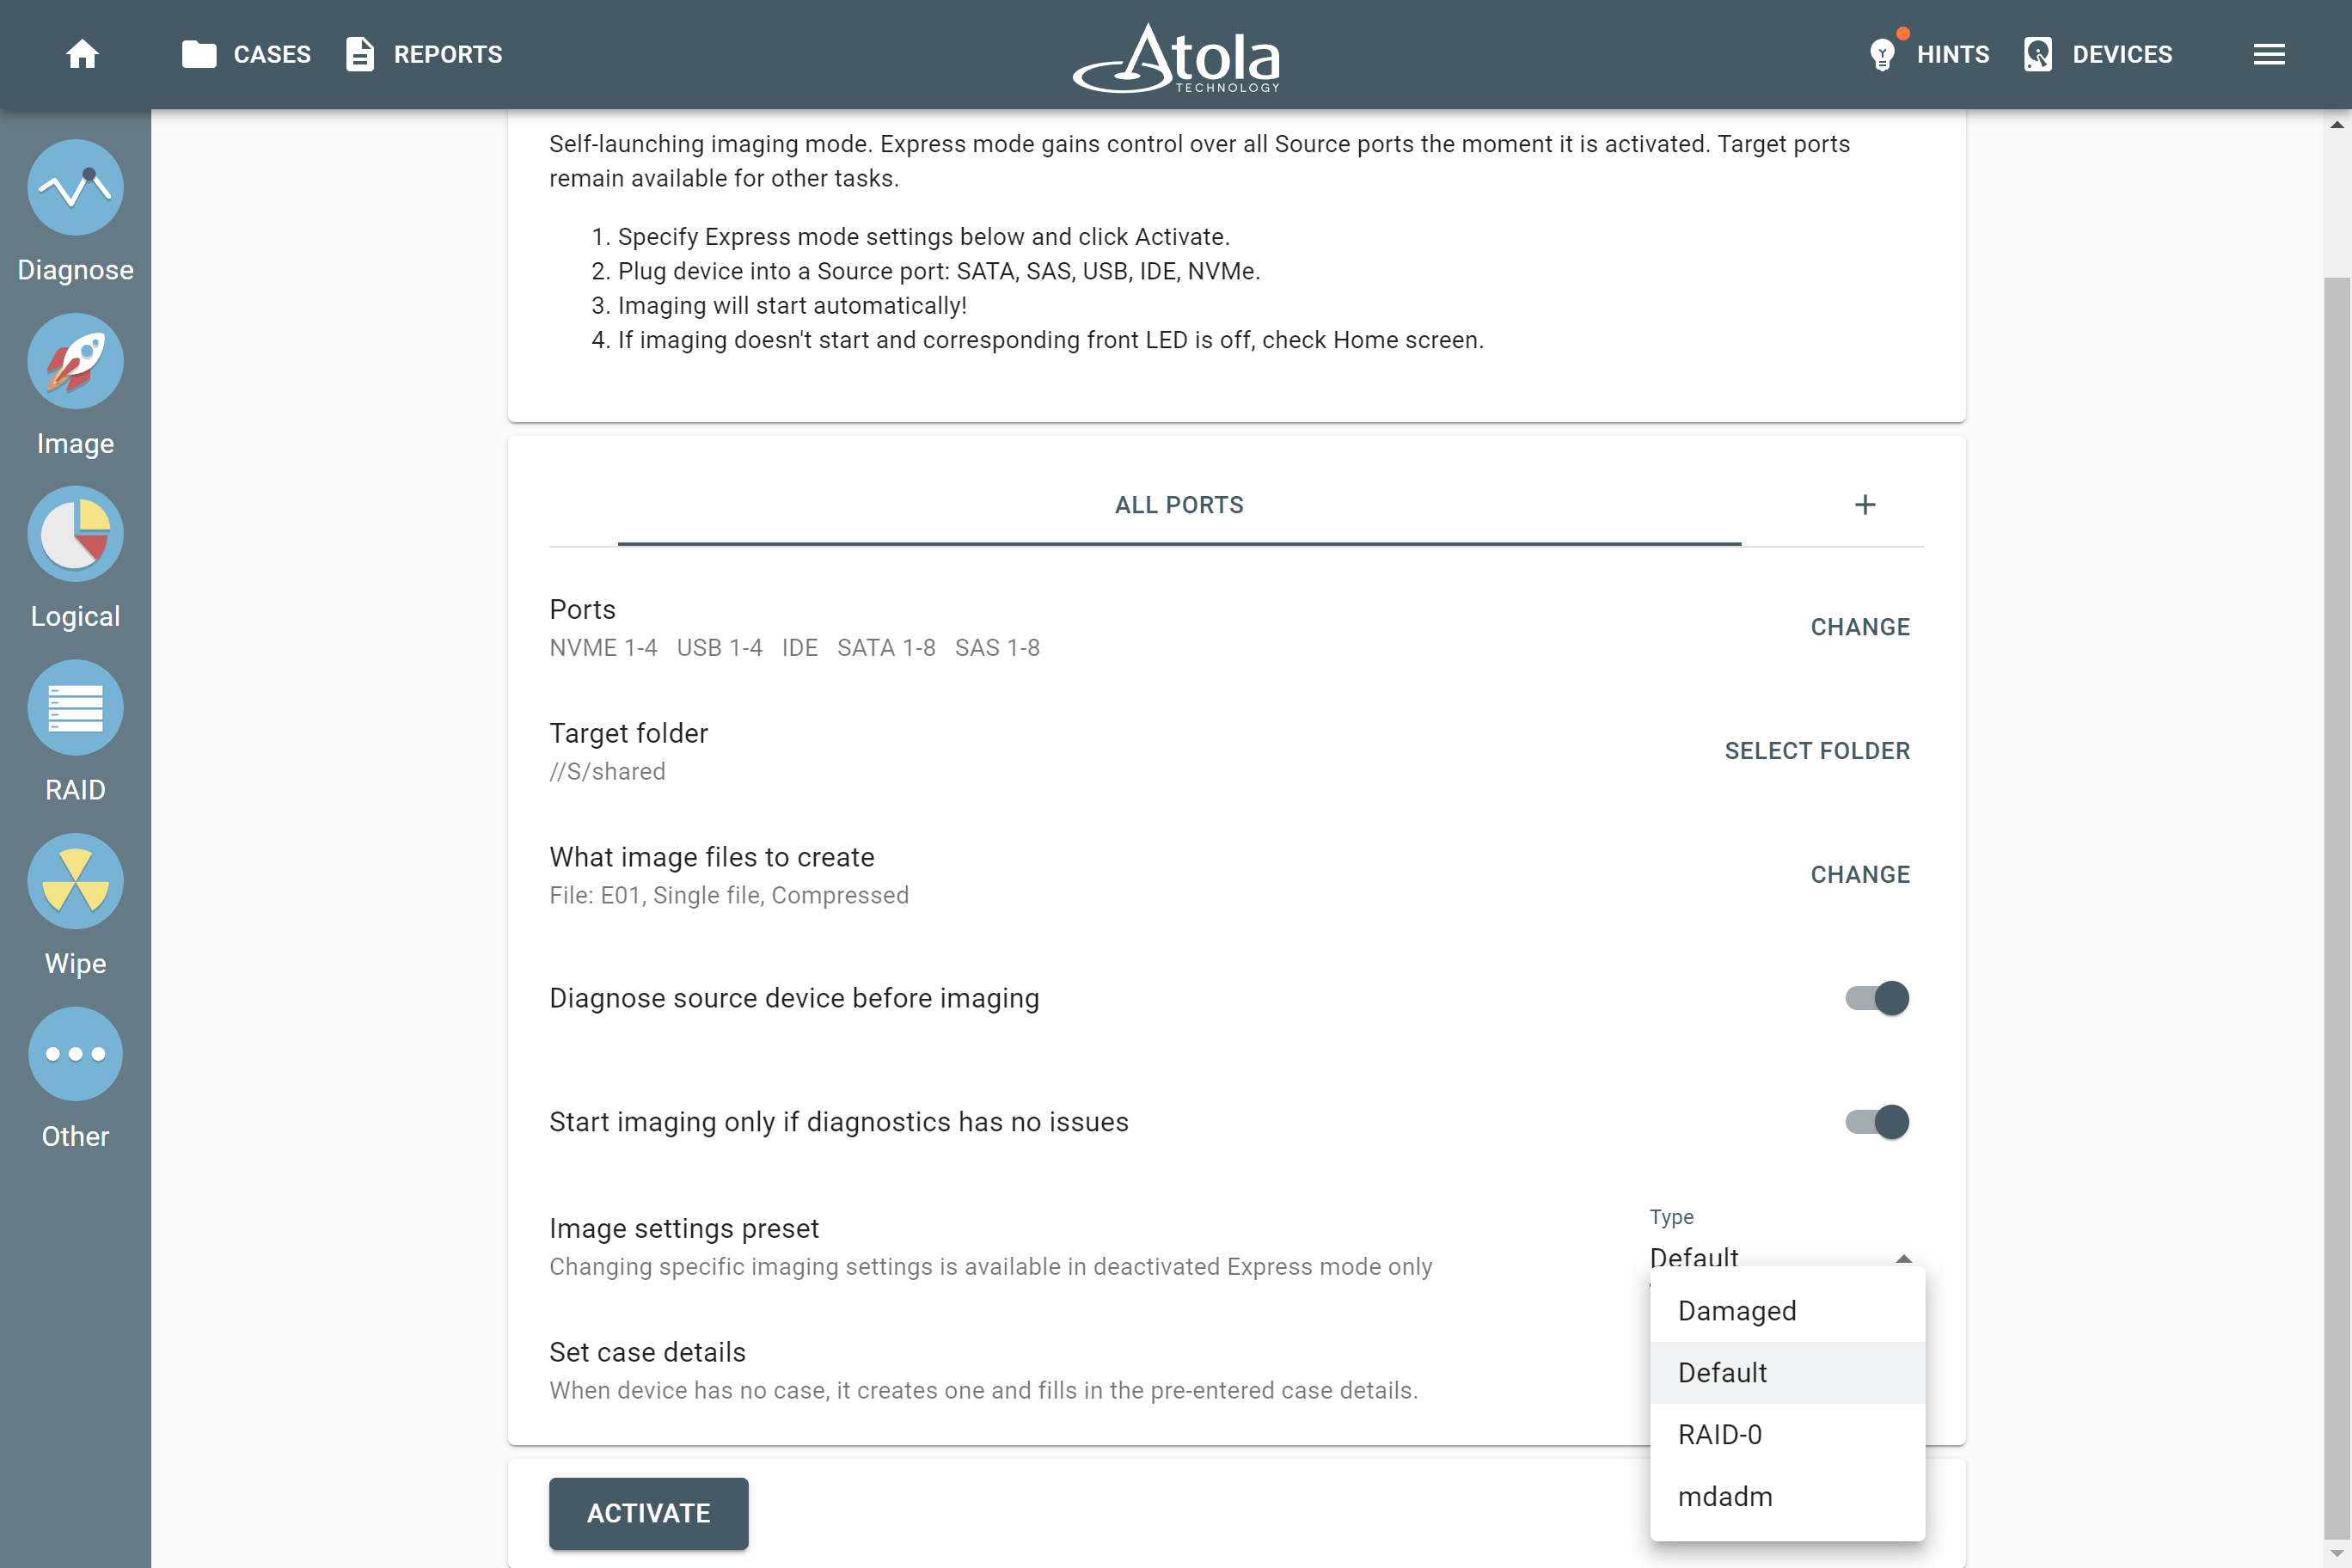
TaskForce 2 has two built-in imaging presets, Default and Damaged, for good and bad drives respectively, but you can also create and configure your own preset. For guidance, see Imaging presets.
To select an imaging preset for Express mode, use the Type list in the Imaging settings preset section.
Changing the imaging preset is available only when Express mode is deactivated.
Set case details
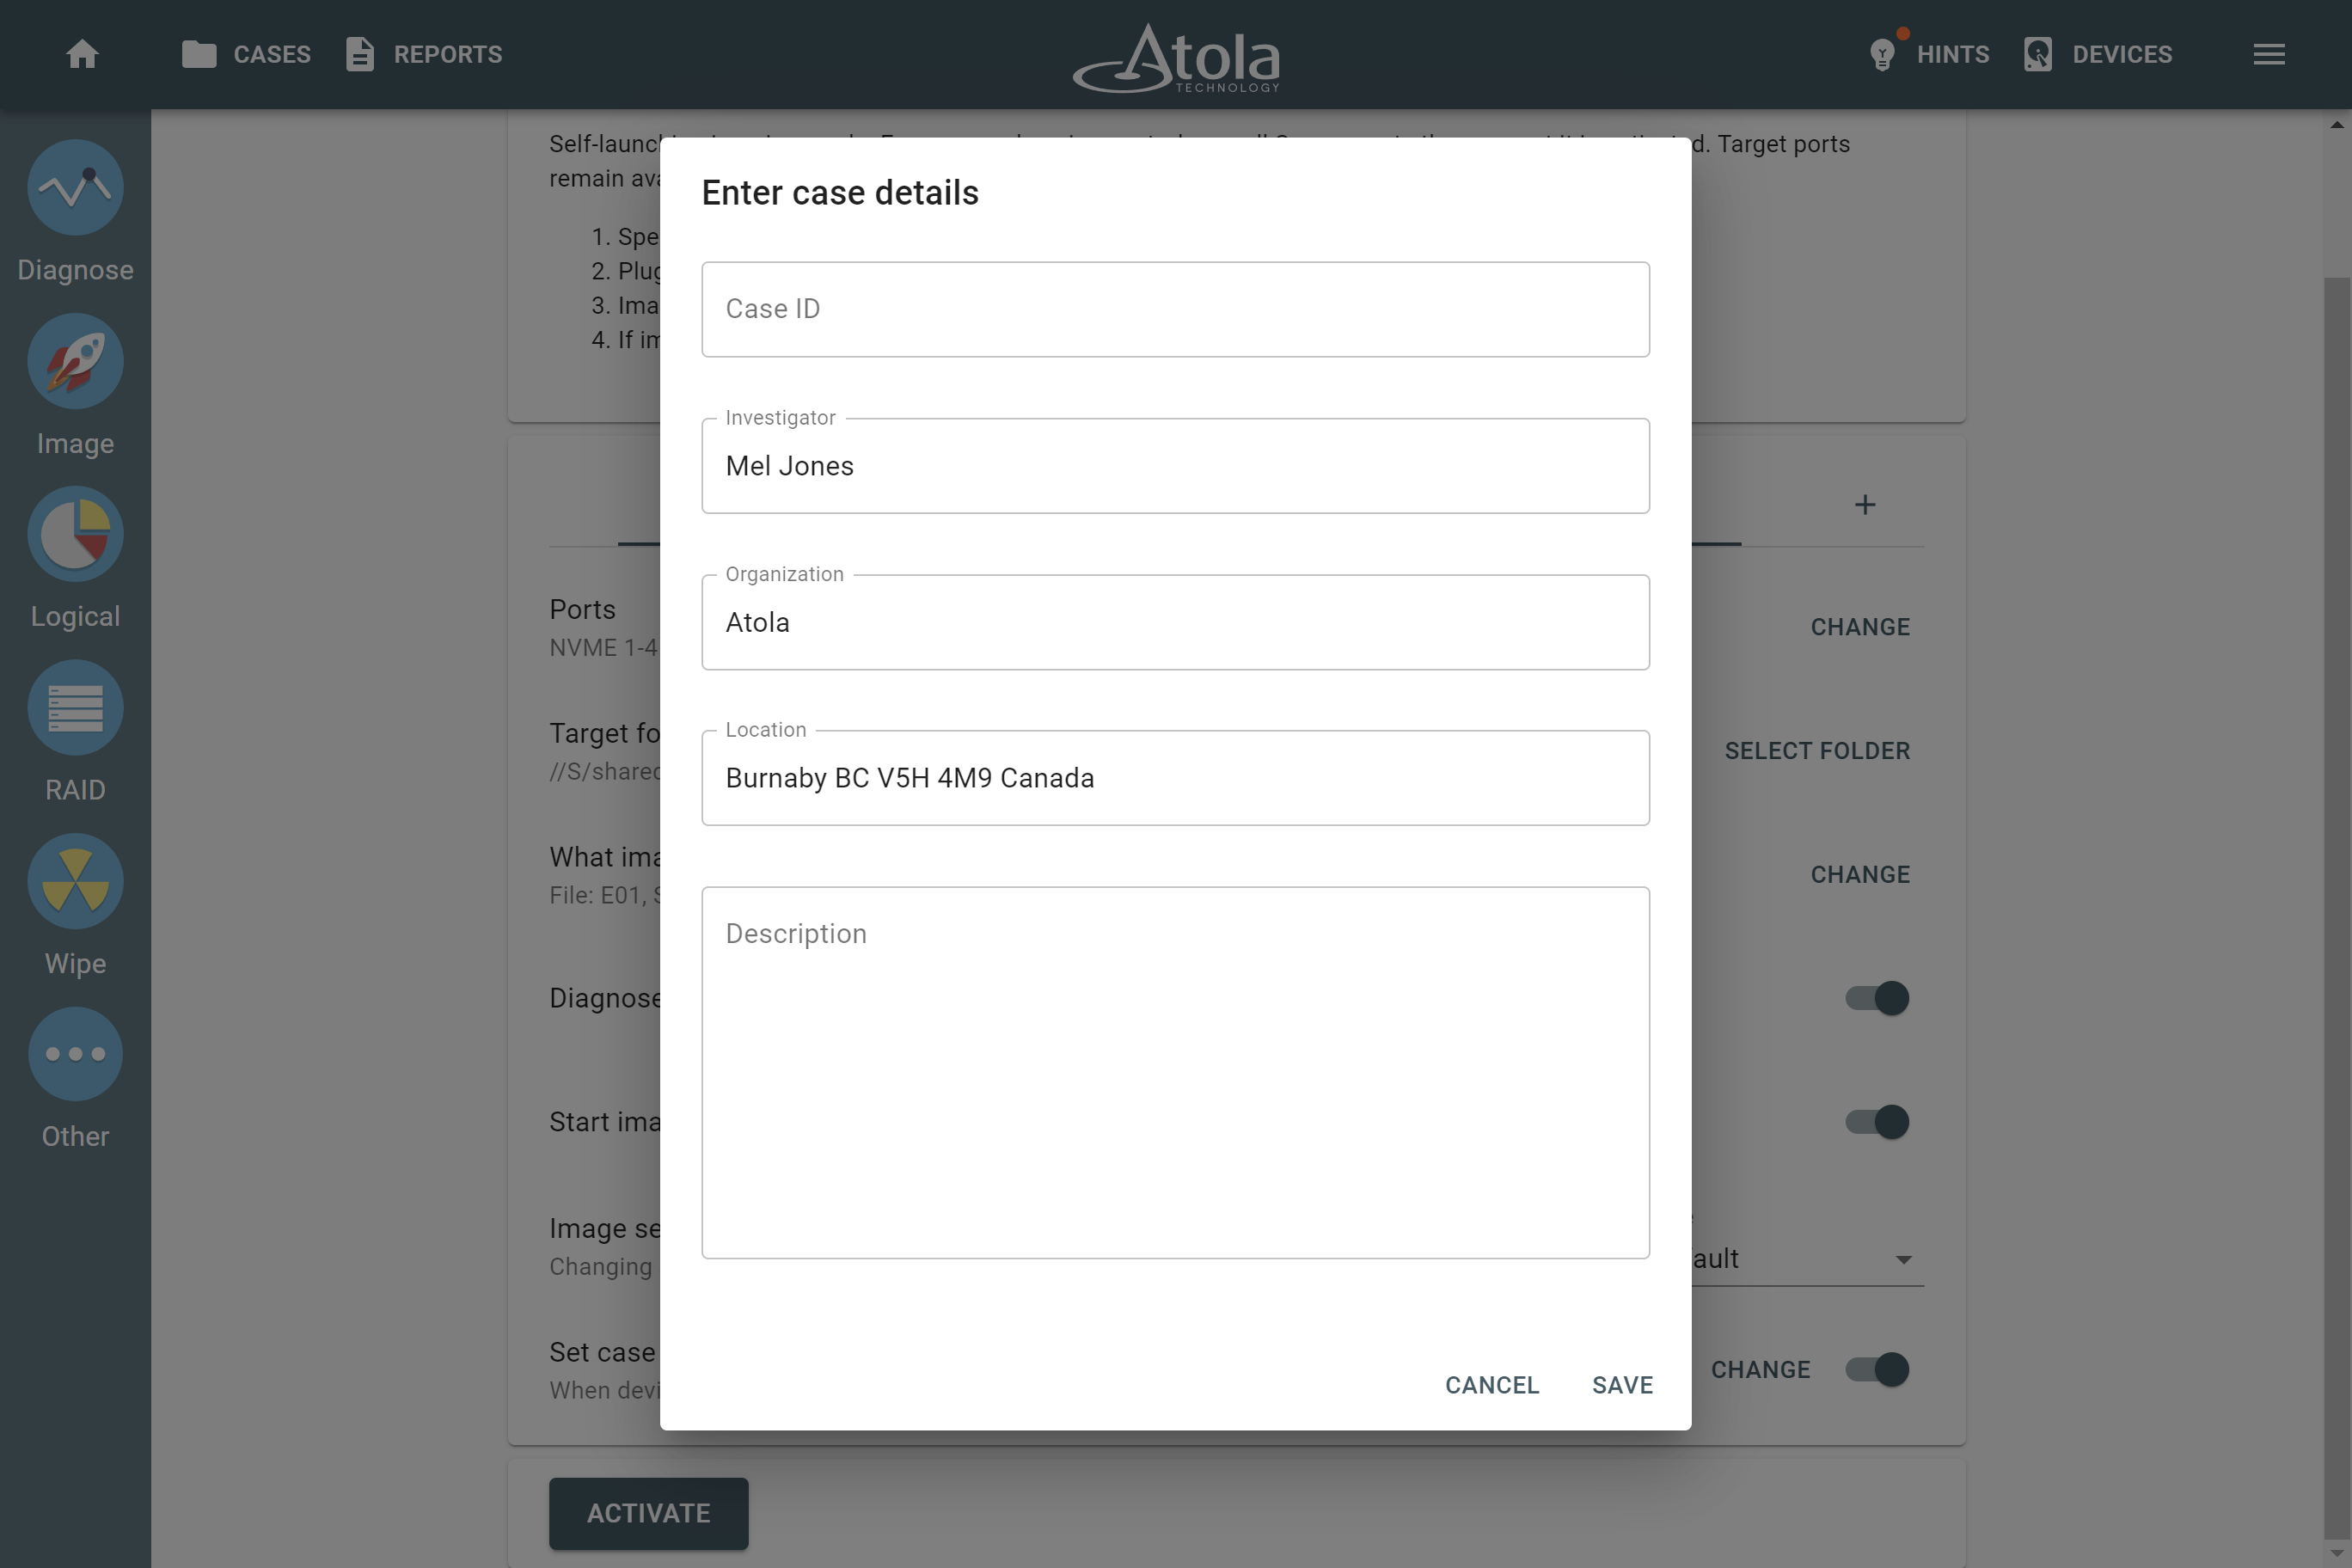
To streamline your acquisition workflow in the Express mode, you can pre-fill case details for each evidence drive using predefined information:
- Case ID
- Investigator’s name
- Organization
- Location
- Description
To enter predefined case details for Express mode and allow filling them up:
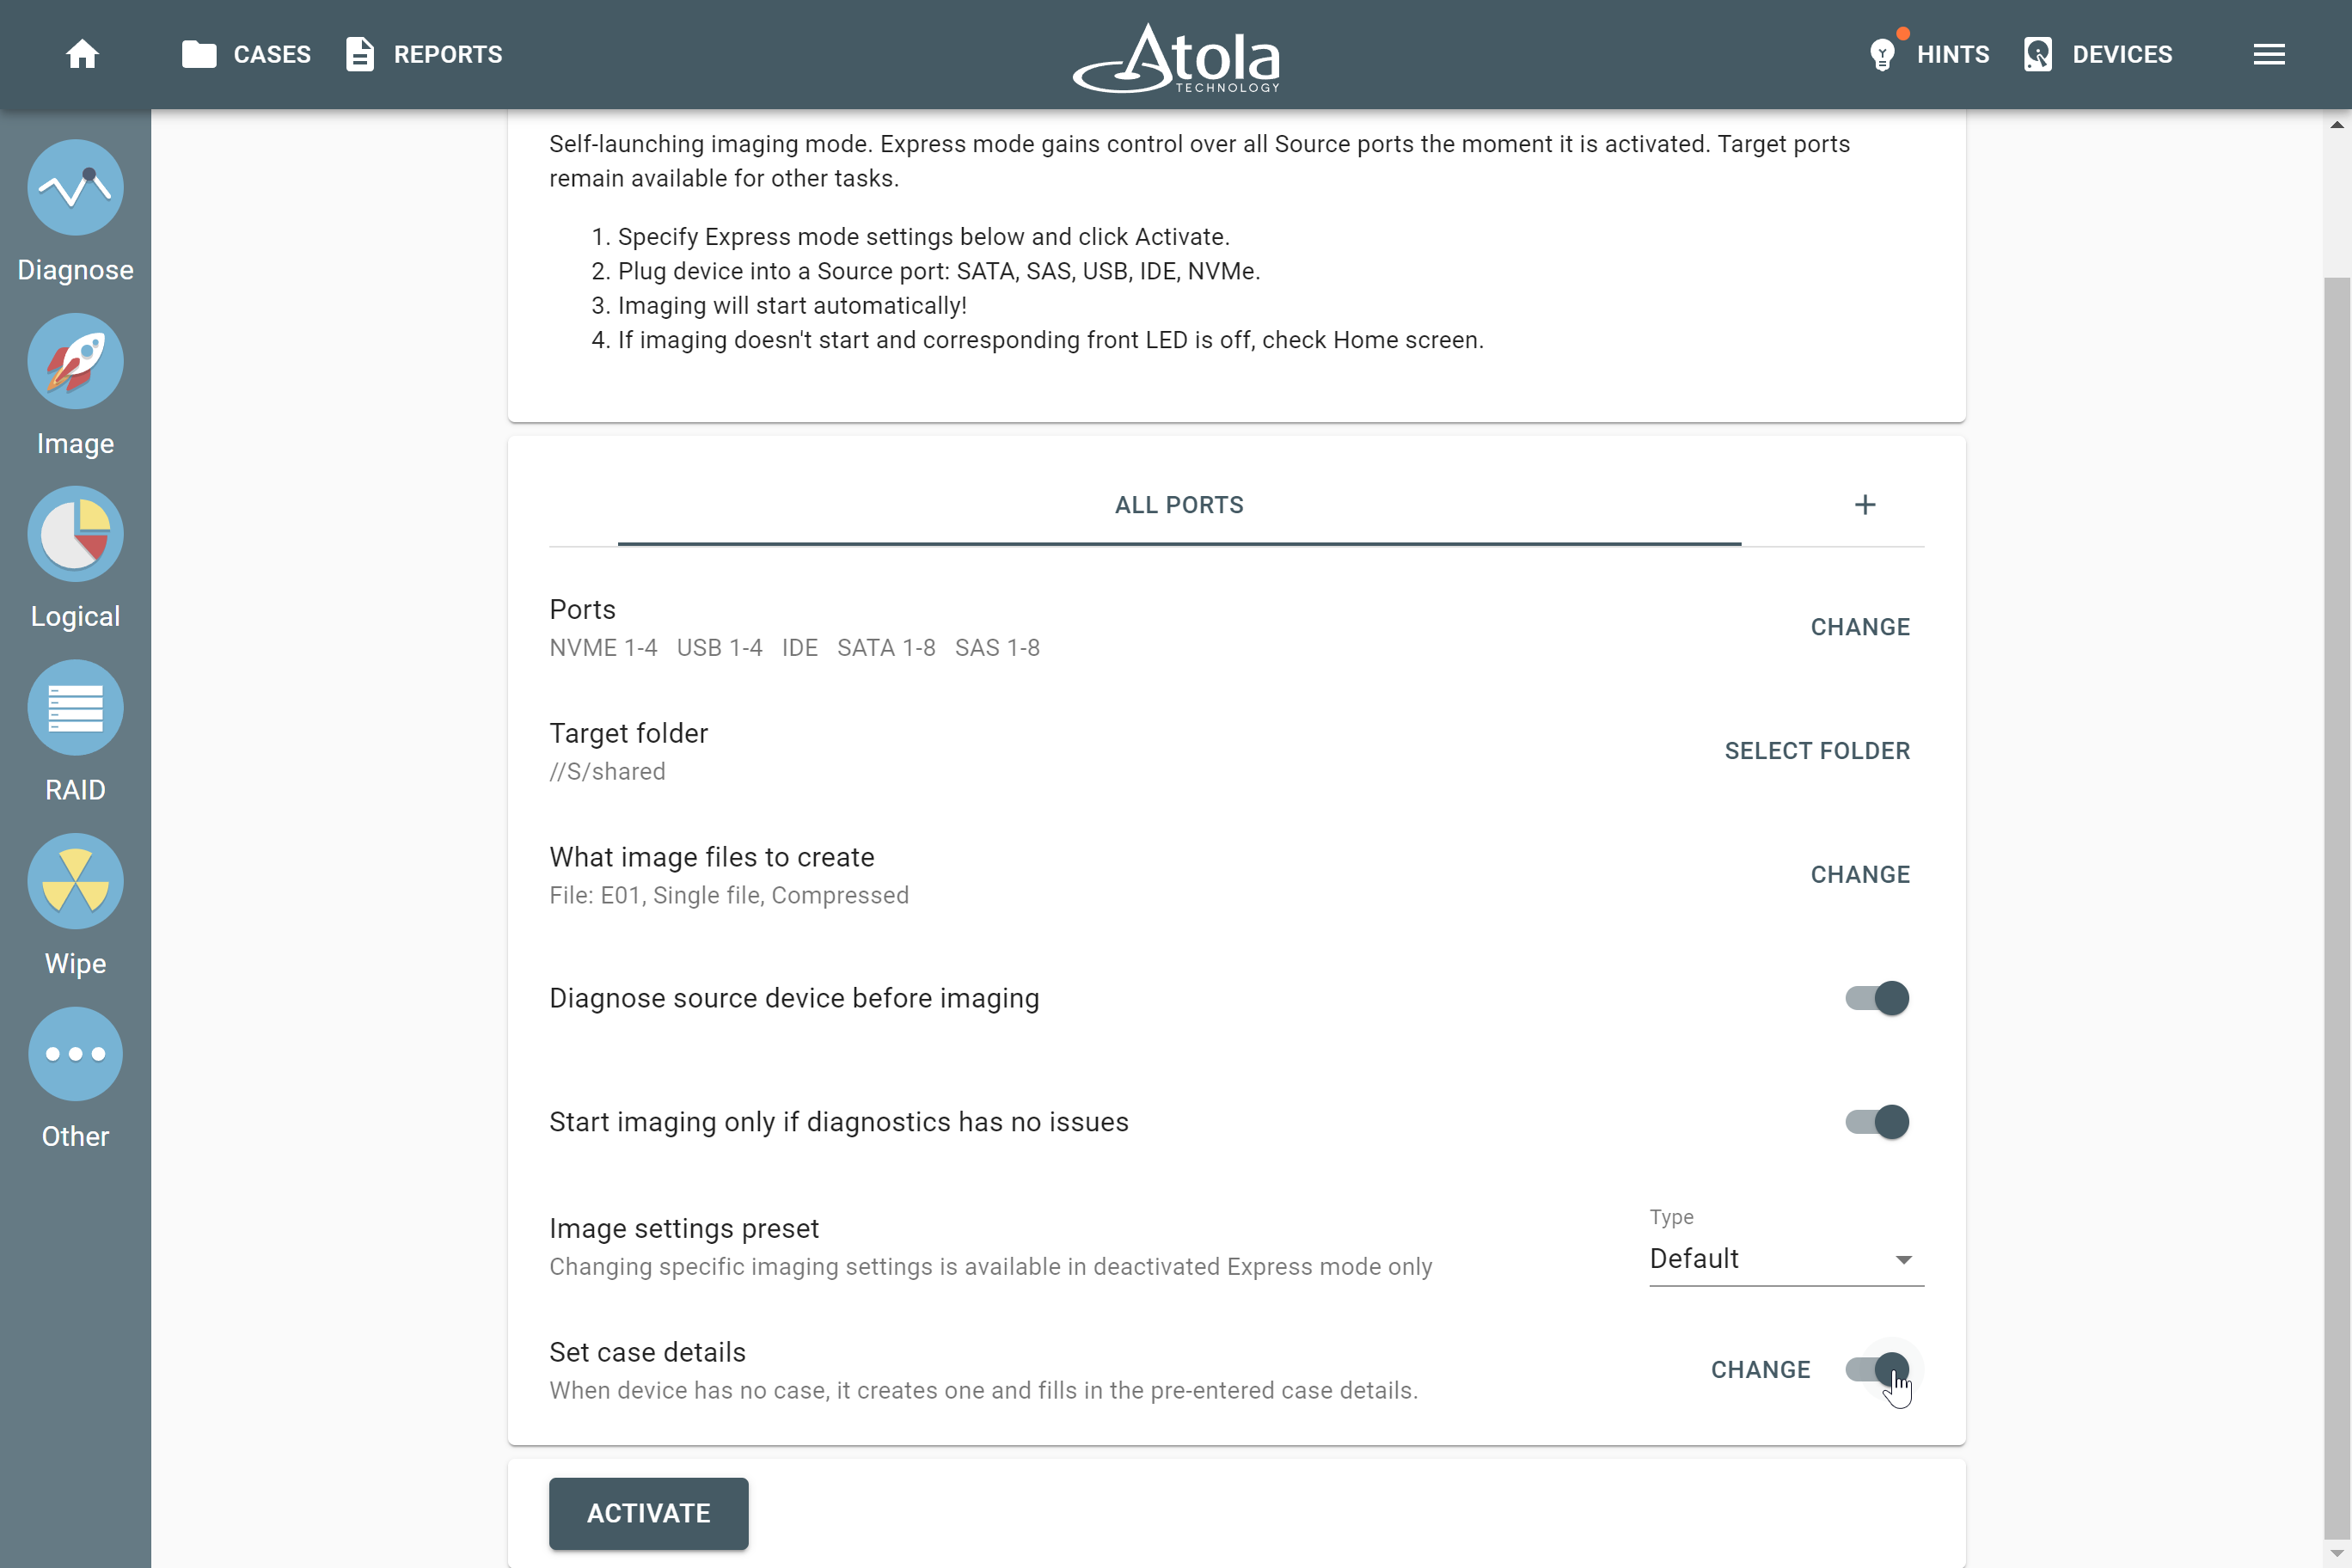
- On the Express mode settings page, go to the Set case details section and toggle this option on.
- Click Change.
- In the dialog window, enter case details and click Save.
Activate Express mode
Once Express mode settings are specified, click the Activate button and connect your evidence drives for an immediate start of imaging.
If any drives are already connected to the source ports, TaskForce starts to image those devices immediately using Express mode settings once you click Activate.
To indicate that TaskForce now operates in Express mode:
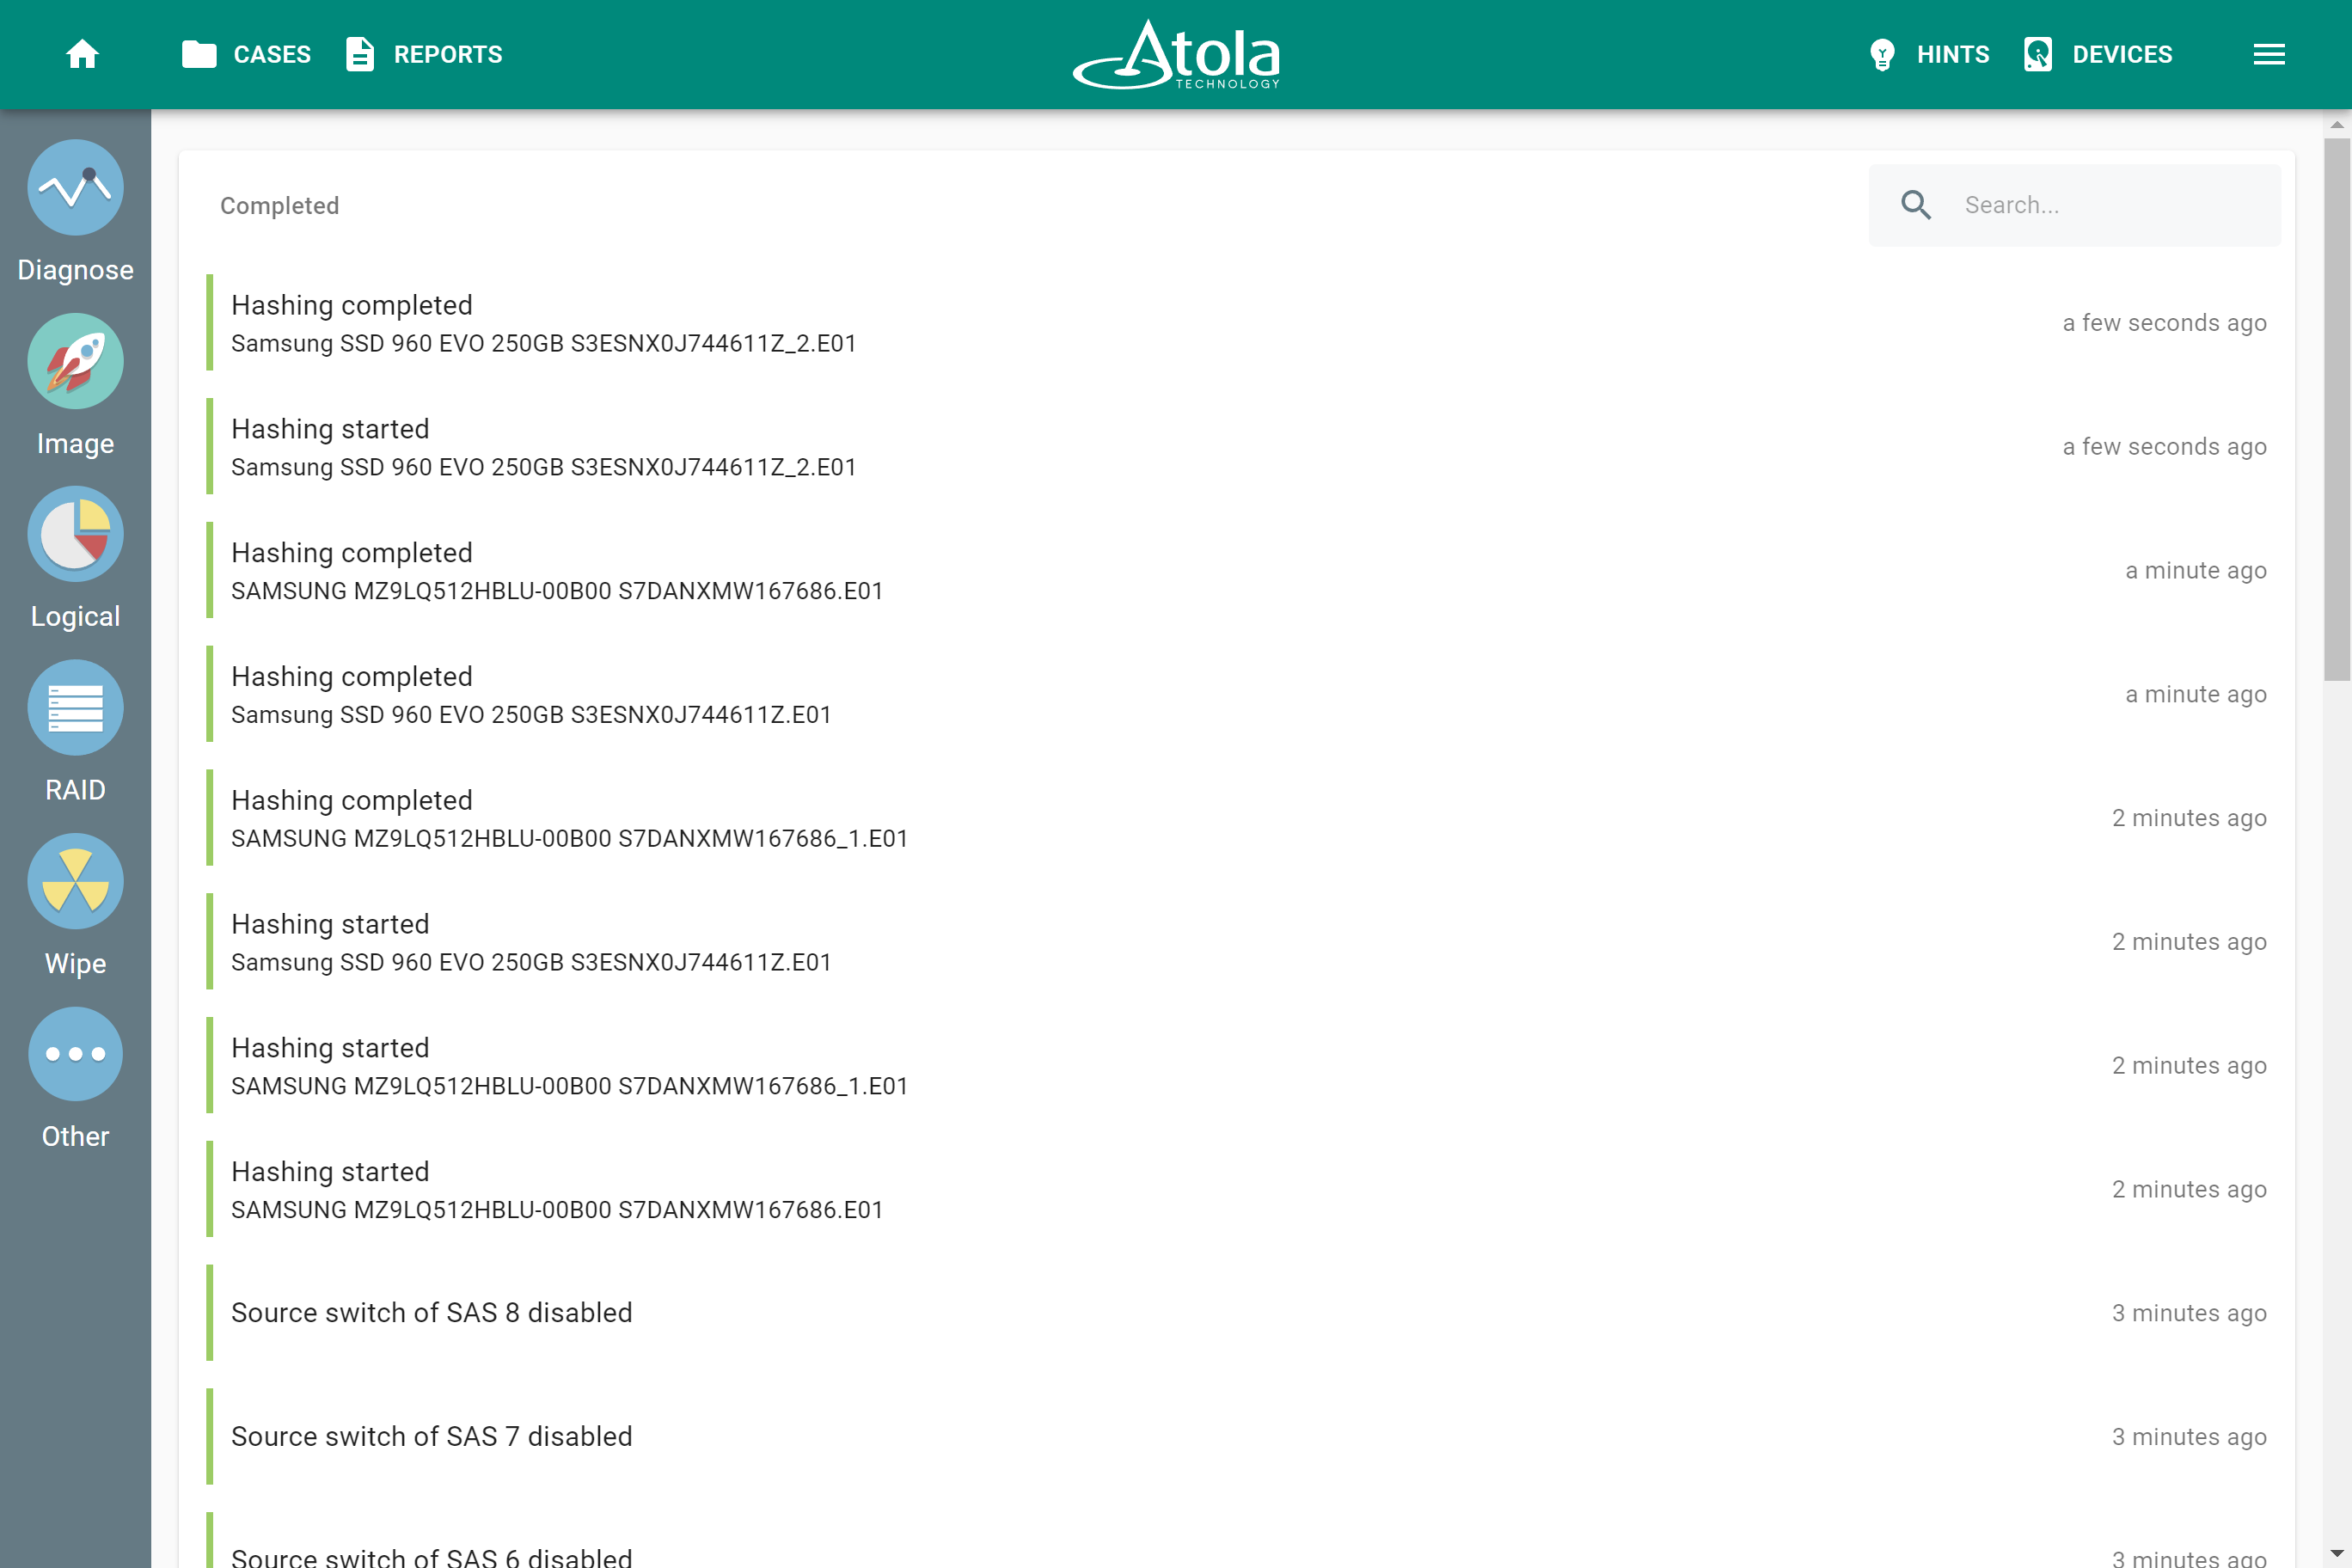
- In the user interface, the color of the top panel and the Image icon on the left changes.
- On the TaskForce’s IP screen, the message “Express mode” appears.
Image drives in Express mode
Plug drives
Once all settings are configured and Express mode is activated, simply plug in the drives one by one and watch the imaging sessions start automatically.
Control imaging status in Express mode
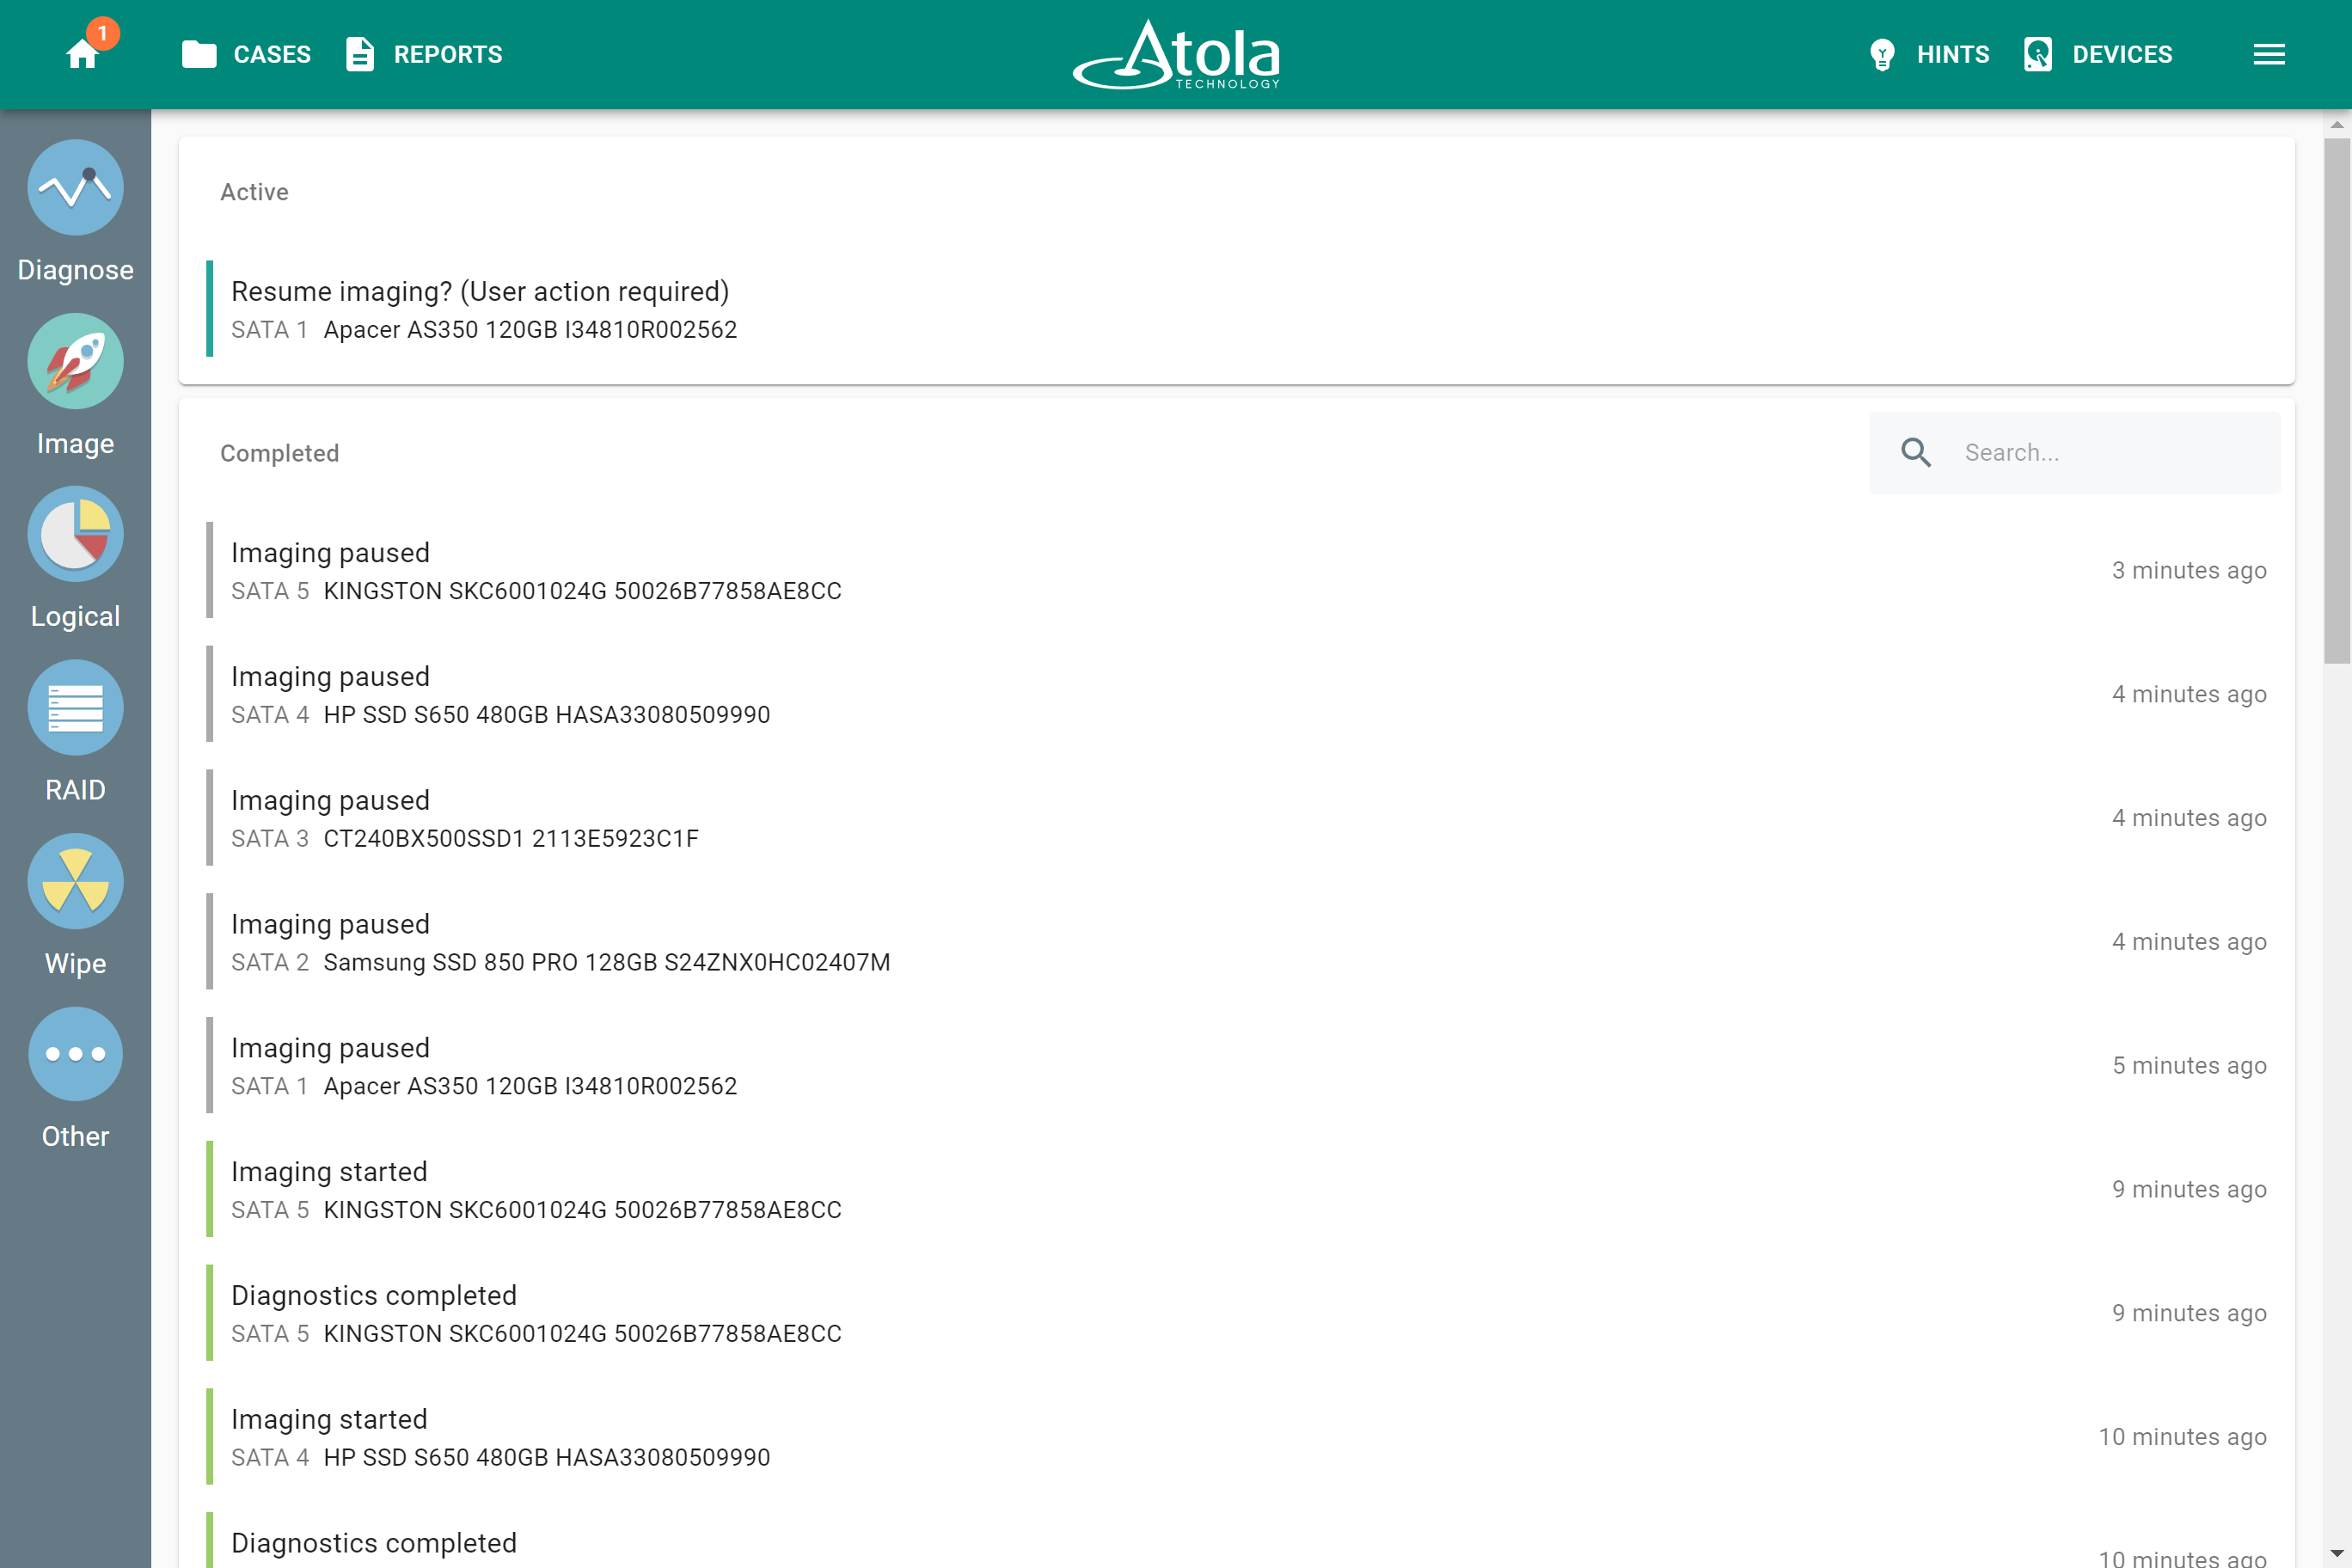
- Home screen: All diagnostics and imaging processes launched in Express mode appear on the Home screen. Click any process to see its details.
-
LED indicators on the TaskForce front panel:
- Blinking green - everything is OK, the process is running smoothly.
- Yellow - user action required.
- IP screen: TaskForce 2 keeps the user updated by displaying the number of user actions required on the IP screen on the front panel of the unit.
User action required
When TaskForce 2 detects an issue with an imaging session, the User action required notification appears on the Home screen for the user to make a decision.
The number of user actions required is also displayed on the IP screen on the front panel of the hardware unit.
TaskForce prompts for user to take action if:
- Diagnostics detect any issues with a device.
- A user pauses the imaging process.
- Imaging finishes.
- A source device has already been imaged, fully or partially.
- A source device has been formatted as storage.
Pause and resume imaging session
As in standard imaging mode, in Express mode you can pause any imaging session and then resume it later.
To pause an imaging session in Express mode:
- On the Home screen, click on the running imaging process you want to pause.
- On the imaging details page, click the Pause button at the bottom.
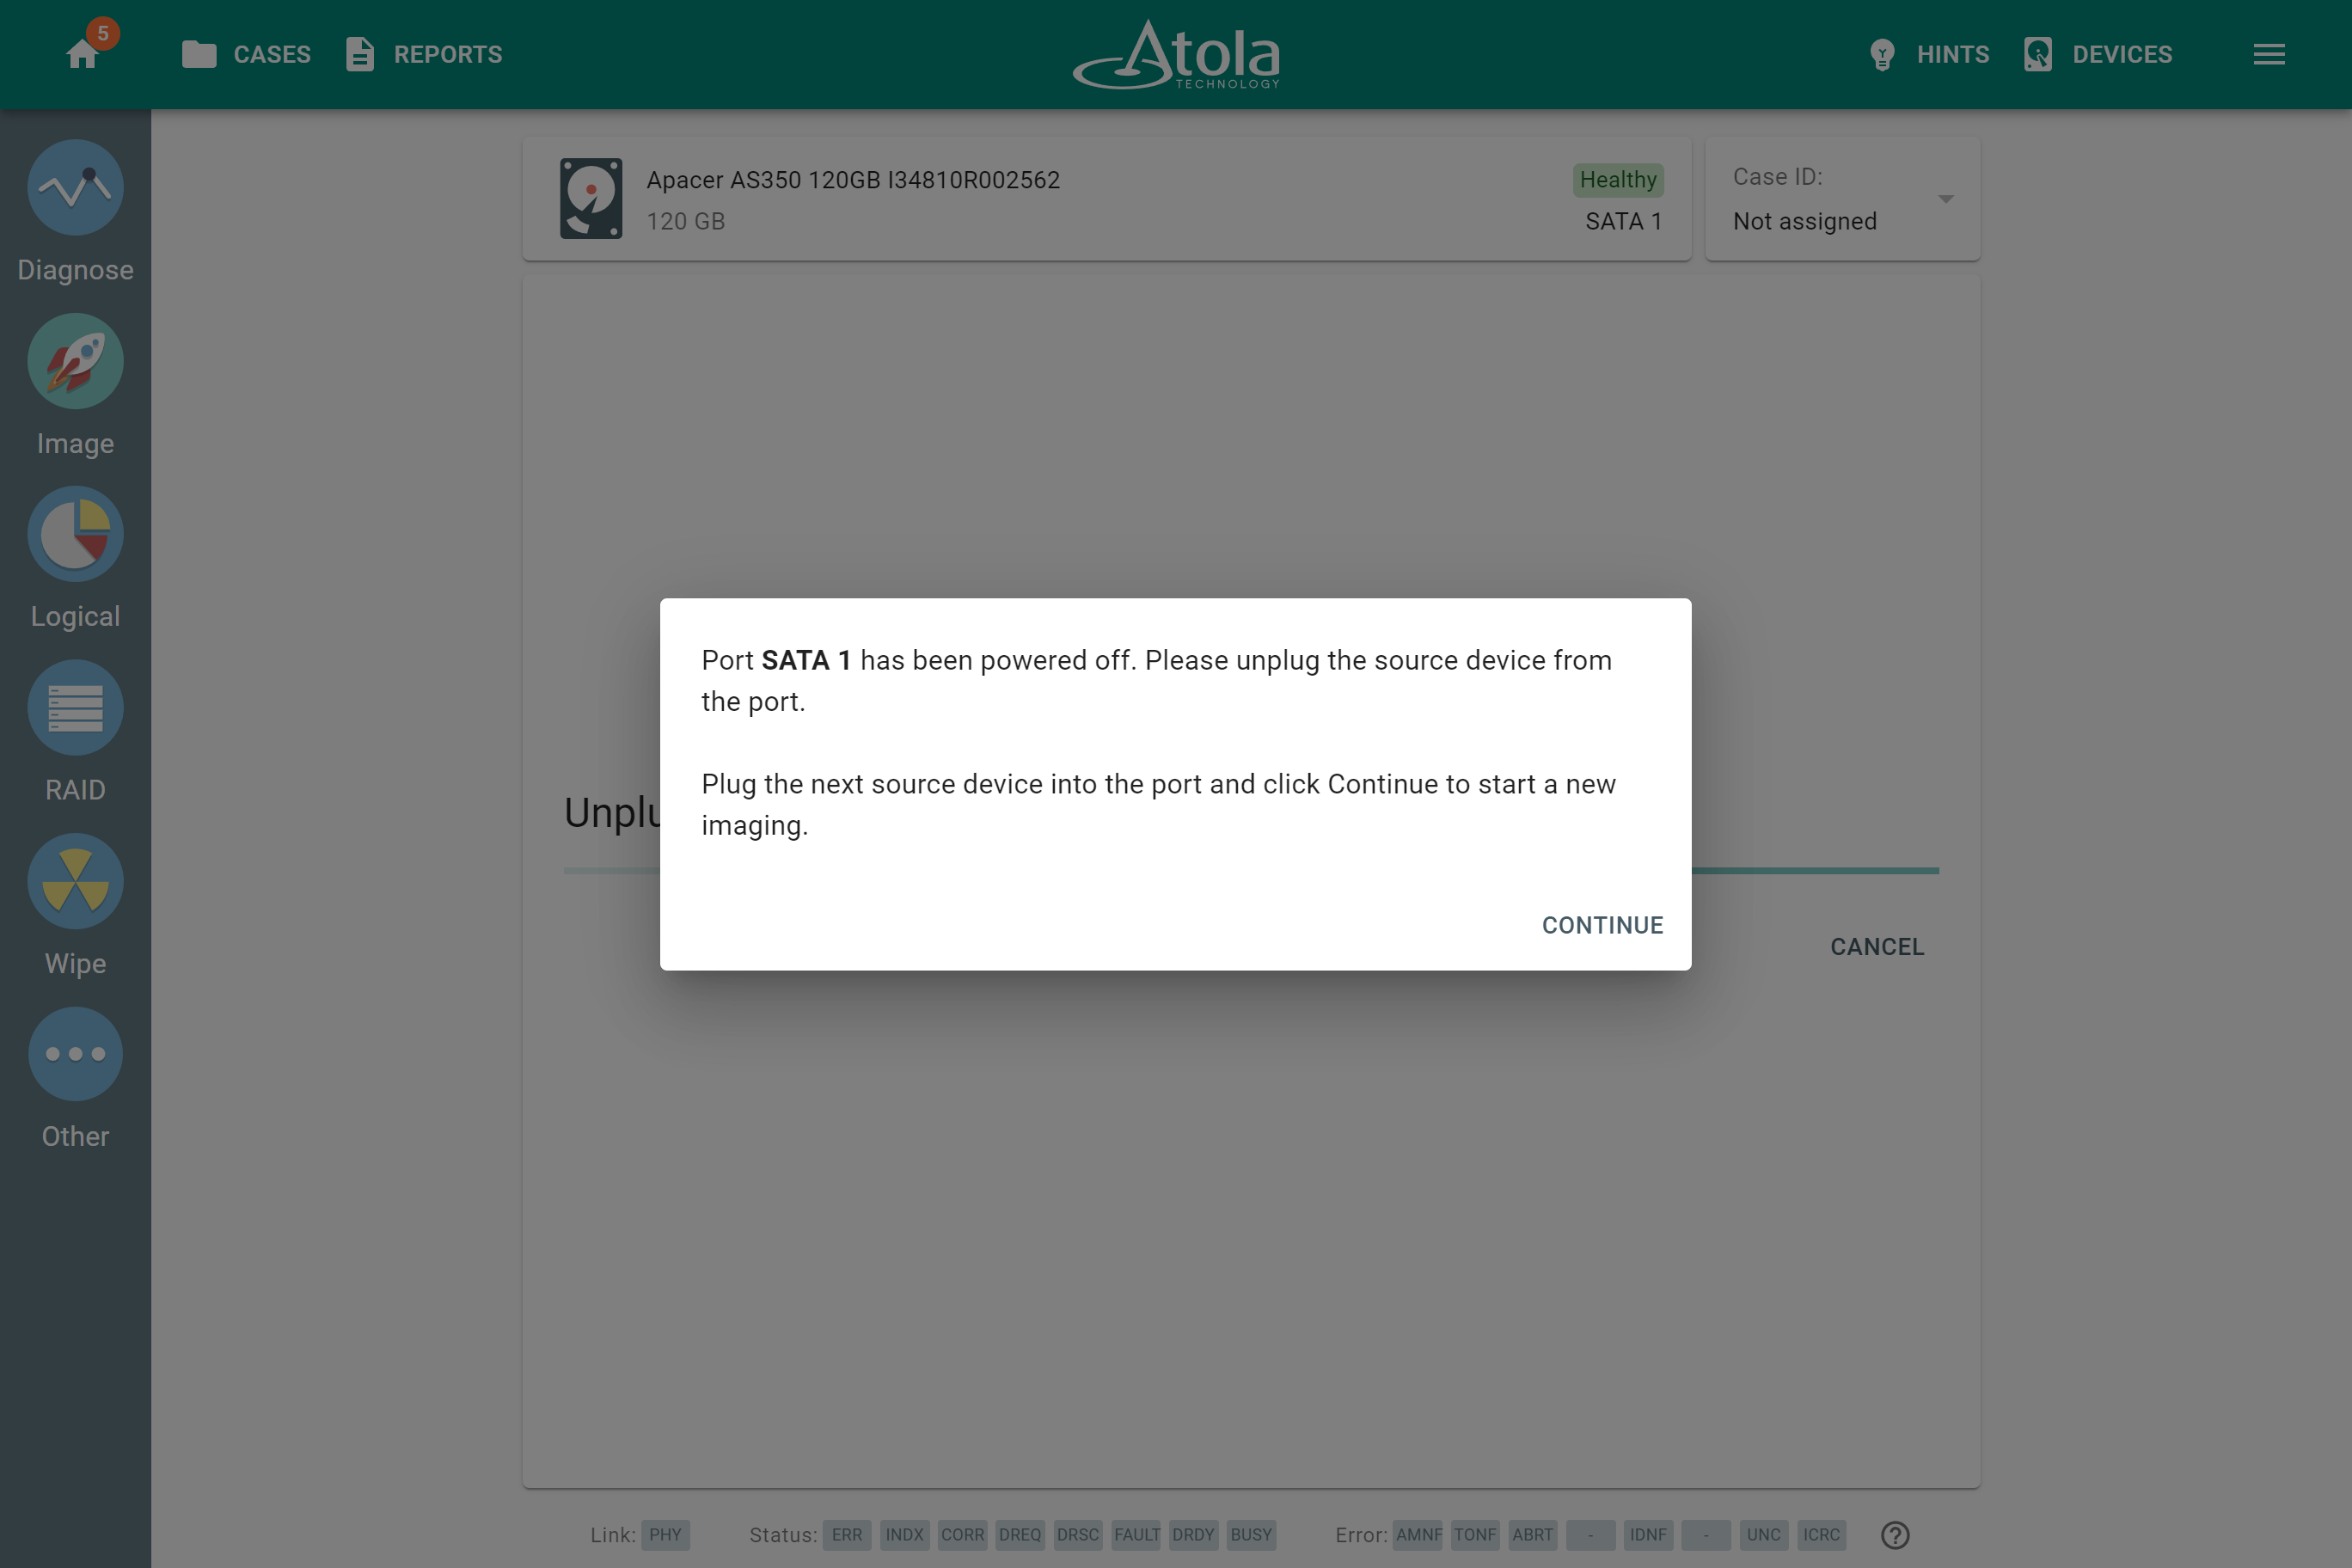
- Confirm pausing the imaging process.
- TaskForce shows the notification that the port has been powered off.
- Optional: Unplug your evidence drive from the port.
- Optional: Plug the next drive or do not plug any.
- In the dialog, click Continue.
Once the imaging process is paused, TaskForce creates an Imaging paused report available either from the Home screen or from the Reports page.
To resume the paused imaging session in Express mode:
- On the Home screen, click the paused session.
- In the dialog, click Resume.
Check imaging reports
Once the imaging process is started, paused, resumed, or completed in Express mode, TaskForce creates the respective report.
Reports contain the various details of the session in its current stage including source and target drive details, imaging settings, hash values, the time when the imaging session started, when it was completed and more.
Reports are available either from the Home screen or from the Reports page.
Change drives
Once an imaging session in Express mode is completed, TaskForce powers the respective port off and prompts a user to plug in the next evidence device.
To start a new imaging session, plug in the next source device and click Continue in the dialog.
Deactivate Express mode
To deactivate Express mode:
- Click the Menu in the top right and select Express mode.
- On the bottom of the Express mode settings page, click Deactivate.
To show that Express mode is deactivated, TaskForce changes the color of the top panel and the Image icon on the left back to normal. The message “Express mode” on the IP screen also disappears.
