Imaging to a compressed E01 file on a target drive
In TaskForce 2, you can image source drives to target files on a storage device connected directly to one of the imager’s drive ports. E01, AFF4, and RAW file formats are supported. E01 and AFF4 files can be compressed.
To create multiple target images on a directly connected drive, first, you need to set this device to the Storage mode.
If a drive is already in the Storage mode, plug it into one of the TaskForce drive ports and use it to store target image files without additional formatting. You can image several evidence devices to target files on storage simultaneously.
The drive in the Storage mode is marked with a special blue icon on the Select target devices panel. A LED status indicator of the respective drive port on the TaskForce 2 front panel also turns blue.
Set a device to the Storage mode
To set a target device to the Storage mode:
- Go to Image.
- Select the source evidence drive.
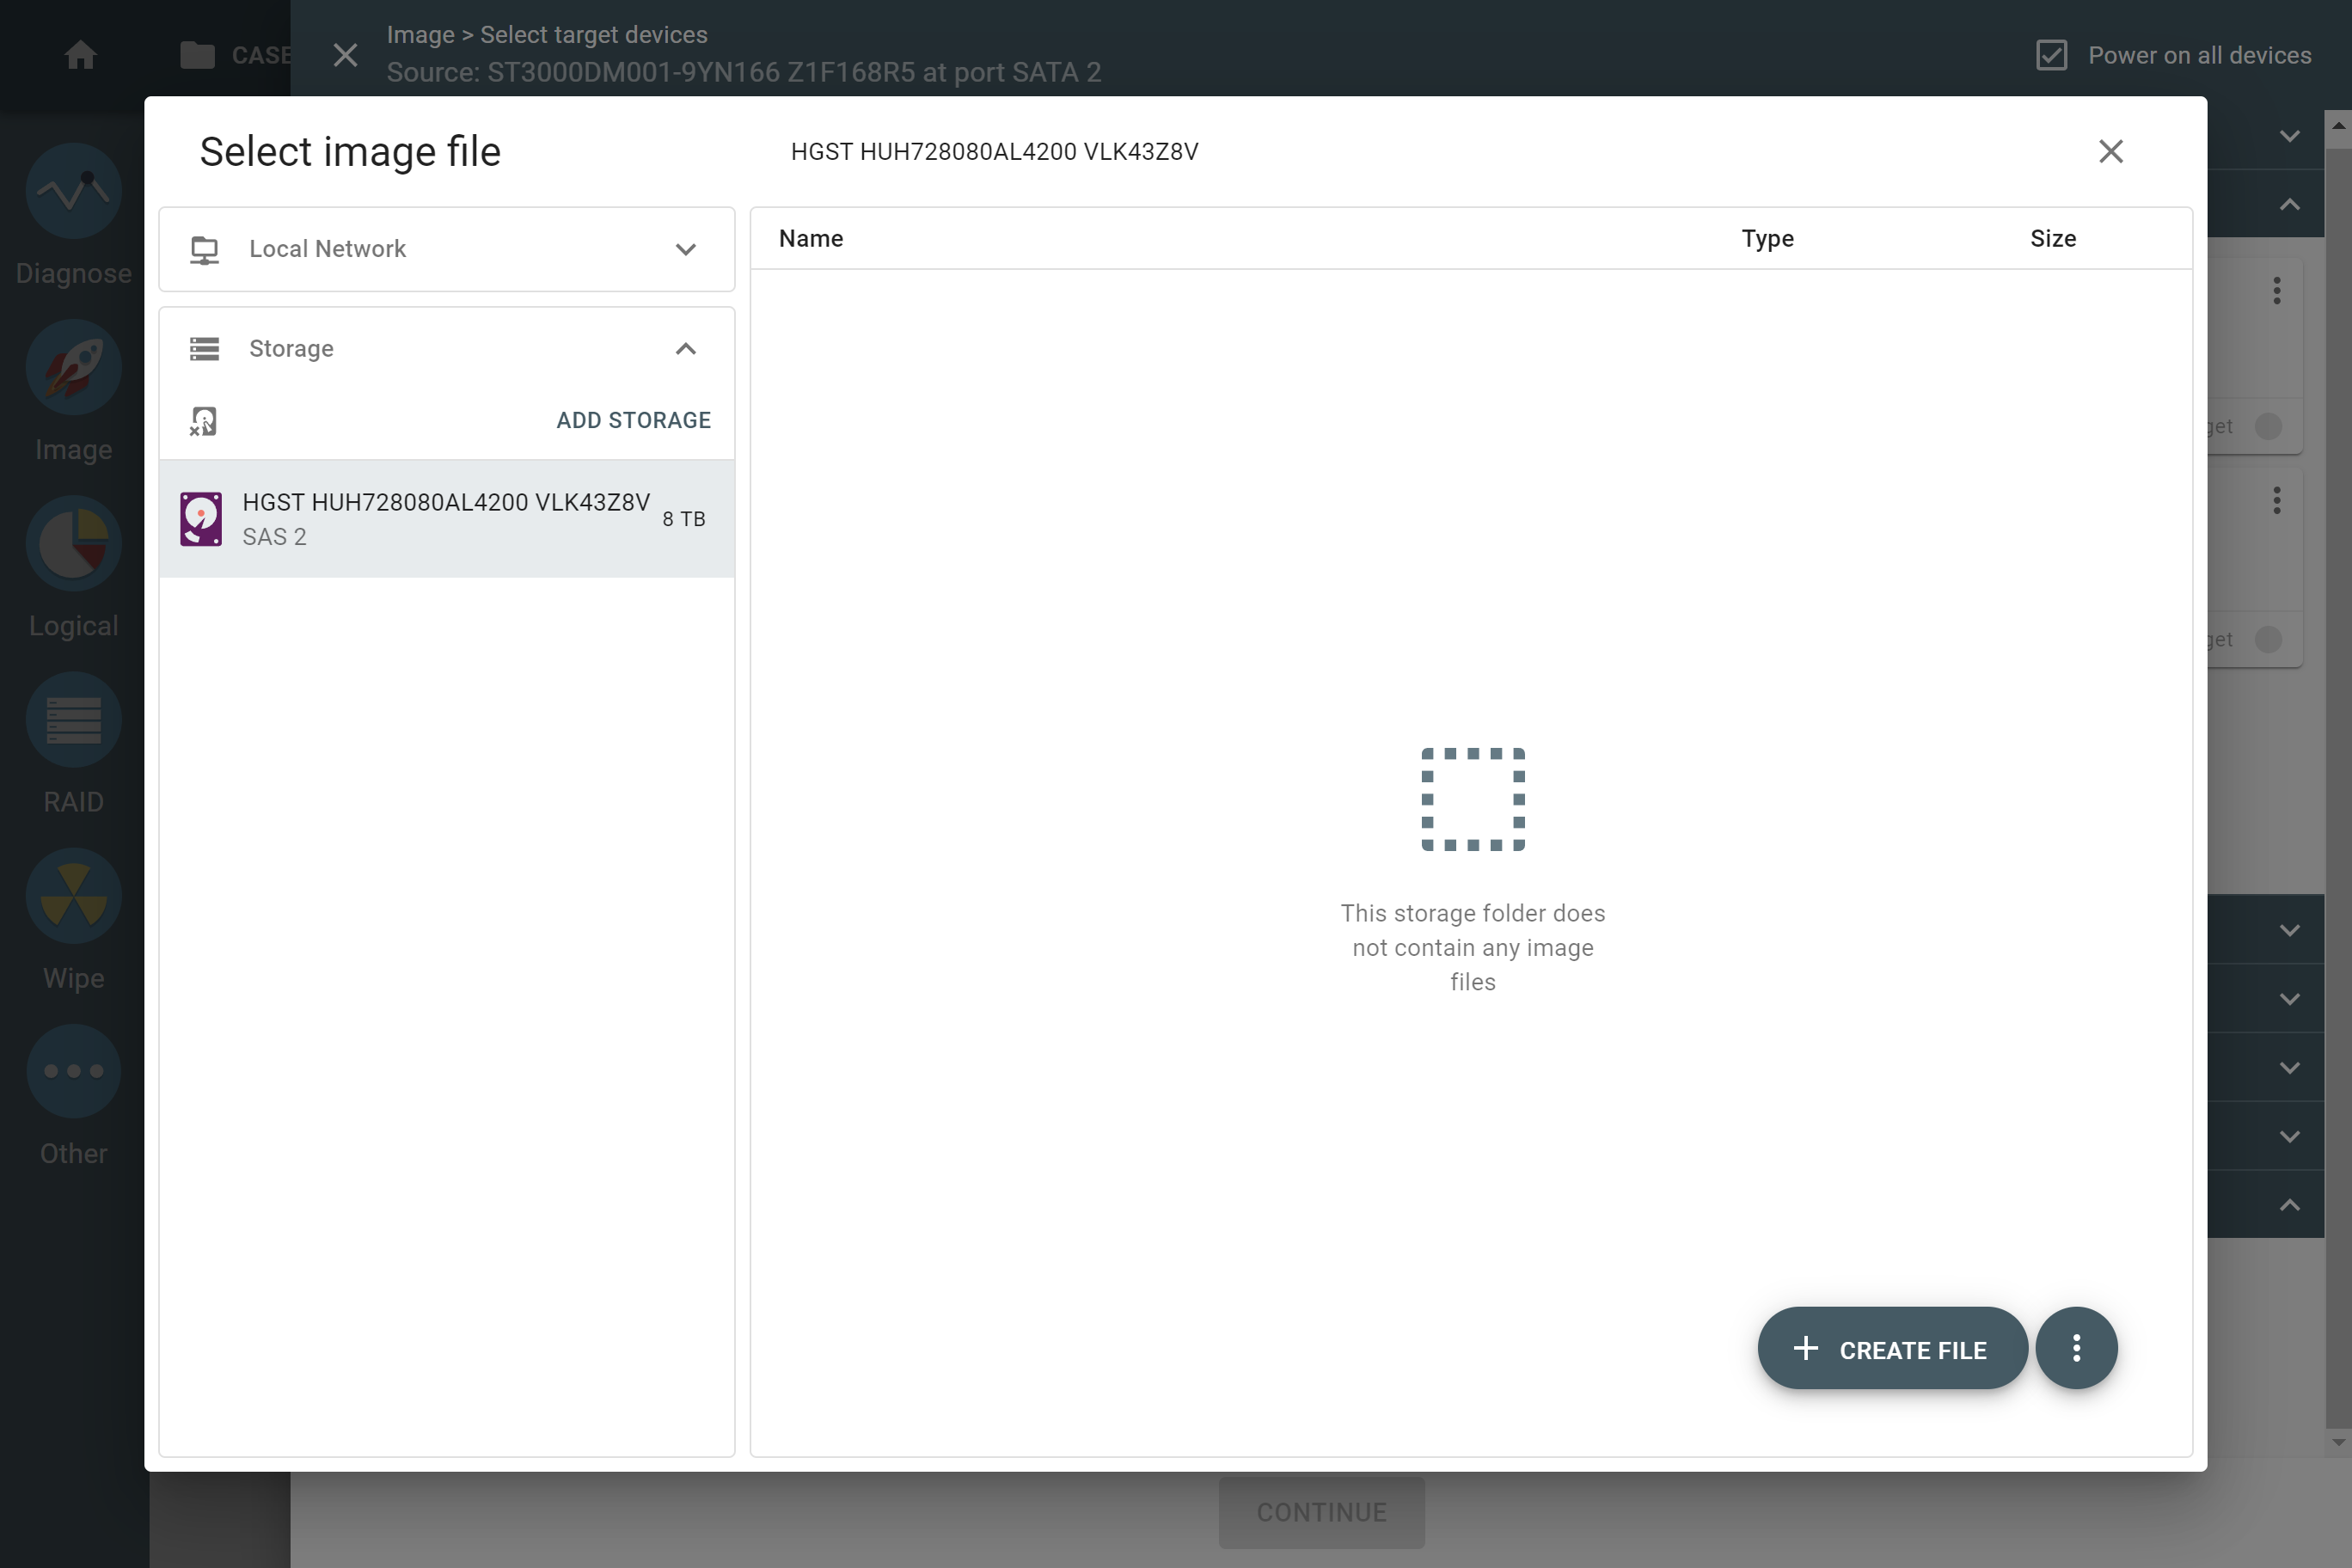
- On the Select target devices panel, switch to the Files tab and click Create file.
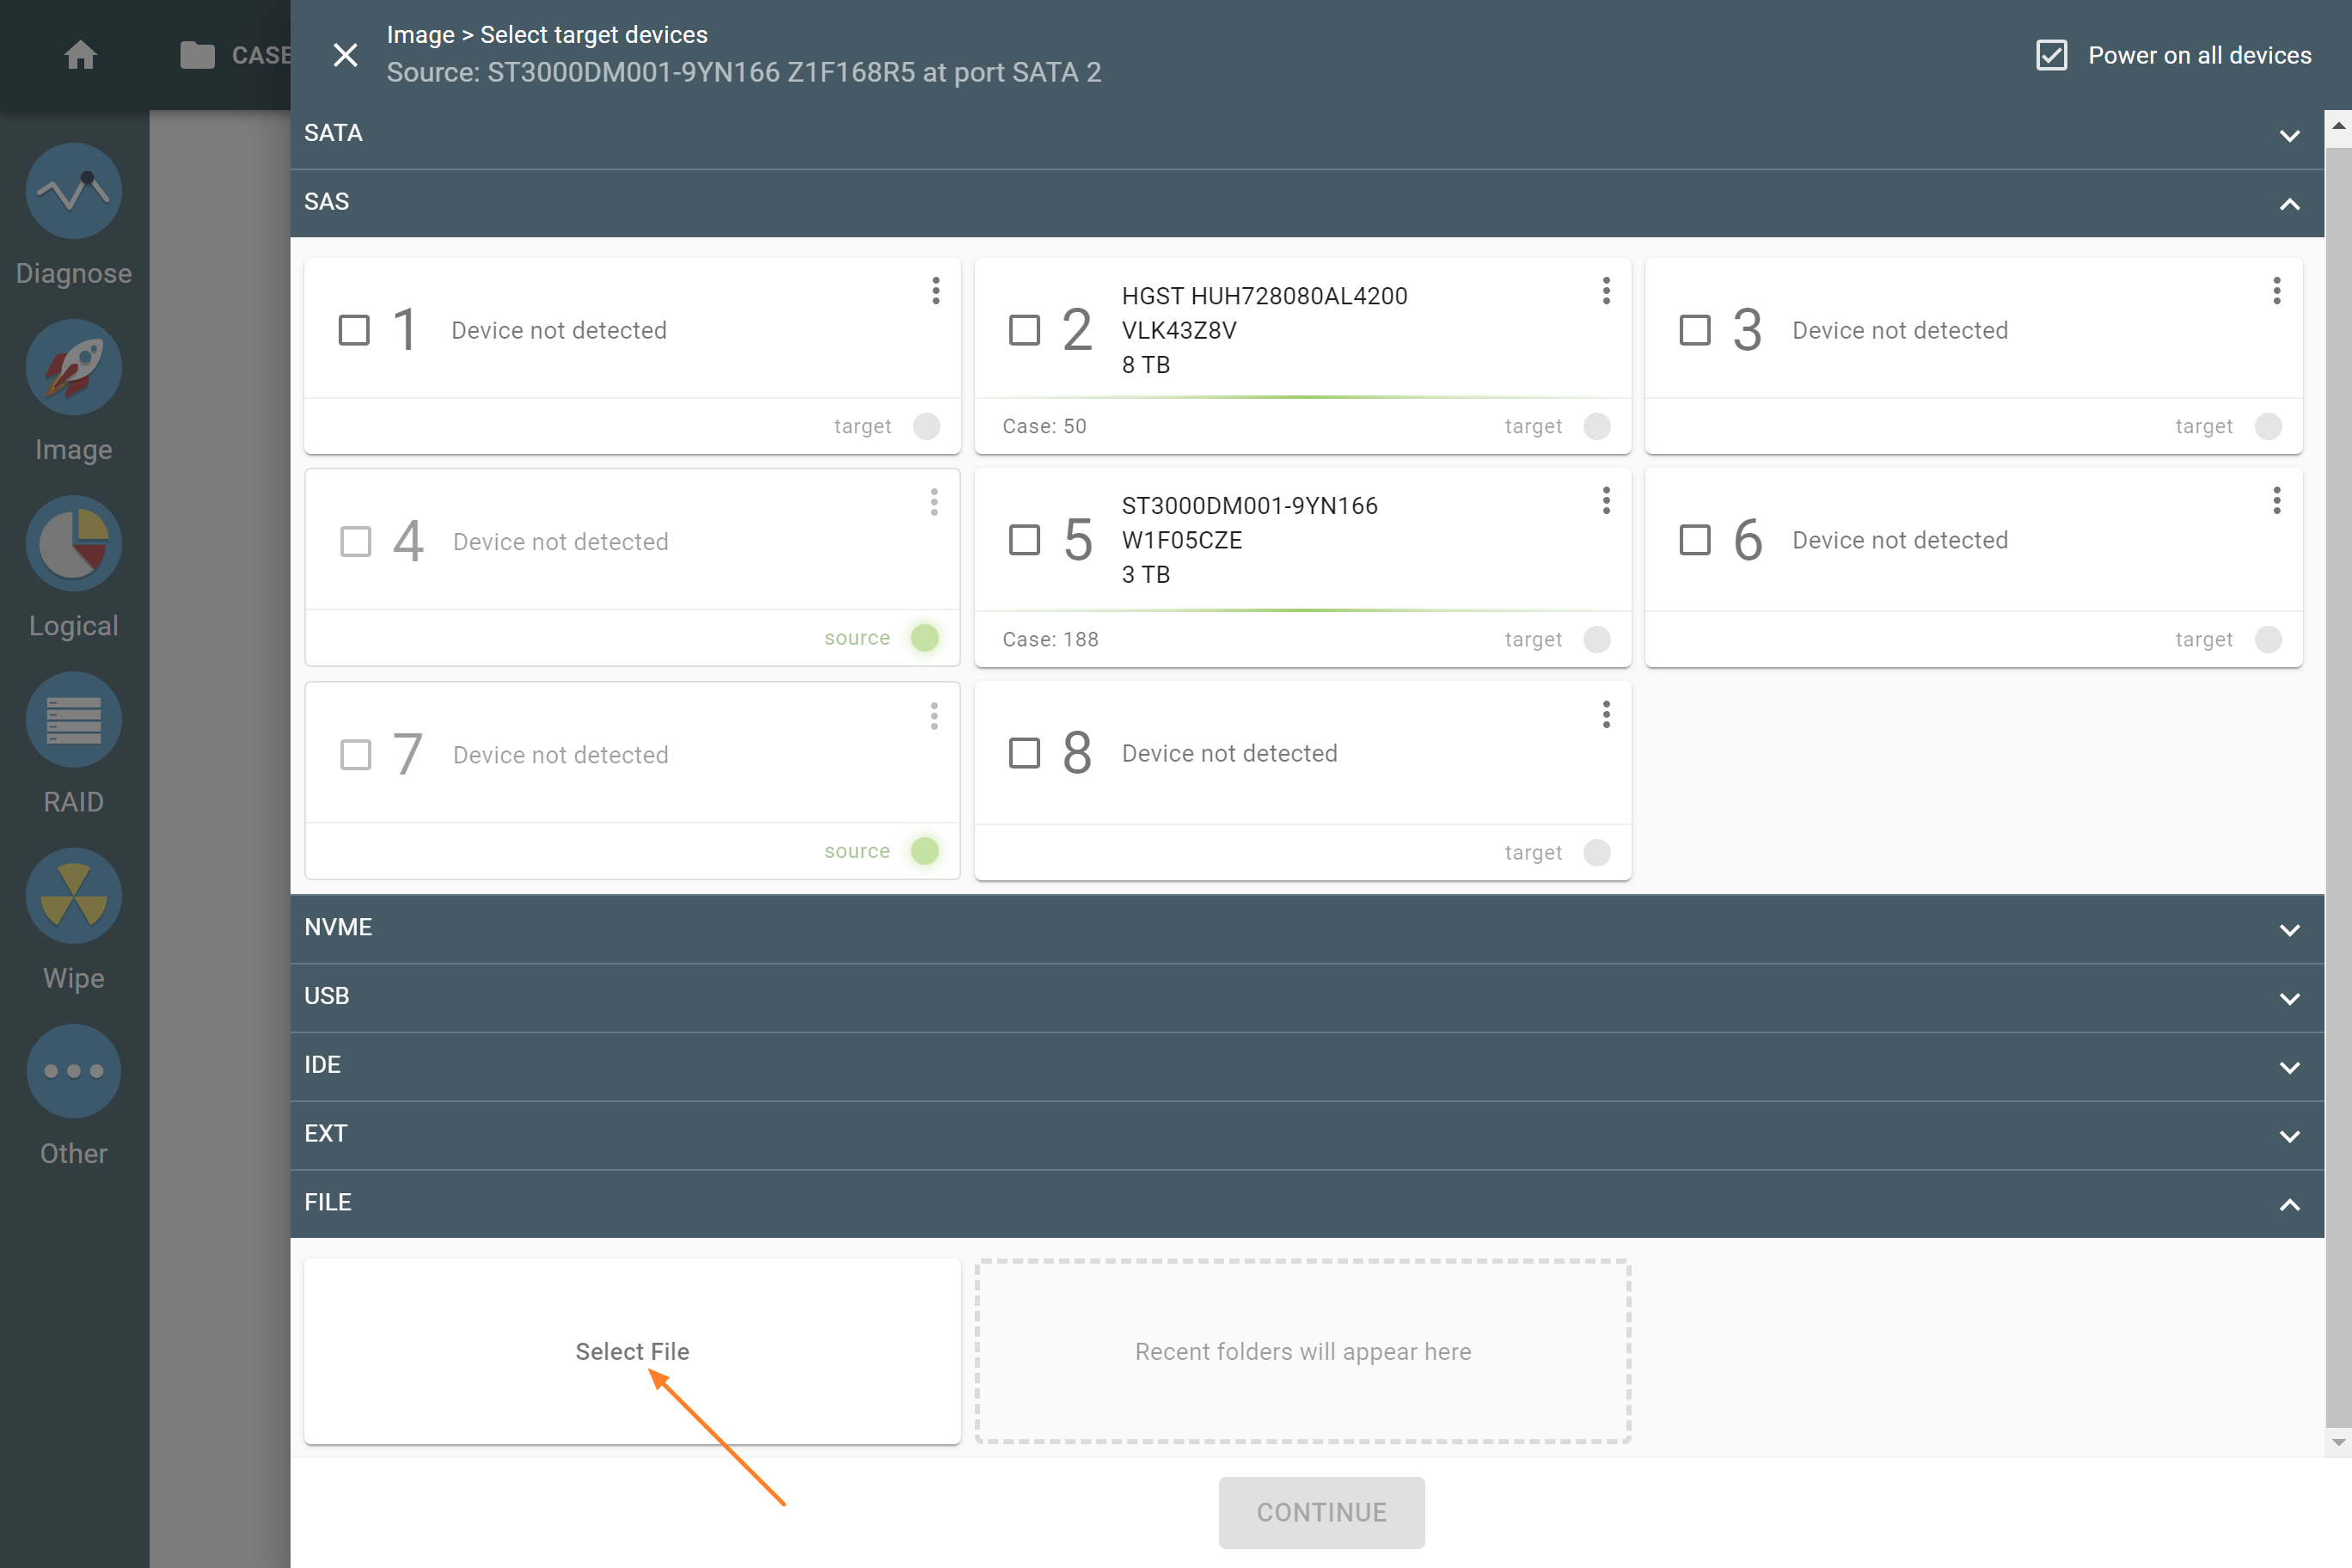
Selecting a target file.
- In the Select image file window, click Add storage.
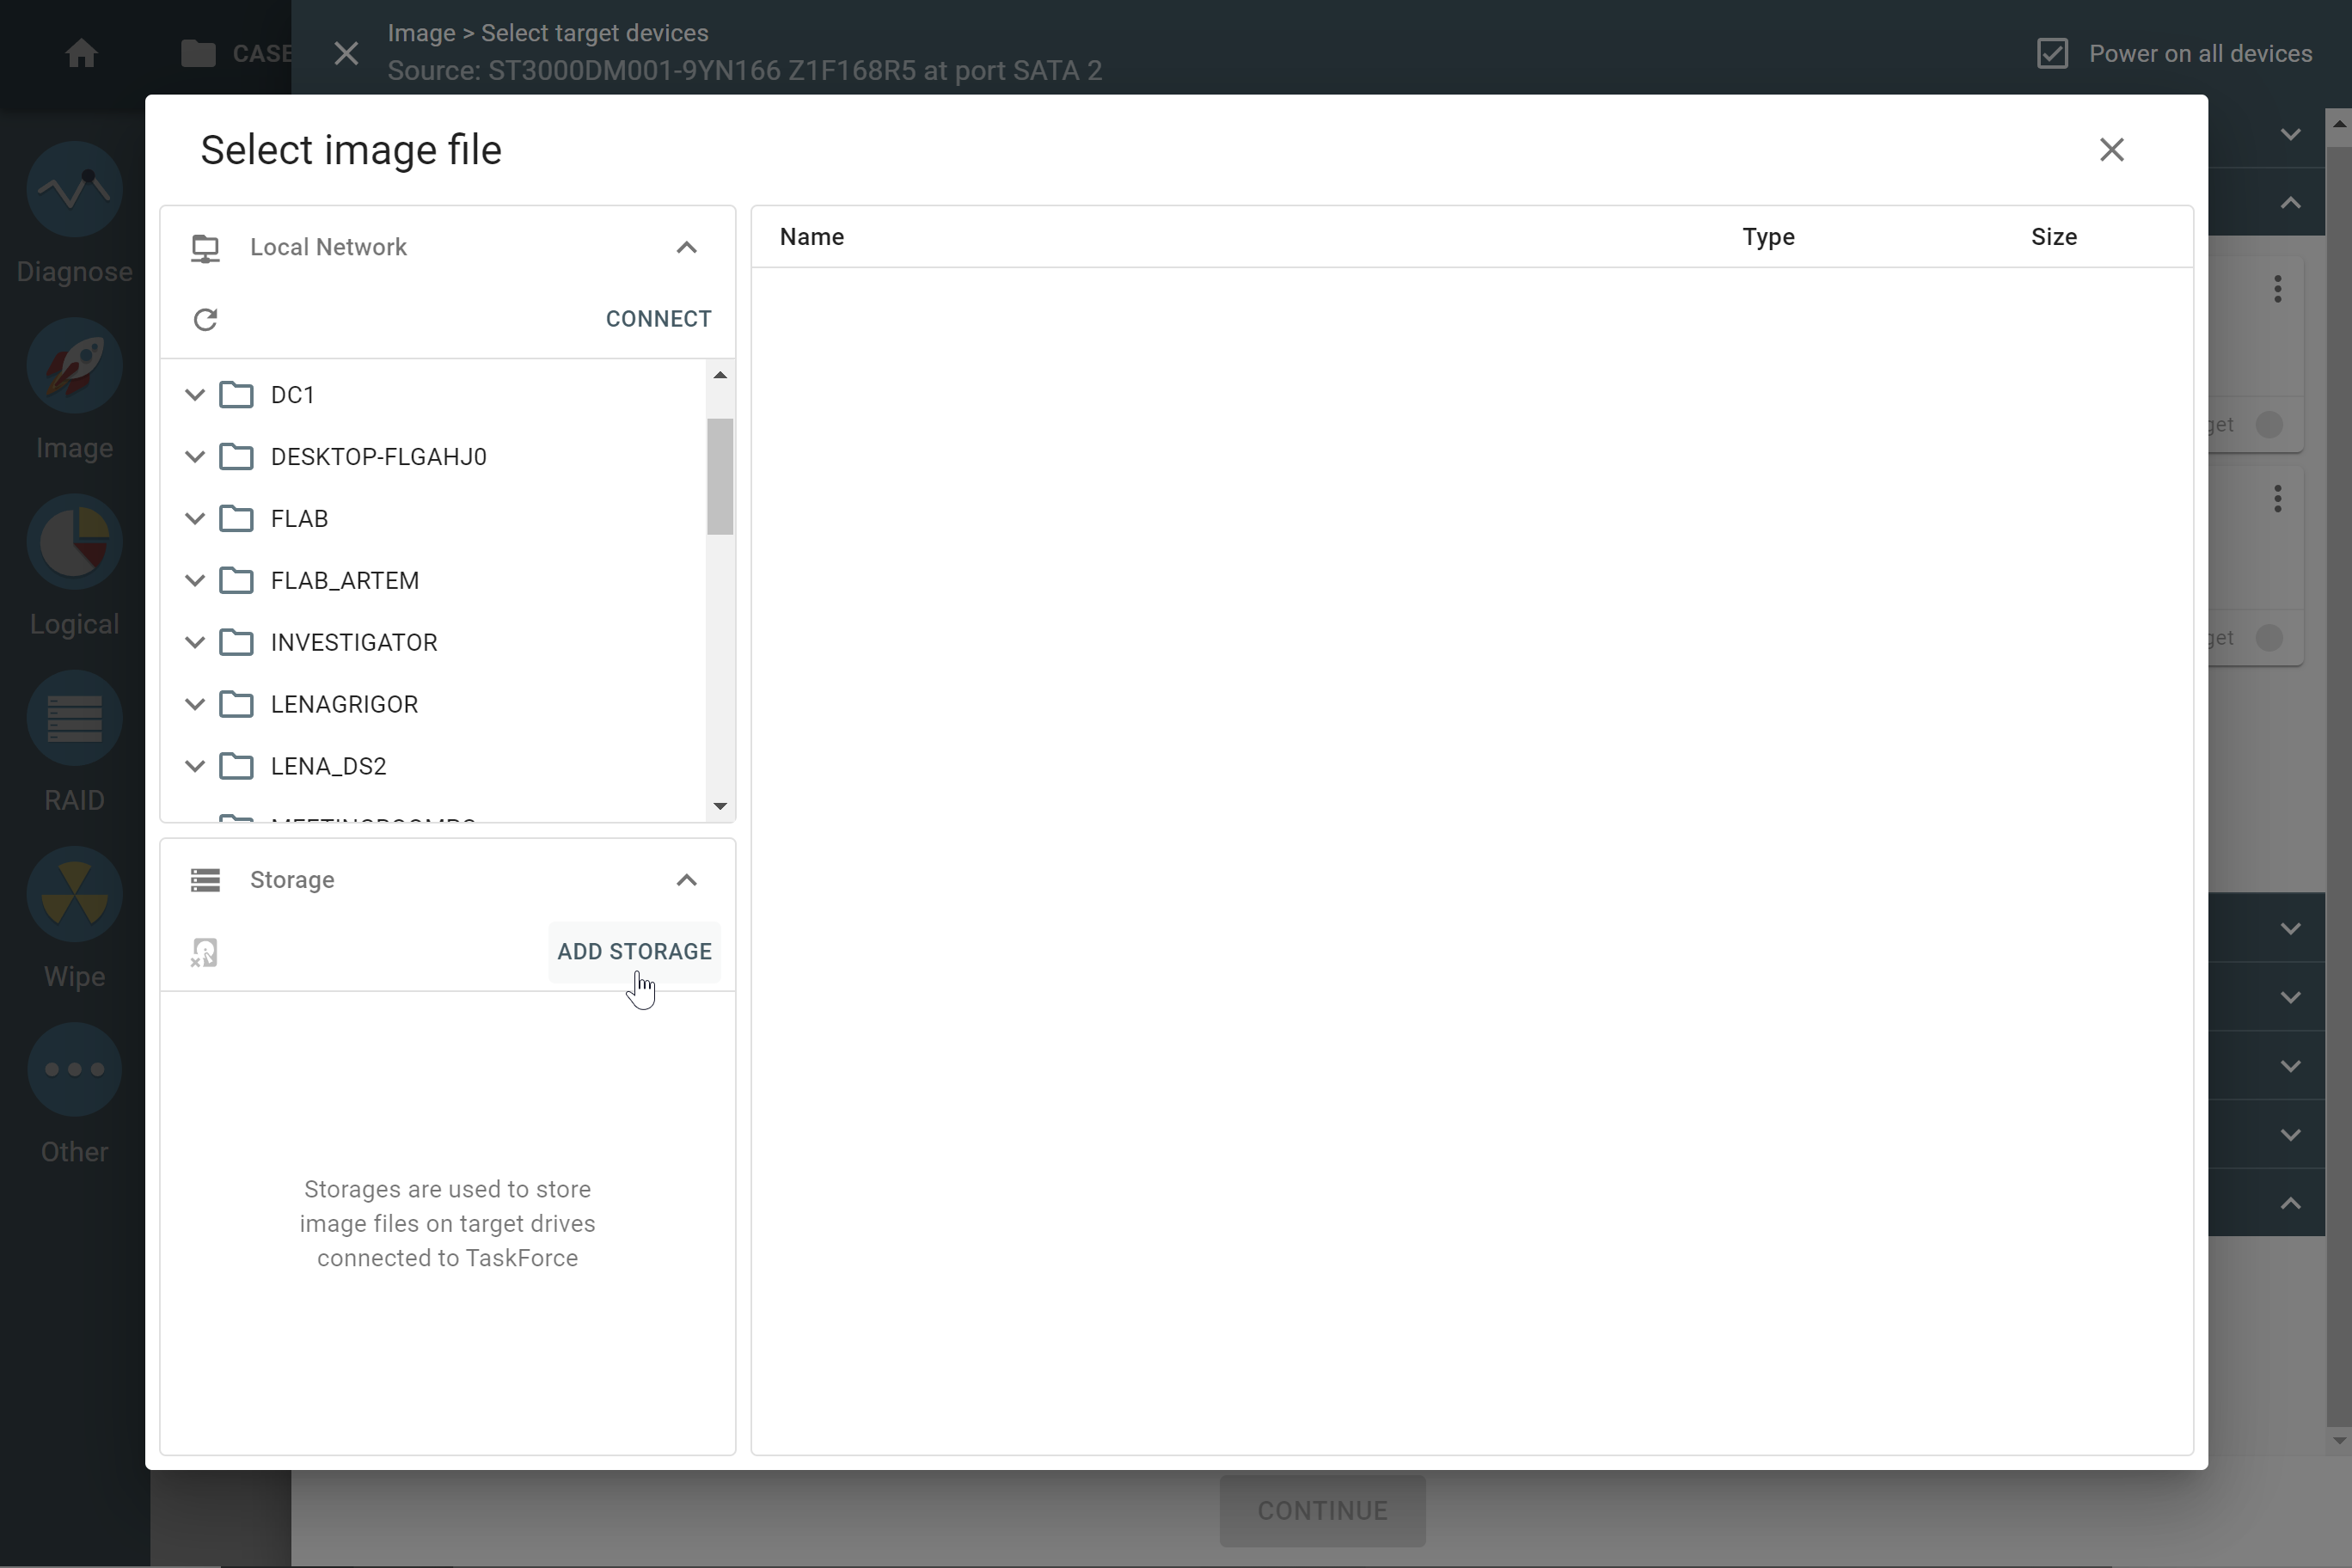
Adding a storage drive.
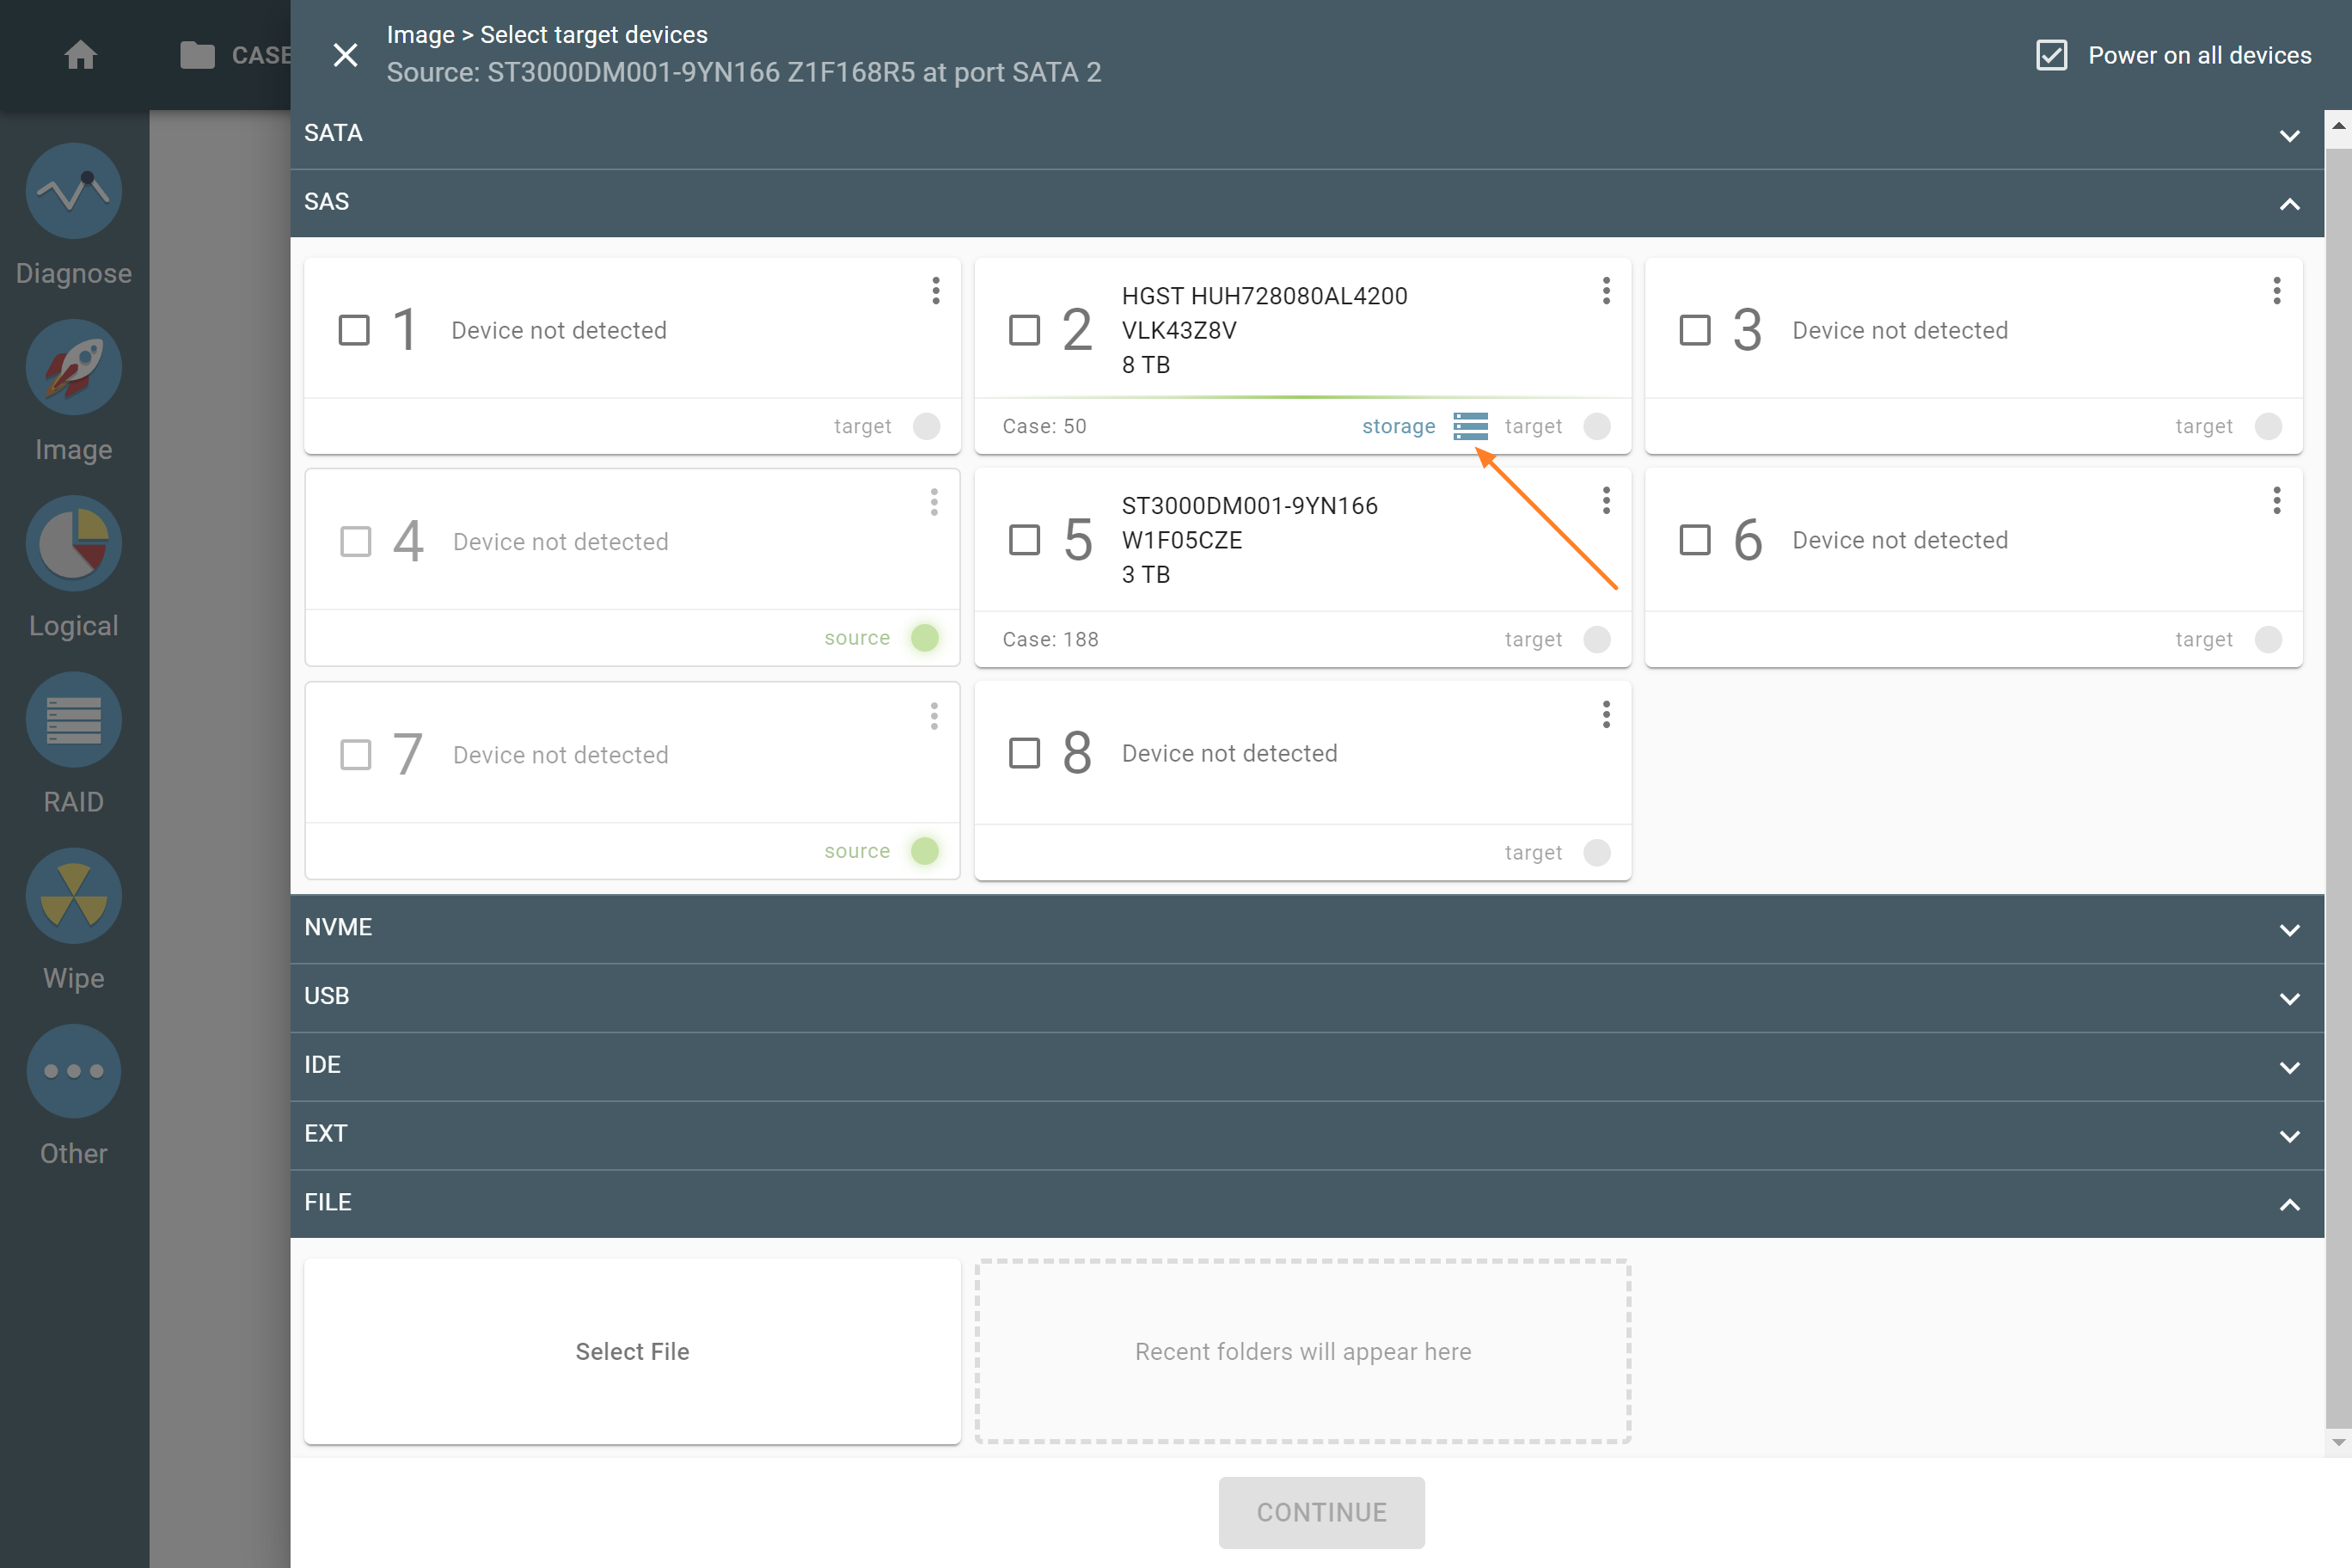
- On the Select device panel, choose the drive you want to use in the Storage mode. TaskForce 2 uses a lighter shade of blue to indicate that a storage drive is being configured.
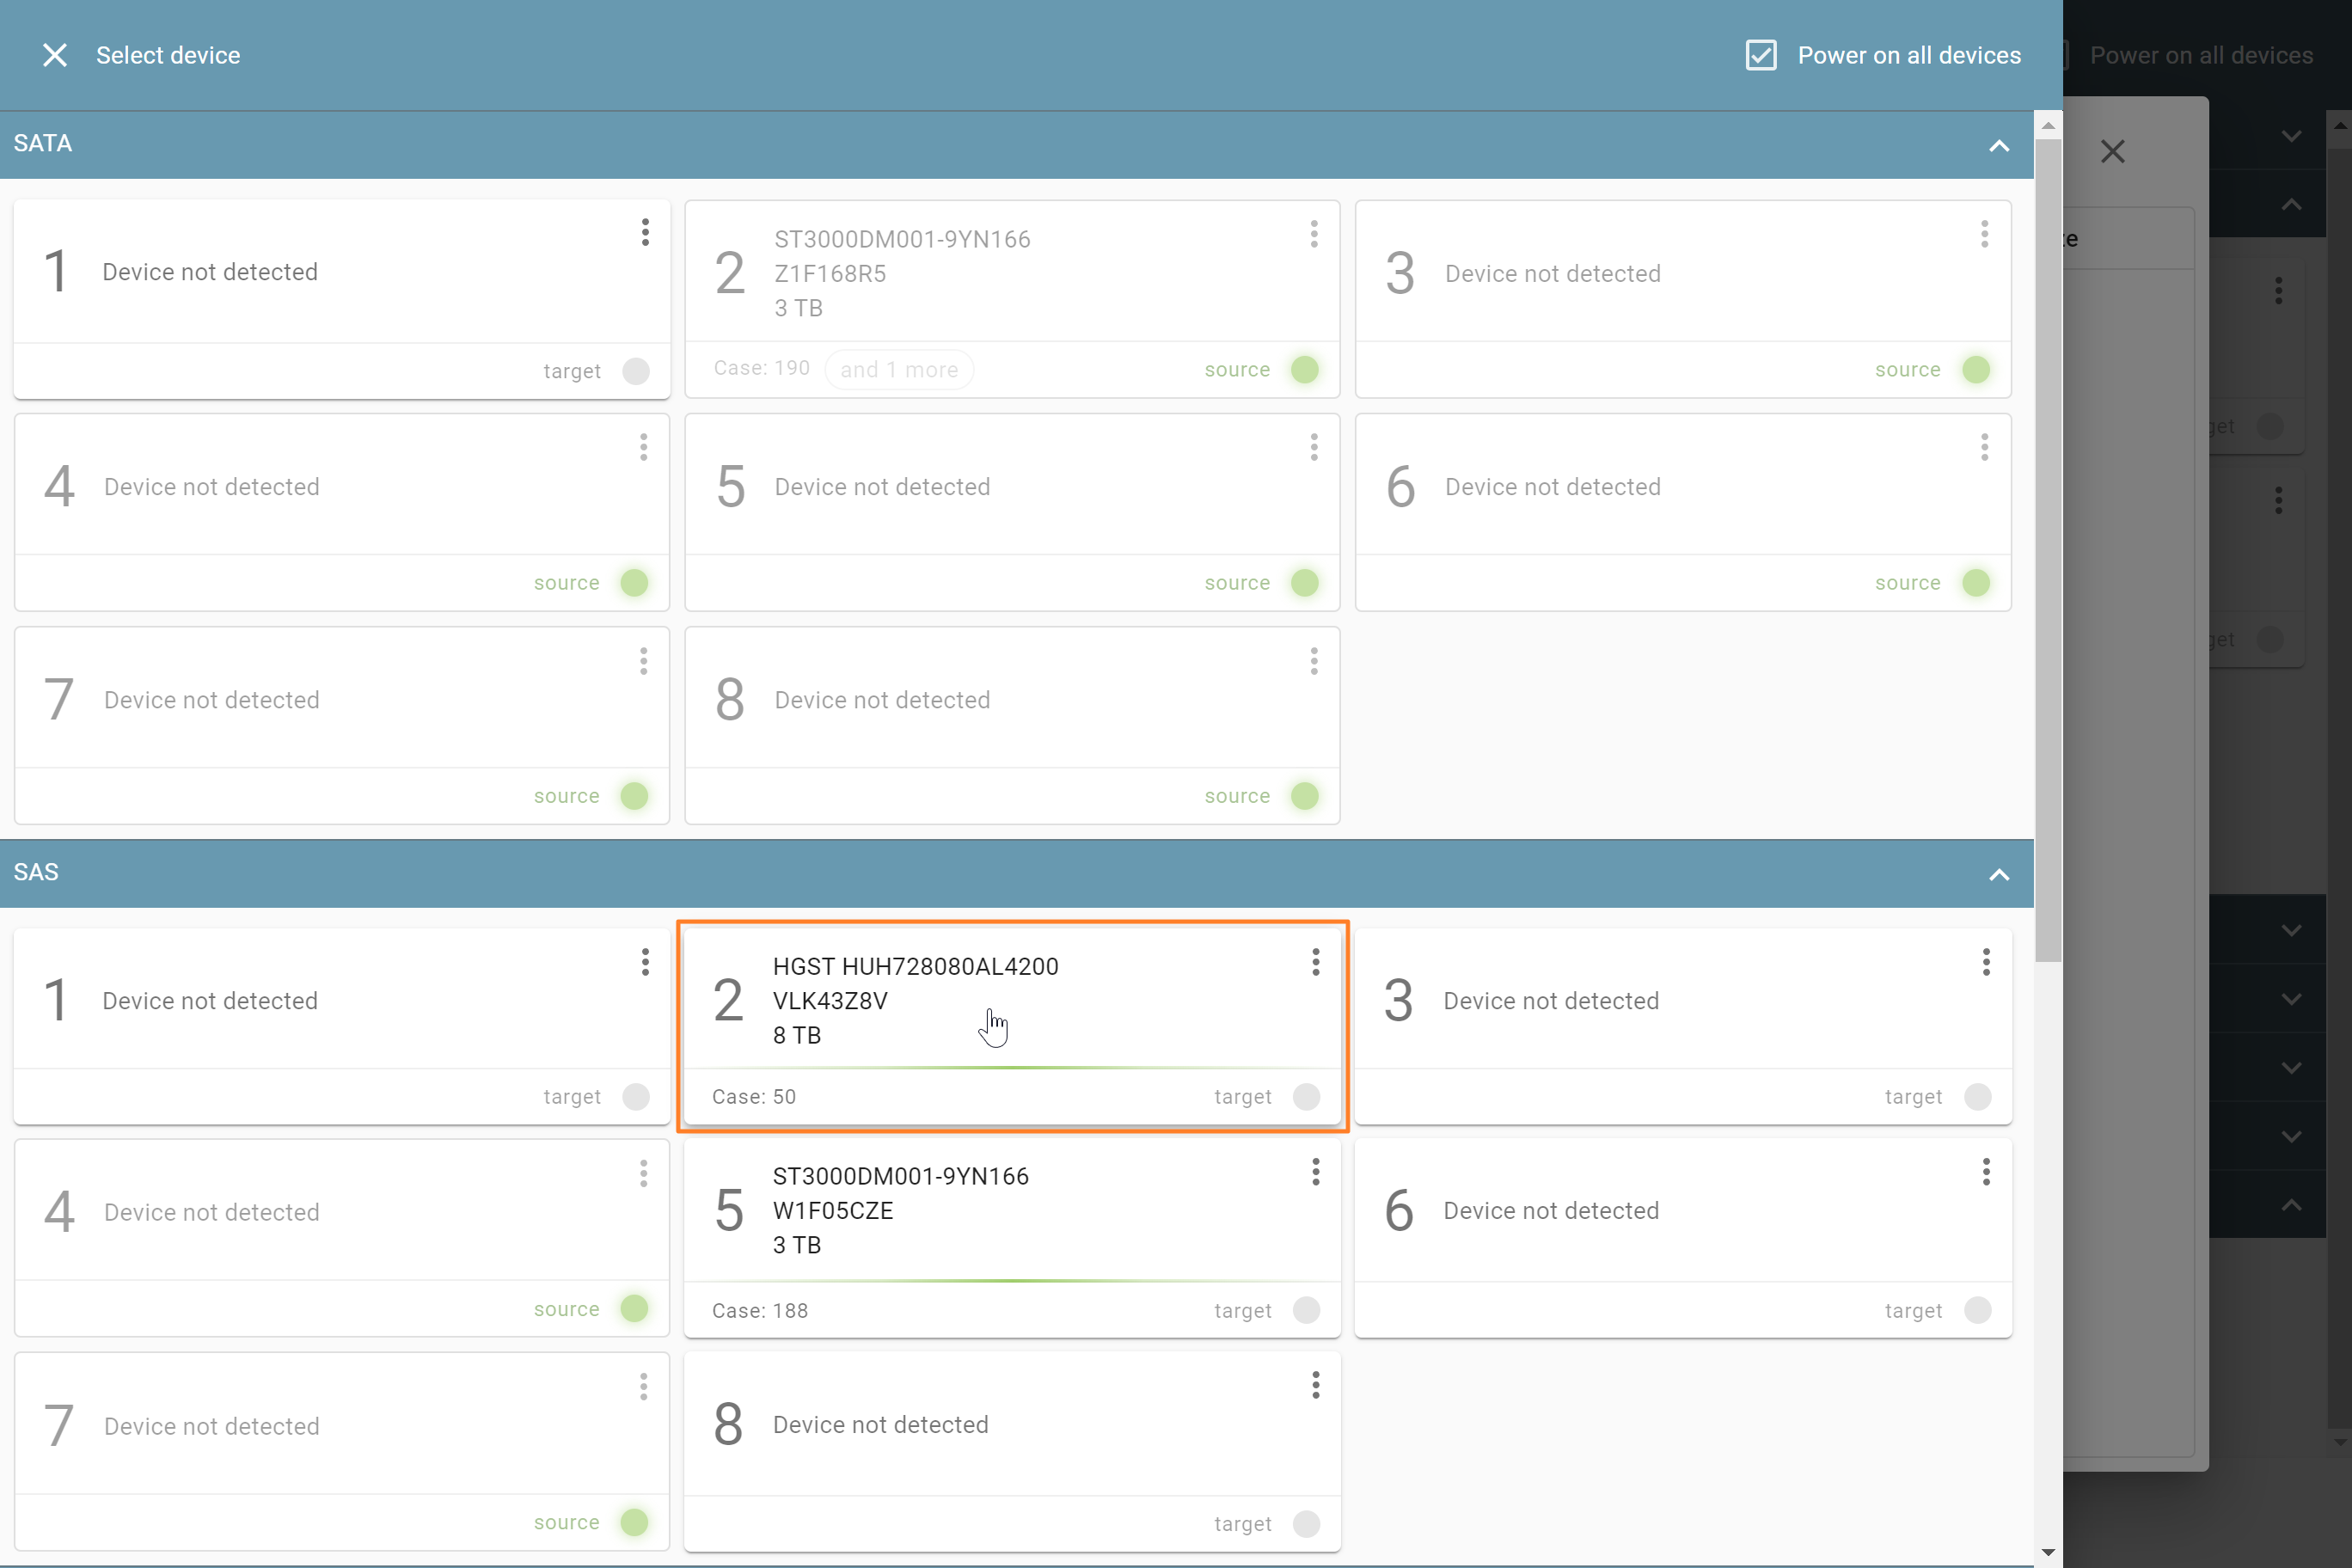
Selecting a storage drive.
- If TaskForce 2 cannot find the appropriate exFAT partition on the selected drive, it offers you to format the device accordingly. In that case, select Format device to exFAT and click Next.
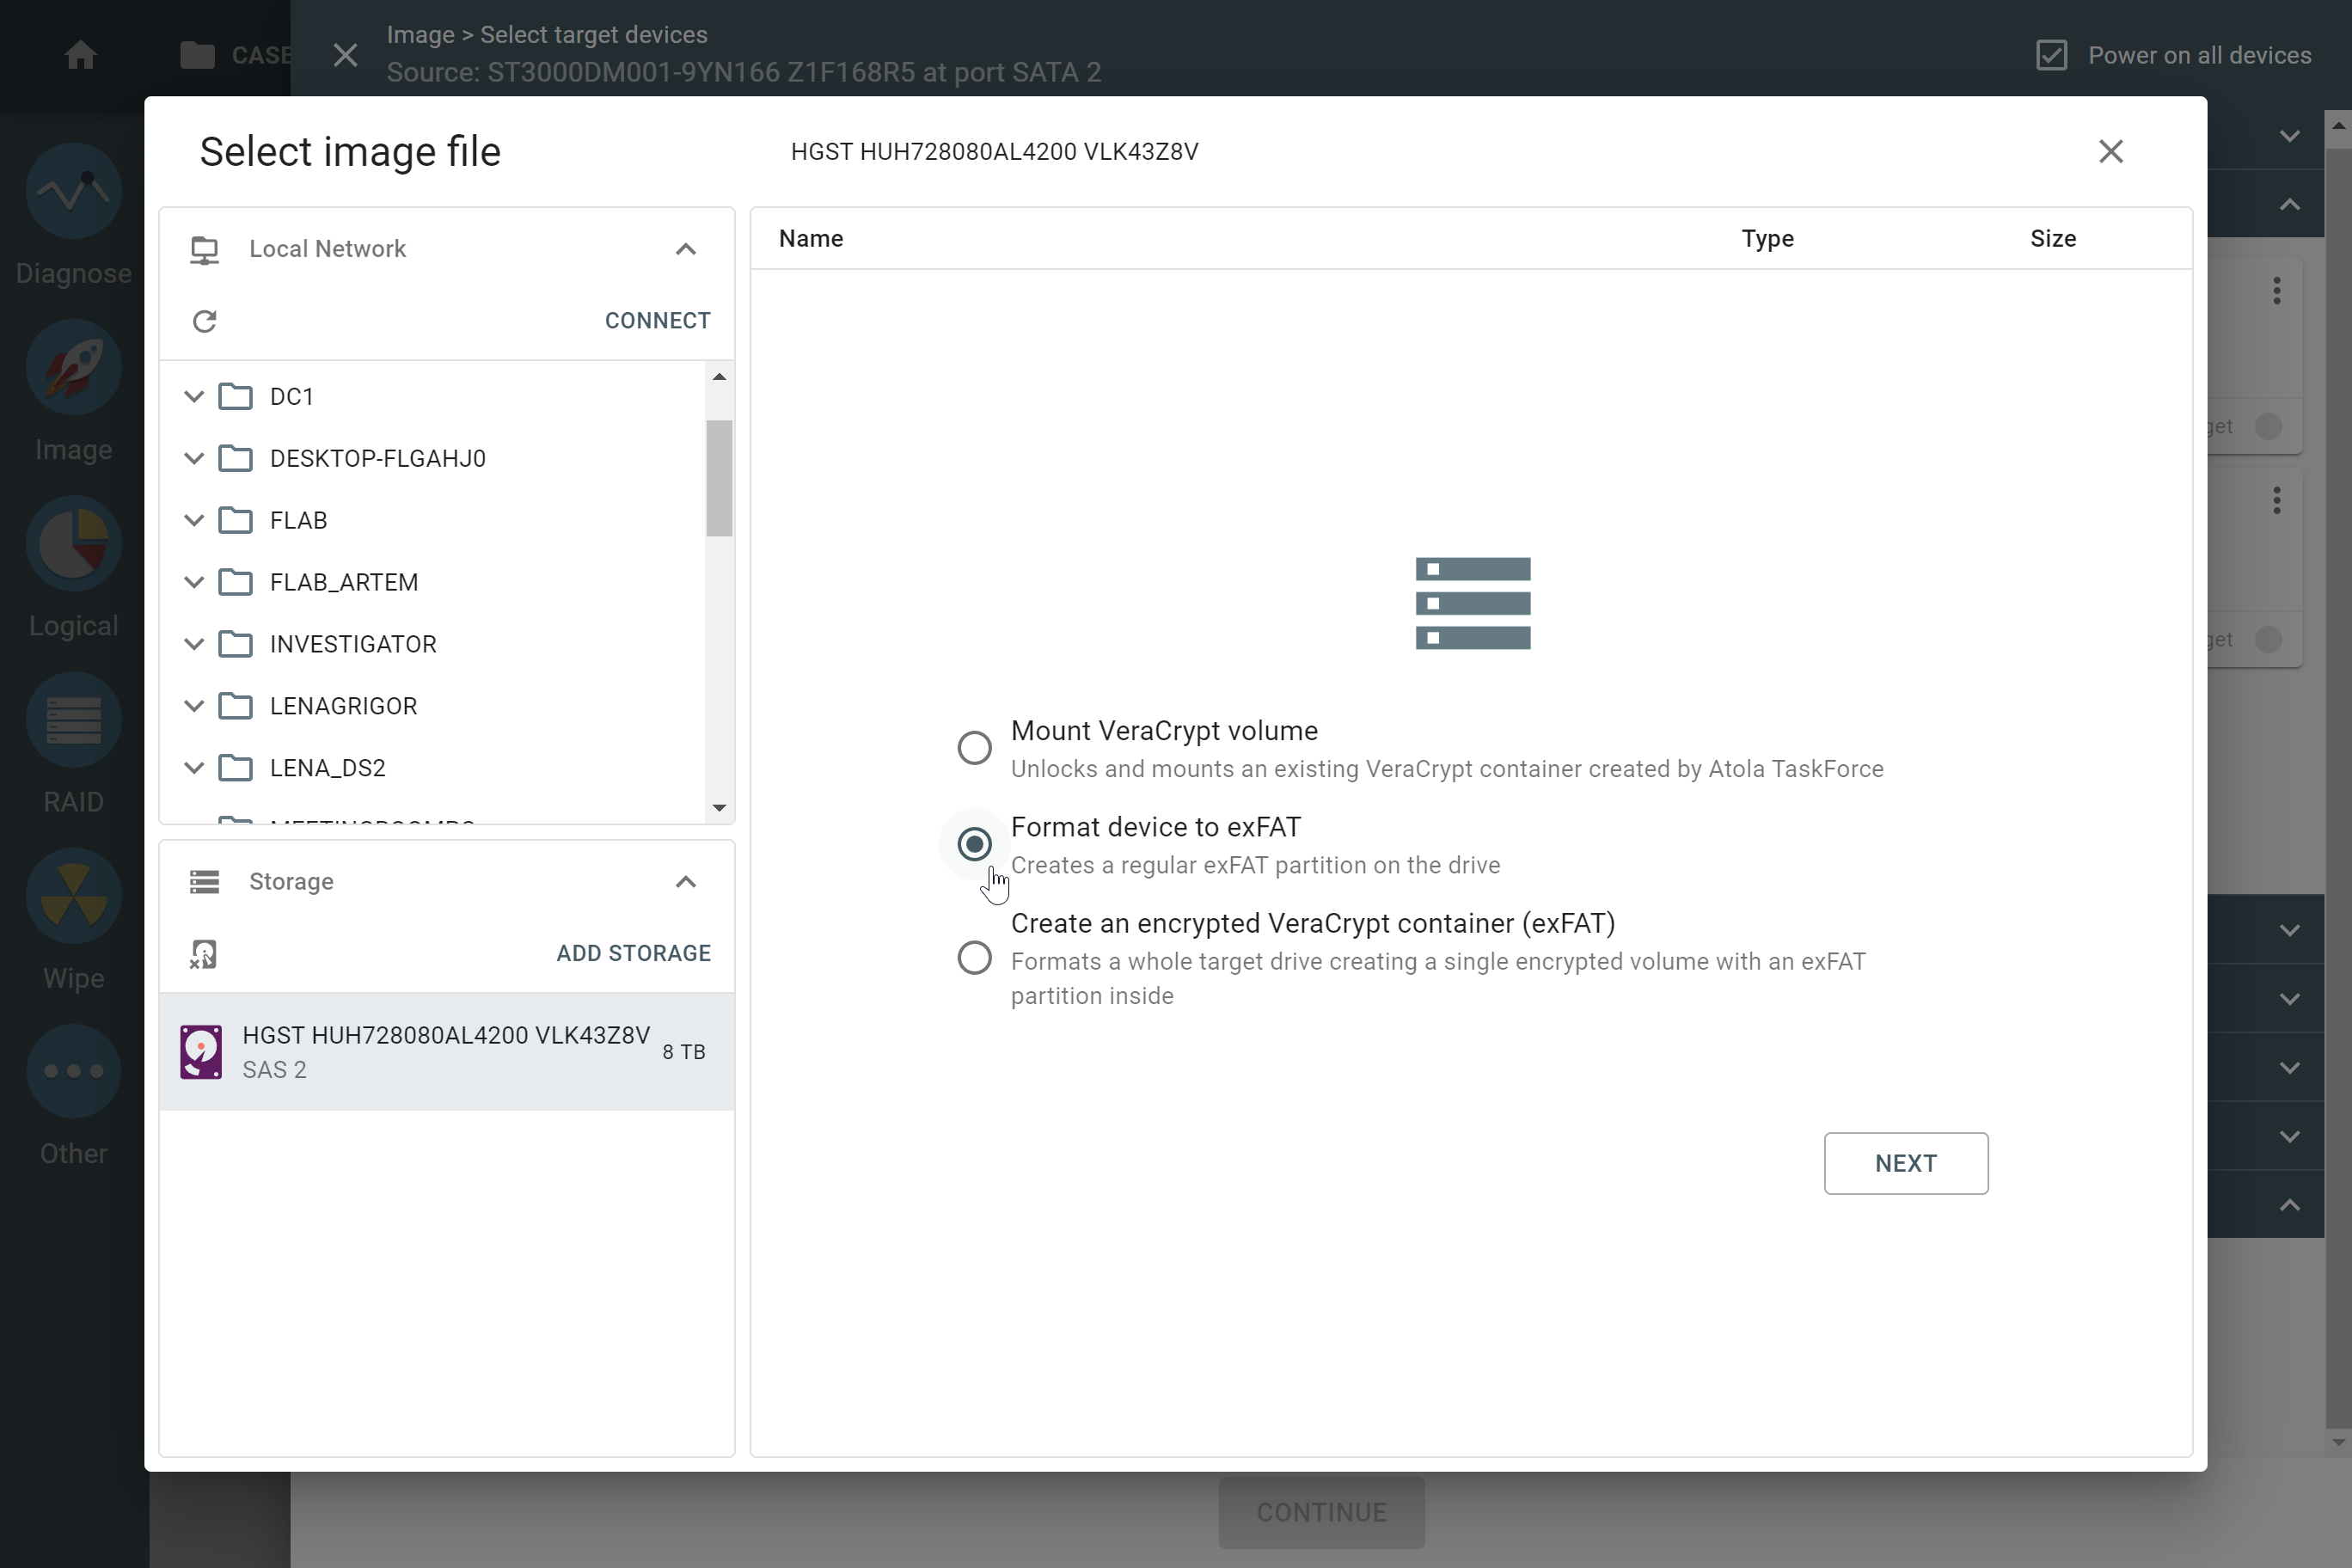
Formatting the target to exFAT.
- To launch target device formatting to exFat with a large cluster size (32 MB), click Format and enter YES for confirmation. This cluster size enables faster imaging to this drive.
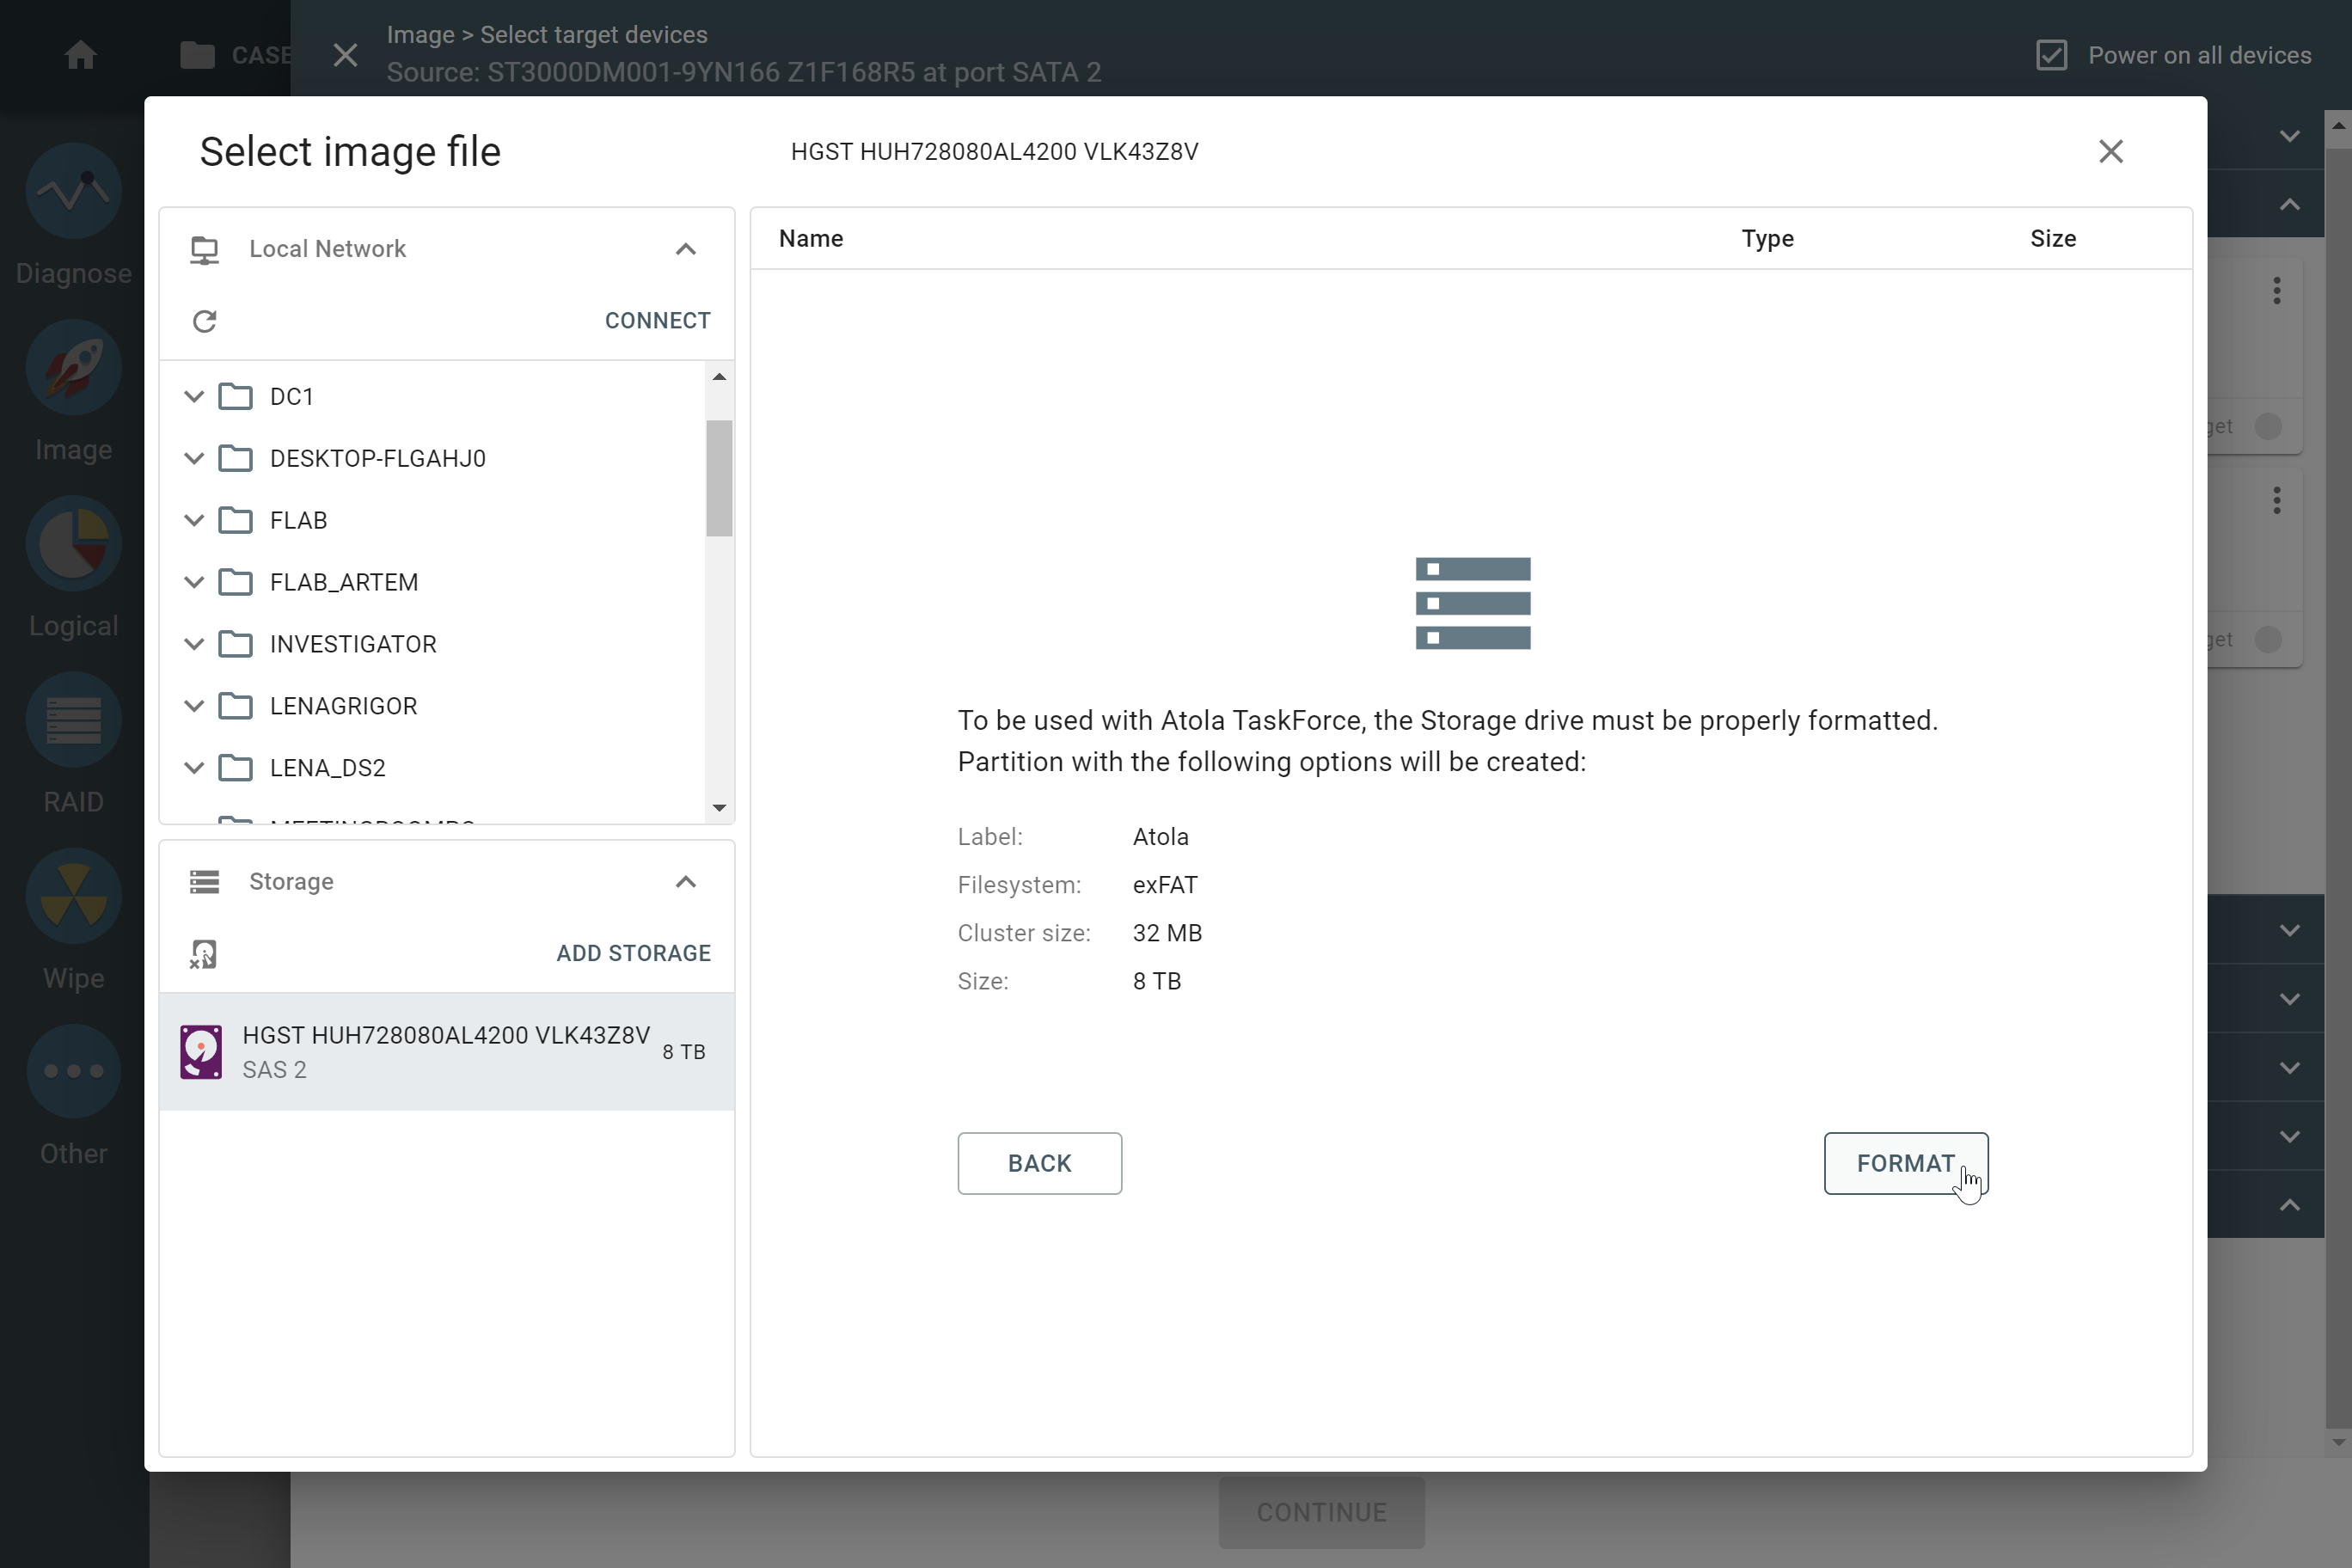
Formatting the target to exFAT.
Once the target device is formatted, TaskForce 2 perceives it as a Storage target and you can proceed to create a compressed E01 image file on the storage device.
The drive in the Storage mode is marked with a special blue icon on the Select target devices panel. A LED status indicator of the respecting drive port on the TaskForce 2 front panel also turns blue.
A drive in the Storage mode.
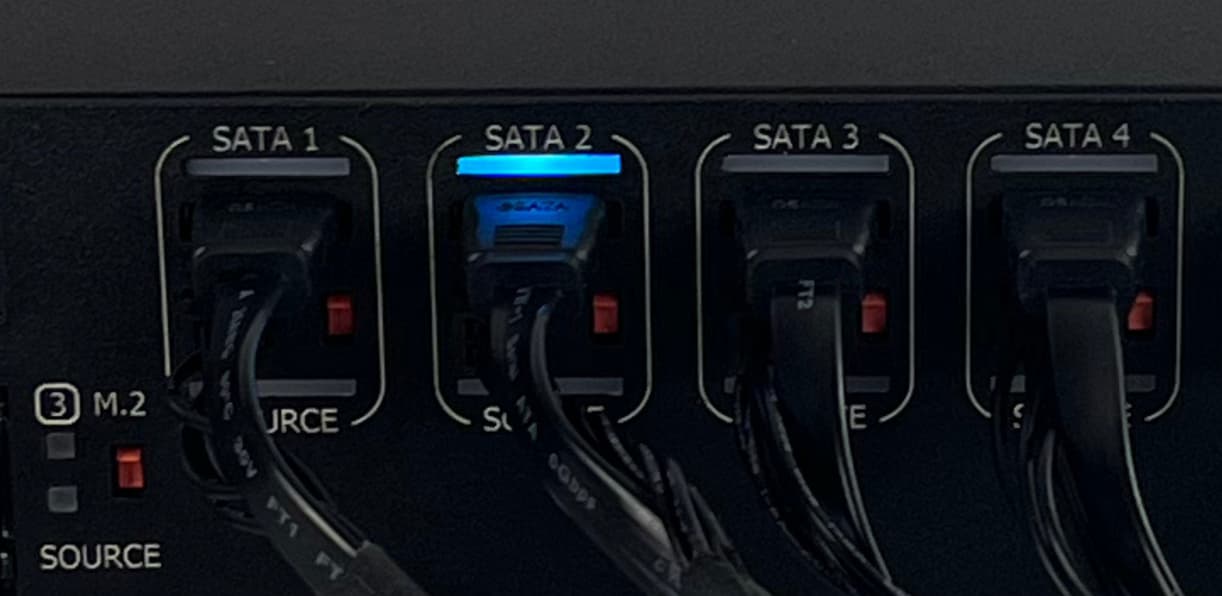
Image to a Storage drive
If you already have a drive configured as a Storage, you can plug it into one of the TaskForce drive ports and use it to store target image files without additional formatting:
- Go to Image.
- Select the source evidence drive.
- On the Select target devices panel, switch to the Files tab and click Create file.
Selecting a target file.
- On the bottom left in the Select image file window, select your Storage drive. Then proceed to create a target image file.
Selecting a target file.
Create a compressed E01 image file
To proceed with creating a compressed E01 image file on the storage device, do the following:
- In the Select image file window, select the storage drive and then click + Create file.

Adding a new file.
- In the Create image file dialog, enter the file name and select the E01 file type.
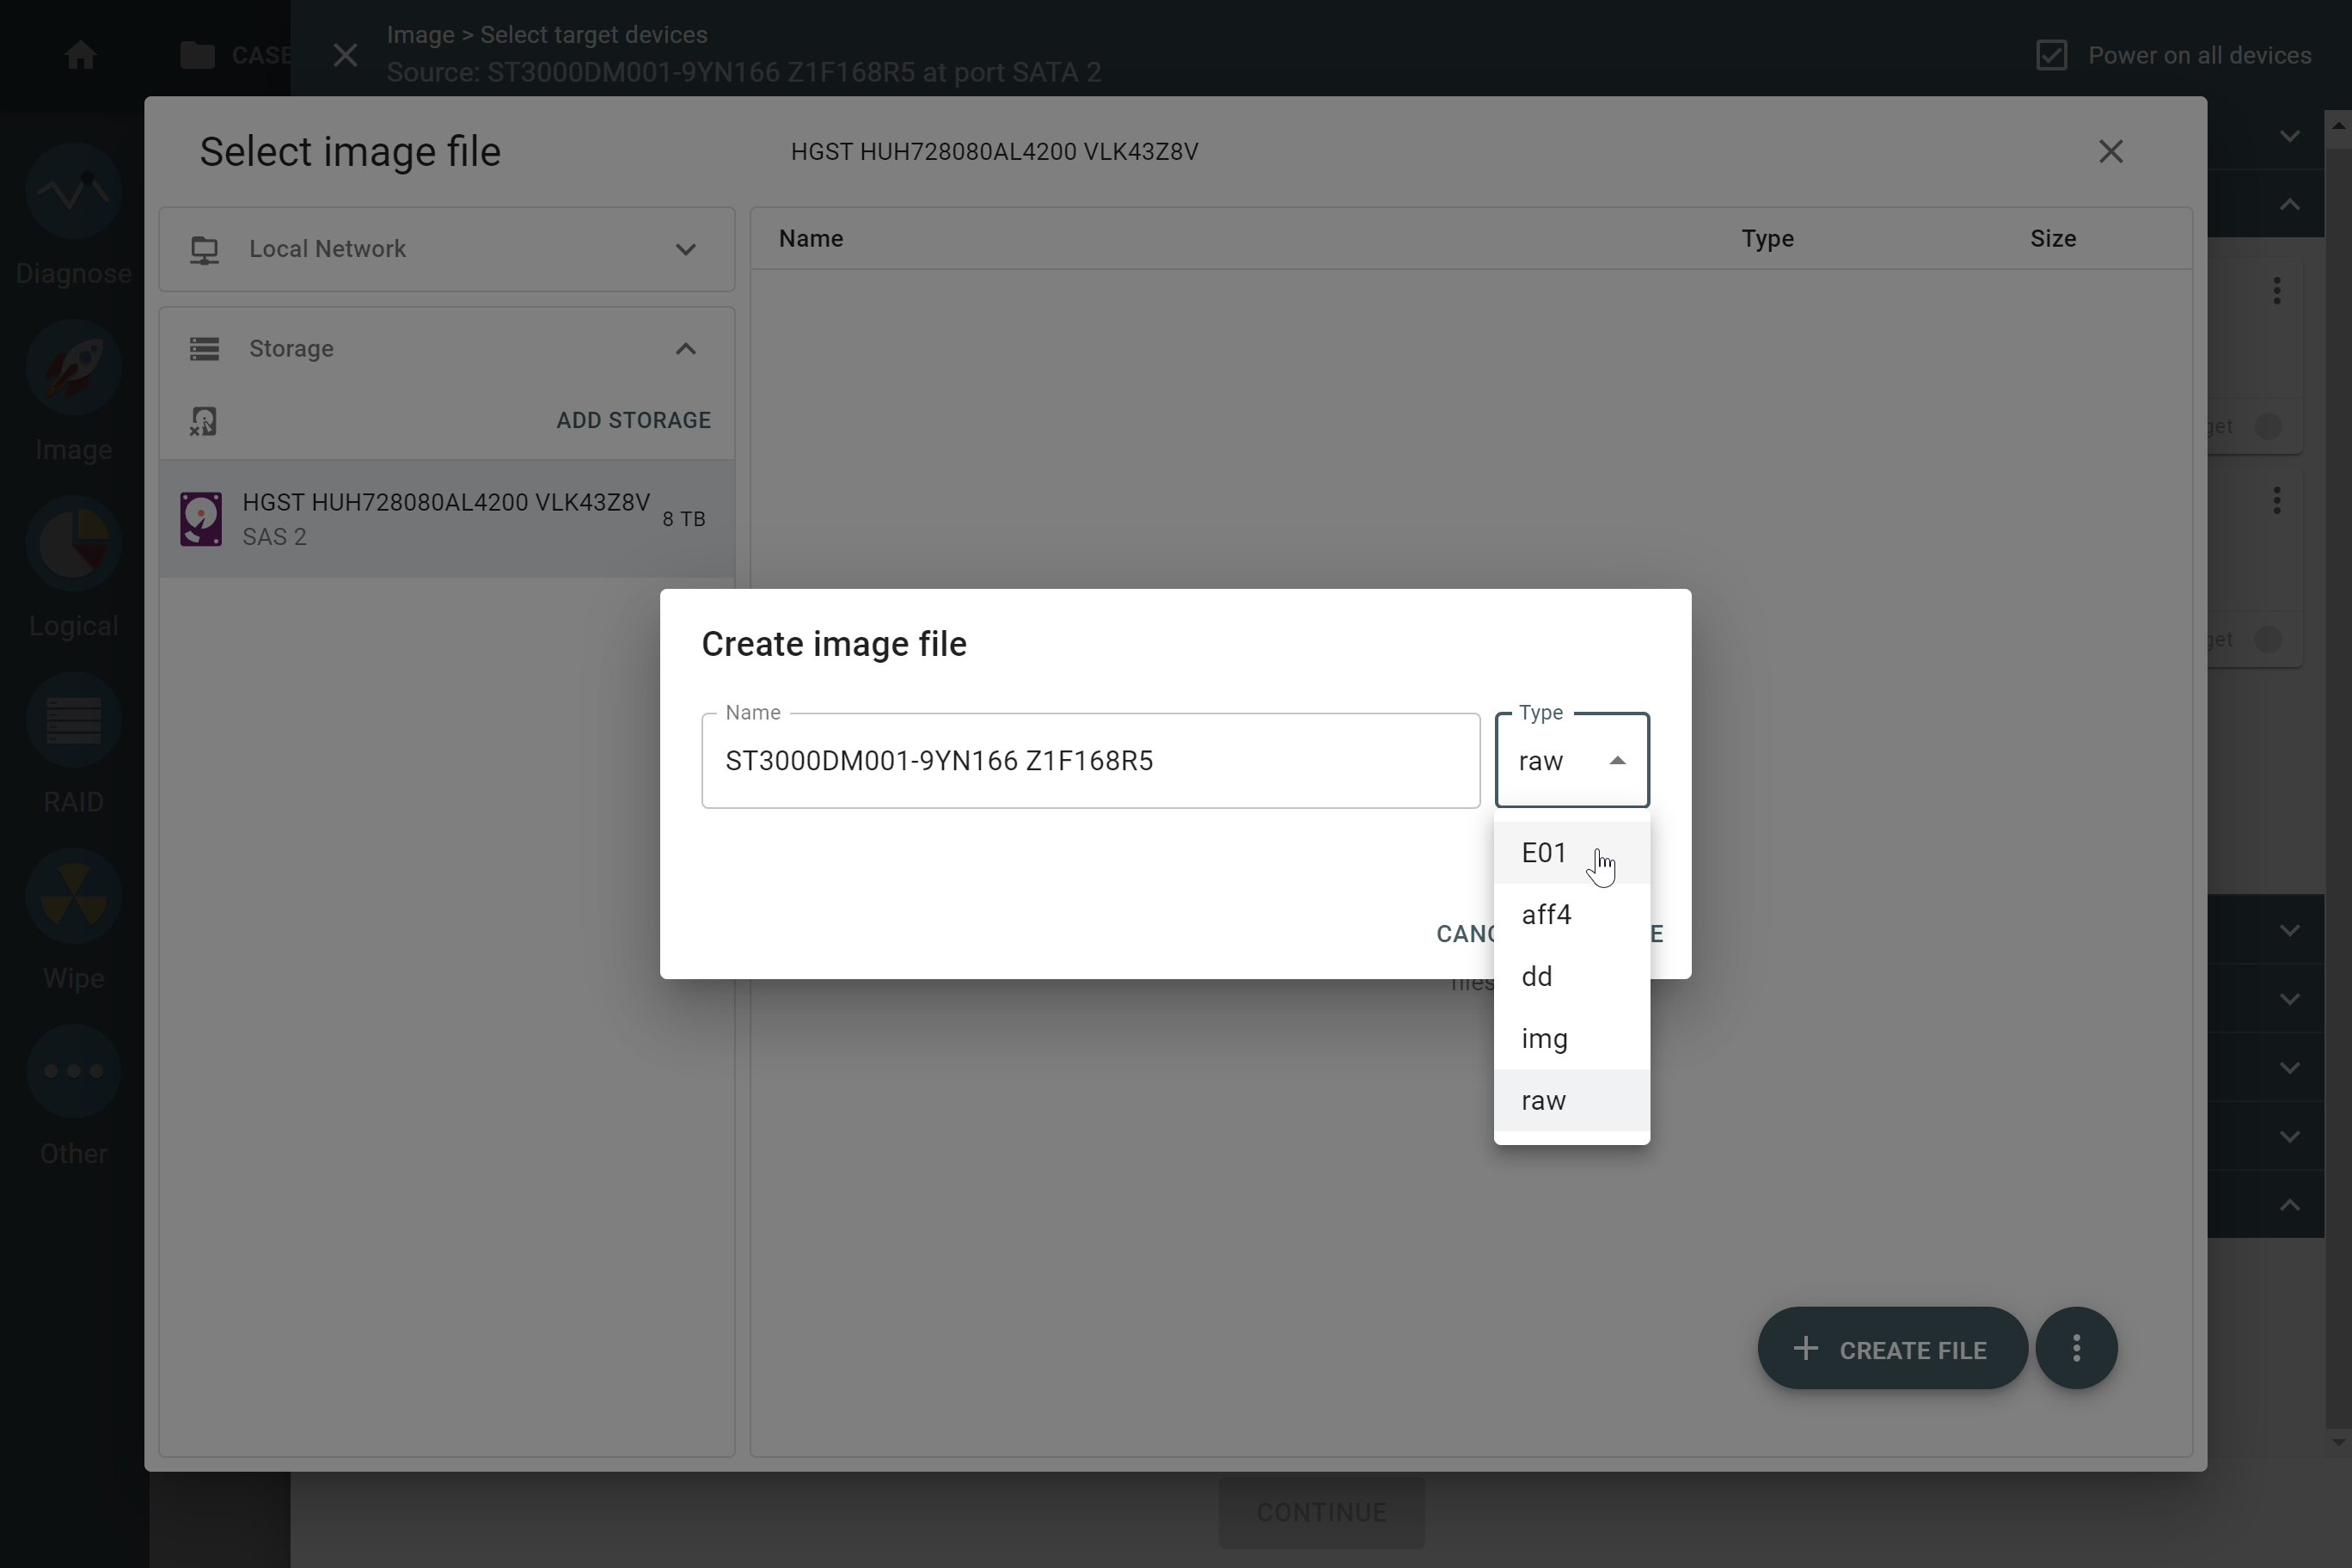
Creating an image file.
- Select the Compress E01 option.
- Fill out other file details, and then click Create.
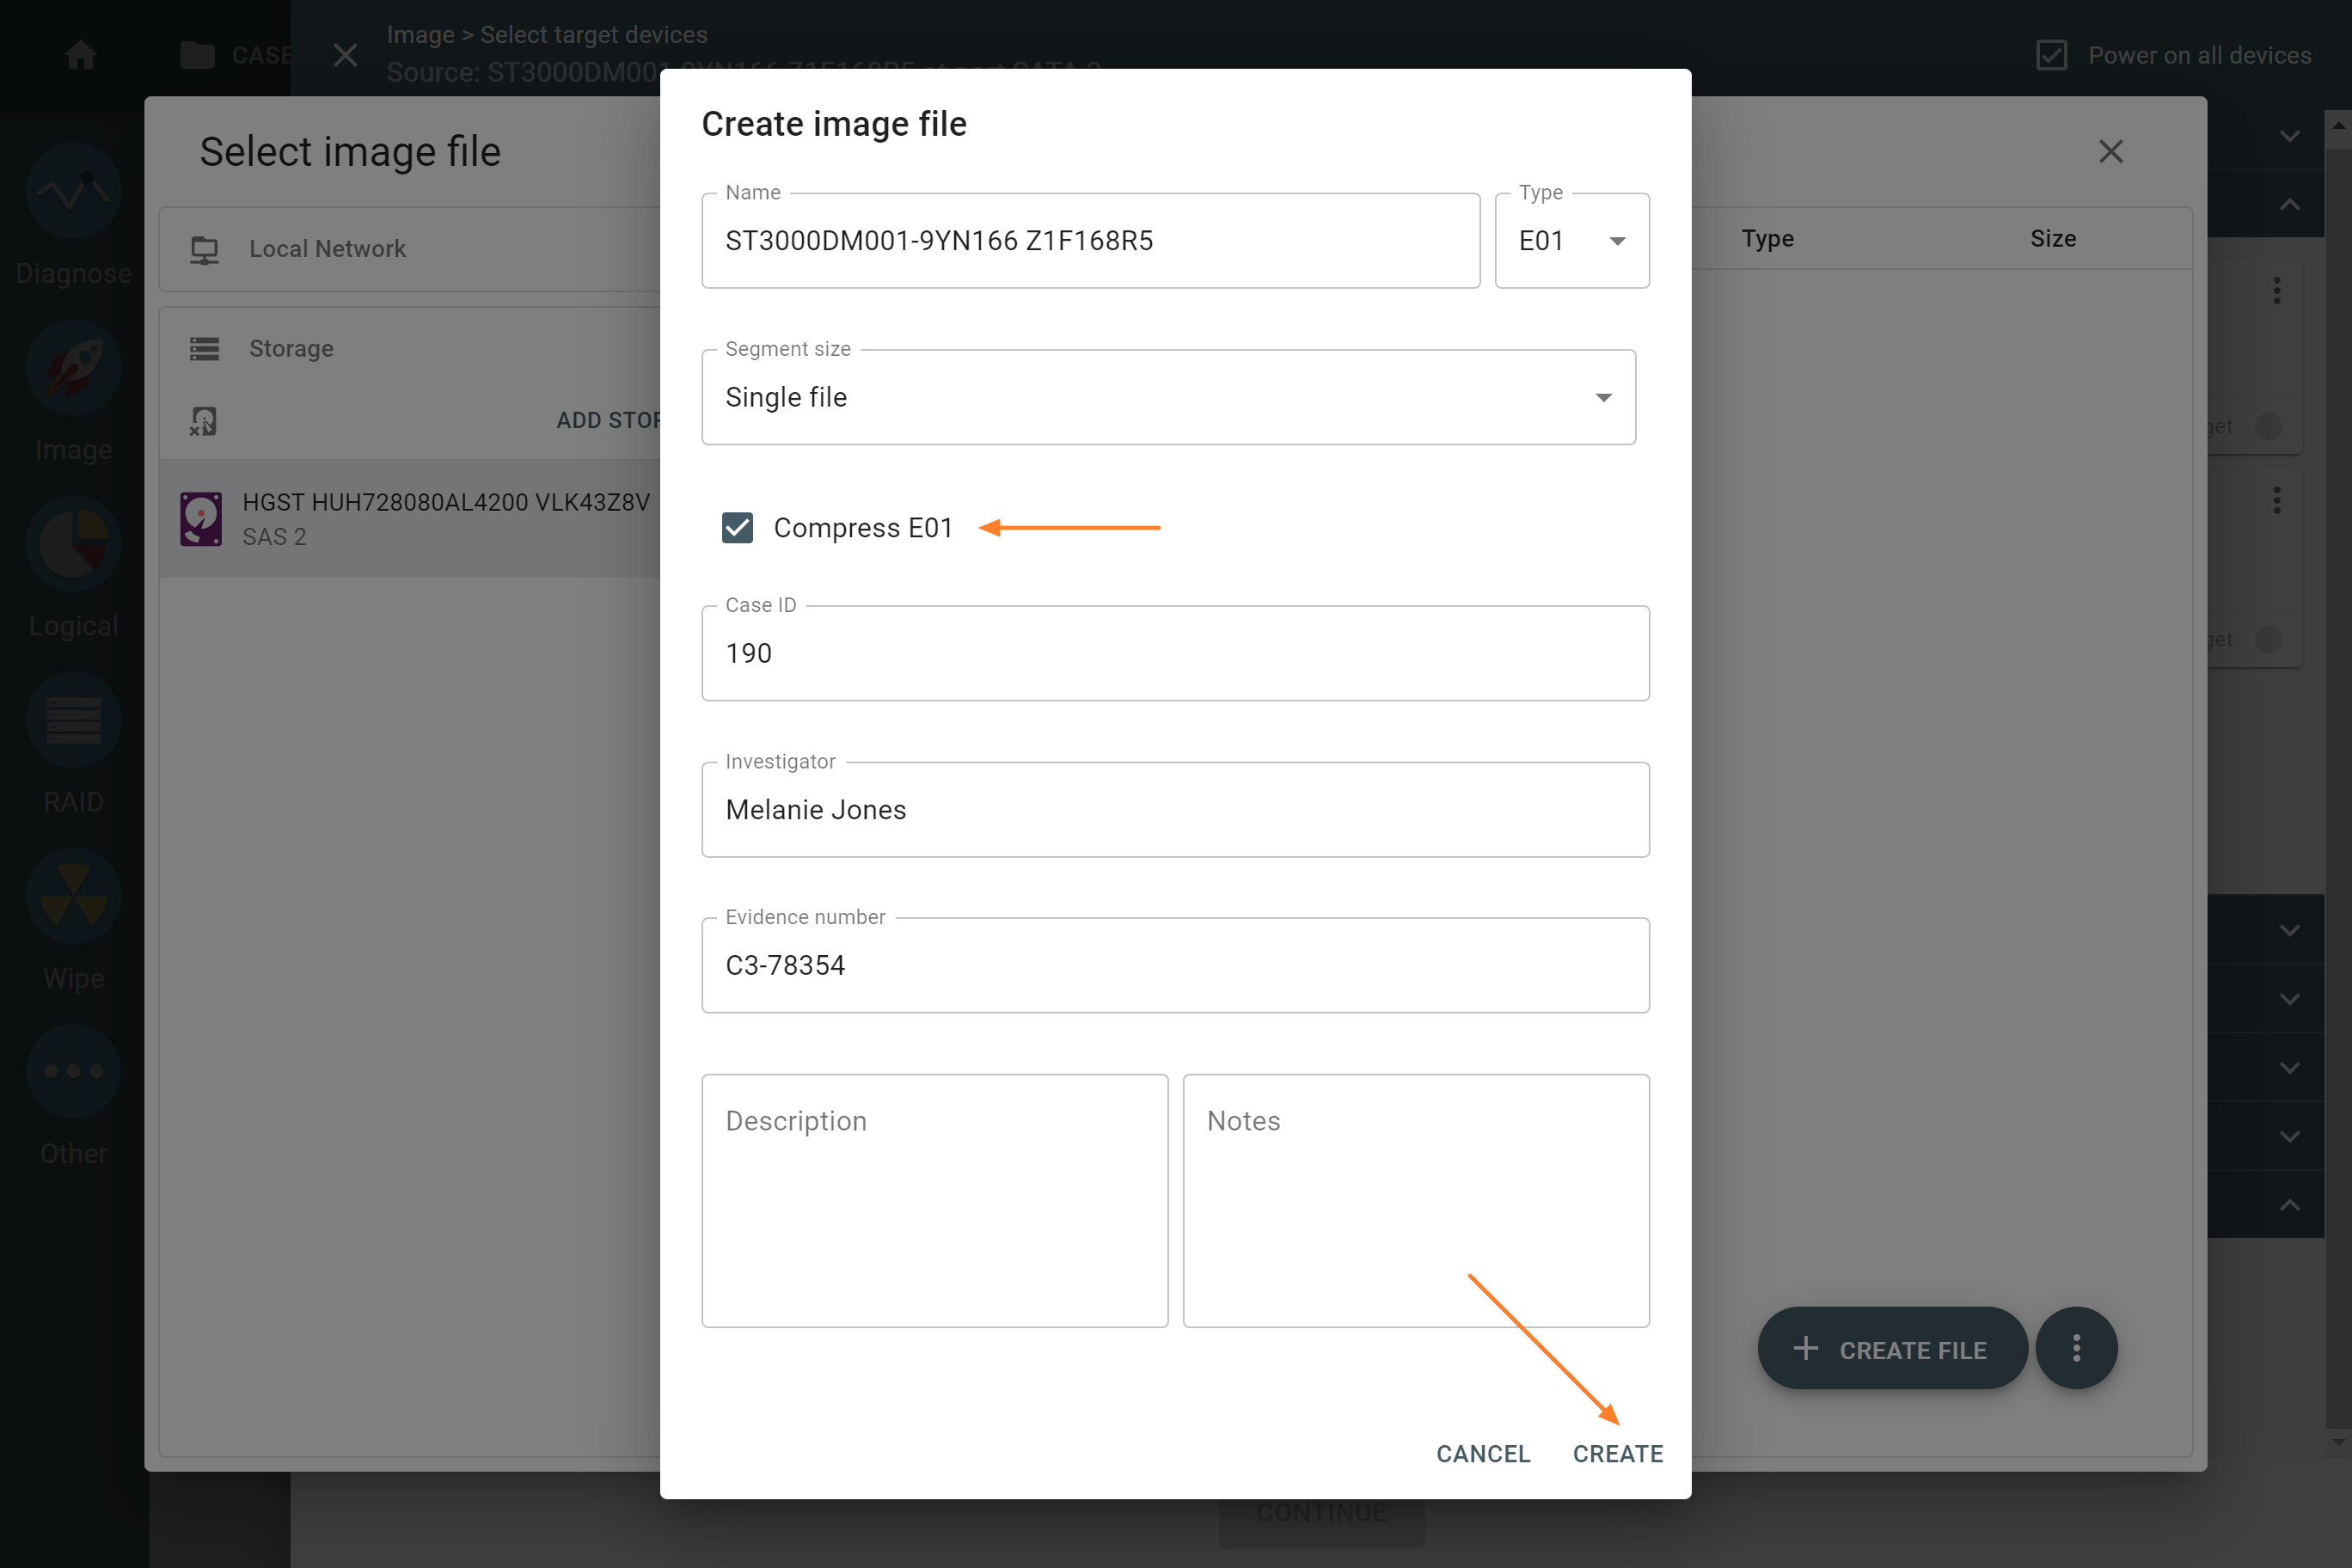
Configuring the compressed E01 file.
- Check your imaging settings and click Start to proceed with imaging.
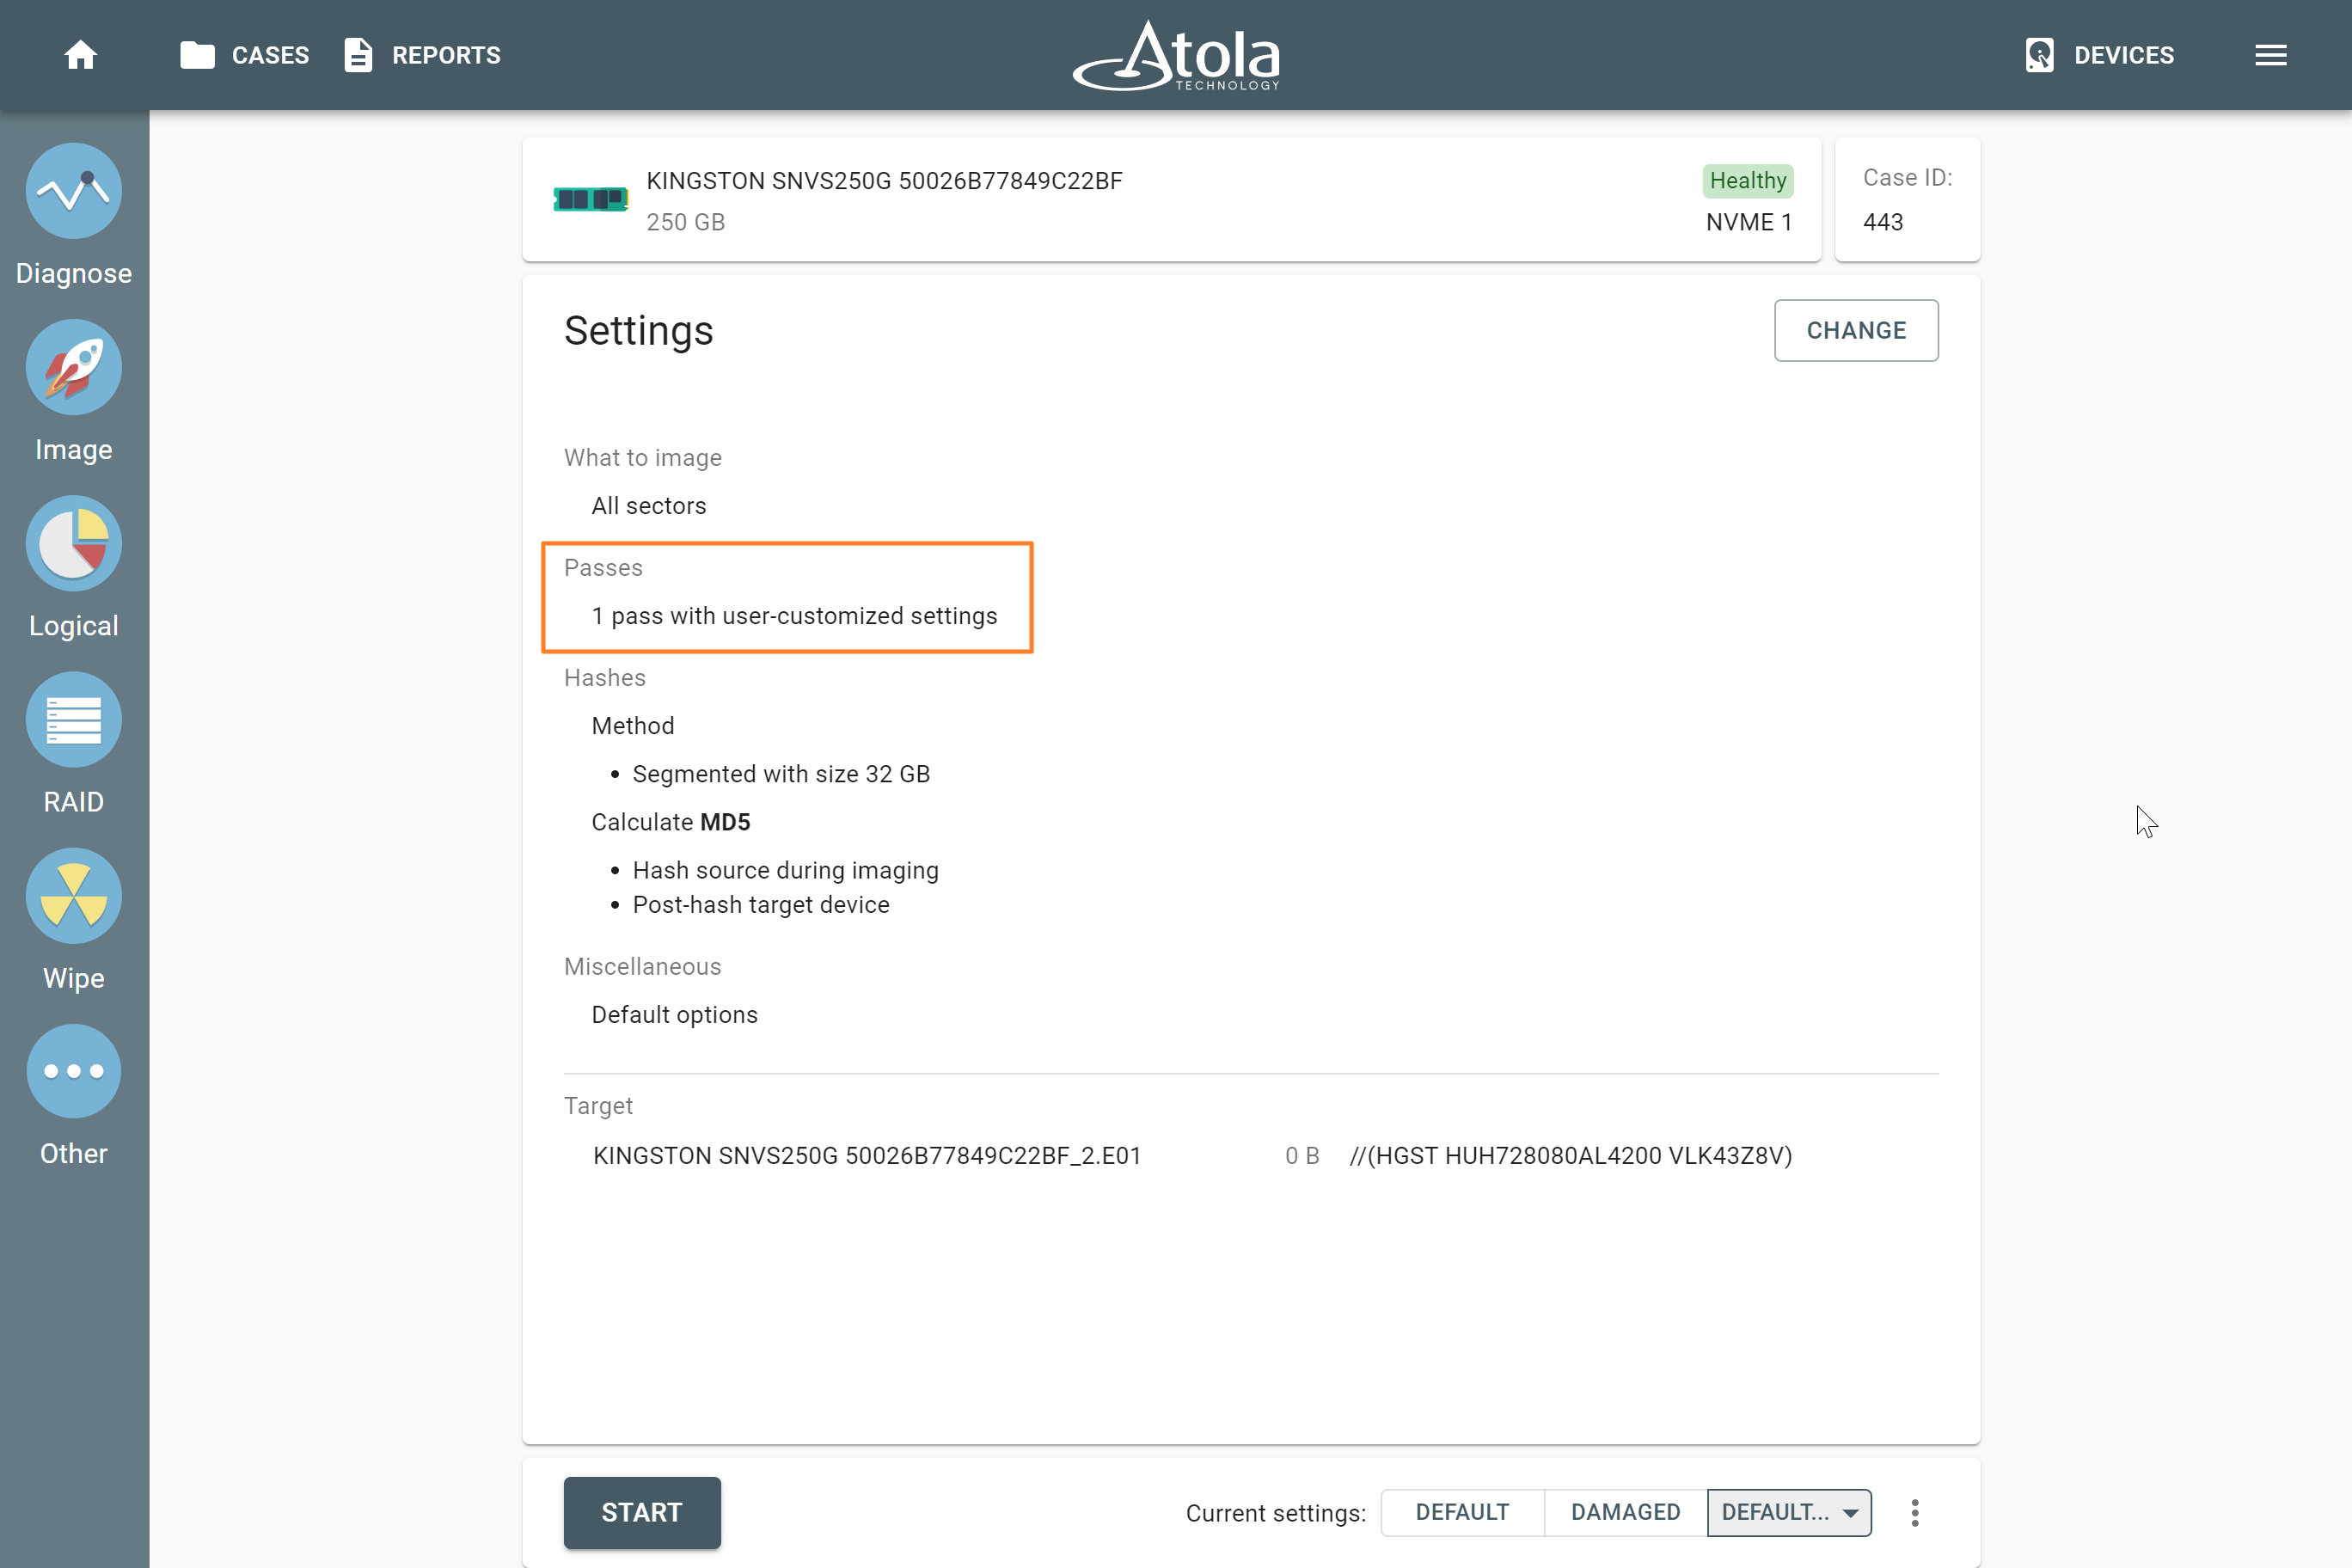
The imaging settings screen.
Image several devices to a Storage drive in parallel
You can run multiple imaging sessions to E01/AFF4/RAW files on a Storage drive simultaneously.
To do that, follow the steps described in the Image to a Storage drive section and then Create a compressed E01 image file for each evidence device.
Imaging completed report
The Imaging completed report provides all the time stamps, hash values, and hash verification result. To look up the settings of the imaging session, you can also see the Imaging started report in the case management system.
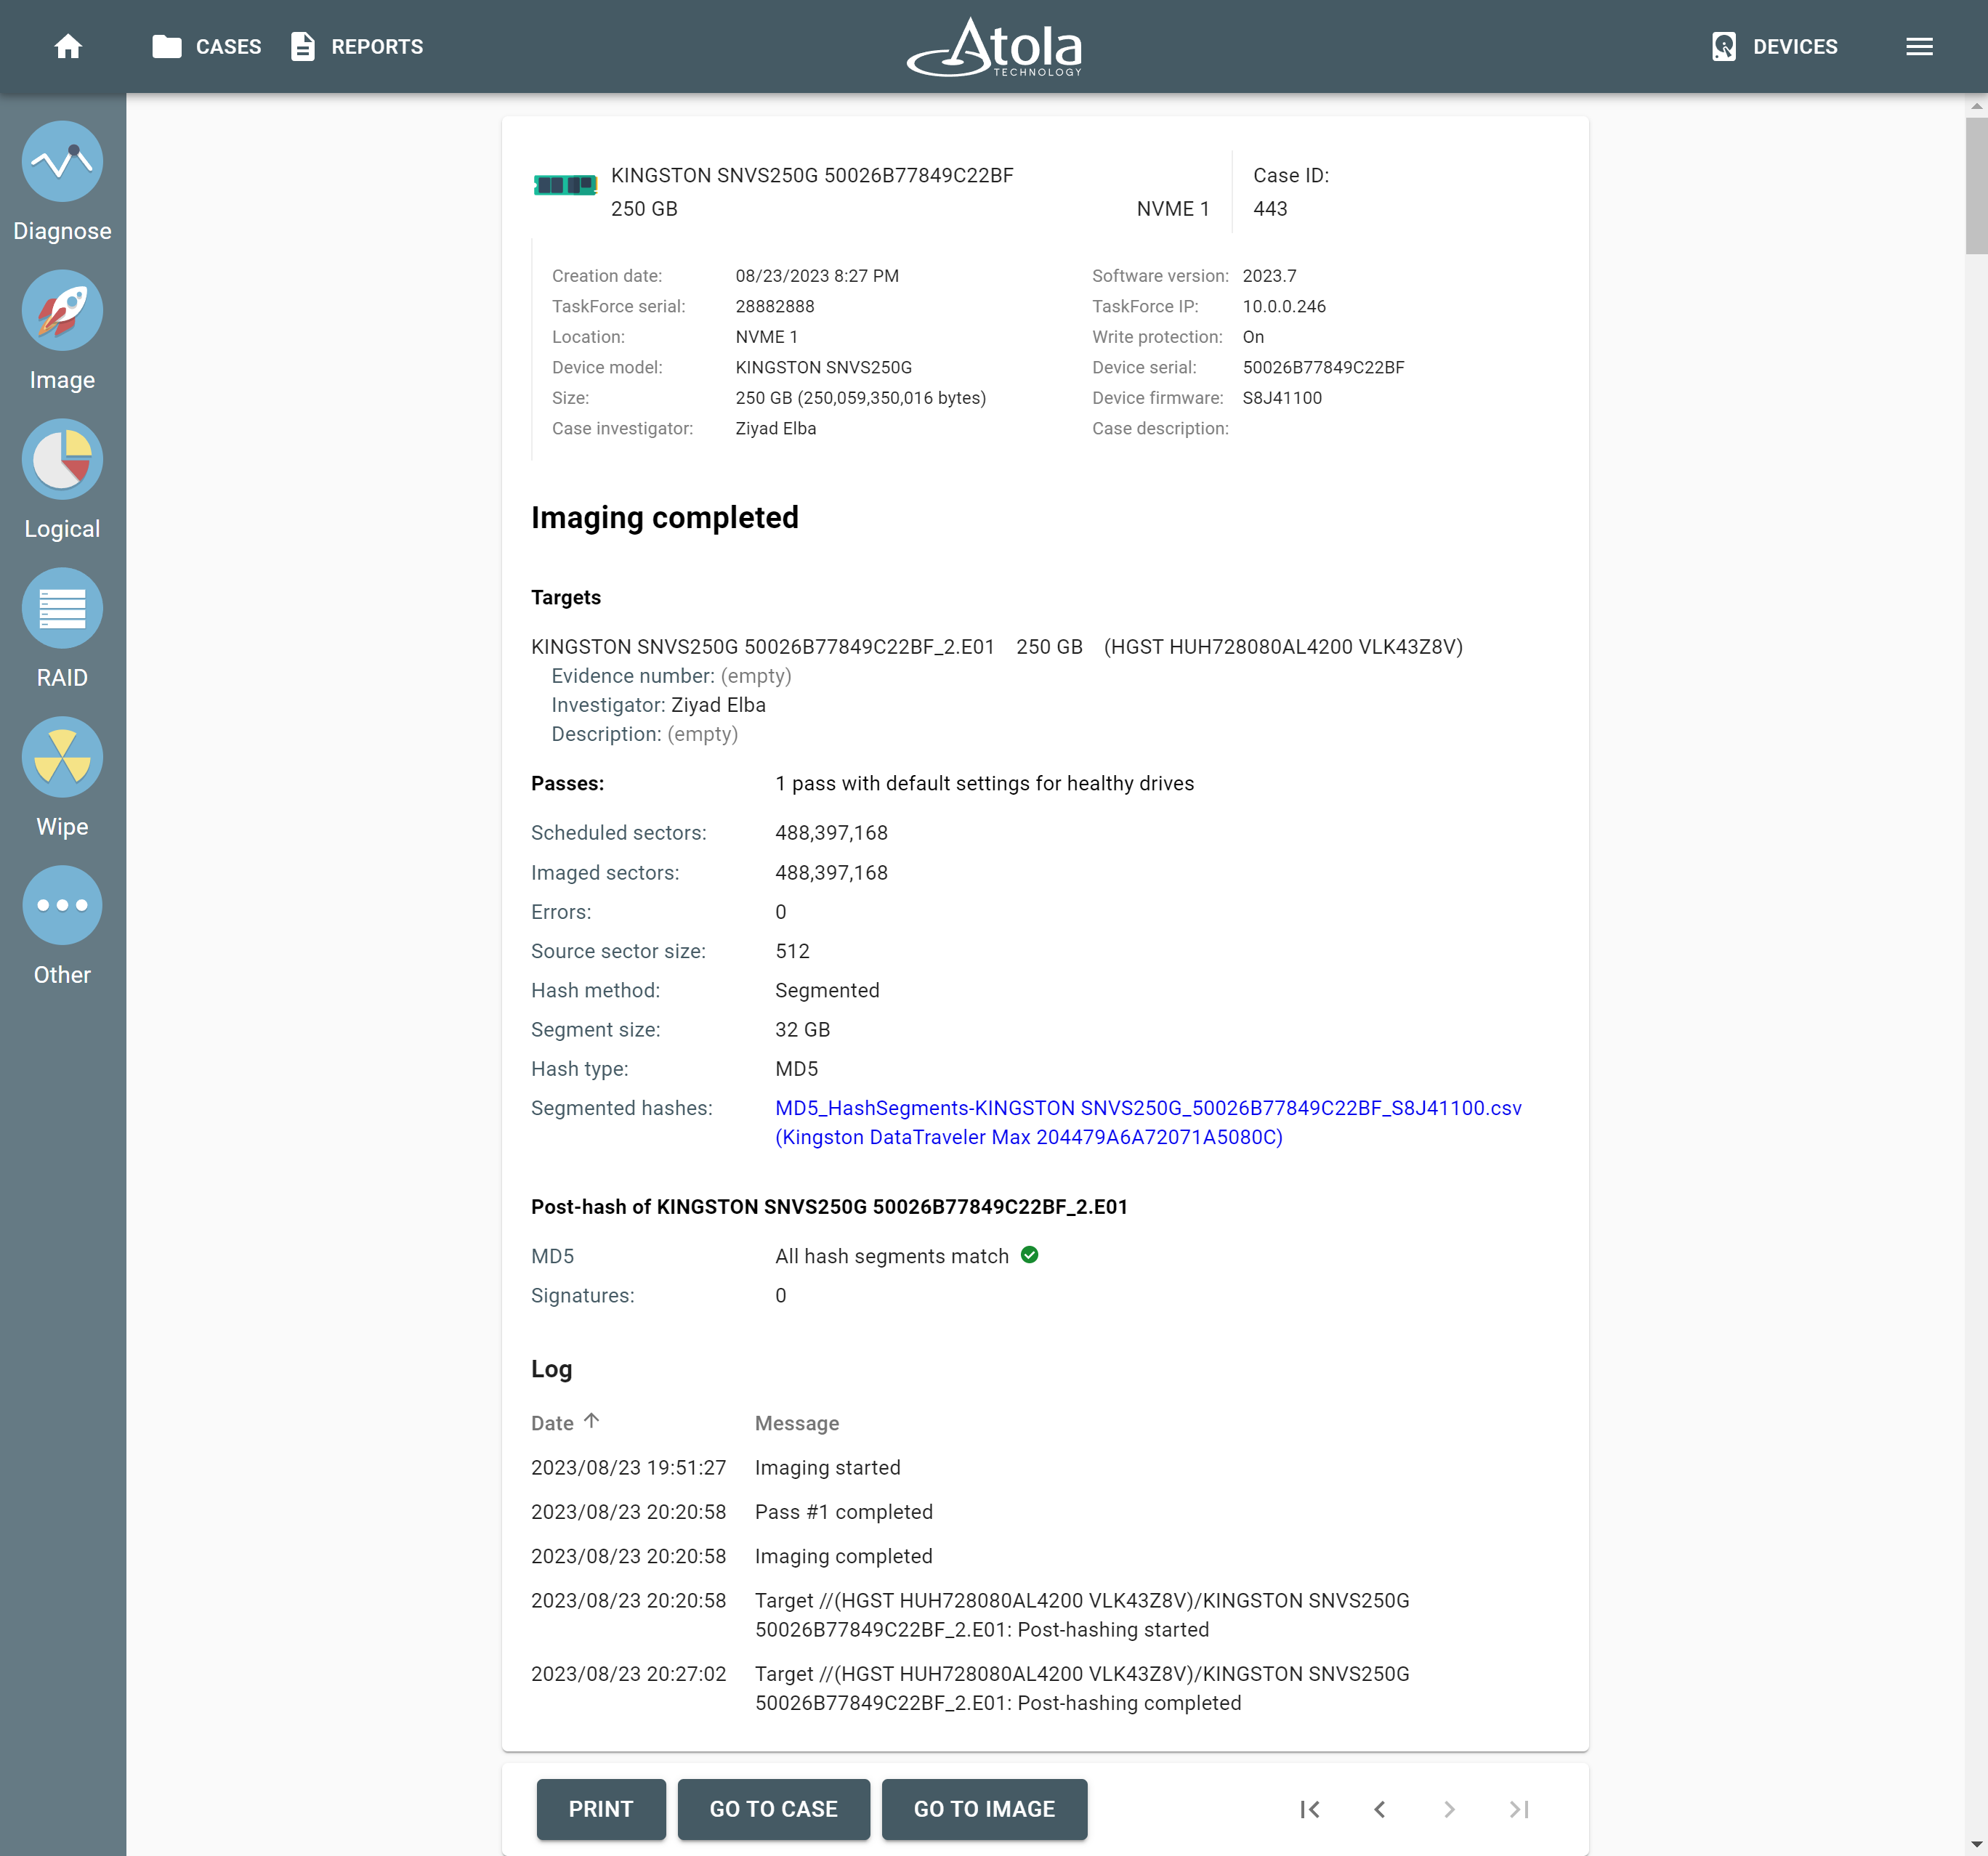
The Imaging completed report.