Connectivity and multi-user access
Atola TaskForce has three connectivity options:
- 10Gb Ethernet network
- Standalone mode
- WiFi access point (optional)
10Gb Ethernet network
TaskForce is equipped with two built-in 10Gb Ethernet ports. Optionally, a 25G Fiber Extension adds two 25GbE SFP28 ports via the Extension port. Whenever the system is connected to a local network via one of its Ethernet ports, an IP address will be displayed on the IP screen on the front panel of the system.
Supported network features:
- Two built-in 10Gb Ethernet ports; optional 25G Fiber Extension (two 25GbE SFP28 ports)
- Dynamic (DHCP) IP / Static IP address
- Settings: DNS nameserver, Default gateway, Jumbo frames
- Secure connection with password-protected network folders
- Support of HTTPS with external organizational and self-signed certificates
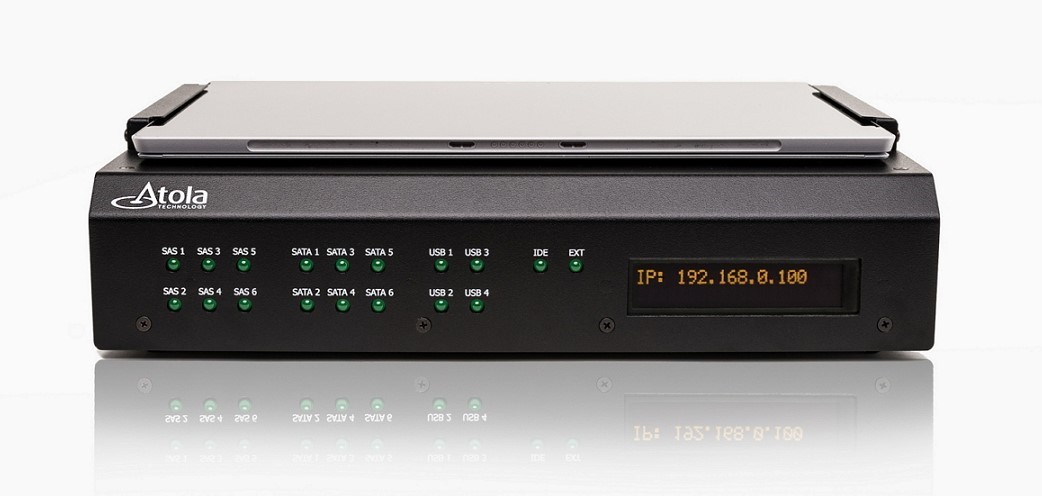
IP address of Atola TaskForce
If the system is connected via both Ethernet ports, two IP addresses will be displayed on the screen. These IP addresses are assigned to TaskForce by your DHCP server.
Multi-user access
With the help of these IP addresses, TaskForce can be operated by multiple users simultaneously from their workstations or mobile devices:
- enter either of the IP addresses as shown on the IP screen in Chrome browser on another device within the same local network.
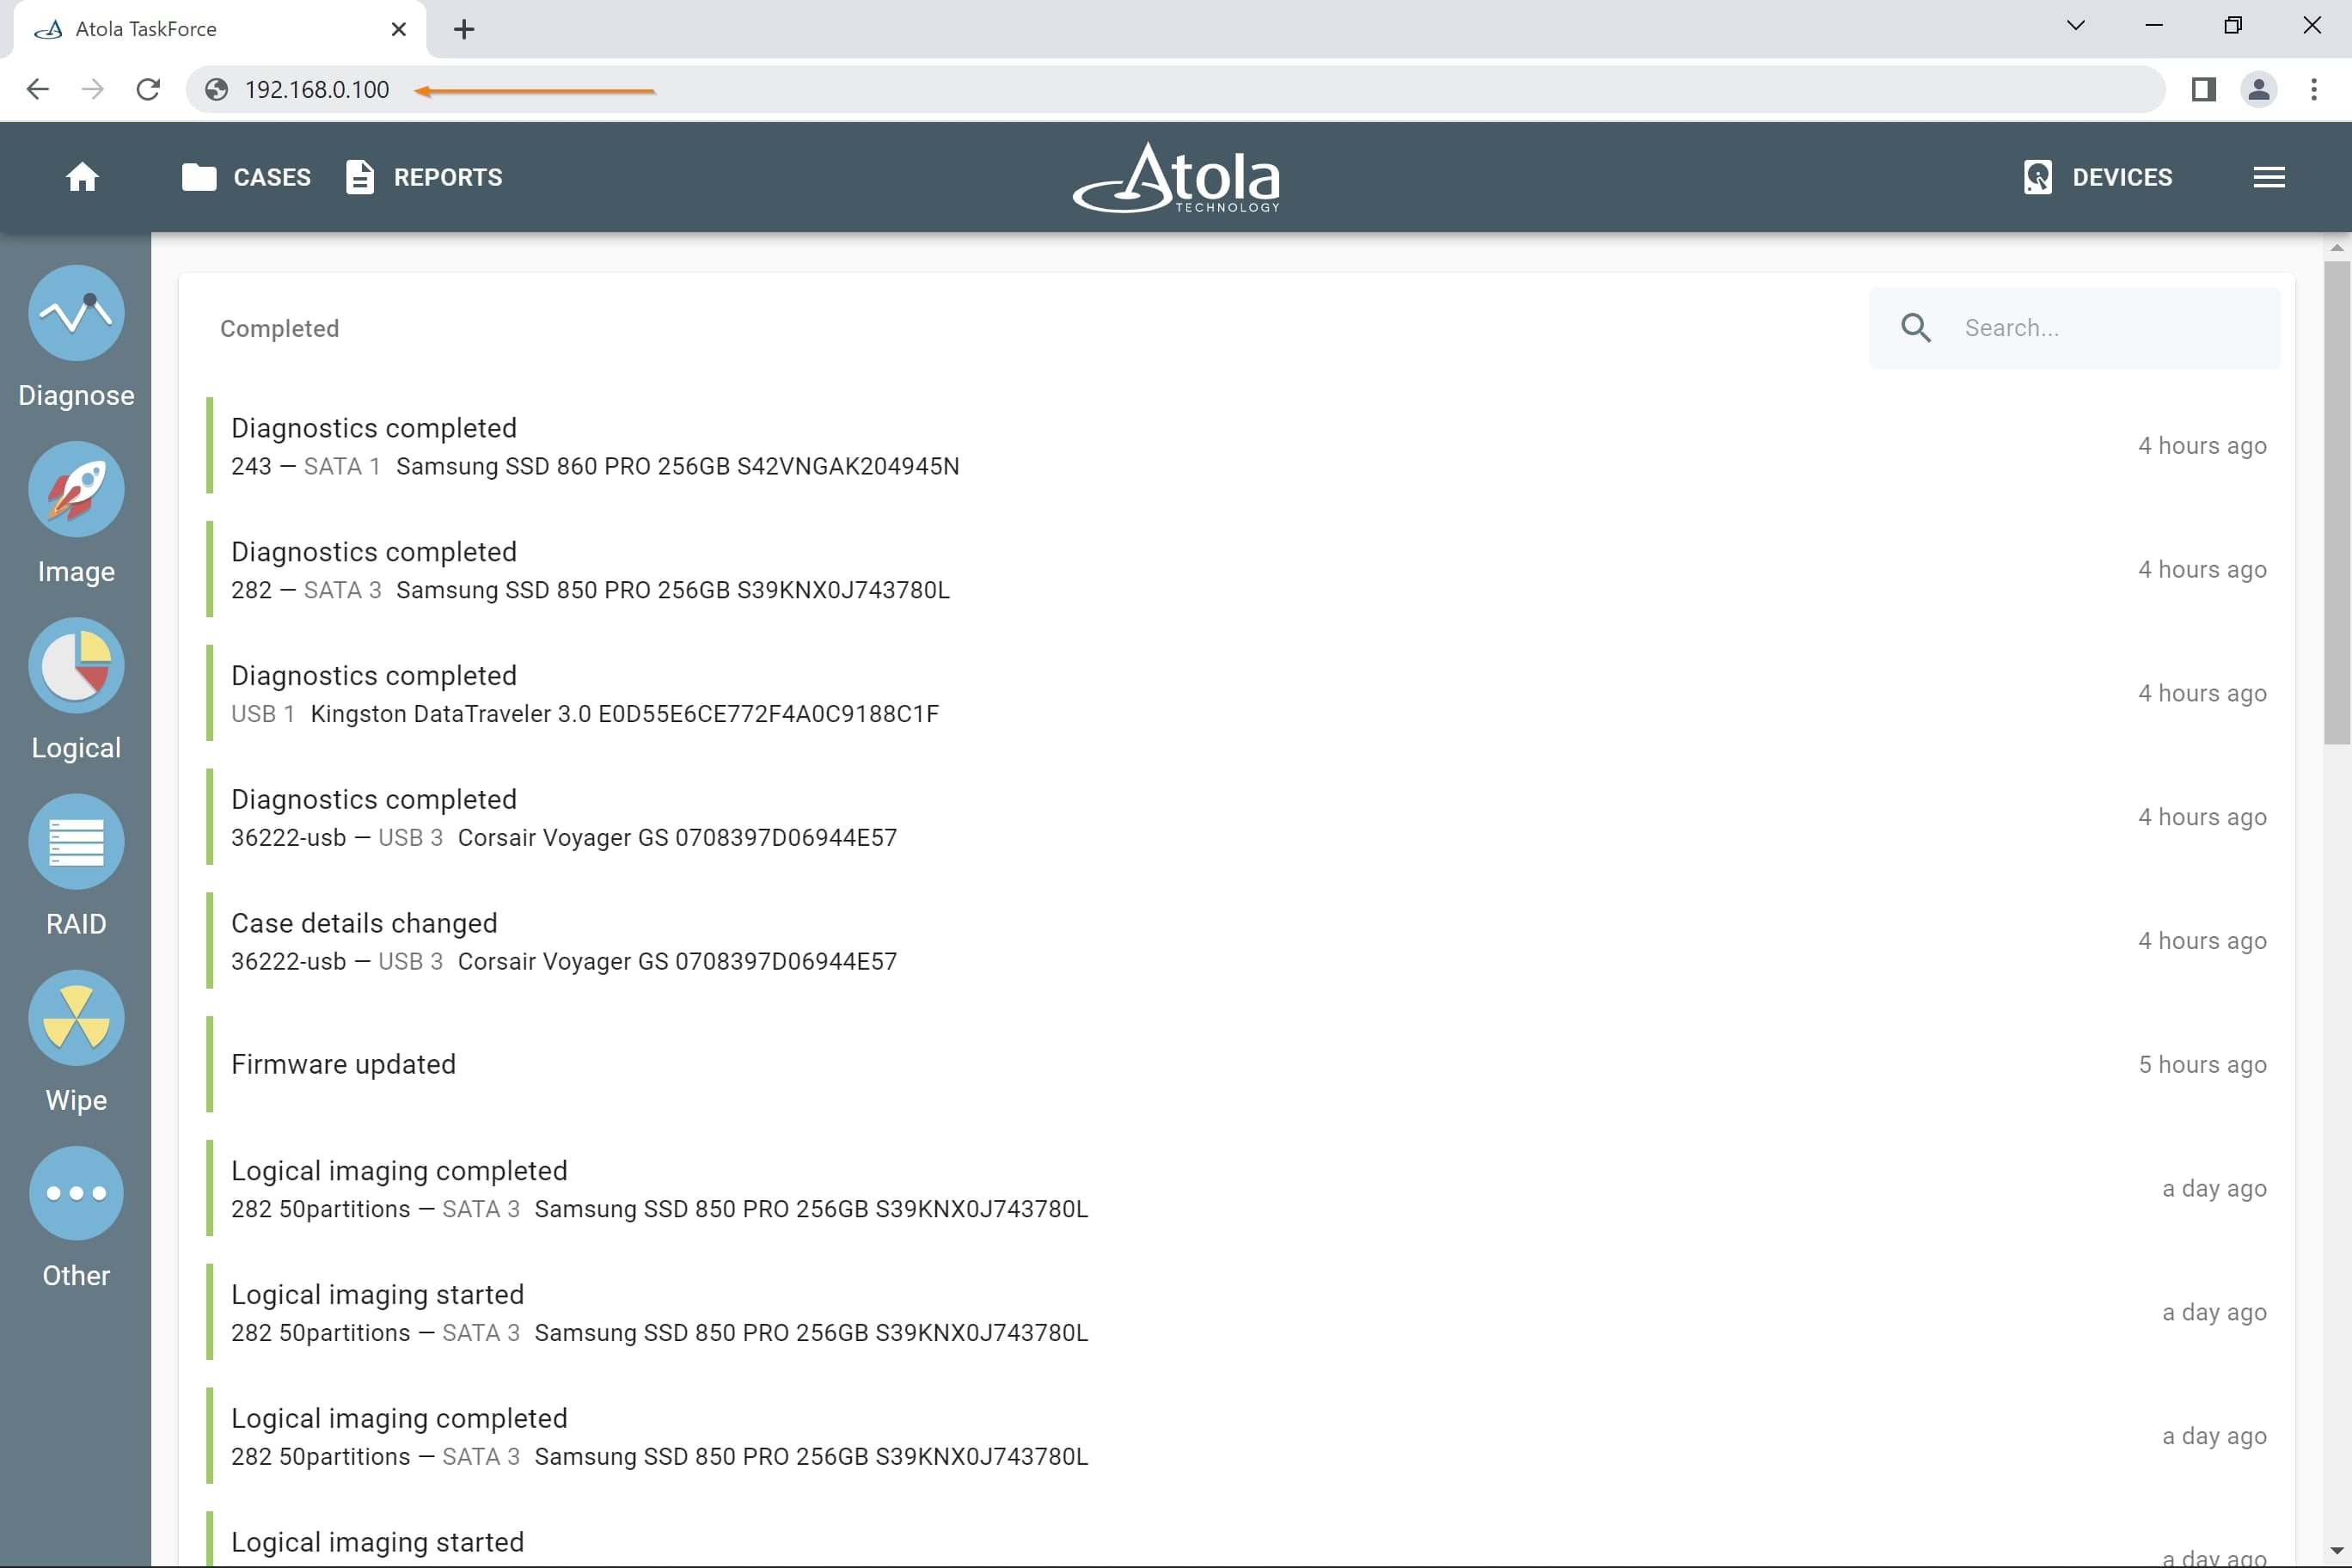
Enter IP address in Chrome browser
Through Chrome browser one can remotely track and manage tasks, power devices on and off, open, edit and print cases etc.
Types of devices that can be used to access TaskForce simultaneously include:
- Desktop PC
- Laptop
- Tablet
- Smartphone
- Built-in TaskForce touch screen
TaskForce software can be open in Chrome browser within any OS.
This functionality enables a group of users to work on different assignments using the same tool. This helps utilize TaskForce’s multitasking capabilities to the maximum and track operation progress remotely. The number of users accessing TaskForce simultaneously is unlimited.
Standalone mode
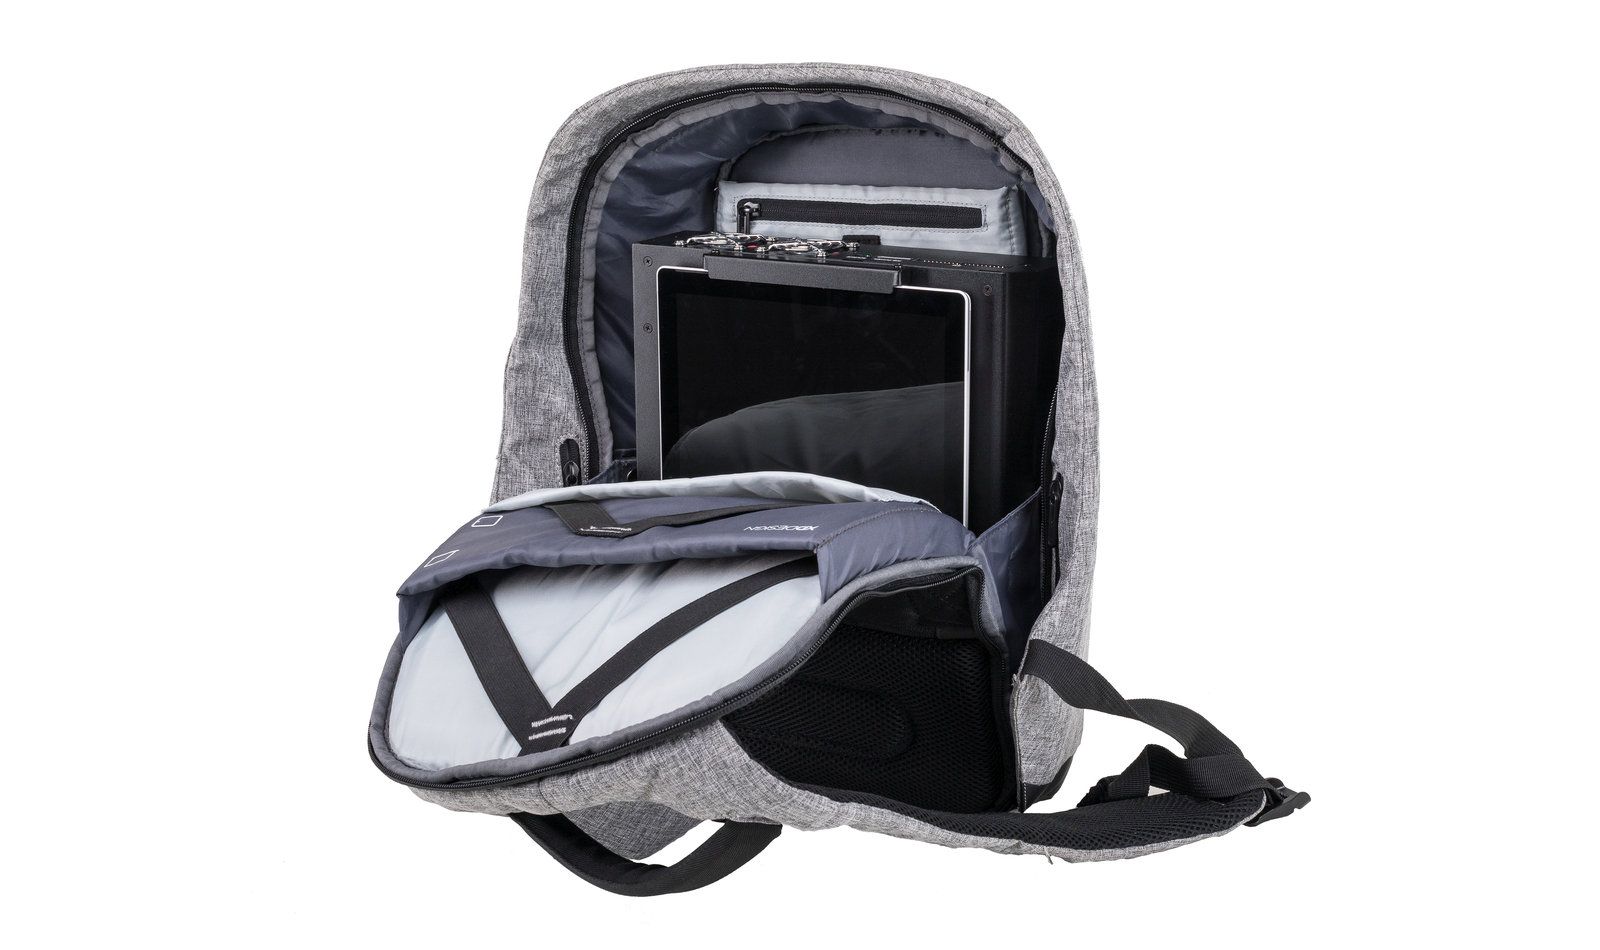
TaskForce is equipped with highly responsive HD screen (see Hardware specs), which allows the system’s use in standalone mode.
Whenever the system is not connected to a network via its built-in 10Gb Ethernet ports (or via an installed 25G Fiber Extension), Standalone mode status will be displayed on the IP screen.
In this mode, you can image data from multiple source drives to target drives in parallel. Thanks to its compact size TaskForce can be easily used in the field.
Wi-Fi access point
The third way to access TaskForce's user interface is via Wi-Fi 802.11n 150 Mb/s adapter. The adapter is optional and can be purchased from your preferred retailer. Here is a link to the supported adapter sold on Amazon. To enable the adapter, follow these steps:
- Connect the adapter to one of your TaskForce's USB ports.
- Go to Menu in the top right corner of the TaskForce web page.
- Click Settings.
- Enable Wi-Fi Hotspot. An IP address will appear underneath the Wi-Fi Hotspot category.
- Click Settings.
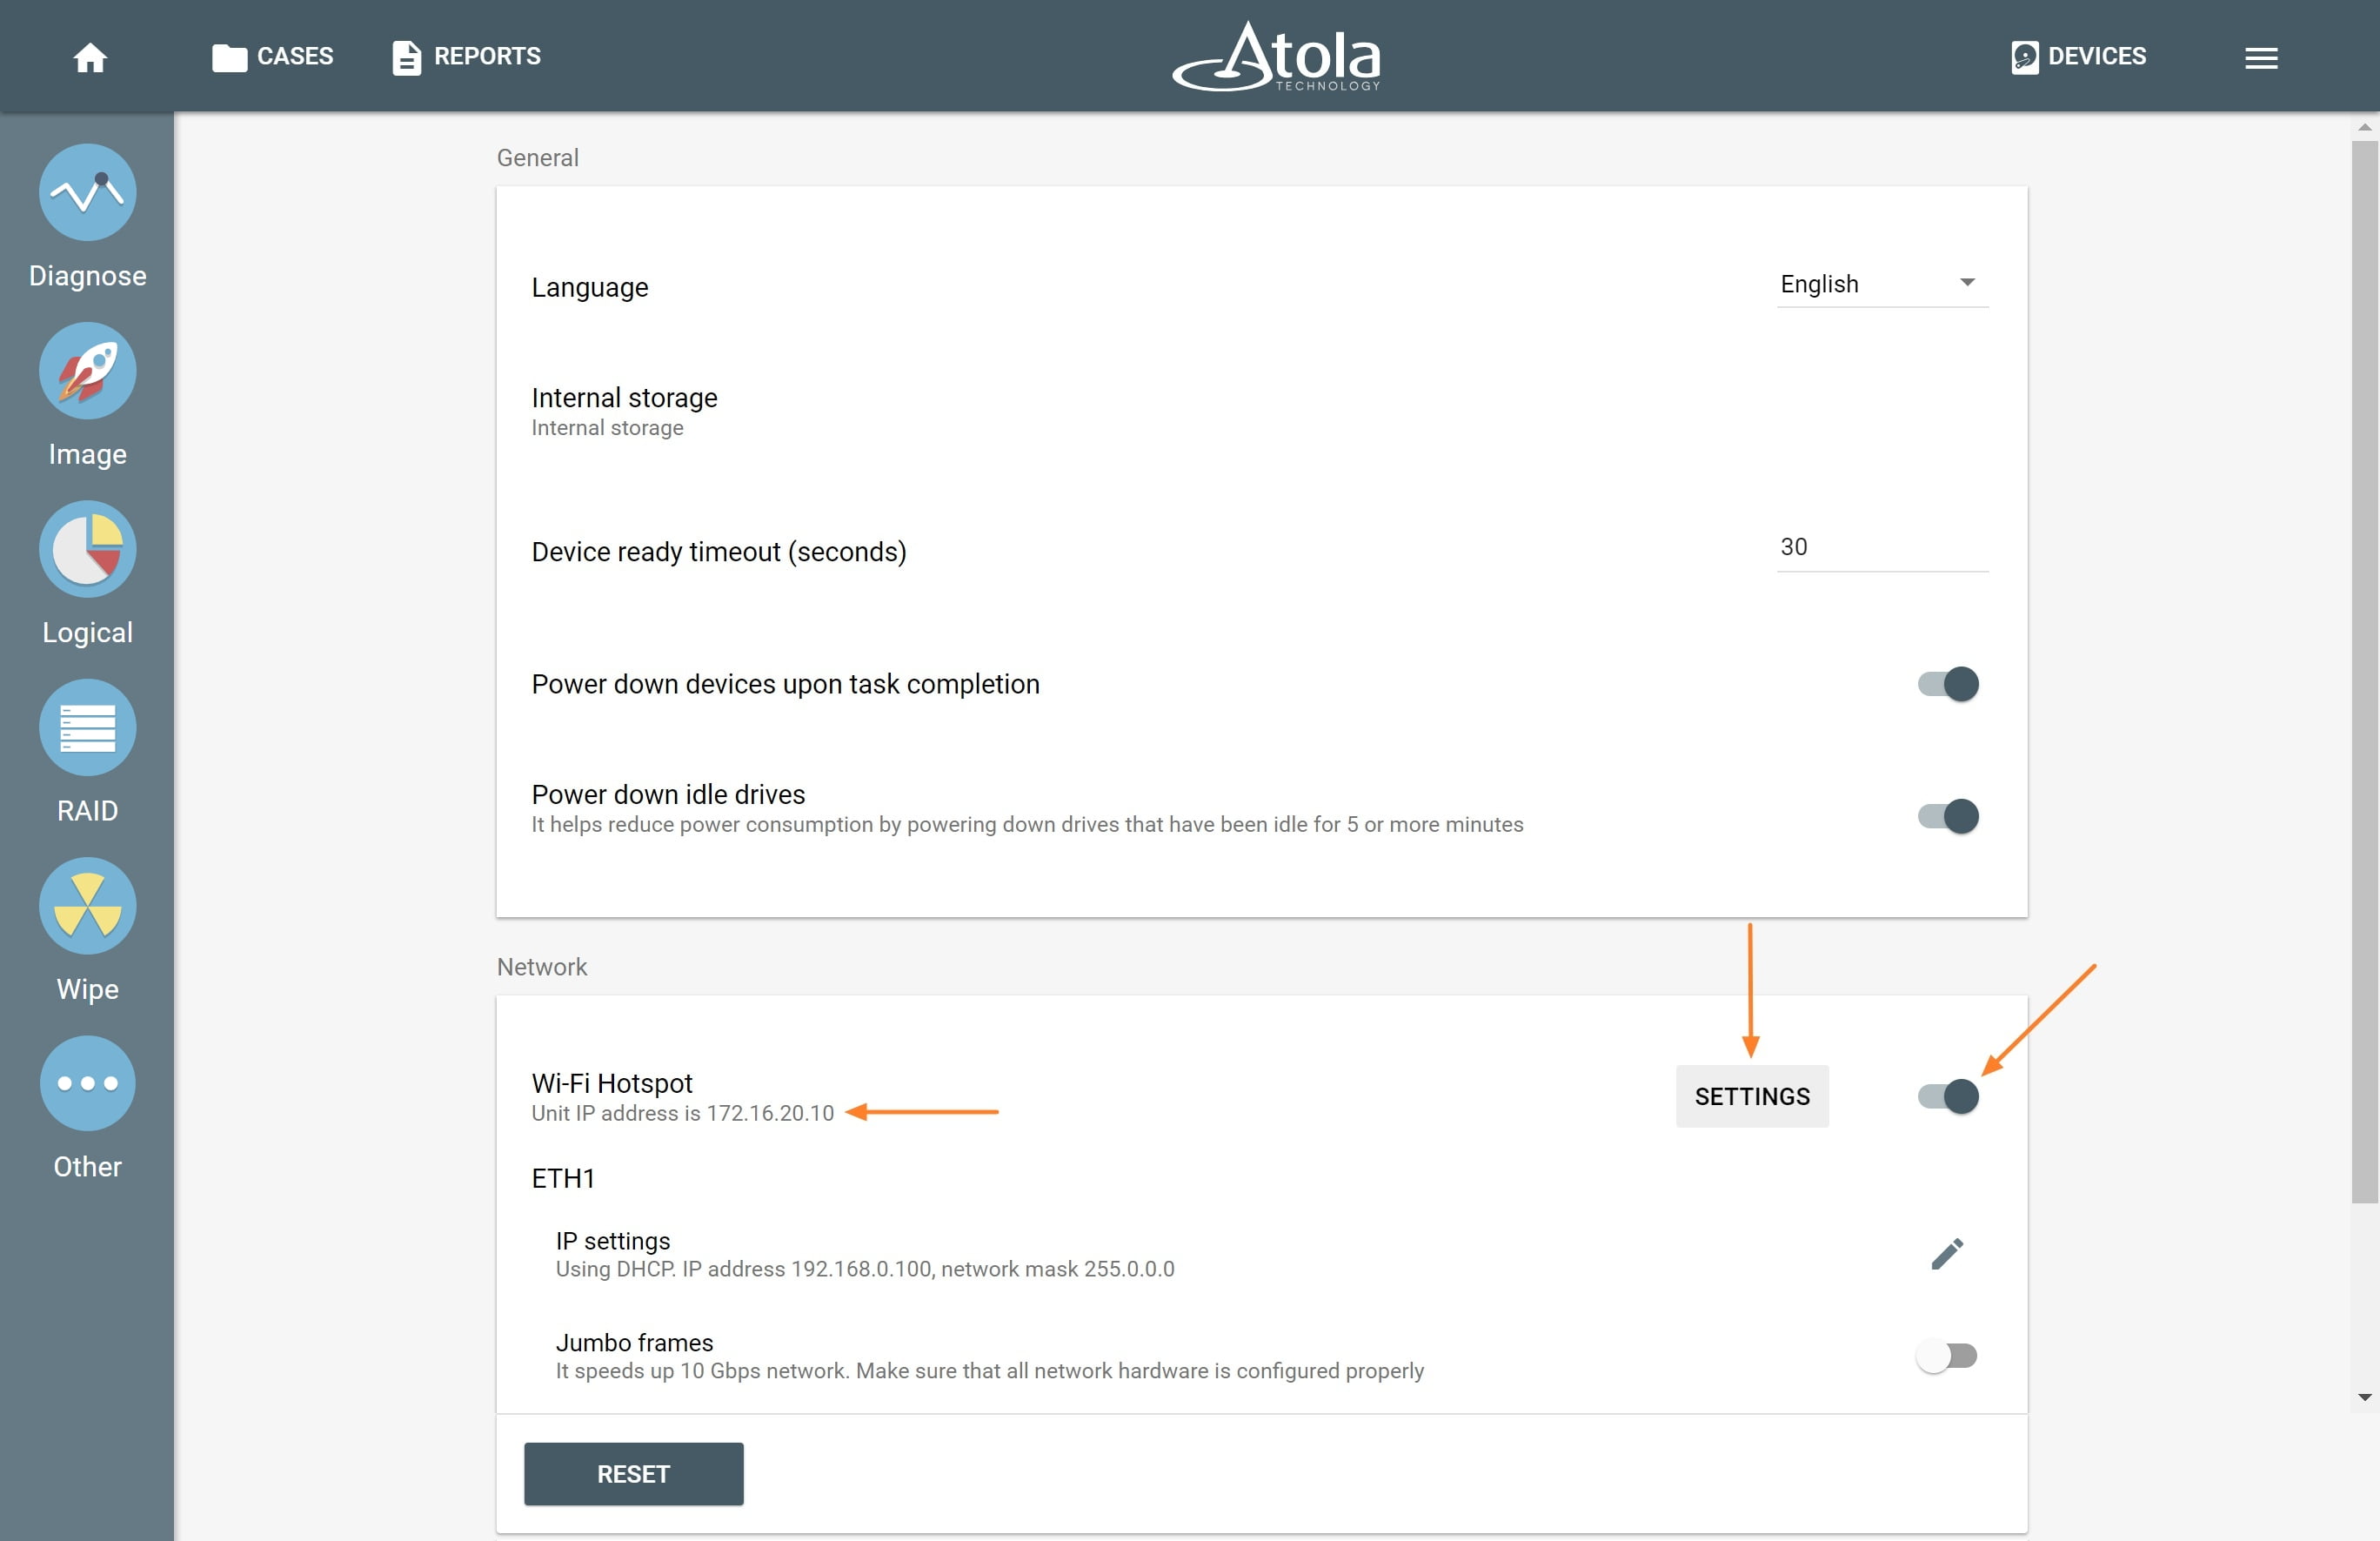
Enable Wi-Fi Hotspot
- Enable Wi-Fi Hotspot.
- Set SSID and Password. To make the network invisible to other devices, select Hidden mode. Click Save.
- Use these details to connect to the Hotspot from another device.
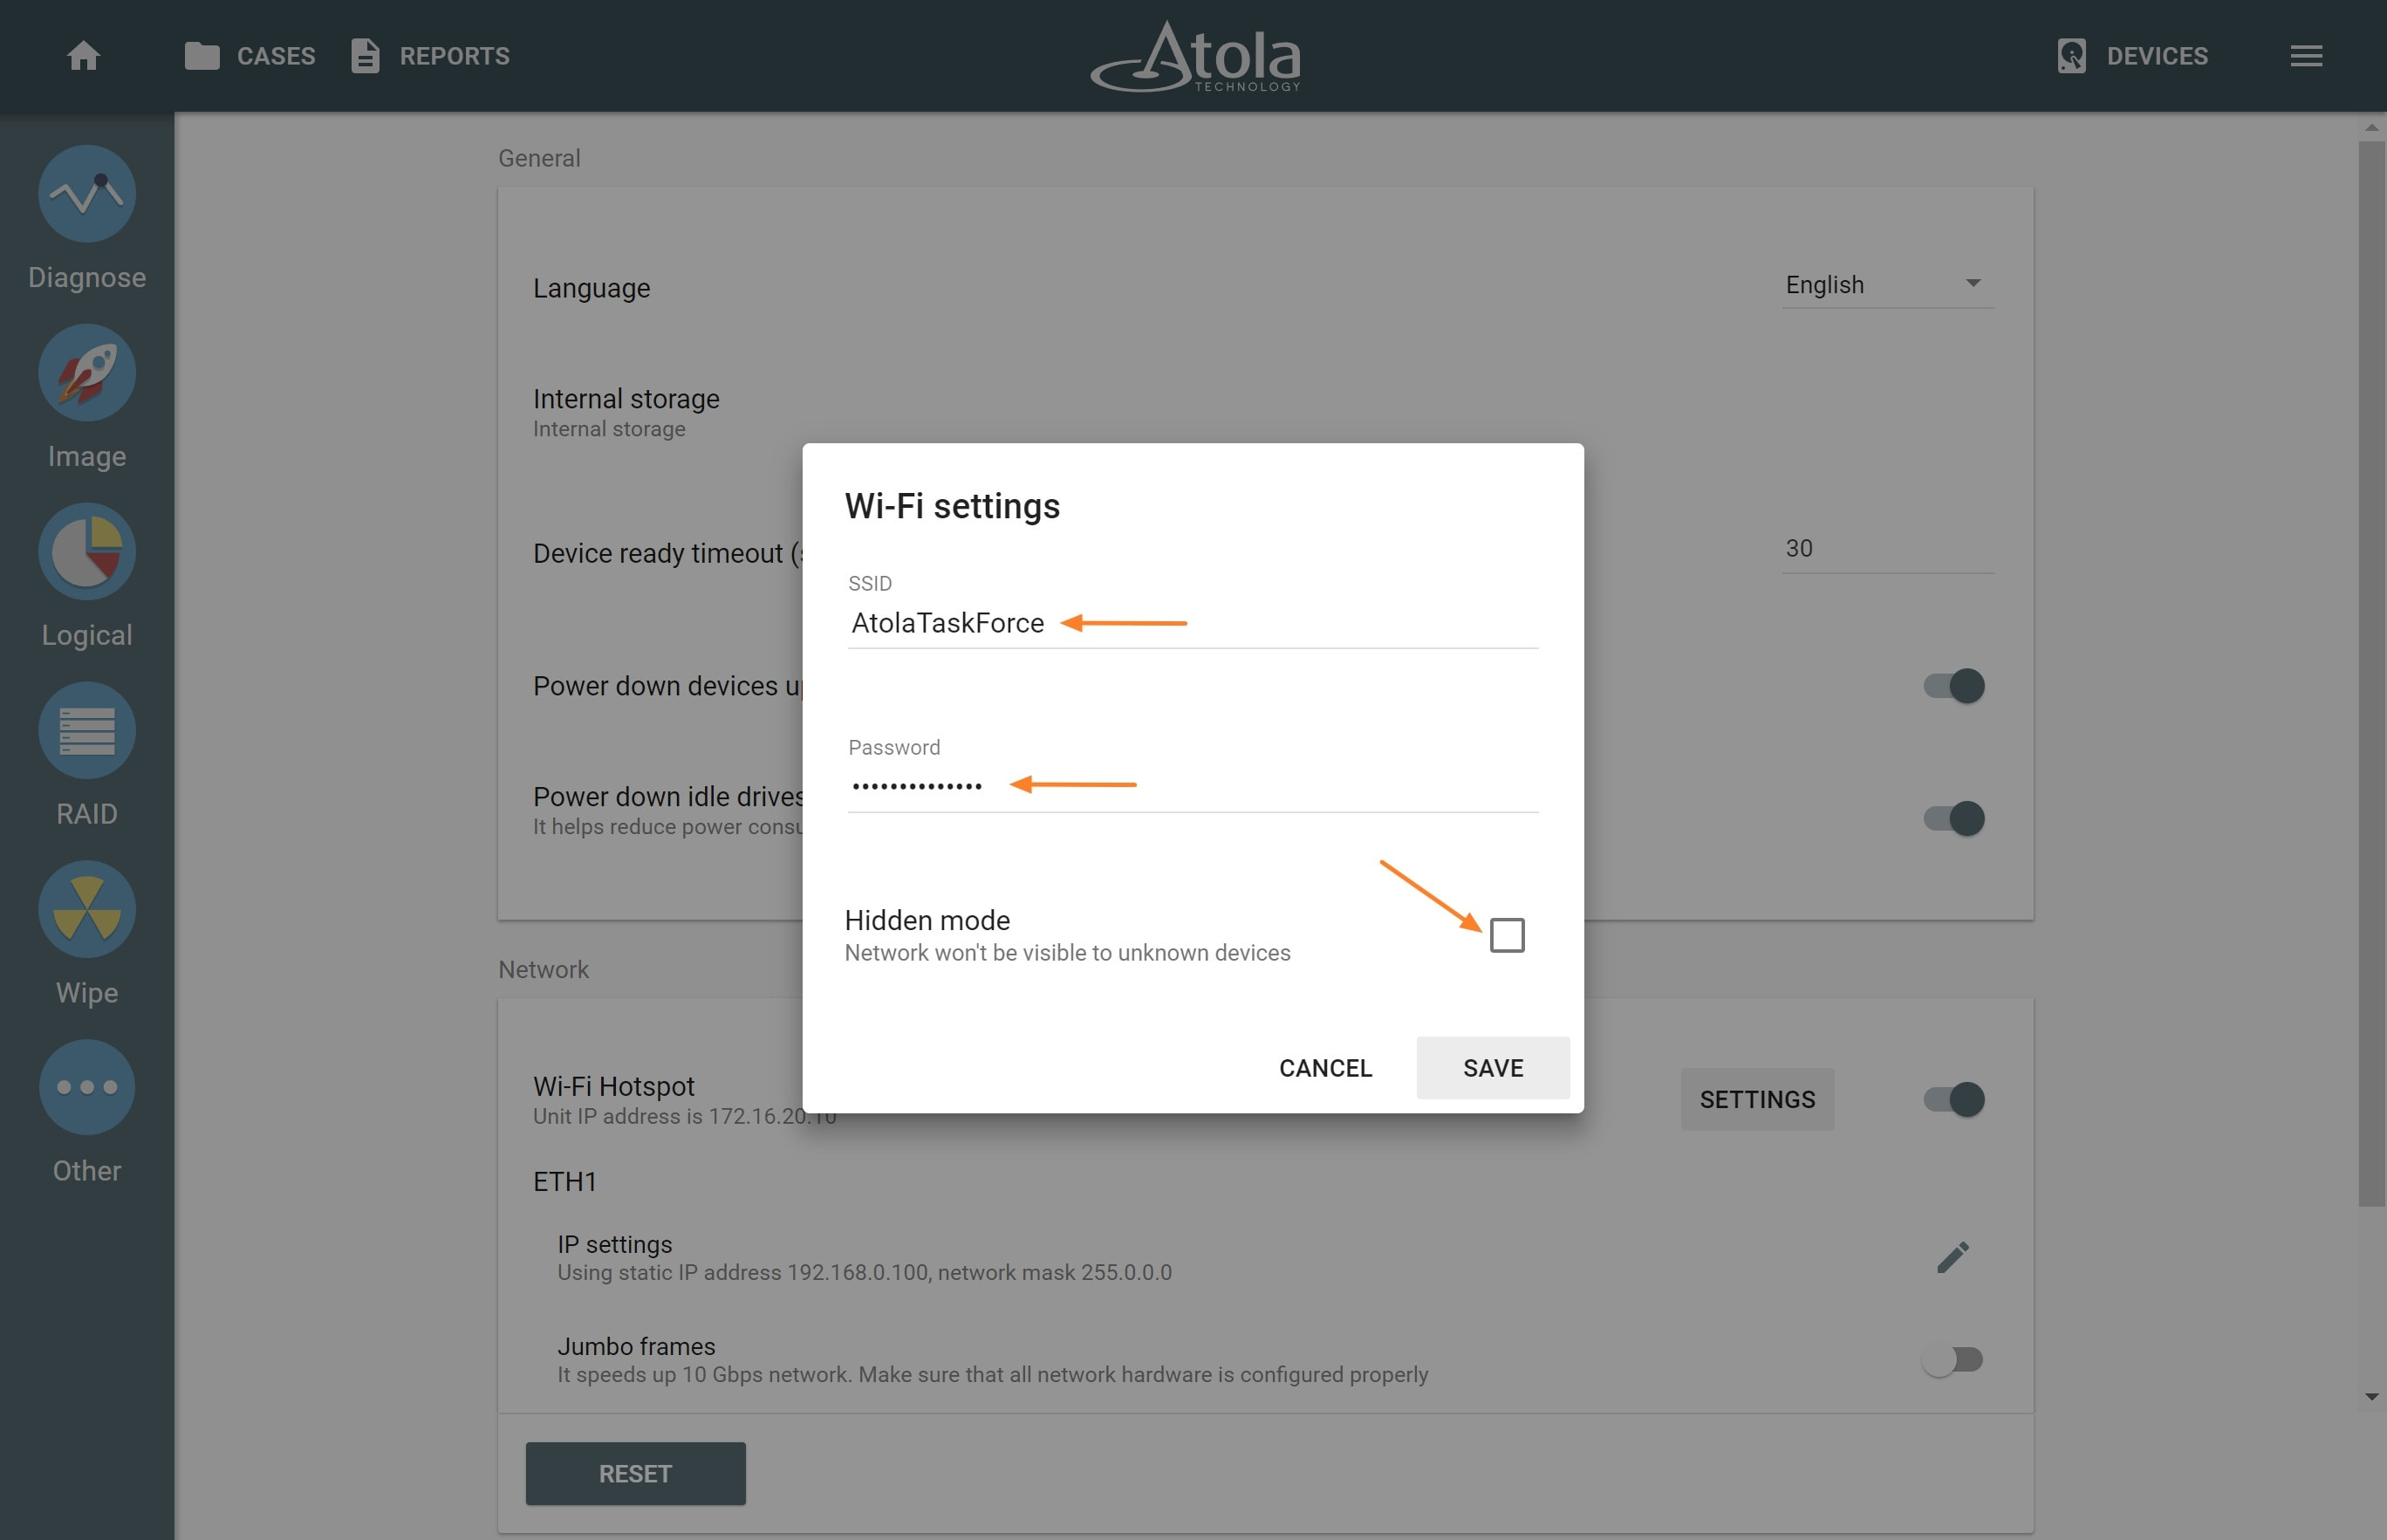
Adjust Wi-Fi settings
- To open the TaskForce interface, enter the IP address (indicated under Wi-Fi Hotspot category in the Settings window, see Step 3) in the Chrome browser of the device you have connected to the Hotspot.
The vast connectivity options make TaskForce a great tool for using both in the lab and in the field.