Verify damaged images with segmented hashing
Segmented hashing is a non-linear hashing method that allows hashing damaged drives. Hashes are calculated only for the good areas of evidence media, while bad areas, that are impossible to read and image, are left out of the calculation.
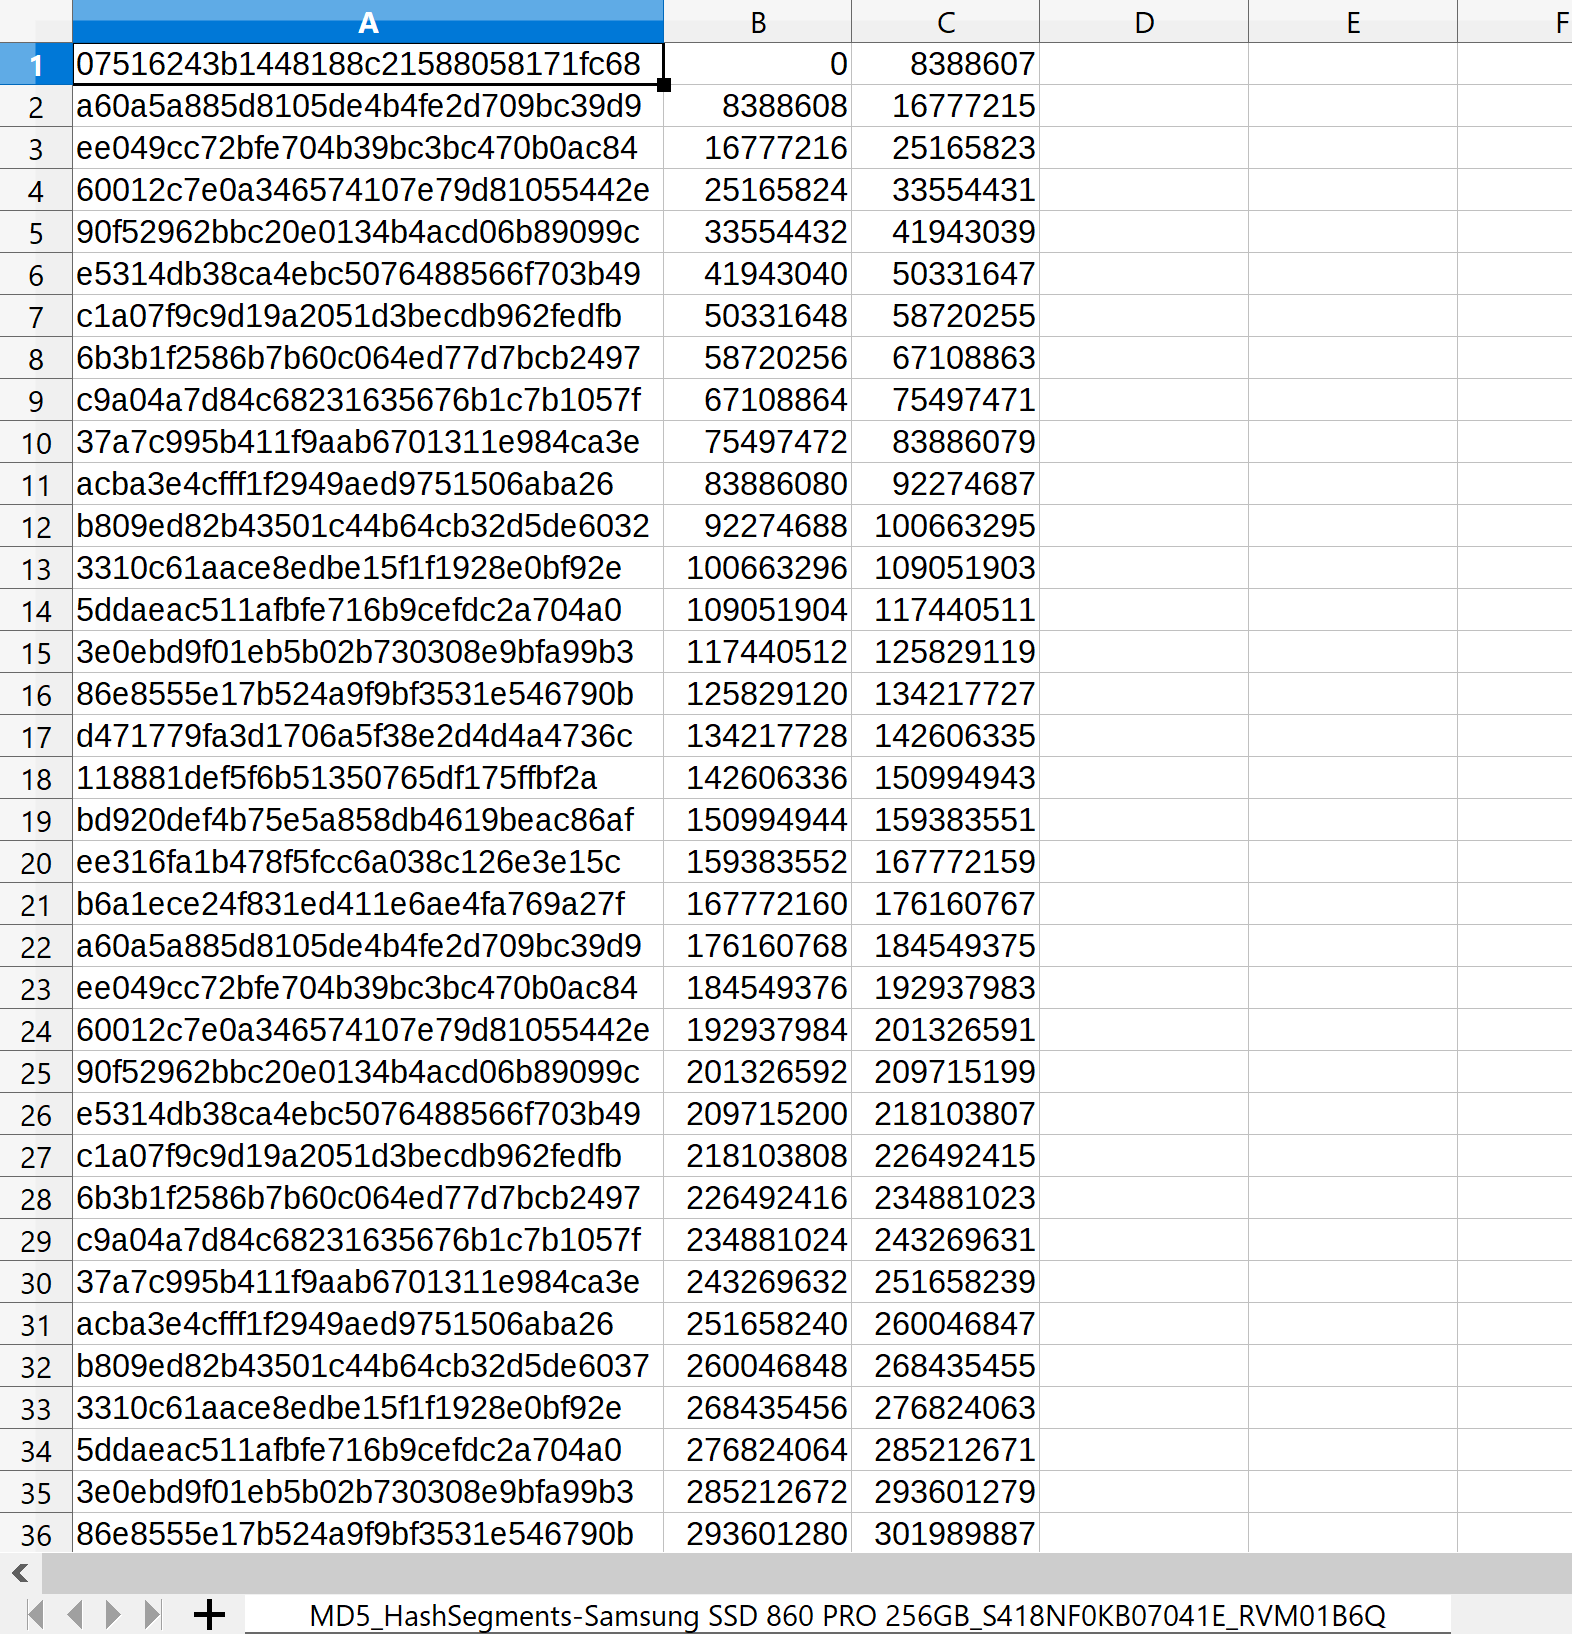
In Atola TaskForce 2, the segmented hashing module produces a list of hashes of corresponding LBA ranges of the image. Then hashes are saved into a CSV file in the following format: Hash, start LBA, end LBA.
The sum of the LBA ranges represents the entire image. By verifying all hashes in a set you can prove that the entire image has not been modified.
Benefits of segmented hashing
With the conventional linear hashing method you get a single hash for the entire image. As the linear hashing stops upon encountering the first bad sector, it is impossible to calculate hash for the entire space of the source evidence drive.
With segmented hashing, hashing can be performed during the multipass imaging of a damaged drive. Hashes are calculated only for the successfully imaged areas, while all bad sectors are excluded from the calculation.
If an acquired evidence image is damaged at some point in the future, with the regular linear hashes you will get a hash mismatch upon verification, and the entire image becomes useless. With segmented hashes only the hash of the damaged segment will become invalid.
Calculate segmented hashes of a source and target devices
To calculate segmented hashes of a damaged drive during imaging and post-hash the target for immediate image verification, do the following:
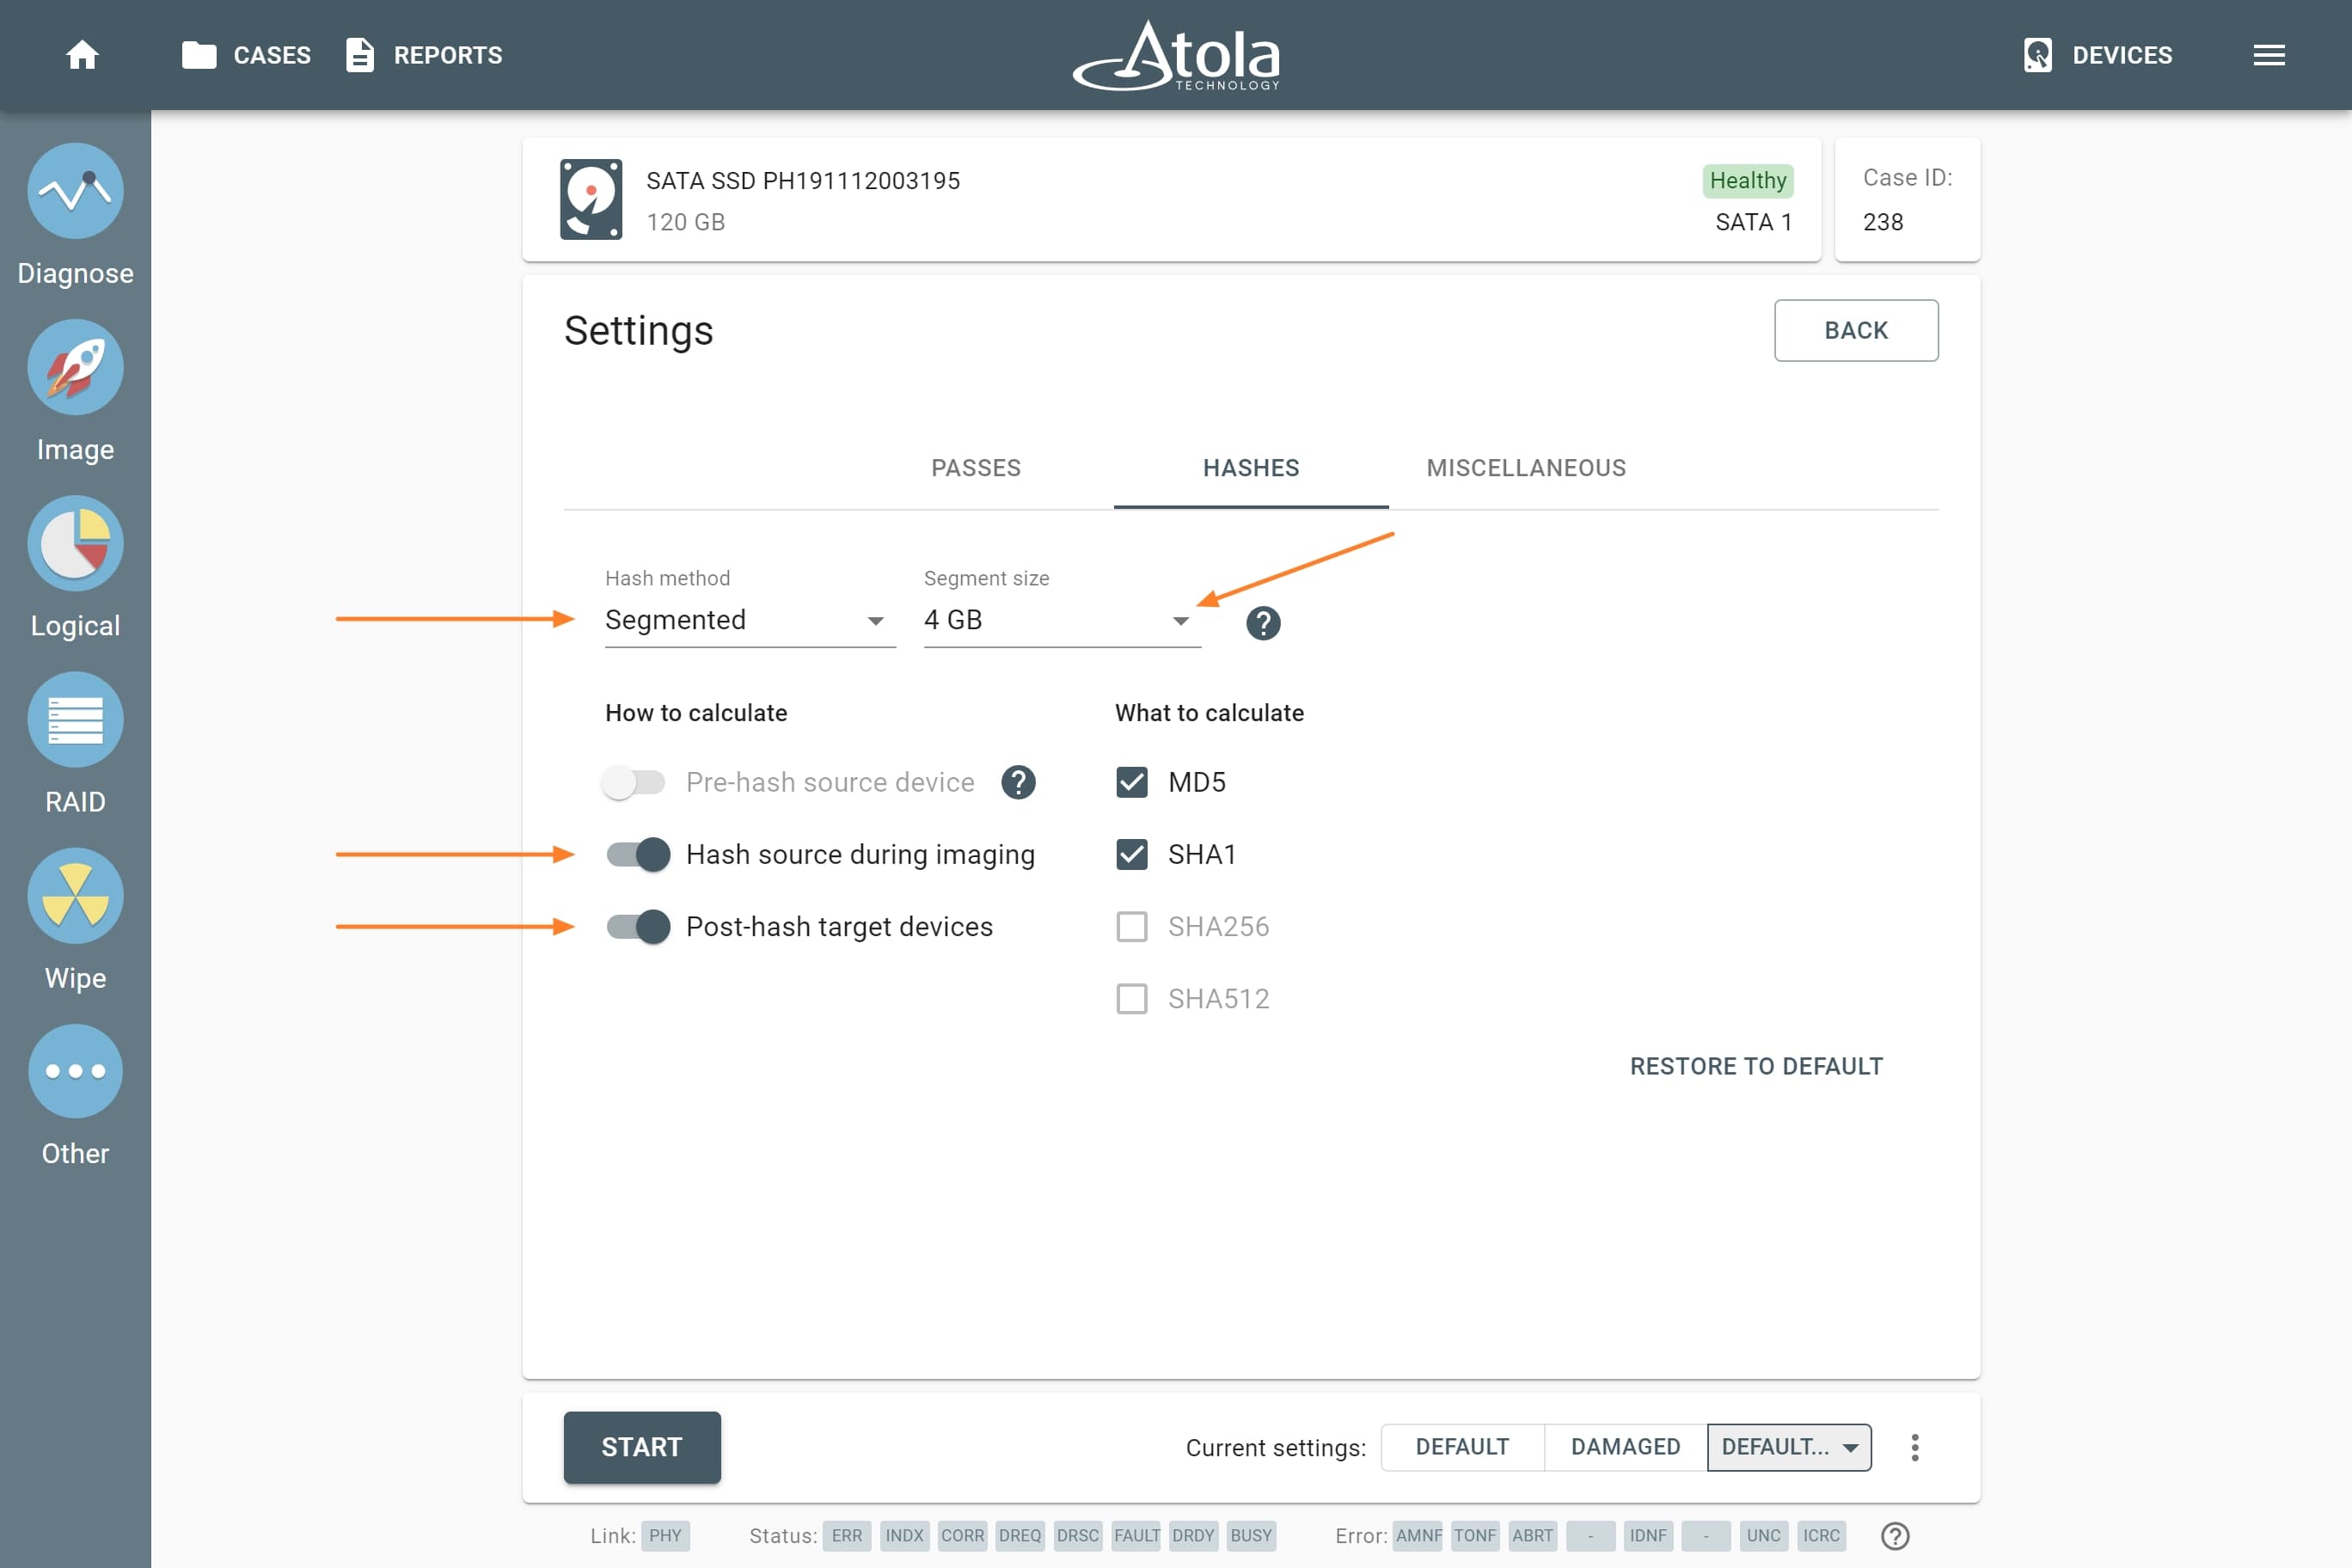
- Go to the imaging Settings.
- On the Hashes tab, select Segmented hashing method and specify Segment size.
- To obtain both sets of hashes for the evidence drive and the image, toggle Post-hash target devices.
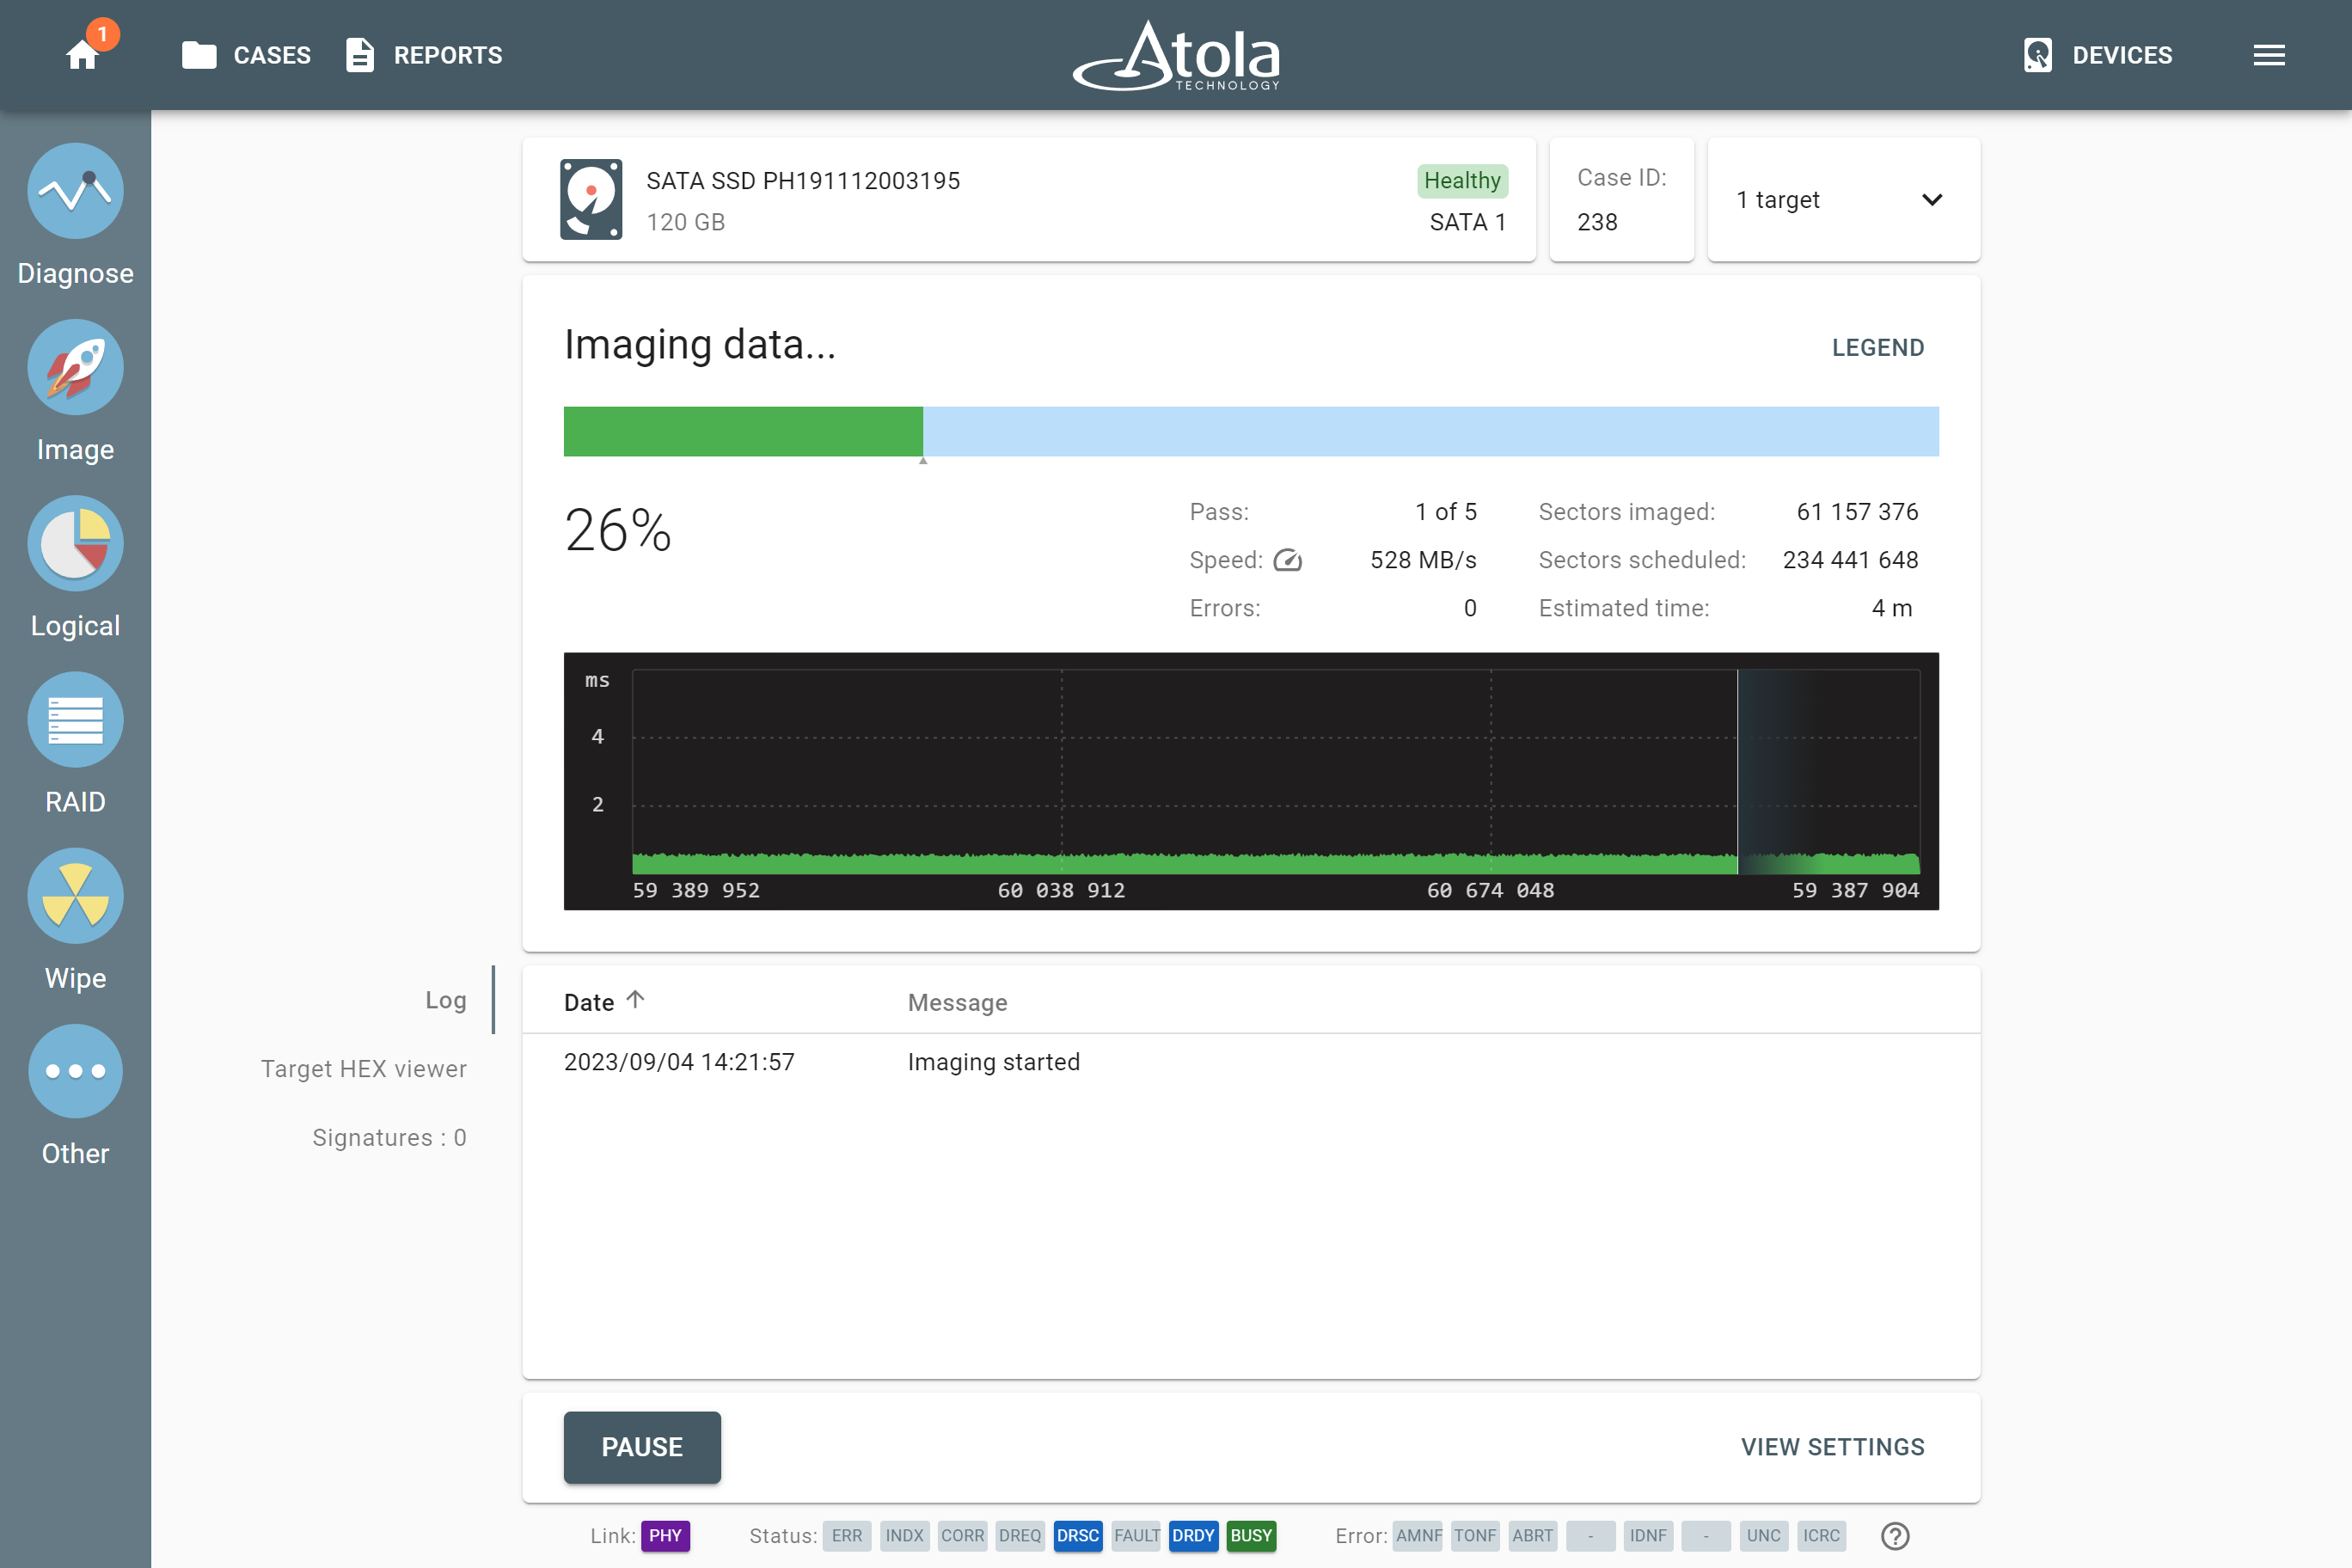
Hashing while imaging does not slow down the imaging session:
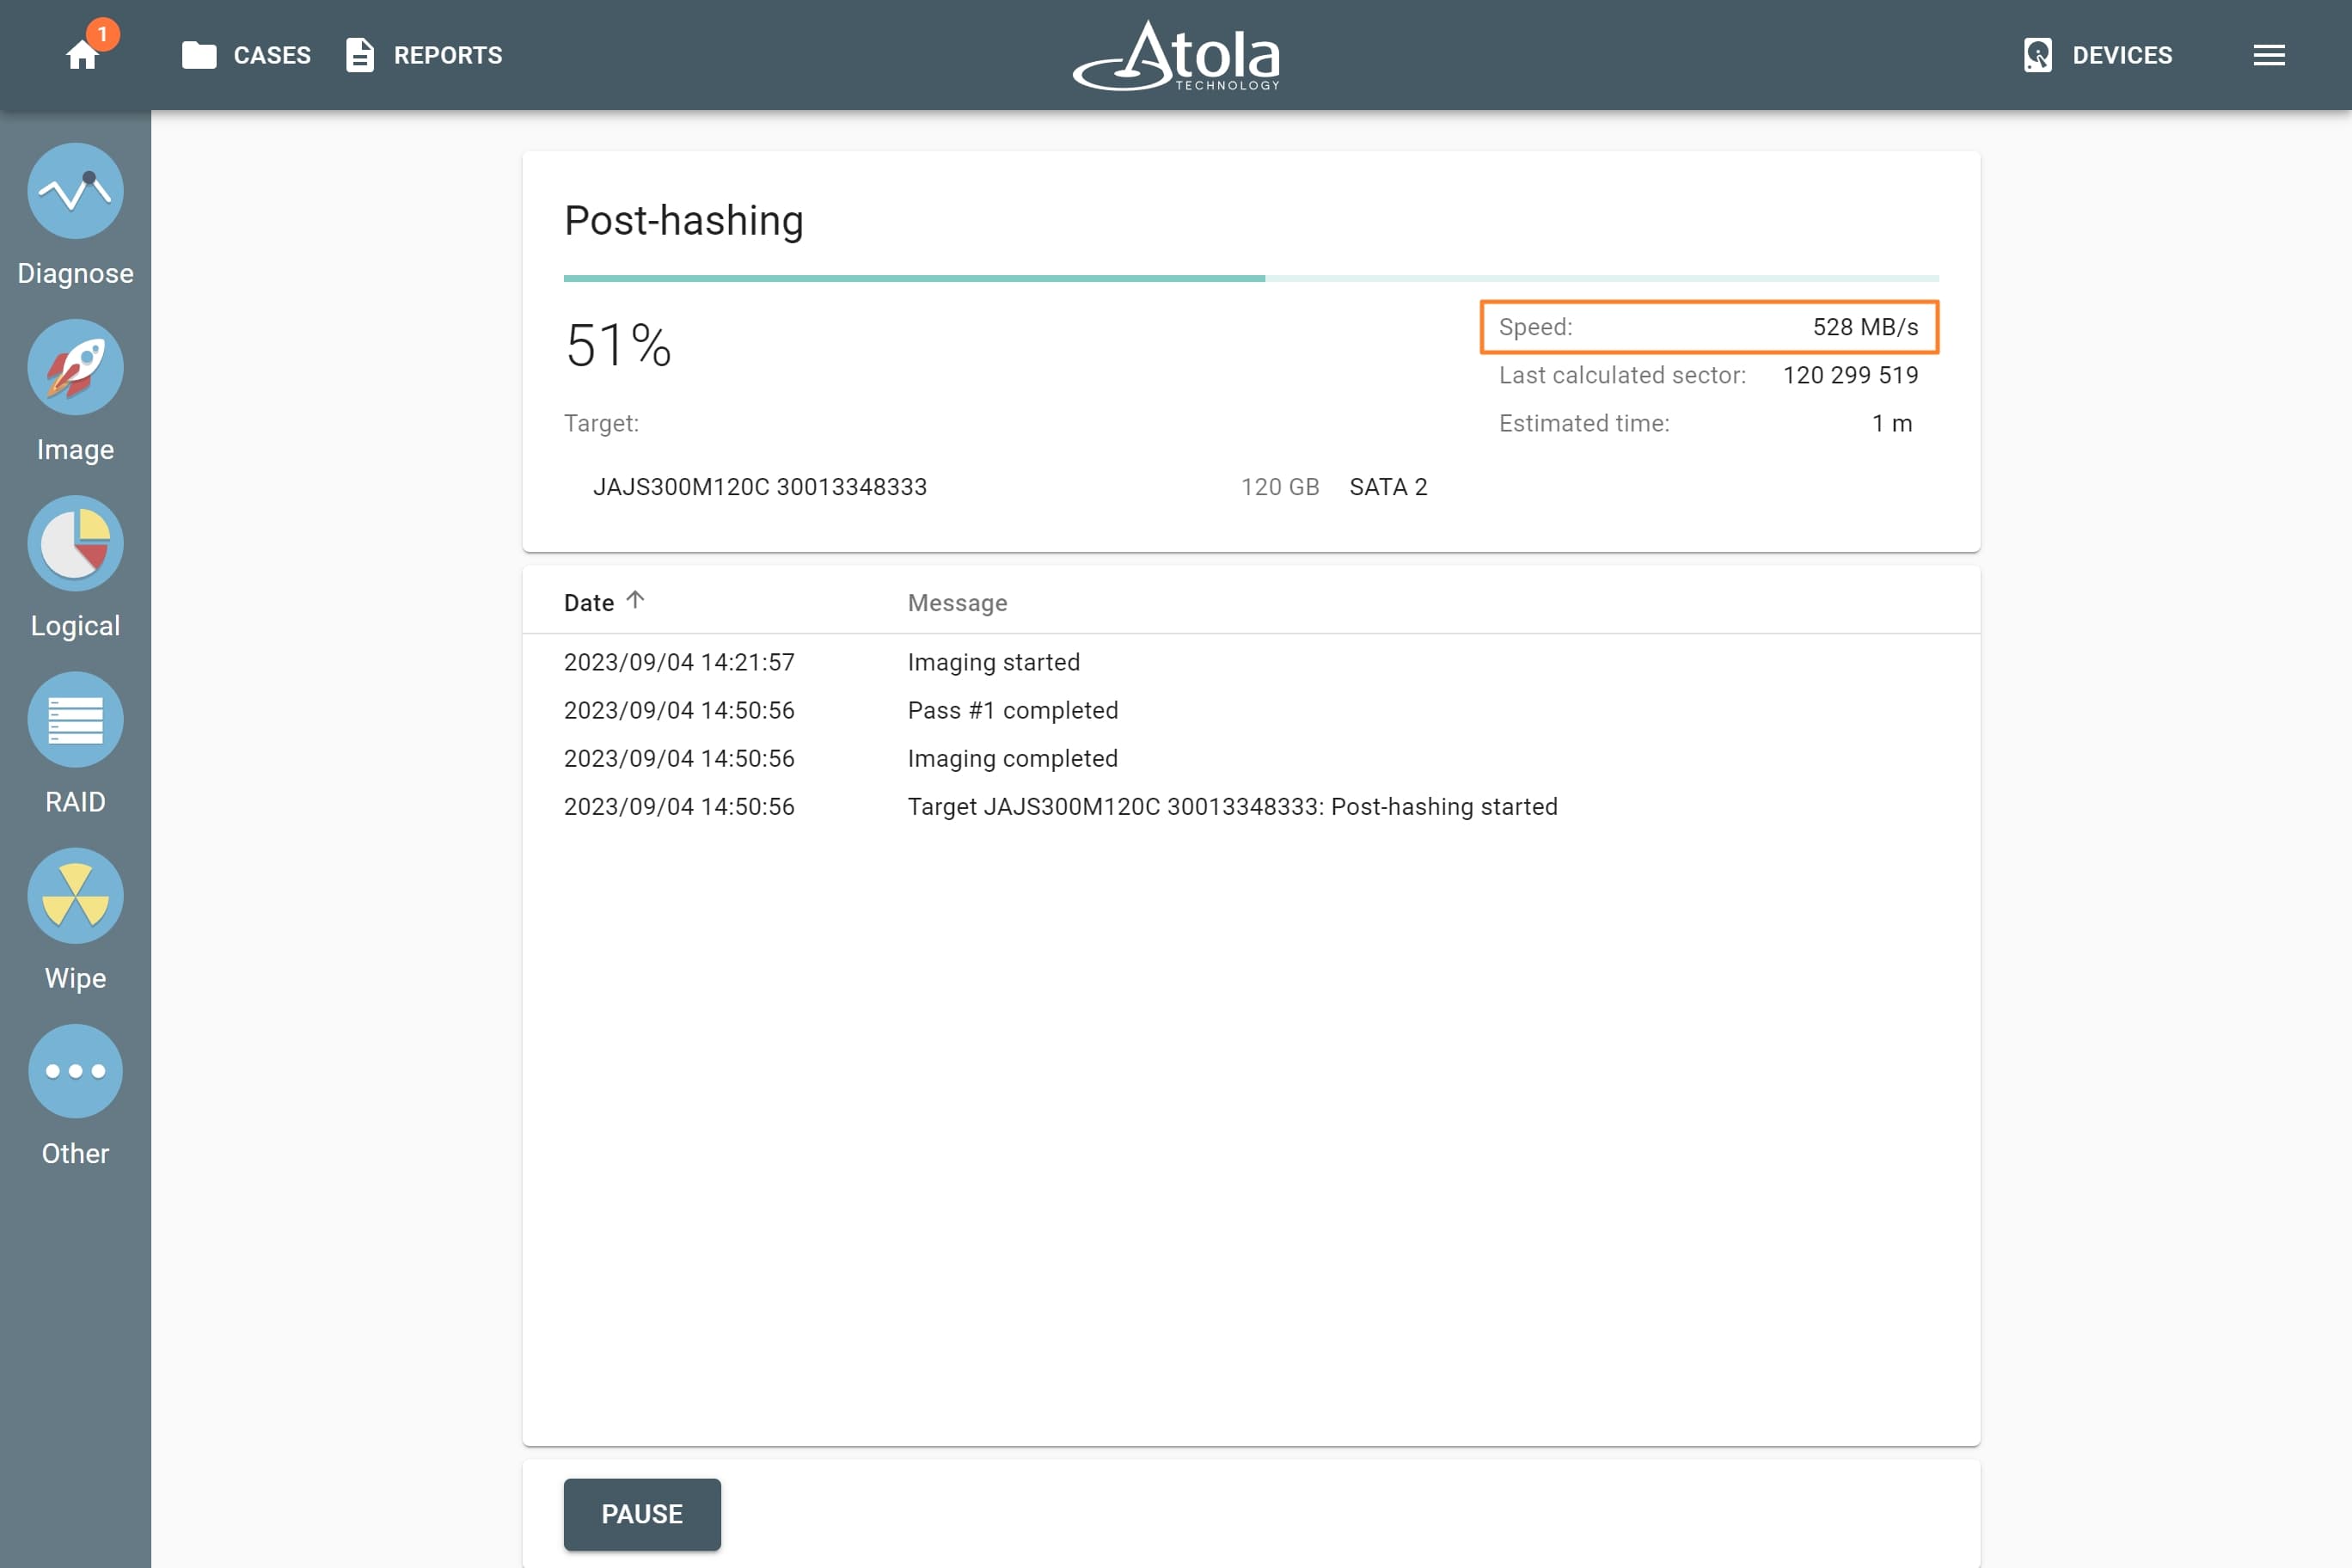
Post-hashing commences as soon as the imaging session is completed:
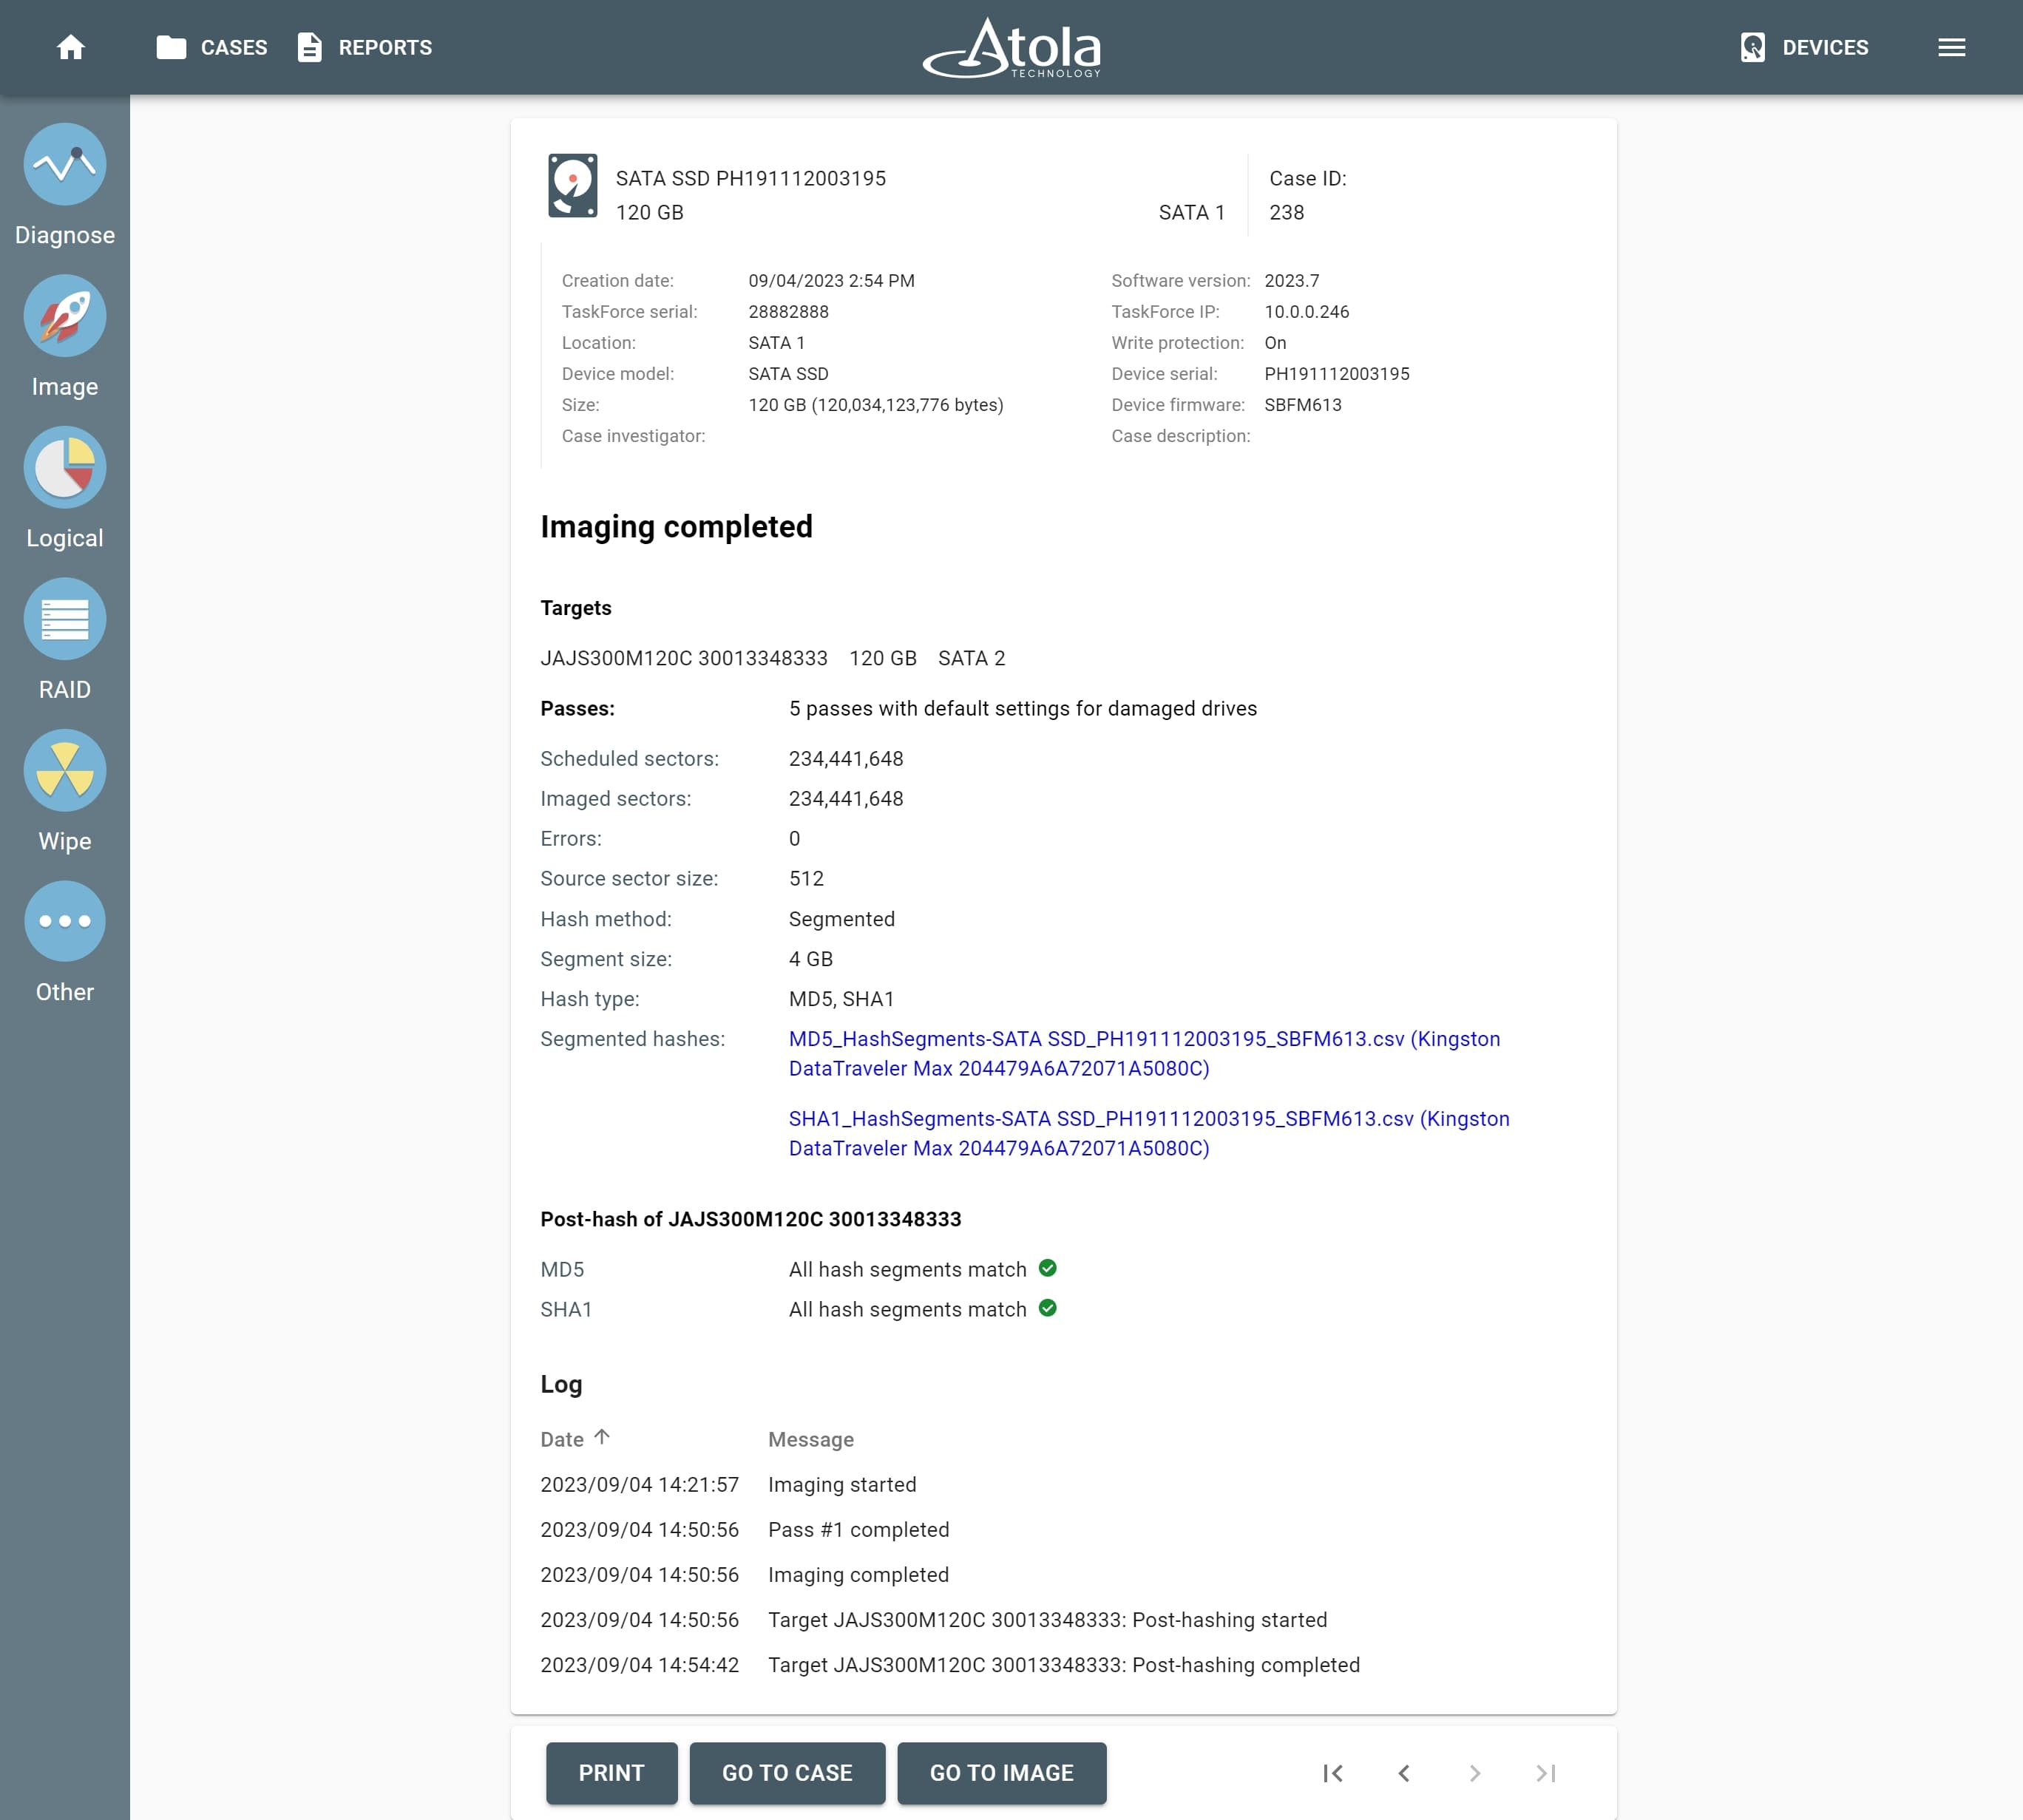
In the Imaging completed report, you can see imaging results with the link to the file with segmented hashes.
In case you select the post-hashing of the target, you also get the results of cross-checking between the hash sets of the evidence drive and the image.
Verify an image of a drive with segmented hashing
To verify an acquired image file of an evidence drive with segmented hashing, do the following:
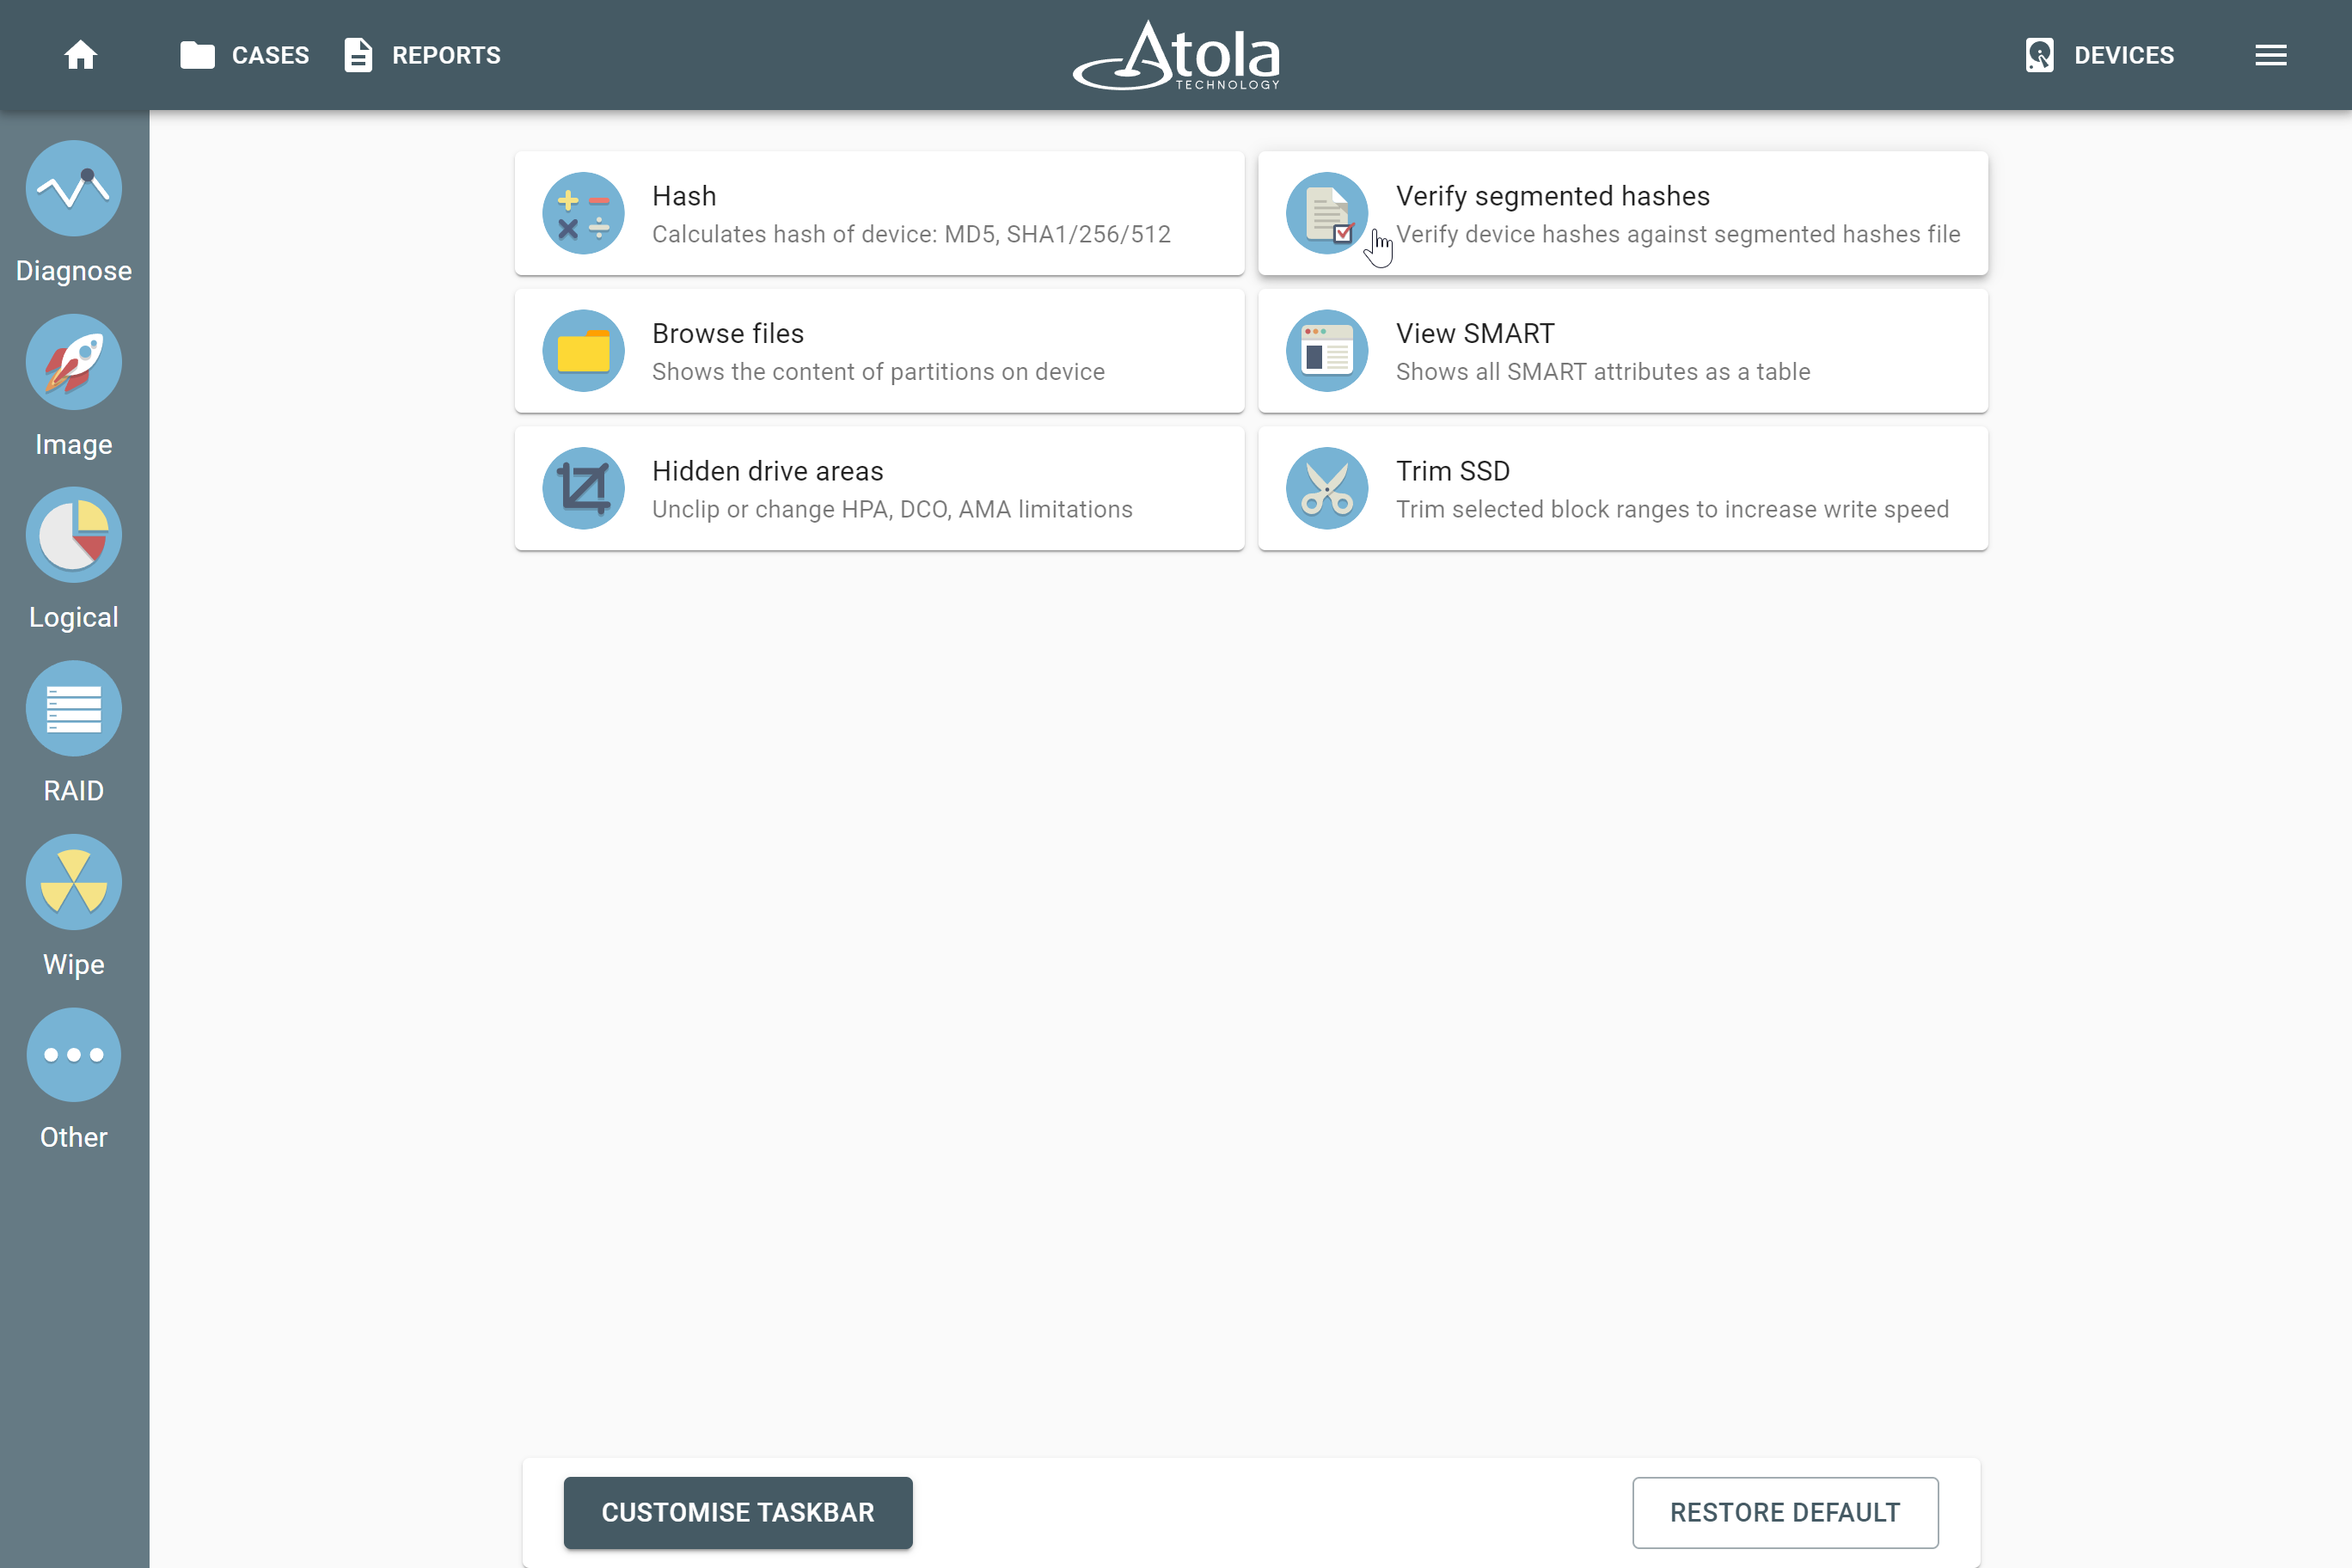
- In the TaskForce window, go to Other > Verify segmented hashes.
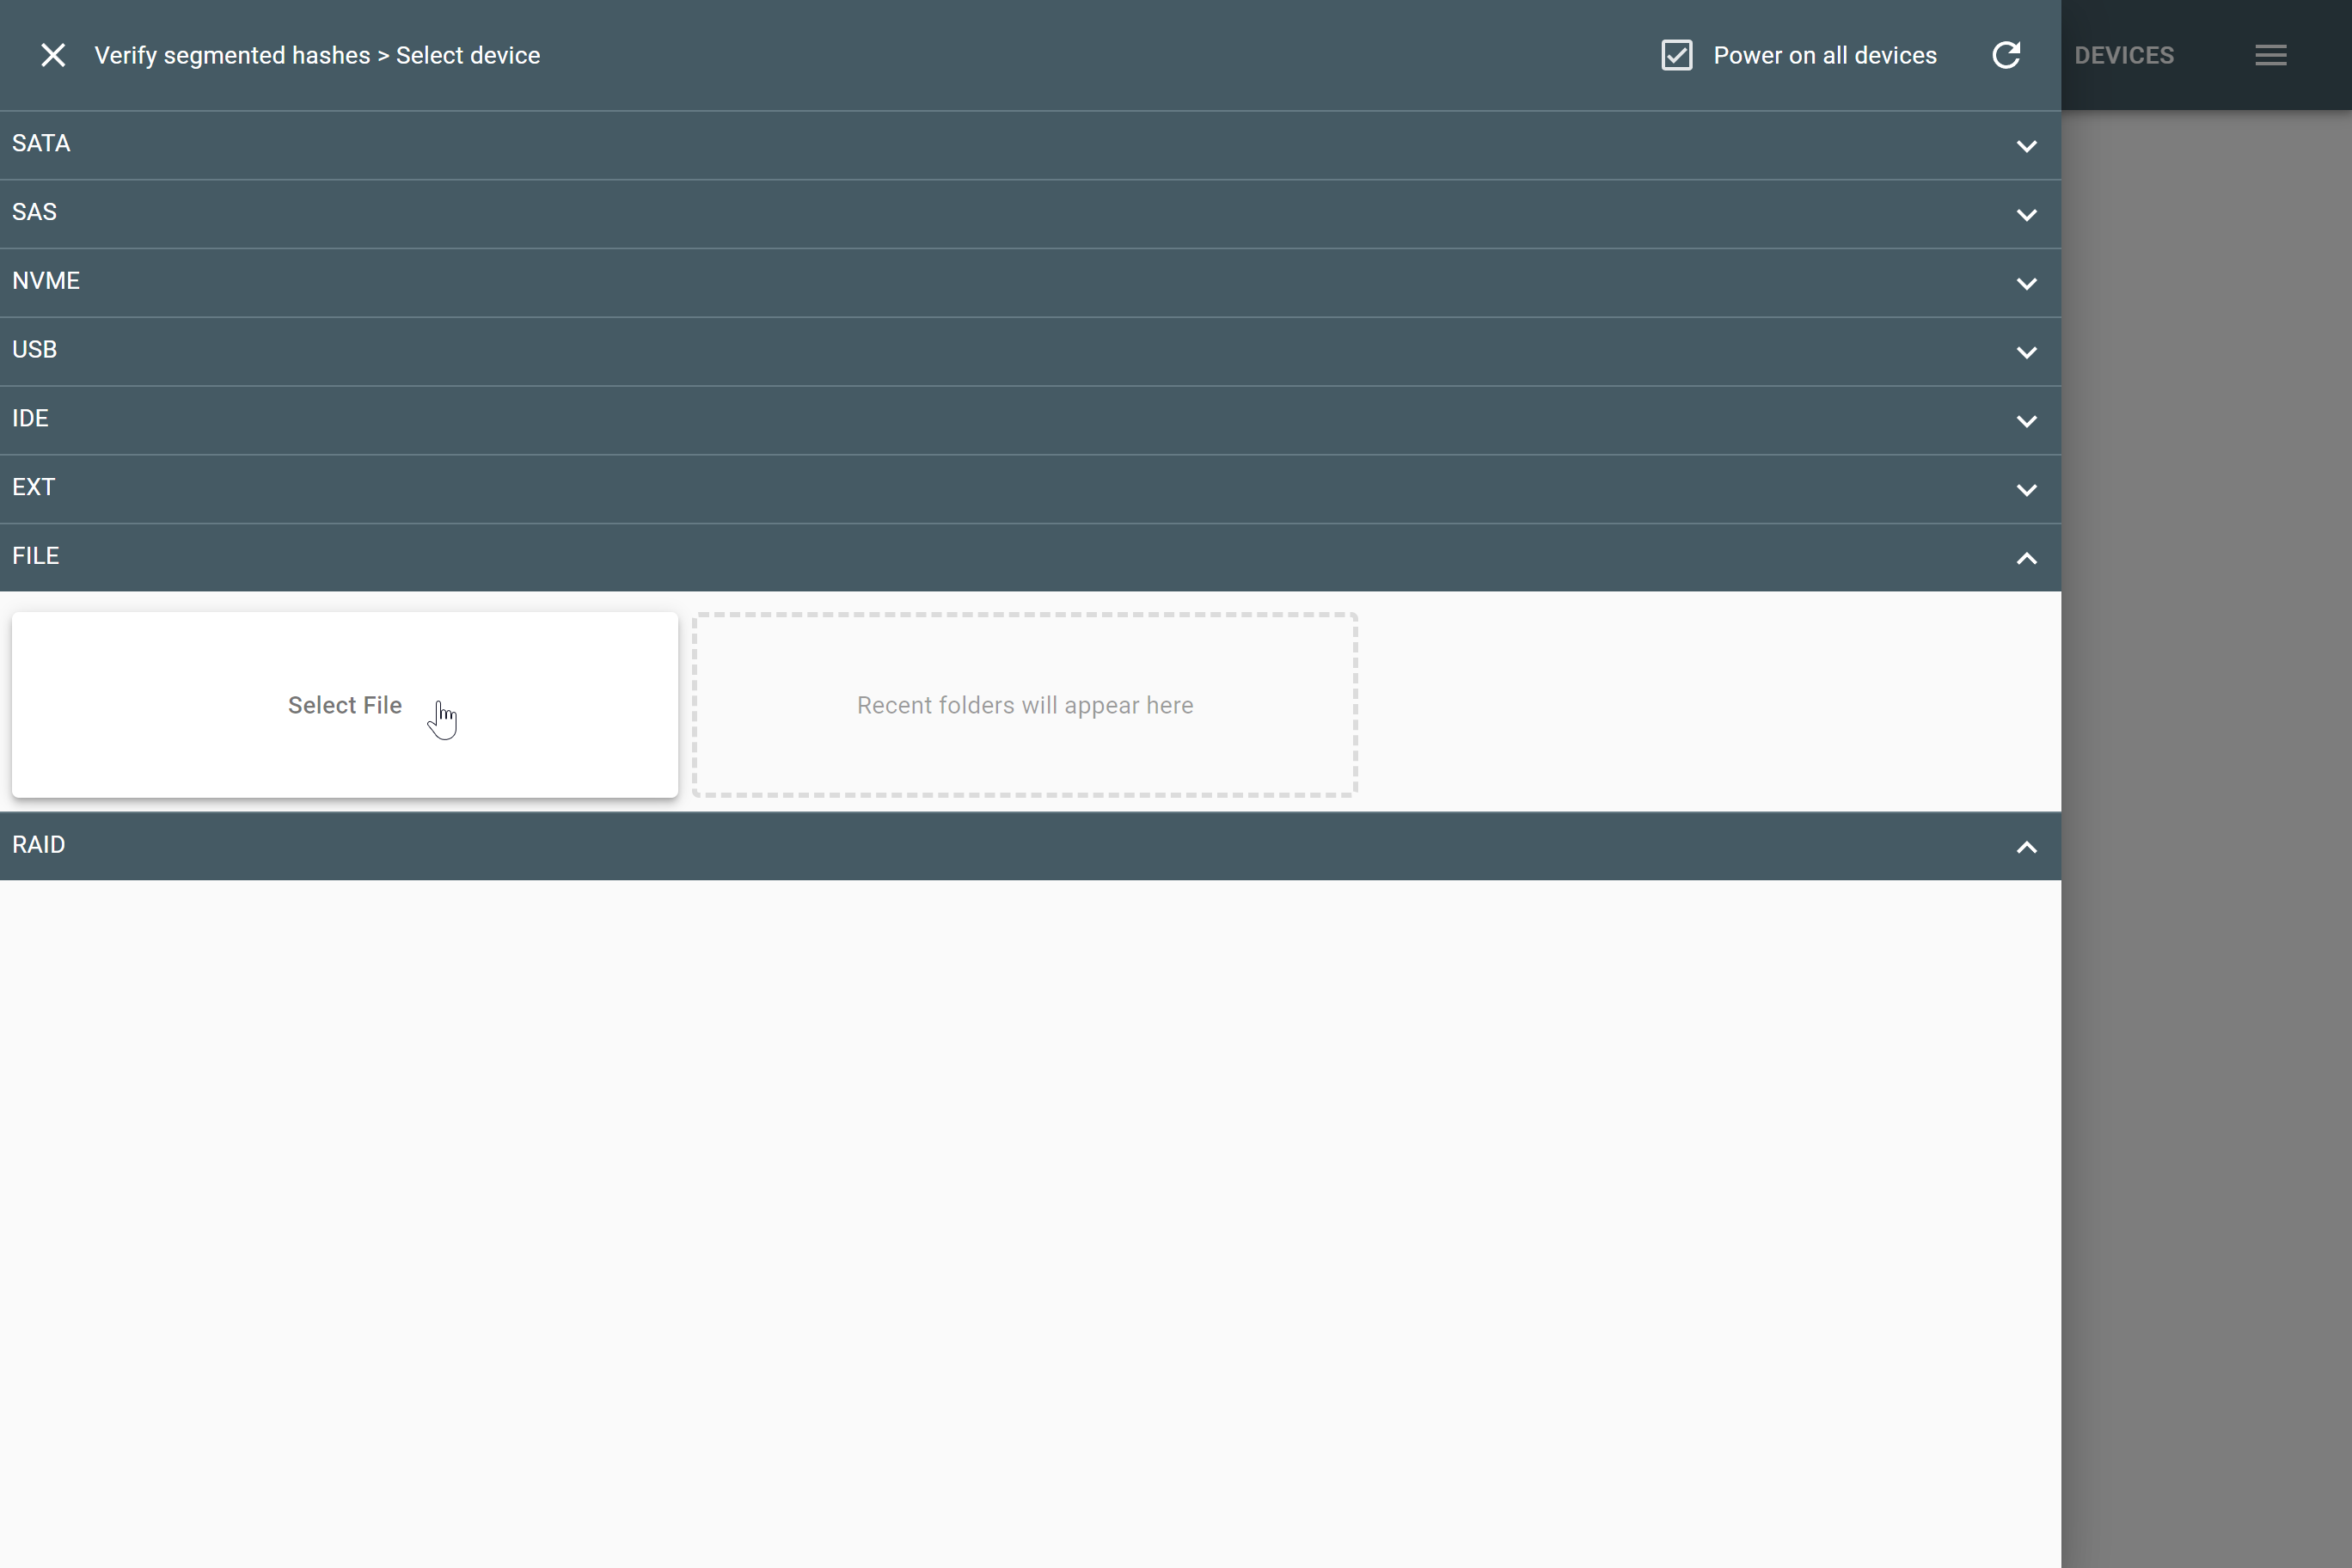
- The Select device panel opens. Expand the File section and click Select file.
- Select an image file you want to verify. The E01, AFF4 and Raw formats are supported.
-
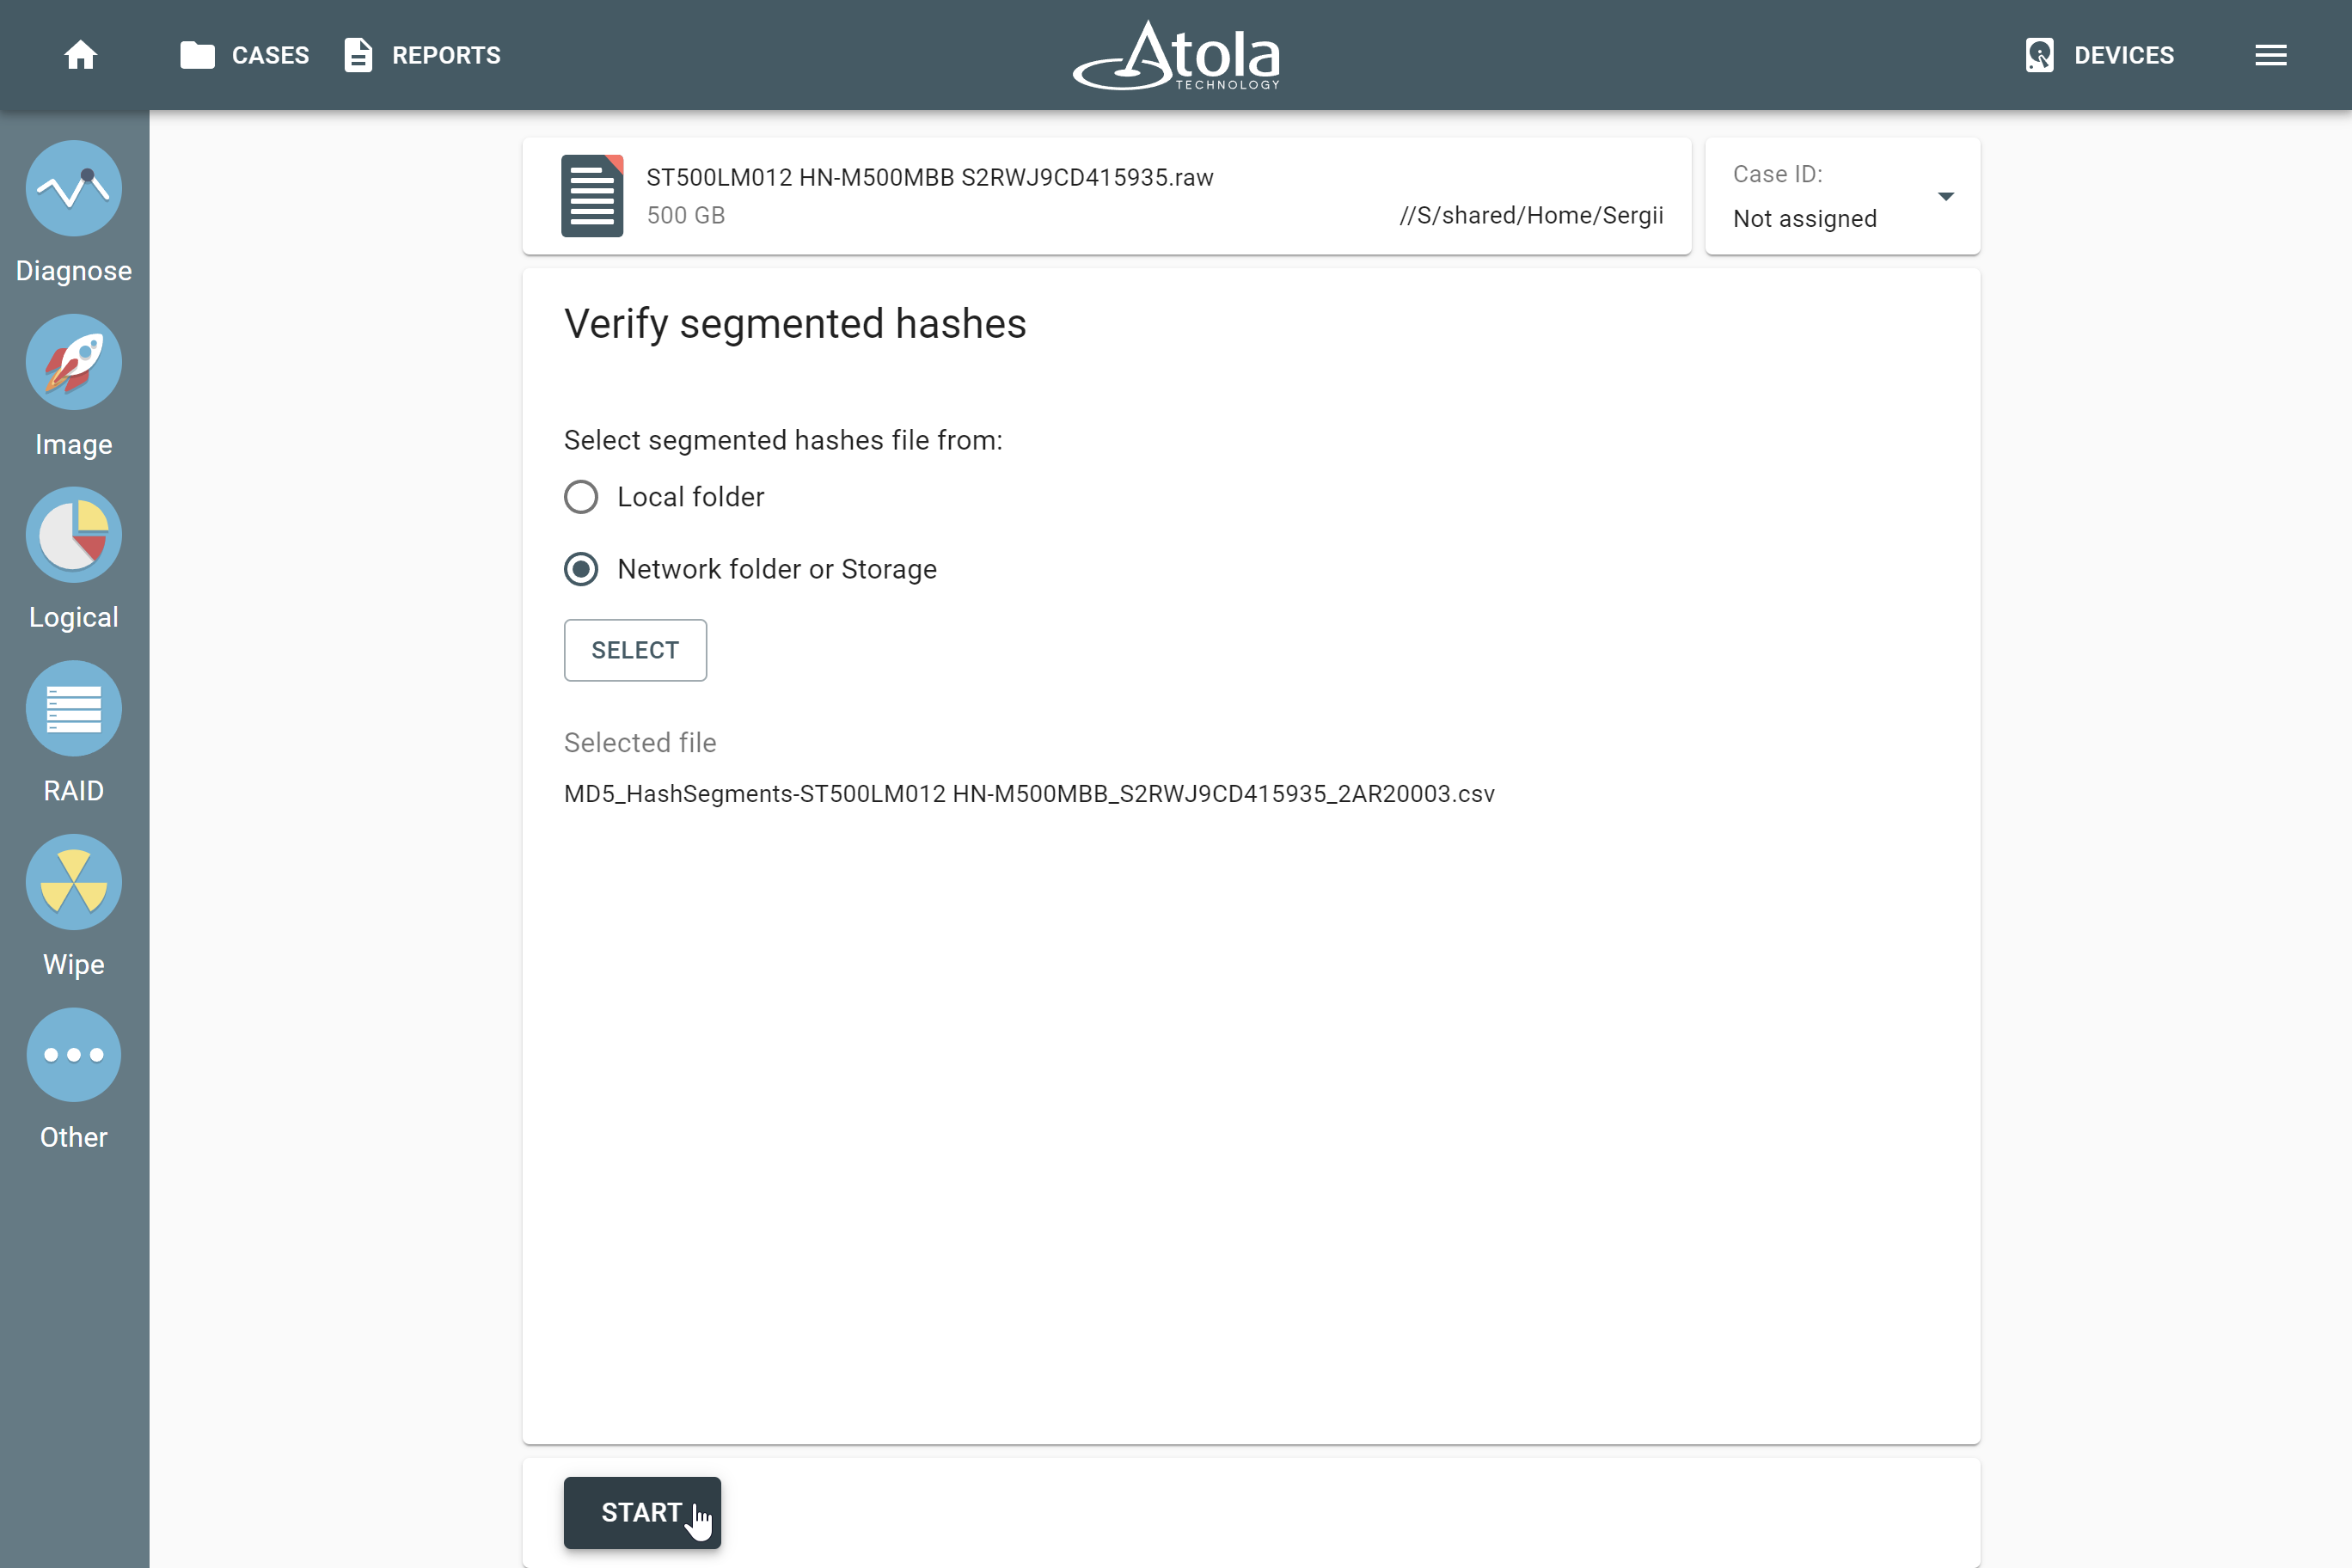
Select the CSV file with segmented hashes that relates to your image file:
- Choose either Local folder or Network folder or Storage.
- Click Select.
- Find and select a CSV file with segmented hashes.
- Click Start.
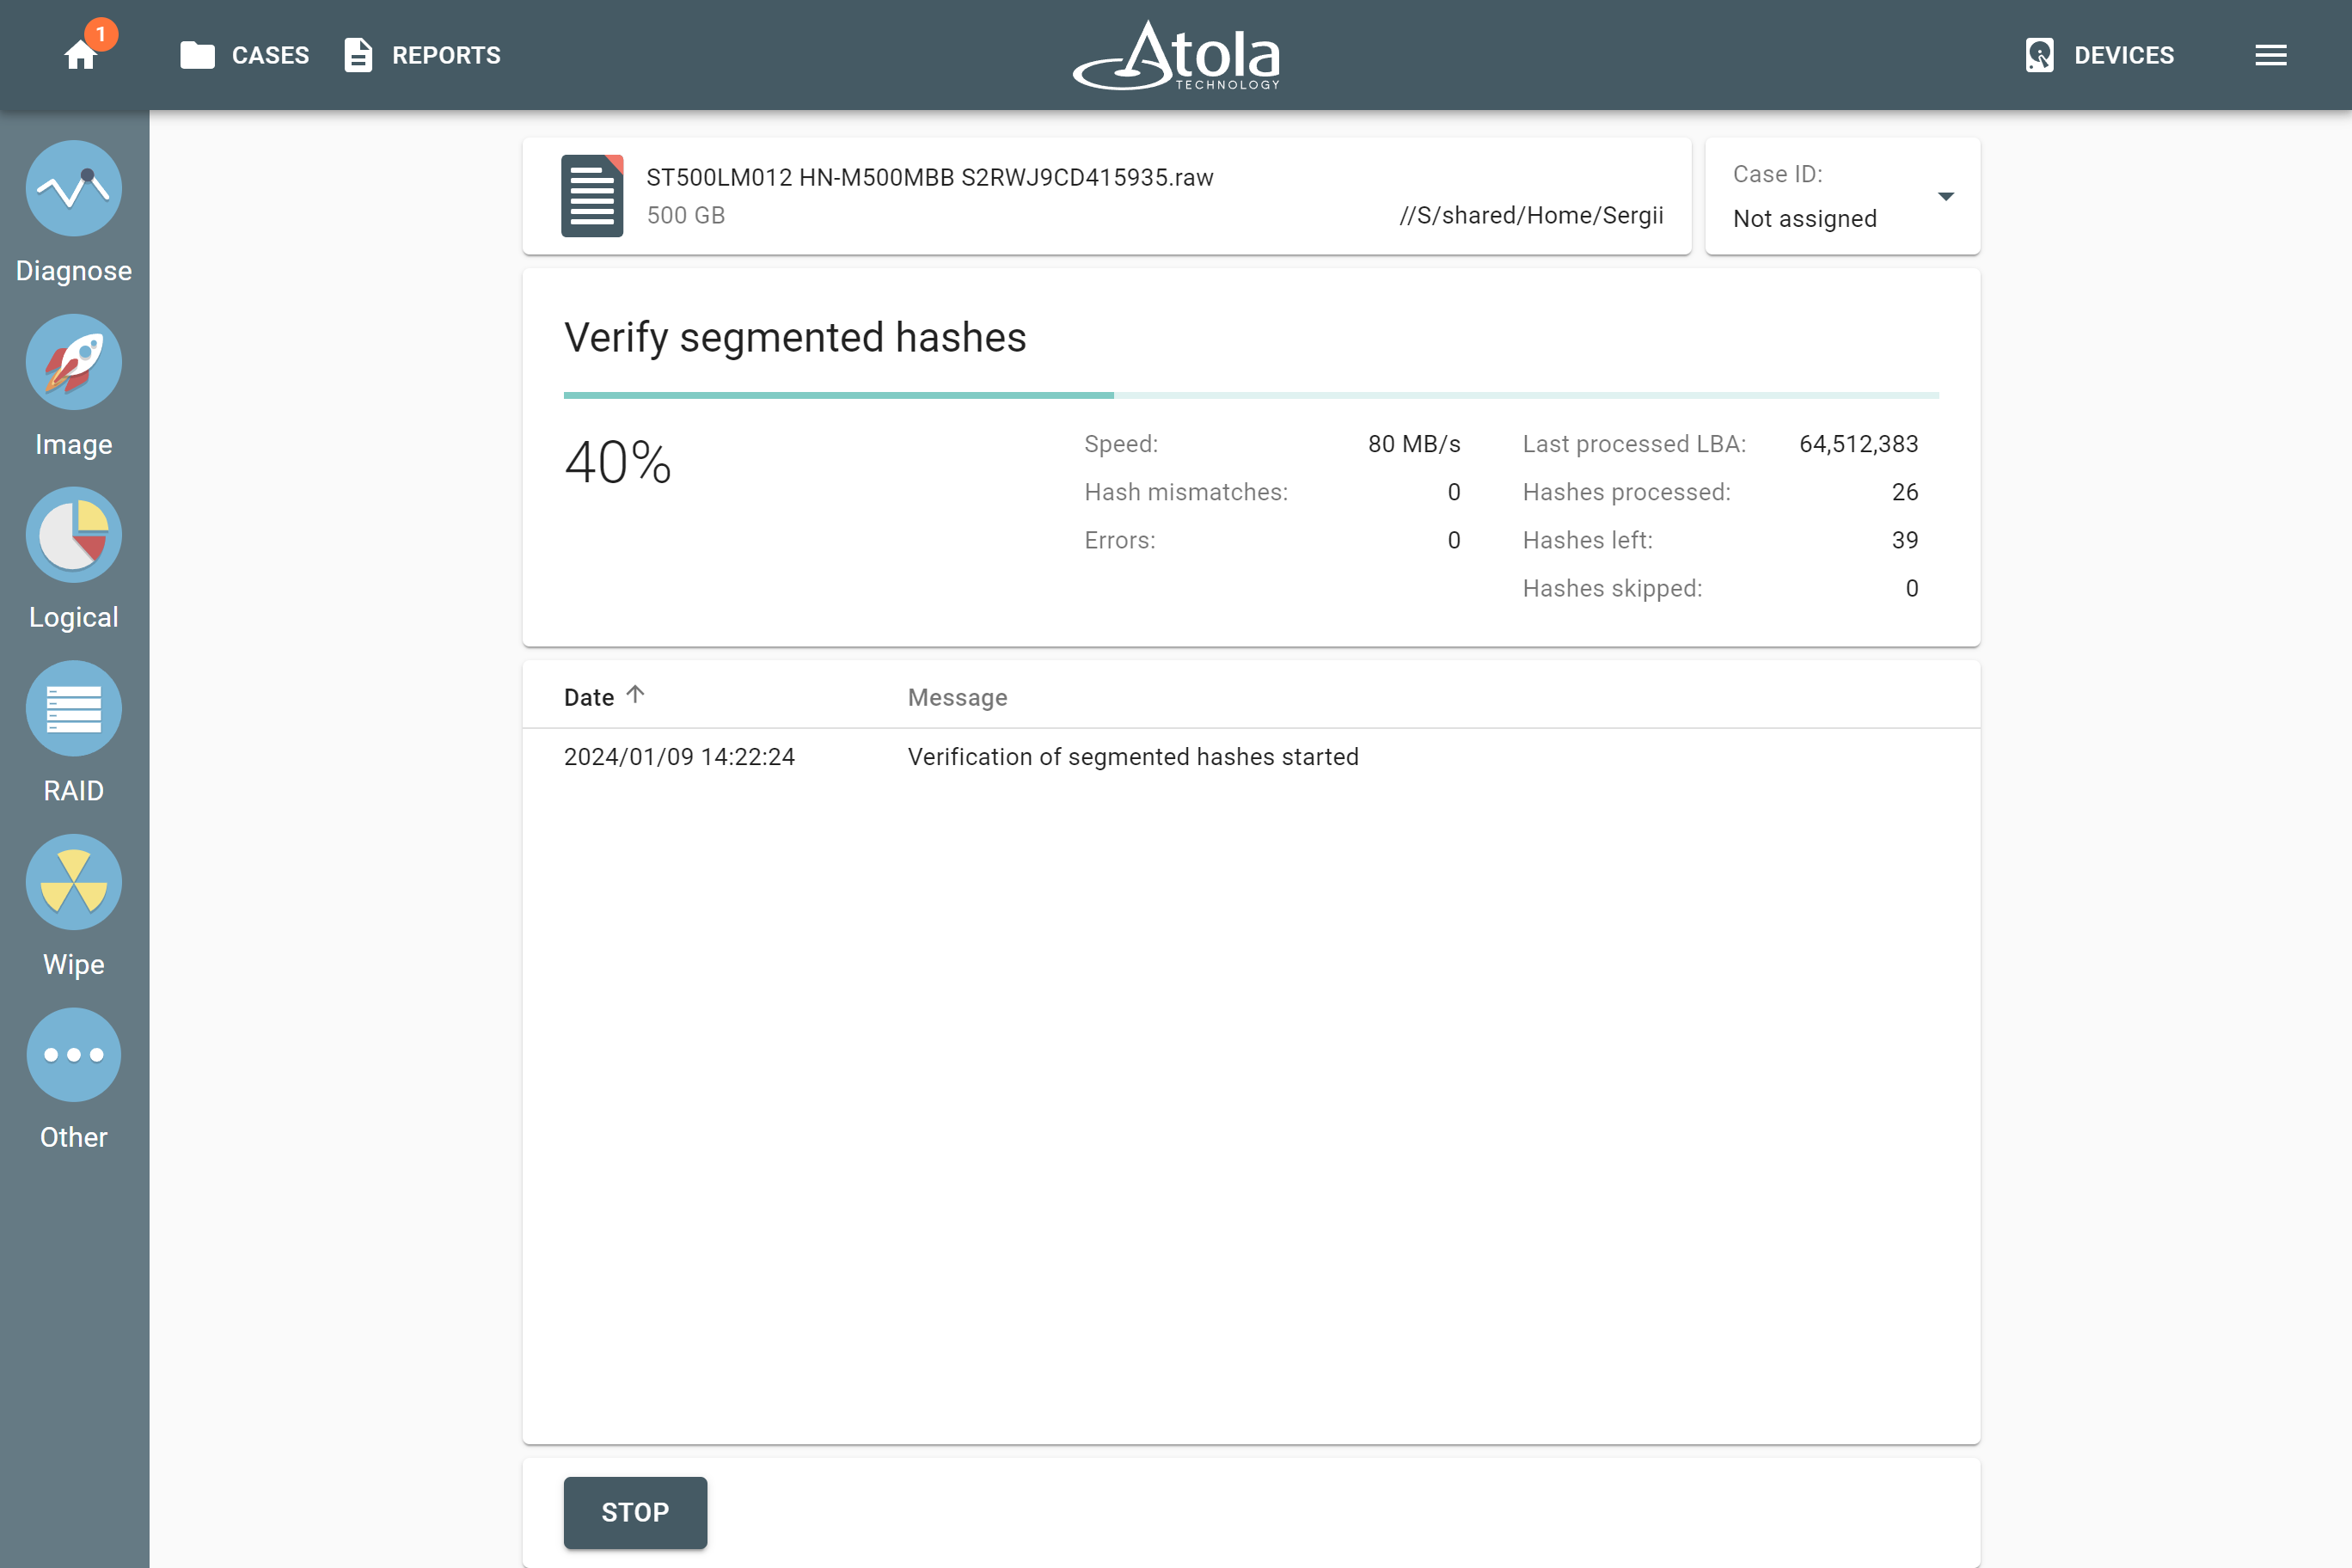
- TaskForce 2 starts the data verification process.
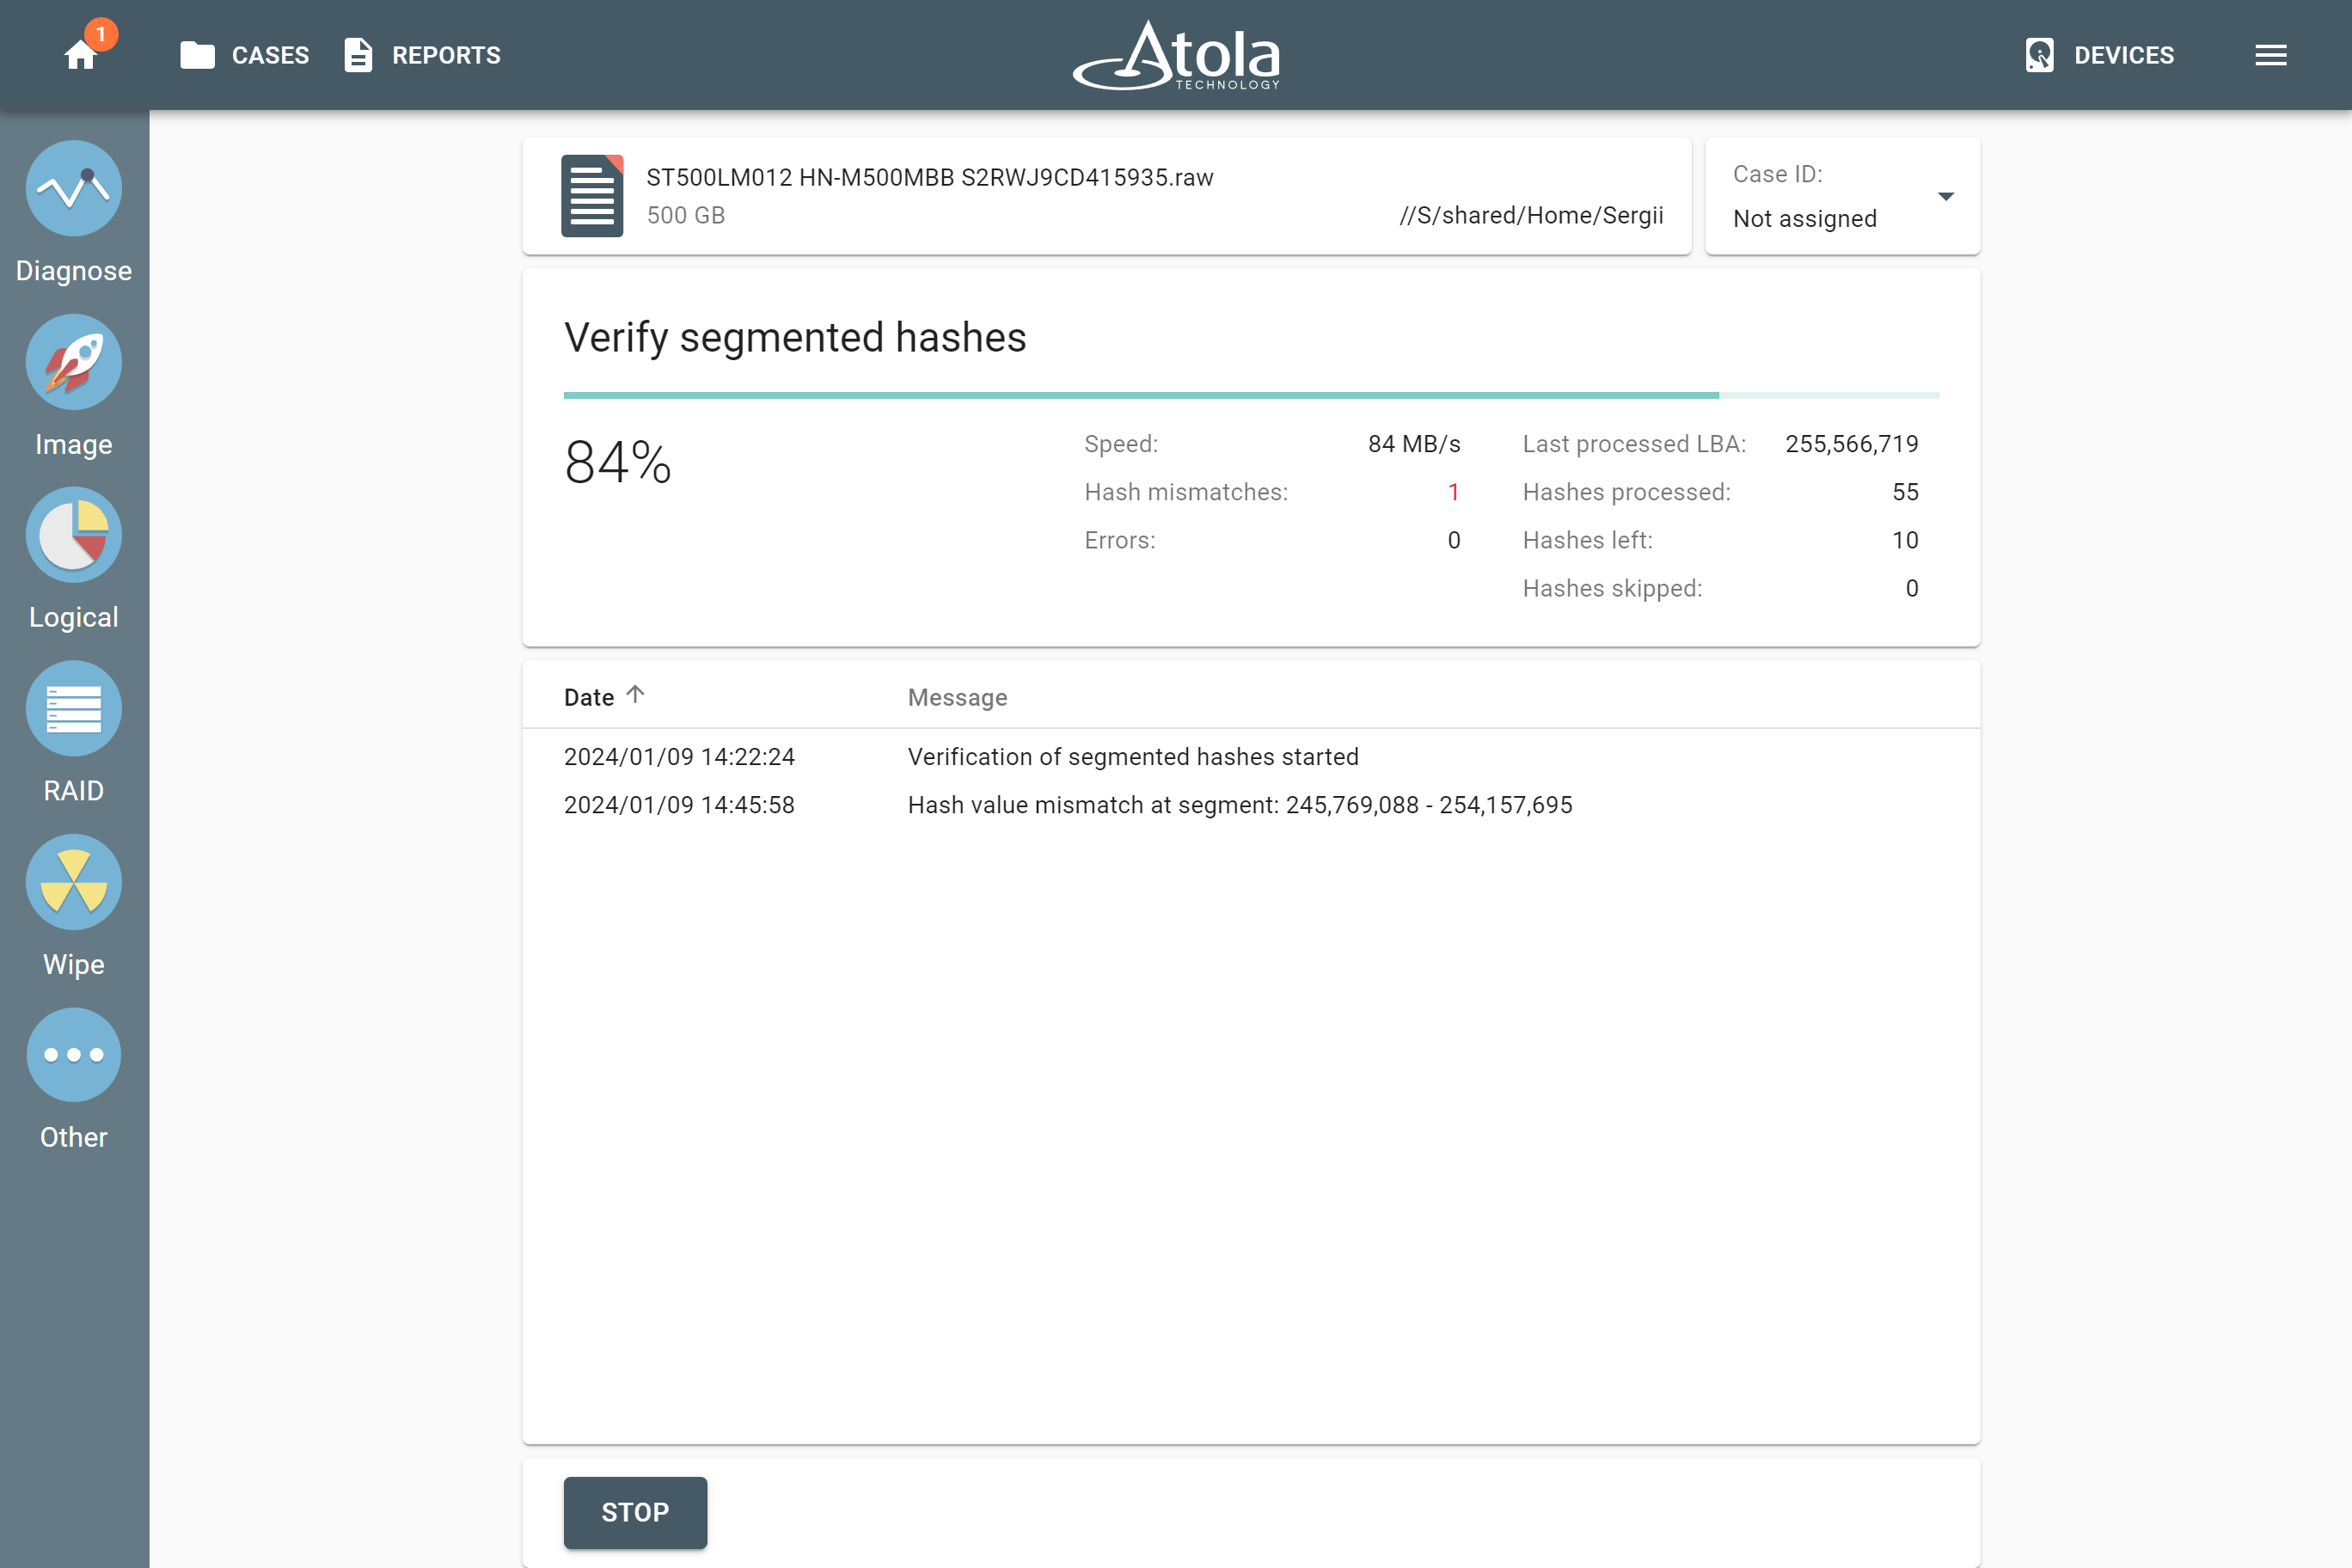
- If TaskForce encounters a hash value mismatch, it is reflected in the Hash mismatches counter and in the event log, with Start and End LBA of the respective segment.
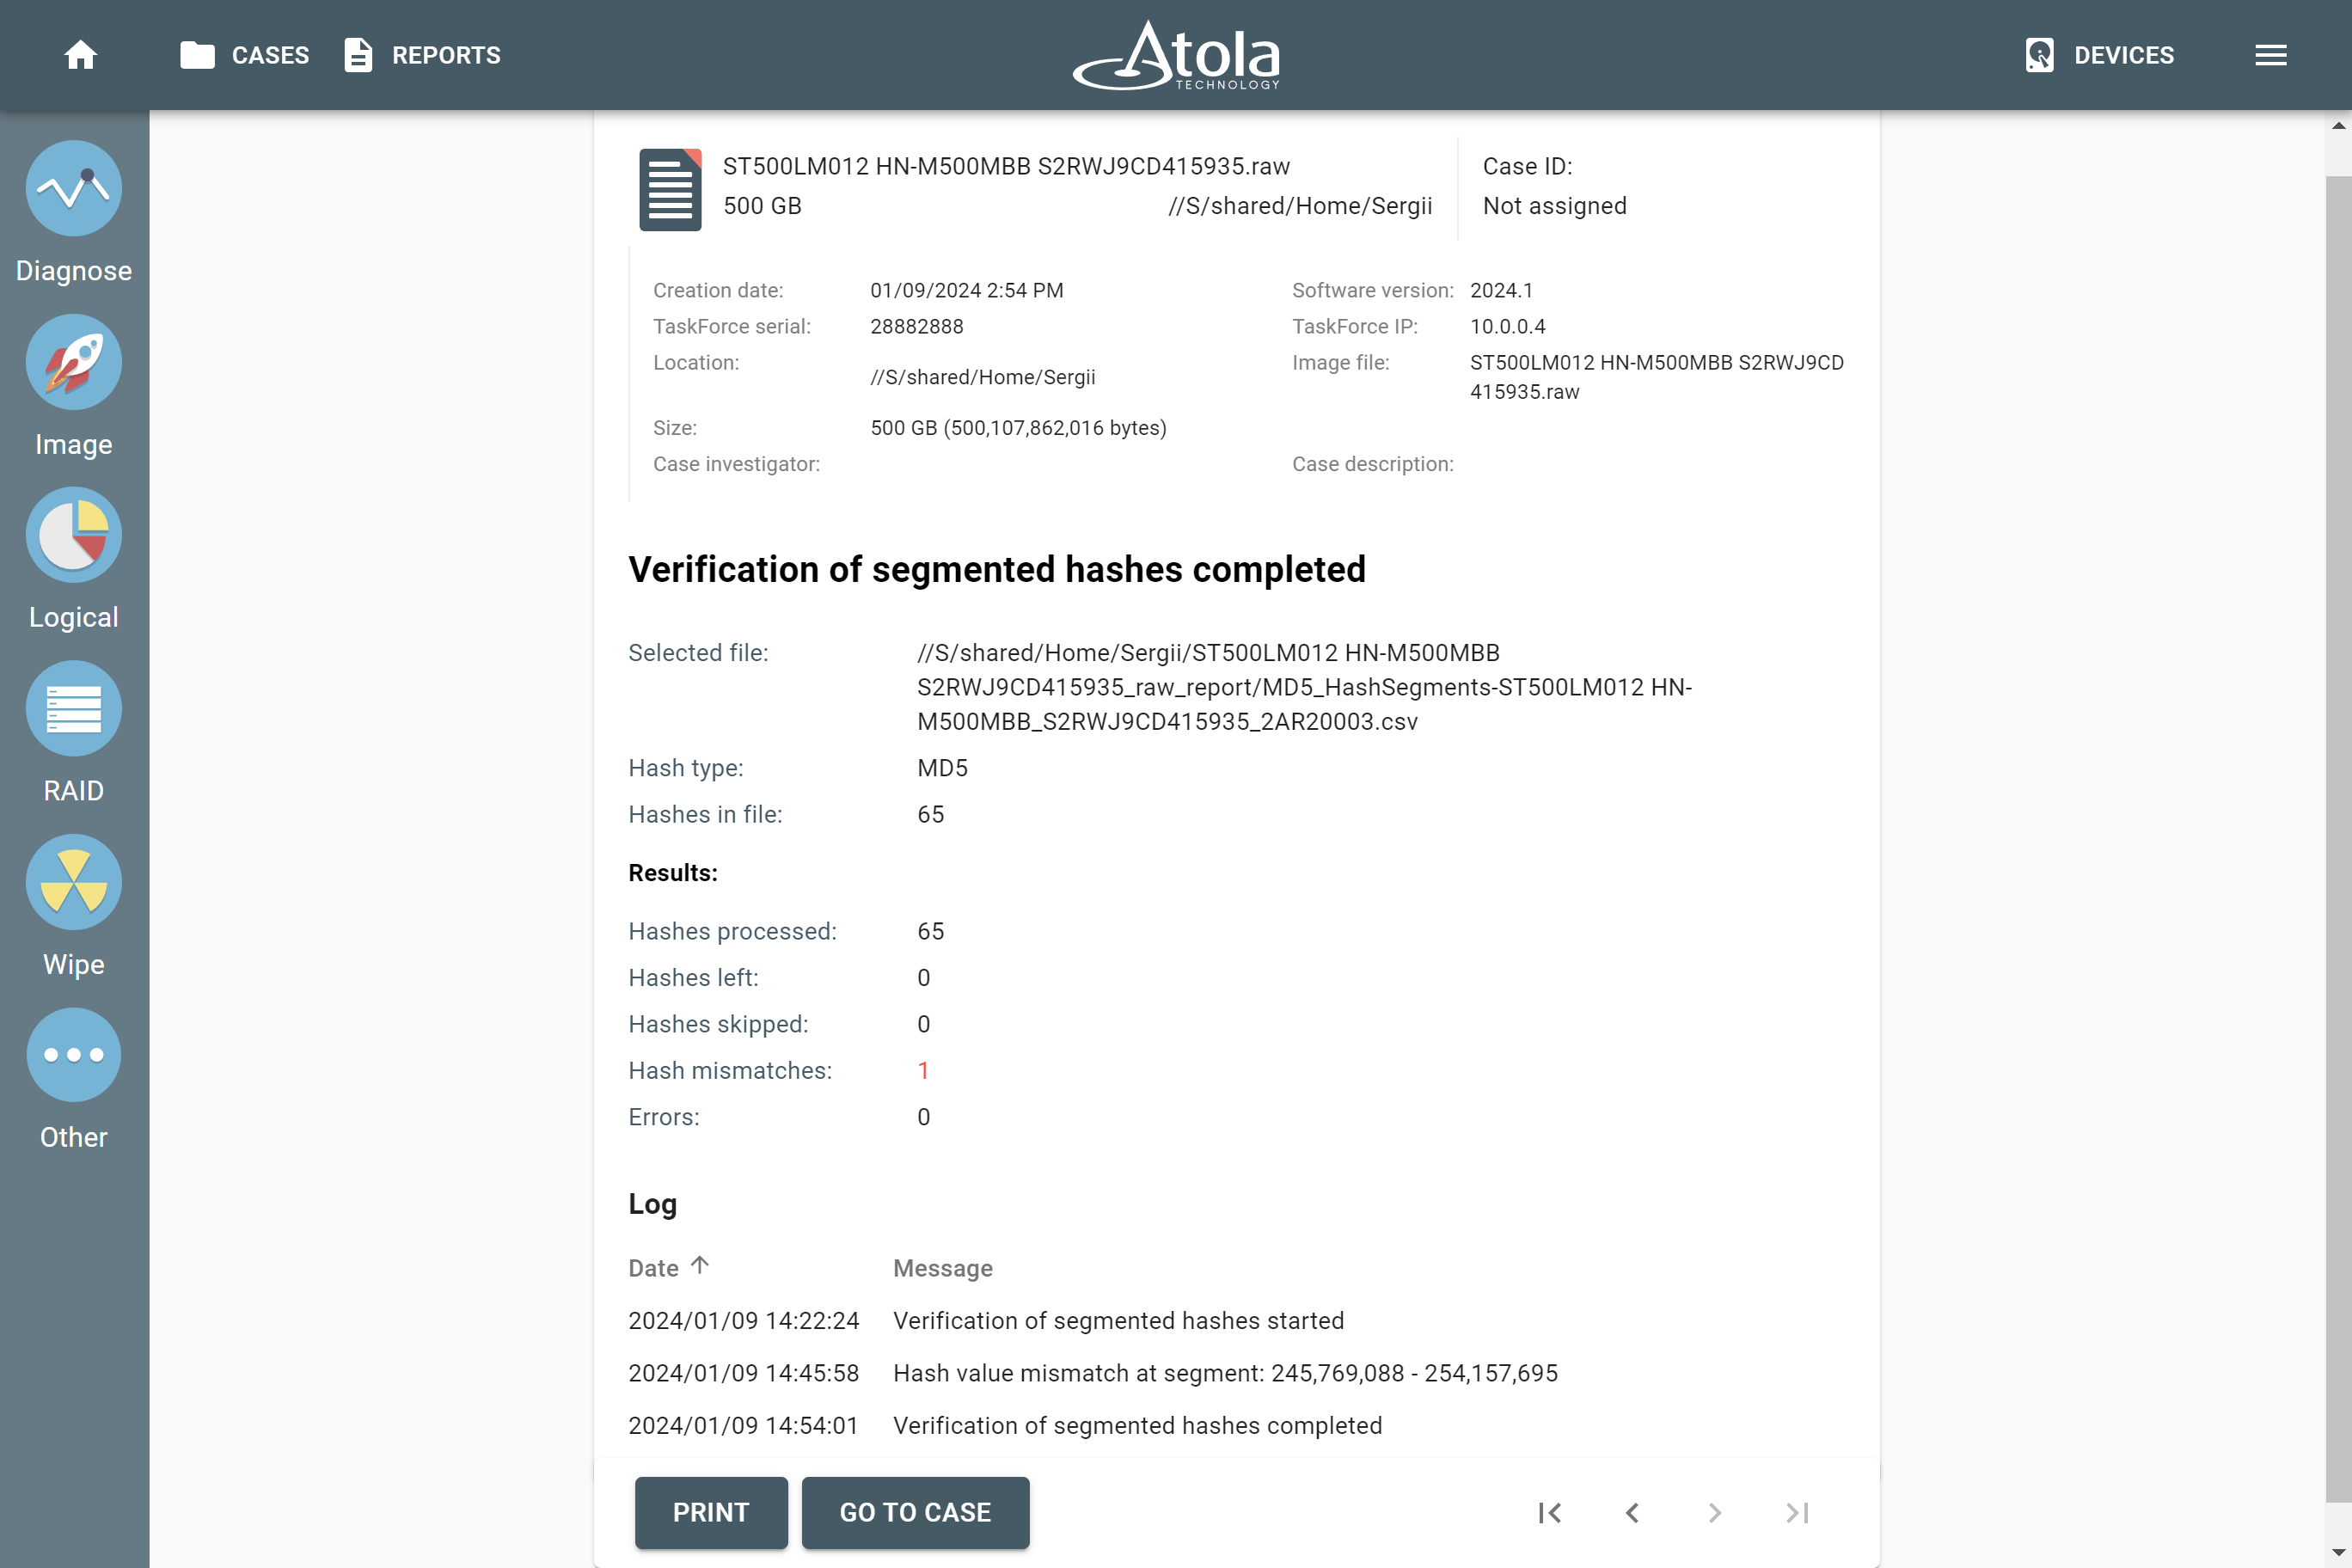
- Once verification of segmented hashes is completed, TaskForce 2 generates a detailed report about its results. The report contains information about the verified image and the file with its segmented hashes, hash type, number of processed hashes and found mismatches if any.
