RAID 10: reassembly and imaging
RAID 10 arrays combine mirroring and striping techniques. This helps these arrays have higher performance and better resiliency against data loss or corruption. TaskForce 2 uses both of these advantages: it images data faster from a RAID 10 compared to other RAID types and rebuilds the image using the data redundancy in case of disk failure.
TaskForce's configuration autodetection module will help identifying the type and other parameters of a RAID 10, should there be a lack of information about the given RAID and its configuration.
To mount an unknown RAID 10 and image it:
- On the left in the TaskForce main window, click RAID.
- Select the drives that make up the RAID array and click Continue.
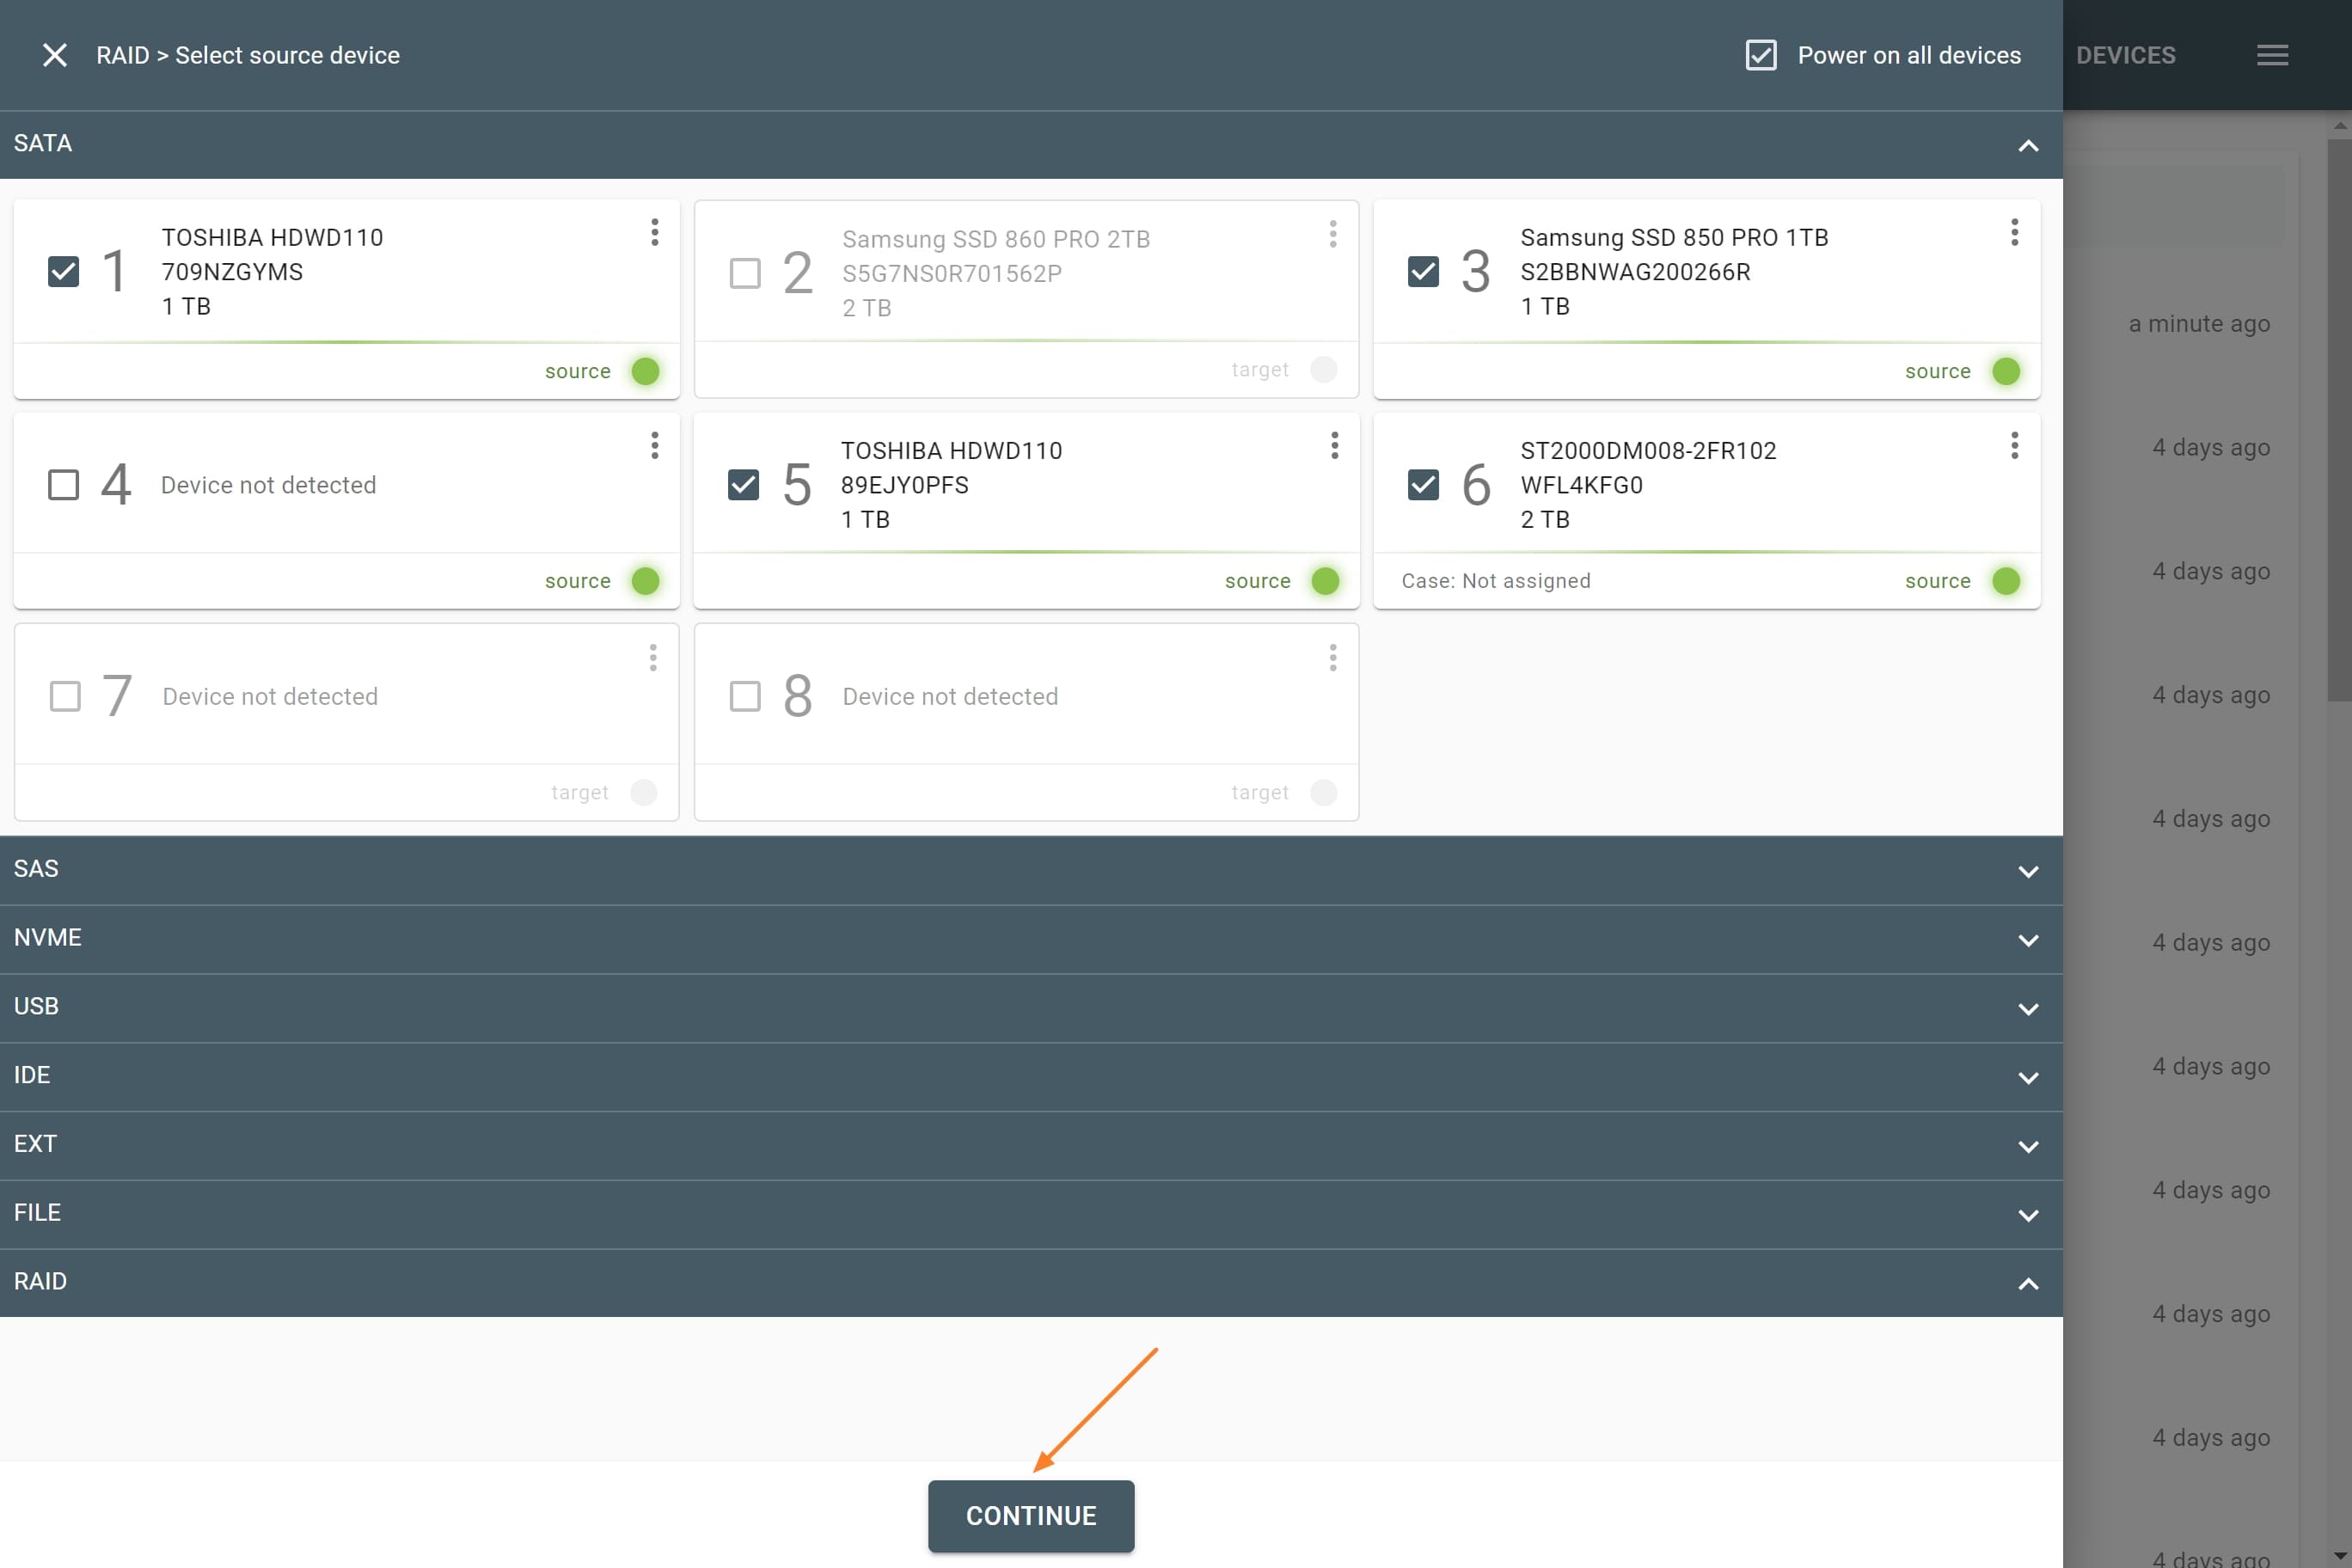
RAID 10. Selecting RAID members.
- When the autodetection module (in the right part of the screen) comes up with a suggestion of RAID configuration, click Apply.
If you know the type and parameters of the RAID, you can enter them manually in the drop-downs.
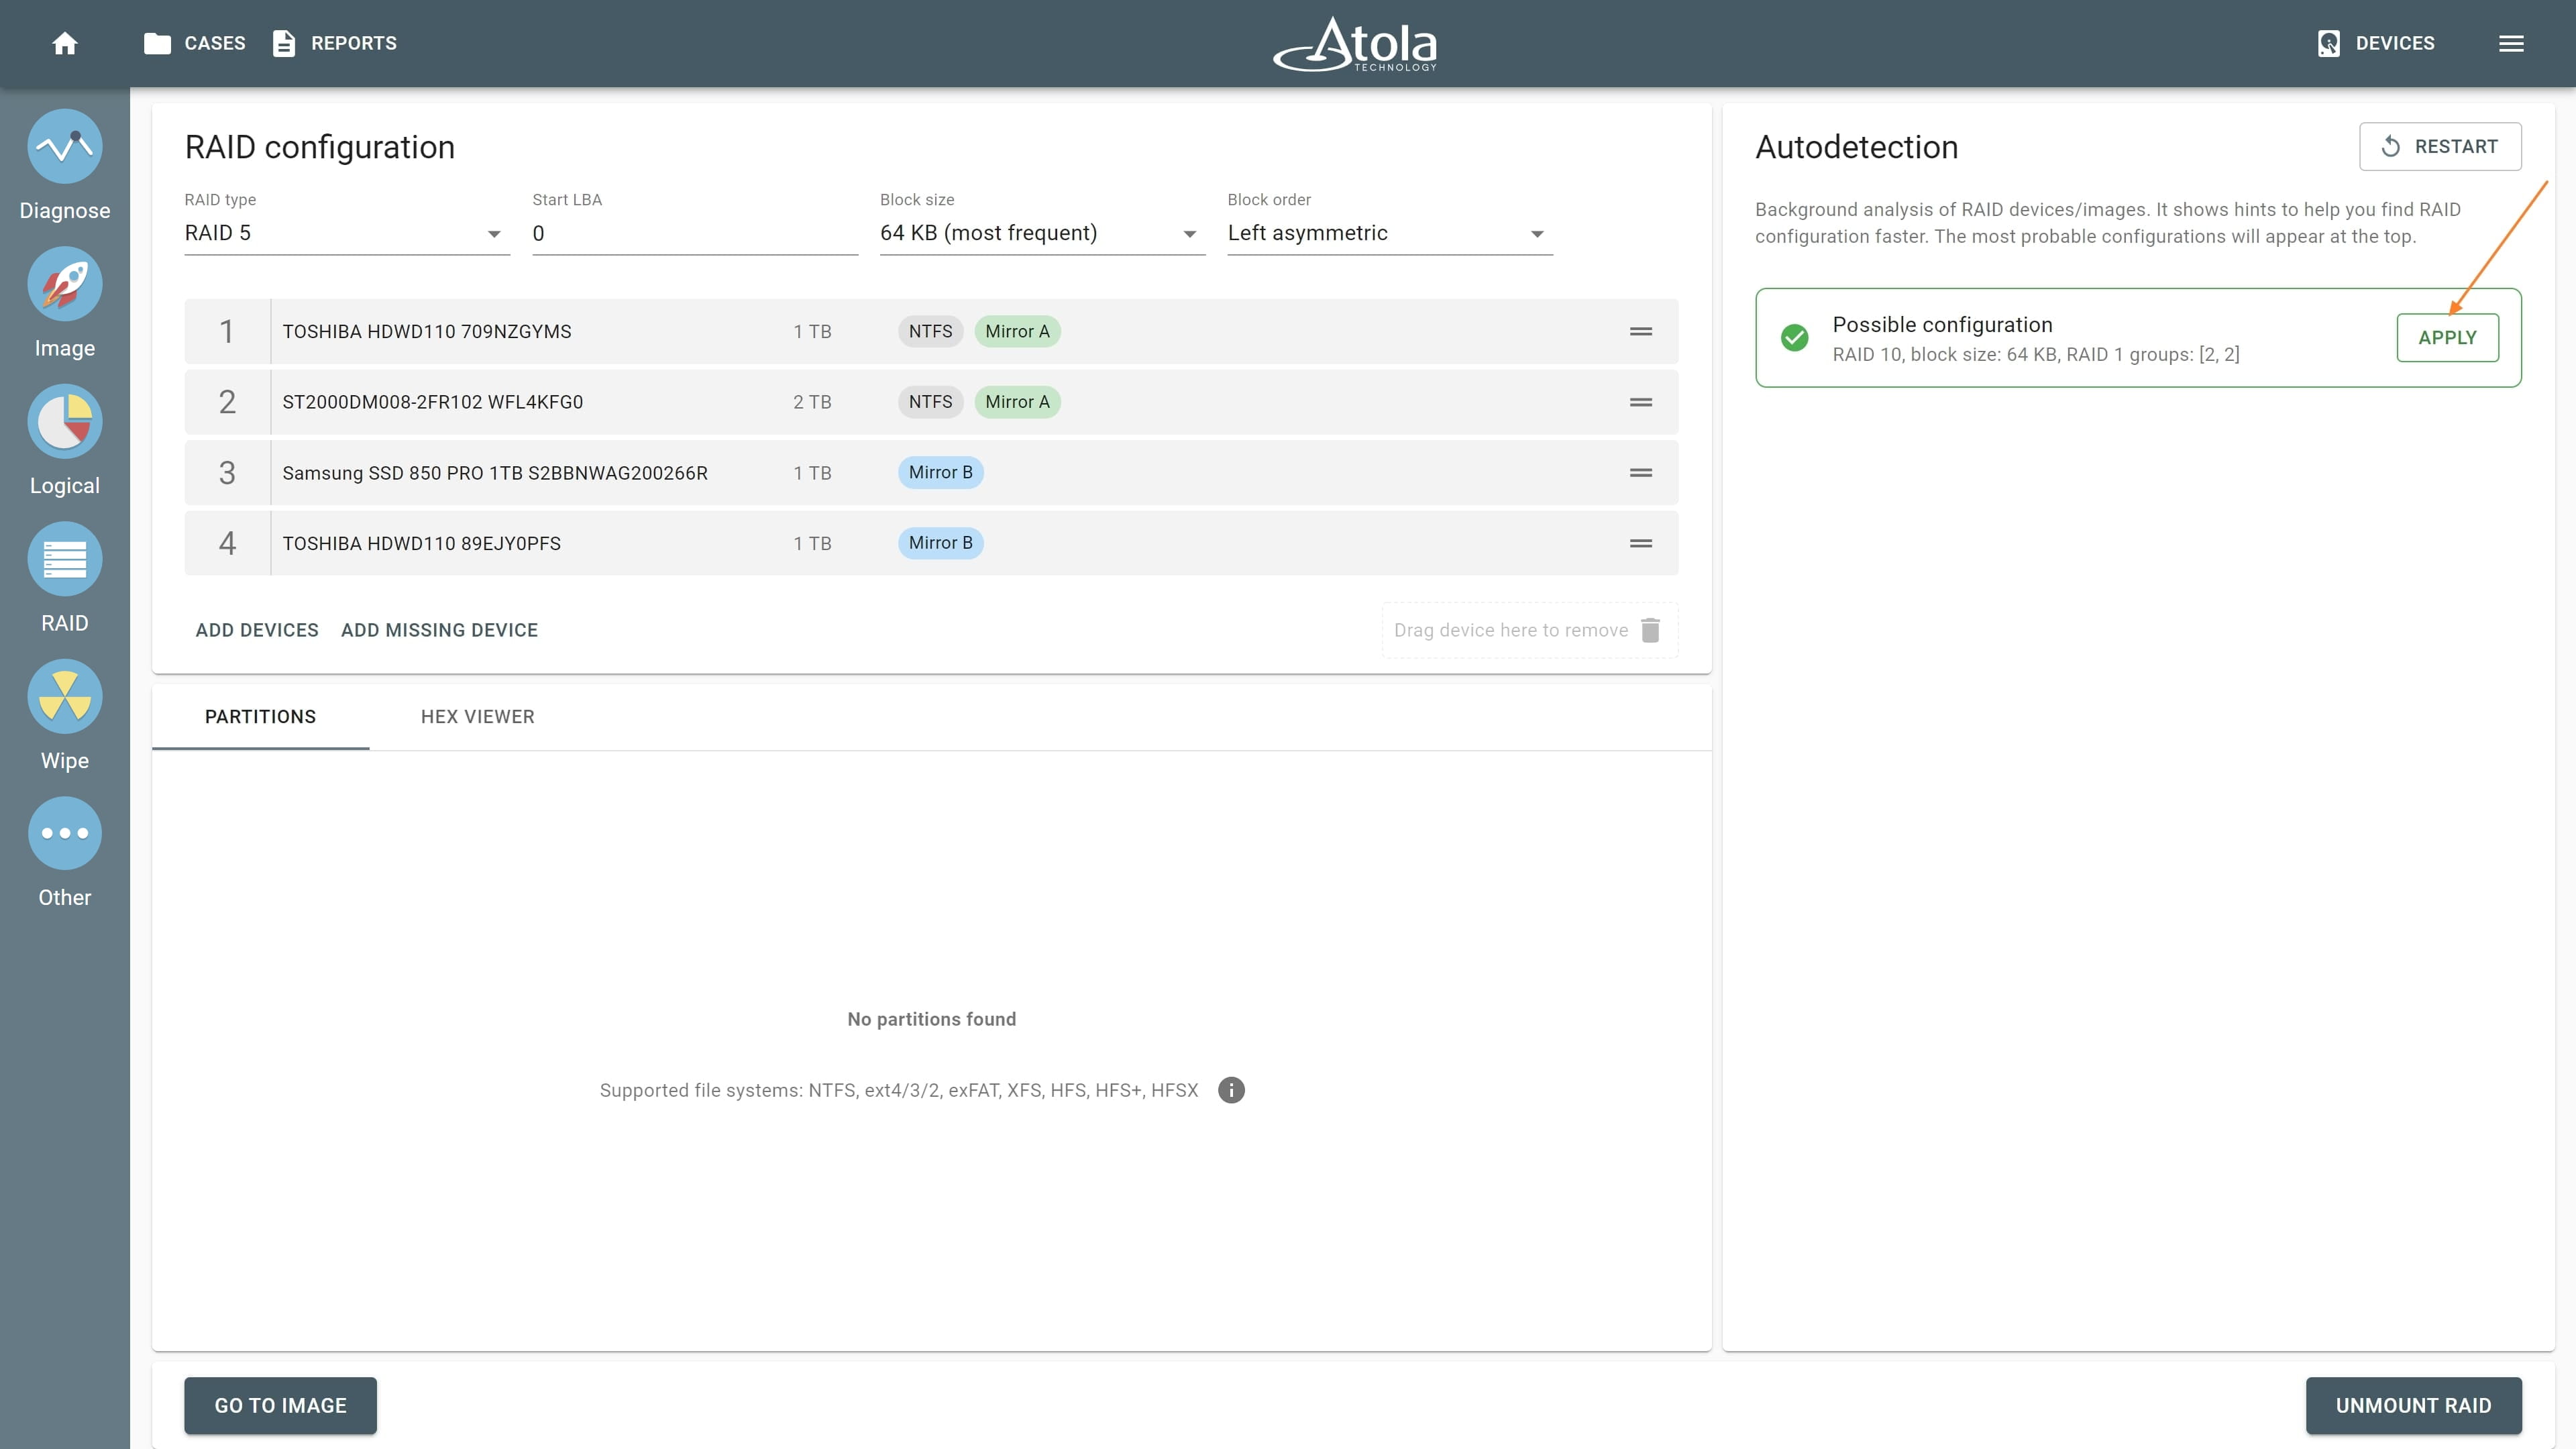
RAID 10. Applying the detected configuration.
- TaskForce 2 arranges the drives into respective groups and applies other RAID settings to mount the partitions, which you can browse through in the Partition preview below.
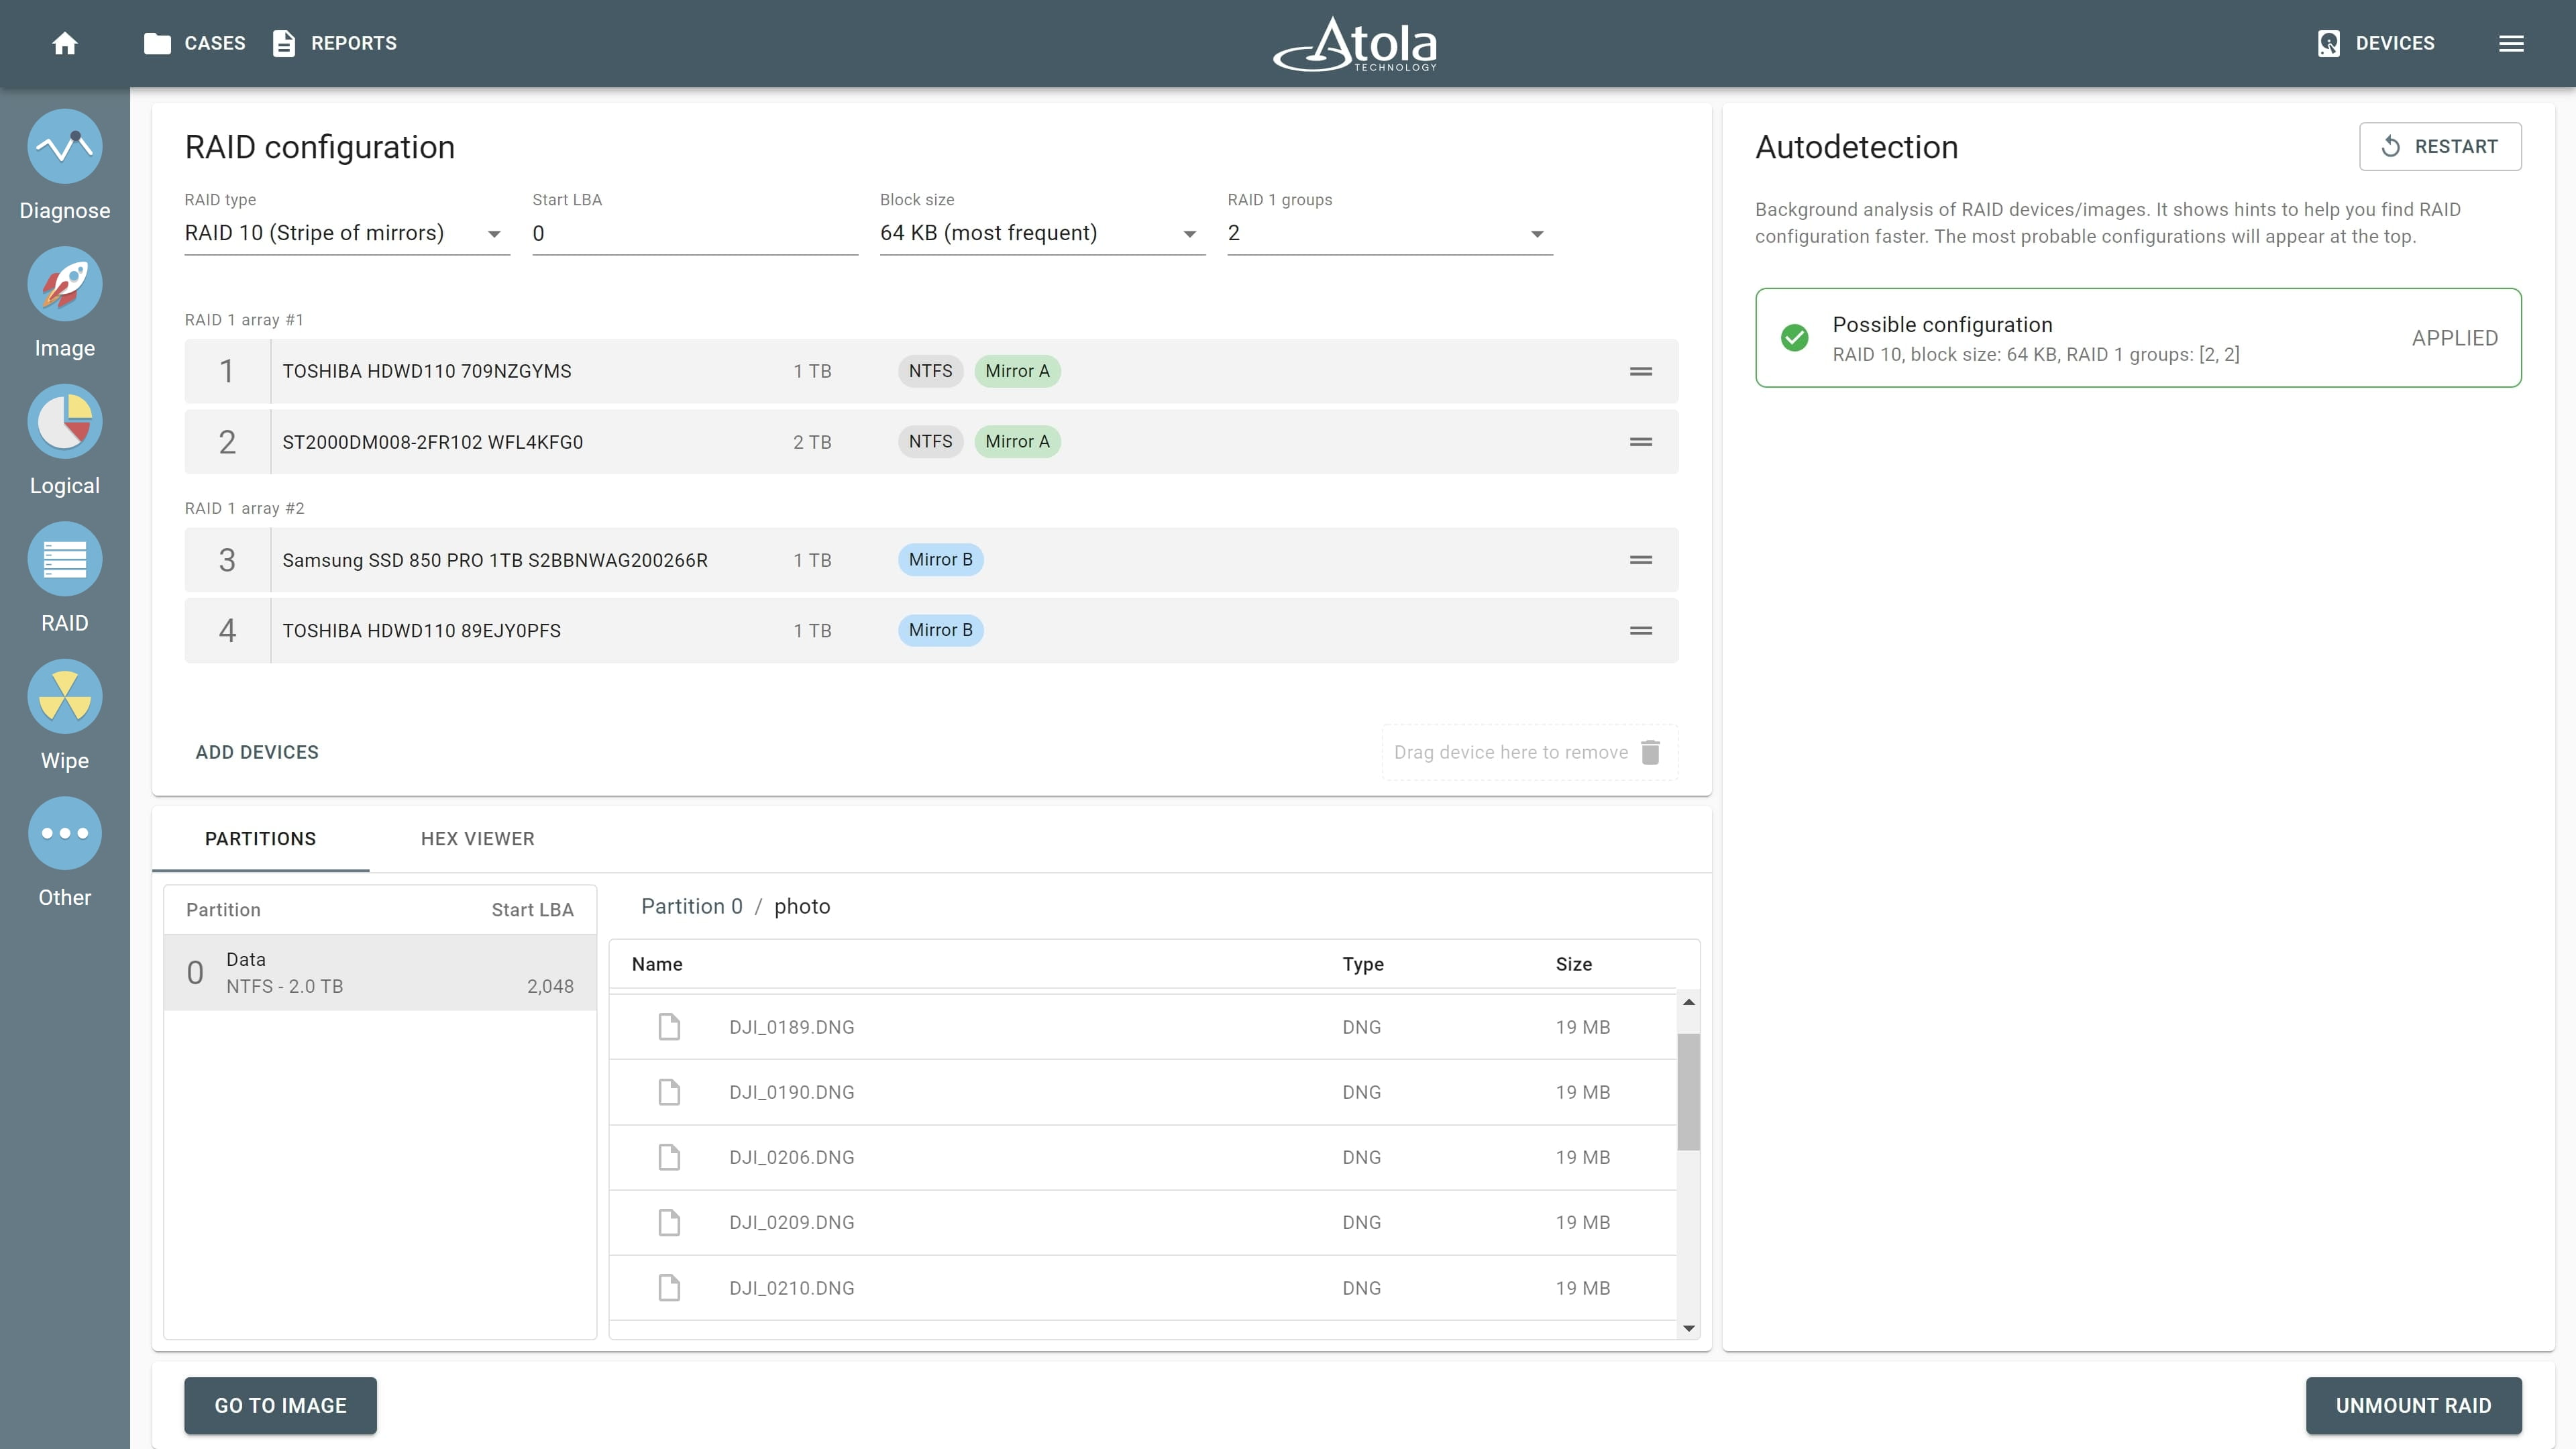
RAID 10. Previewing the partitions.
- Click the Go to image button and select the target.
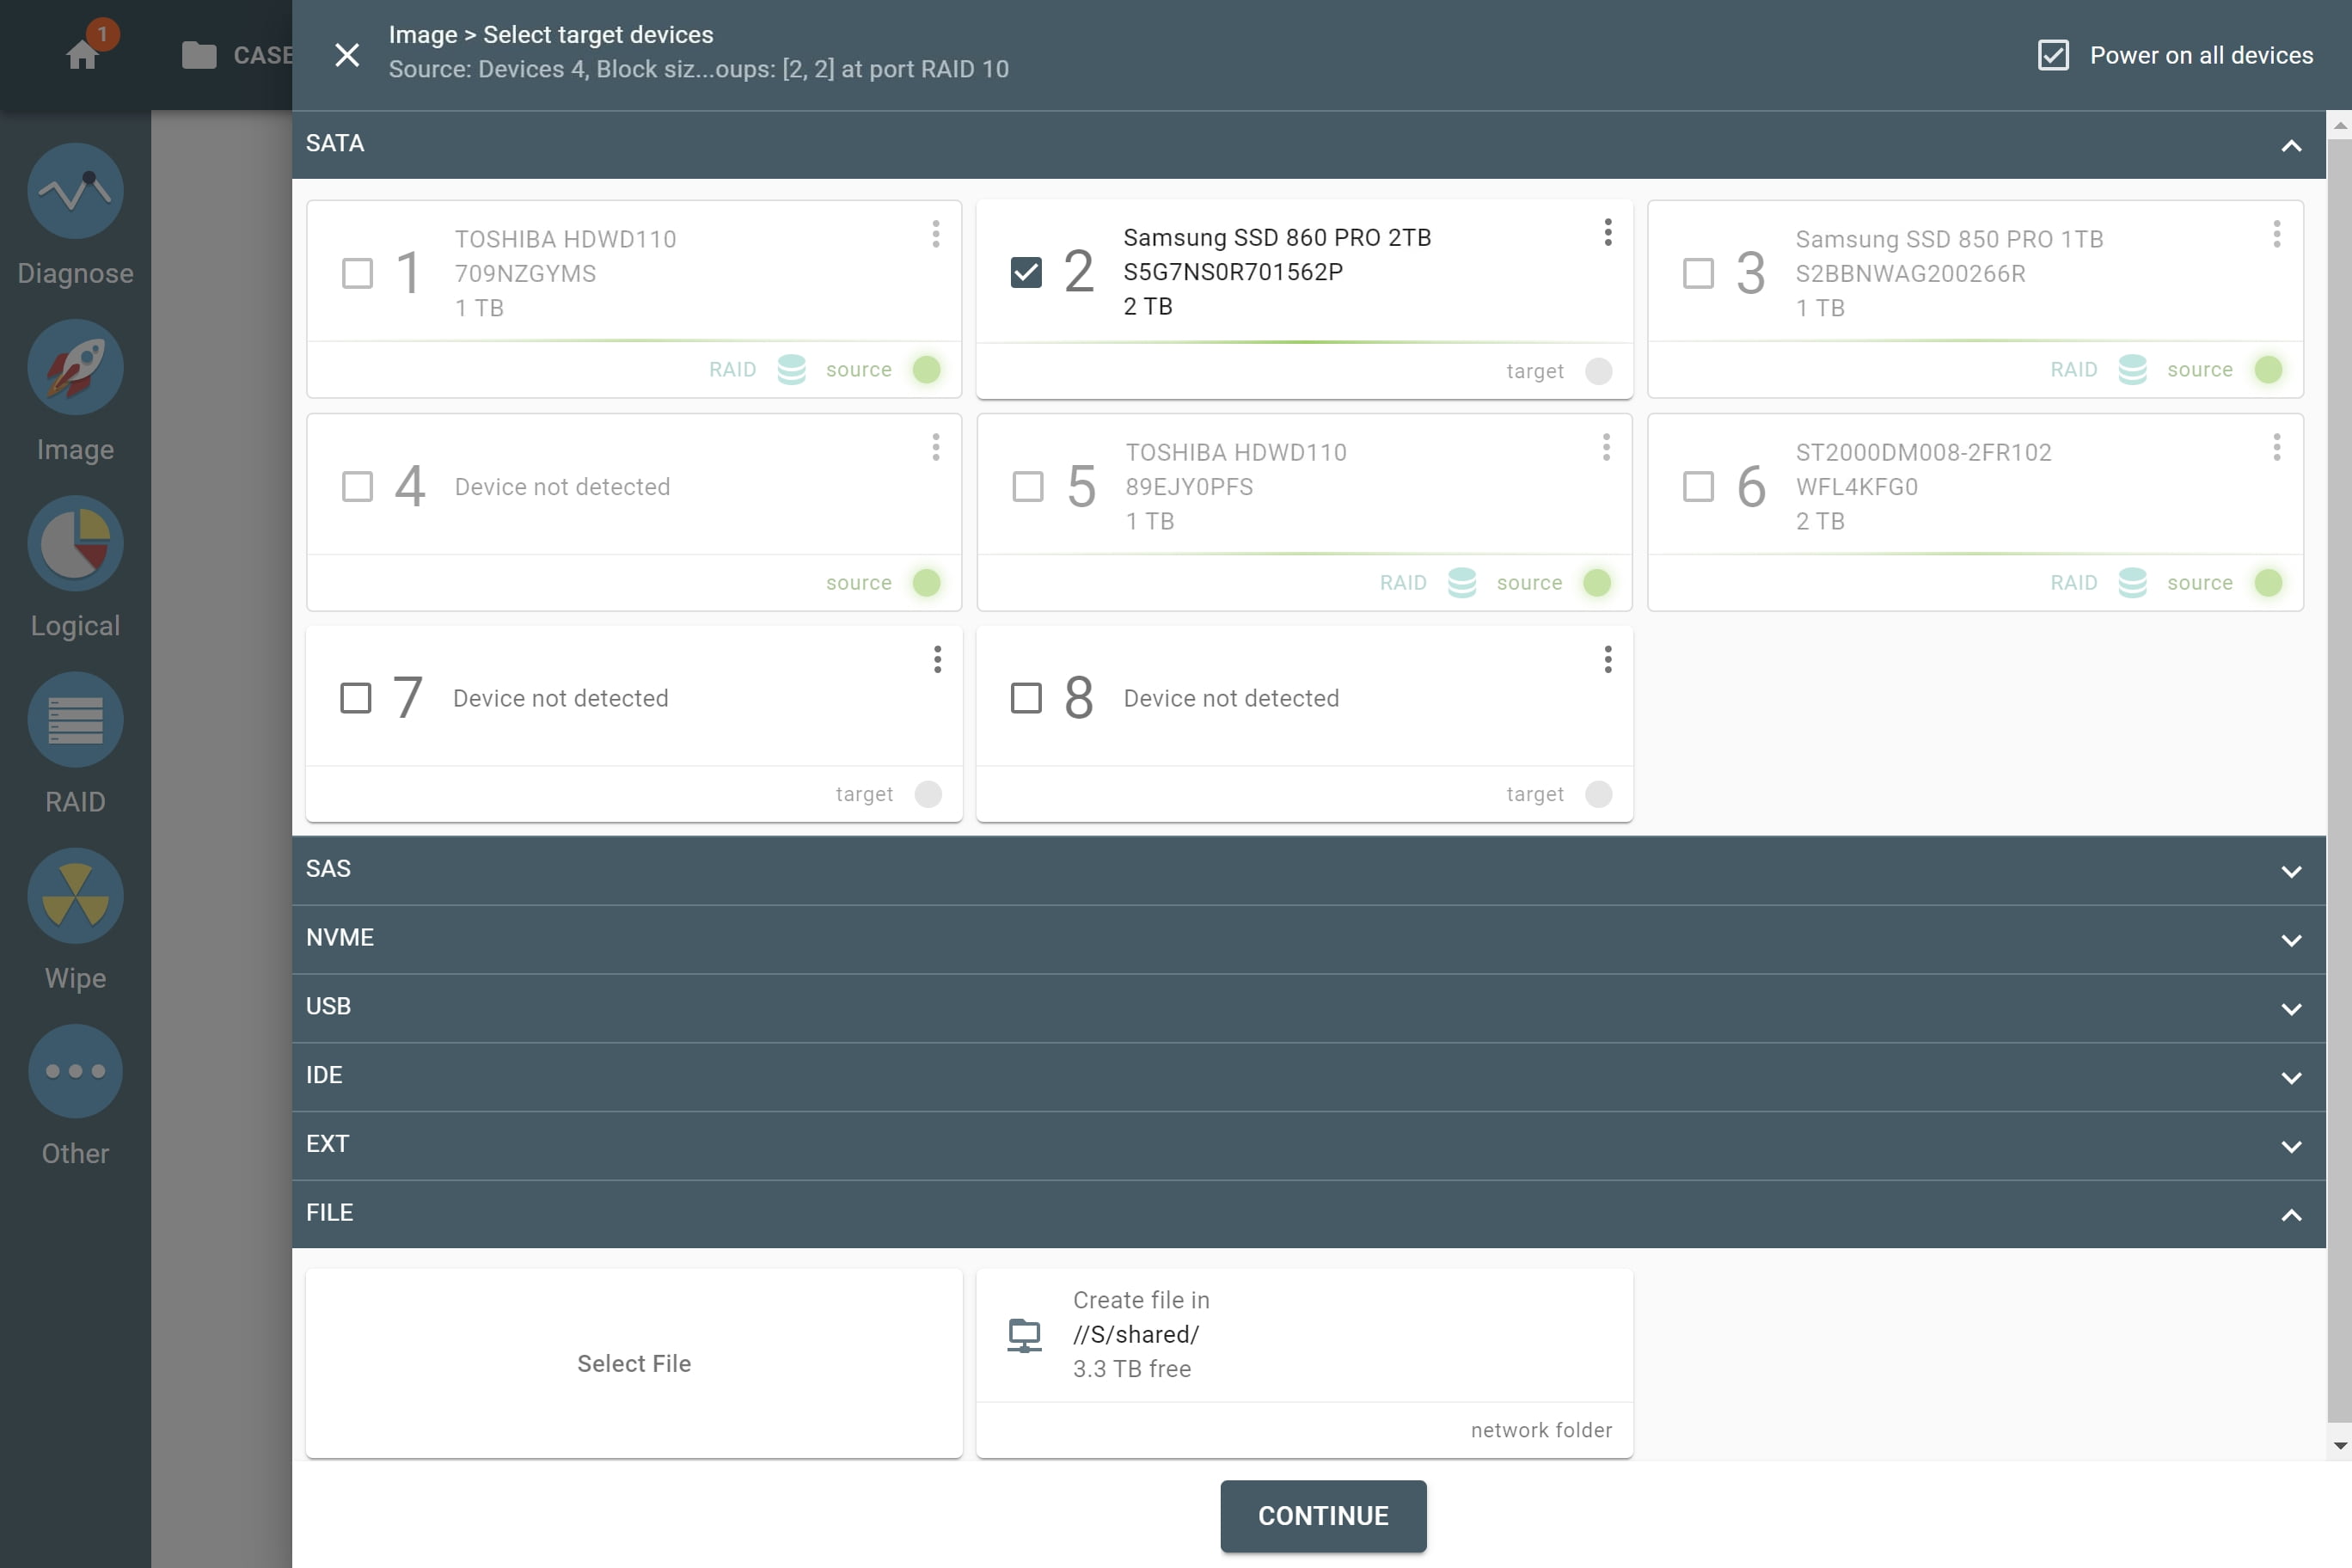
RAID 10. Selecting target.
- Check the settings. Please note that you can choose to image only part of the data (only one of the partitions).
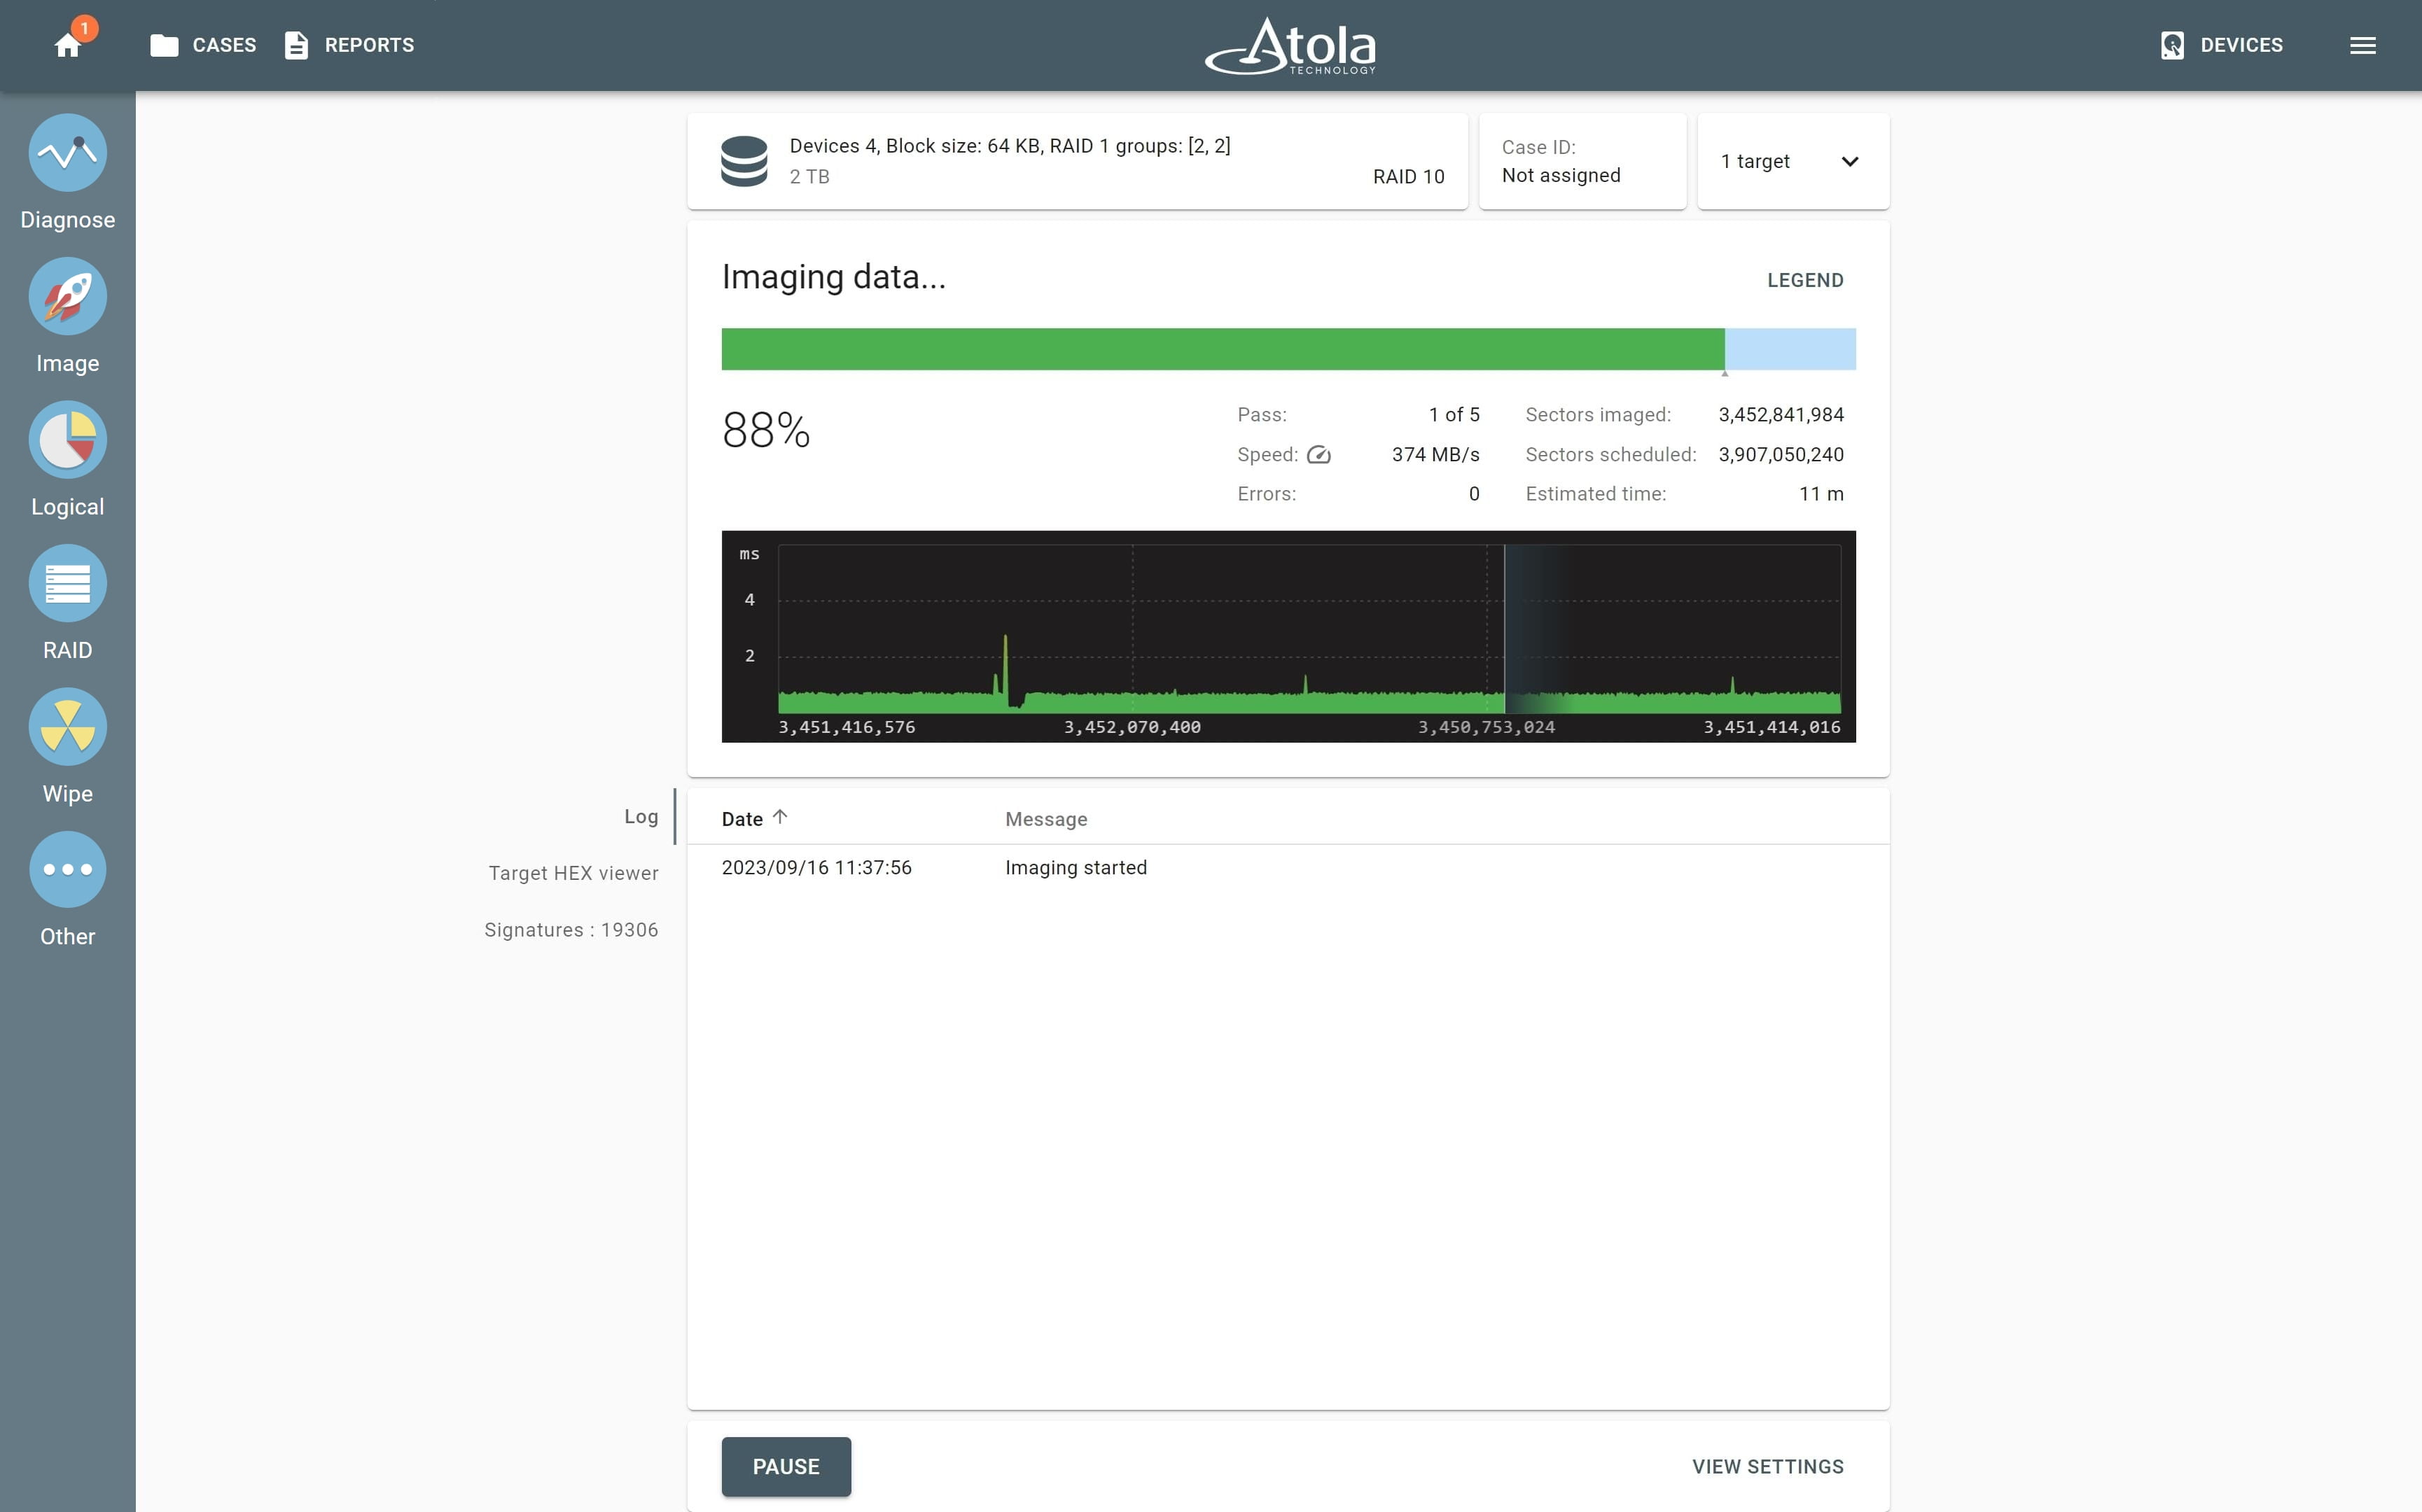
RAID 10. Imaging.
- The automatically generated Imaging report contains the details of the RAID and its members, the target, hashes, signatures found as well as the timestamps.
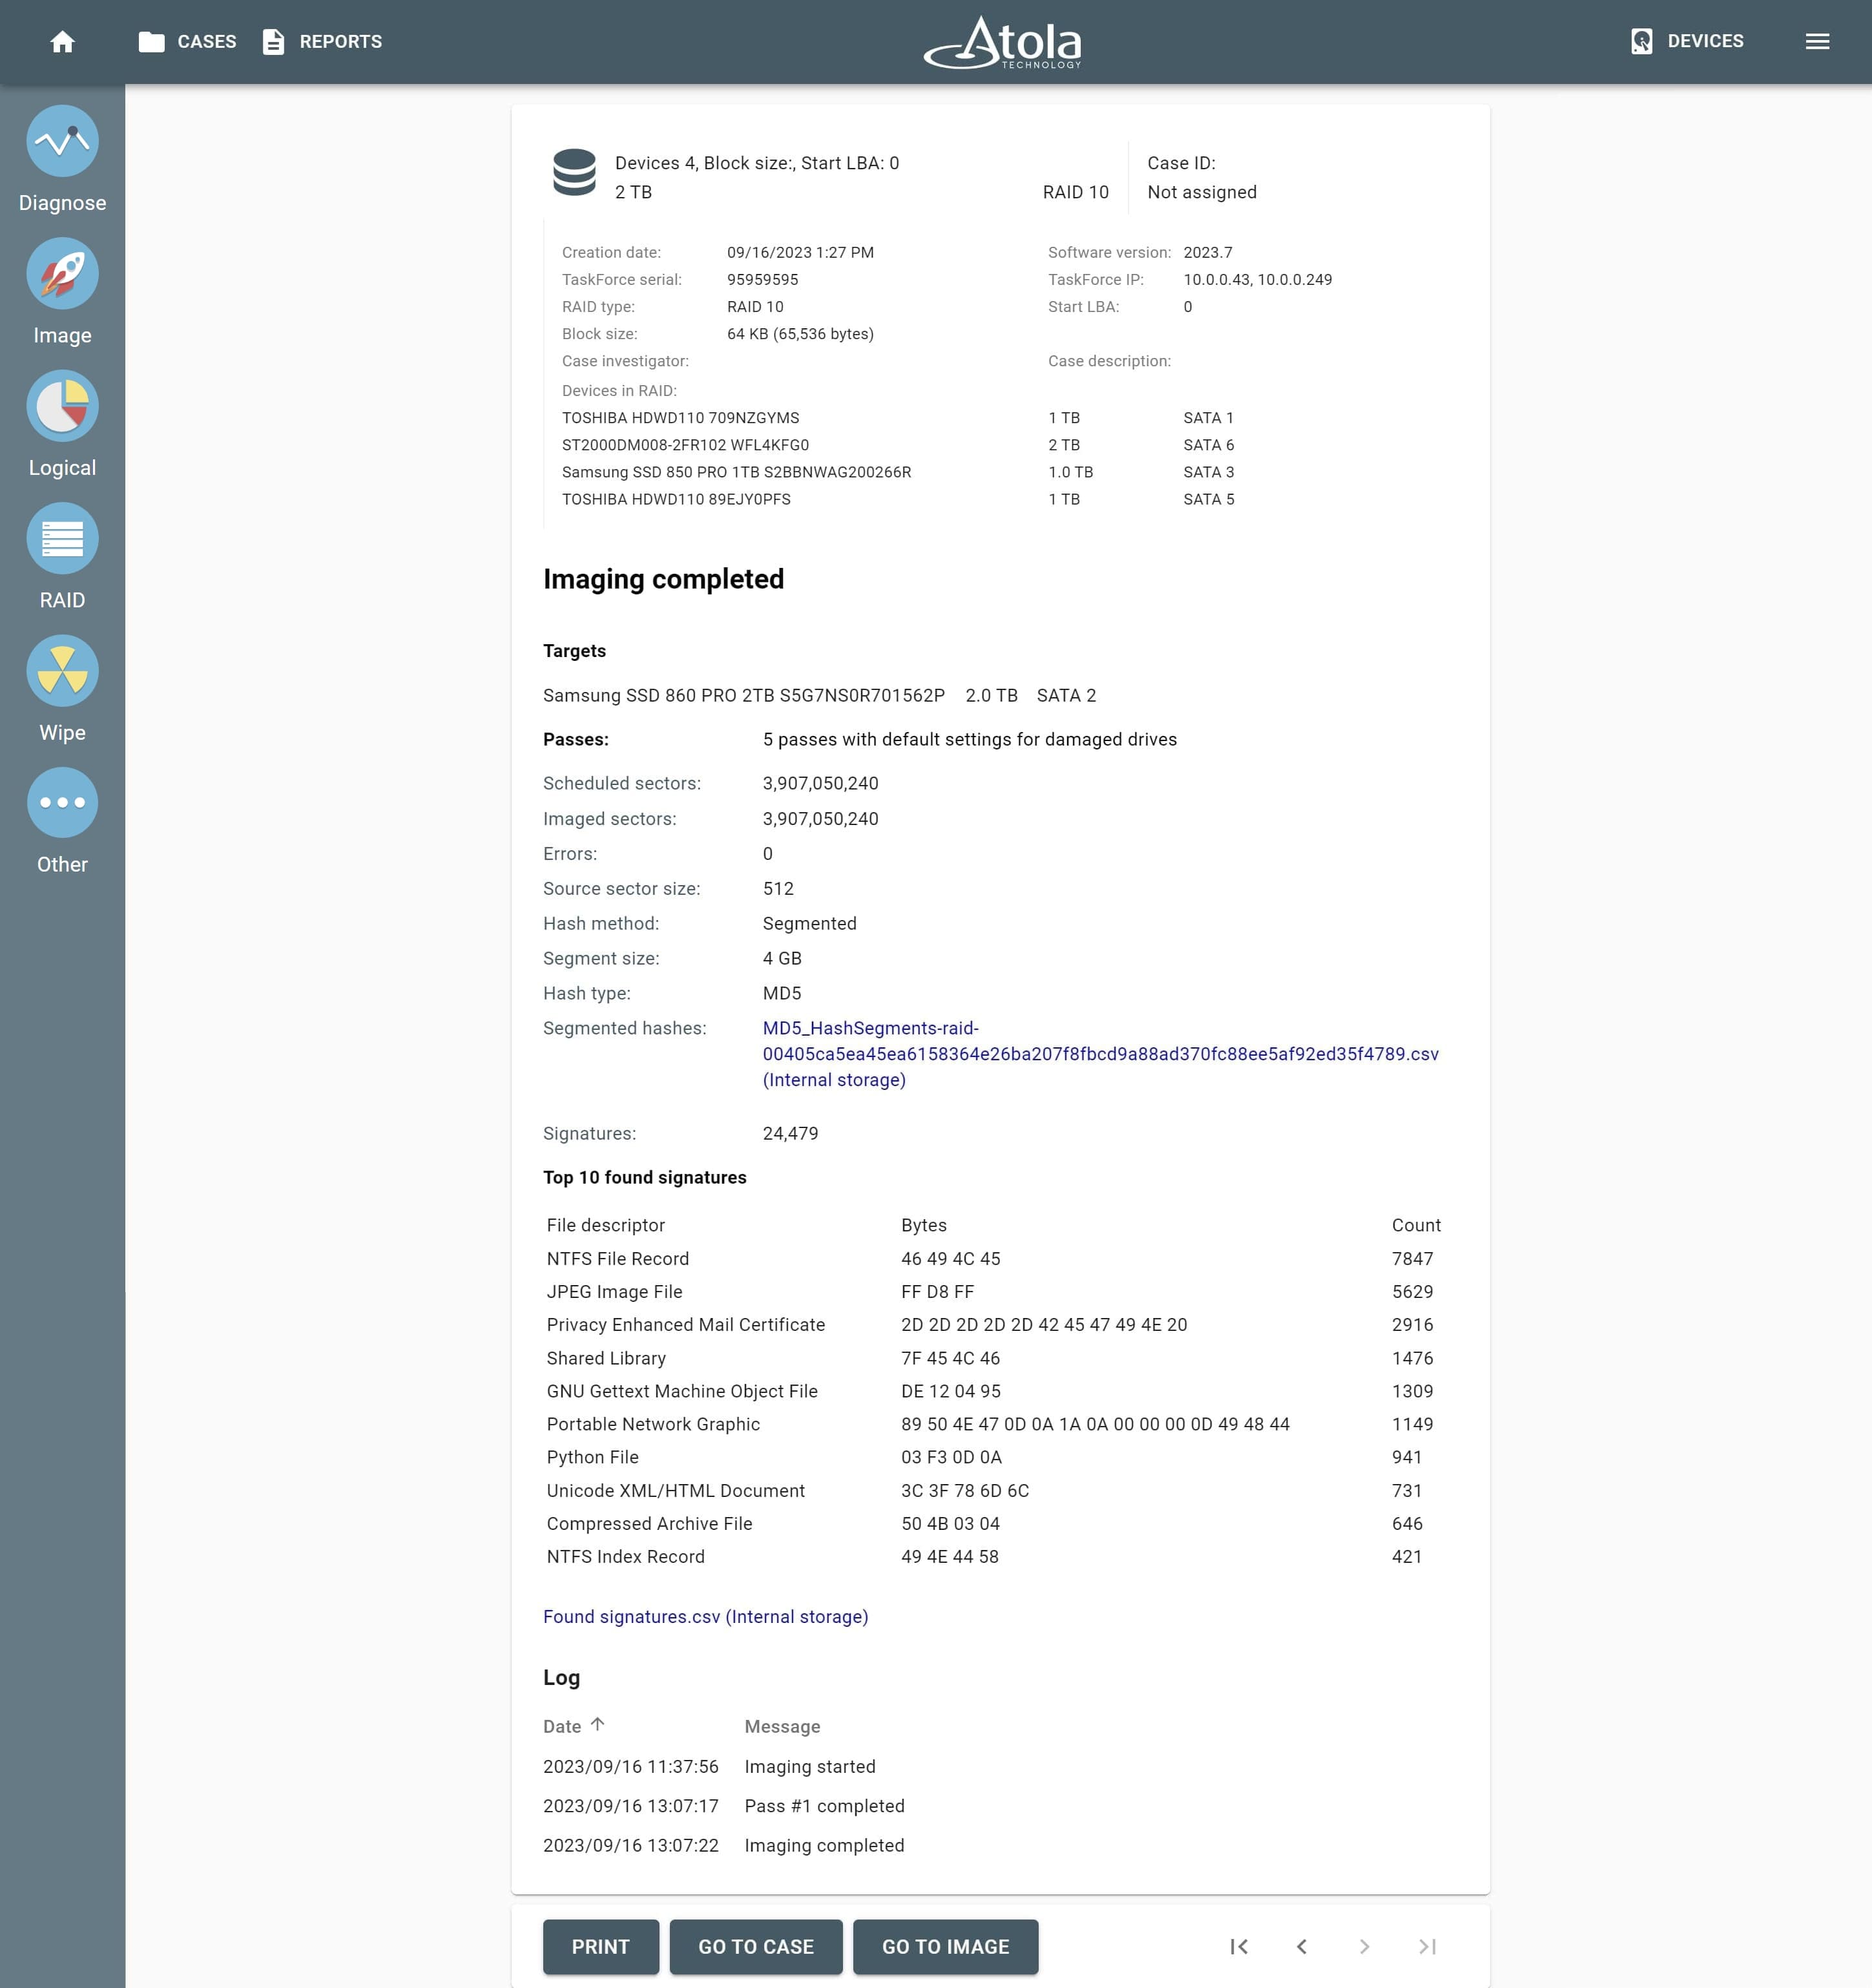
RAID 10. Imaging report.