RAID 0 imaging
Atola TaskForce 2 can automatically detect a RAID 0 configuration, assemble and image such RAID array.
Assembling a RAID 0 with unknown configuration
- Connect the drives to the TaskForce hardware unit's ports that are switched to the Source mode.
- On the left in the TaskForce main window, click RAID.
- On the Select source device panel, select the drives that make up a RAID array and click Continue.
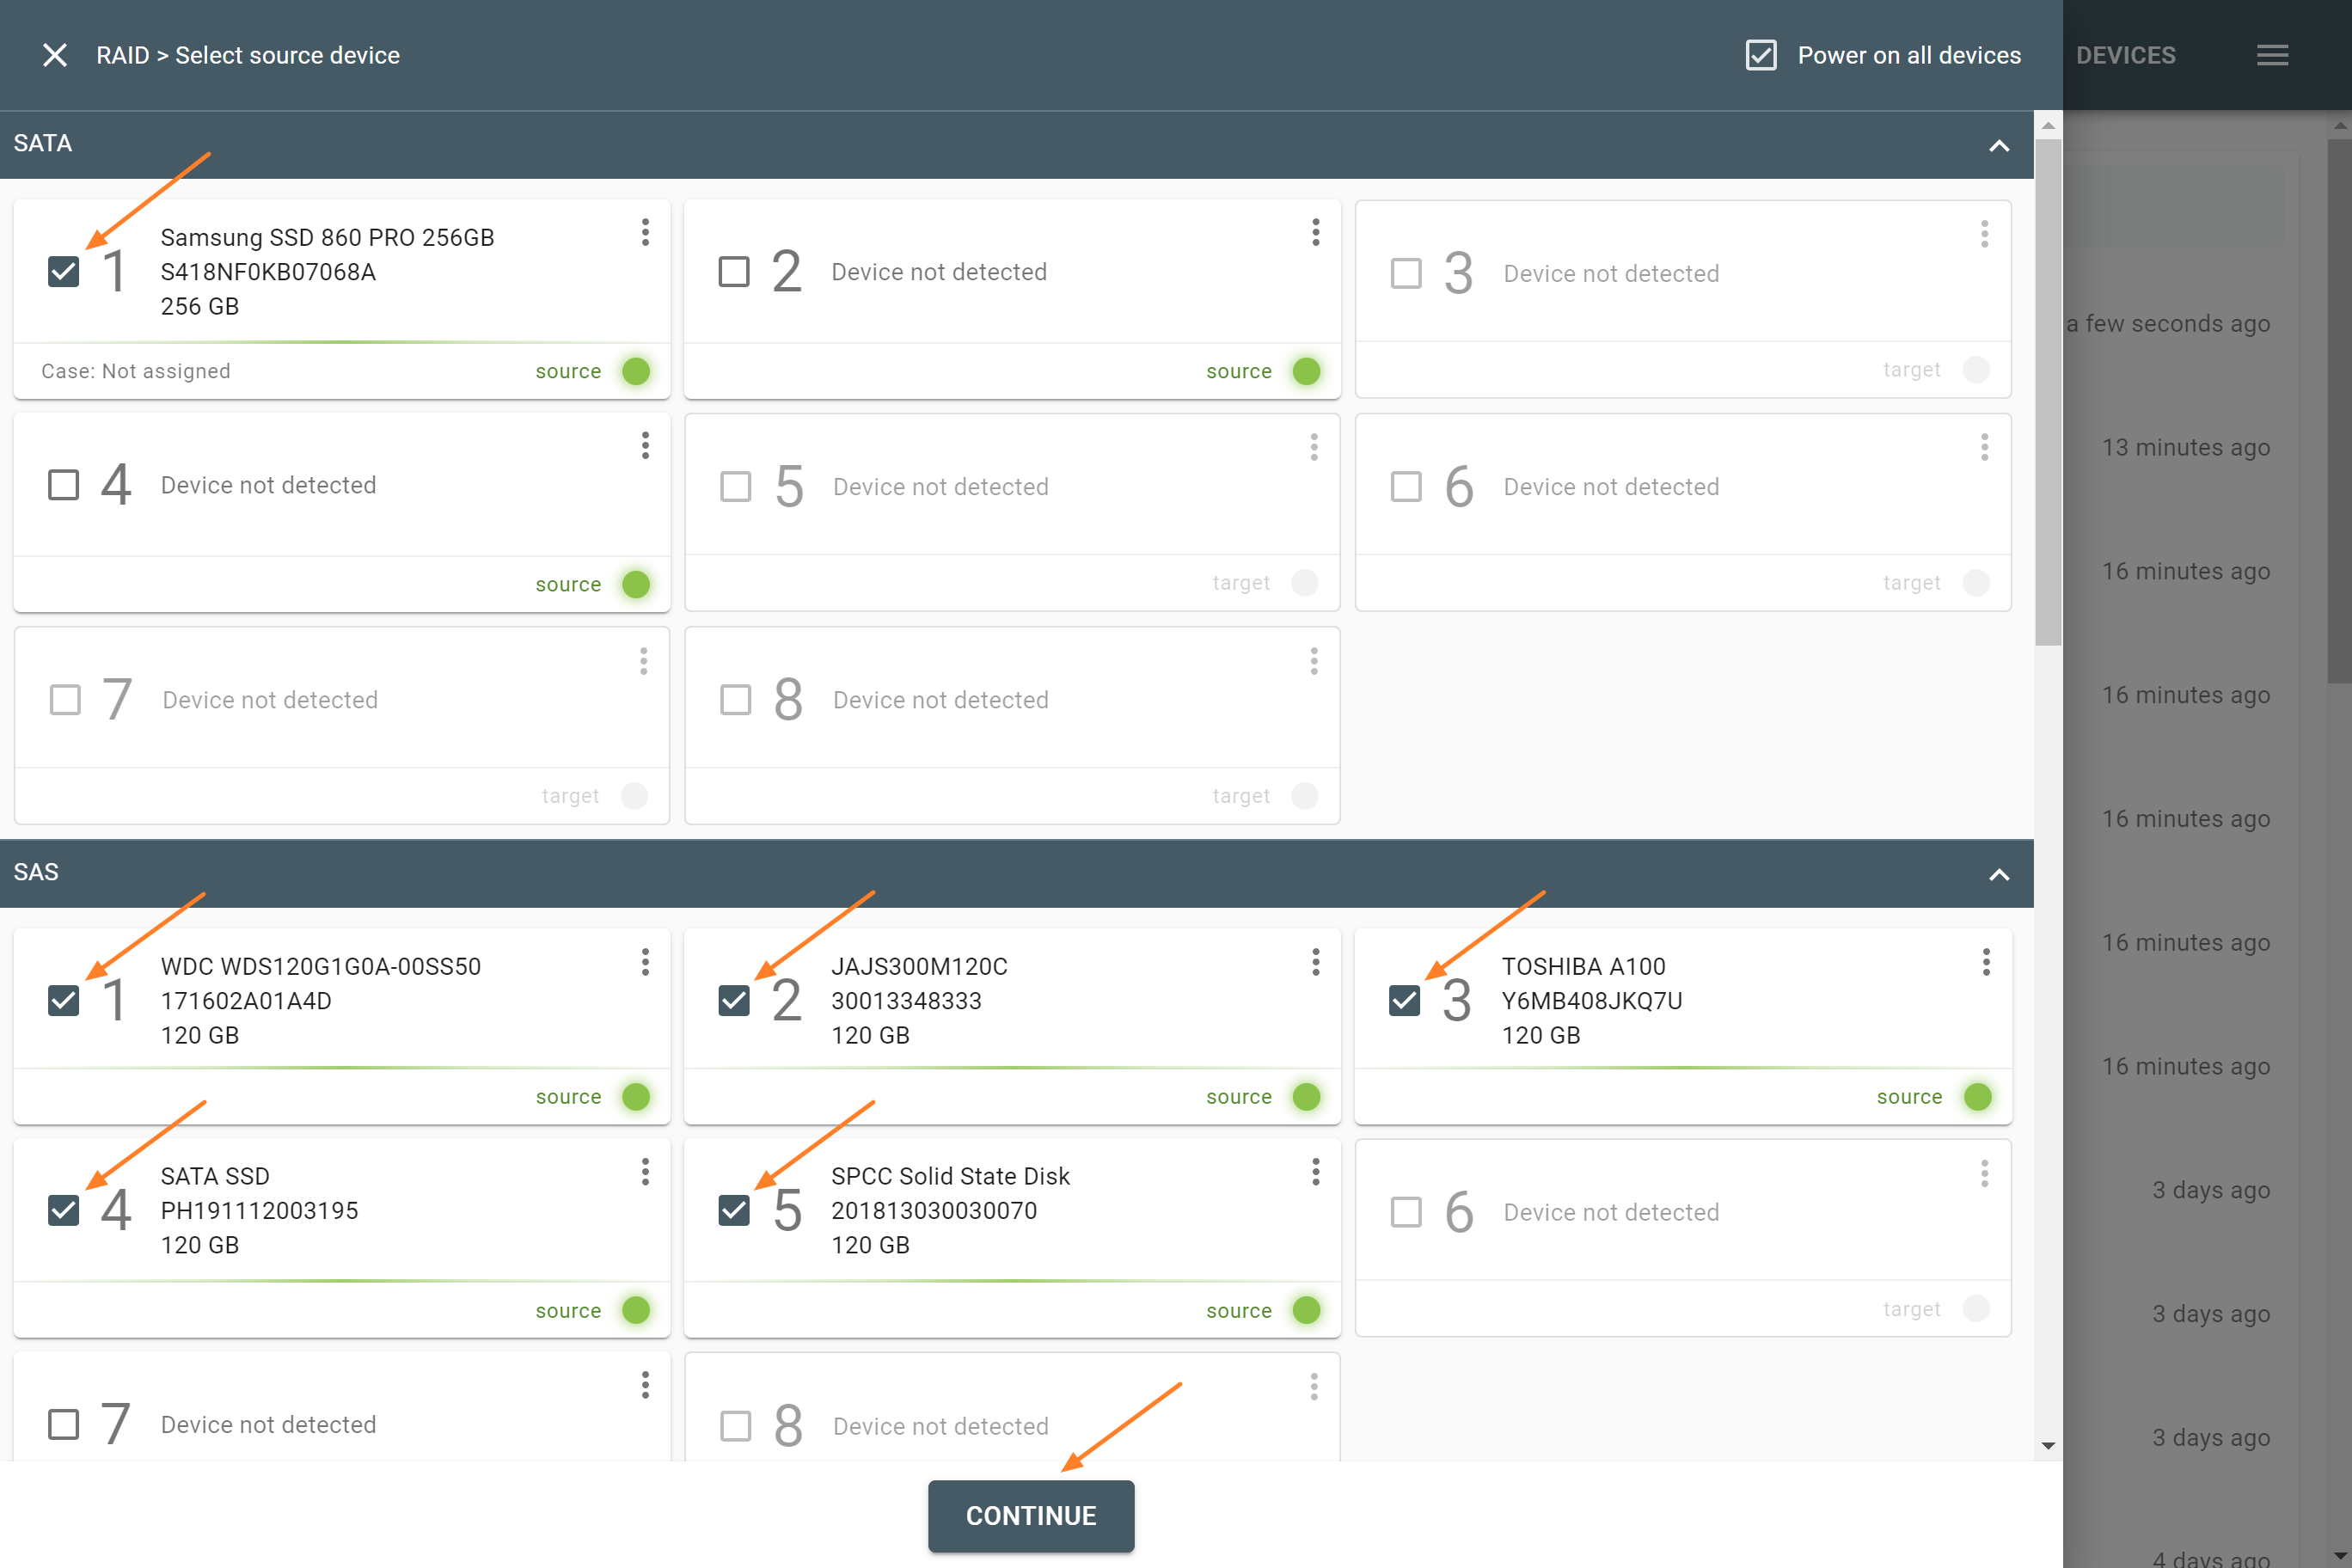
Selecting source RAID drives.
You can see key RAID configuration parameters at the top of the page:
- Order of drives/images
- RAID type
- Start LBA
- Block size
- Block order
Before you enter other values either manually or by applying Autodetection module results, the most commonly used values are displayed in the given fields.
The Autodetection module starts running immediately.
RAID 0 autodetection
Stage 1: TaskForce 2 is reading data on the drives to identify the RAID type.
To change the order of drives in the array, simply drag a drive to its new position. To remove a device from the current array, grab it and put it into the bin.

Analyzing devices.
Stage 2: TaskForce 2 goes through thousands of possible variants of RAID parameters.
Click Apply as soon as a Possible configuration tile appears.
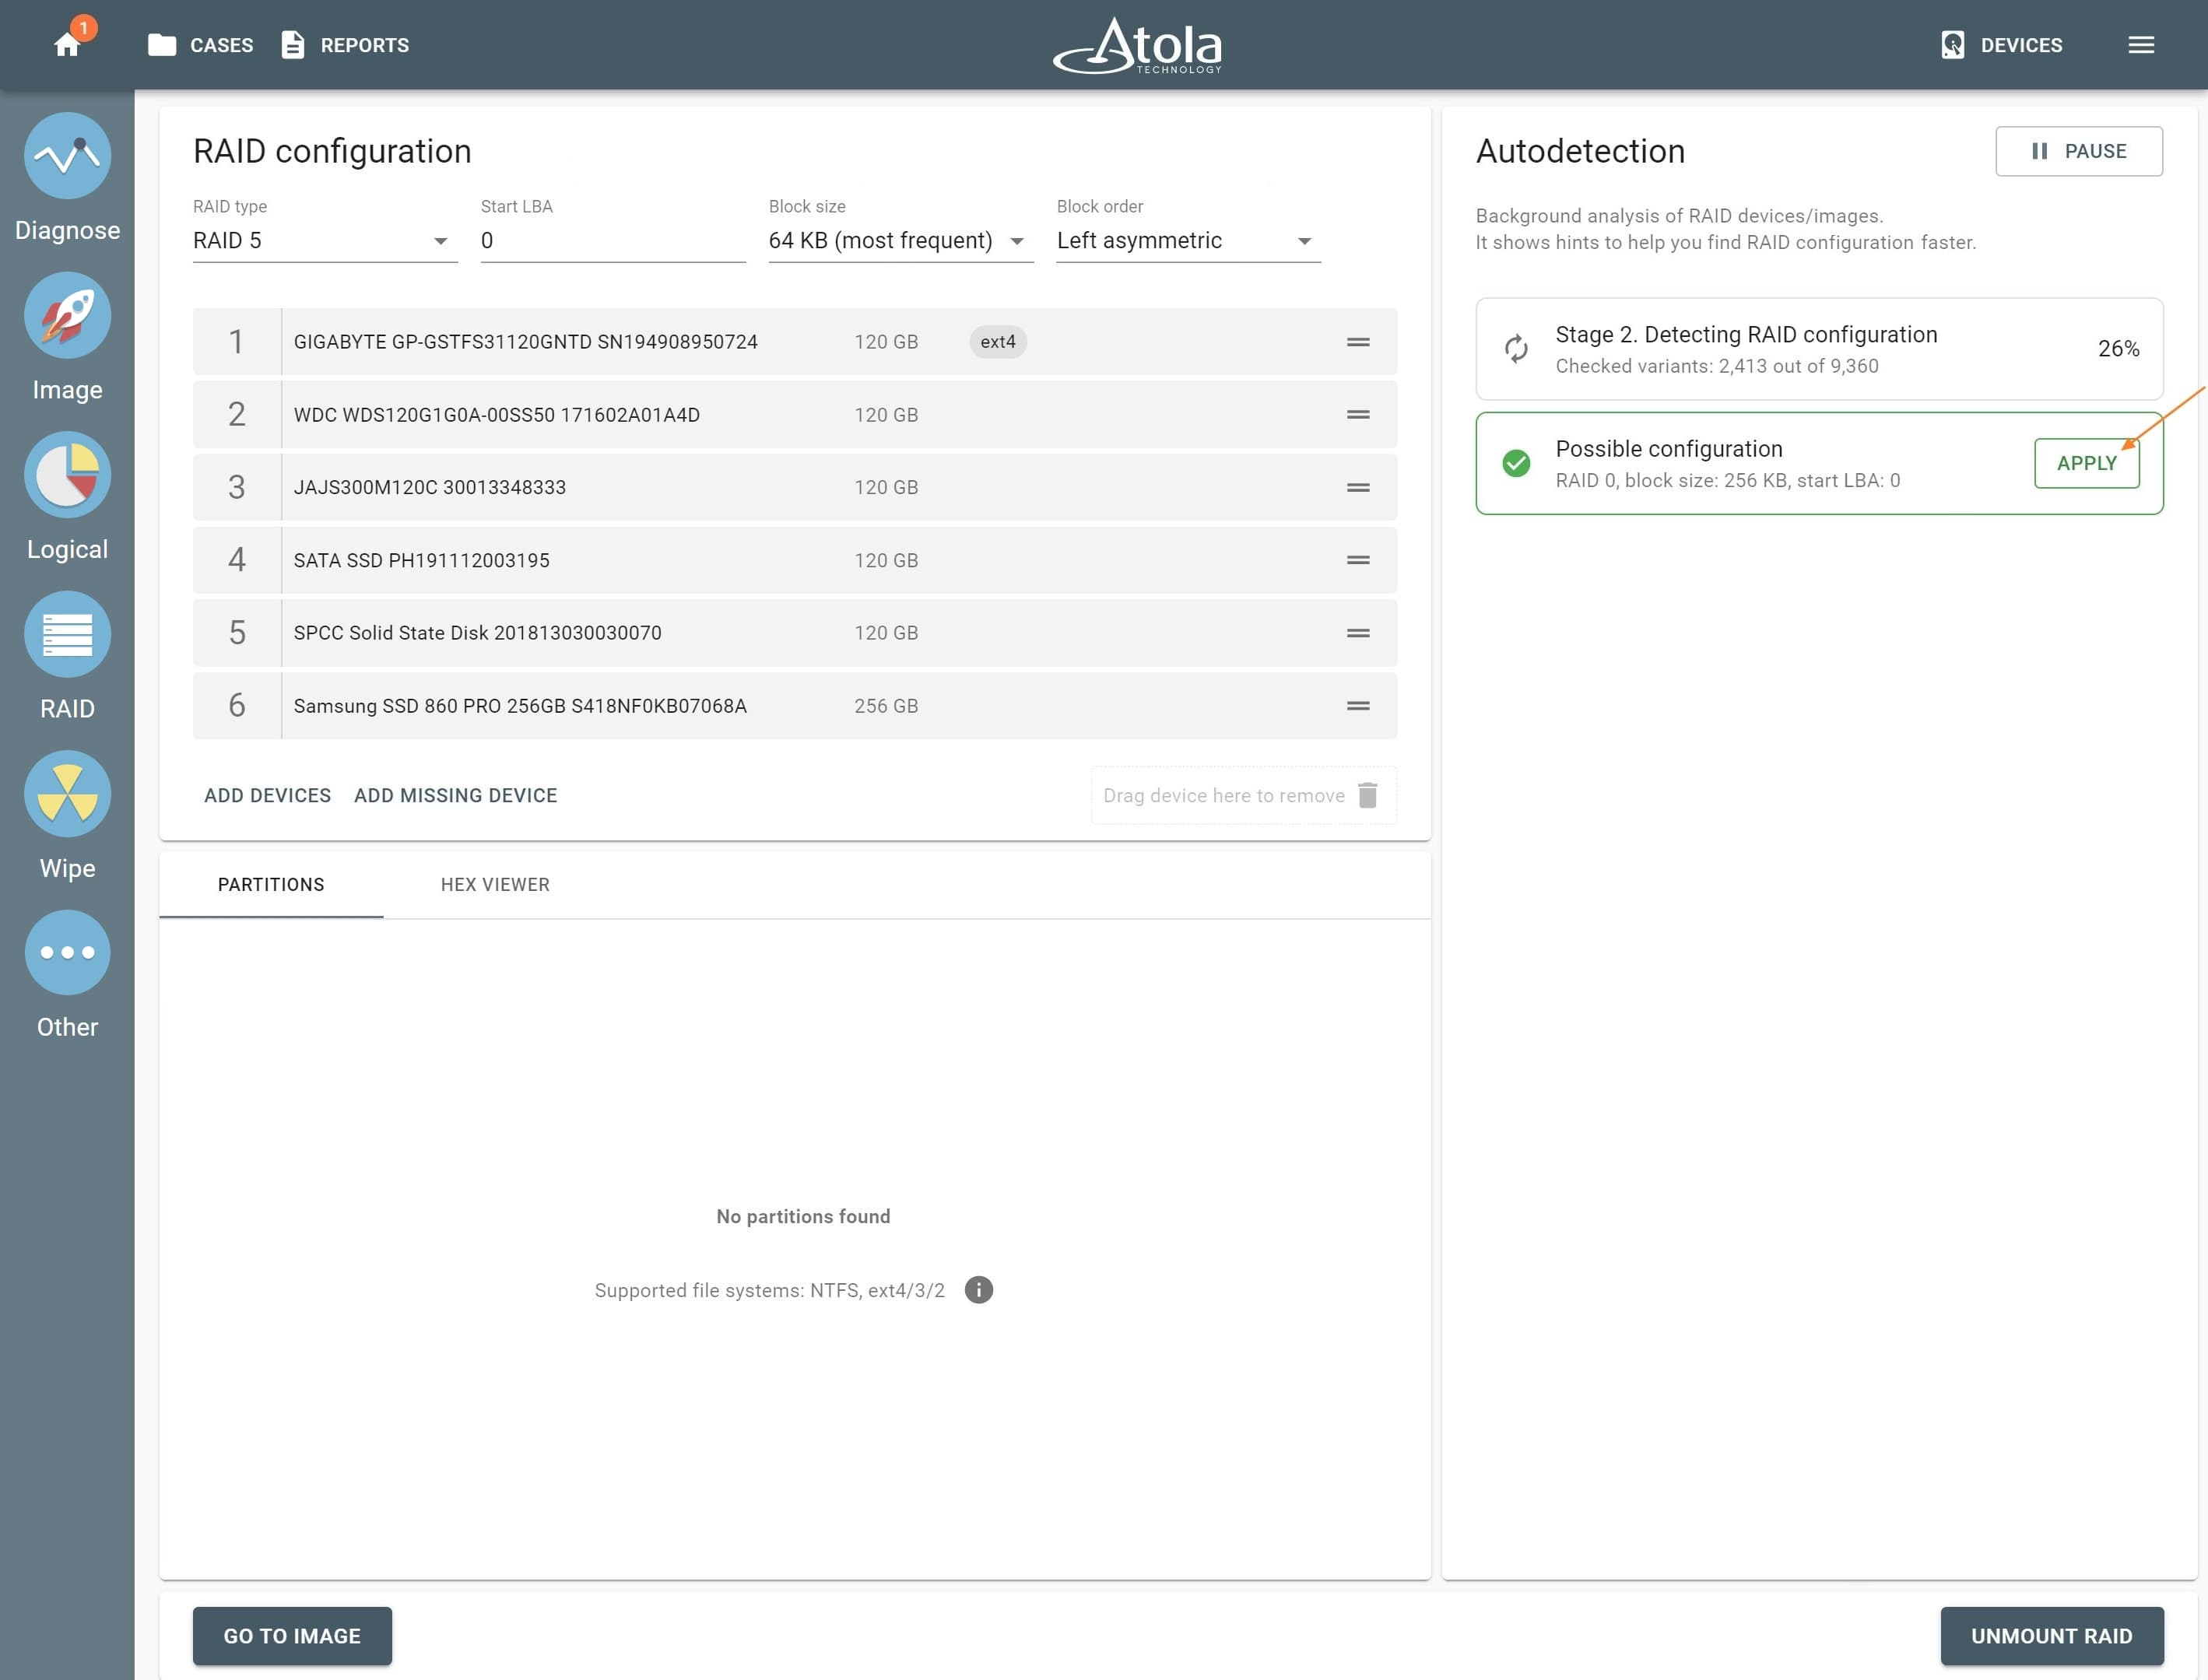
Possible RAID configuration.
After you click Apply, TaskForce 2 automatically applies the suggested configuration and checks the file system for partitions. At the bottom of the screen, a preview of the partitions is available.
Observing files and folders in the preview confirms the detected RAID 0 configuration is correct.
Imaging RAID 0 array
- After RAID configuration is successfully applied, click Go to Image to proceed with imaging.
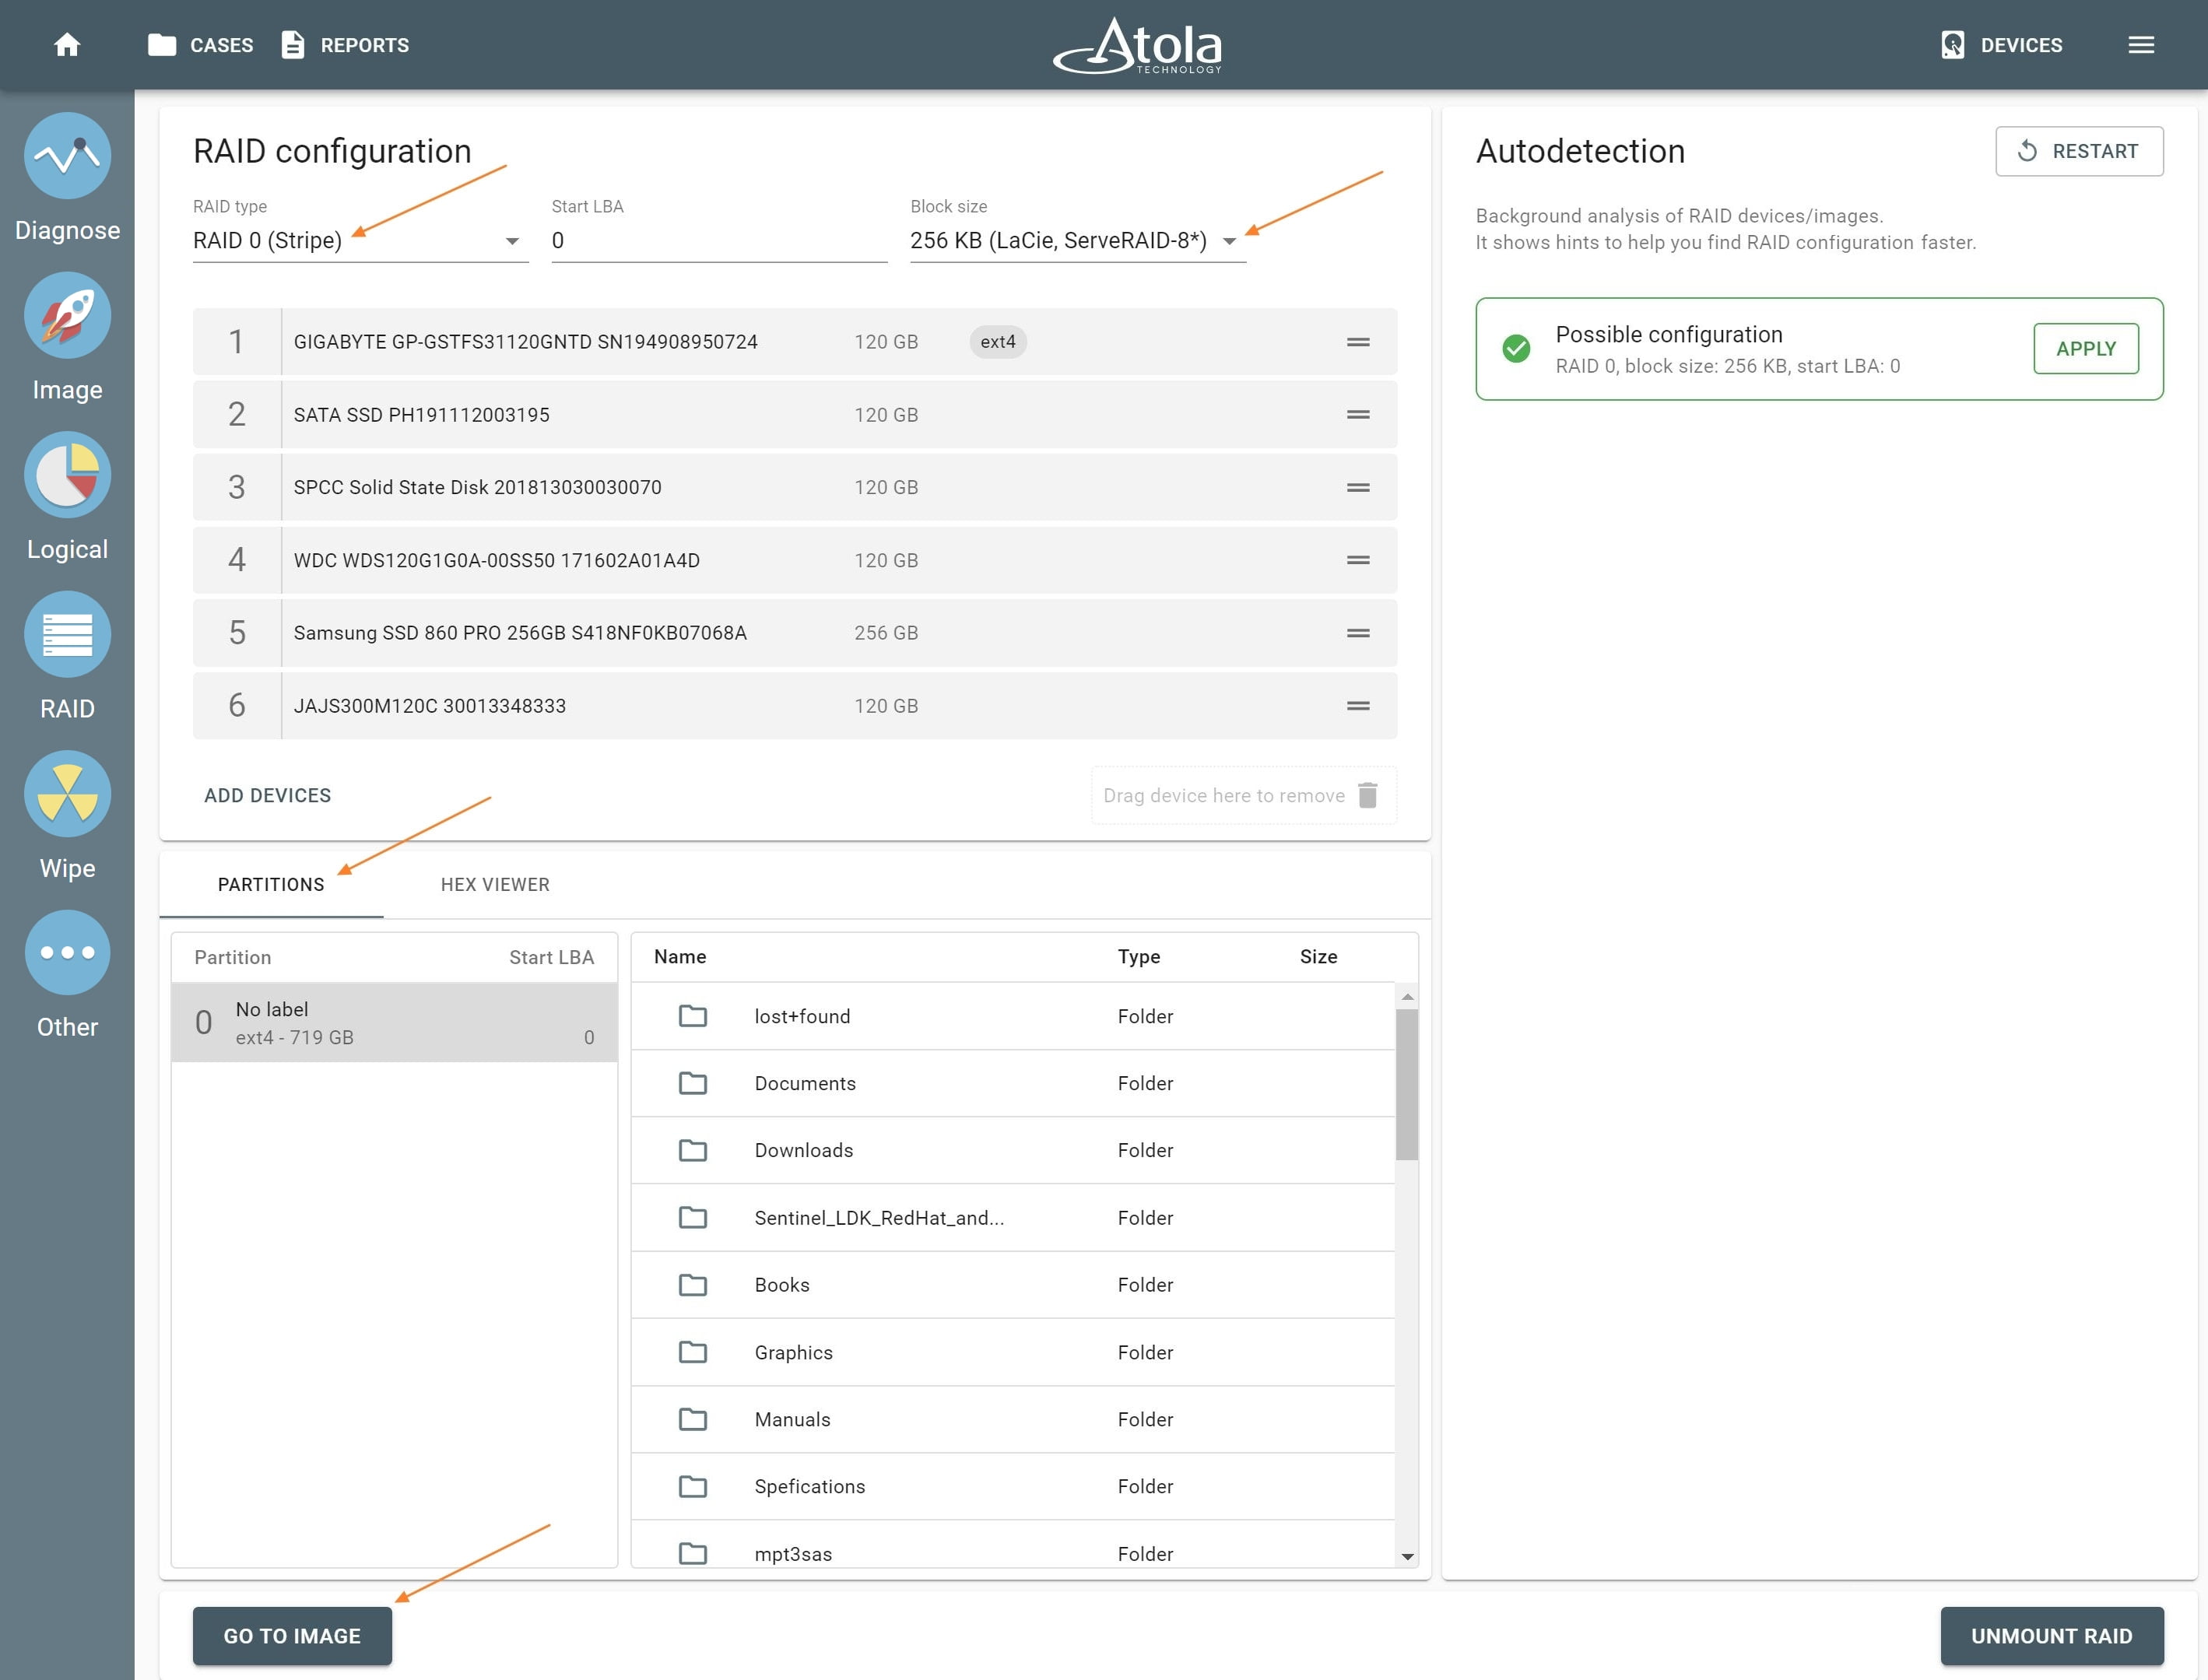
The Go to image button.
- Select your target device or network folder and click Continue.
- To launch your imaging session, click Start.
RAID imaging may take much longer than imaging a drive. You can optimize the imaging speed by using a fast target or a high-speed server.

How to make raid image.
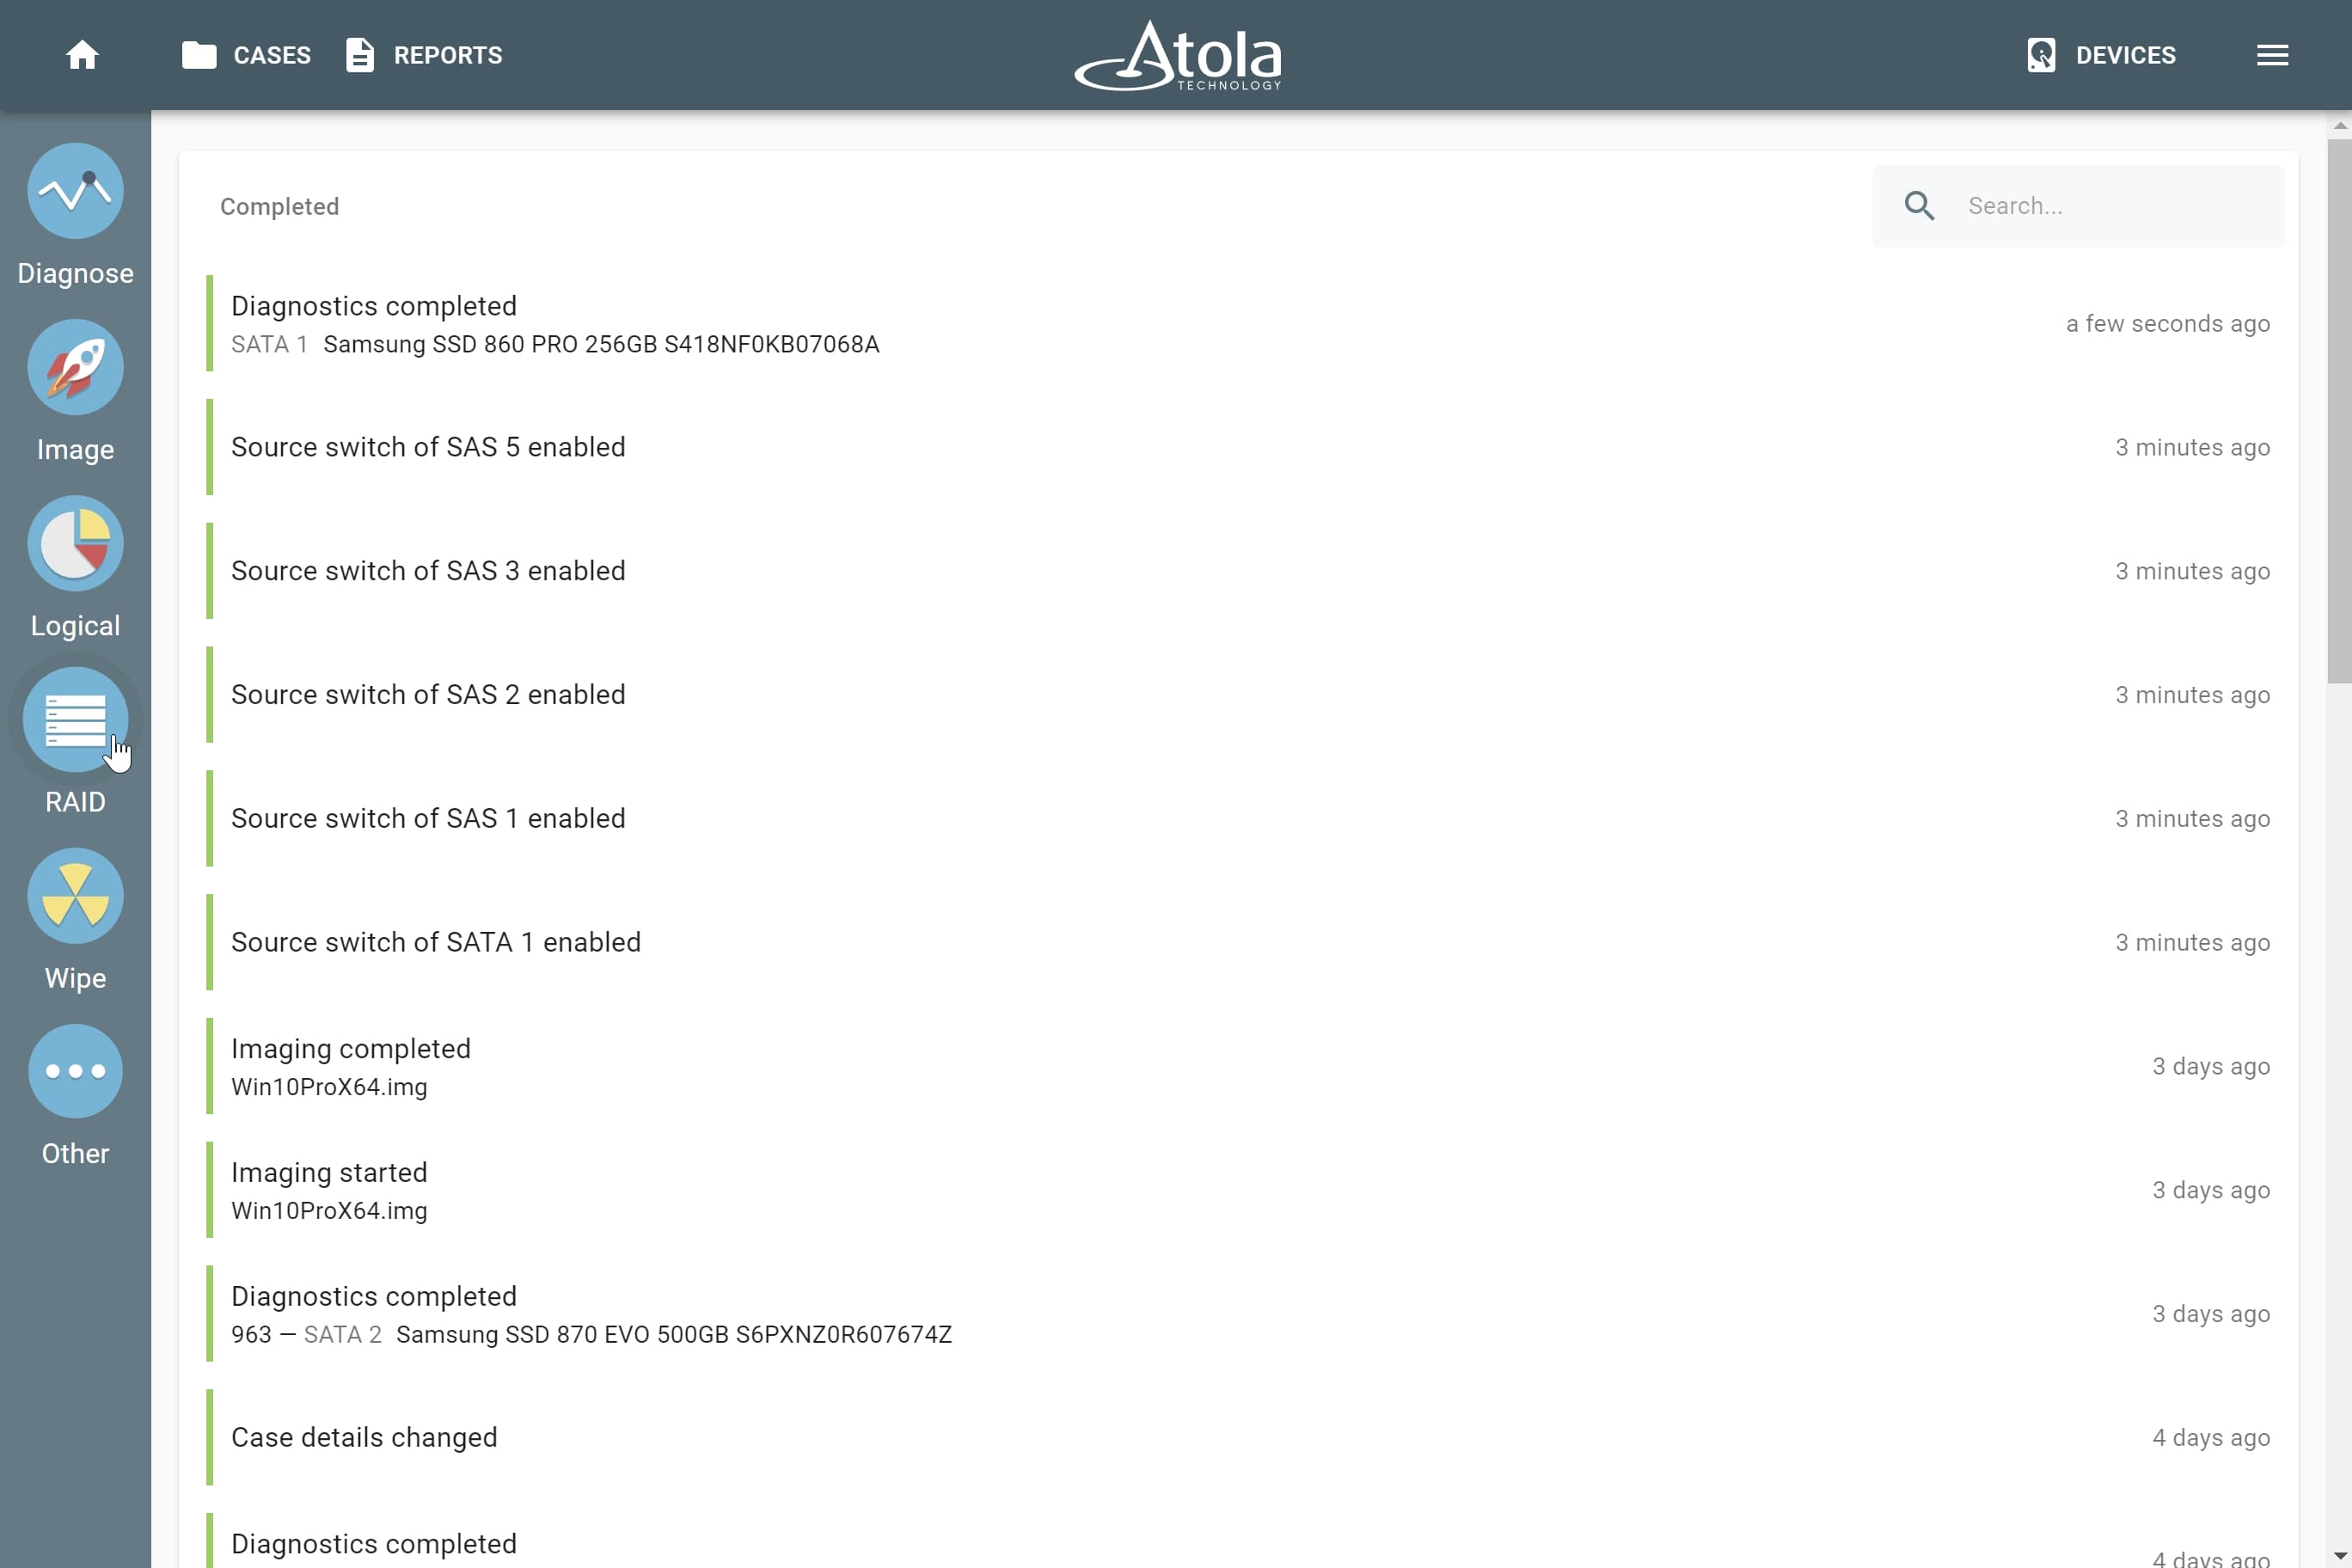
TaskForce 2 automatically generates reports for every session. The Imaging completed report will contain all RAID details as well as timestamps.
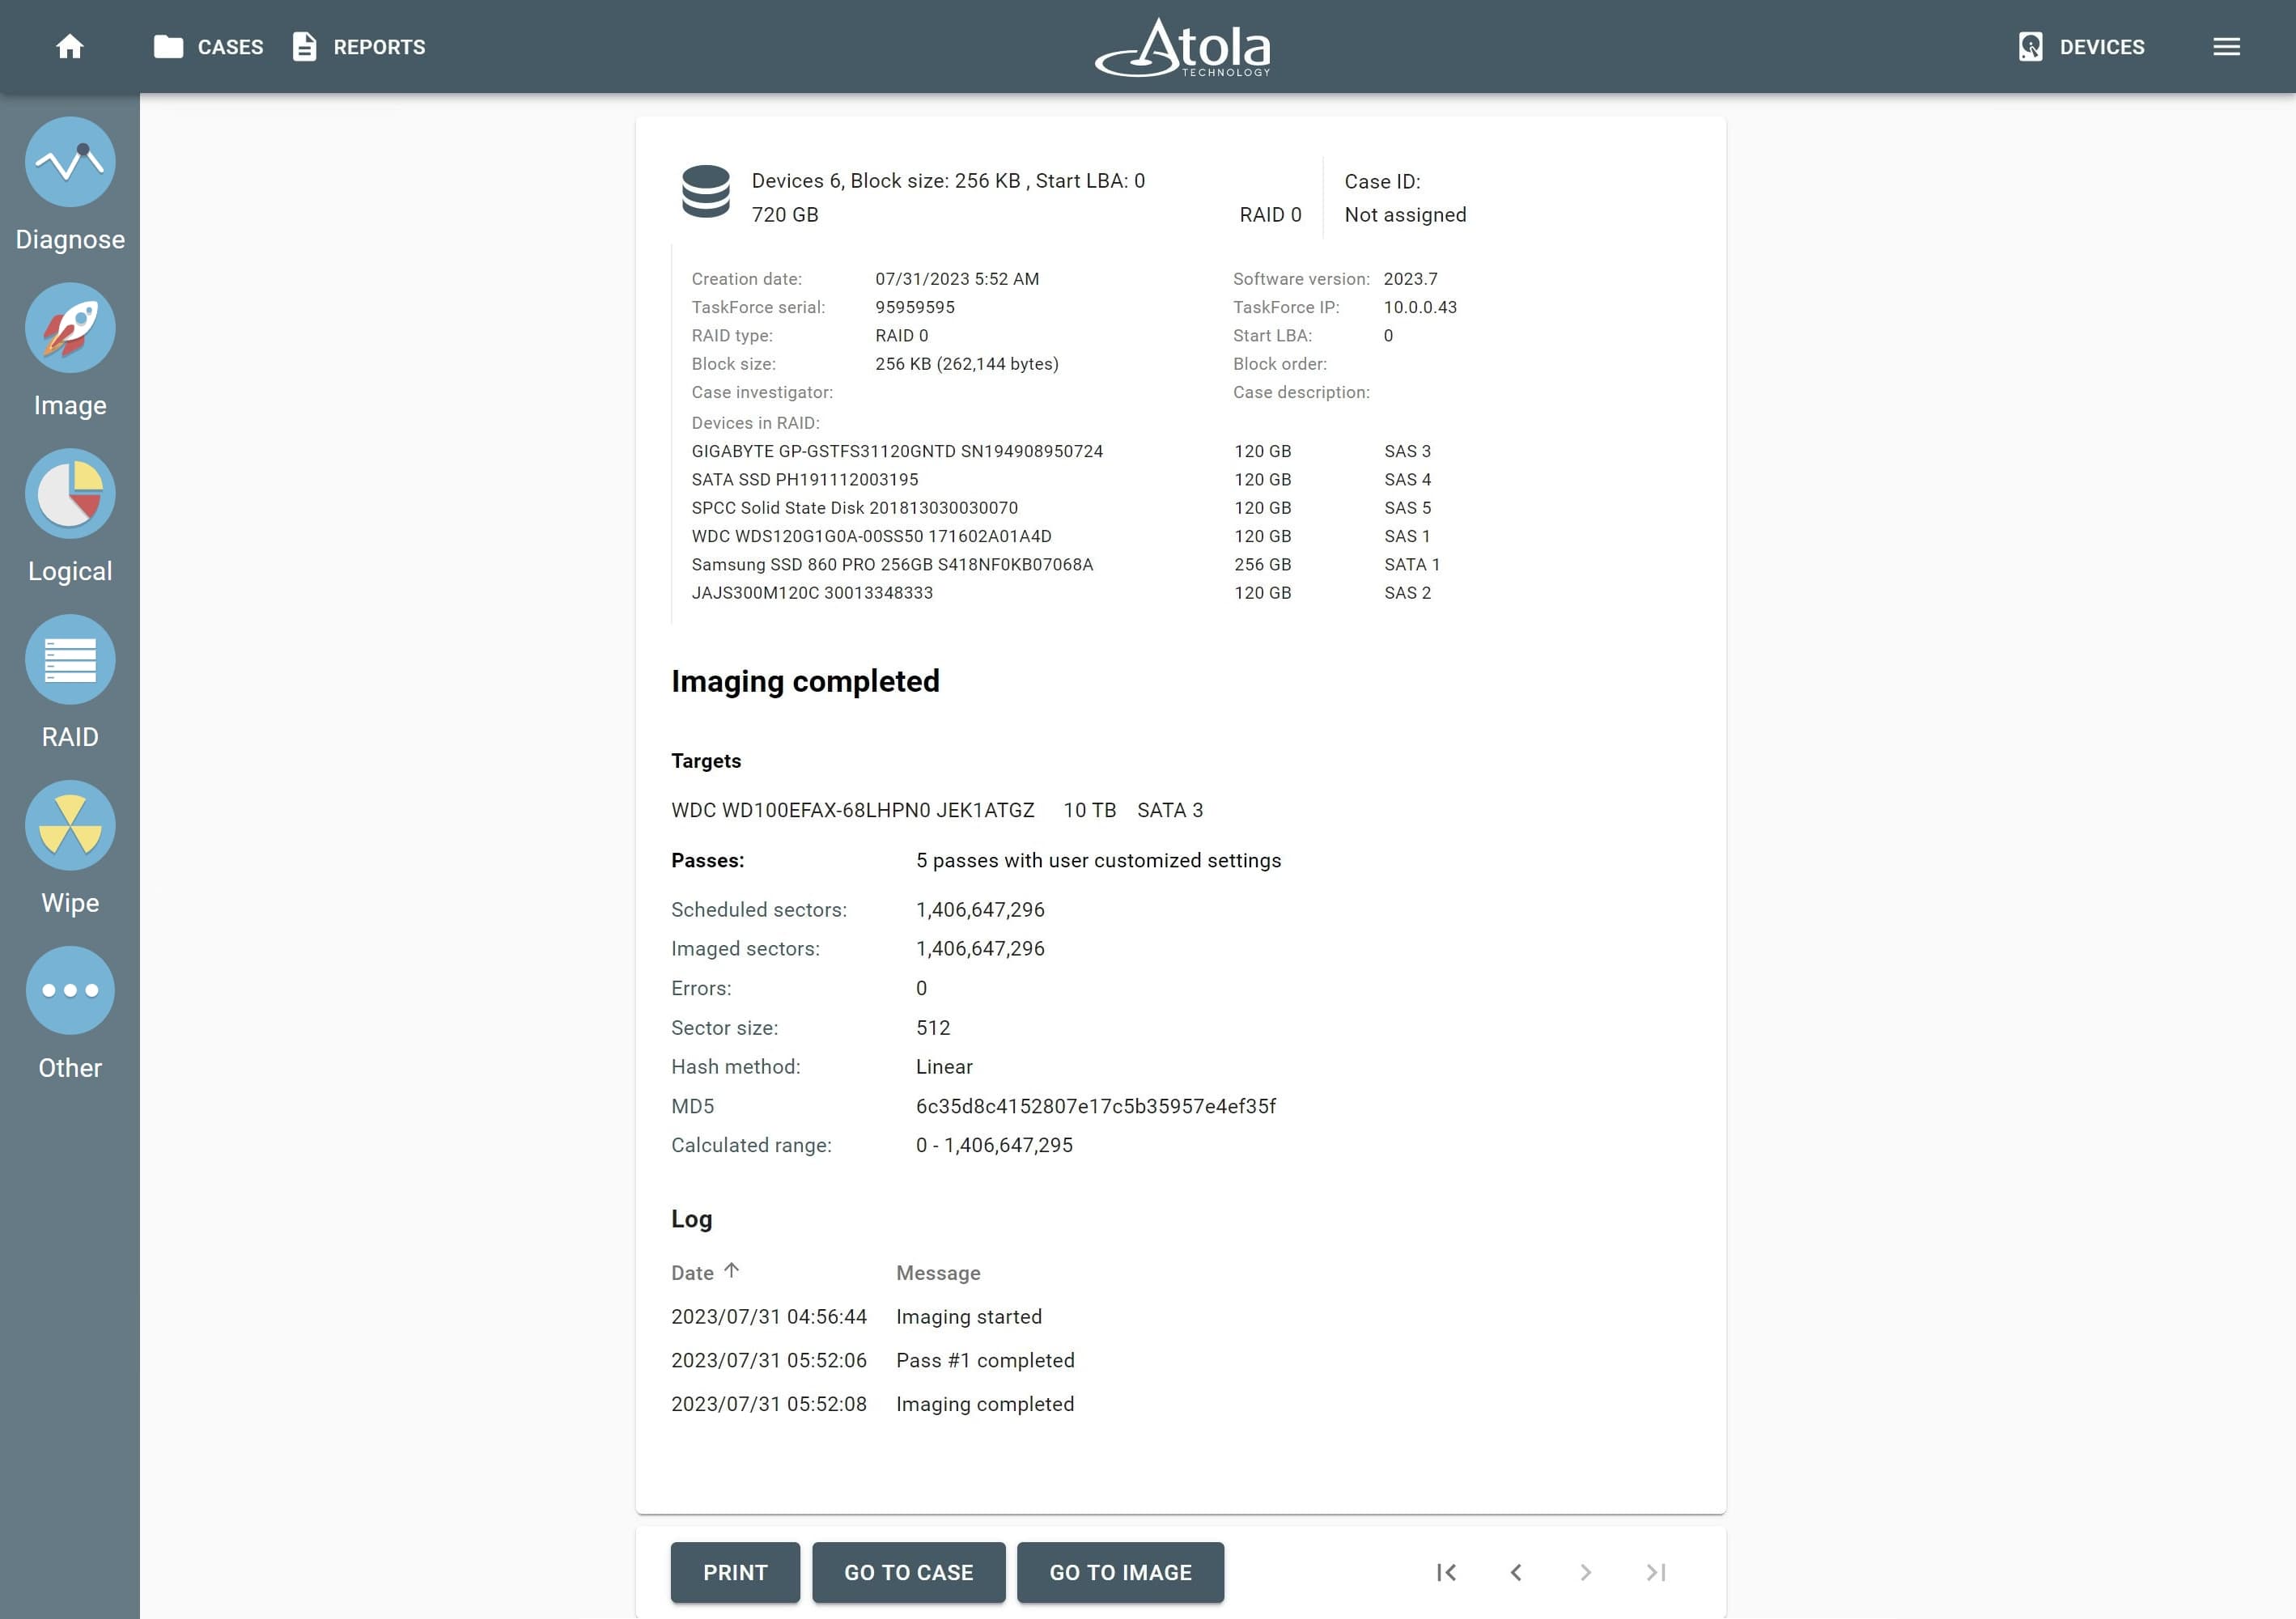
The Imaging completed report.