RAID 5 forensics: Automated reassembly and imaging
TaskForce 2 is equipped with configuration autodetection module that makes assembling and imaging a RAID 5 array with an unknown configuration fast and easy.
Autodetection of RAID 5 configuration
- Connect the drives to the TaskForce hardware unit's ports that are switched to the Source mode.
- On the left in the TaskForce main window, click RAID.
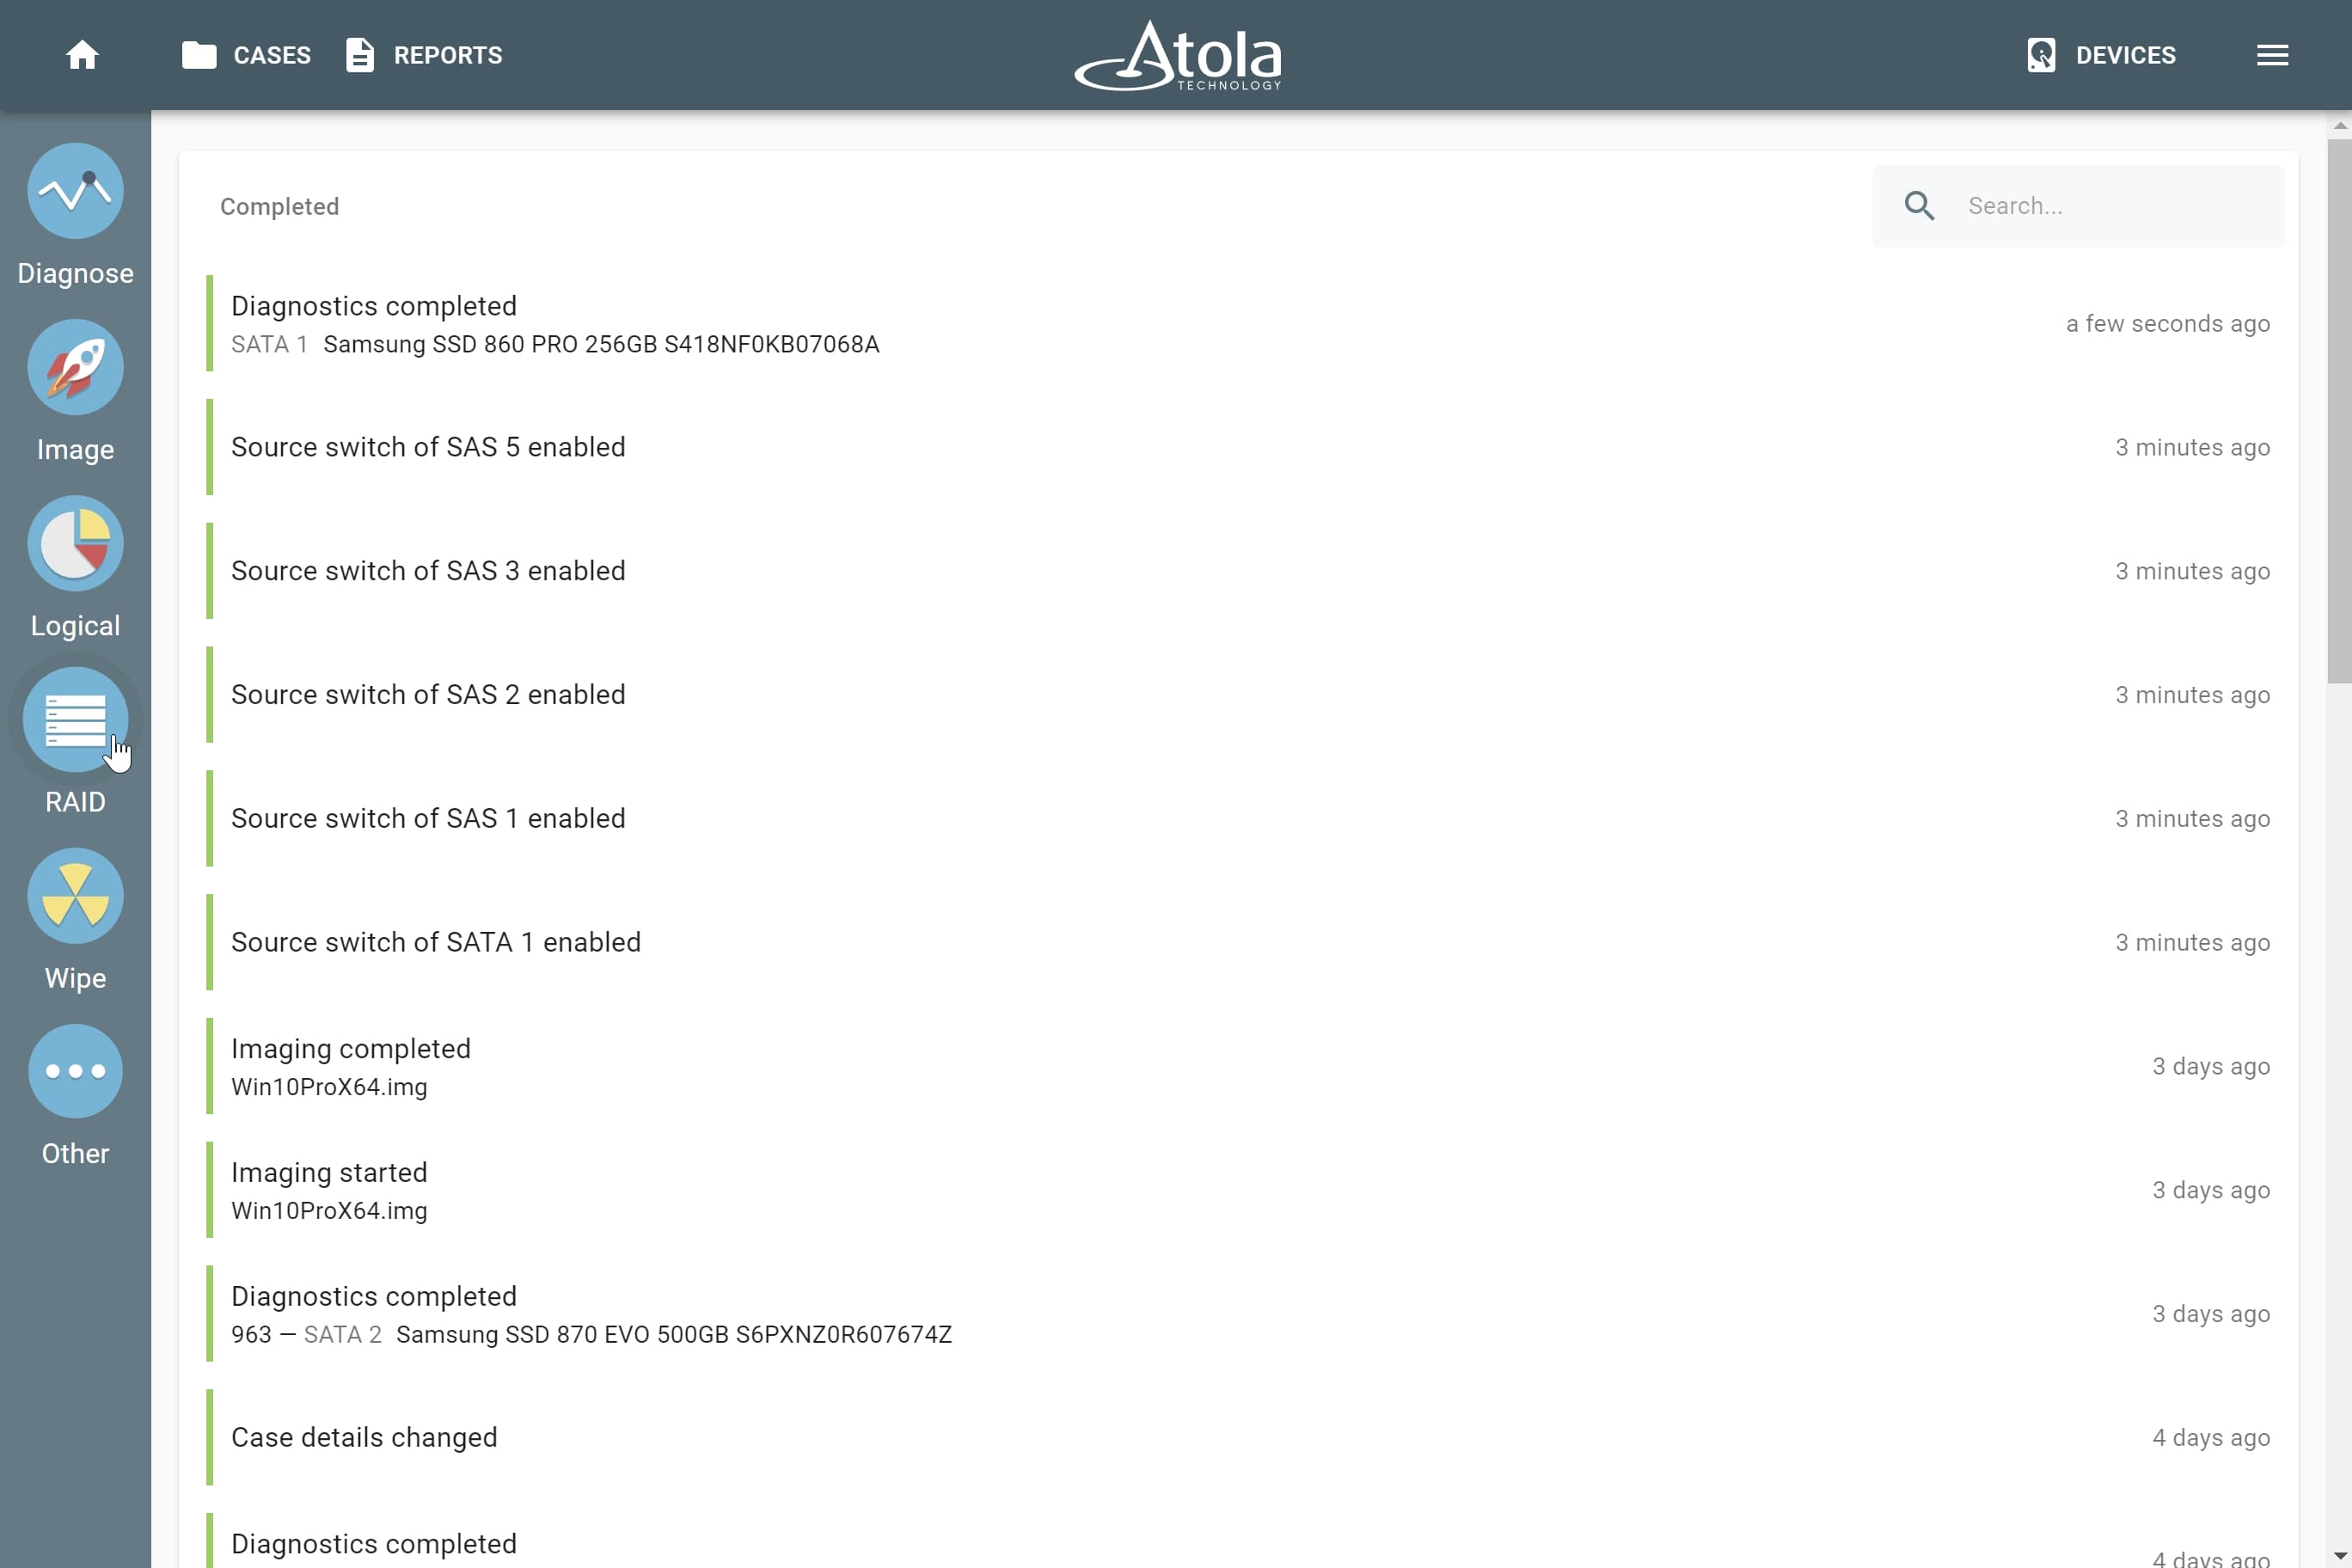
Initiating work with RAID.
- On the Select source device panel, select the drives that make up a RAID array and click Continue.
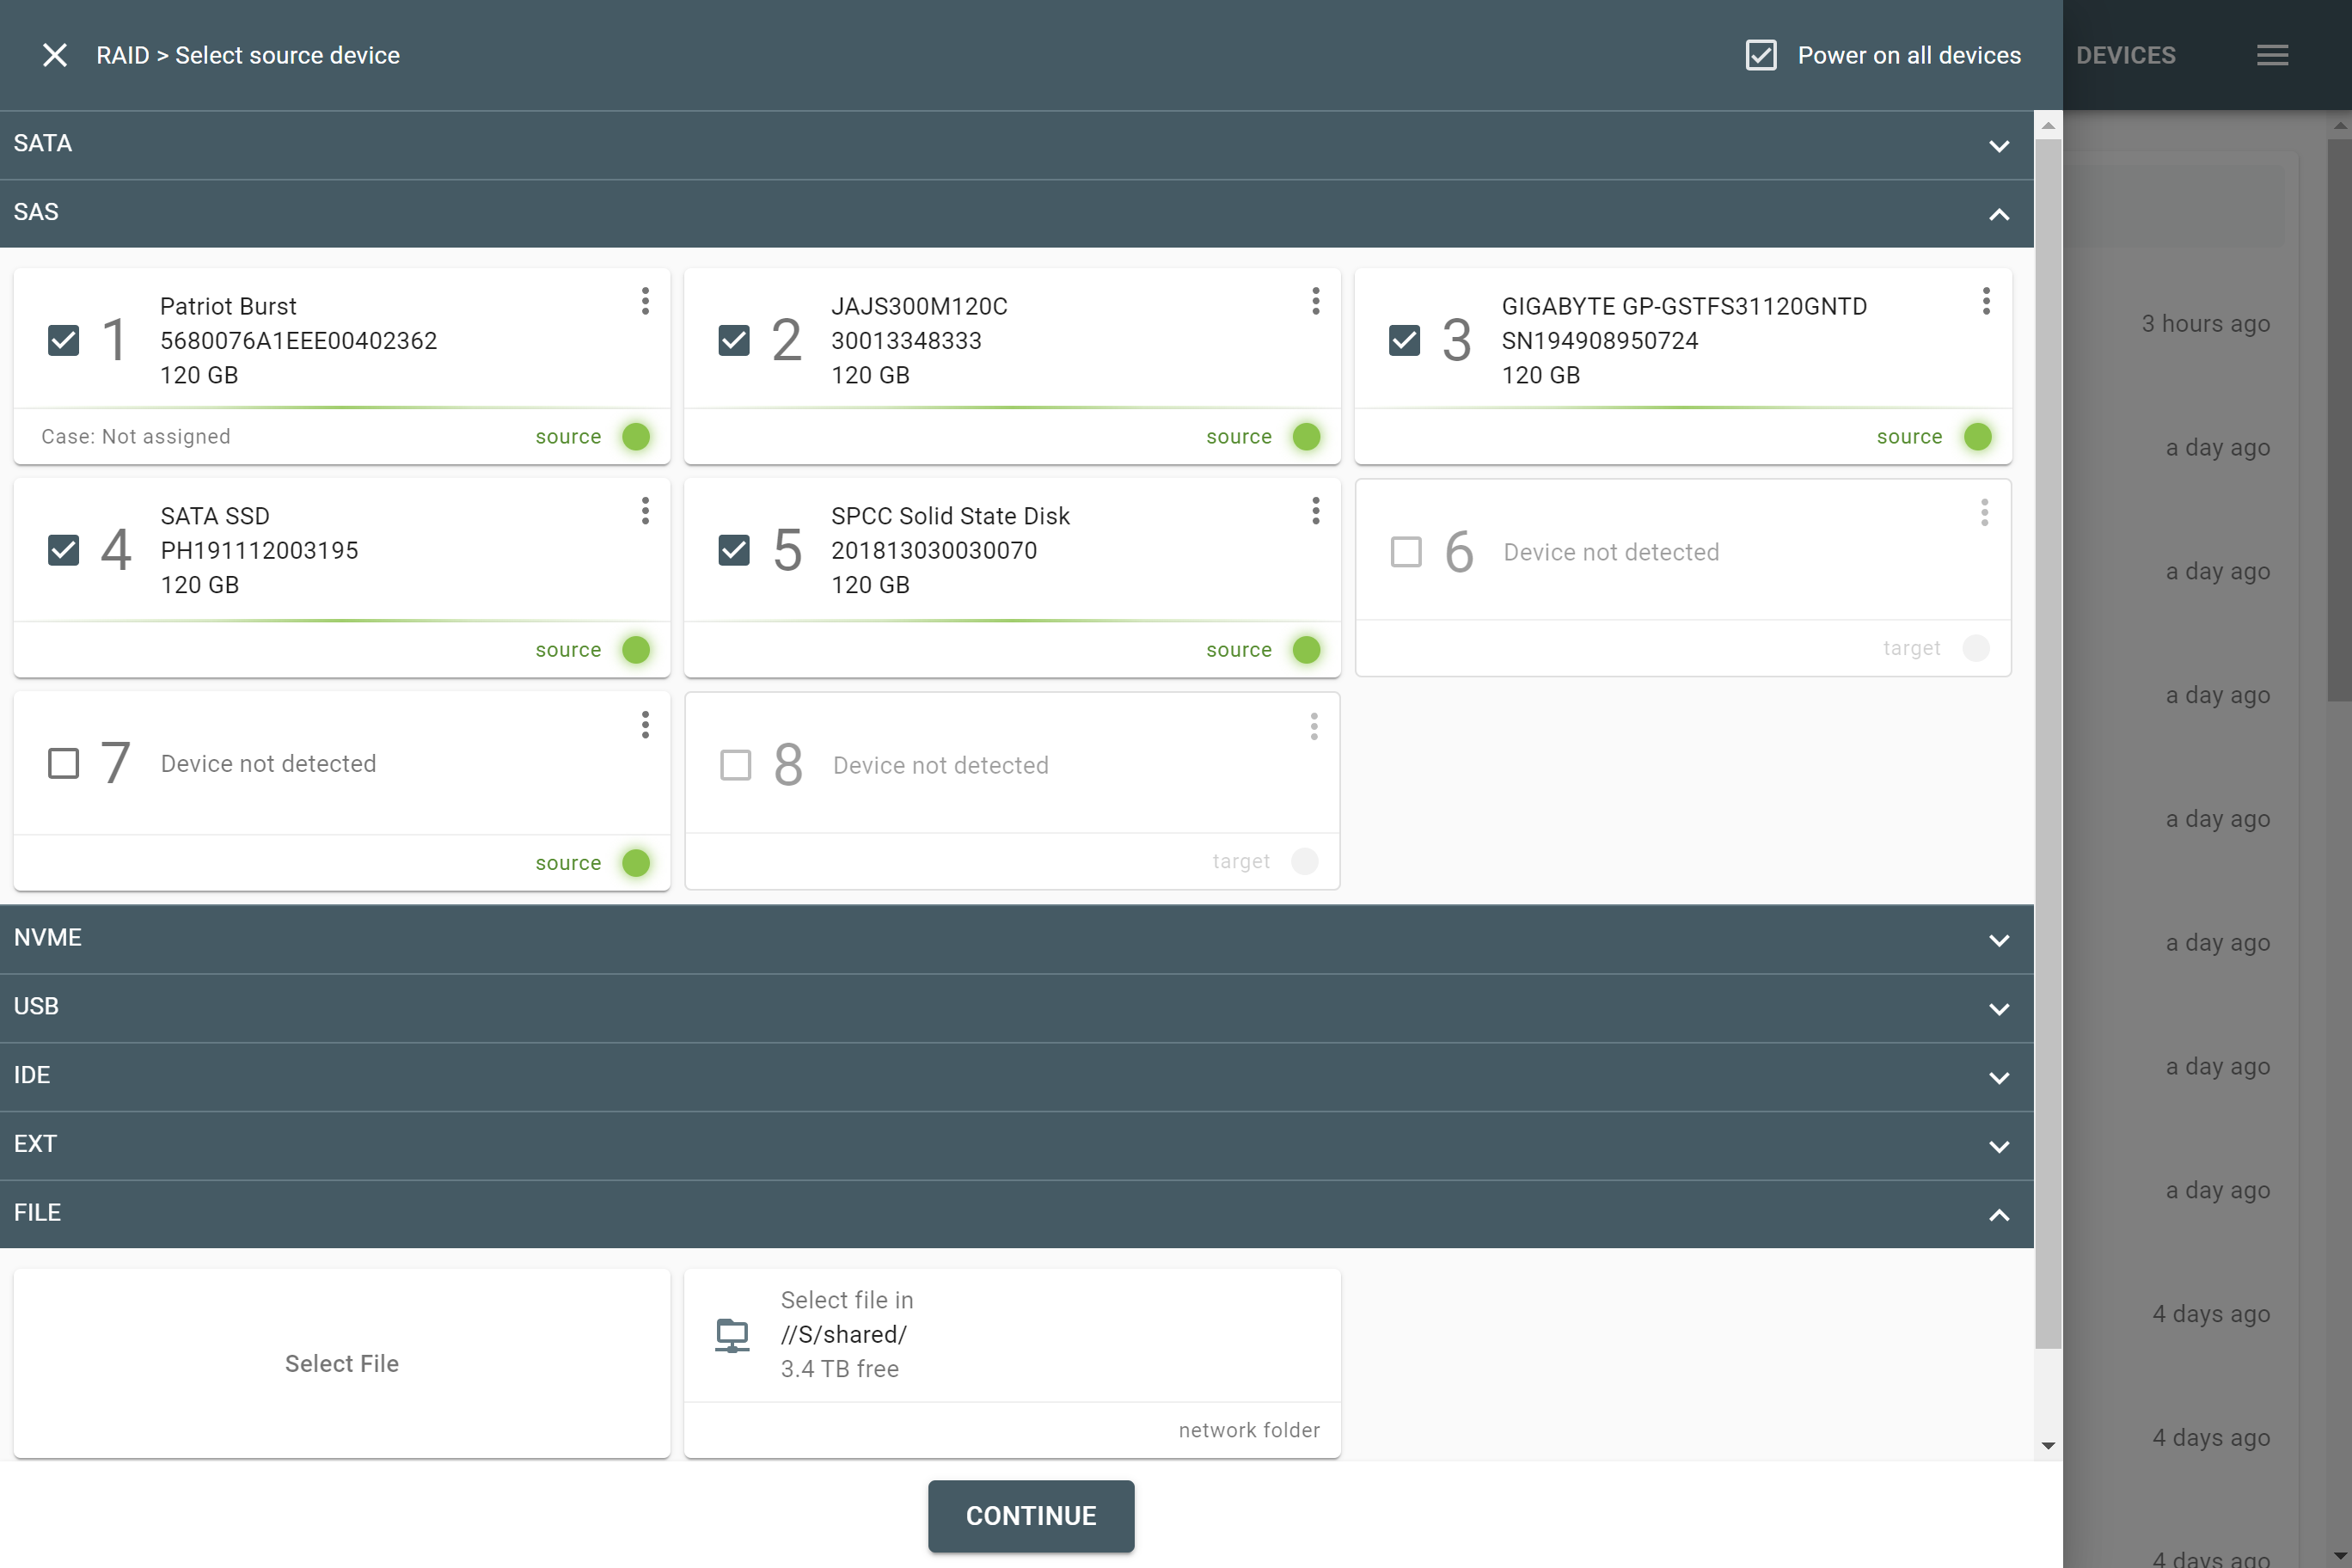
Selecting the drives that make up a RAID.
To assemble a RAID from images instead of drives or to use a combination of drives and images, on the Select source device panel, expand the File section and click Select file. Then browse and select images.
After you selected the drives that make up a RAID array, TaskForce 2 redirects you to the RAID configuration screen. It consists of three parts:
- The selected devices (and/or image files) are shown in the top RAID configuration part.
- The RAID Partitions viewer below it provides a preview of partitions and files within them, once RAID has been successfully assembled.
- The Autodetection module in the right-hand part of the screen immediately starts running and produces an output of RAID configuration suggestions.
Autodetection module reads data from all the selected devices and/or images to detect these RAID parameters:
- Order of drives/images.
- RAID type.
- Start LBA.
- Block size.
- Block order.
Should the configuration be known, these parameters can also be set manually by the operator.
The time required for configuration detection can vary from a few seconds to a few hours depending on the numbers of drives involved, RAID volume and type, and how metadata is distributed on the drives in the RAID. In certain cases, Autodetection may produce several configuration suggestions, which can be applied one by one to find the exact match. TaskForce's Autodetection is based on heuristics algorithms that help speed up the variant check.
- Click the Apply button to apply the configuration suggested by the Autodetection module.
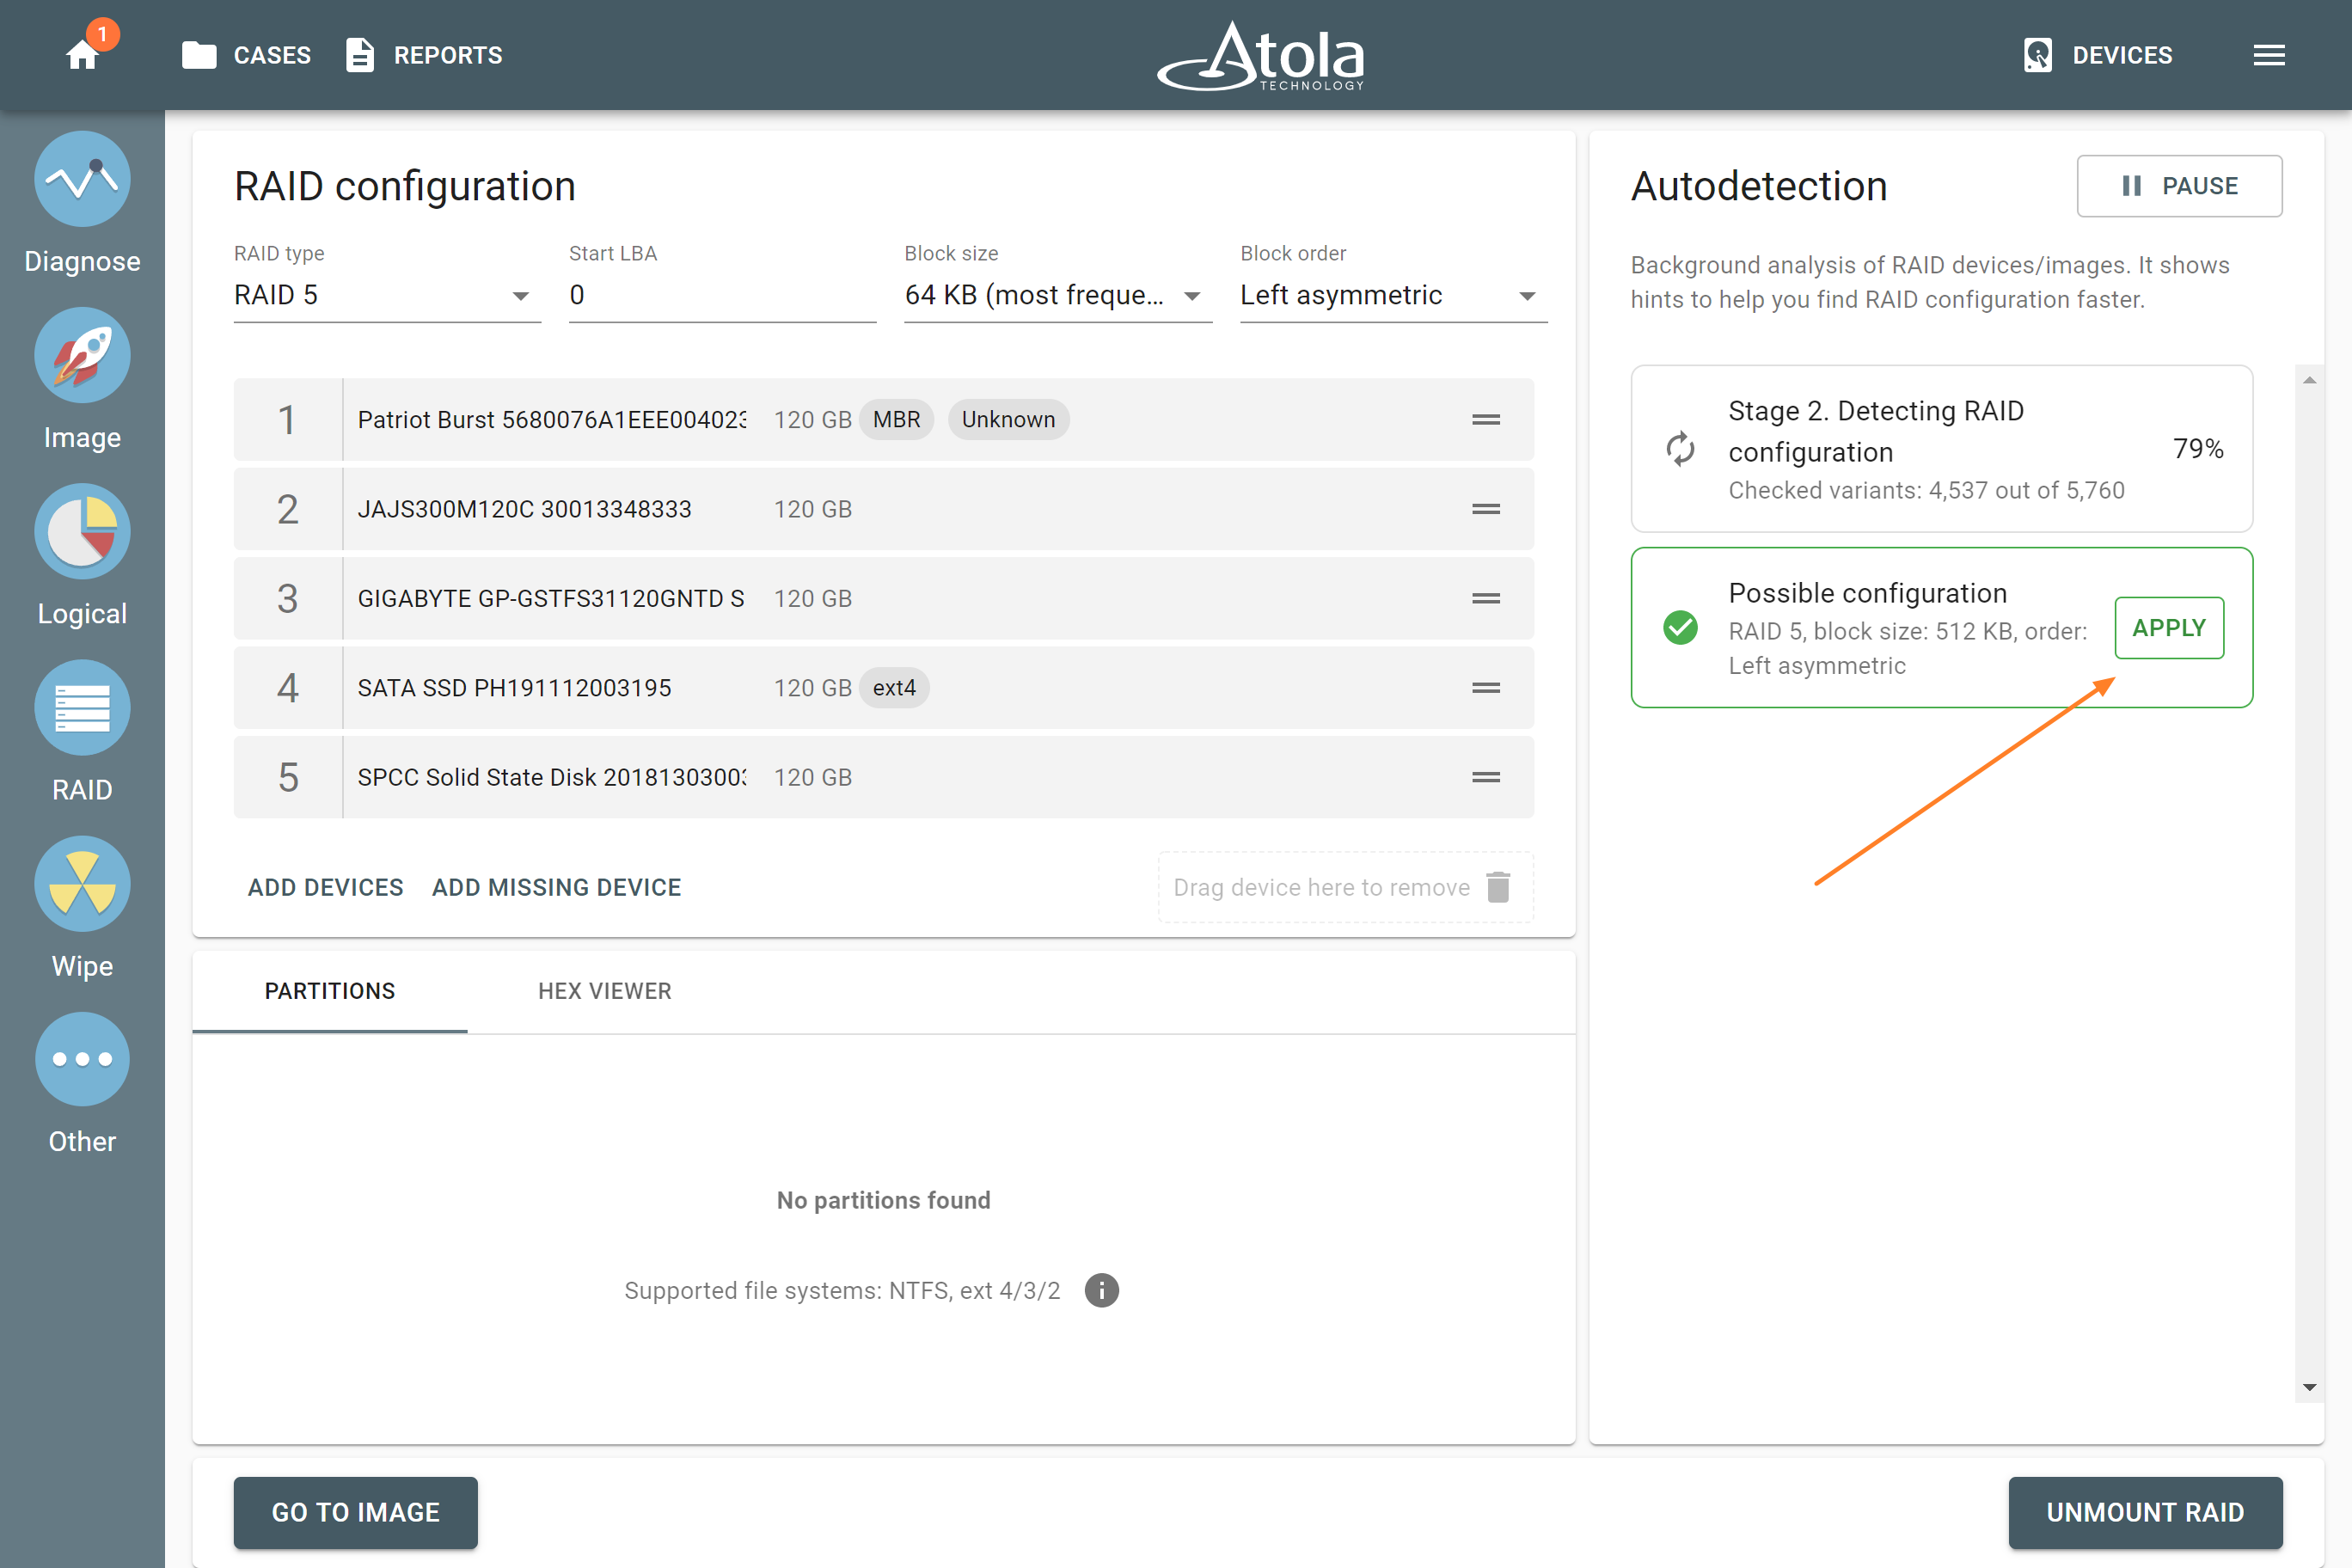
Autodetection module searching for possible RAID configurations.
If the suggested configuration matches the RAID native configuration, partitions of the RAID will be displayed and a preview of data within the partition will be enabled.
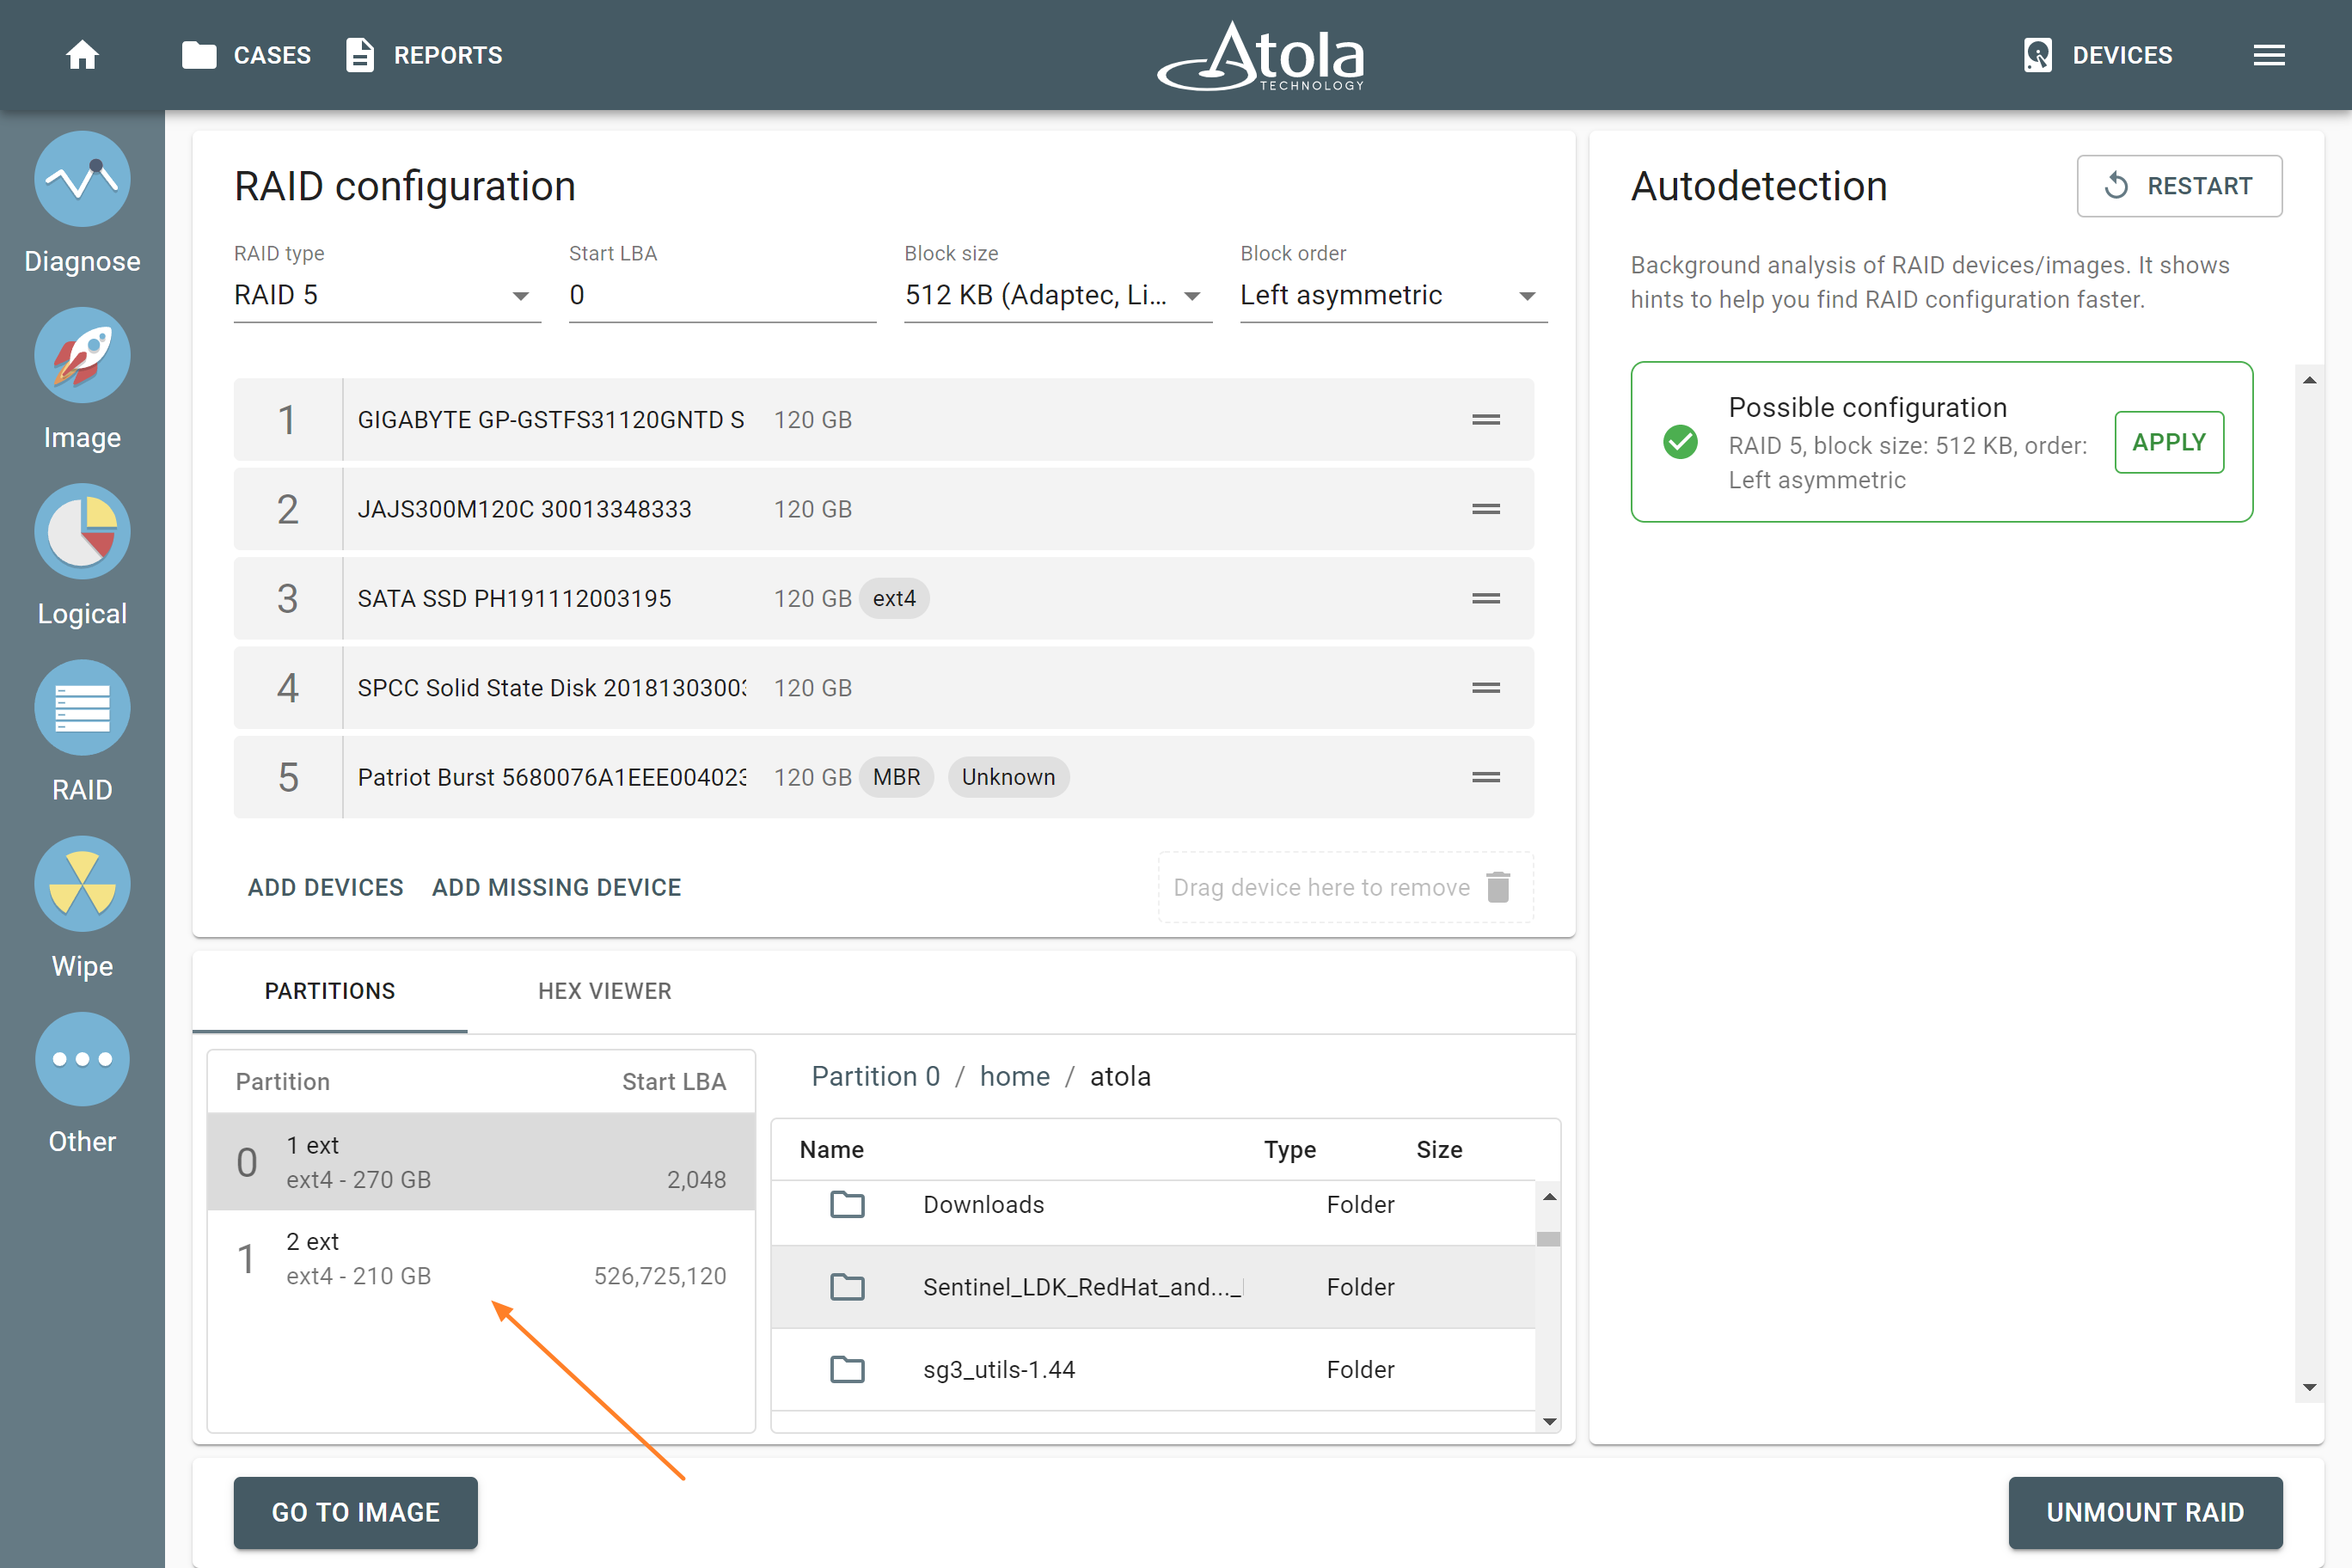
Detected RAID 5 configuration applied
Imaging selected partitions of RAID 5
- To adjust the imaging settings and define the target for the image, in the left bottom corner of the screen, click Go to image.
- Select the target for the imaging session. Both a local server and a target device in Storage mode can be used for imaging of a RAID array.
- Click Create file.
- In the Create image file dialog, fill out the image details and click Create.
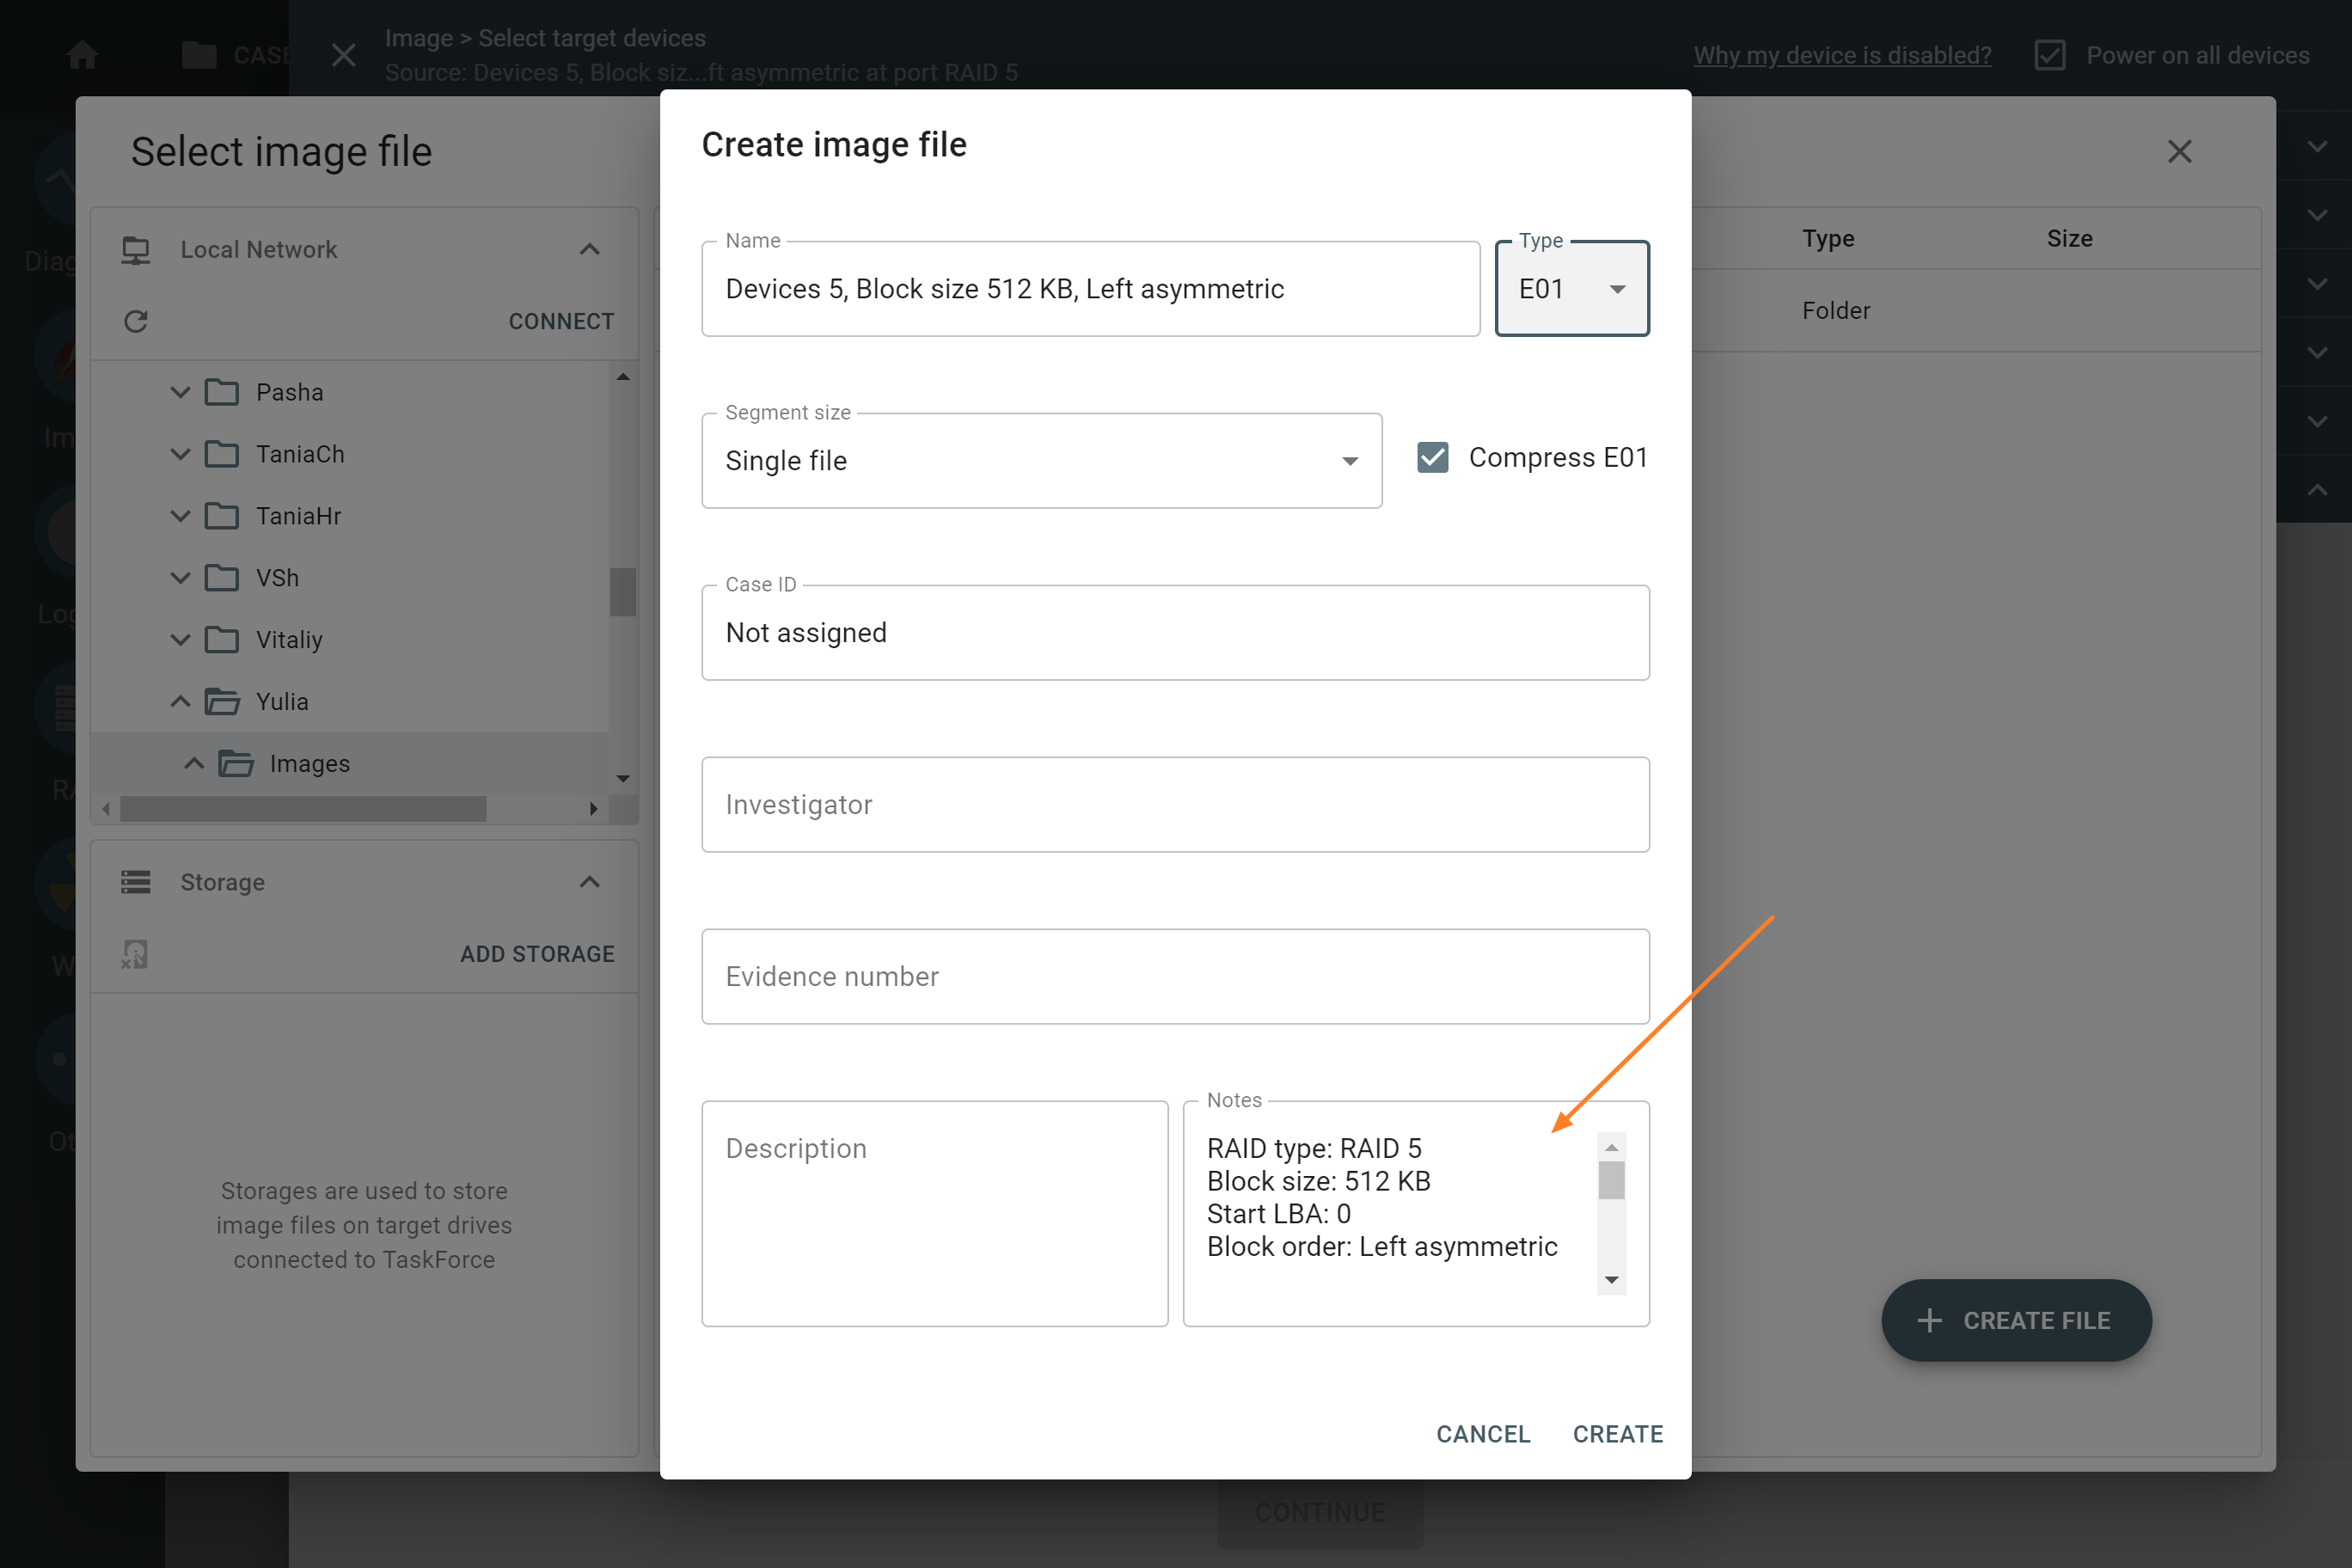
Imaging RAID. E01 details.
- On the Settings page, click Change and then click the settings of an imaging pass.
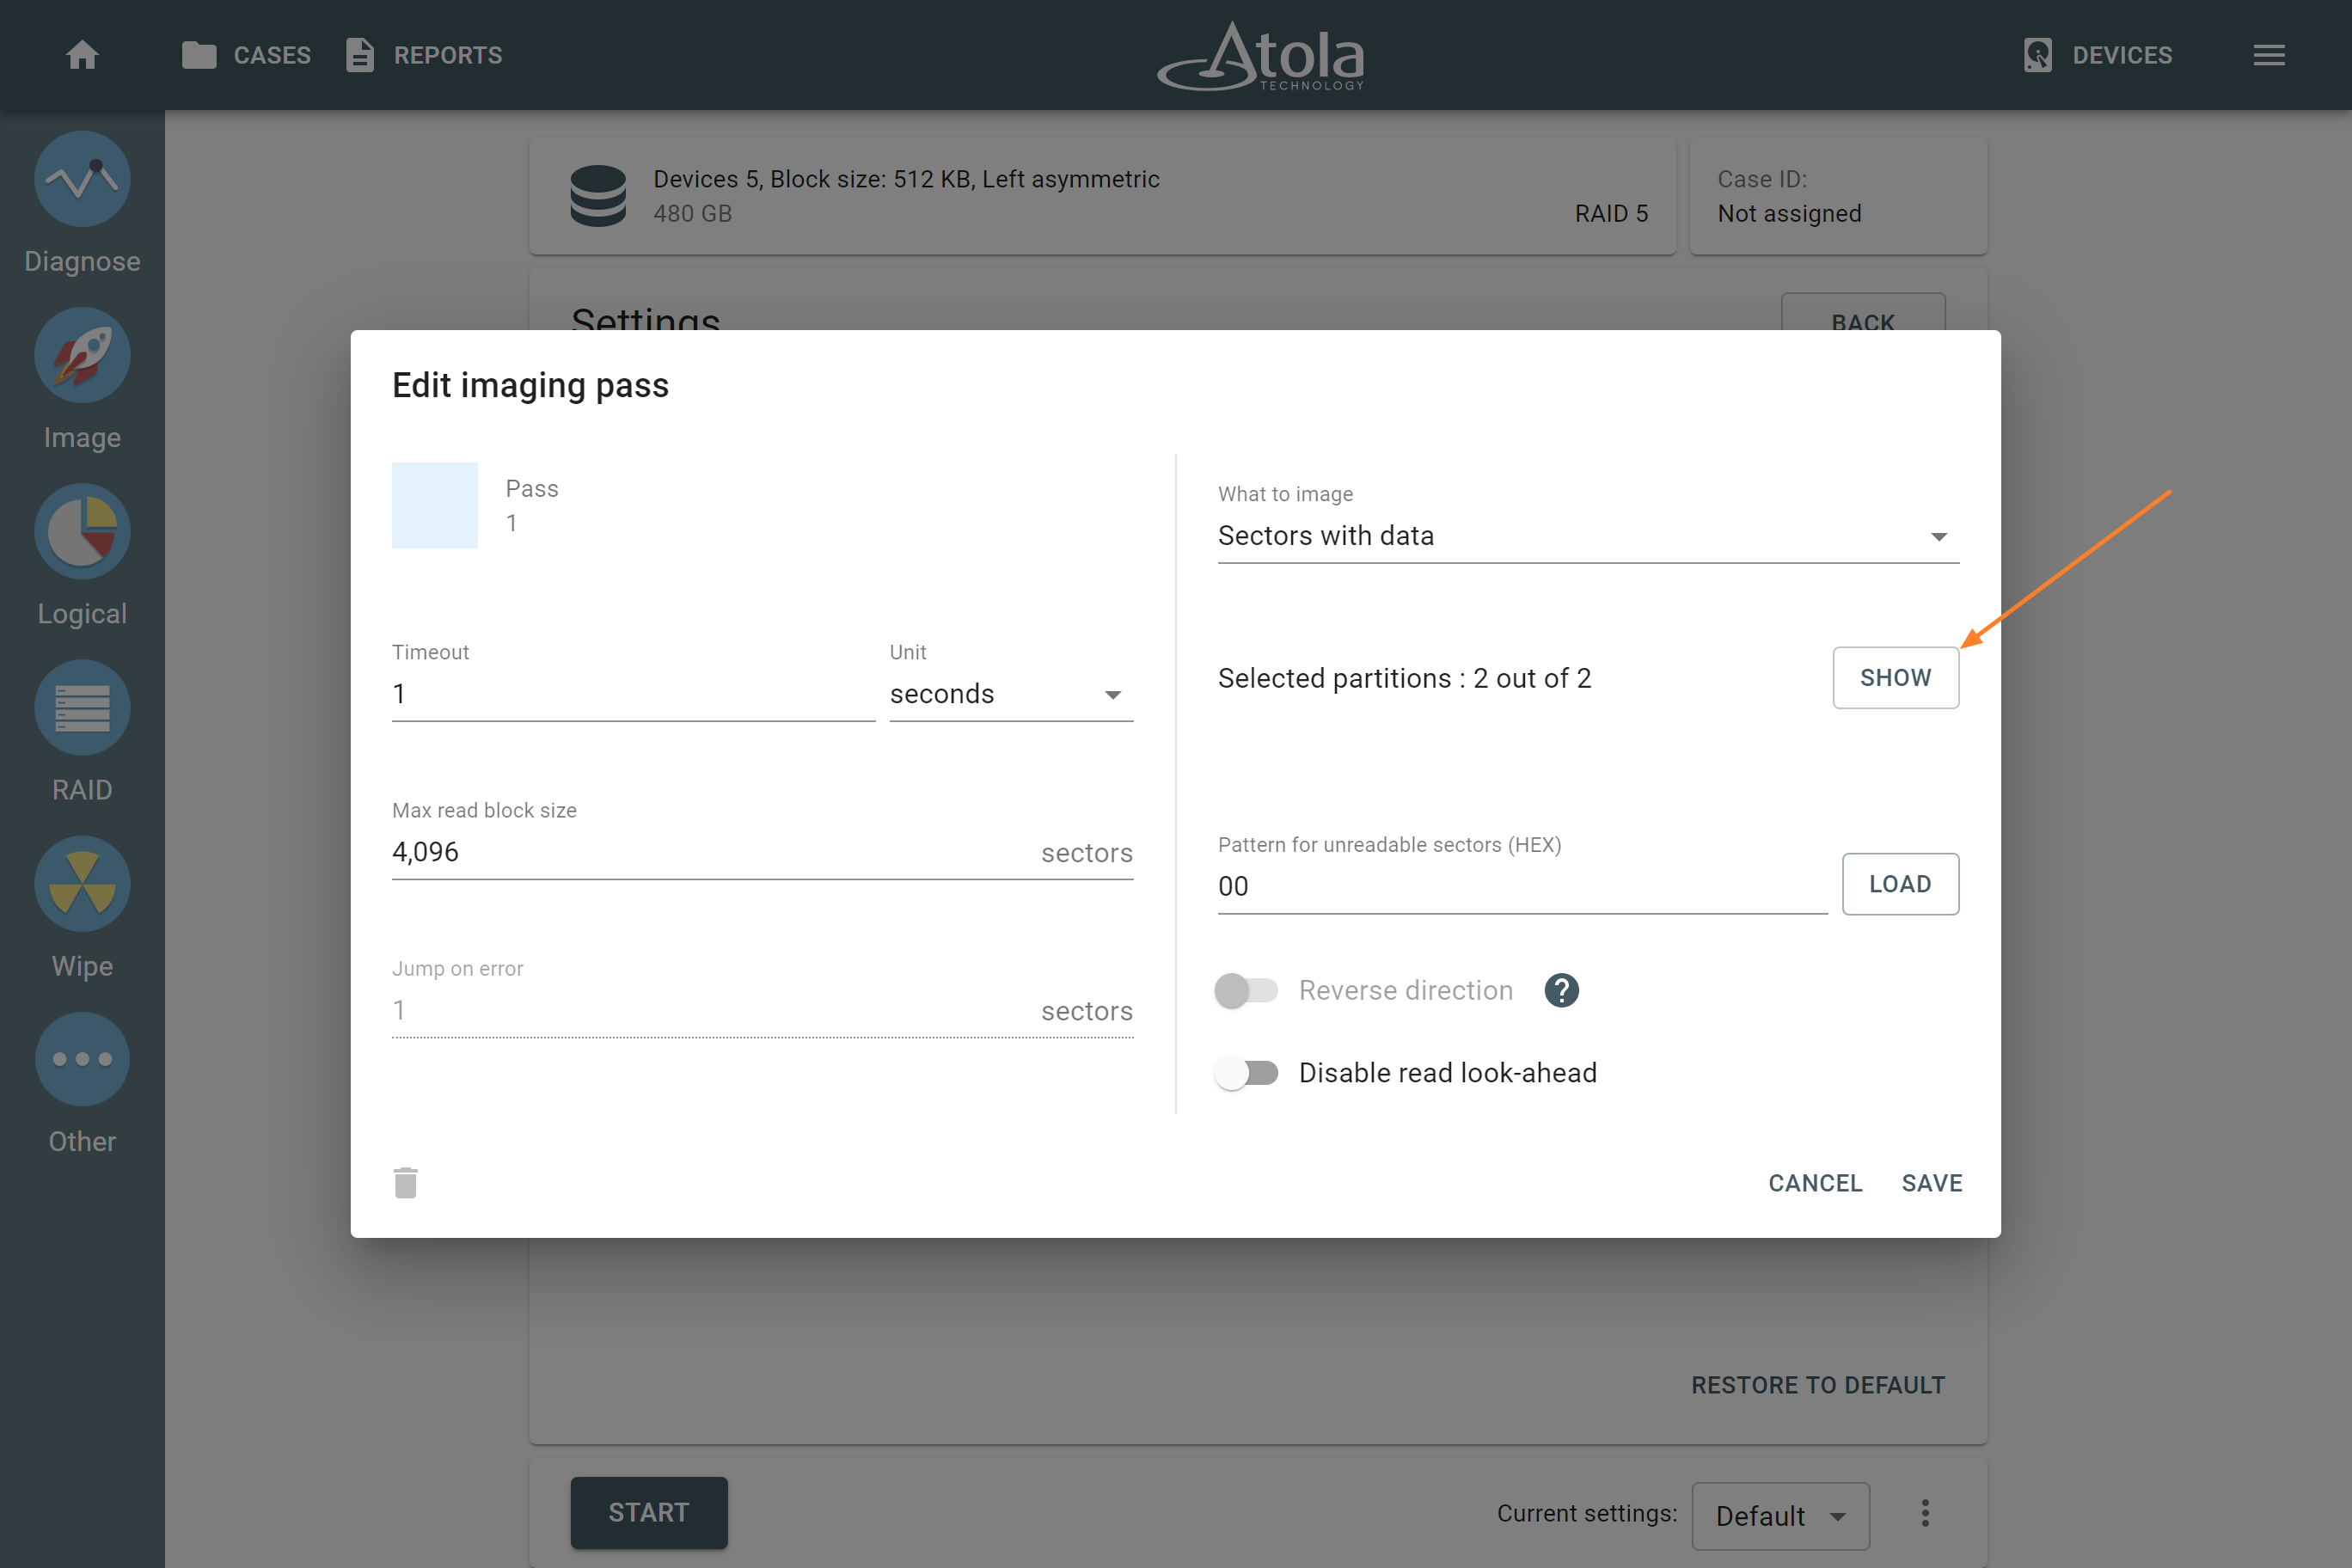
Imaging settings.
- In Edit imaging pass dialog, select the individual partitions to be imaged if selective imaging is required and click Save.

Selecting partitions in imaging settings
- To launch the imaging session, click Start.
TaskForce 2 will be imaging RAID 5 array or its partitions as configured in the imaging settings.
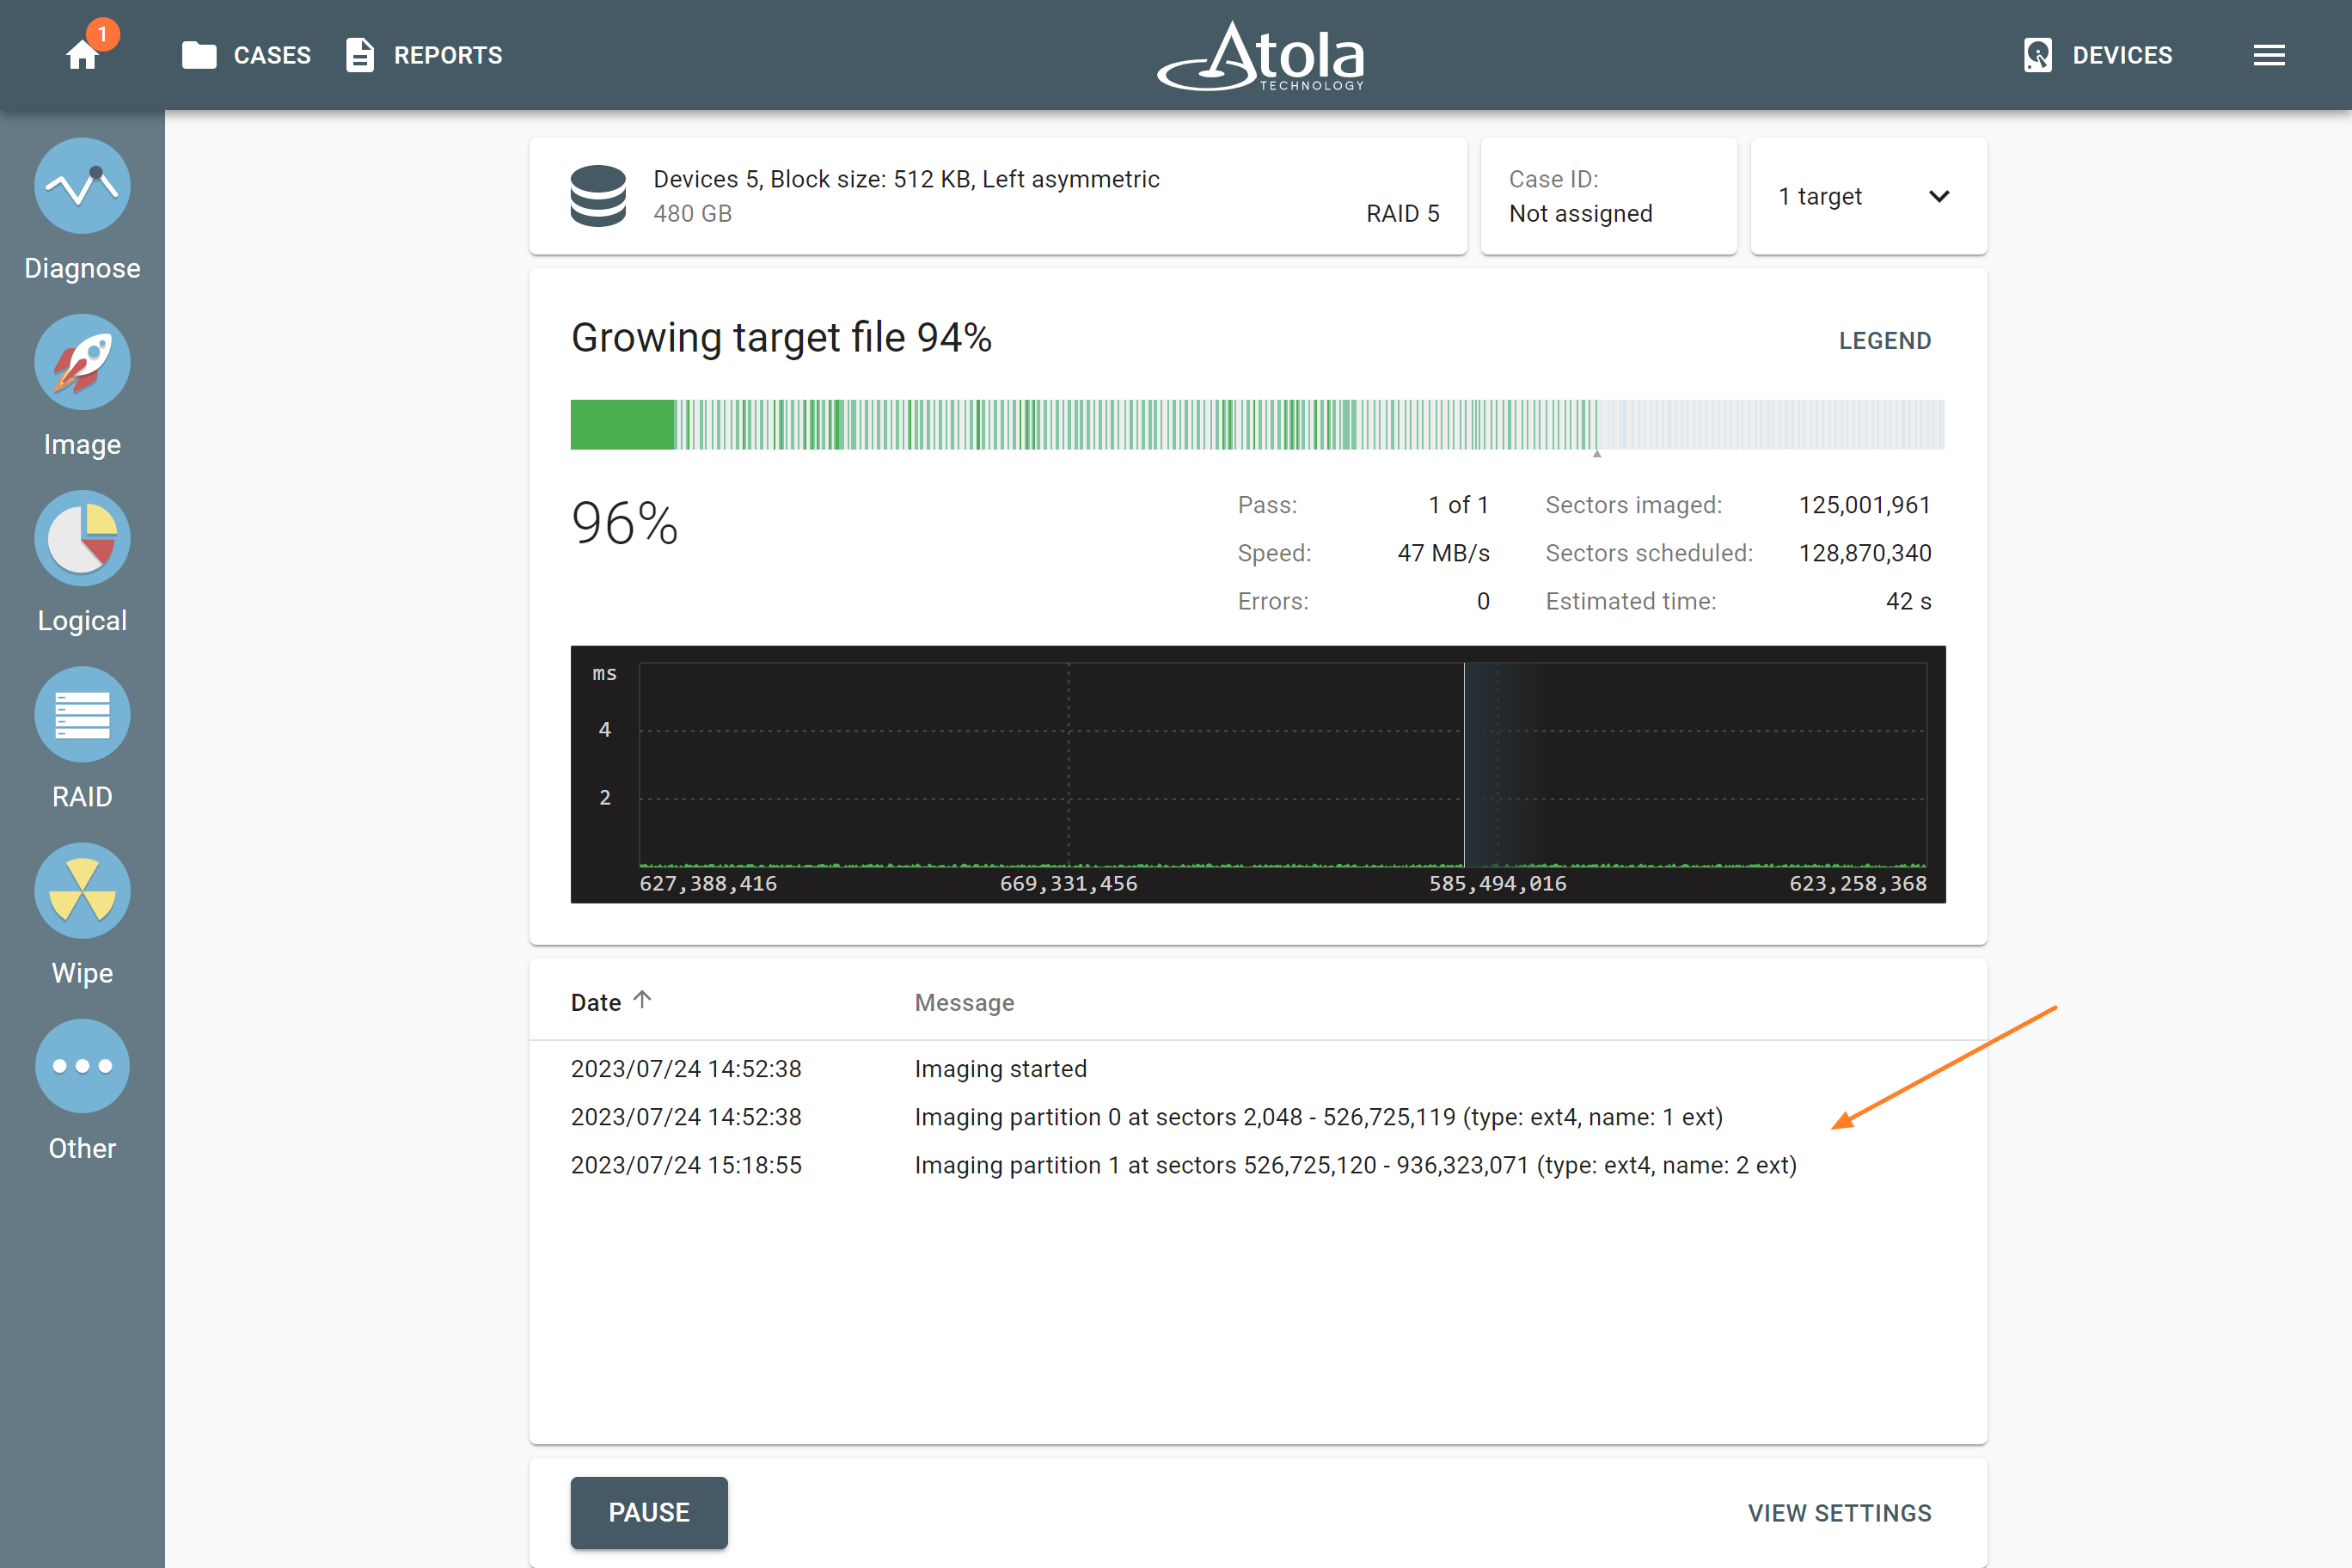
Imaging RAID 5 in progress
At the end of the imaging session, TaskForce 2 produces an Imaging completed report with all the details of the source drives, the RAID configuration, the target, the partition, the timestamps, etc.
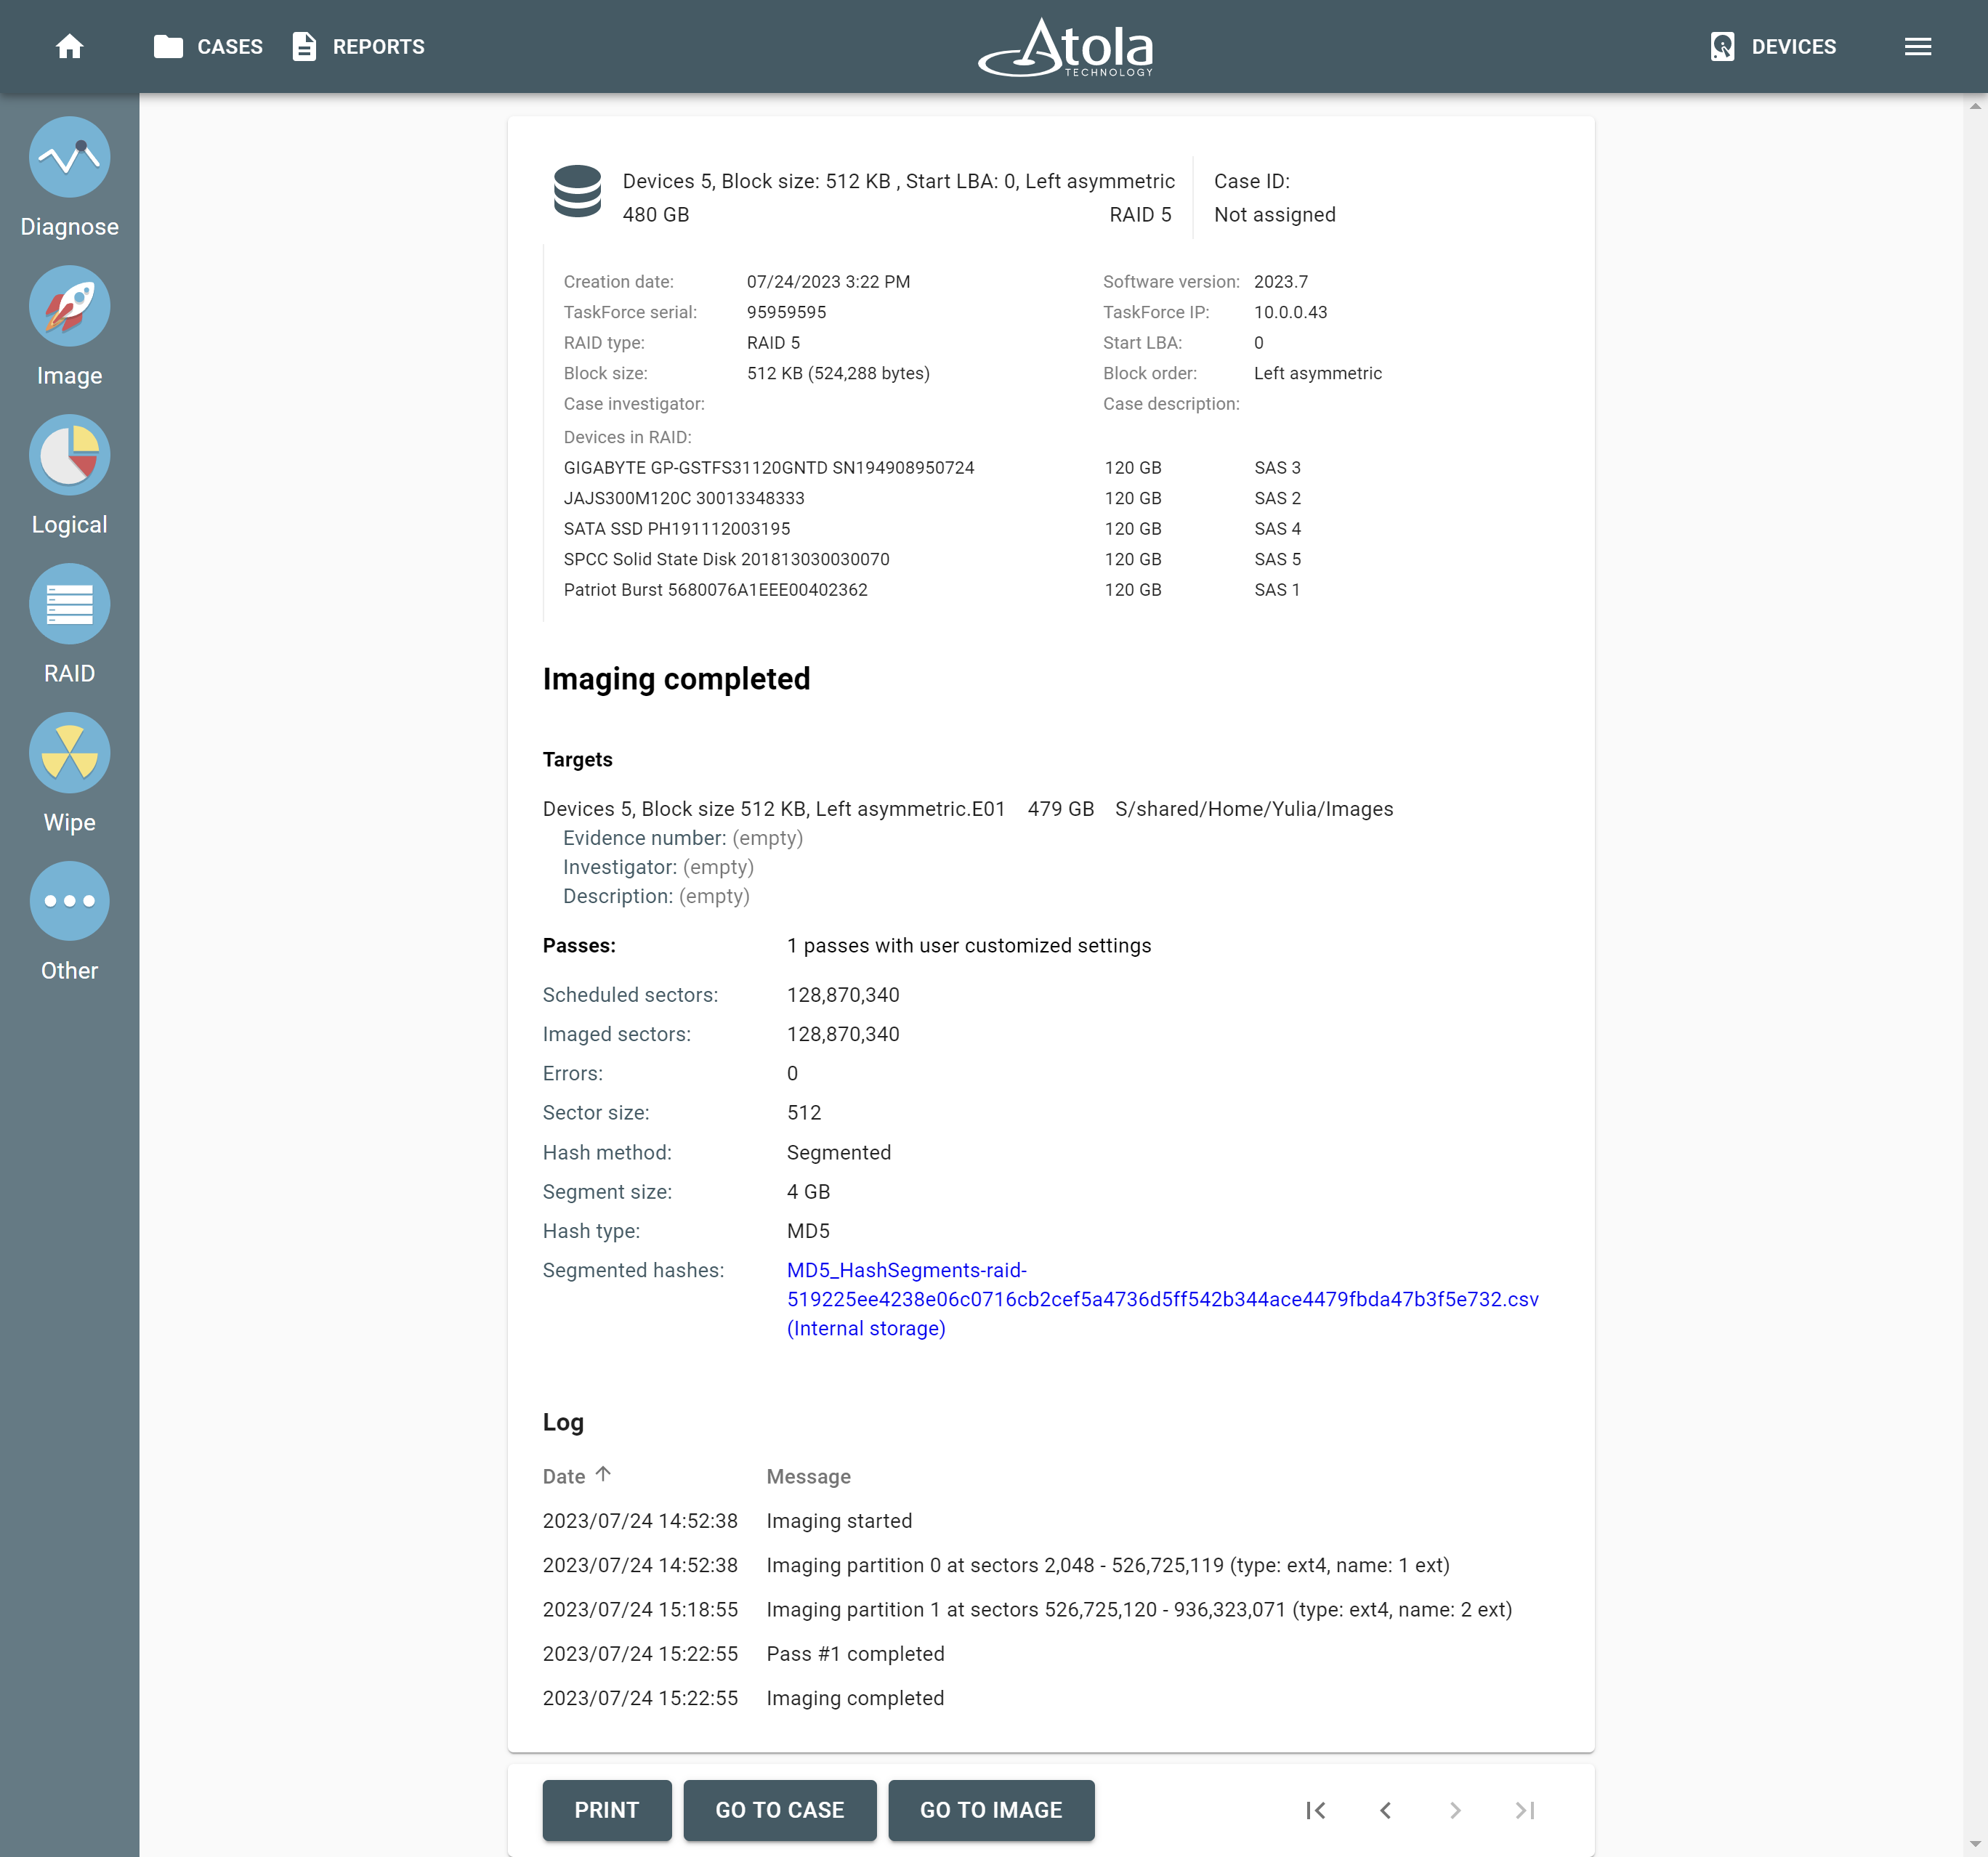
RAID 5 forensics. Imaging report