Instant forensic RAID reconstruction: Linux mdadm
Atola TaskForce 2 can automatically detect configuration of software RAID created with mdadm in Linux and perform immediate forensic RAID reconstruction.
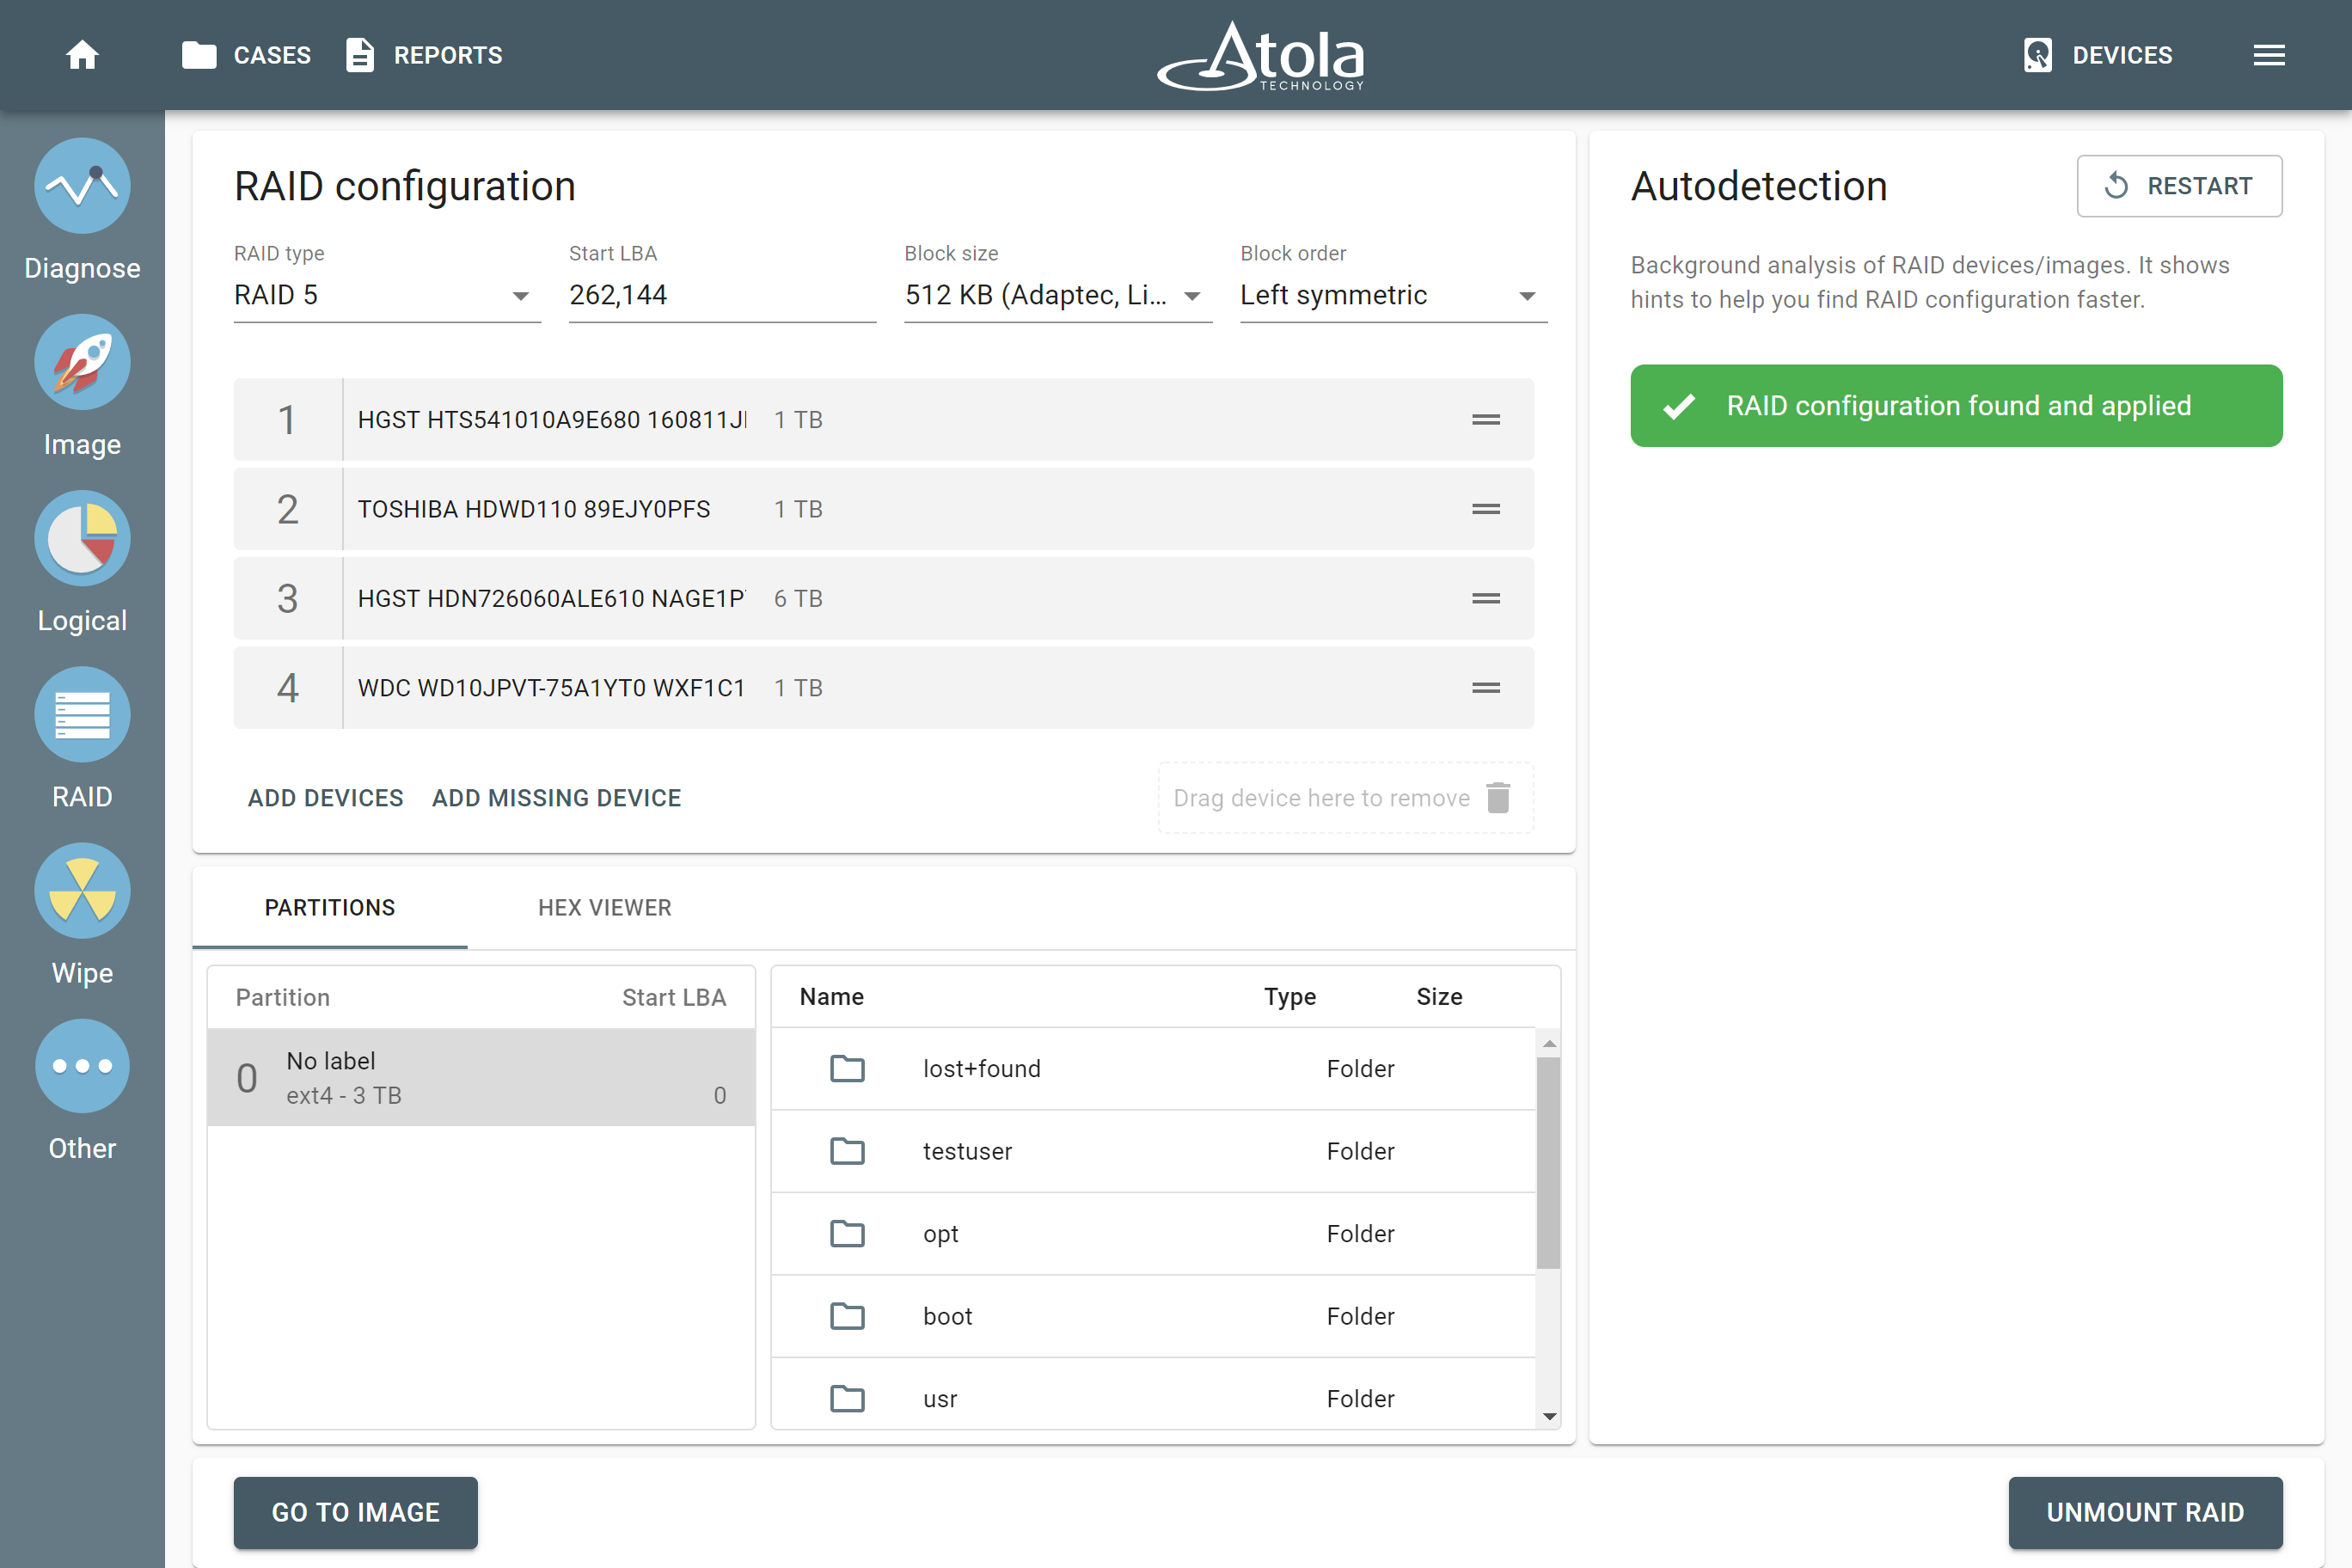
Autodetection of the mdadm-created software RAID
- Connect the drives to ports in Source mode.
- On the left in the TaskForce main window, click RAID.
- Select the drives that make up a RAID array and click Continue.
Autodetection module has instantly recognized and applied the RAID configuration. TaskForce 2 automatically identifies mdadm-created RAID arrays with great precision by detecting controller metadata.
This RAID’s Start LBA is different from 0. TaskForce’s autodetection module is trained to detect this parameter for different types of RAID arrays and mdadm versions.
A partition is displayed in the bottom part of the screen, confirming that the applied configuration is correct.
Forensic RAID reconstruction.
Imaging the mdadm-created RAID array
- To proceed with imaging the assembled RAID, click the Go to image button.
- Select the target and click Continue.
- Click Start and confirm the overwriting of data on the target.
The imaging session runs as fast as the target speed allows.
The imaging report contains all the RAID details and timestamps.
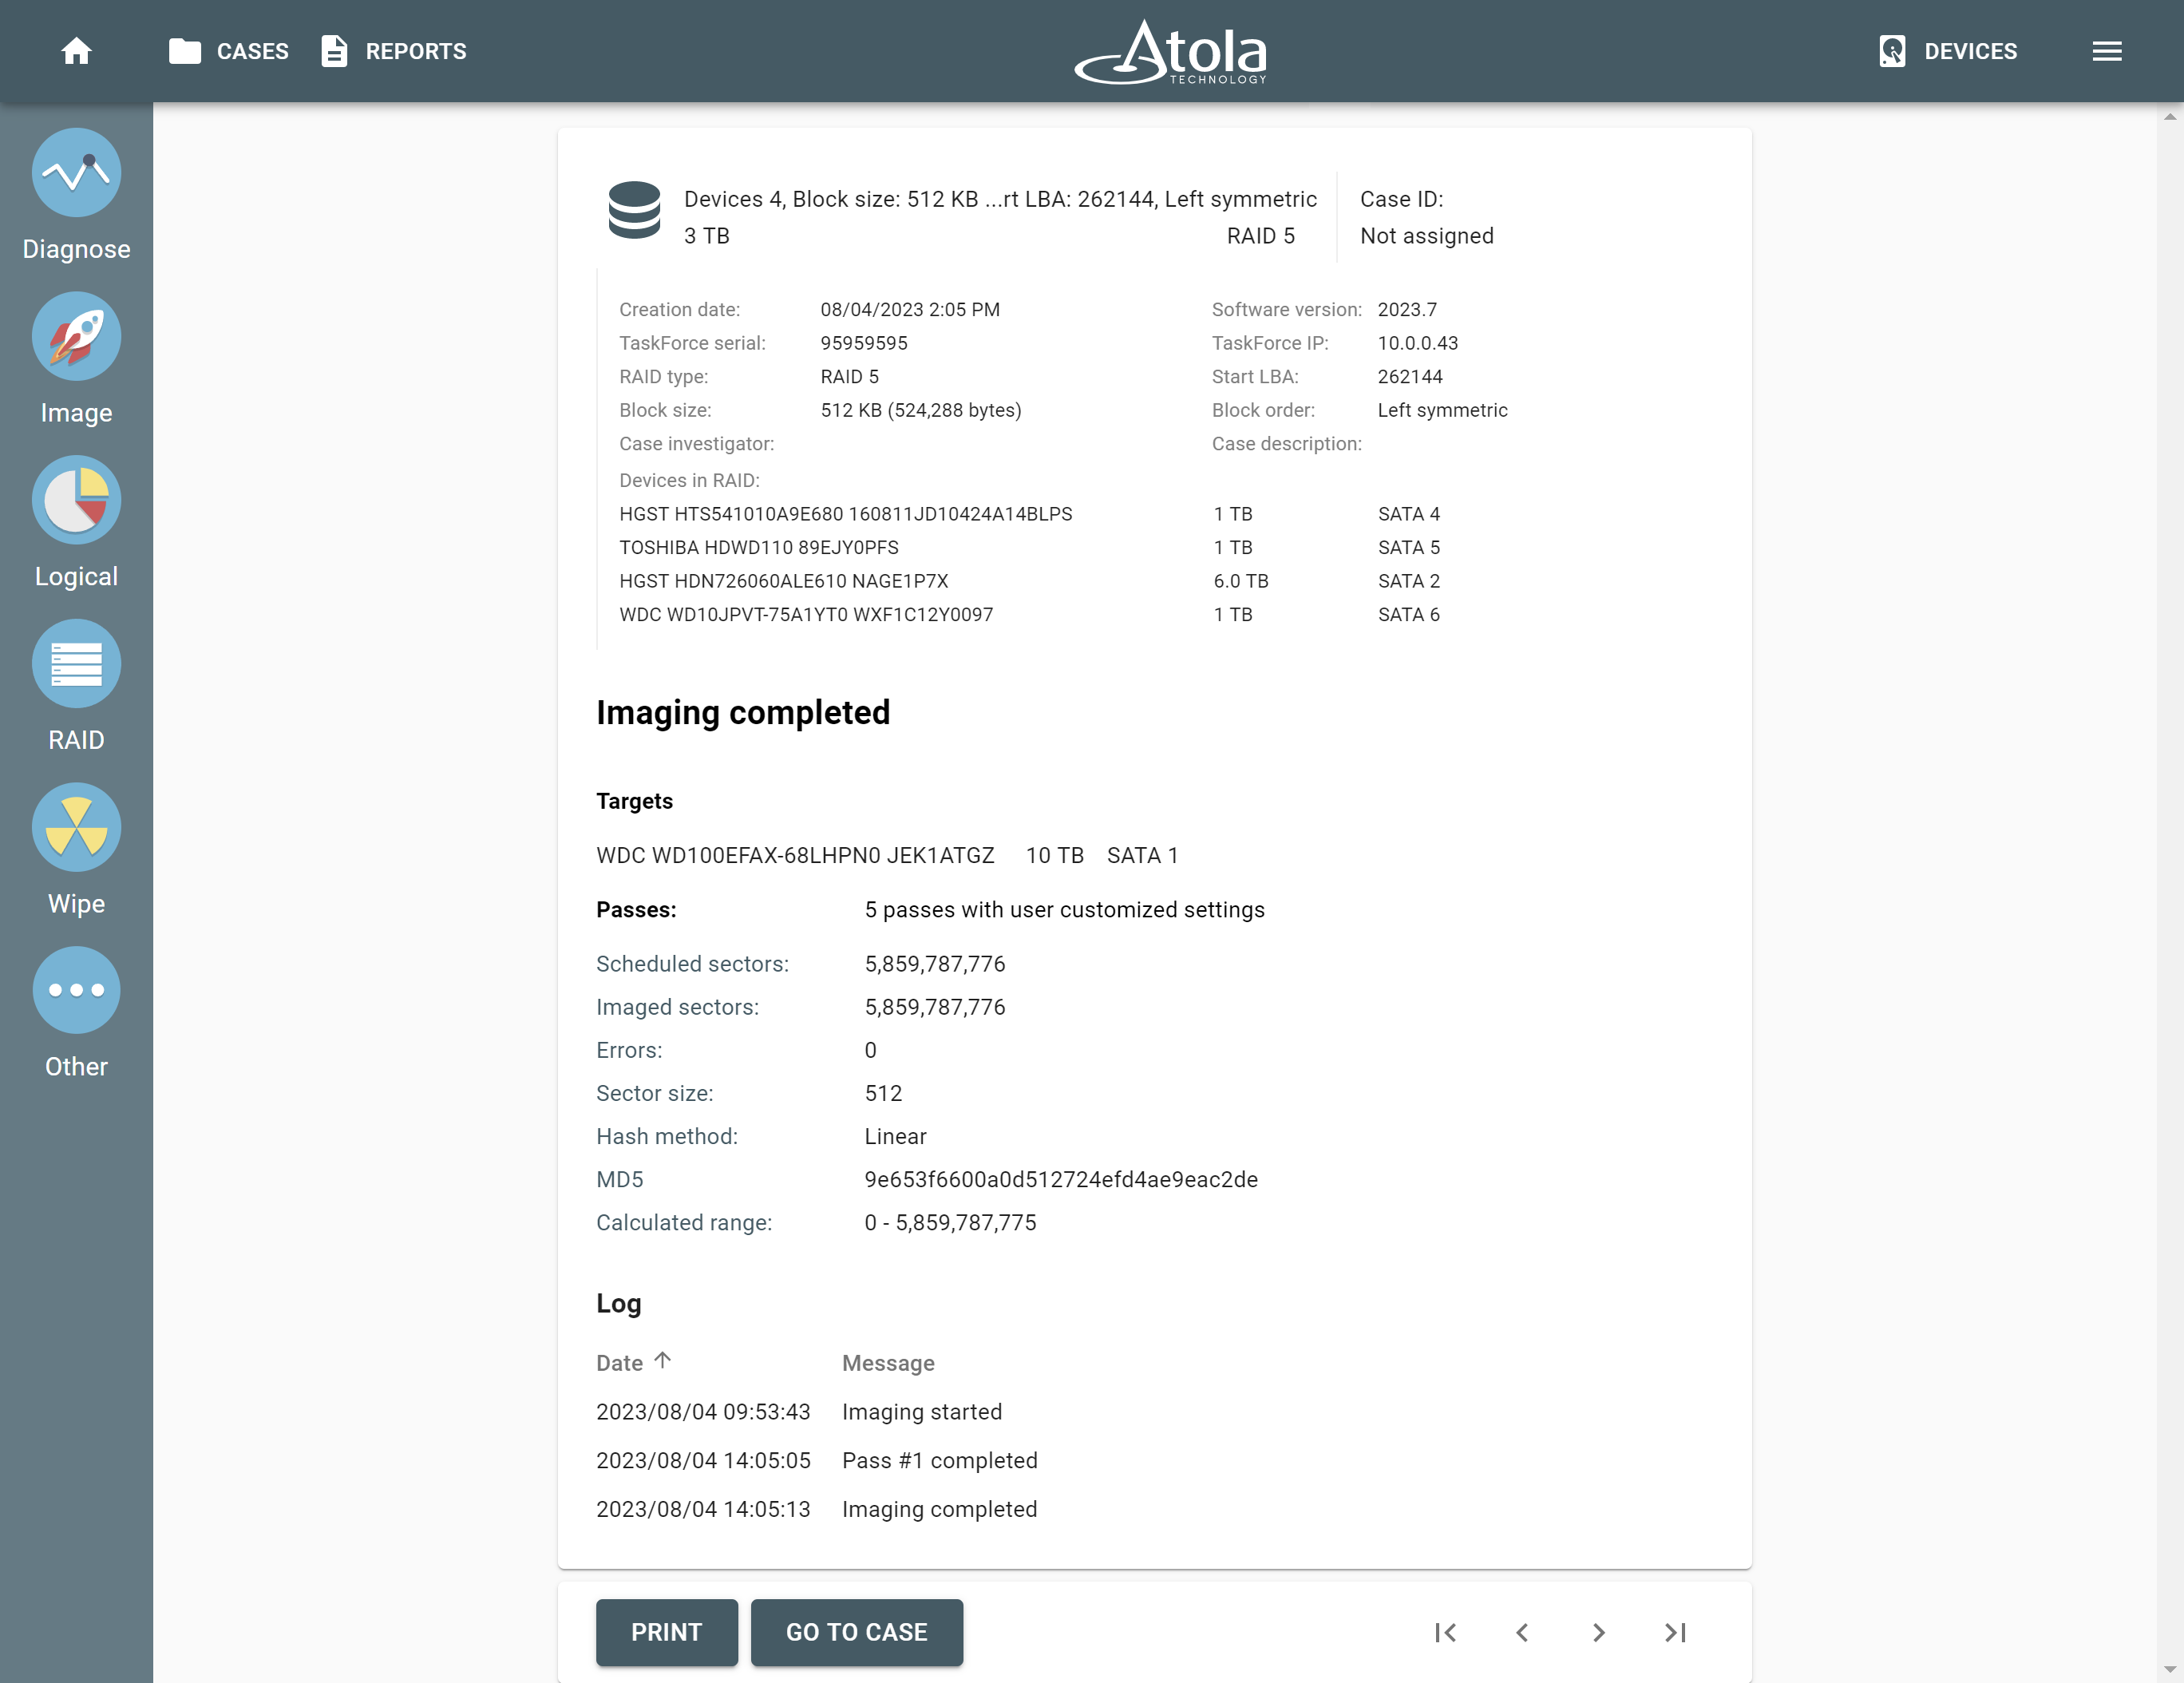
Imaging report for an mdadm-created RAID.