Imaging a shorted hard drive
Atola TaskForce has built-in short circuit protection and can detect shorted hard drives. In most cases, a drive has become shorted after experiencing overvoltage, either due to a power supply failure or as a result of a user error. Here is what happens to a drive in these scenarios and how to fix this.
How drives become shorted
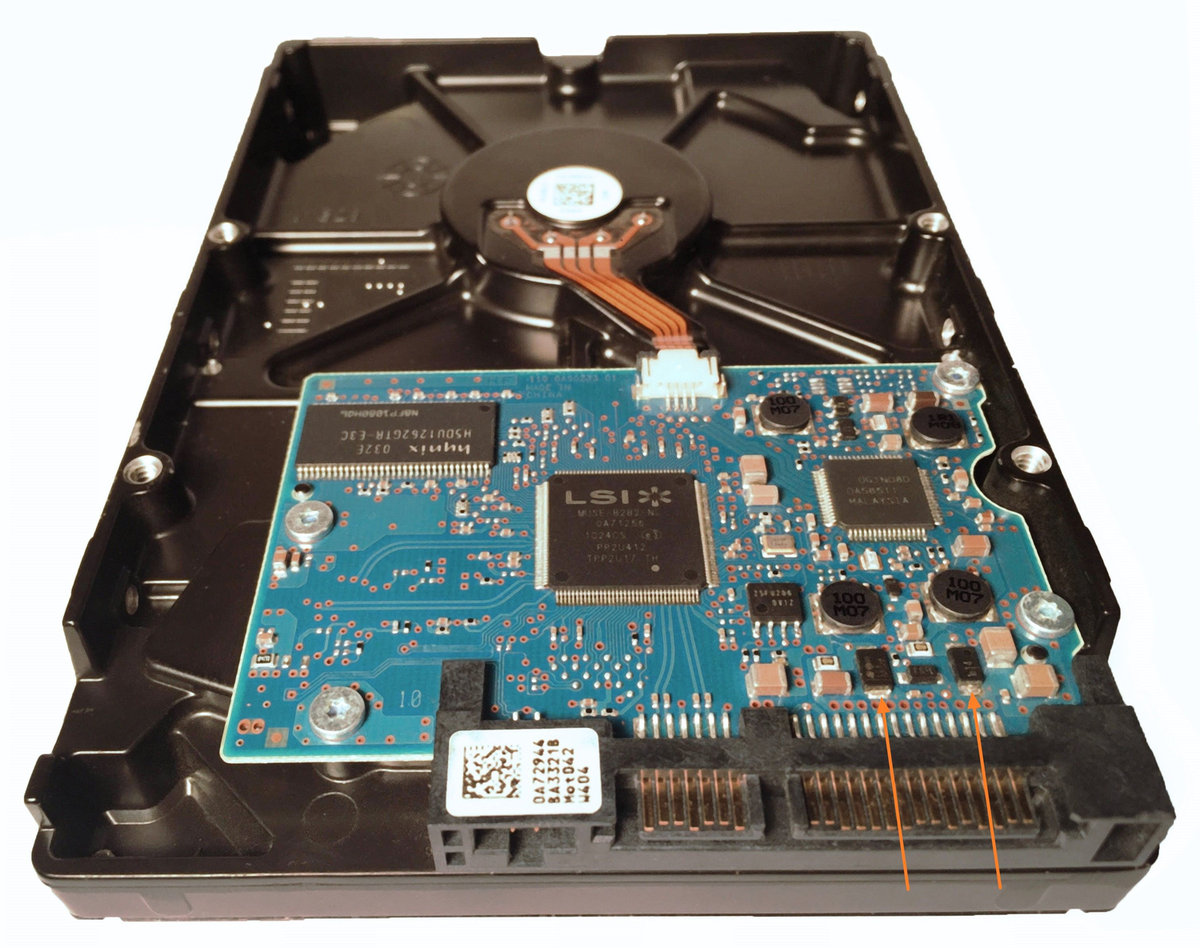
Most drives are equipped with two TVS diodes to protect the circuit from overvoltage. One diode is located on the 5V rail and another on the 12V rail.
If the drive experiences an overvoltage, the diodes convert the excess electrical power into heat energy and warm up, thus protecting the drive's circuit. Similarly, in the case of reverse polarity, the diode warms up as it conducts the current in the opposite direction.
If the overvoltage or reverse polarity event is short and the dissipated energy is not too high, the diodes can recover and continue working. However, if the dissipated energy is too high, the diodes will "sacrifice" themselves and get shorted.
When the drive is subsequently powered, the shorted diodes create a low resistance connection between two nodes, known as a short circuit. This is exactly what happens to a drive when its TVS diodes are shorted.
Detect a shorted drive
When you connect a shorted drive to Atola TaskForce, the Home screen shows a short circuit alert to notify the operator about the detected issue.
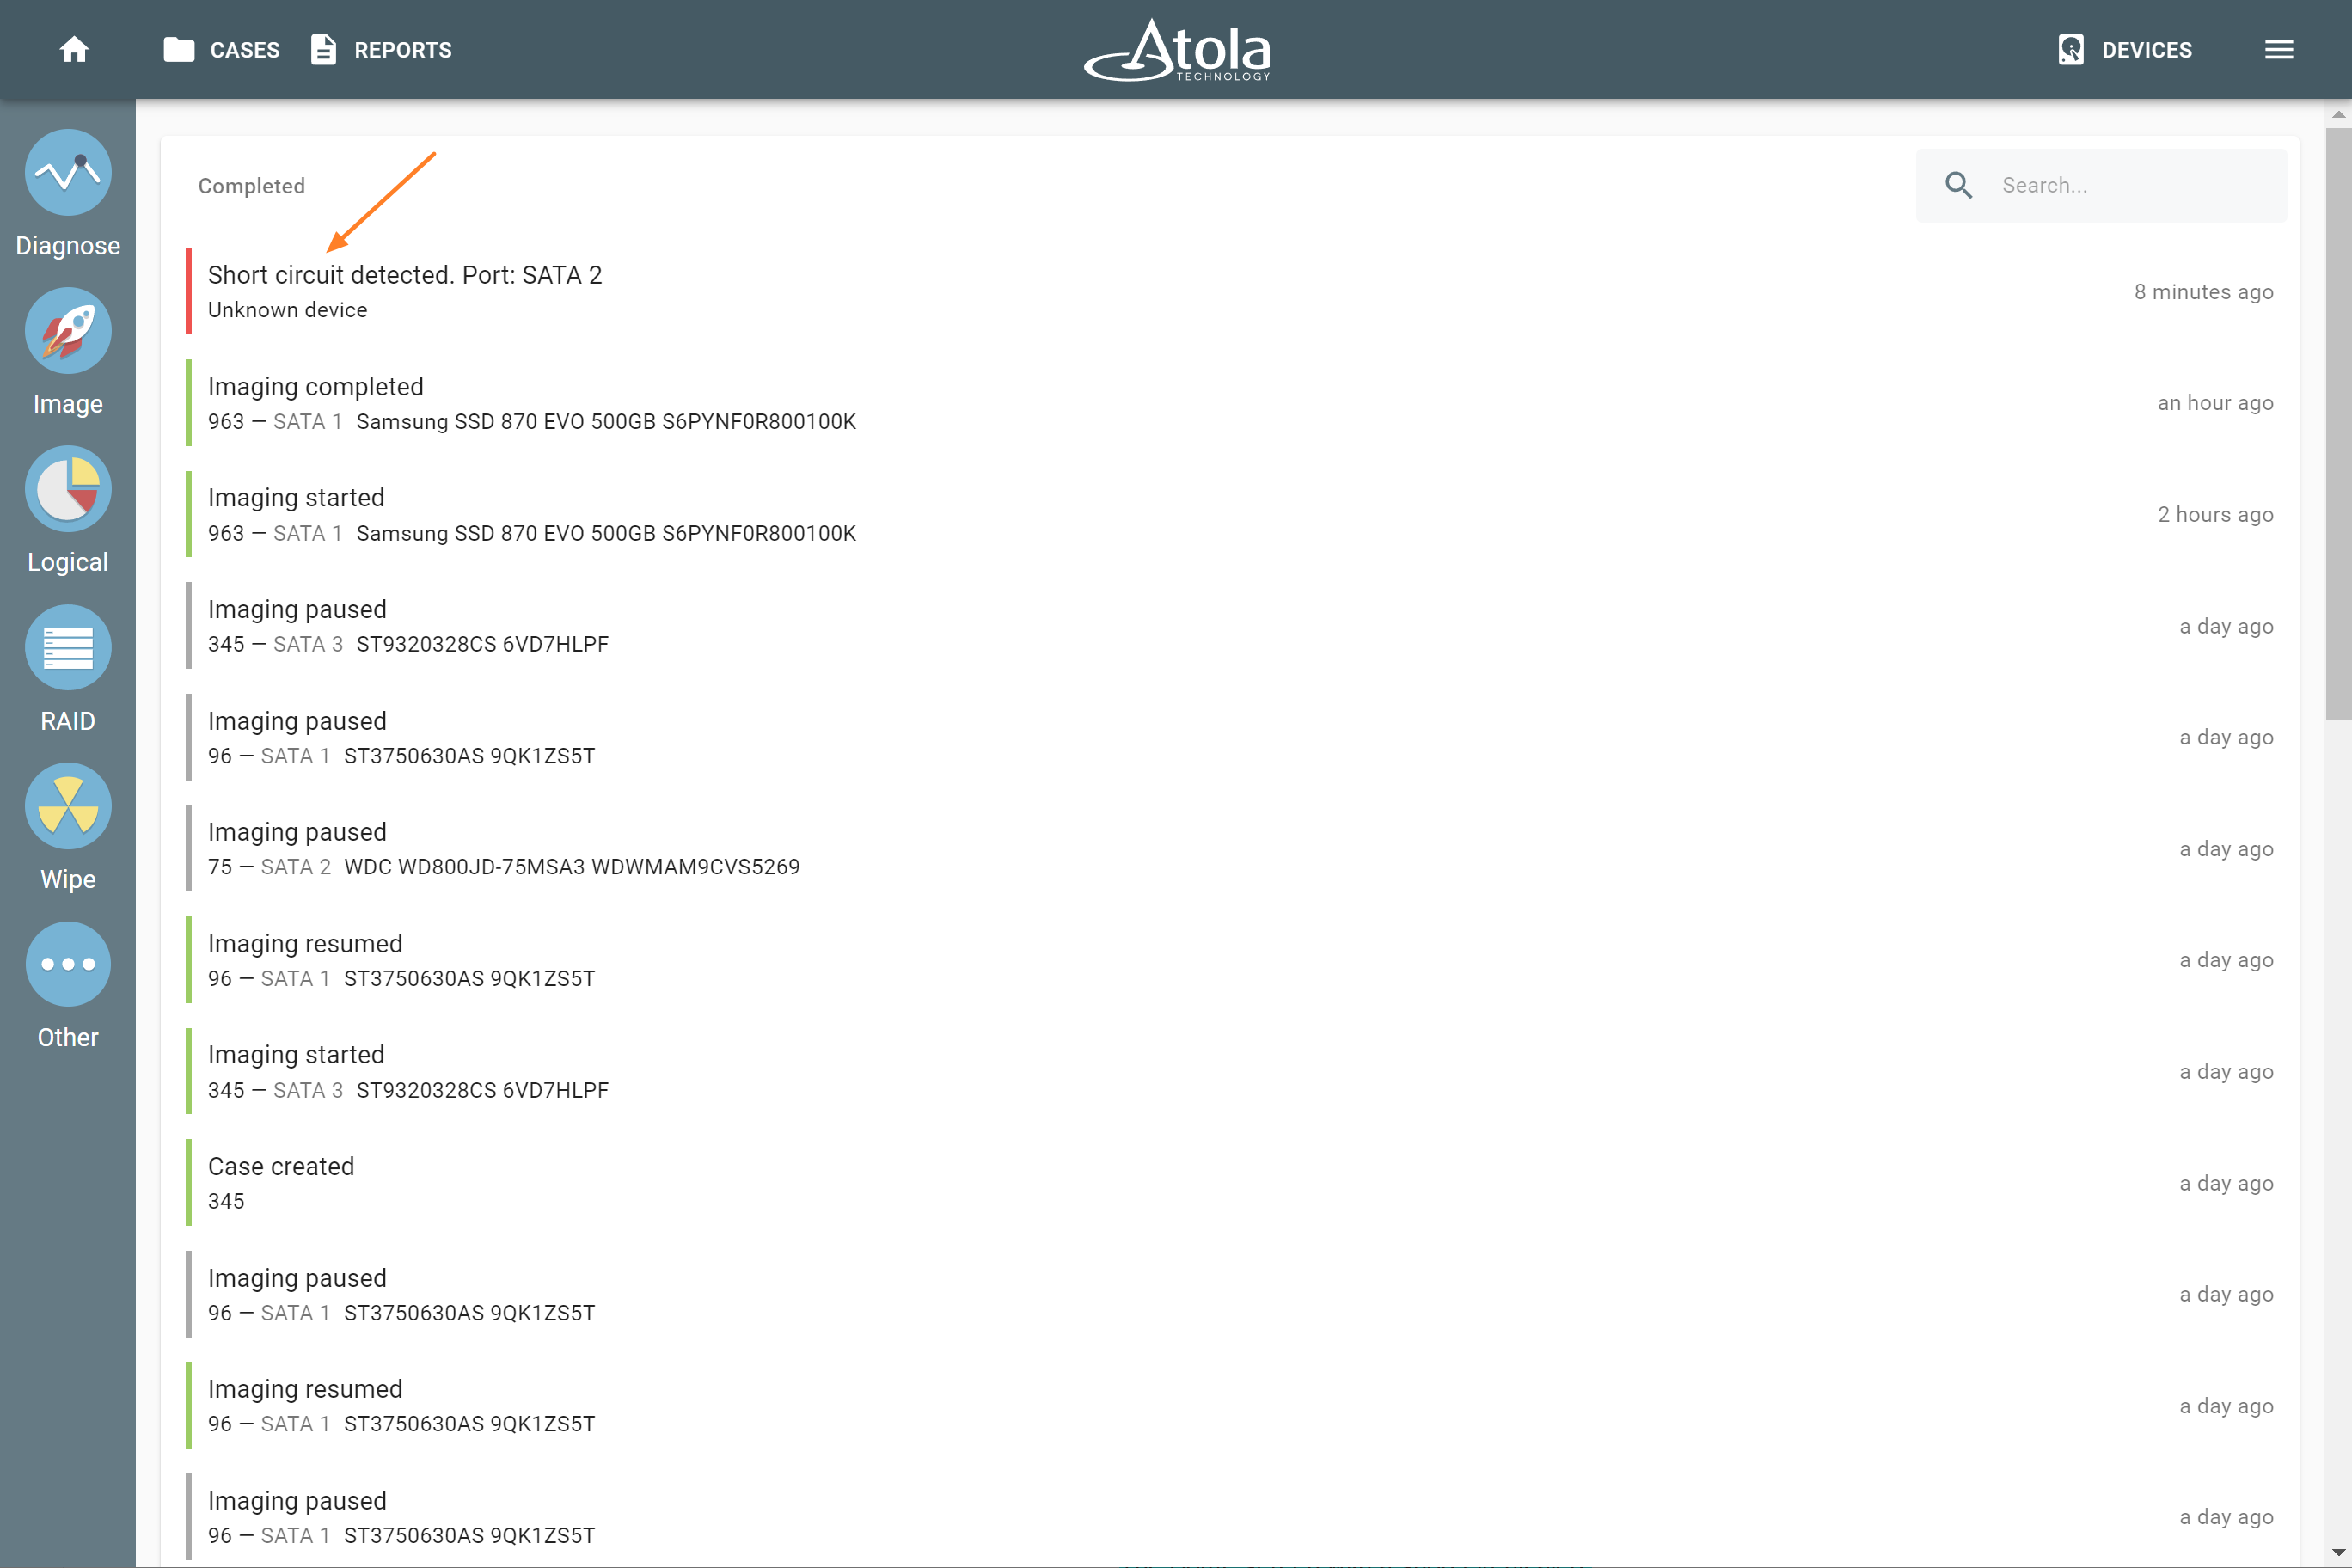
The Home screen with a short circuit alert.
On the Select device panel, TaskForce marks the port to which a shorted drive is connected with the Short circuit tag and icon.
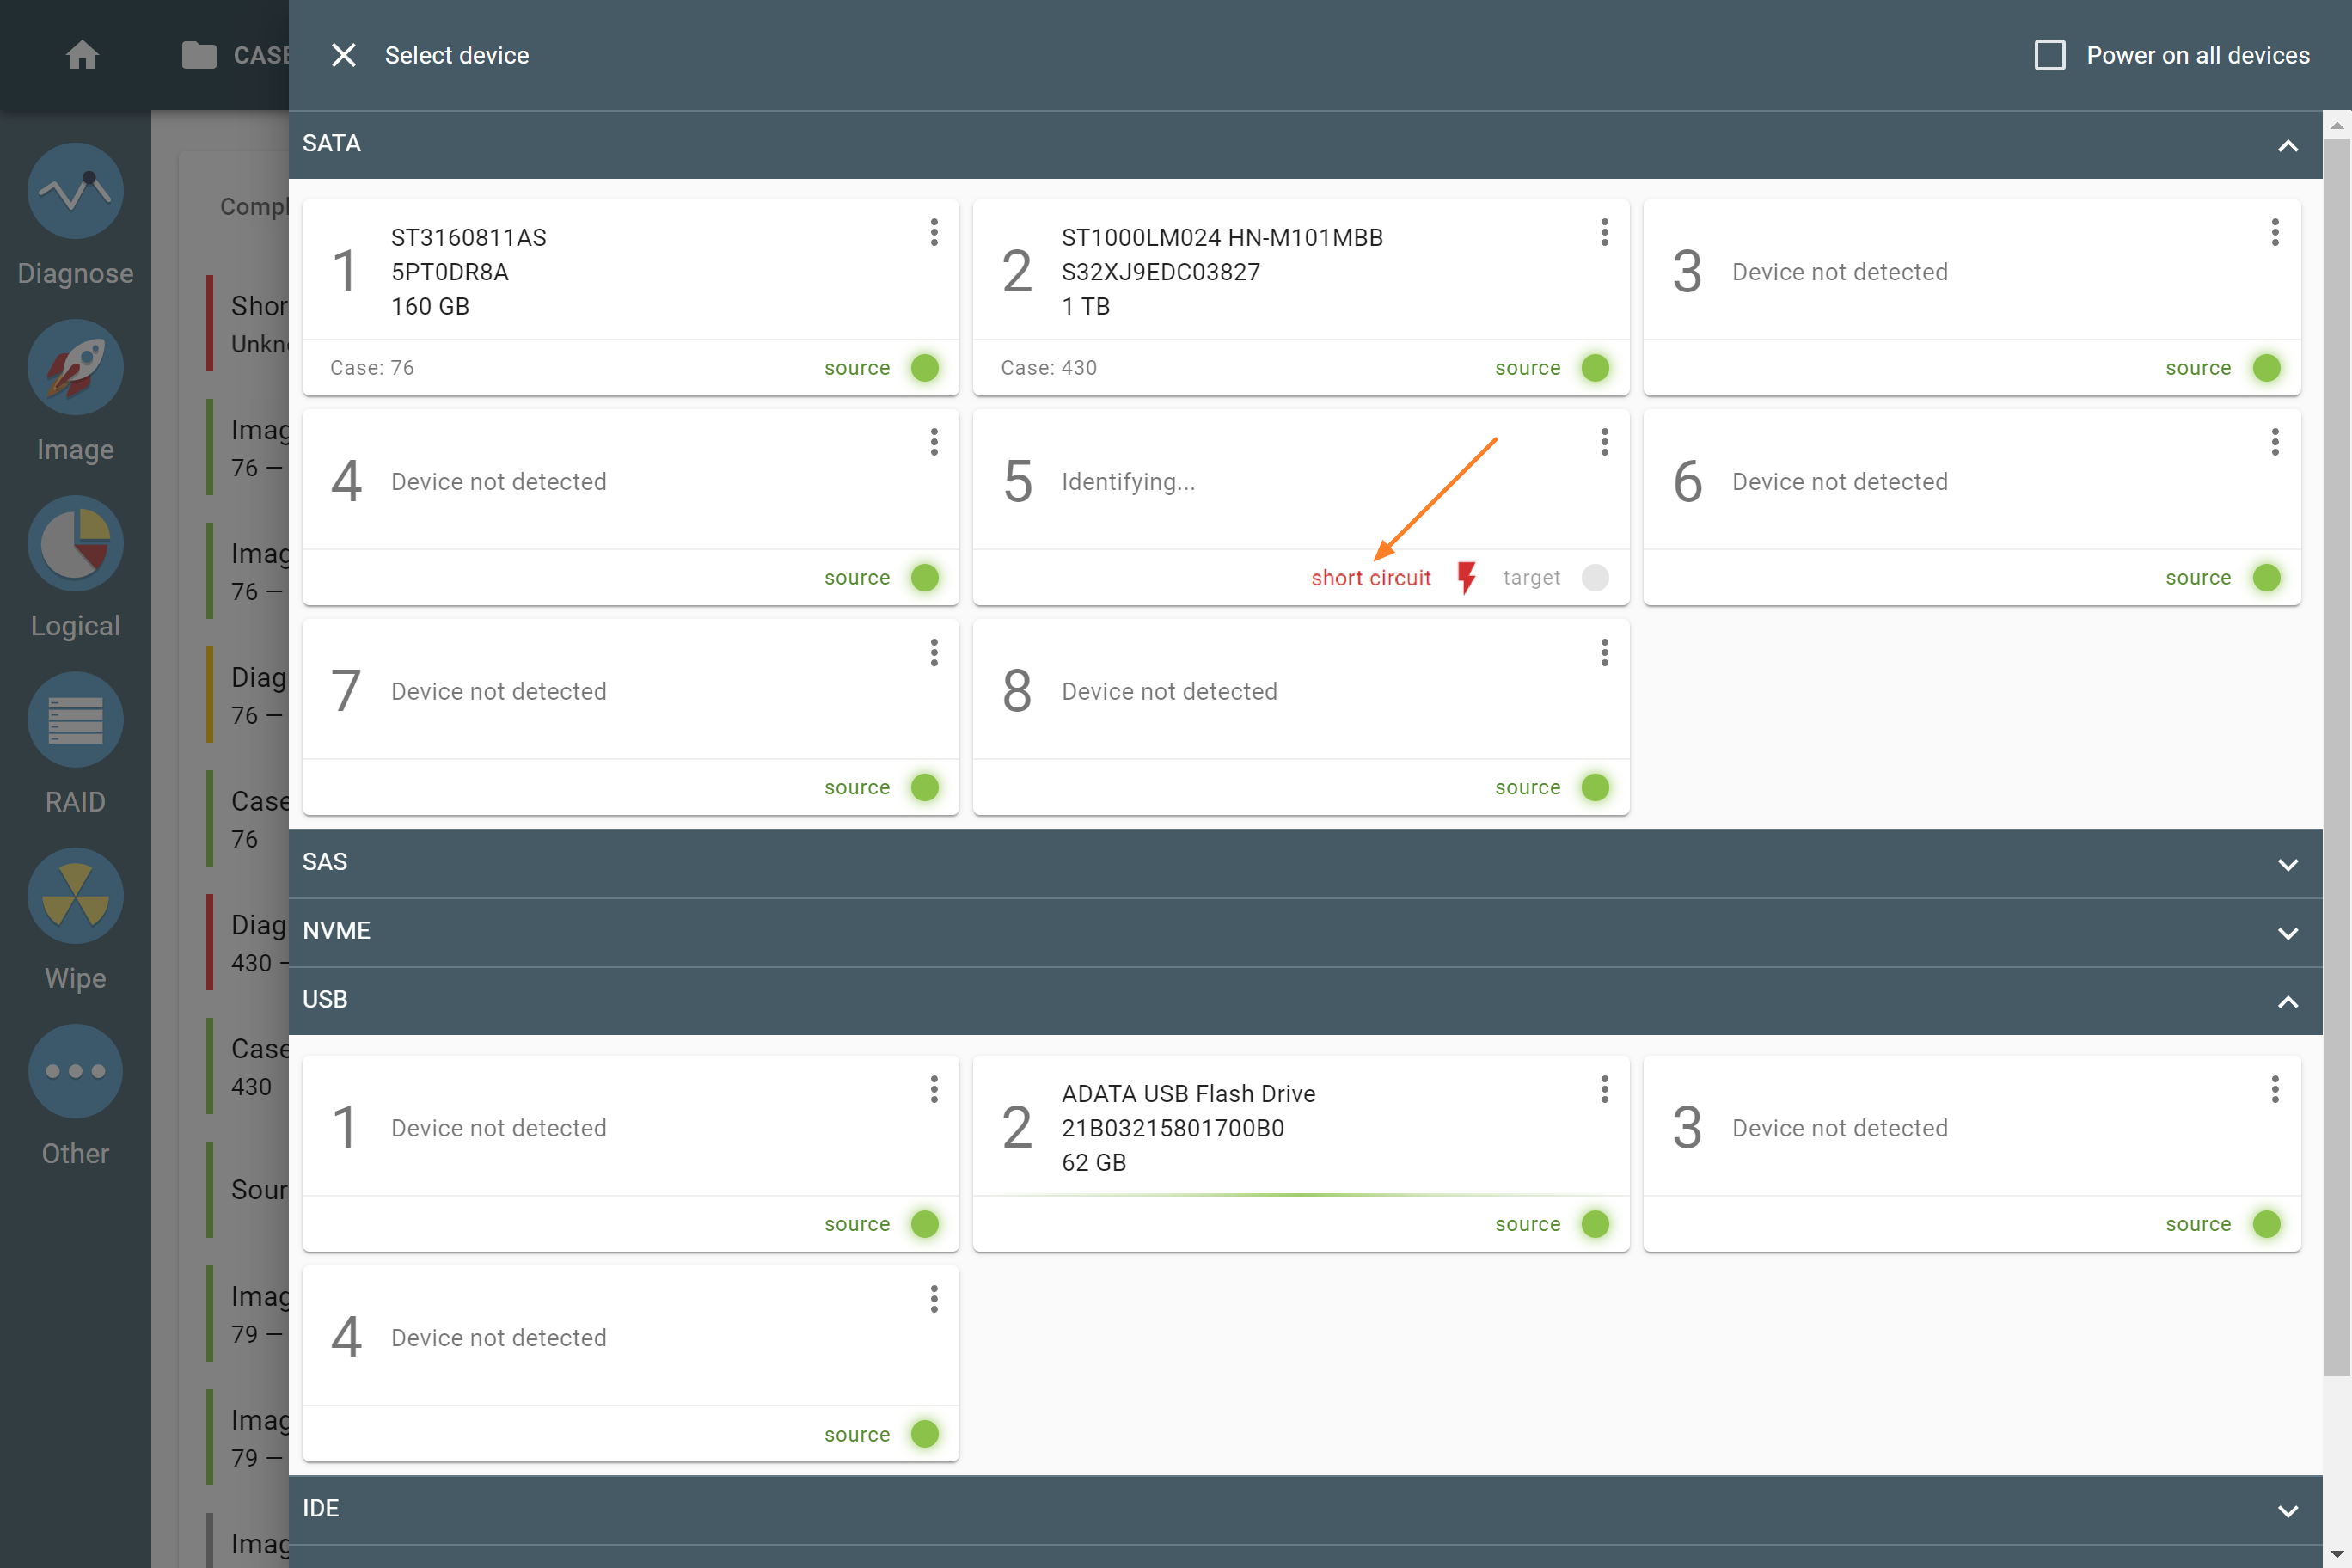
The Short circuit tag and icon on the Select device panel.
A drive with a shorted TVS diode cannot be identified, diagnosed, or imaged with TaskForce, until you replace or remove the diode.
Image a shorted drive
If you need to image a shorted drive but do not have new TVS diodes on hand to replace the shorted ones, you can image the drive using Atola TaskForce after removing the diodes. This process is safe because Atola TaskForce has short circuit and overvoltage protection, which guards both the imager and the drives connected to it against circuit failures.
To remove the diodes, heat the area of the drive where they are located with a hot fan (such as in a hot air soldering station) and then gently remove them with tweezers.
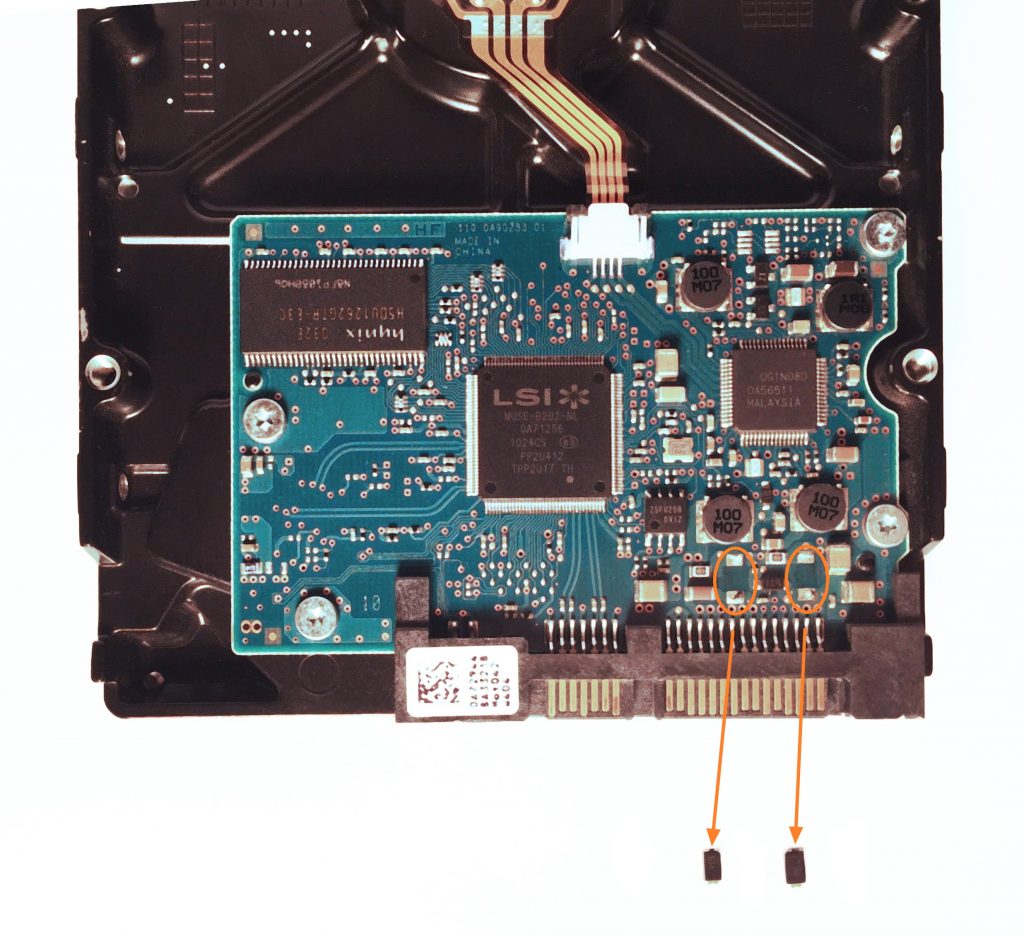
Once the diodes have been detached, you can plug the drive into Atola TaskForce and proceed with imaging data from it.