Imaging RAID 5 array with 2 damaged drives
Even if a RAID 5 array contains errors, Atola TaskForce 2 is able to detect its parameters and image such RAID.
Reassemble RAID 5
- Connect the drives to the ports of the TaskForce 2 hardware unit. Make sure the ports are in Source mode.
- On the left in the TaskForce main window, click RAID.
- Select the drives that make up the RAID array.
- Click Continue.
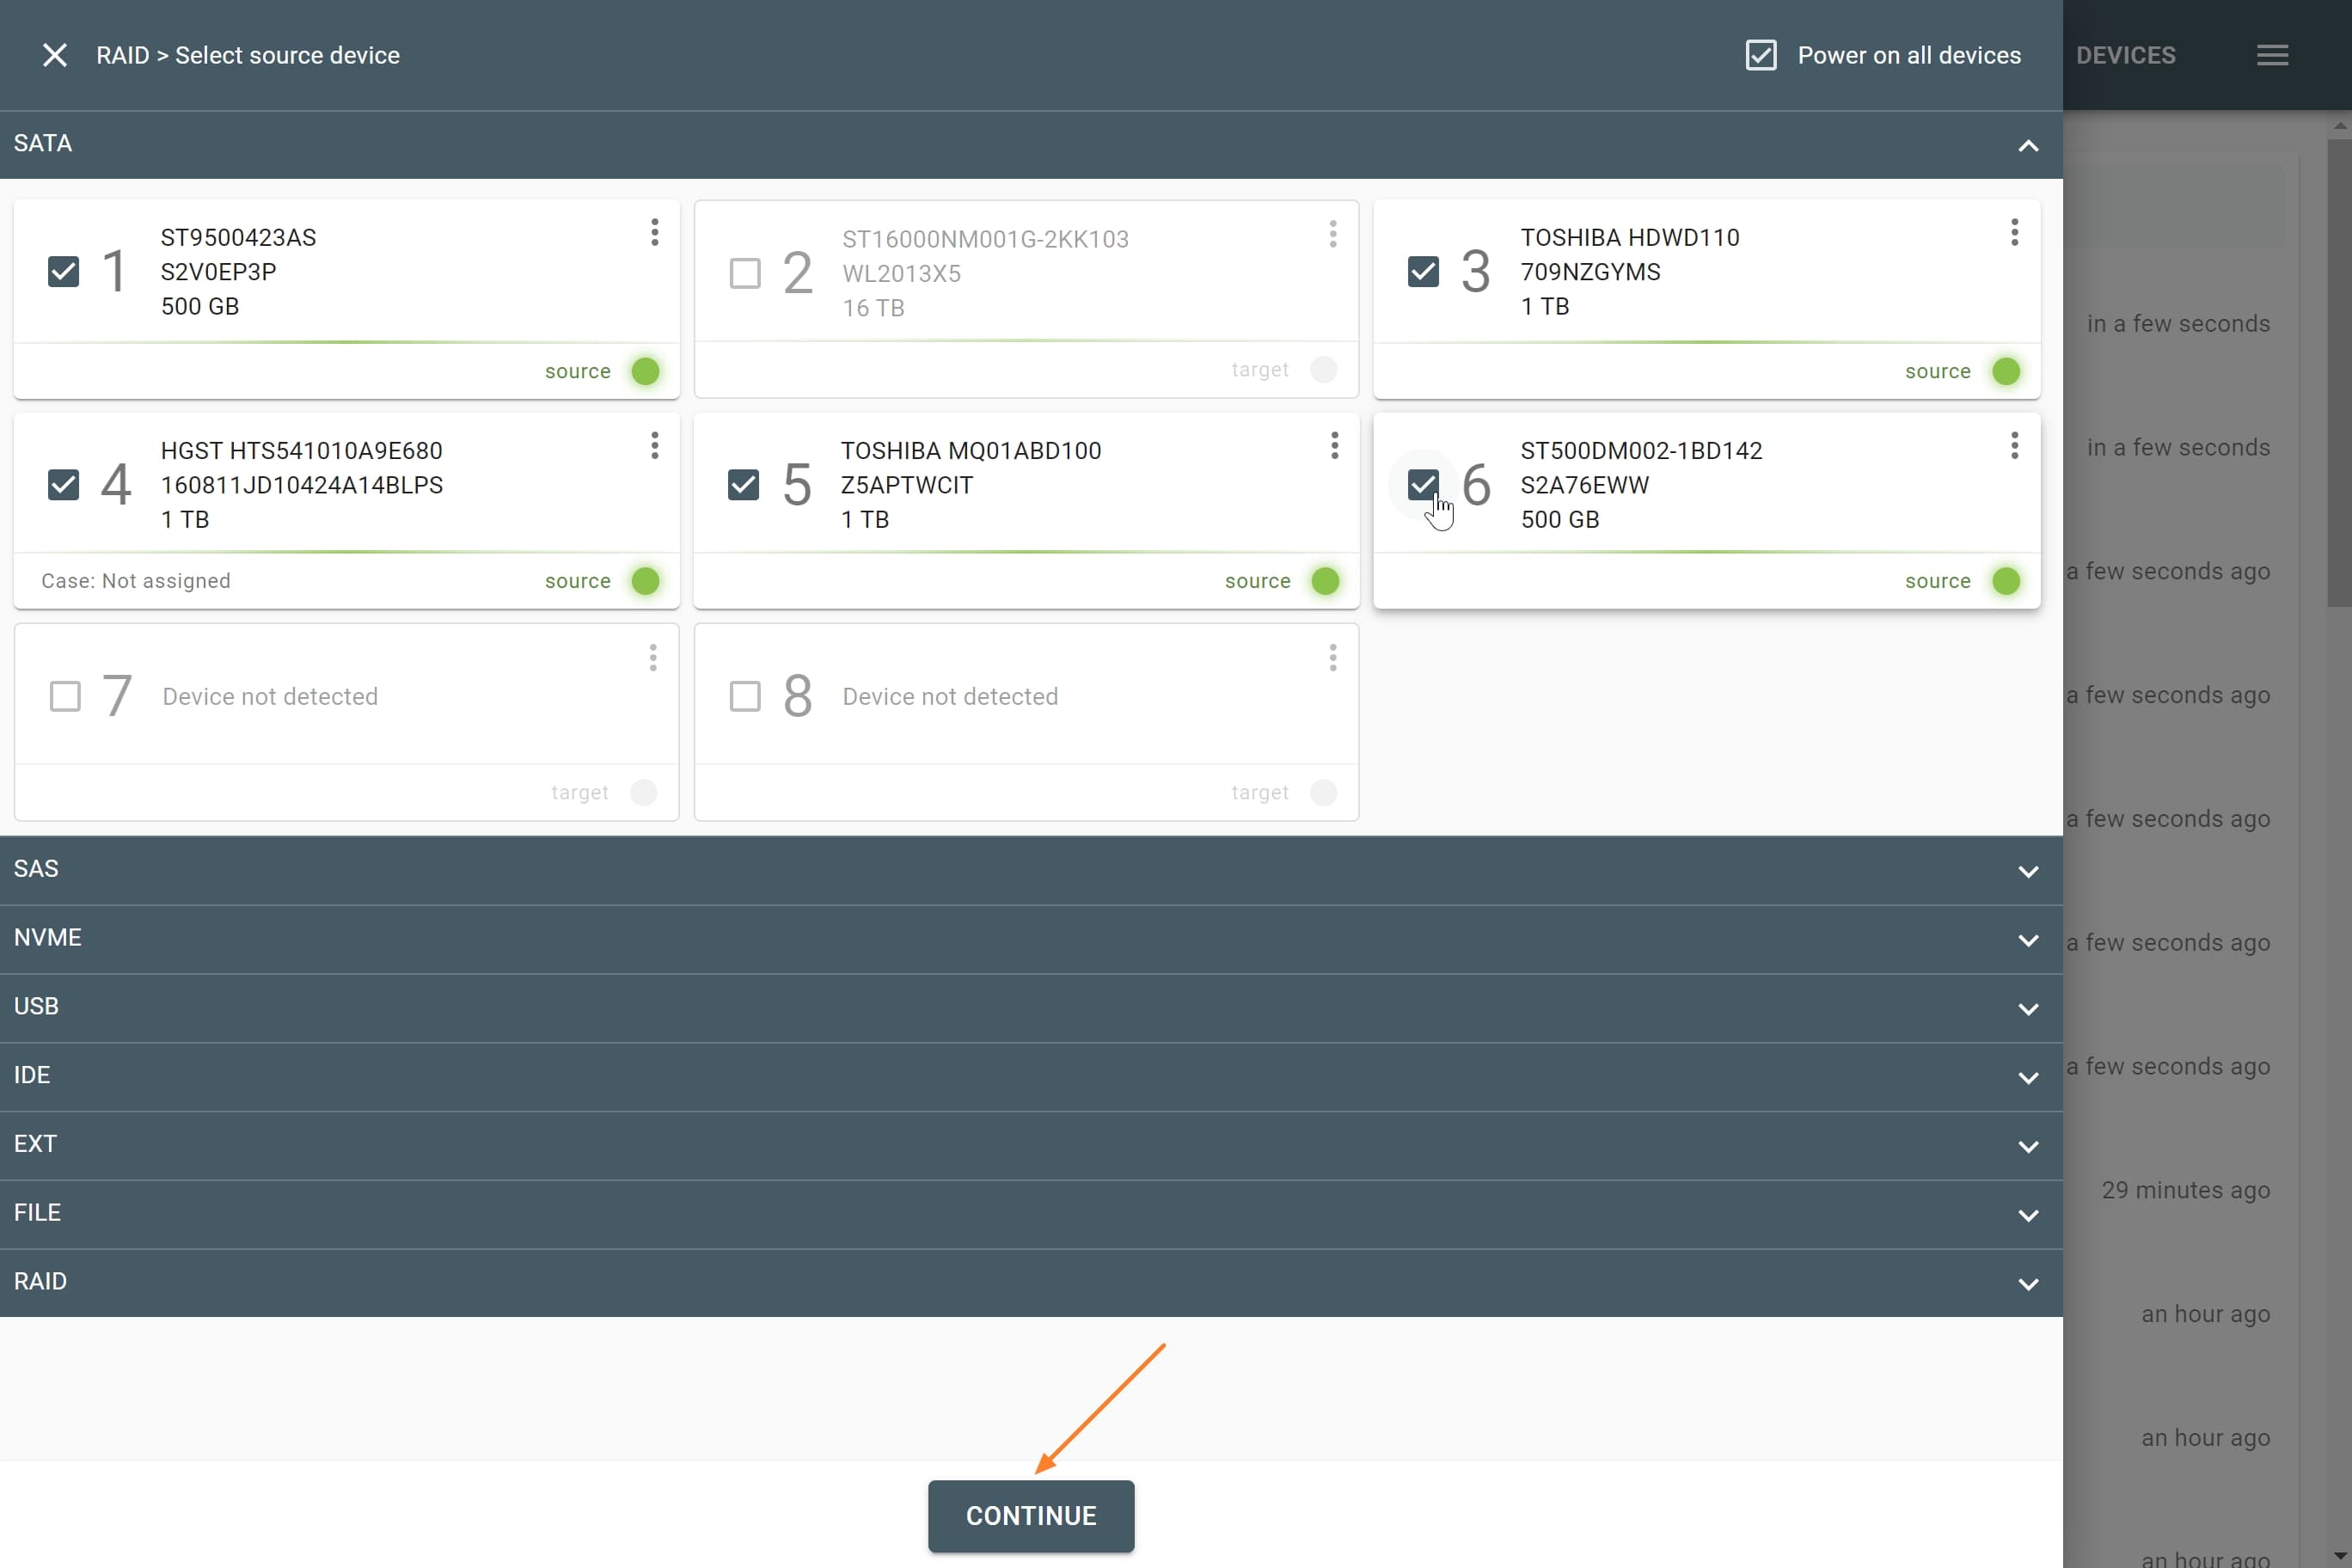
Selecting RAID members
Detecting errors
The TaskForce 2 autodetection module starts running immediately, after you select the RAID devices.
Stage 1: TaskForce 2 reads data on the drives to identify RAID type. If it runs across an error, TaskForce 2 displays error tags next to the respective RAID member.
To see the number of errors encountered on a RAID member, simply hover the cursor over the error tag.
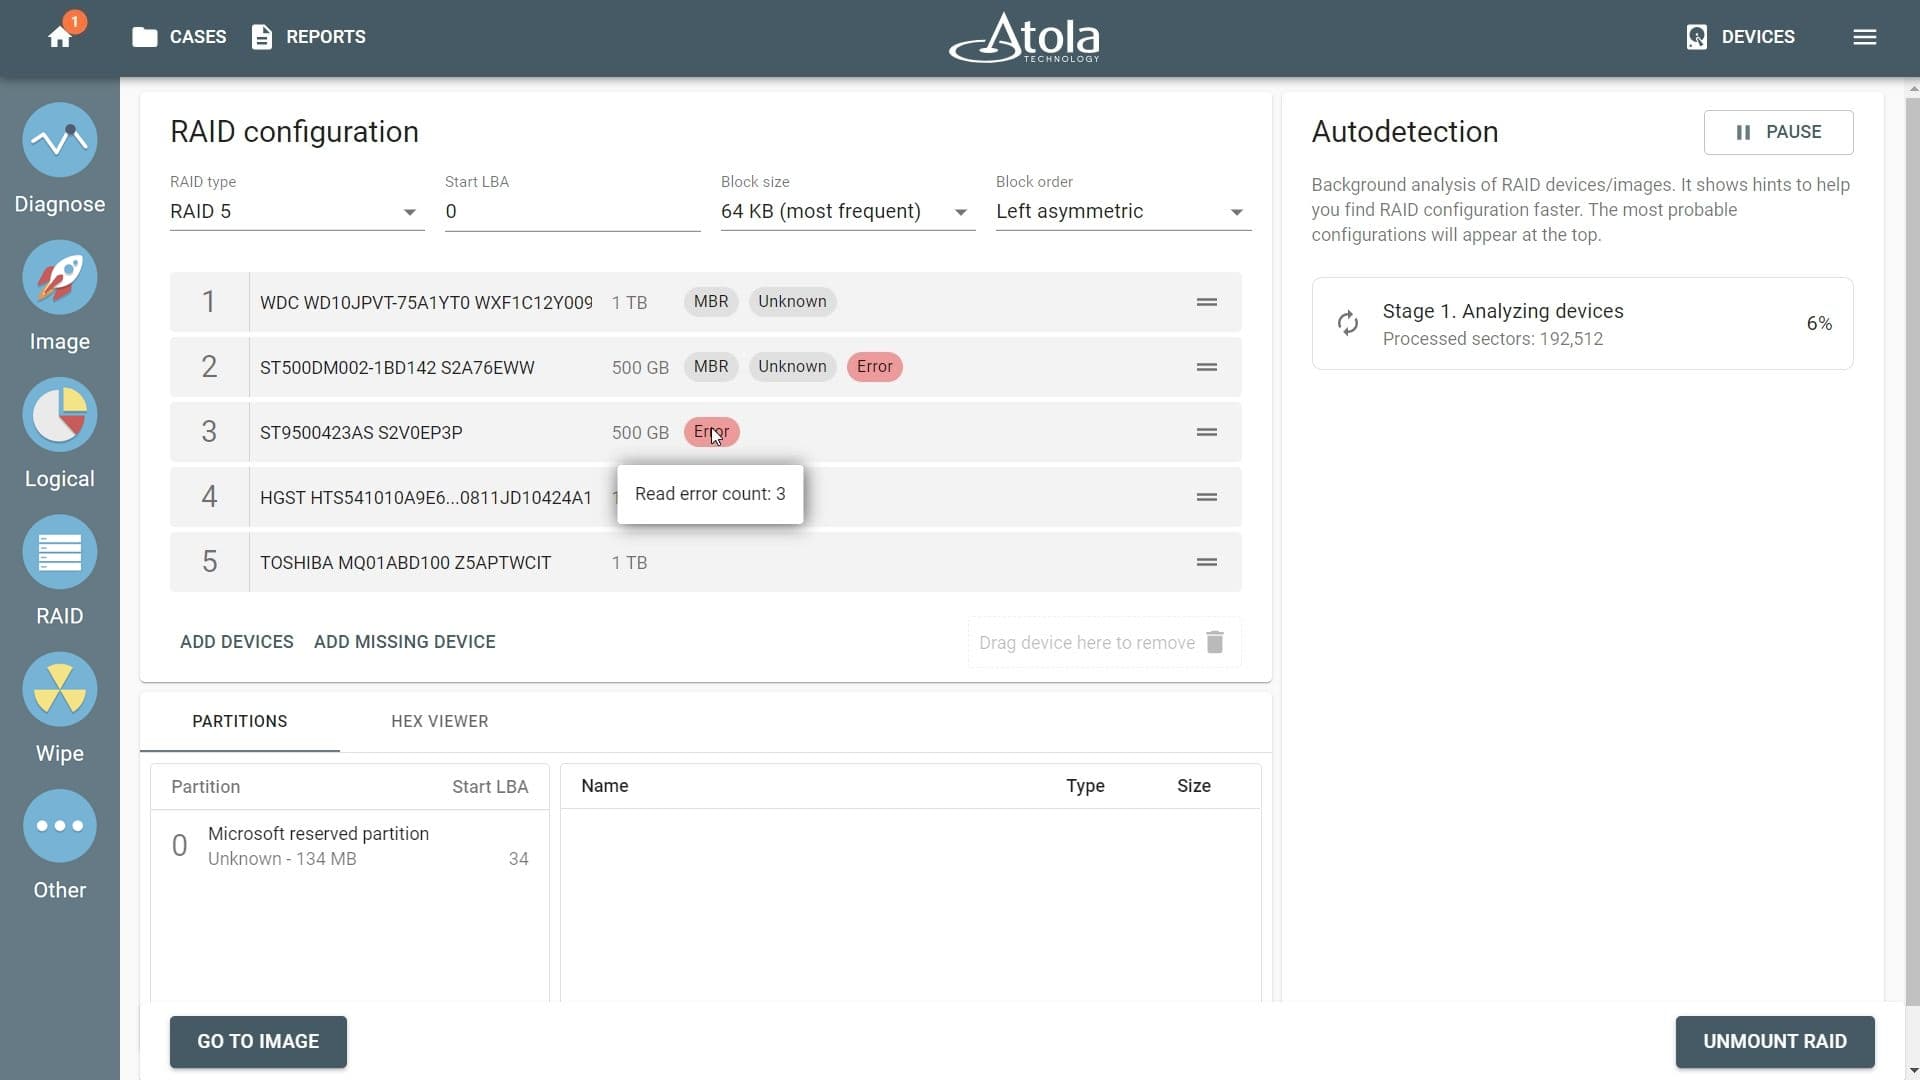
Error tags
Stage 2: TaskForce 2 goes through thousands of possible RAID configurations to identify a suitable one.
Once the configuration is detected, click the Apply button.
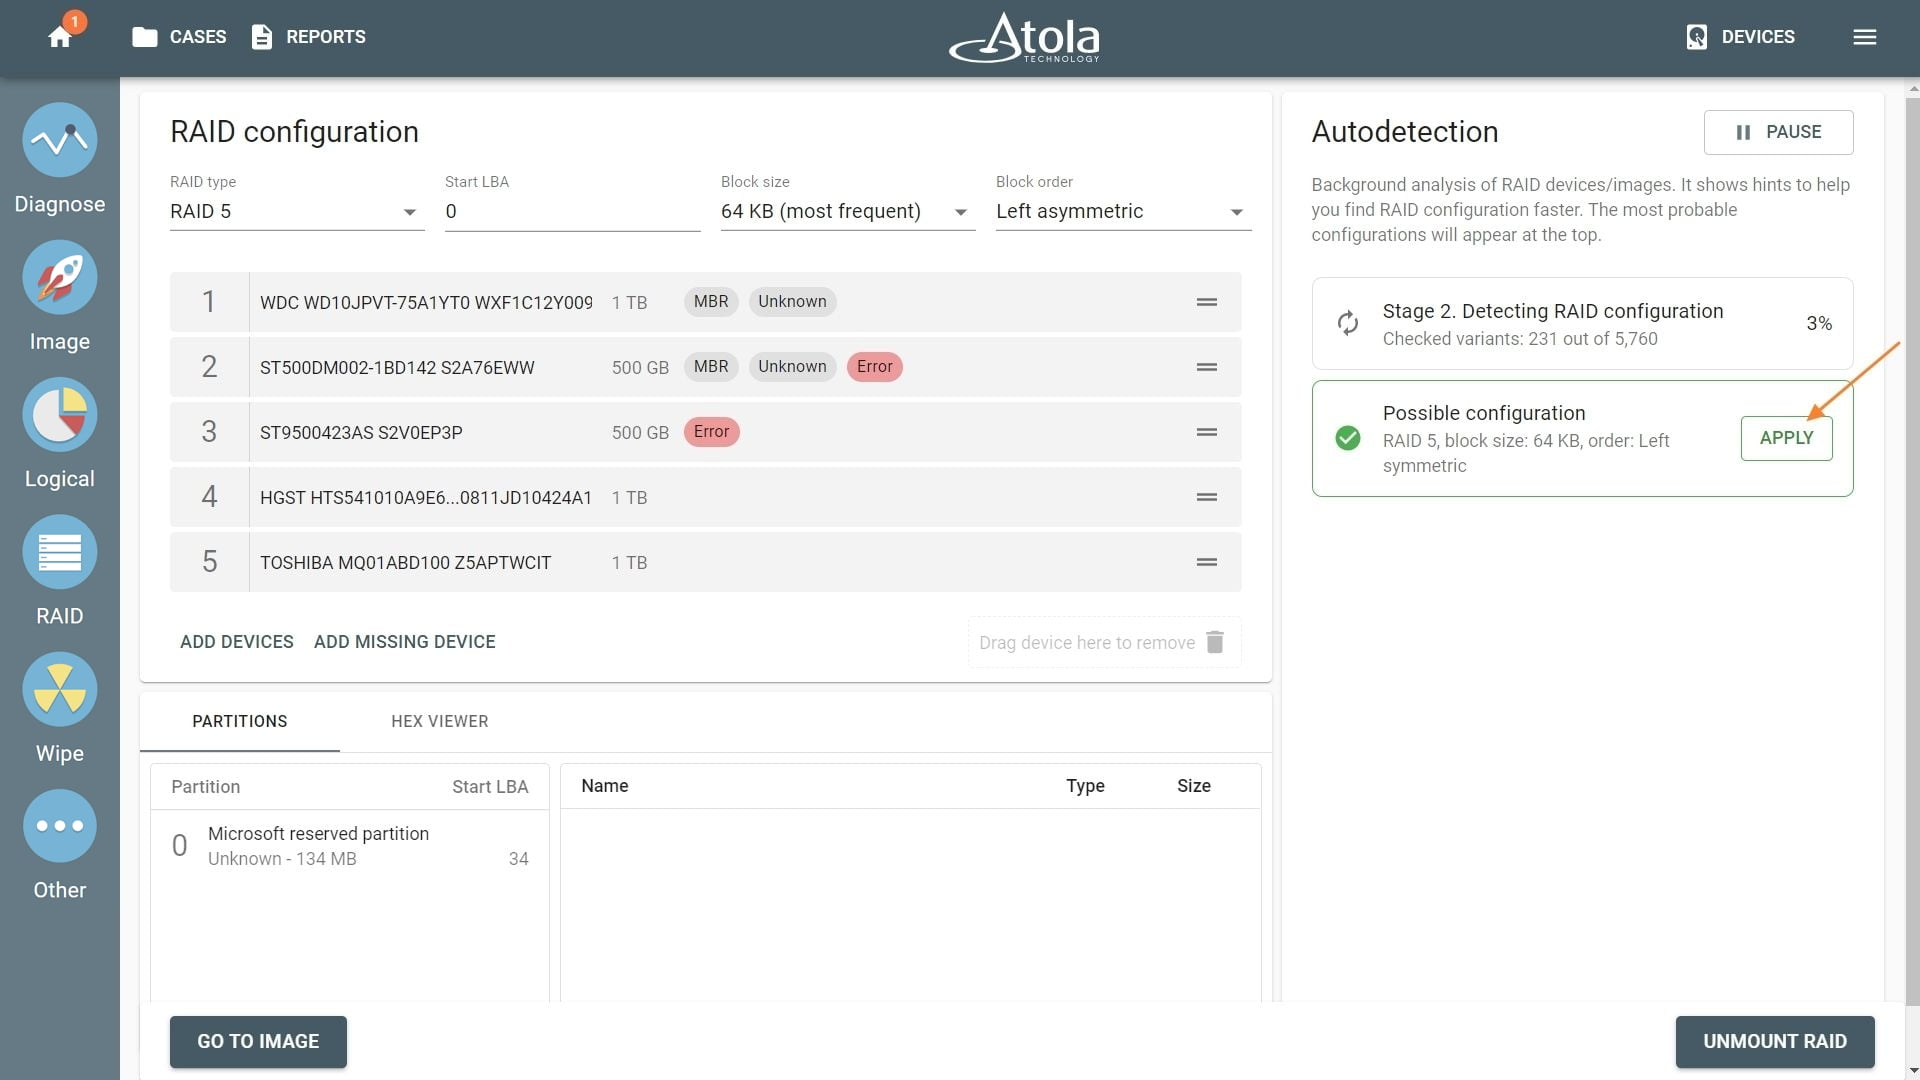
Applying the suggested RAID configuration
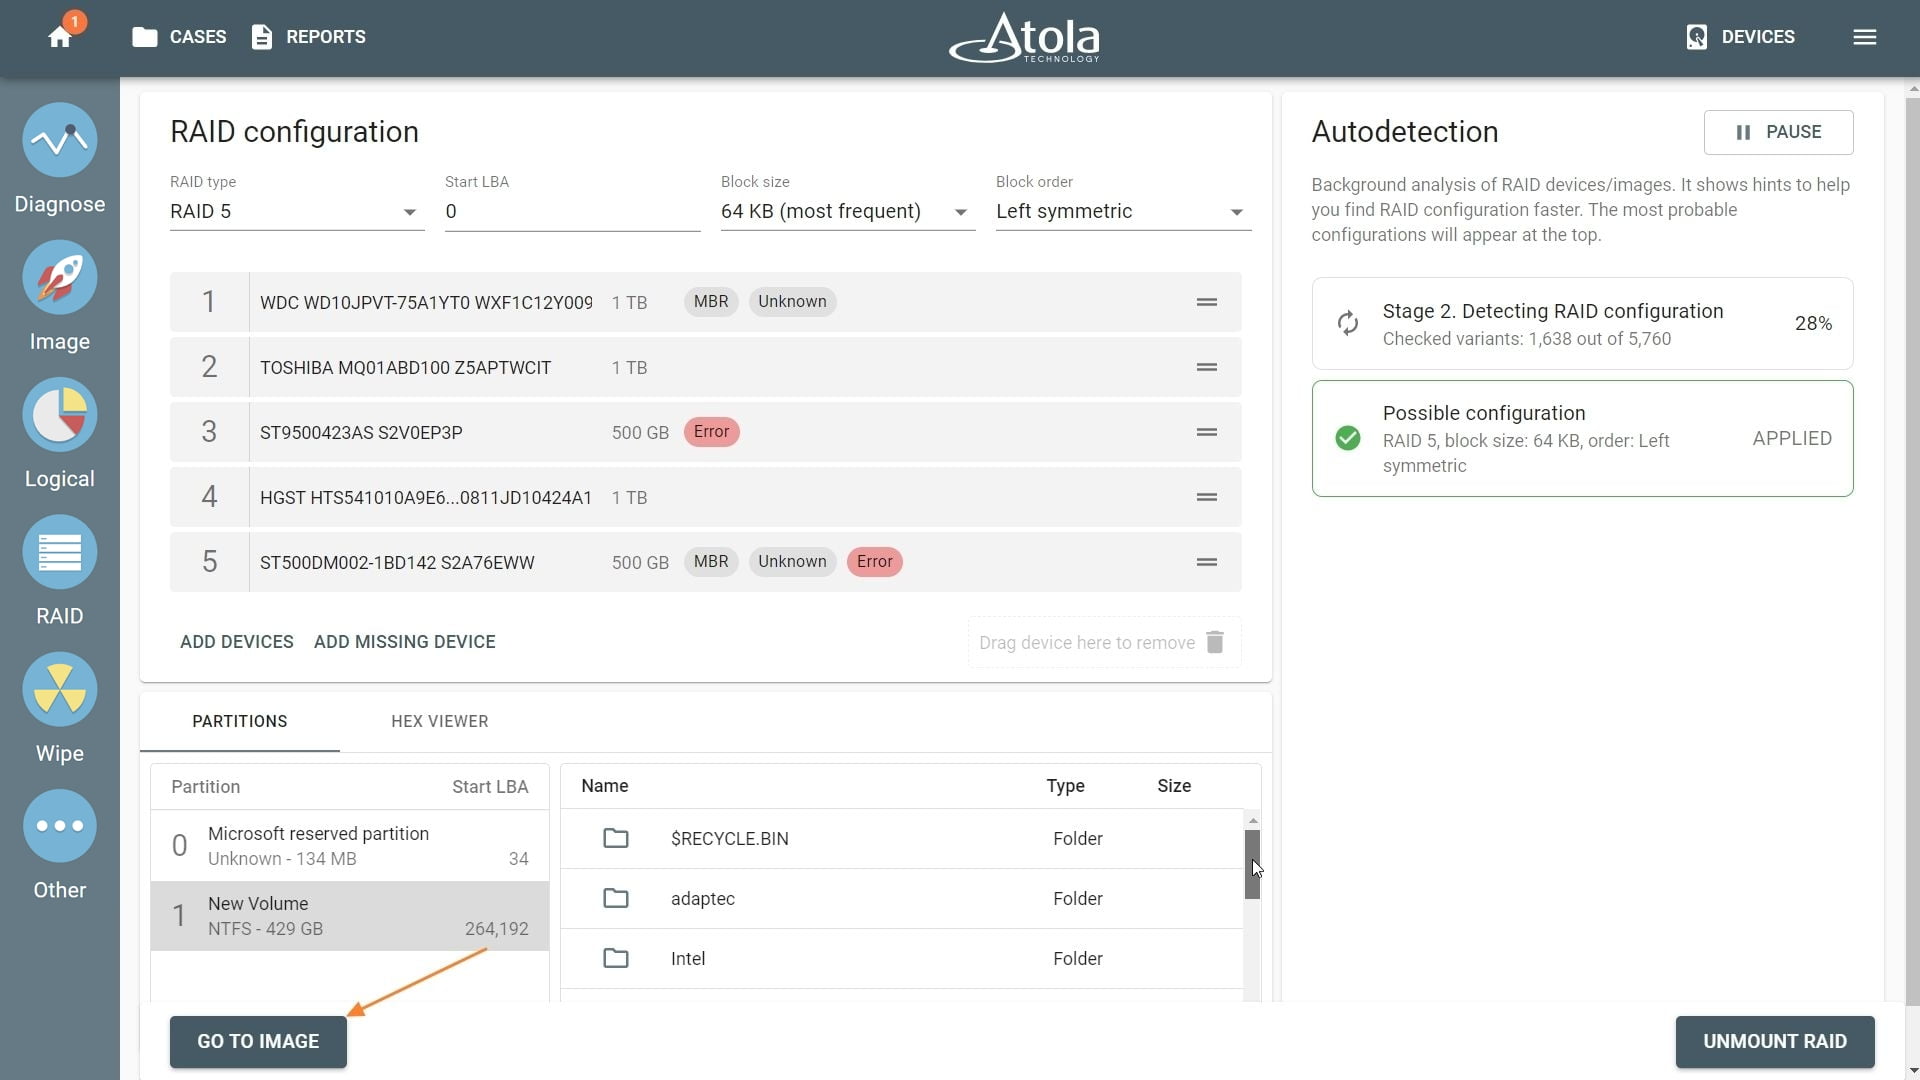
After you click Apply, TaskForce 2 automatically applies the suggested configuration and checks the file system for partitions.
Despite read errors, TaskForce 2 can mount the partitions for preview by rebuilding the data in the bad sectors using data redundancy inherent to this RAID type.
Imaging RAID 5 array with errors
- After RAID configuration is successfully applied, click the Go to image button to proceed with imaging.
- Select your target device or folder and click Continue.
- To launch your imaging session, click Start.
- When the TaskForce system encounters an error, it automatically reconstructs the missing data, using the data in the parity blocks on the remaining RAID members.

Coping with errors.
Thus TaskForce 2 can recover the full image. No operator involvement is necessary.
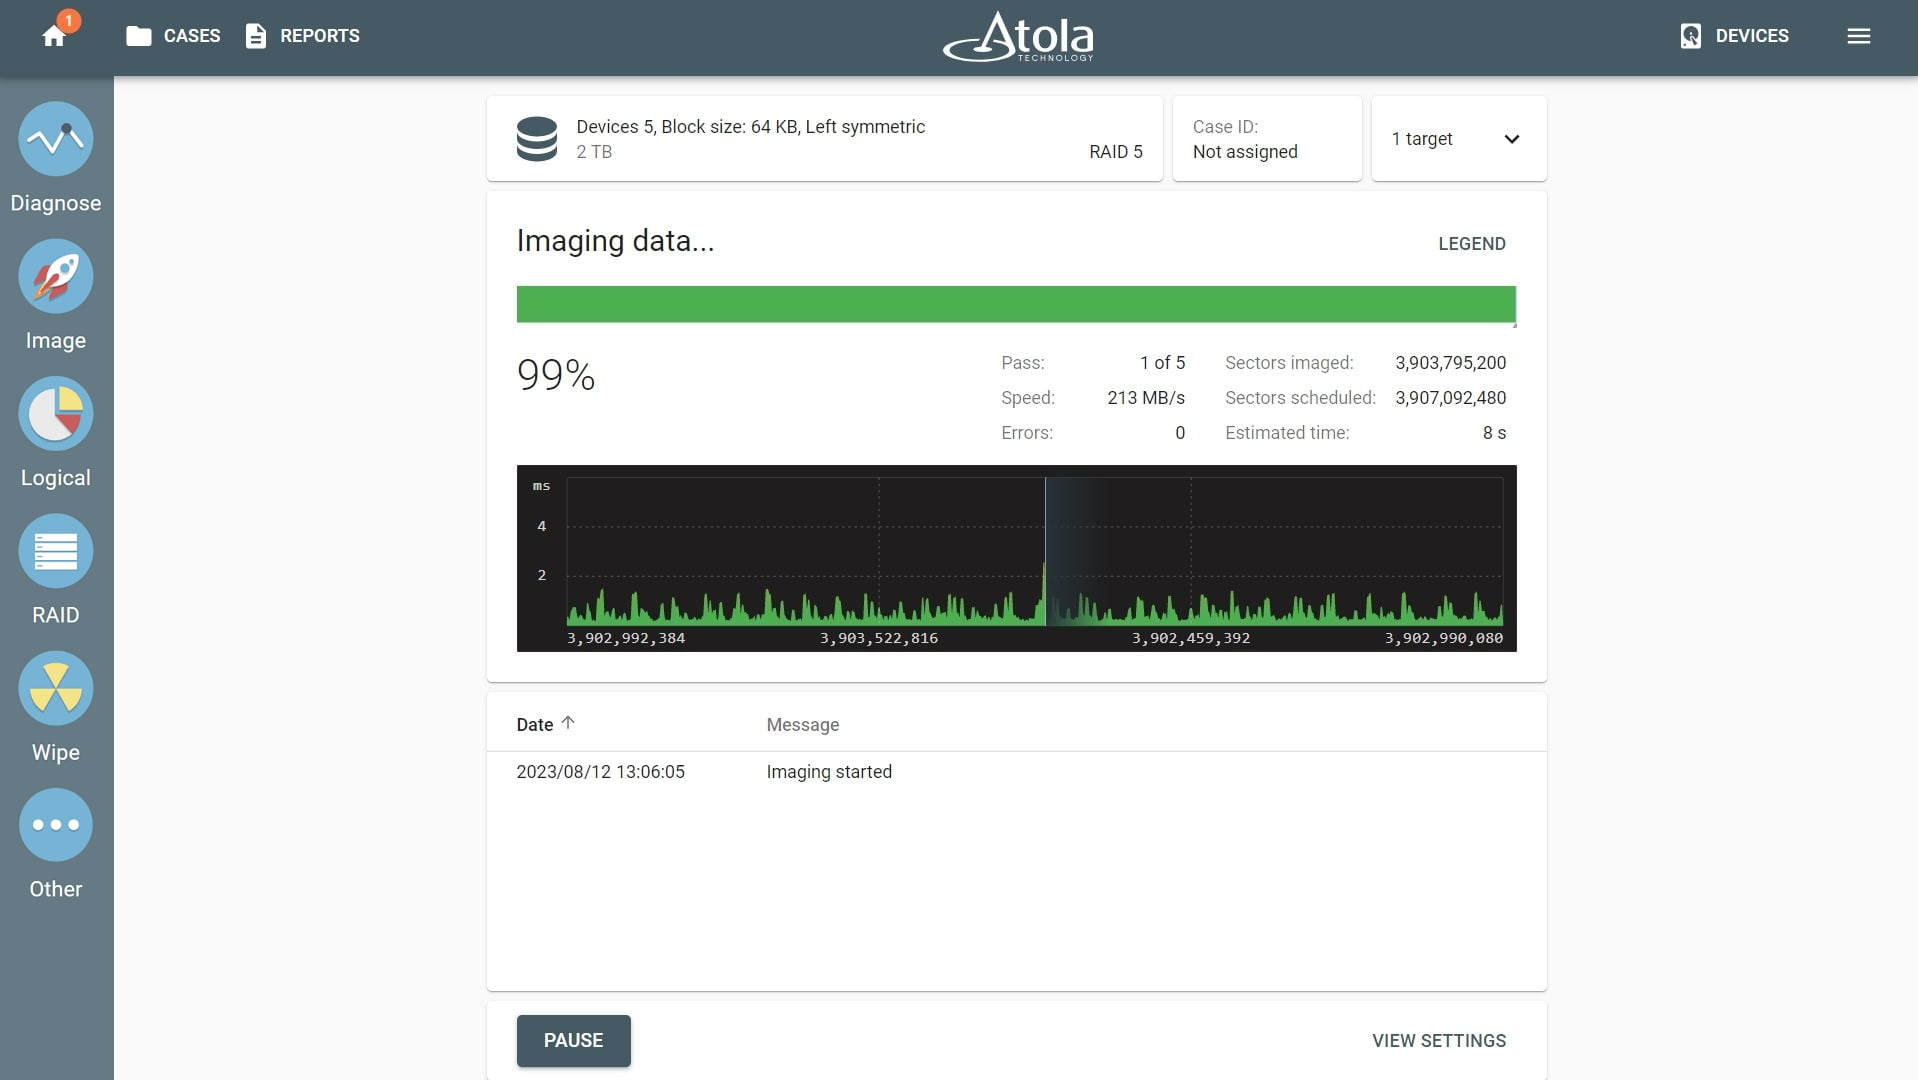
Imaging RAID 5 array.
Imaging report
TaskForce 2 automatically generates the Imaging completed report with all RAID details and timestamps.
TaskForce 2 managed to successfully reconstruct and image all the data. That is why the number of errors in the Imaging completed report is zero.
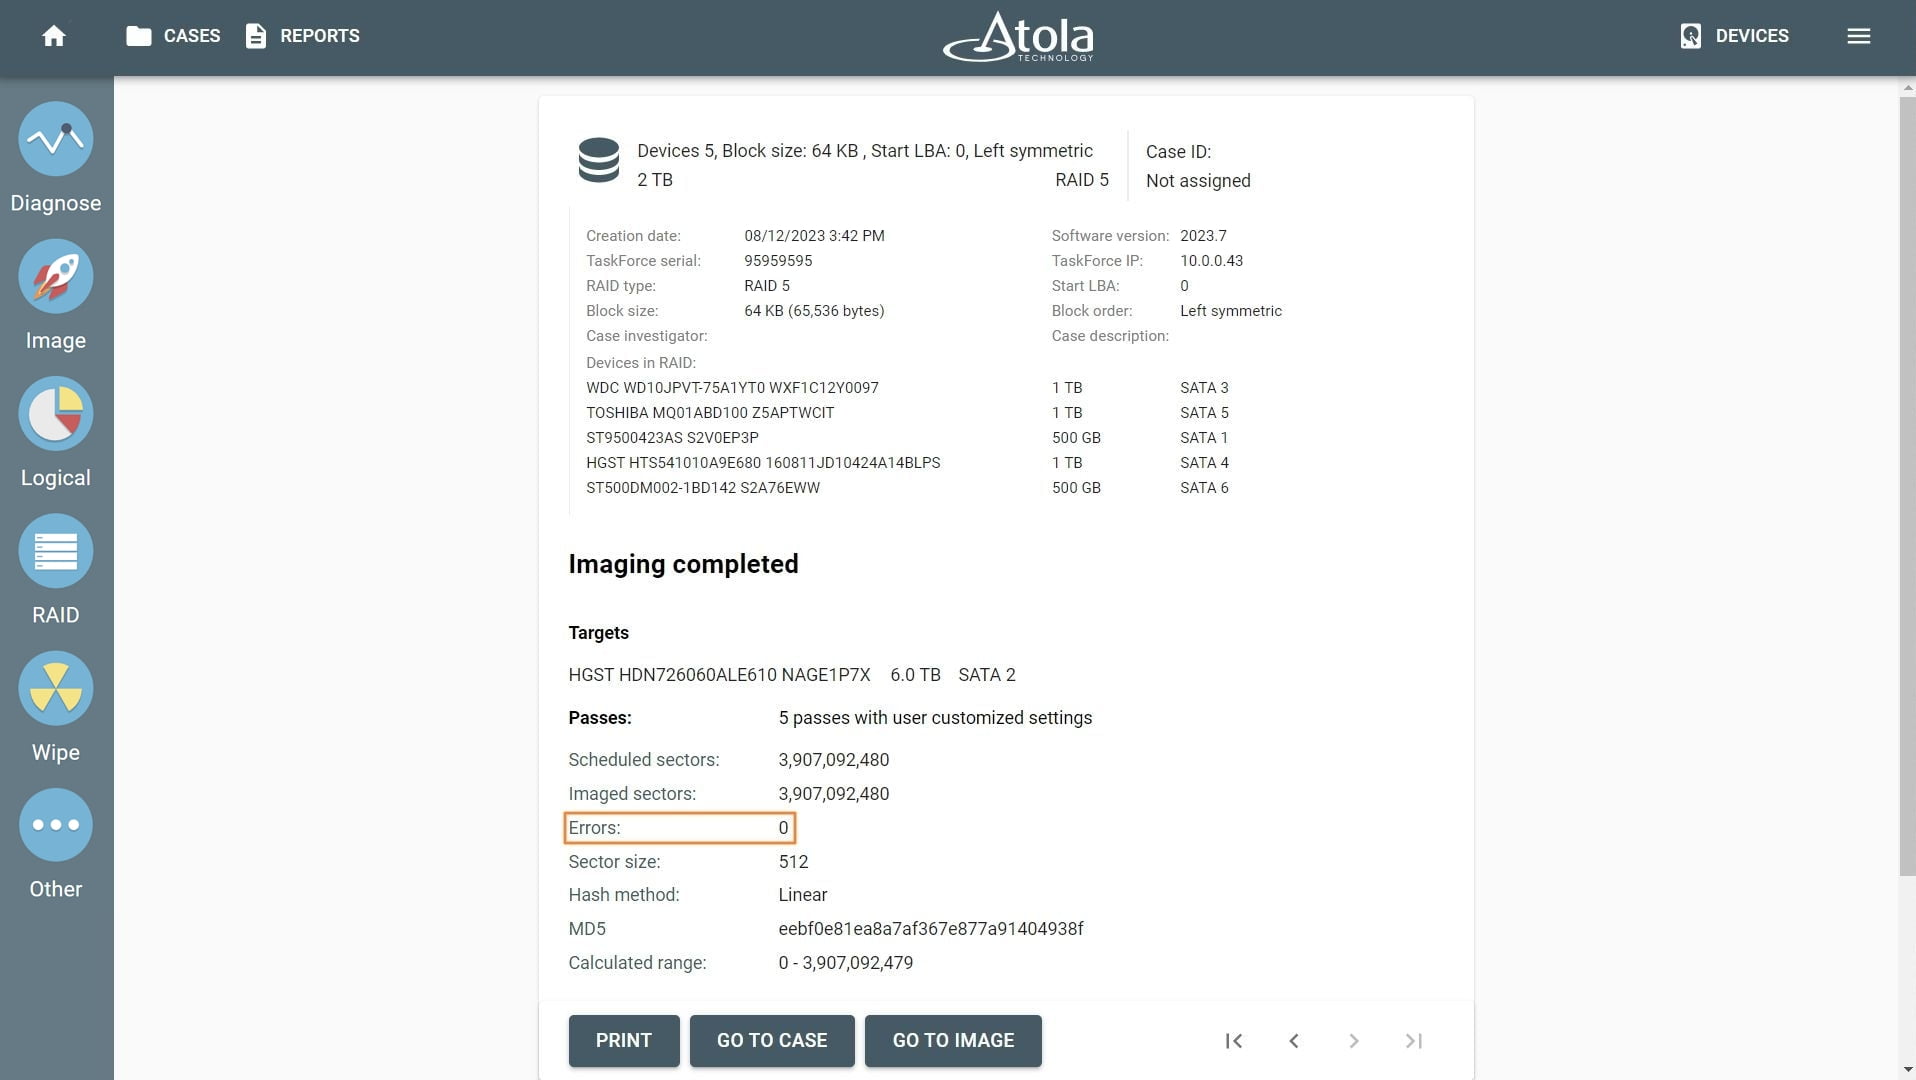
Imaging report.