Imaging to an E01 file with dual hash
E01 file format is the de facto standard format for forensic examiners to store images due to its ability to store not only a copy of the evidence drive, but also case and evidence details. E01 file can also store both MD5 and SHA1 hash values calculated during imaging.
To image a source evidence drive to an E01 file, you have to create a new target file.
Creating a new E01 file
- Go to Image.
- Select the source evidence drive.
- On the Select target devices panel, switch to the Files tab and click Create file.
- In the file selector, find the folder to store the image and click Create file.
- In the Create image file dialog, select the E01 file type.
- Fill in E01 file information, and then click Create.
- On the Select target devices panel, click Continue.
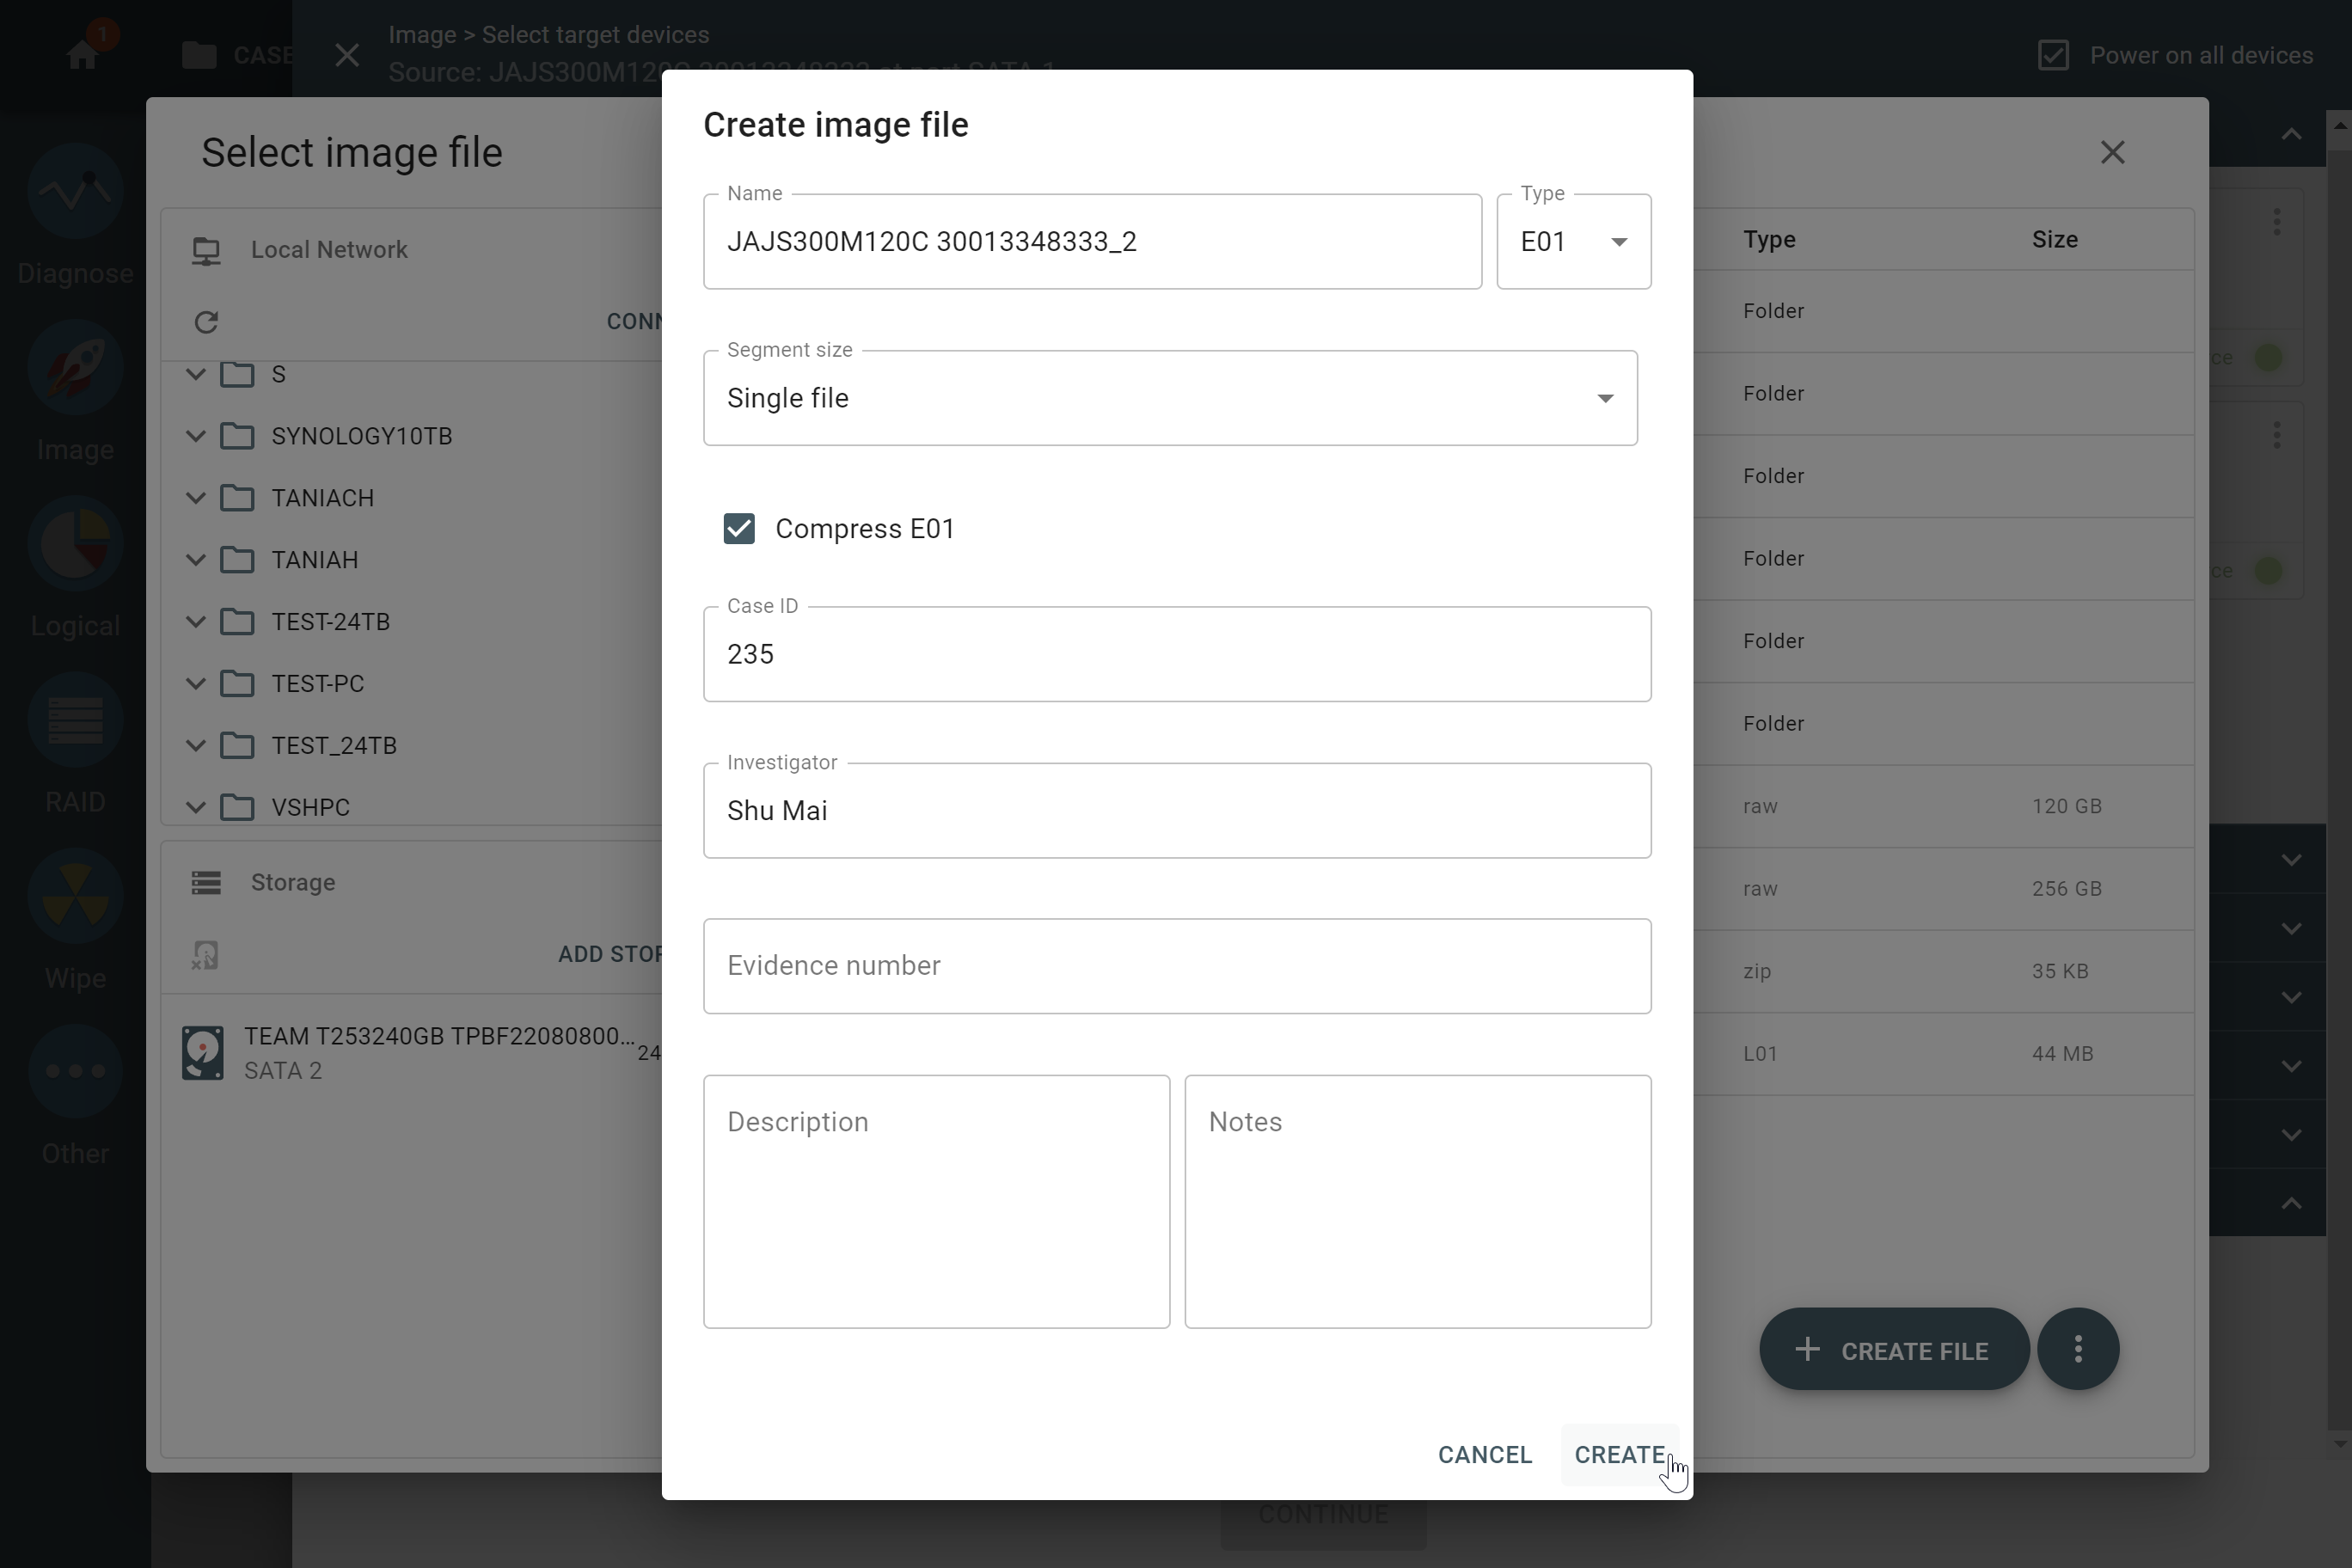
Creating an E01 file.
Enable dual-hash and start imaging
- Once you have selected the source drive and created the target file, you end up on the Settings summary page. To adjust the imaging settings, click Change.
- On the Hashes tab, make sure that Hash source during imaging is selected, also select both MD5 and SHA1 hash types.
- To proceed with imaging, click Start.
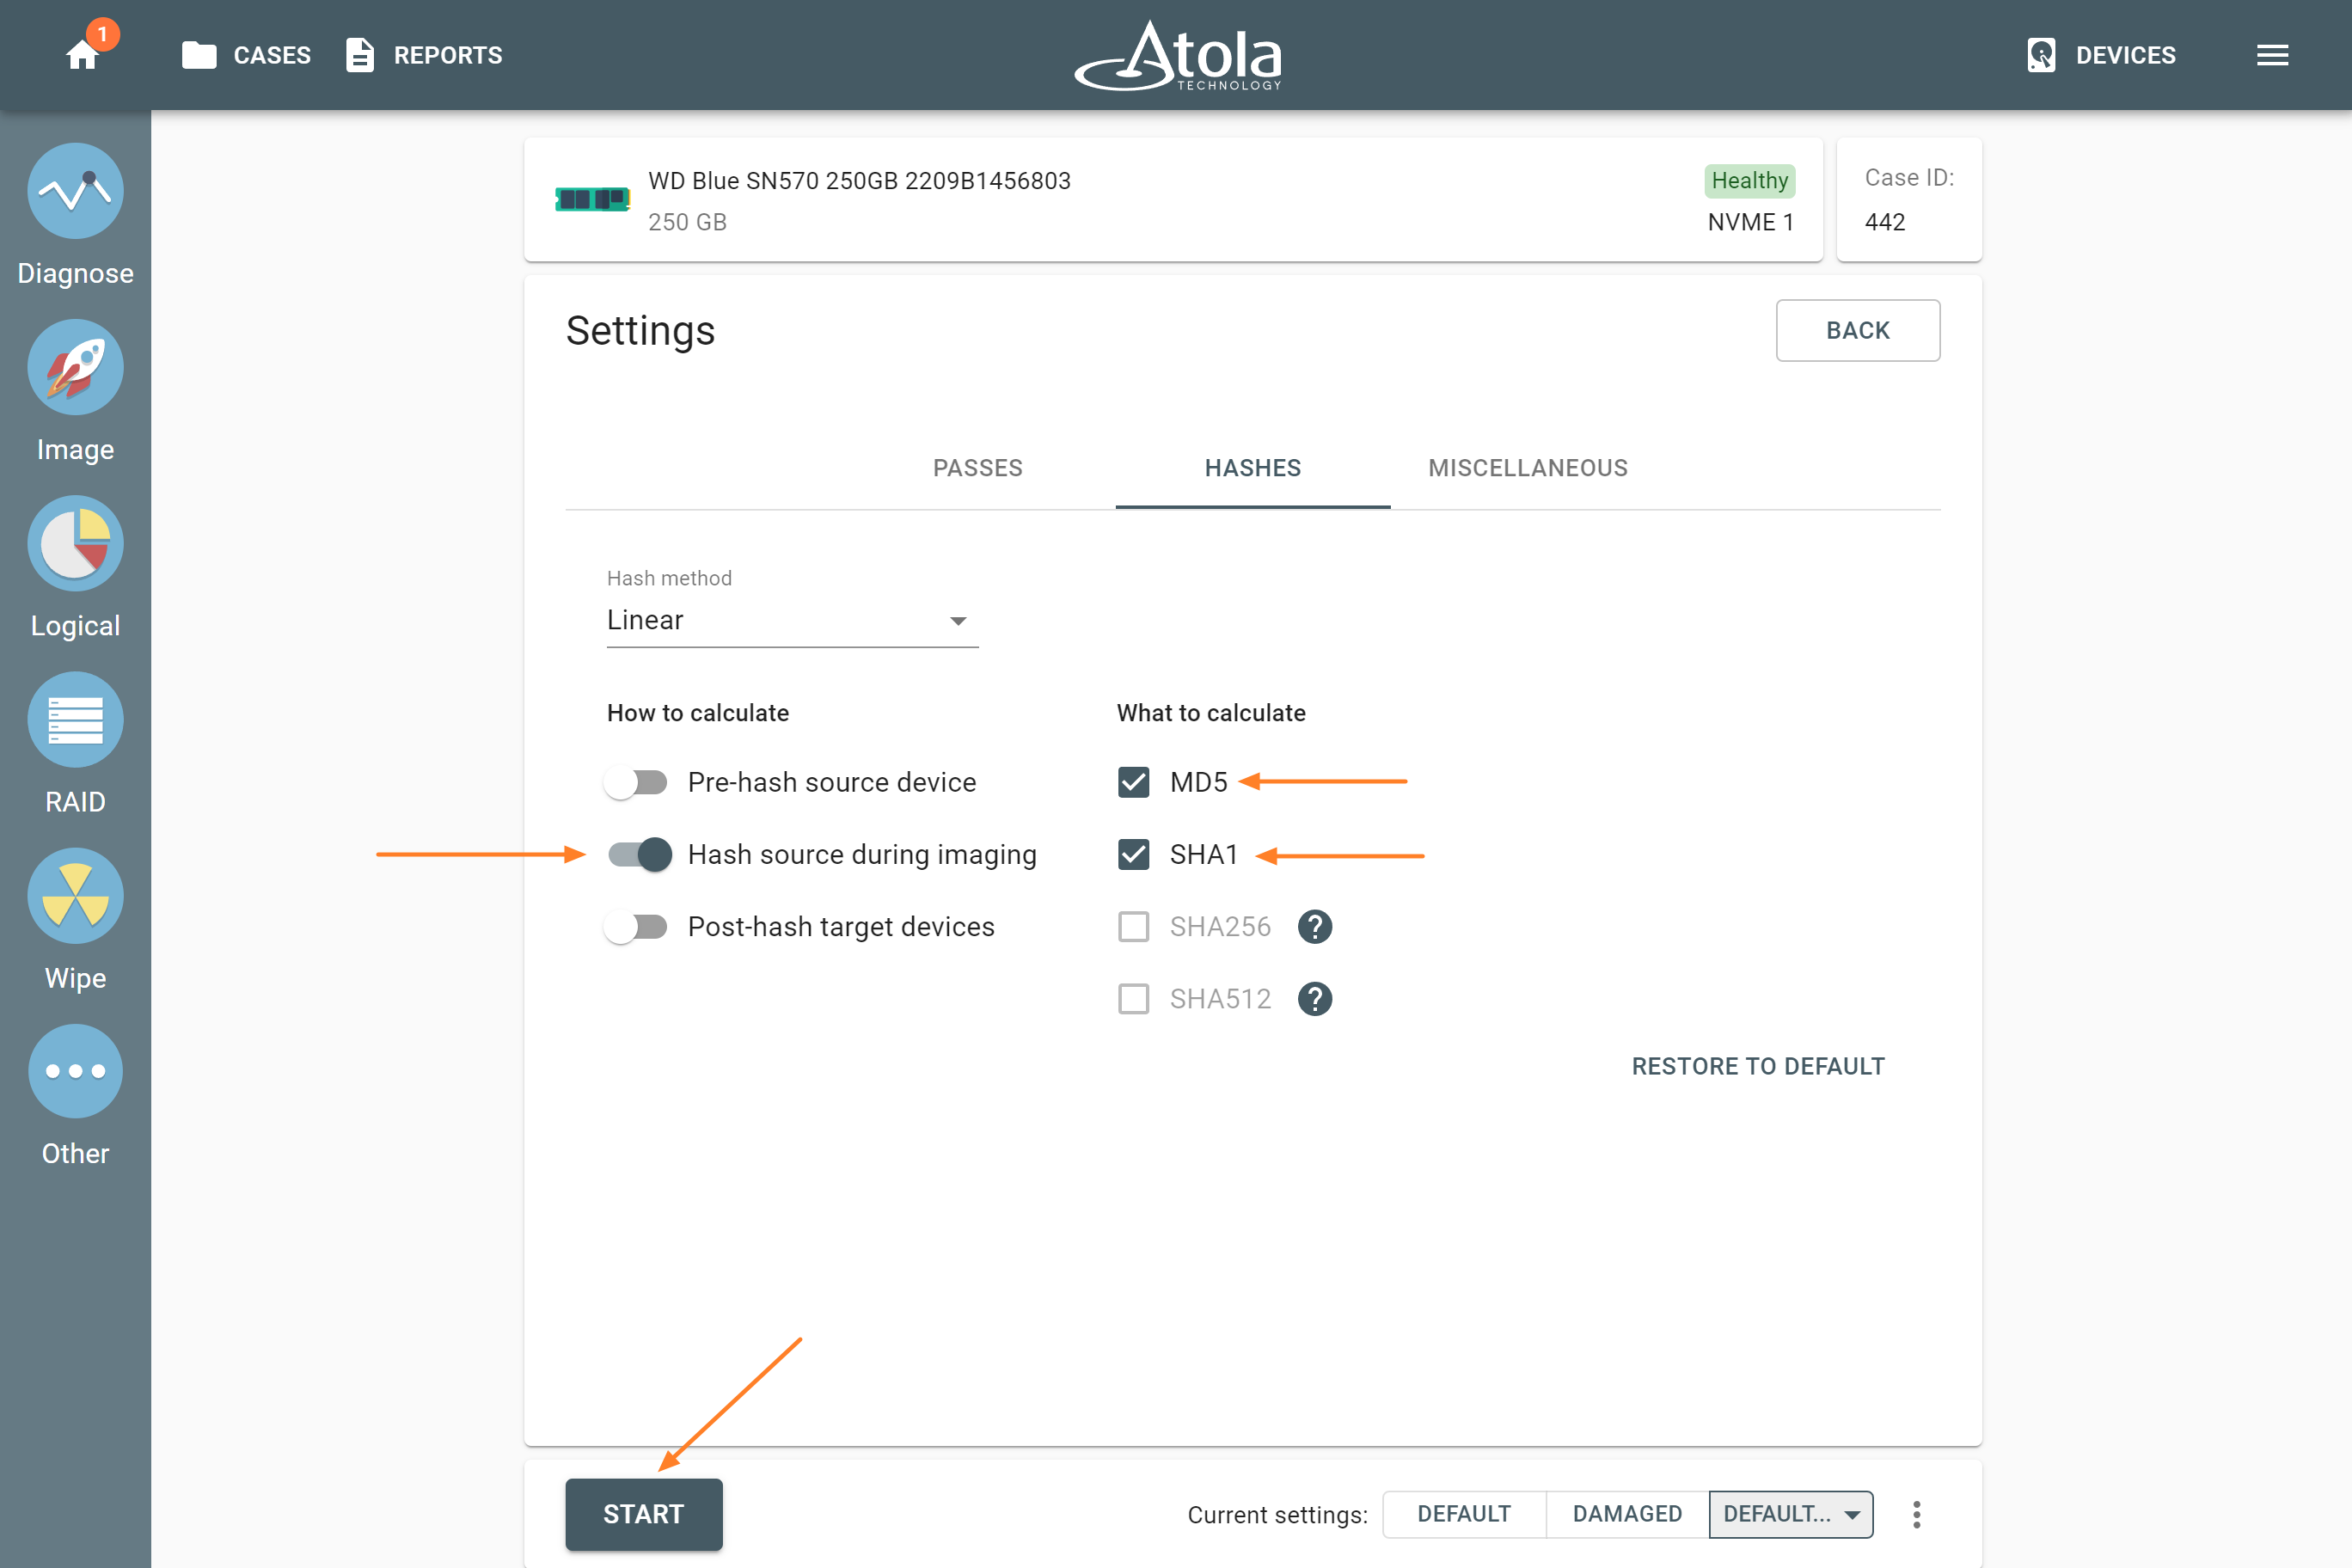
Adjusting imaging settings.
The report and the E01 file
Upon completion of imaging, you can see both MD5 and SHA1 hash values indicated in the Imaging completed report.
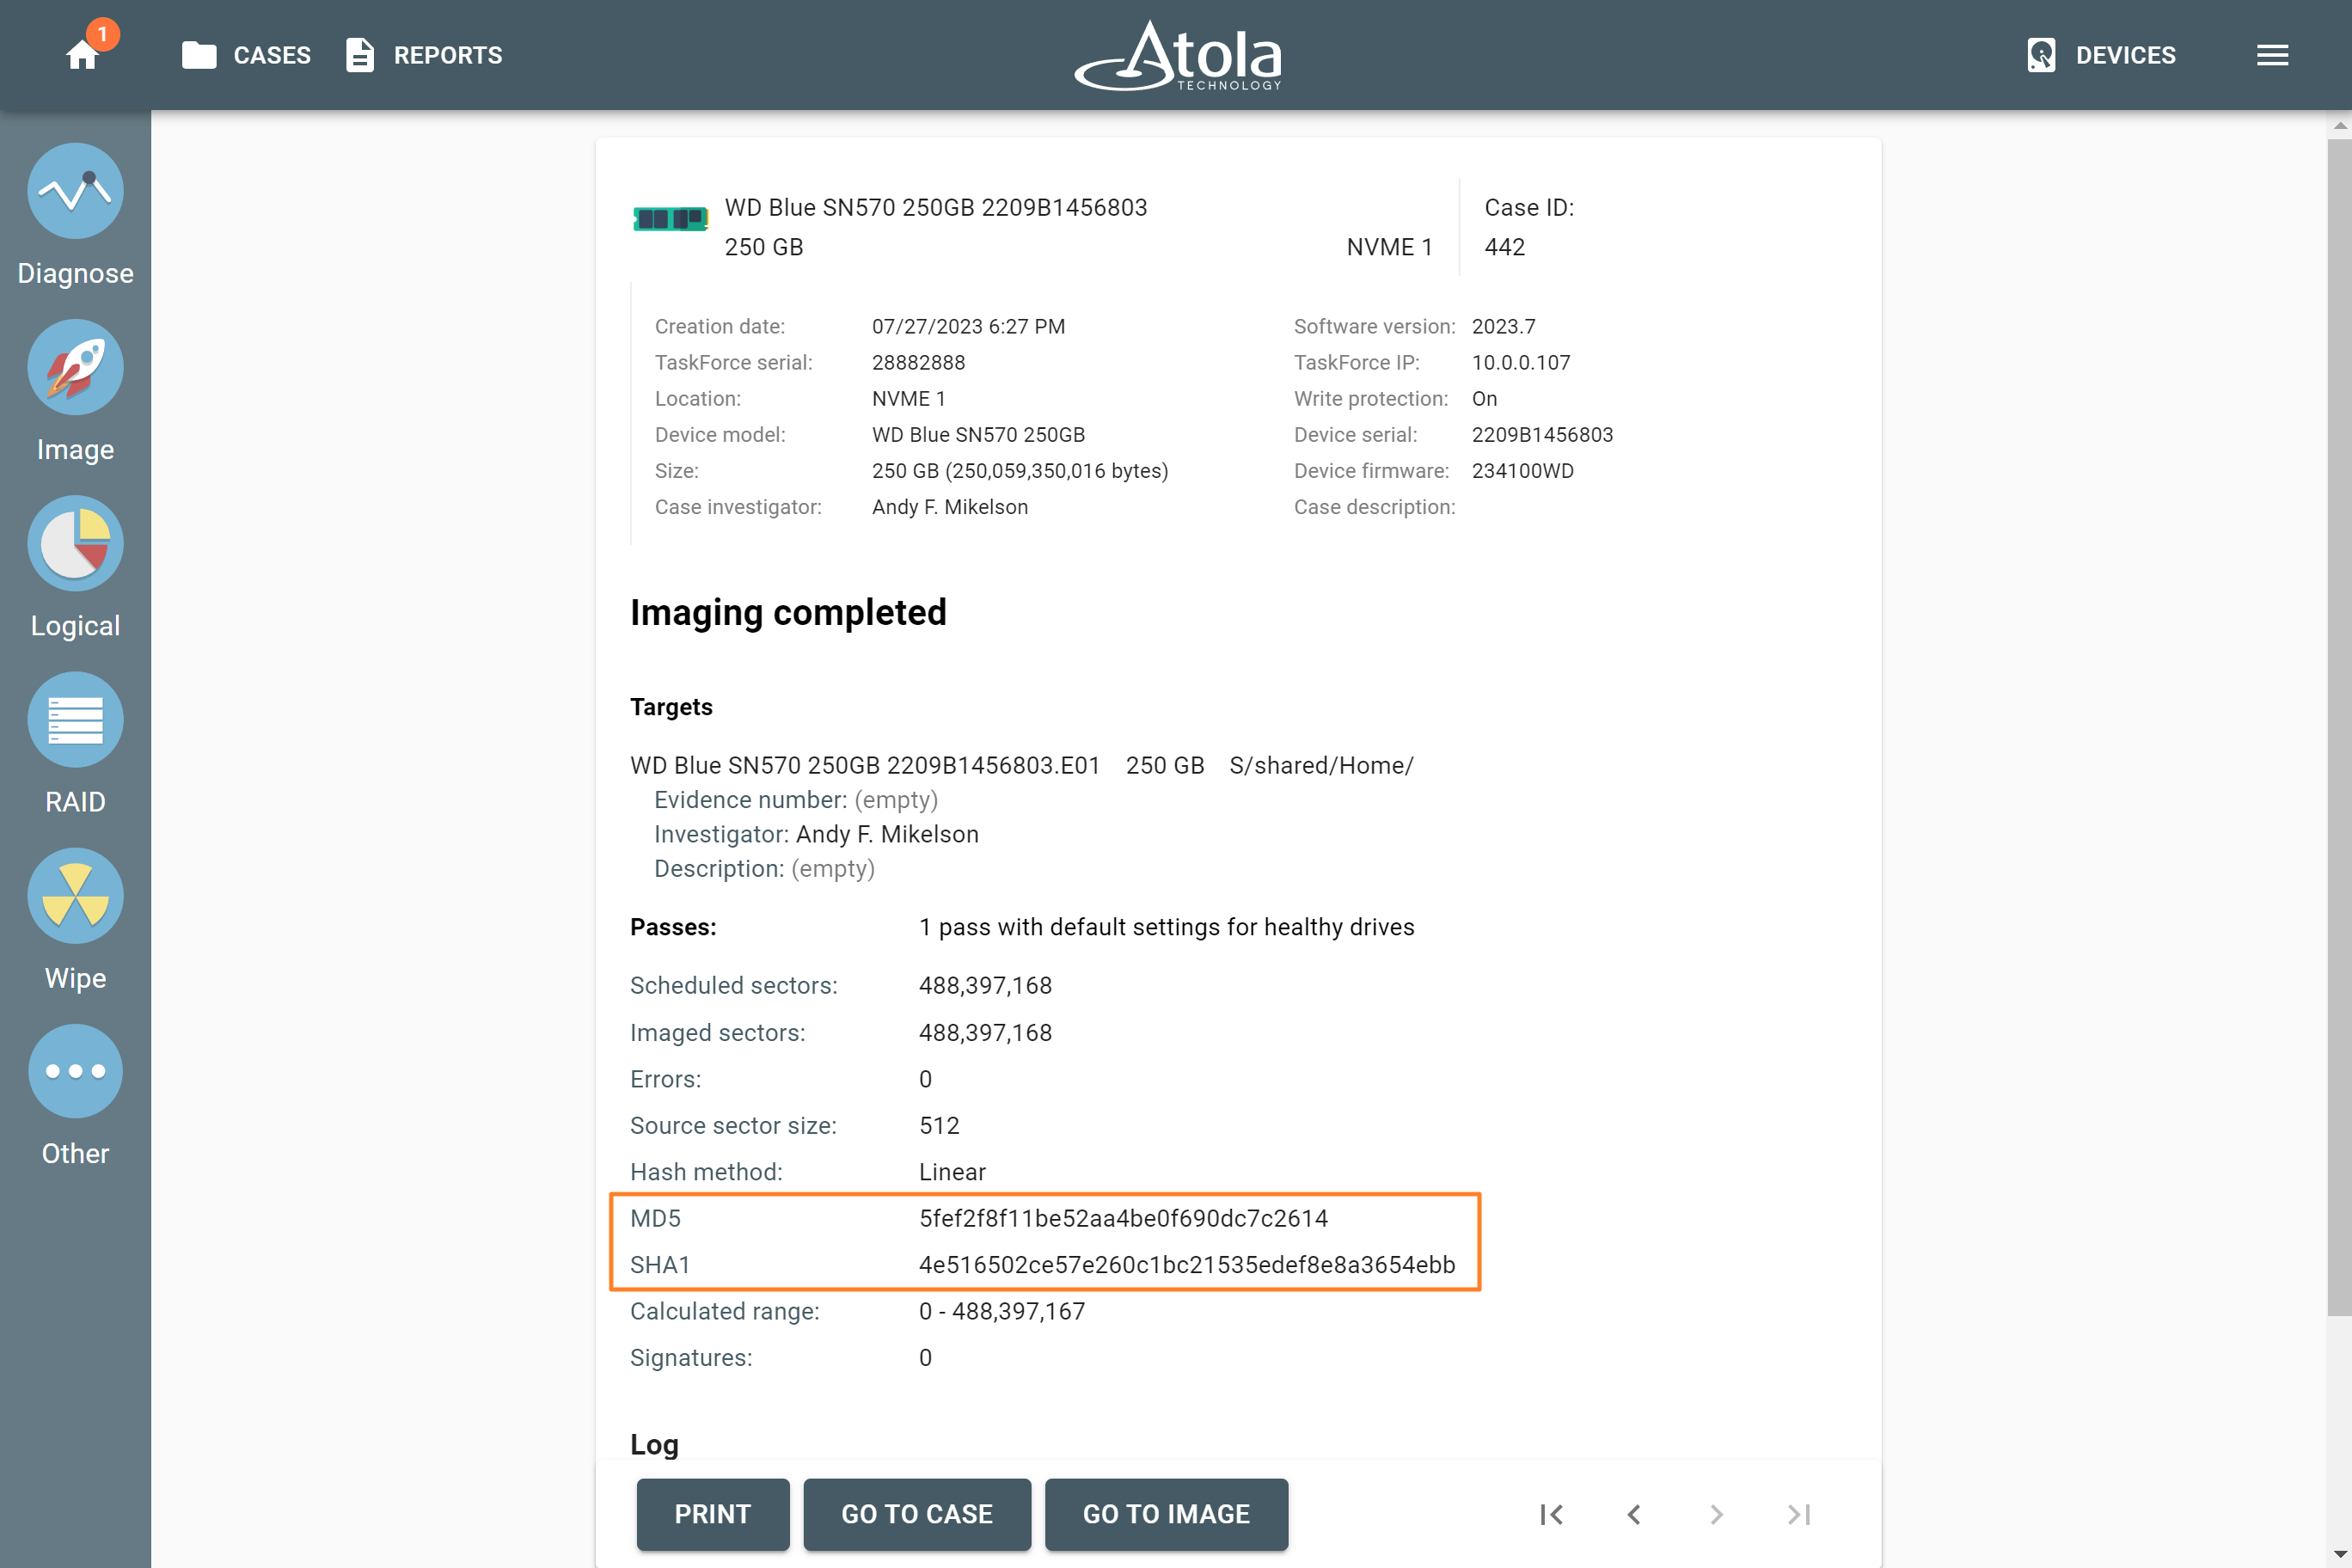
Imaging report.
It is also possible to look up the information of the created E01 file. To do that, perform the following actions:
- Click Devices at the top right.
- Expand the File section and click Select file.
- Choose your file. TaskForce 2 opens the file information page with all the metadata of the E01 file. The MD5 and SHA hash values are listed there, too.
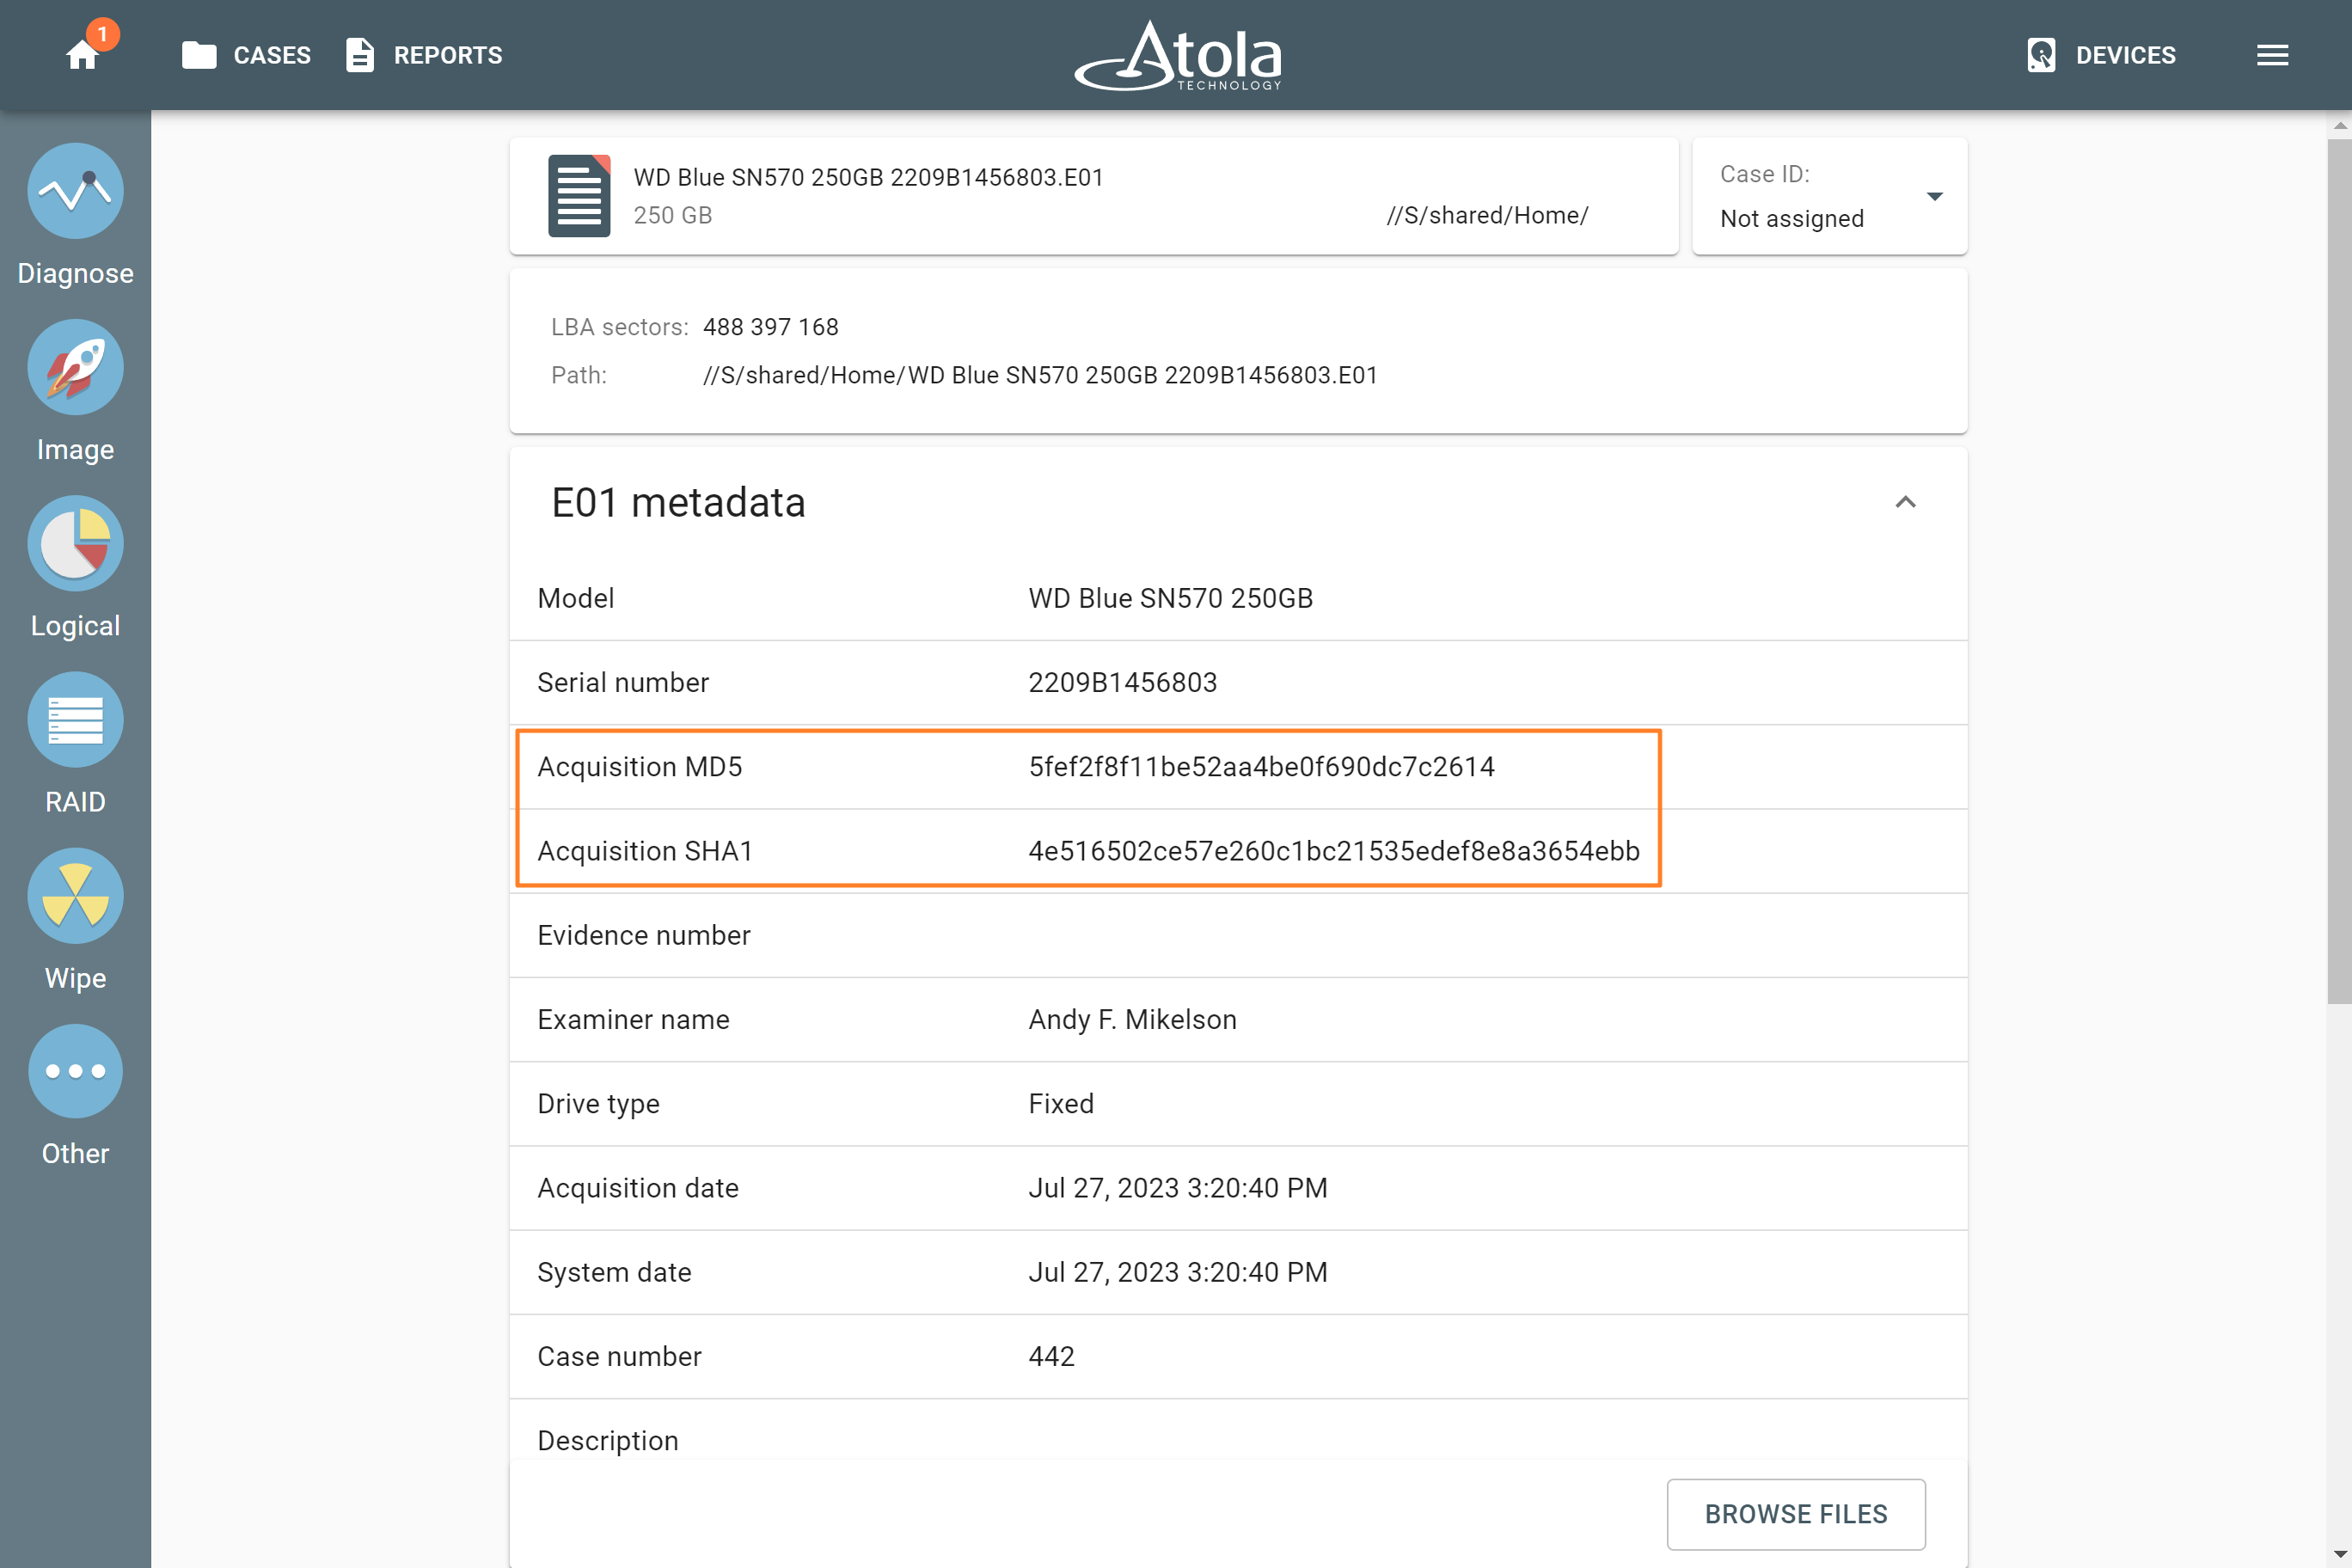
E01 file with calculated MD5 and SHA1 hashes.