Imaging a drive with a damaged head
The diagnostics module, selective head imaging and multipass imaging algorithm allow Atola TaskForce 2 to handle a drive with damaged heads gently and effectively. All these techniques help minimize the risk of losing more data on the working part of the head stack.
Diagnose first
The built-in diagnostics module of TaskForce 2 automatically checks all major subsystems of the evidence drive: circuit board, heads, media surface, firmware and file system.
A diagnostics report provides detailed information about the heads. In addition, it offers recommendations for the optimal imaging strategy for your damaged hard drive.

The above diagnostics report informs the operator that the drive’s hardware has major issues and points to defects in the media and a damaged head (Head#3). The report contains a recommendation to disable the damaged head in the imaging settings.
Selective head imaging
Atola engineers recommend that the good heads are imaged first. To do that:
- Go to Image.
- Select your source and target devices.
- Click Continue.
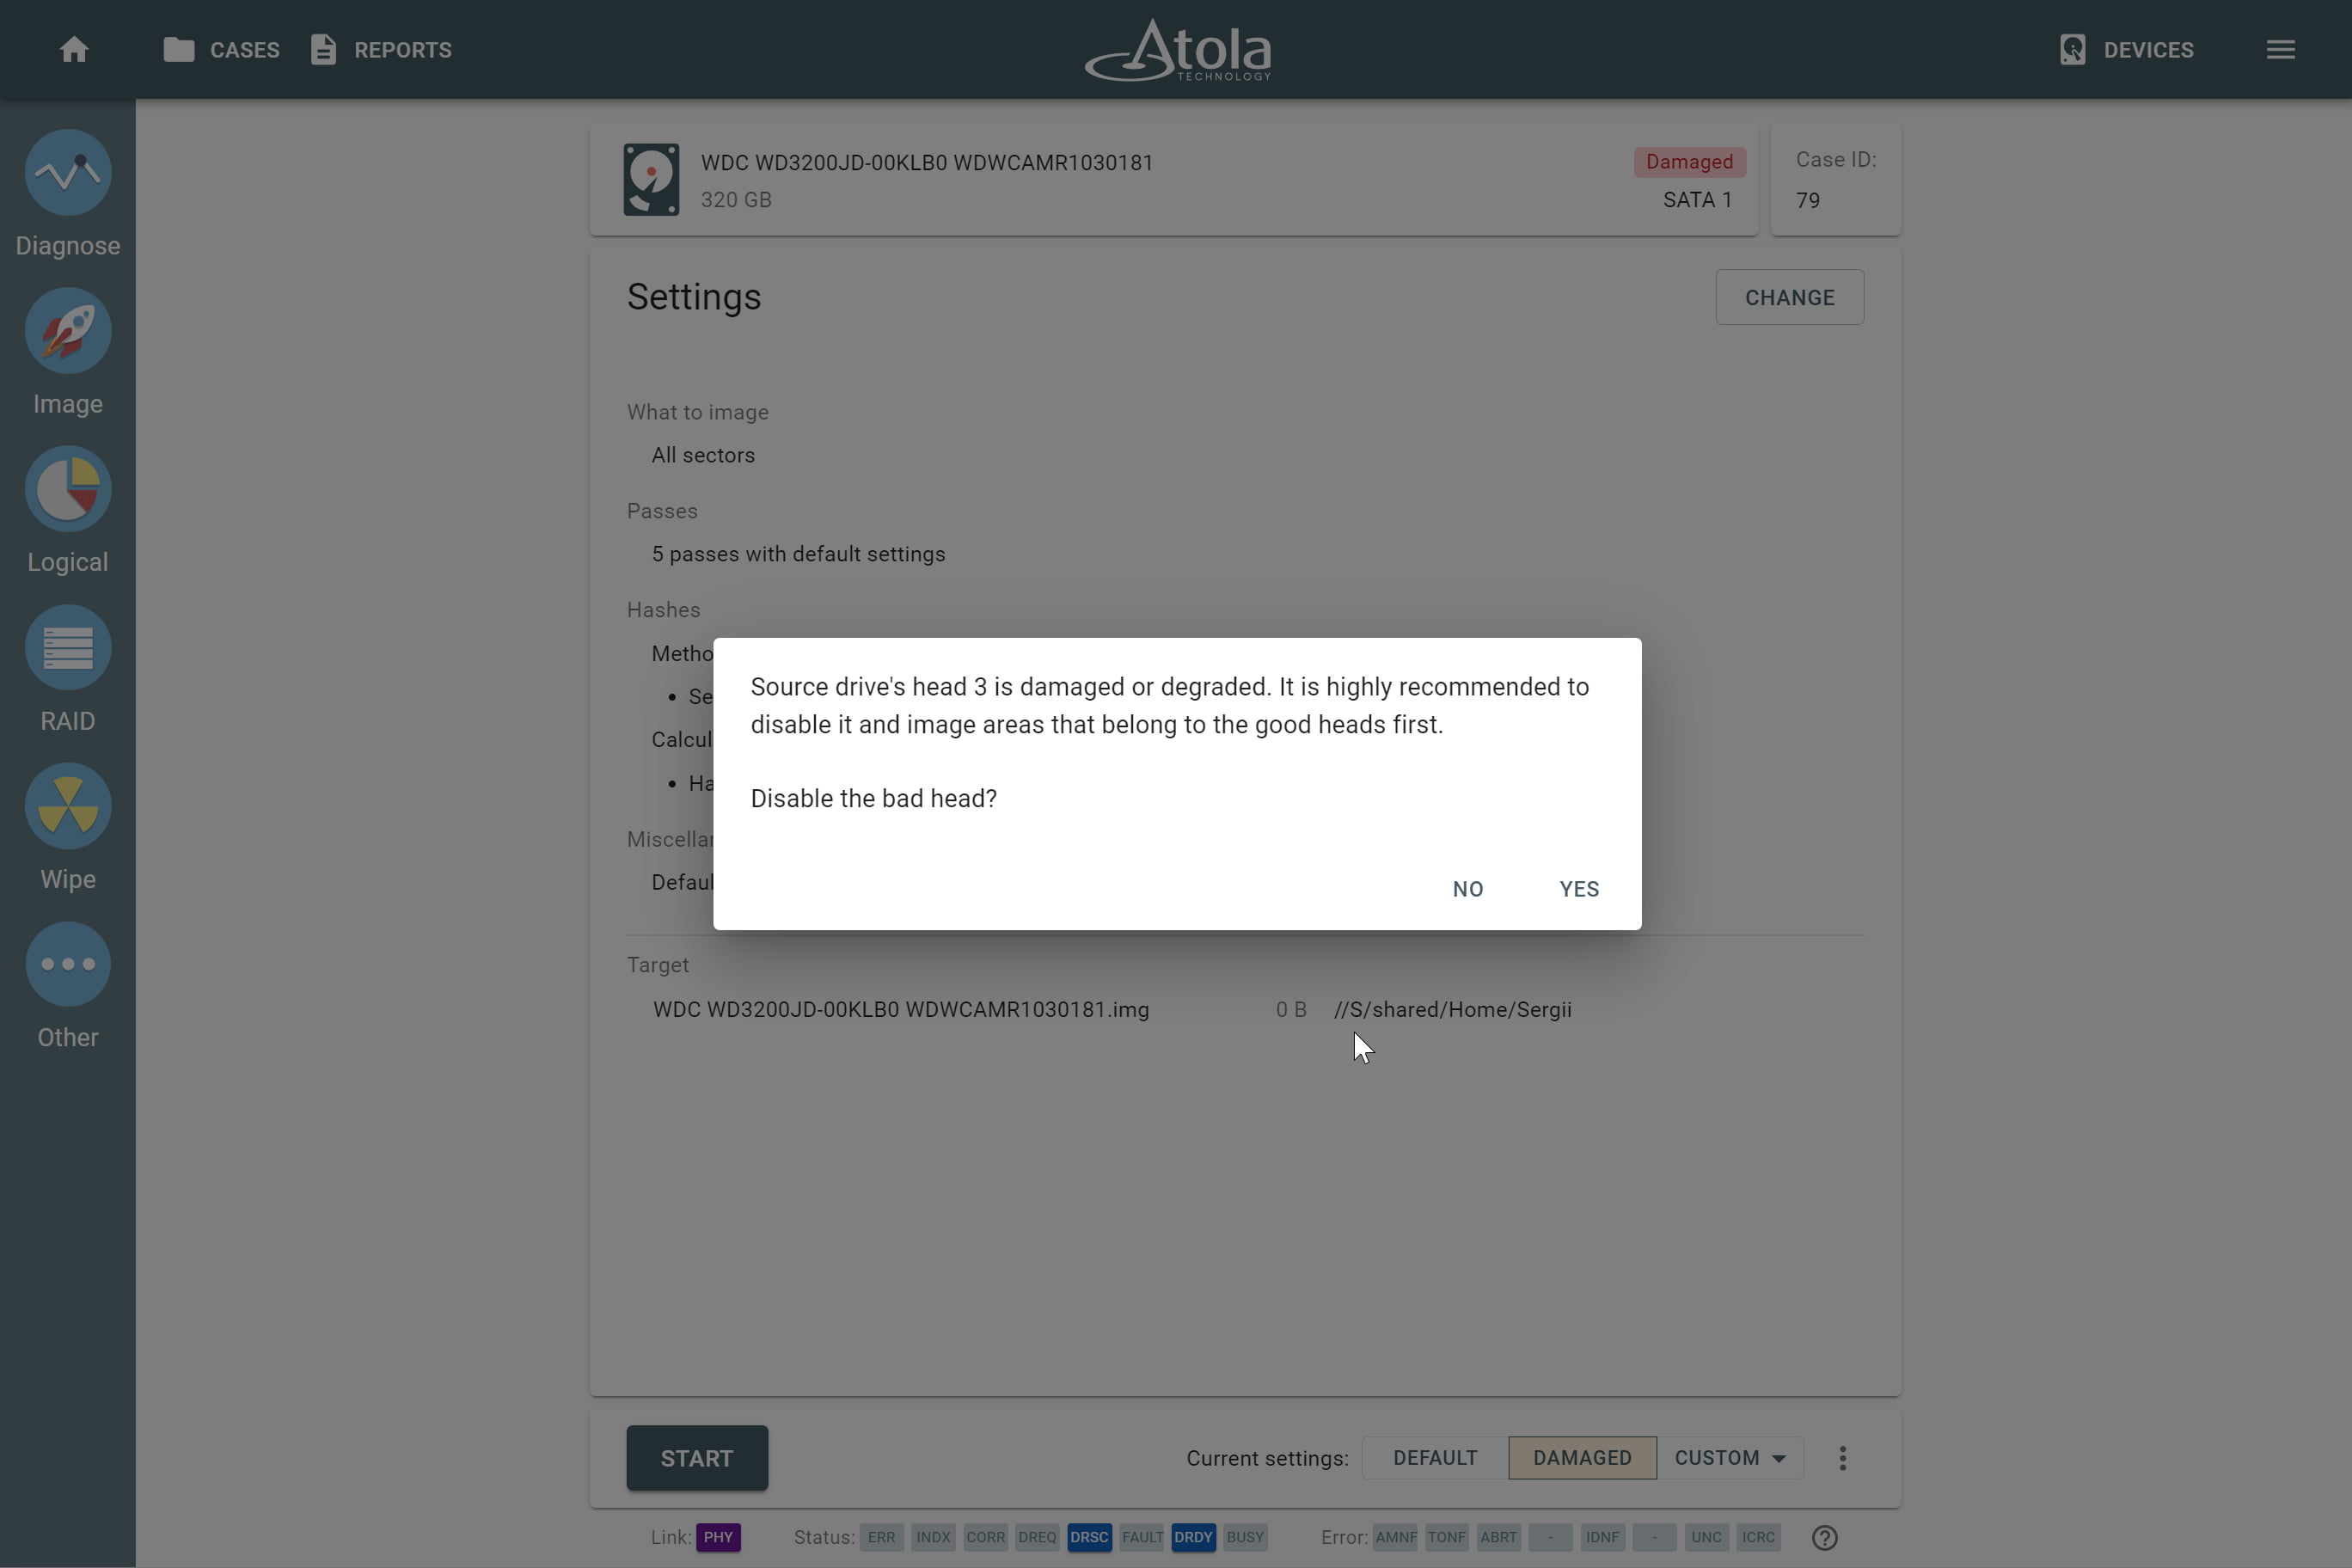
- If a head was identified as damaged during the diagnostics, at this stage TaskForce 2 shows a dialog prompting you to disable the damaged head. To confirm that the head should be automatically disabled for the subsequent imaging session, click YES.
Alternatively, the damaged head can be disabled in the imaging settings:
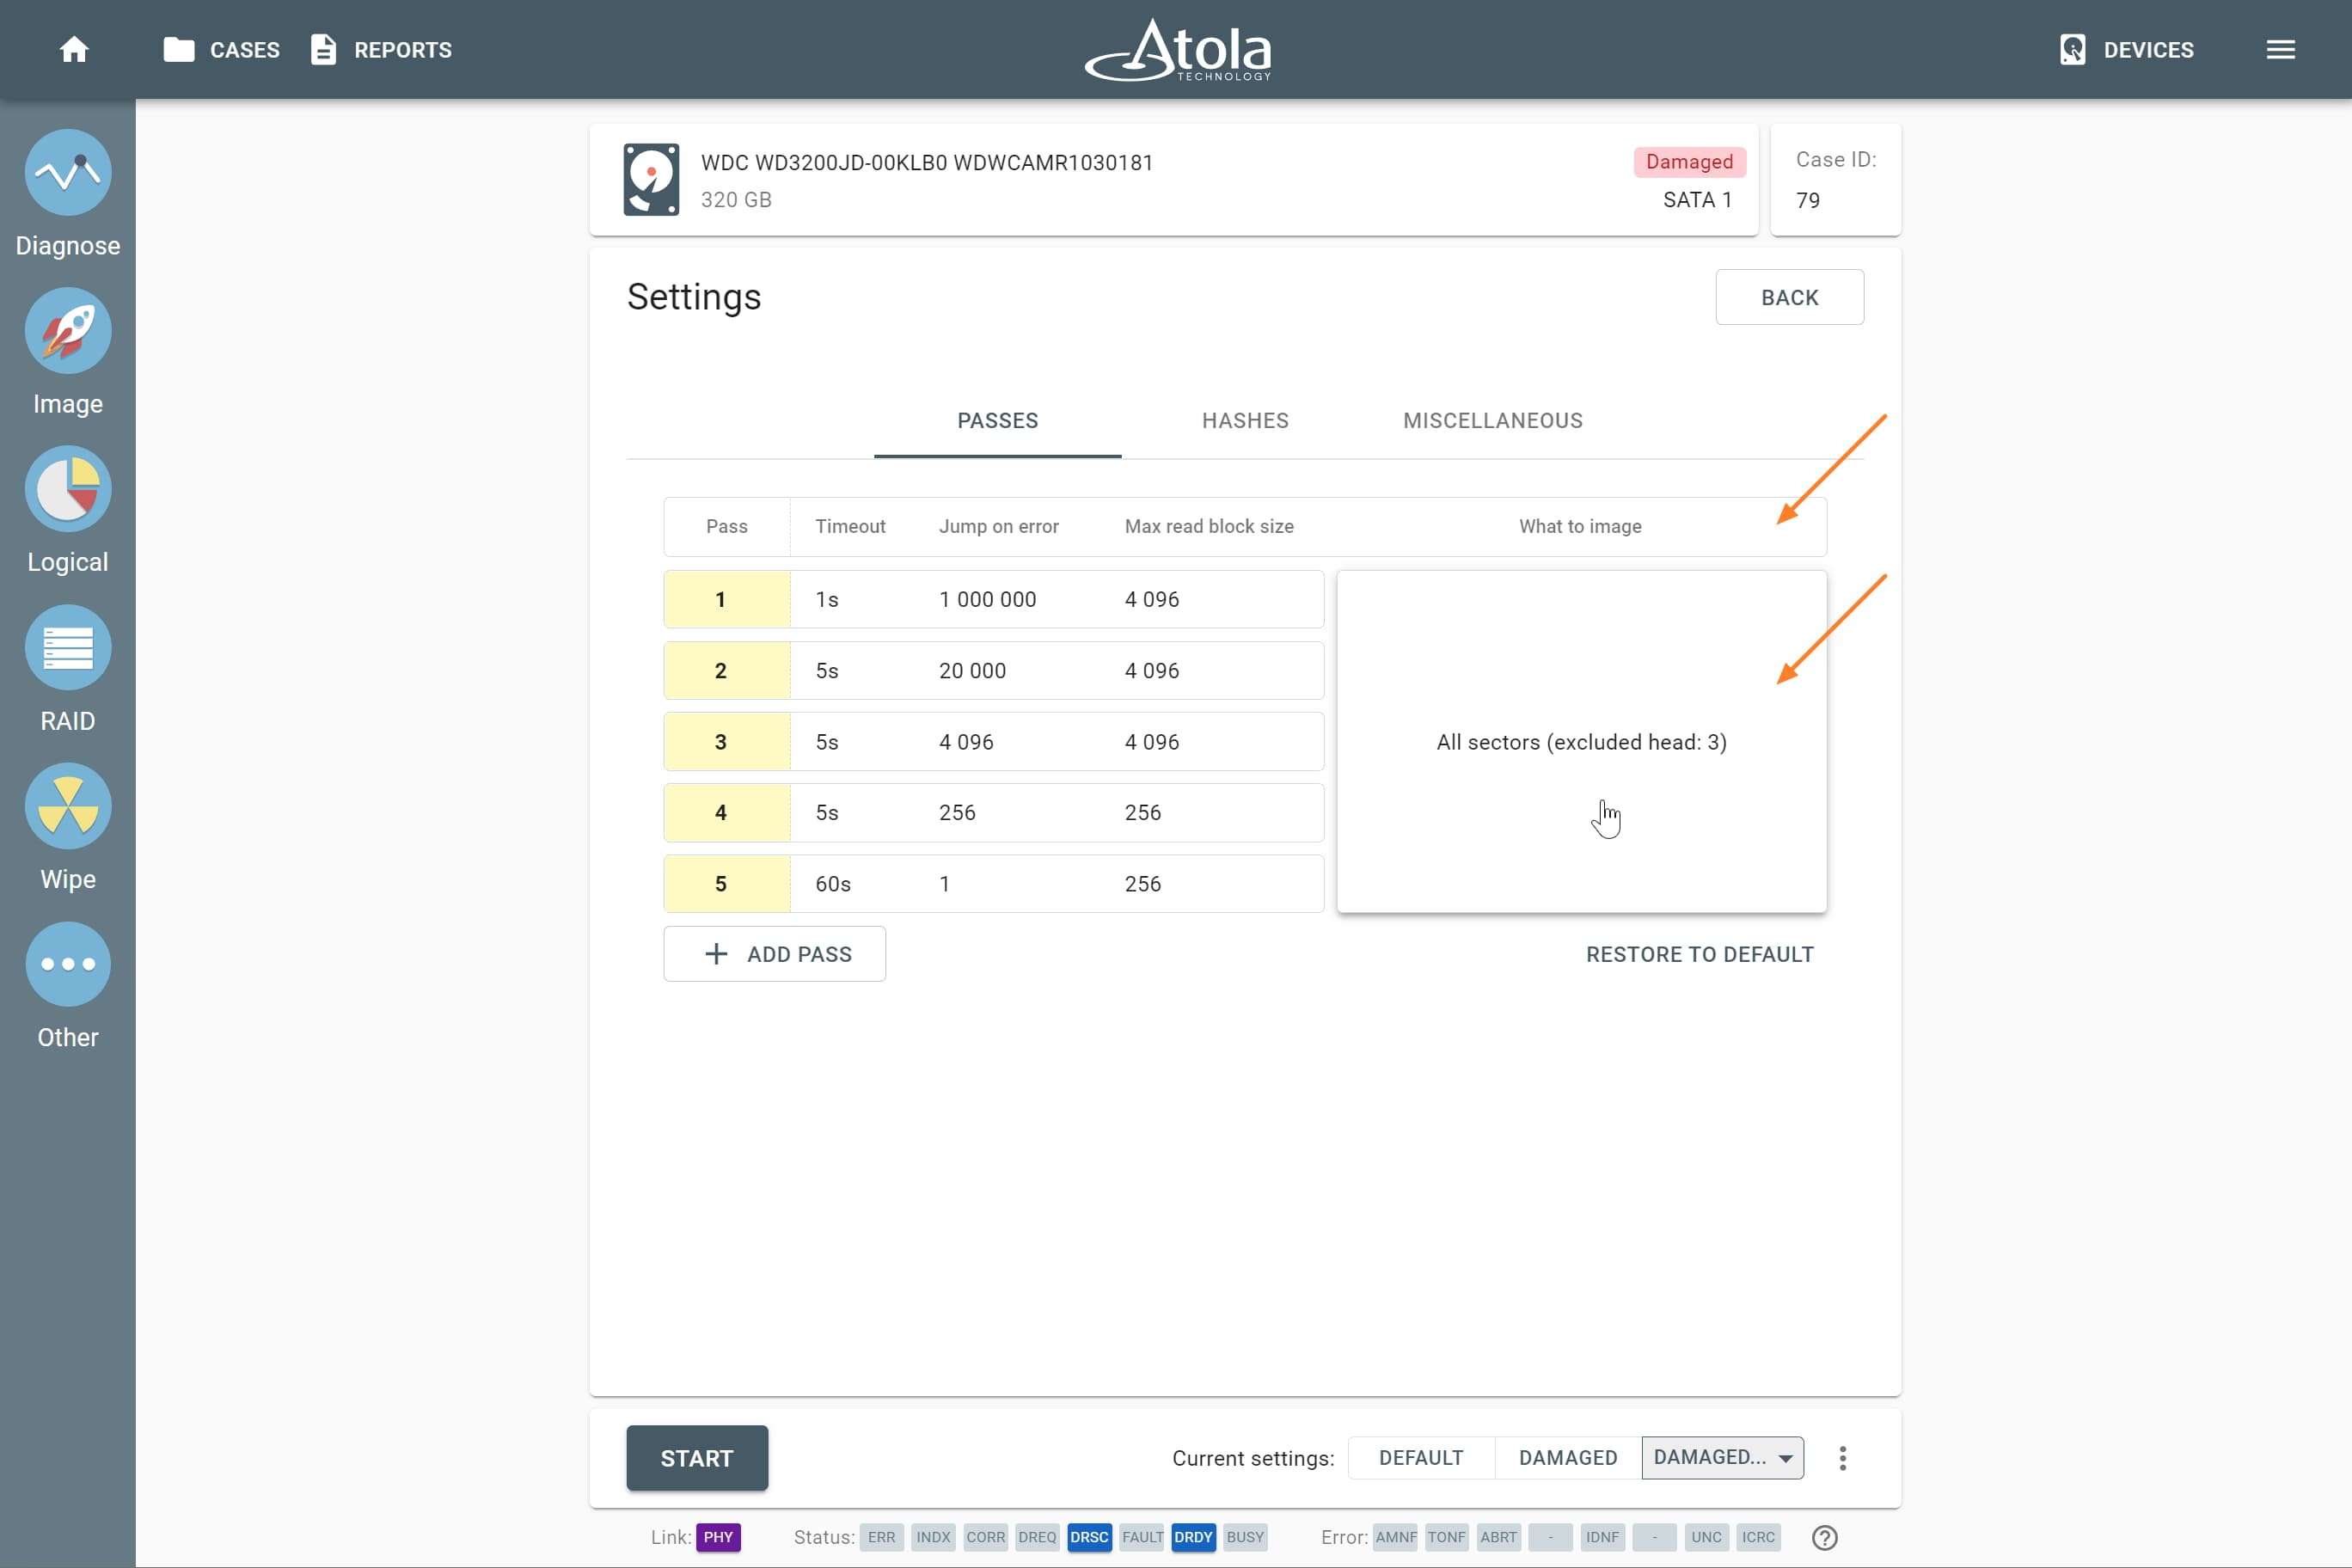
- On the Imaging settings page, click Change to adjust the settings for your imaging session.
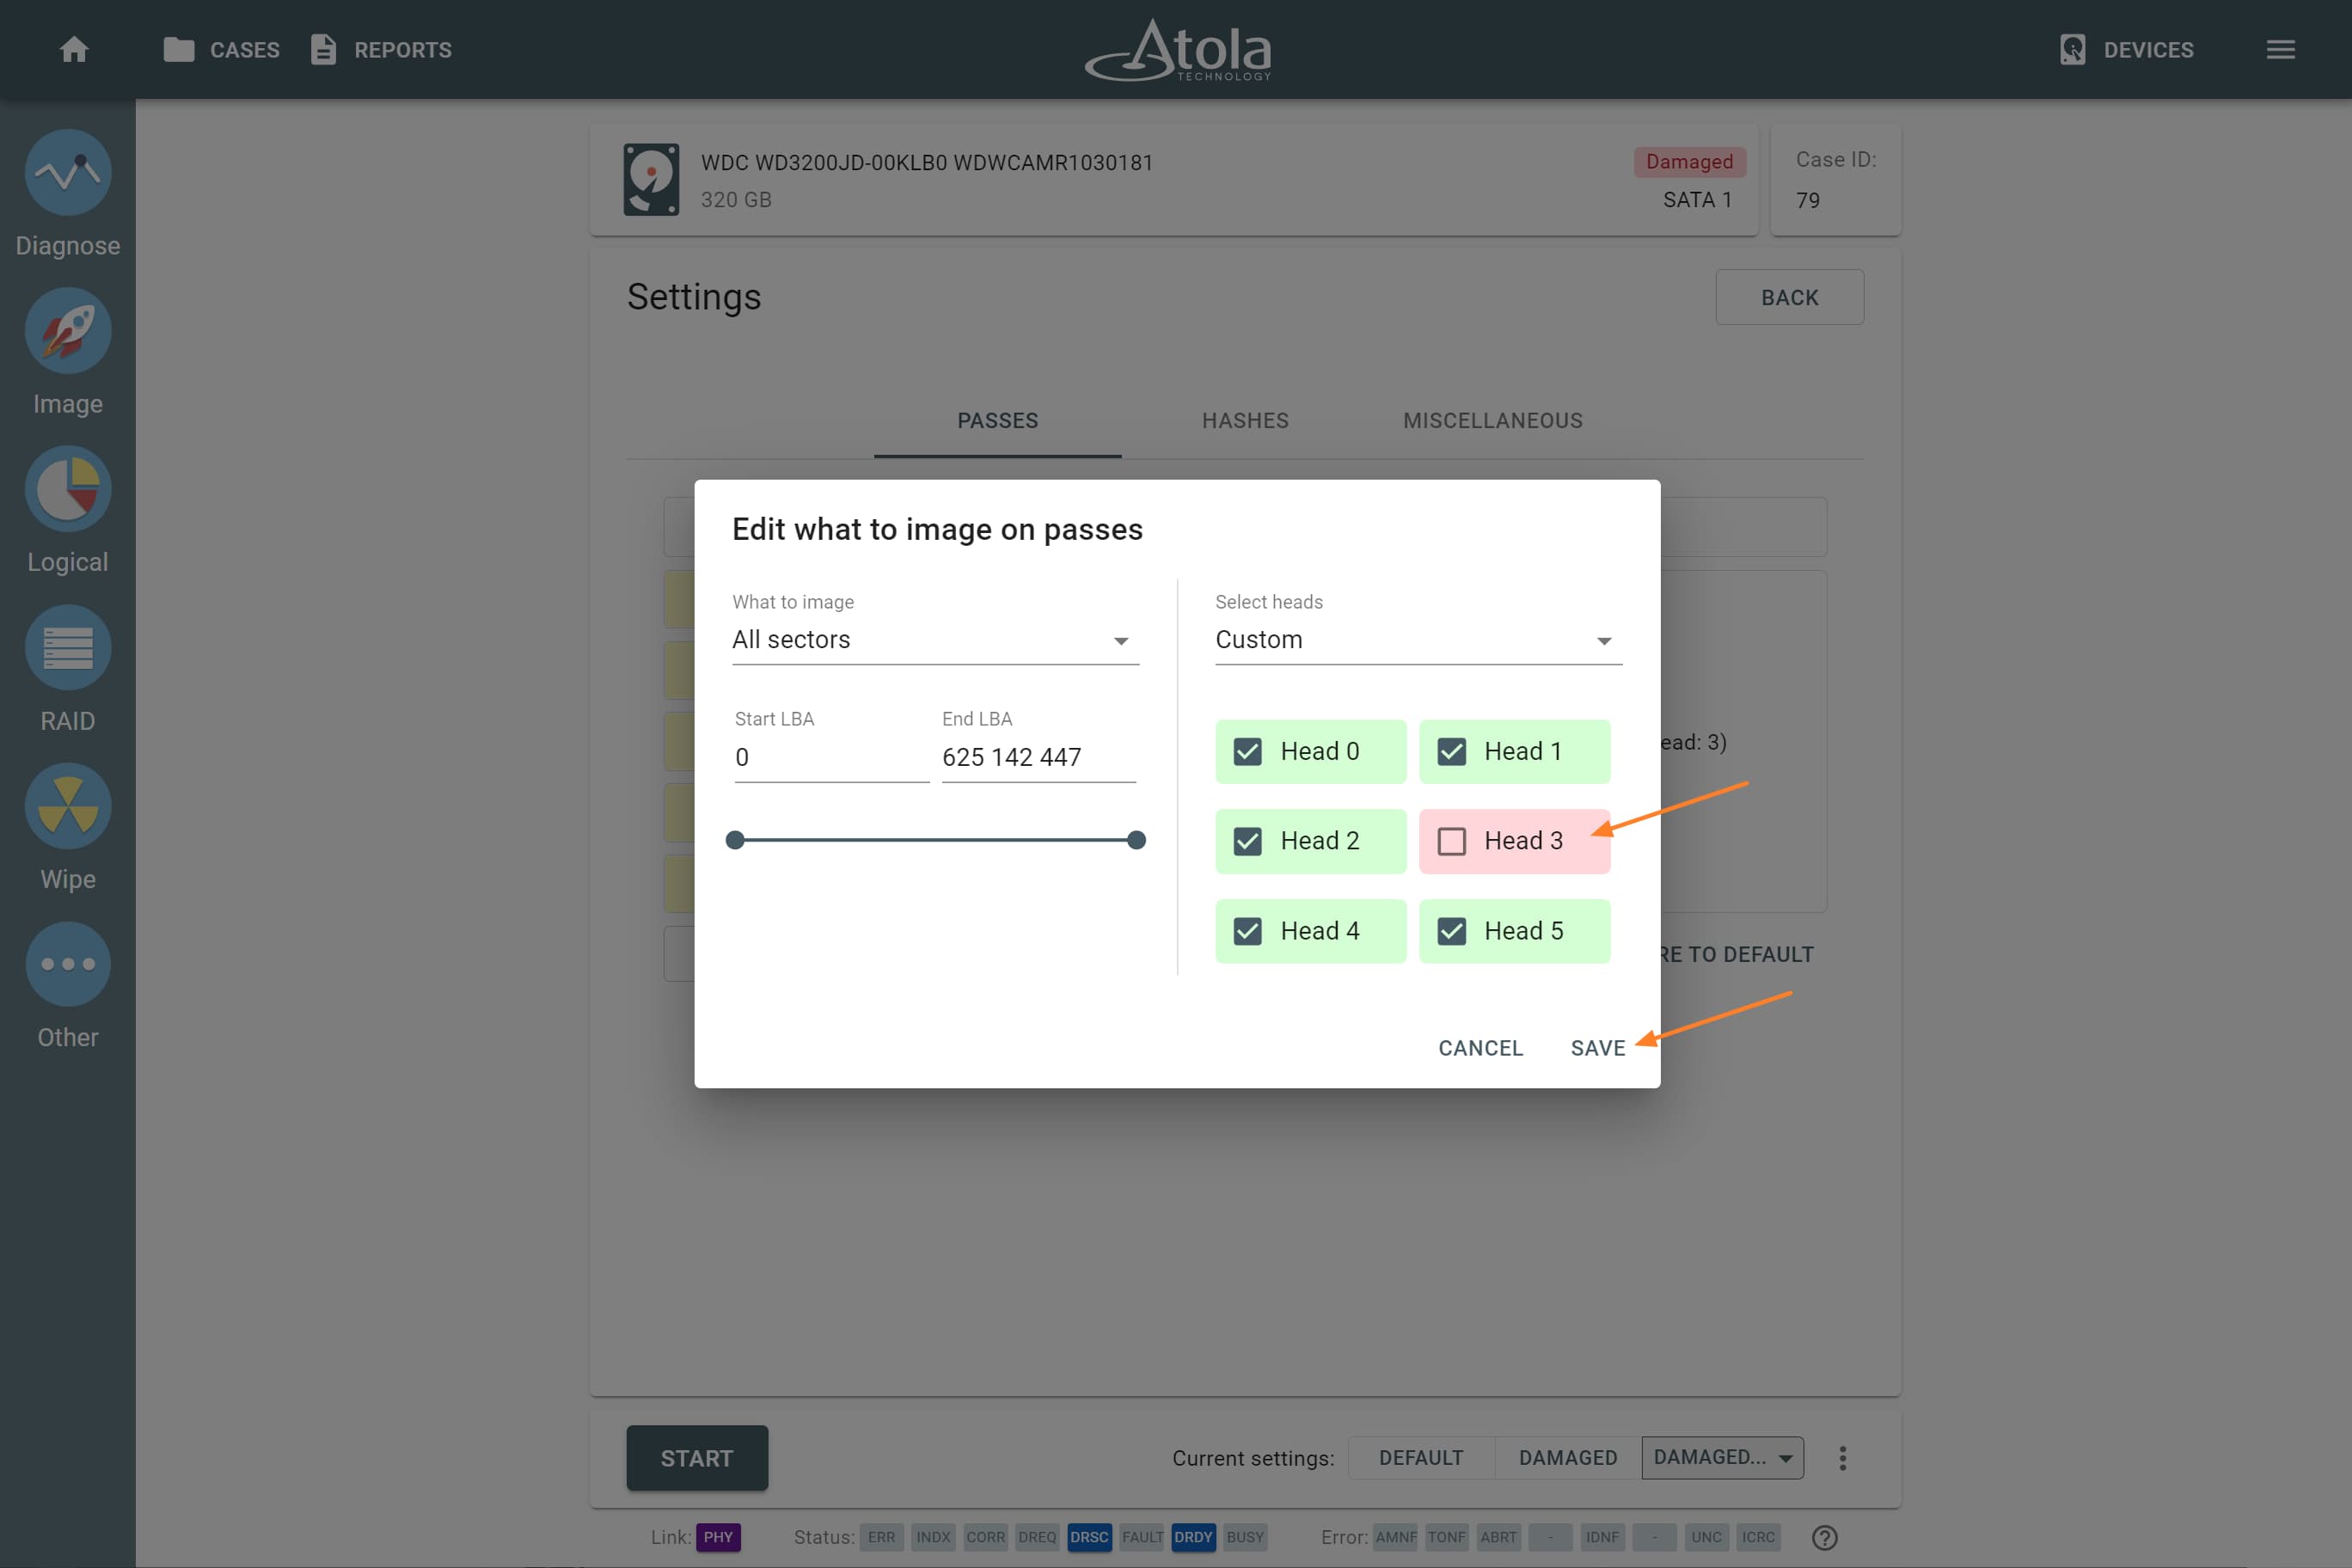
- In What to image section, click on All sectors to configure the selective imaging.
- Unselect the damaged head and сlick Save.
- To launch your imaging session, click Start.
Multipass imaging algorithm
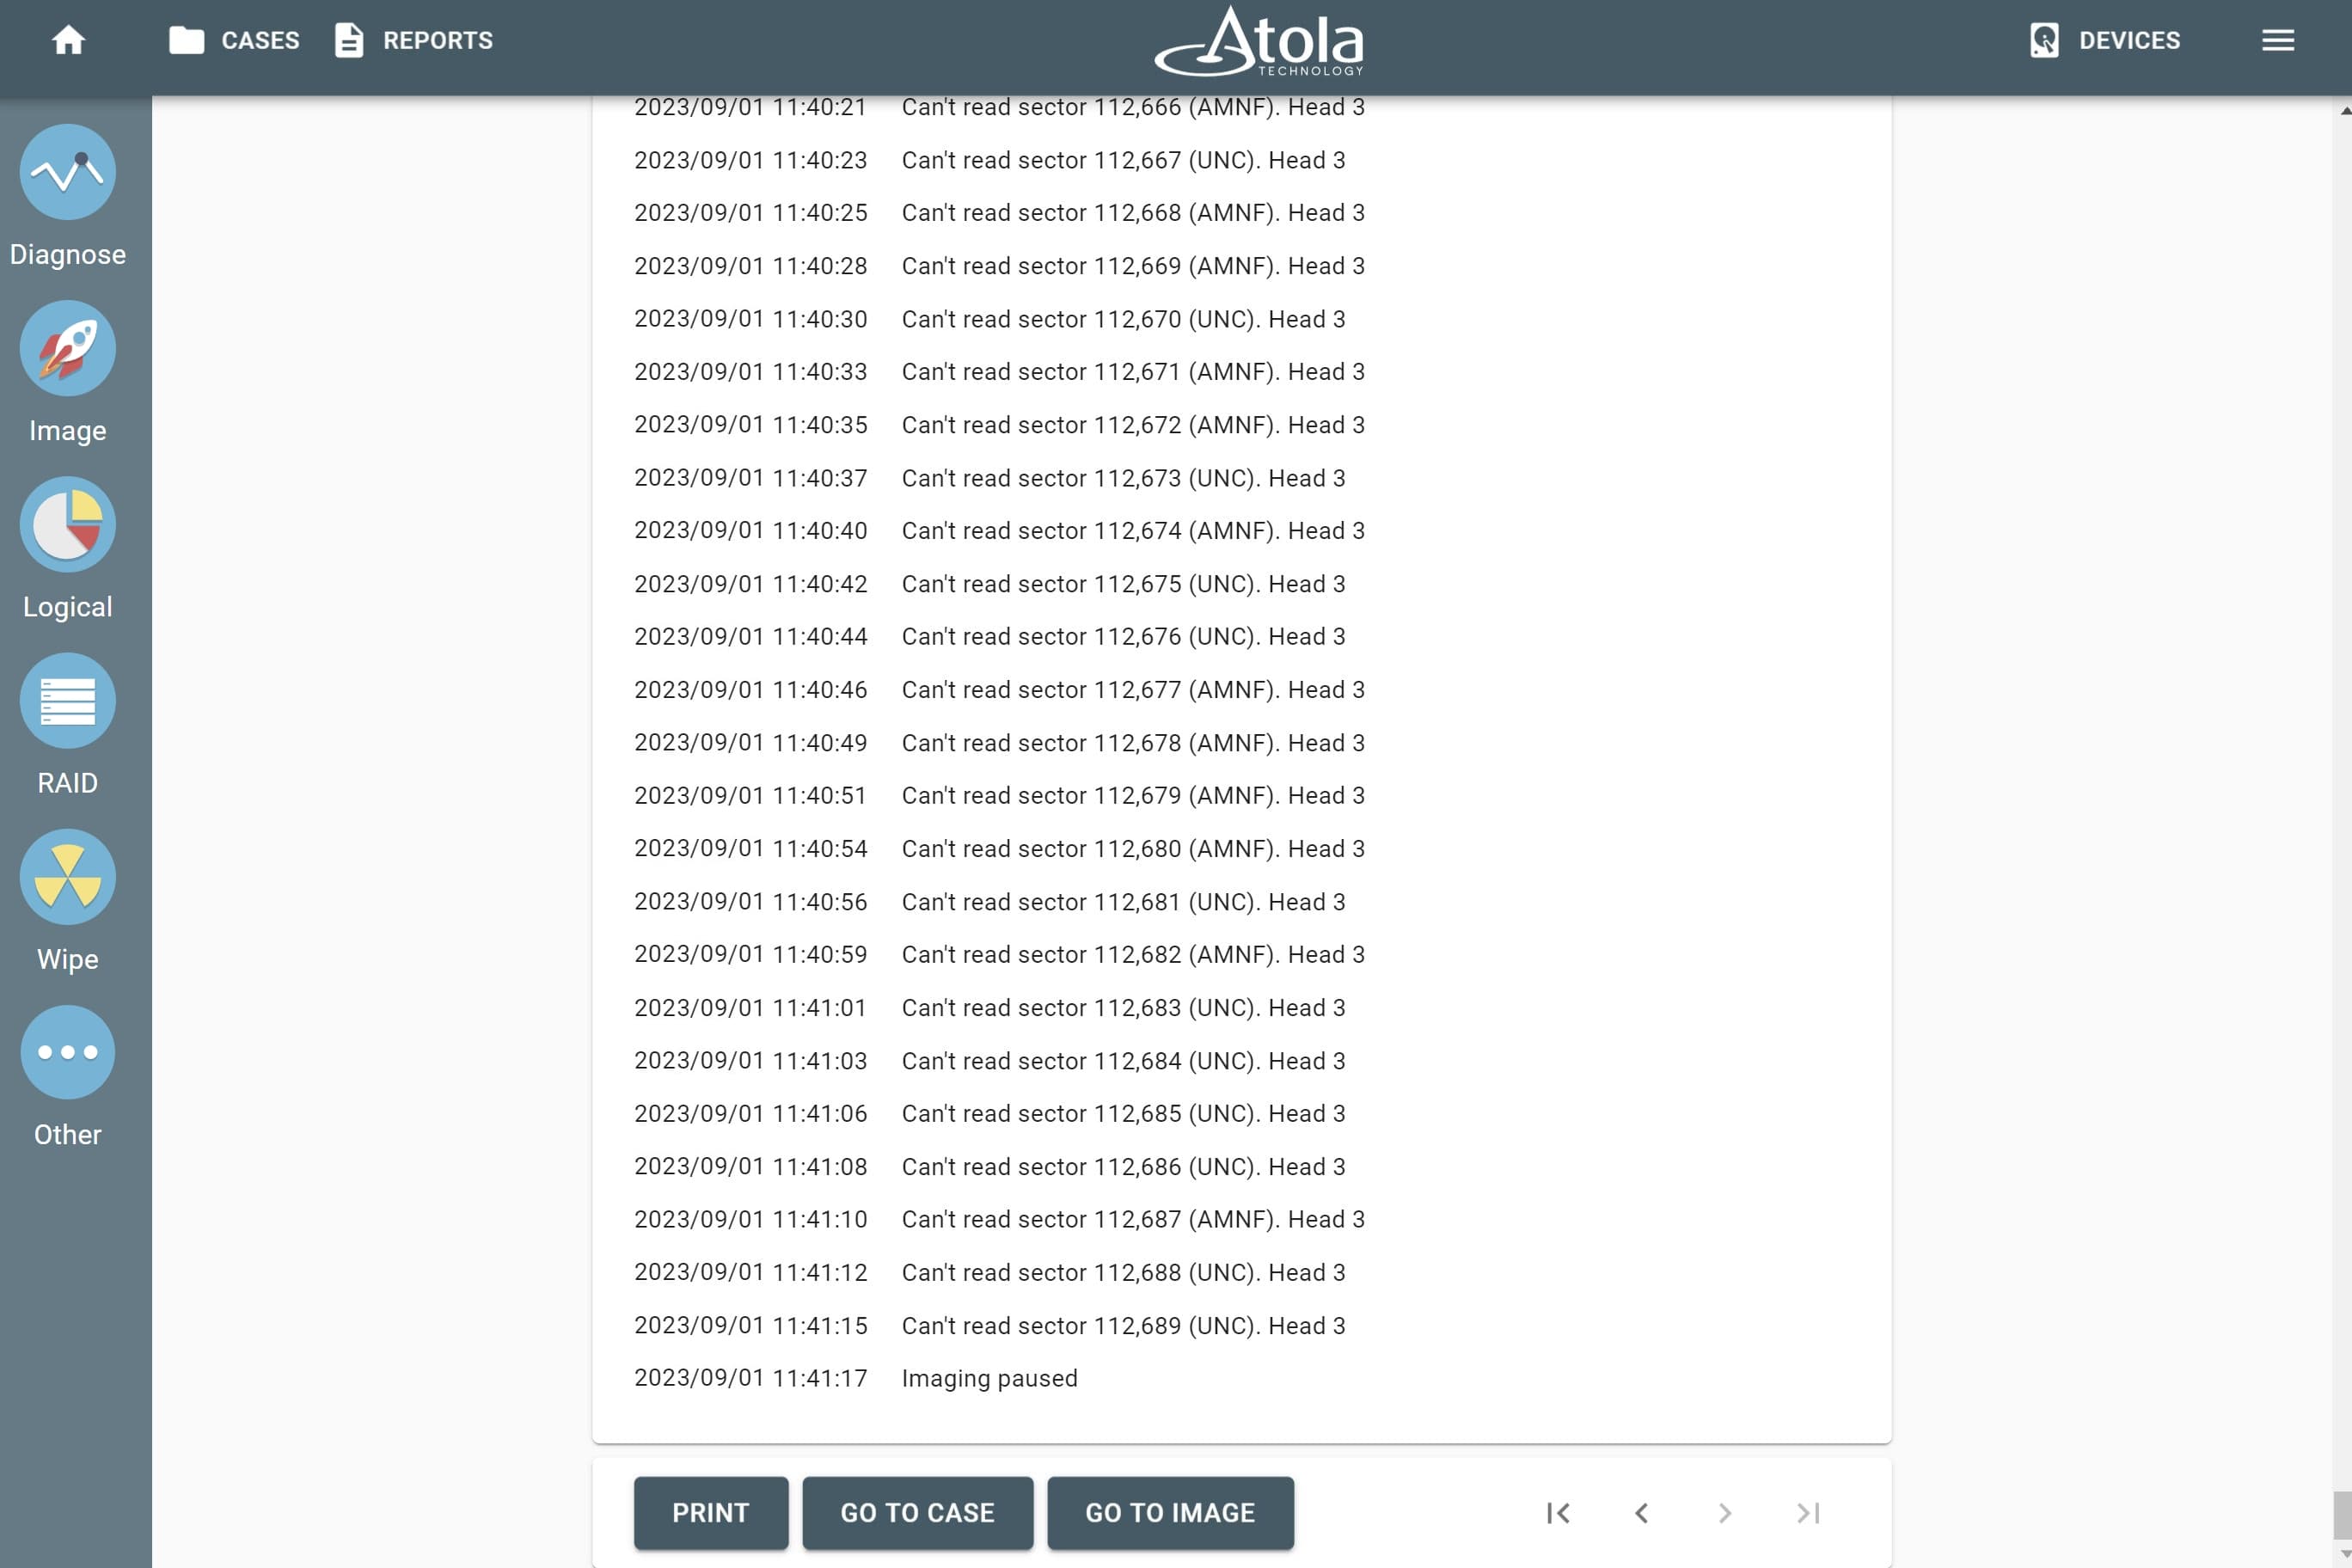
As you can see in the screenshot below, some errors were found in the course of imaging on the space of the drive that is read with the Head#4. It is common for a drive with a bad head to also contain errors on the platters that are read with other heads.
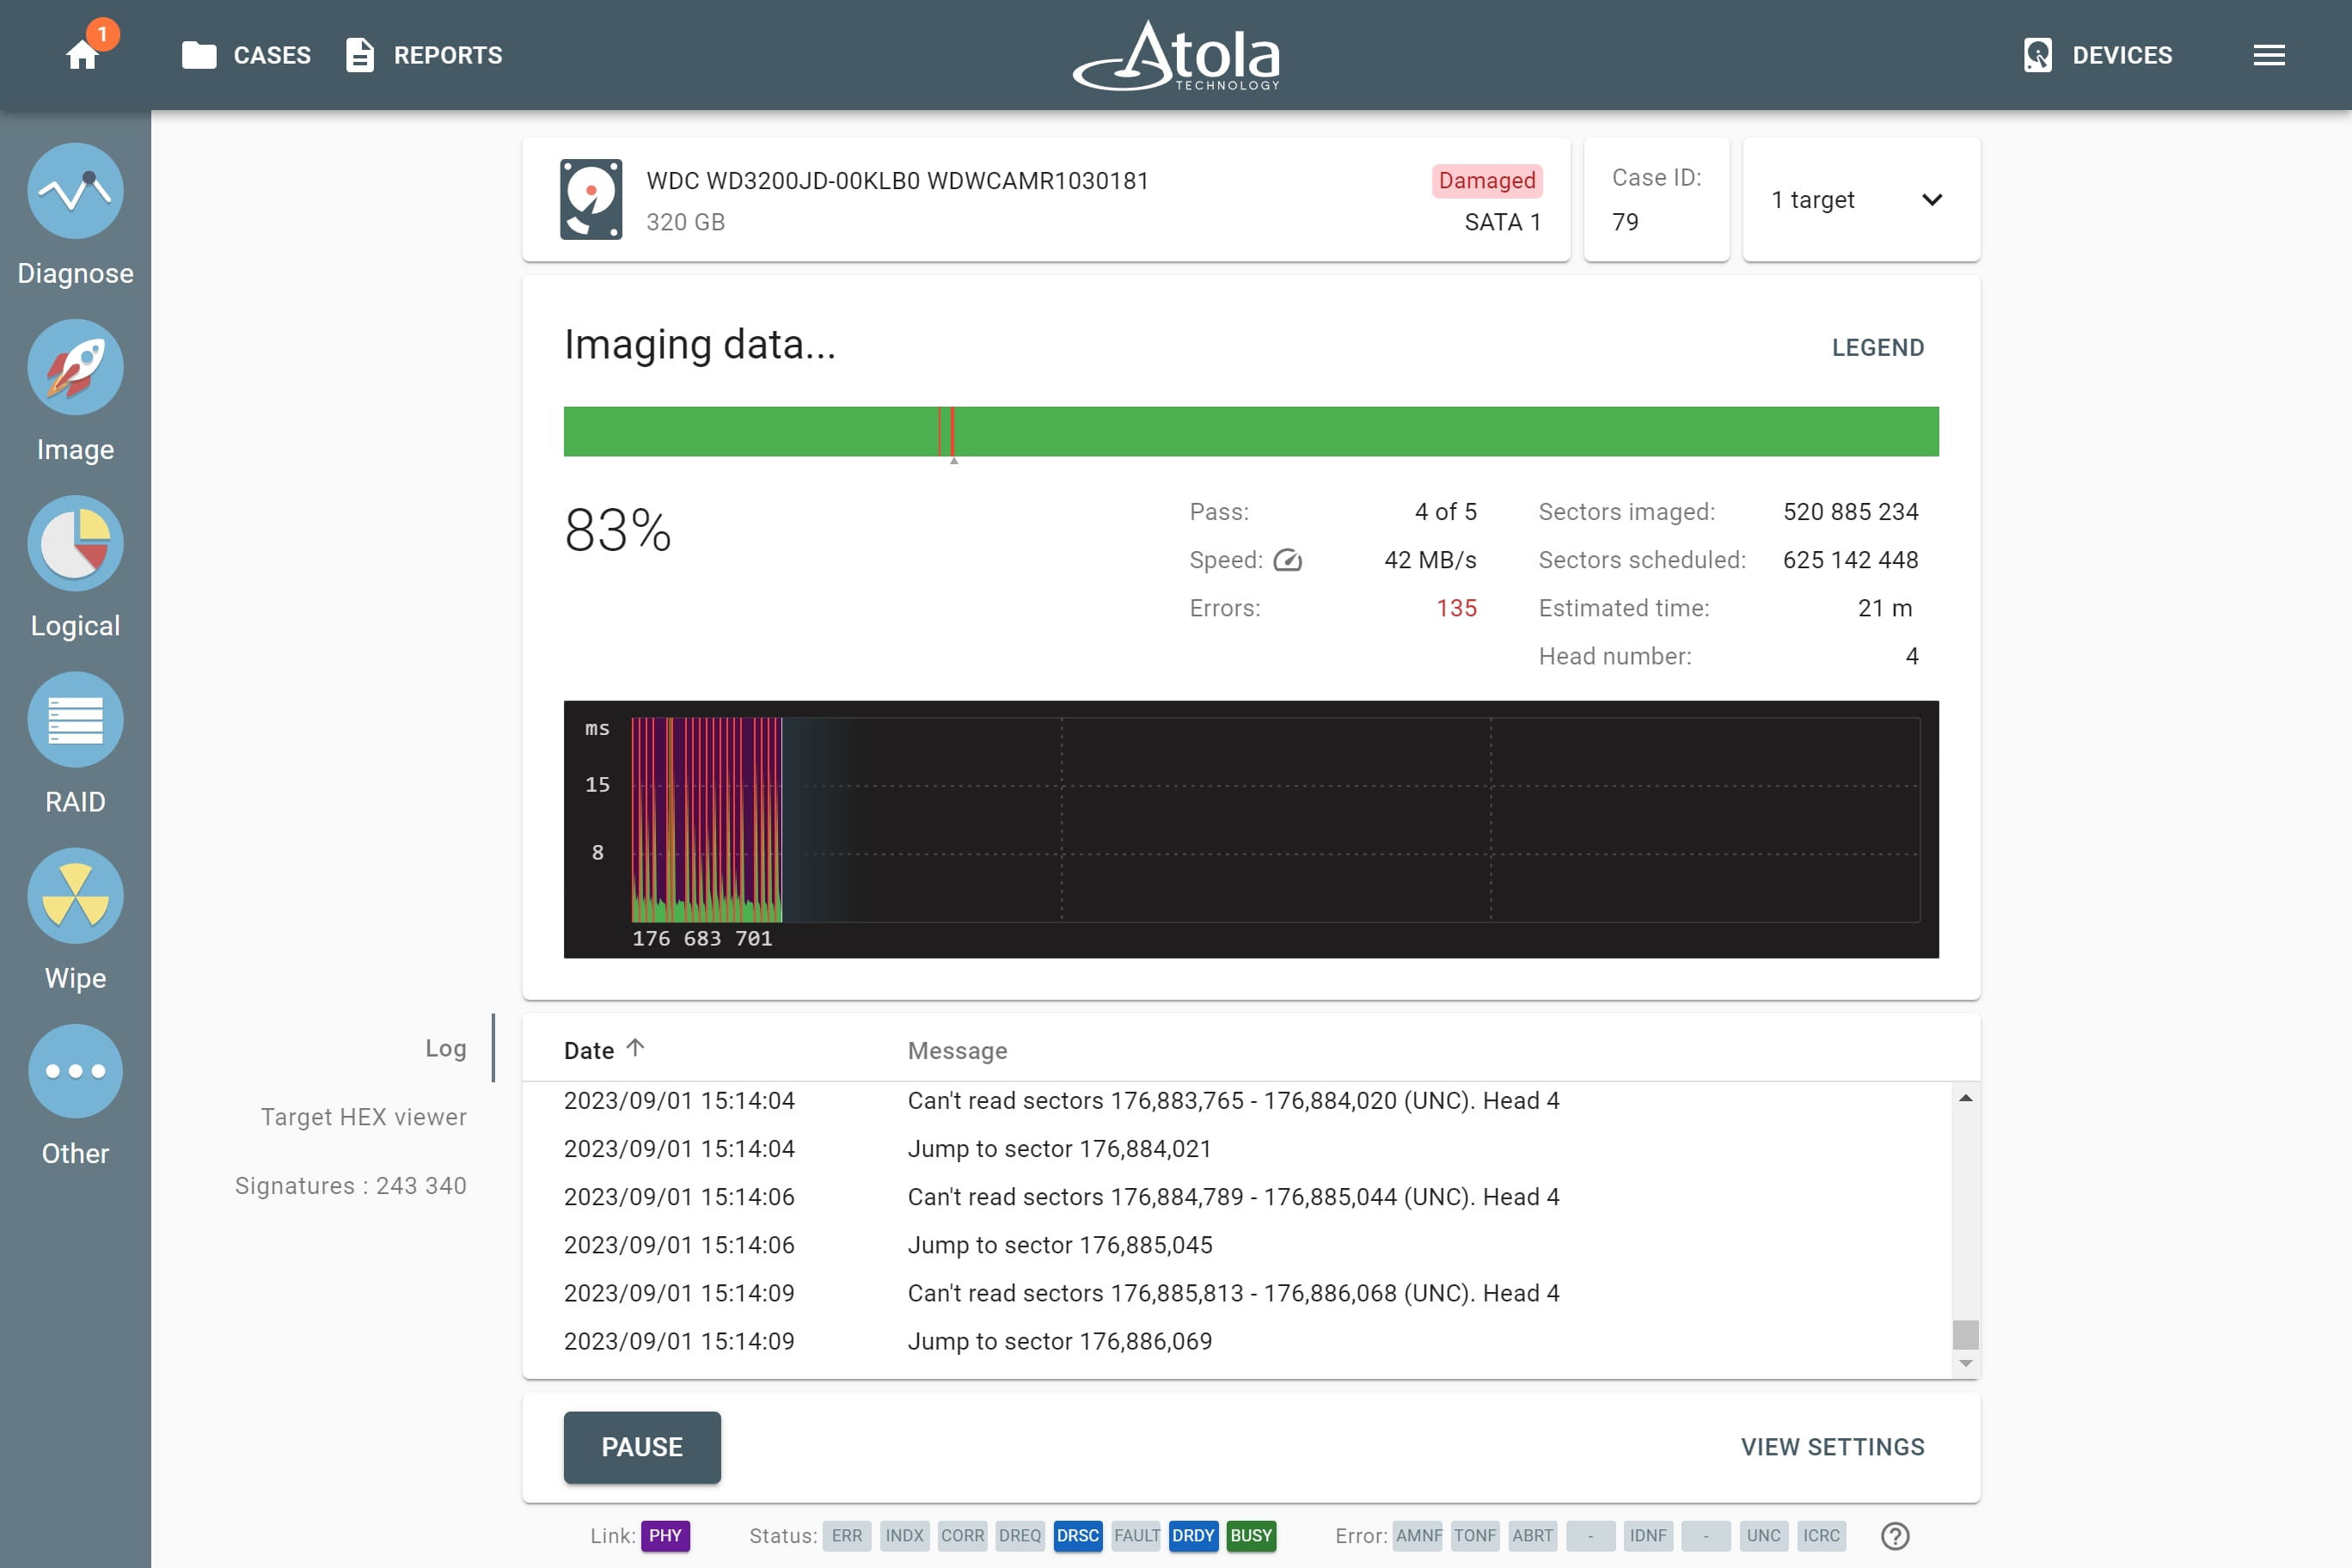
TaskForce 2 uses its multipass imaging algorithm when encountering a bad sector that belongs to a good head. It allows handling errors and retrieving data from some of the bad sectors. For as long as it is possible to read data from the sector or block of sectors within the specified pass timeout, TaskForce 2 will be able to image this data.
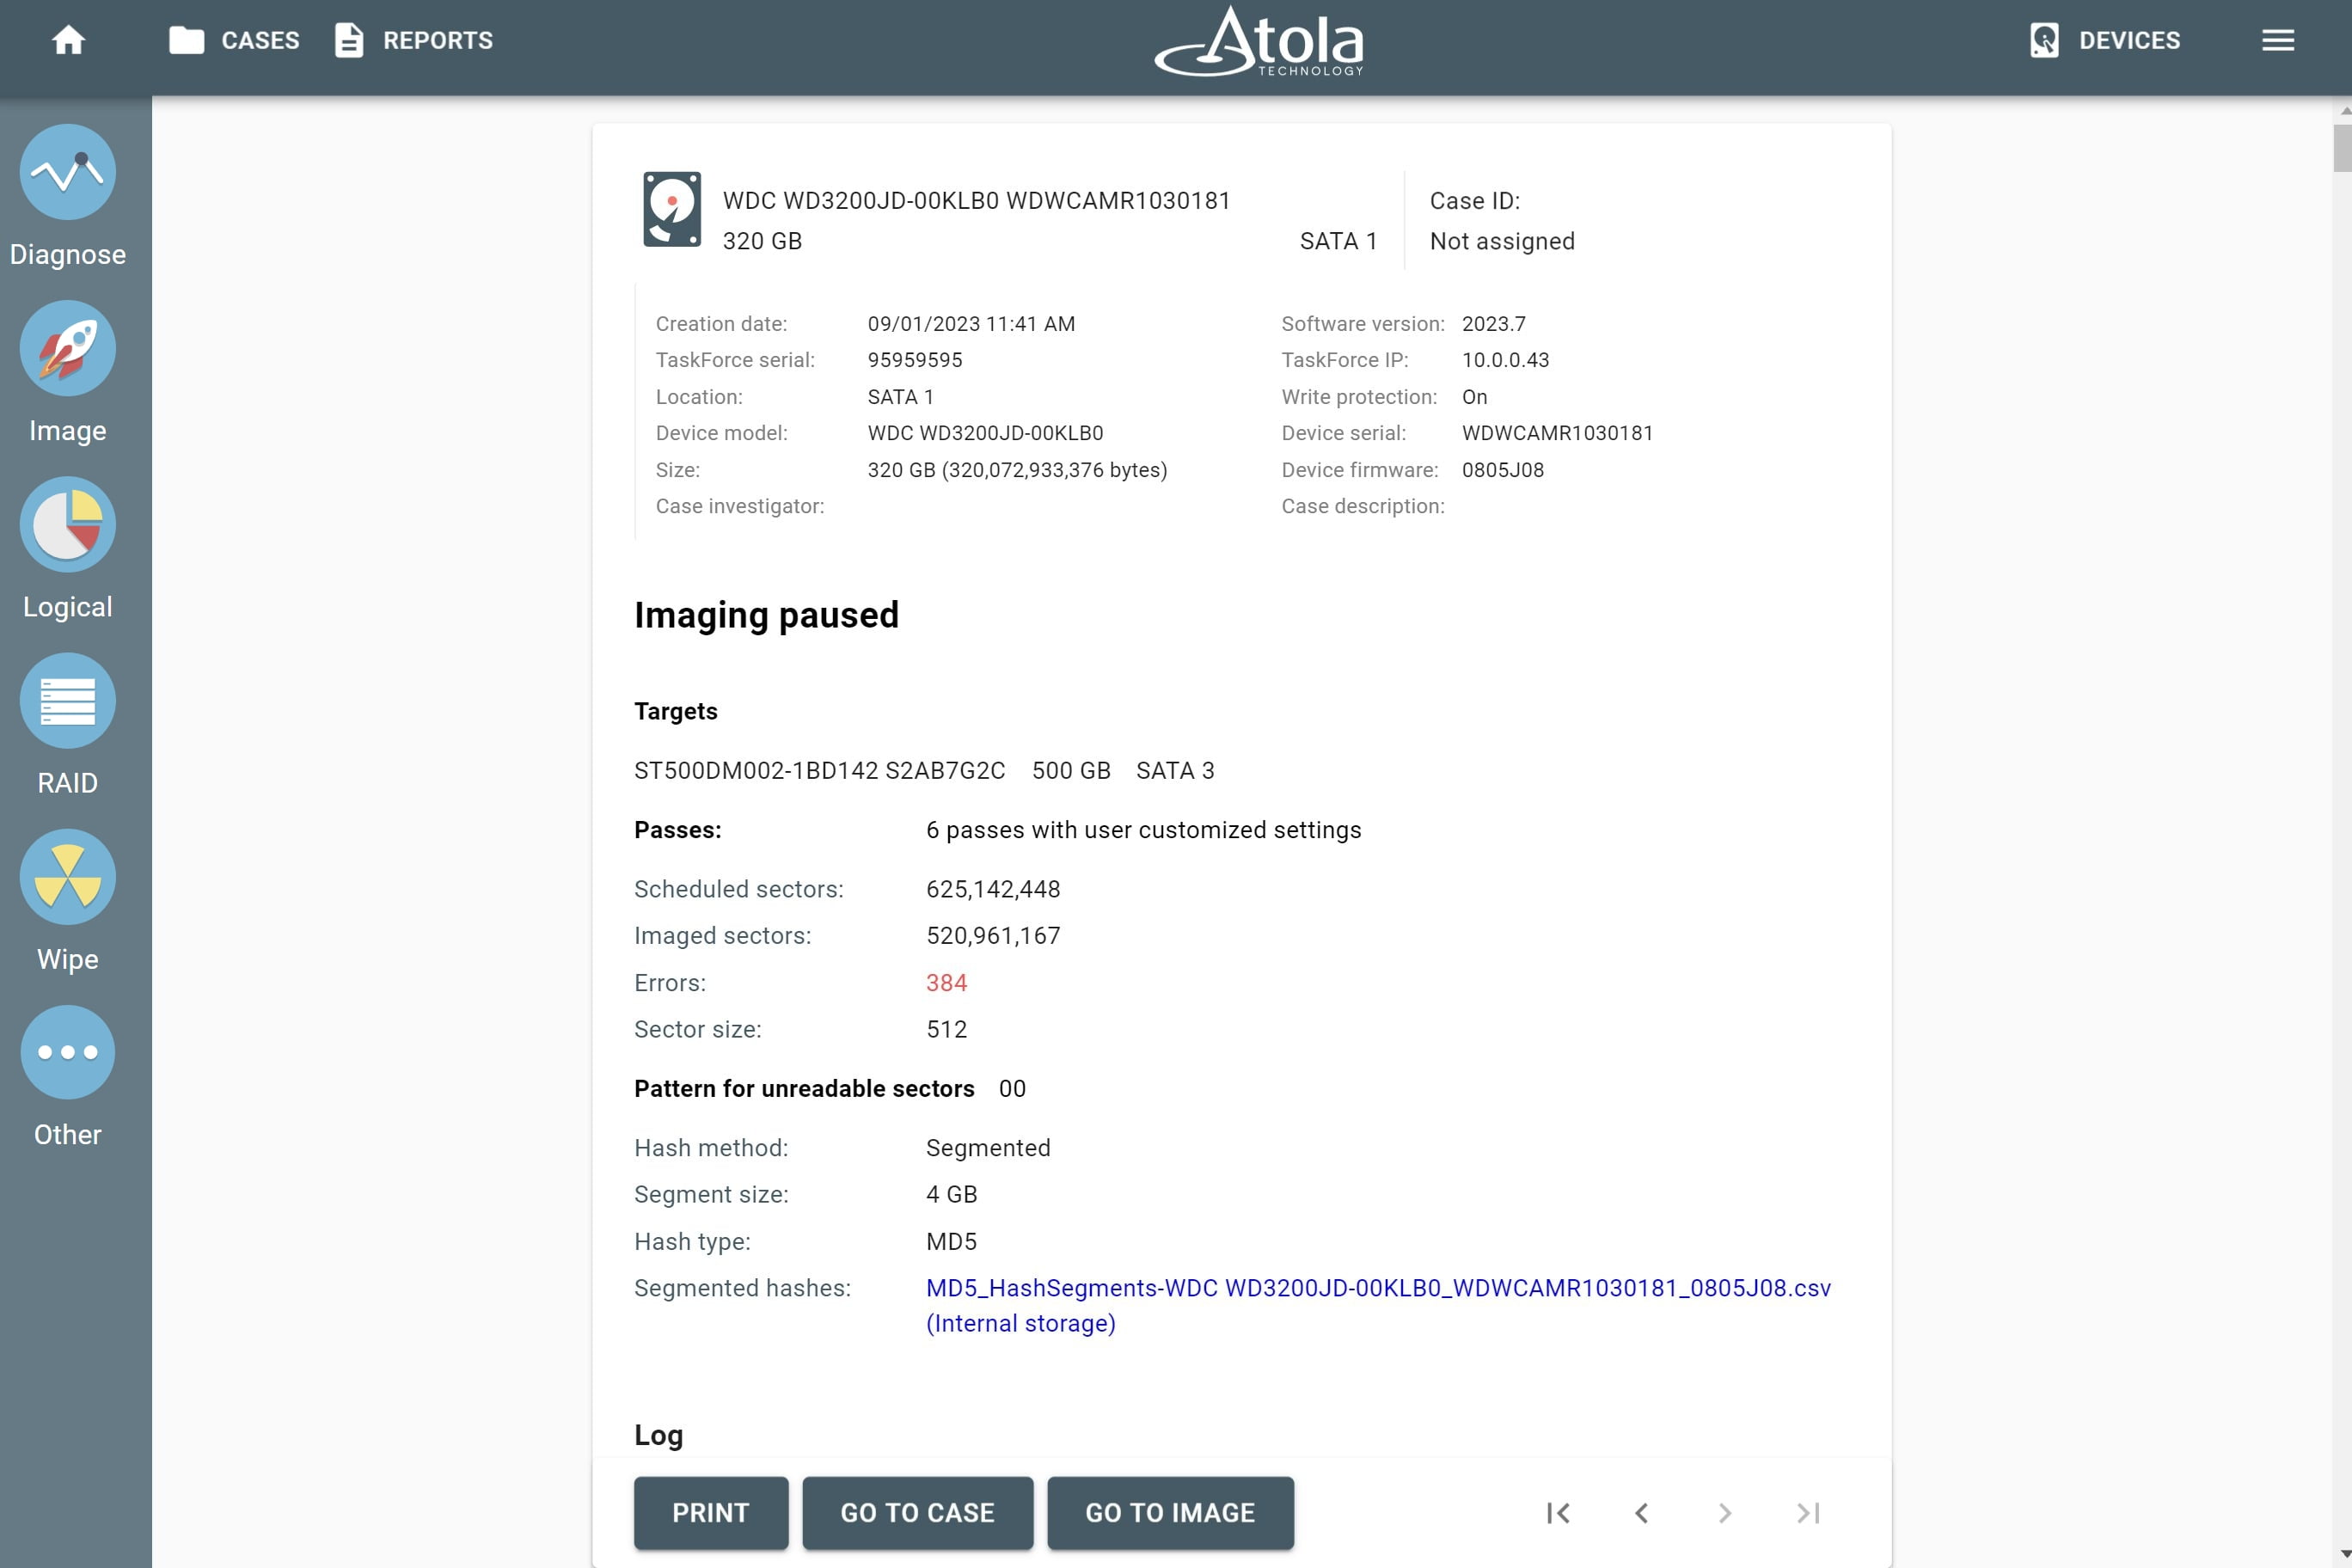
Having completed imaging from the good heads, the system pauses the session and produces a detailed imaging report with a log of all actions performed during the imaging session.
TaskForce 2 allows editing settings of all unstarted imaging passes, adding or removing passes, etc. So if later you think you may be able to retrieve important data with Head#4, you can add another pass and configure the settings of the new pass accordingly.
TaskForce 2 automatically inserts and launches an additional imaging pass after you click Resume on the pause session. The new pass will include all non-imaged sectors.
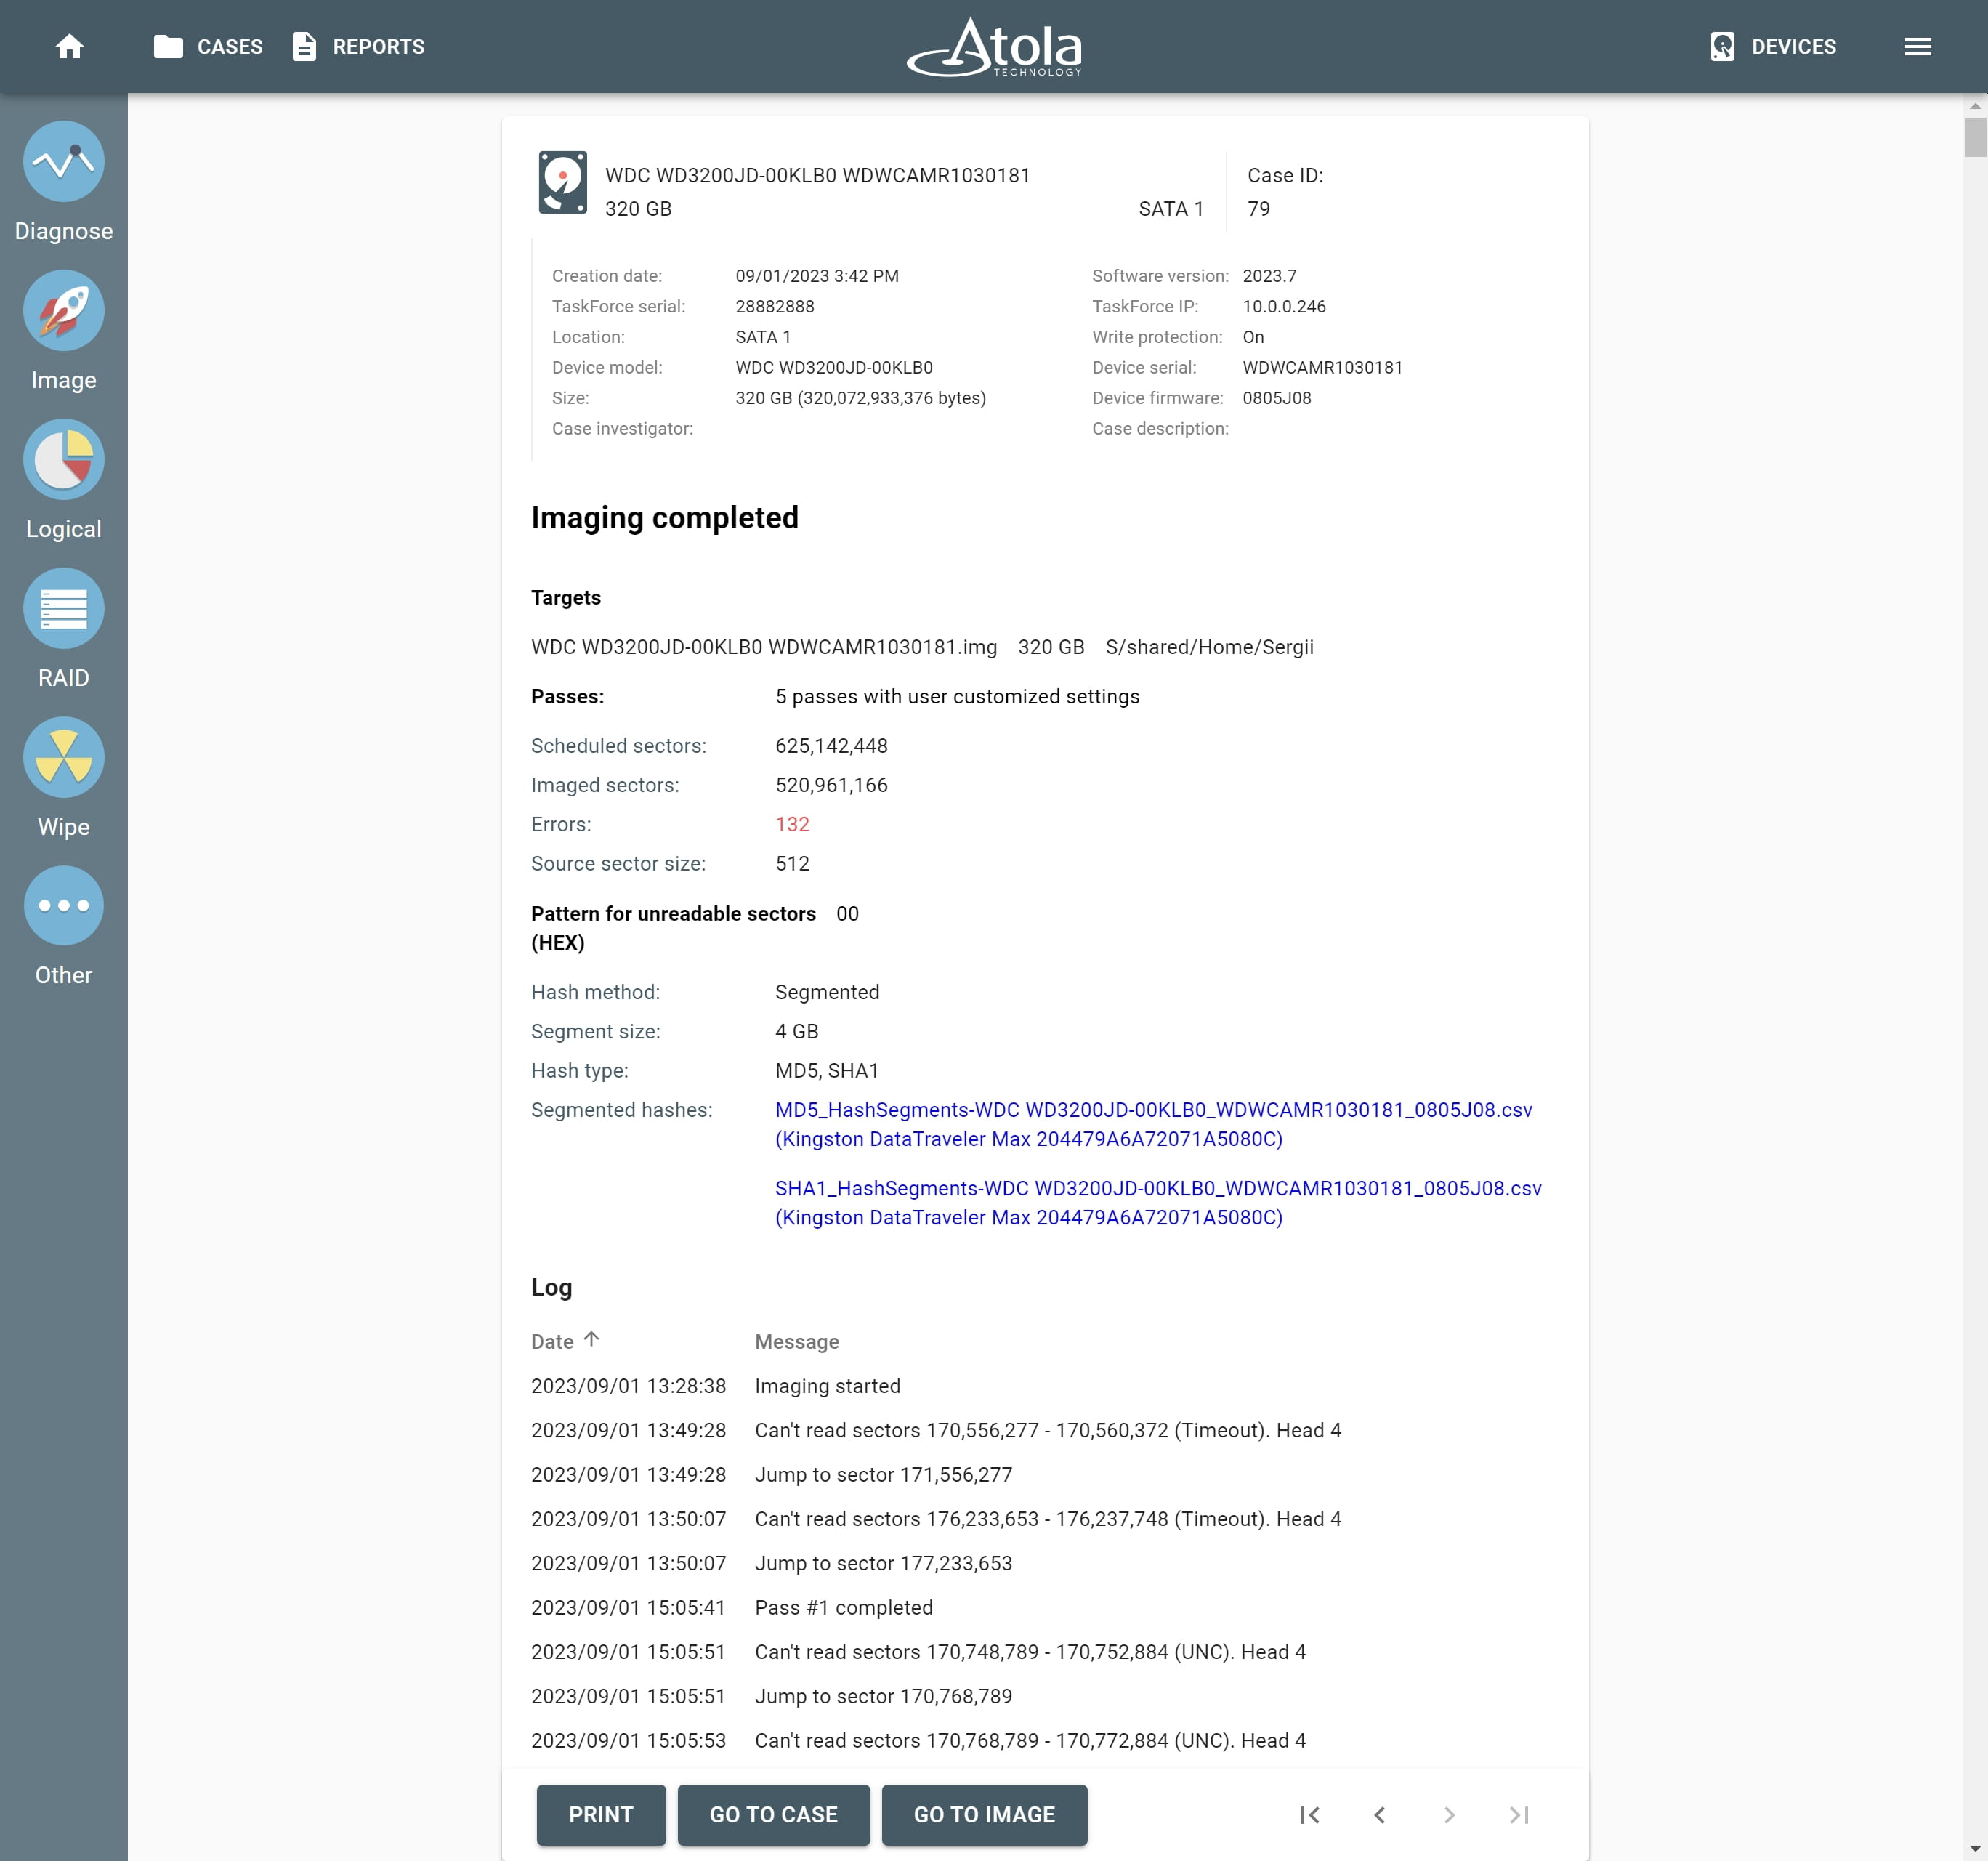
TaskForce 2 automatically creates reports for every single action applied to each device connected to it. The reports are stored in the case management system.
Working with a bad head
After you successfully retrieved data from the good heads, you have two options:
- To replace the head stack before you get down to imaging of the remaining data. You should be aware of the risk, however, that data on the drive can become unreadable due to head stack replacement.
- To attempt imaging data with the Degraded or Damaged head.
To image the unselected bad head, simply click Resume.
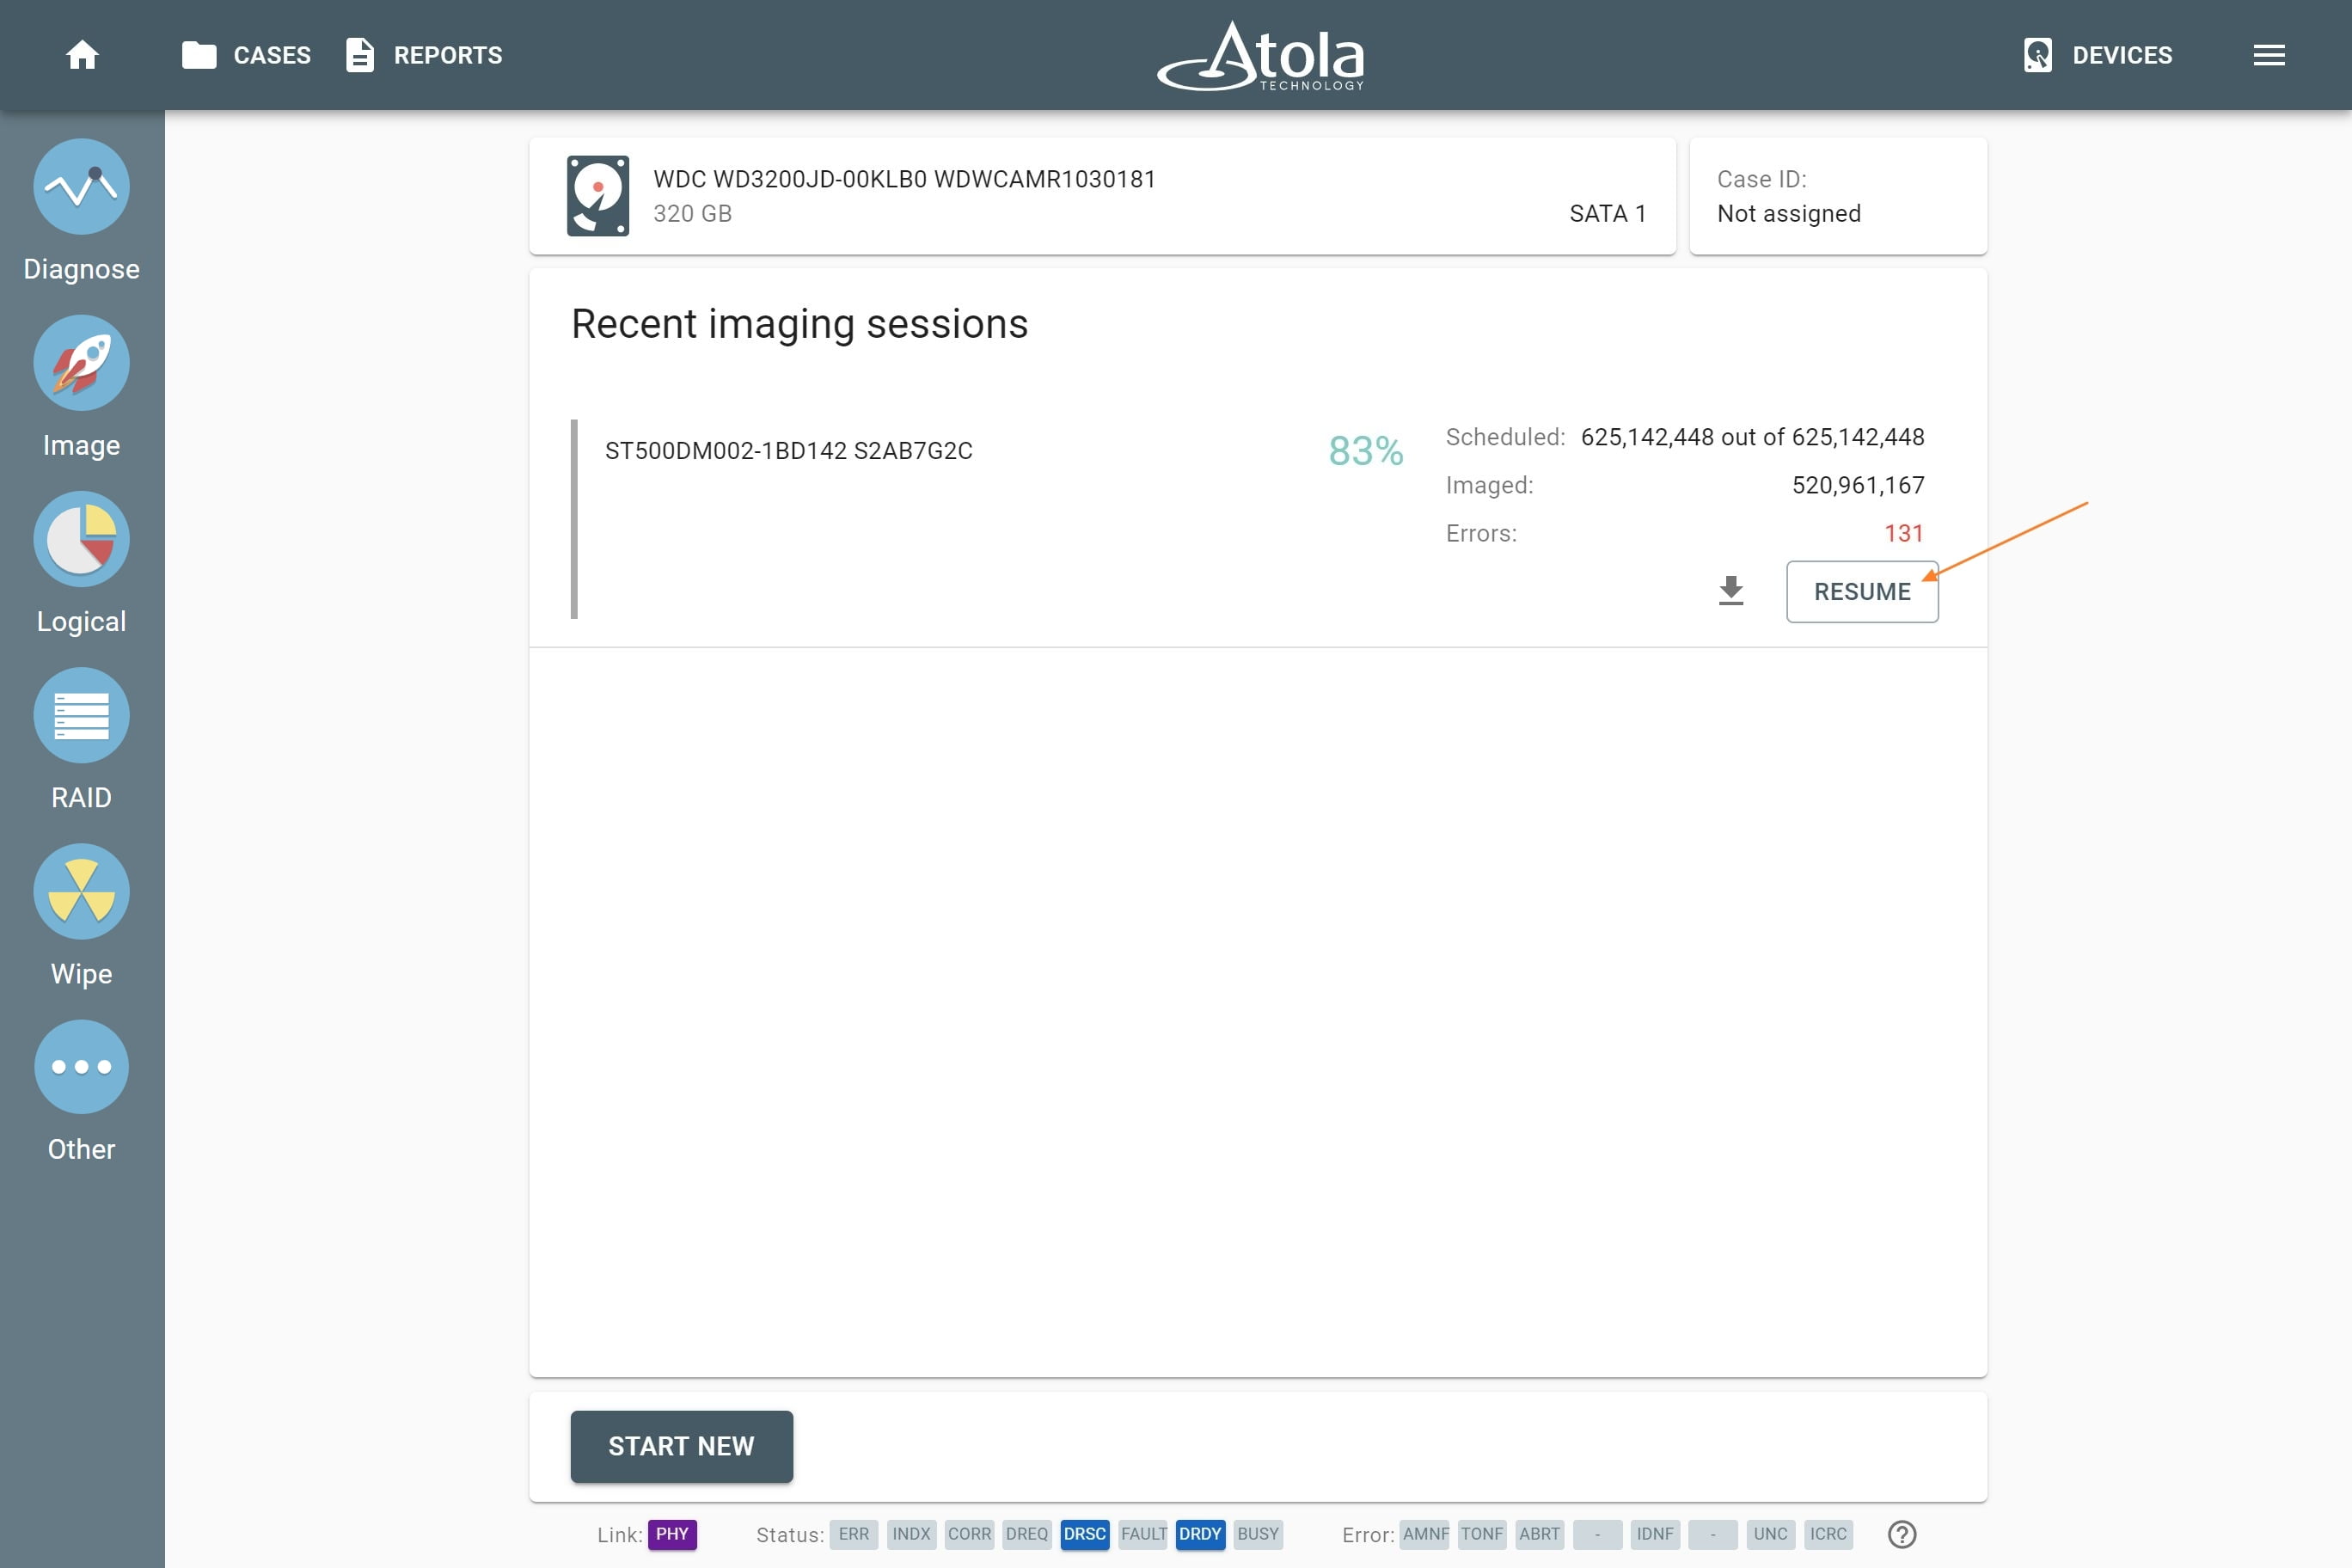
TaskForce 2 resumes the imaging session to focus on the area that belongs to the damaged head.

If the number of errors keeps growing, while the number of the imaged sectors remains unchanged, pause your imaging session and power down the drive because the head seems to be completely inoperable.
In the Imaging report above, you can see that TaskForce 2 imaged 520,961,167 sectors out of 625,142,448, having extracted as much data from good heads as was possible with the default settings.
For more details scroll the report down to check the Log: