Imaging an evidence drive to 5 targets
Atola TaskForce allows imaging to up to 5 targets at a time.
The targets may include:
- E01, AFF4, RAW file on a network server.
- A target drive plugged into one of 26 TaskForce ports.
To start an imaging session that includes 5 targets:
- Go to Image.
- Select a source device.
-
On the Select target devices panel:
- Switch to the Drives tab and select your target drives.
- Switch to the Files tab and click Create File.
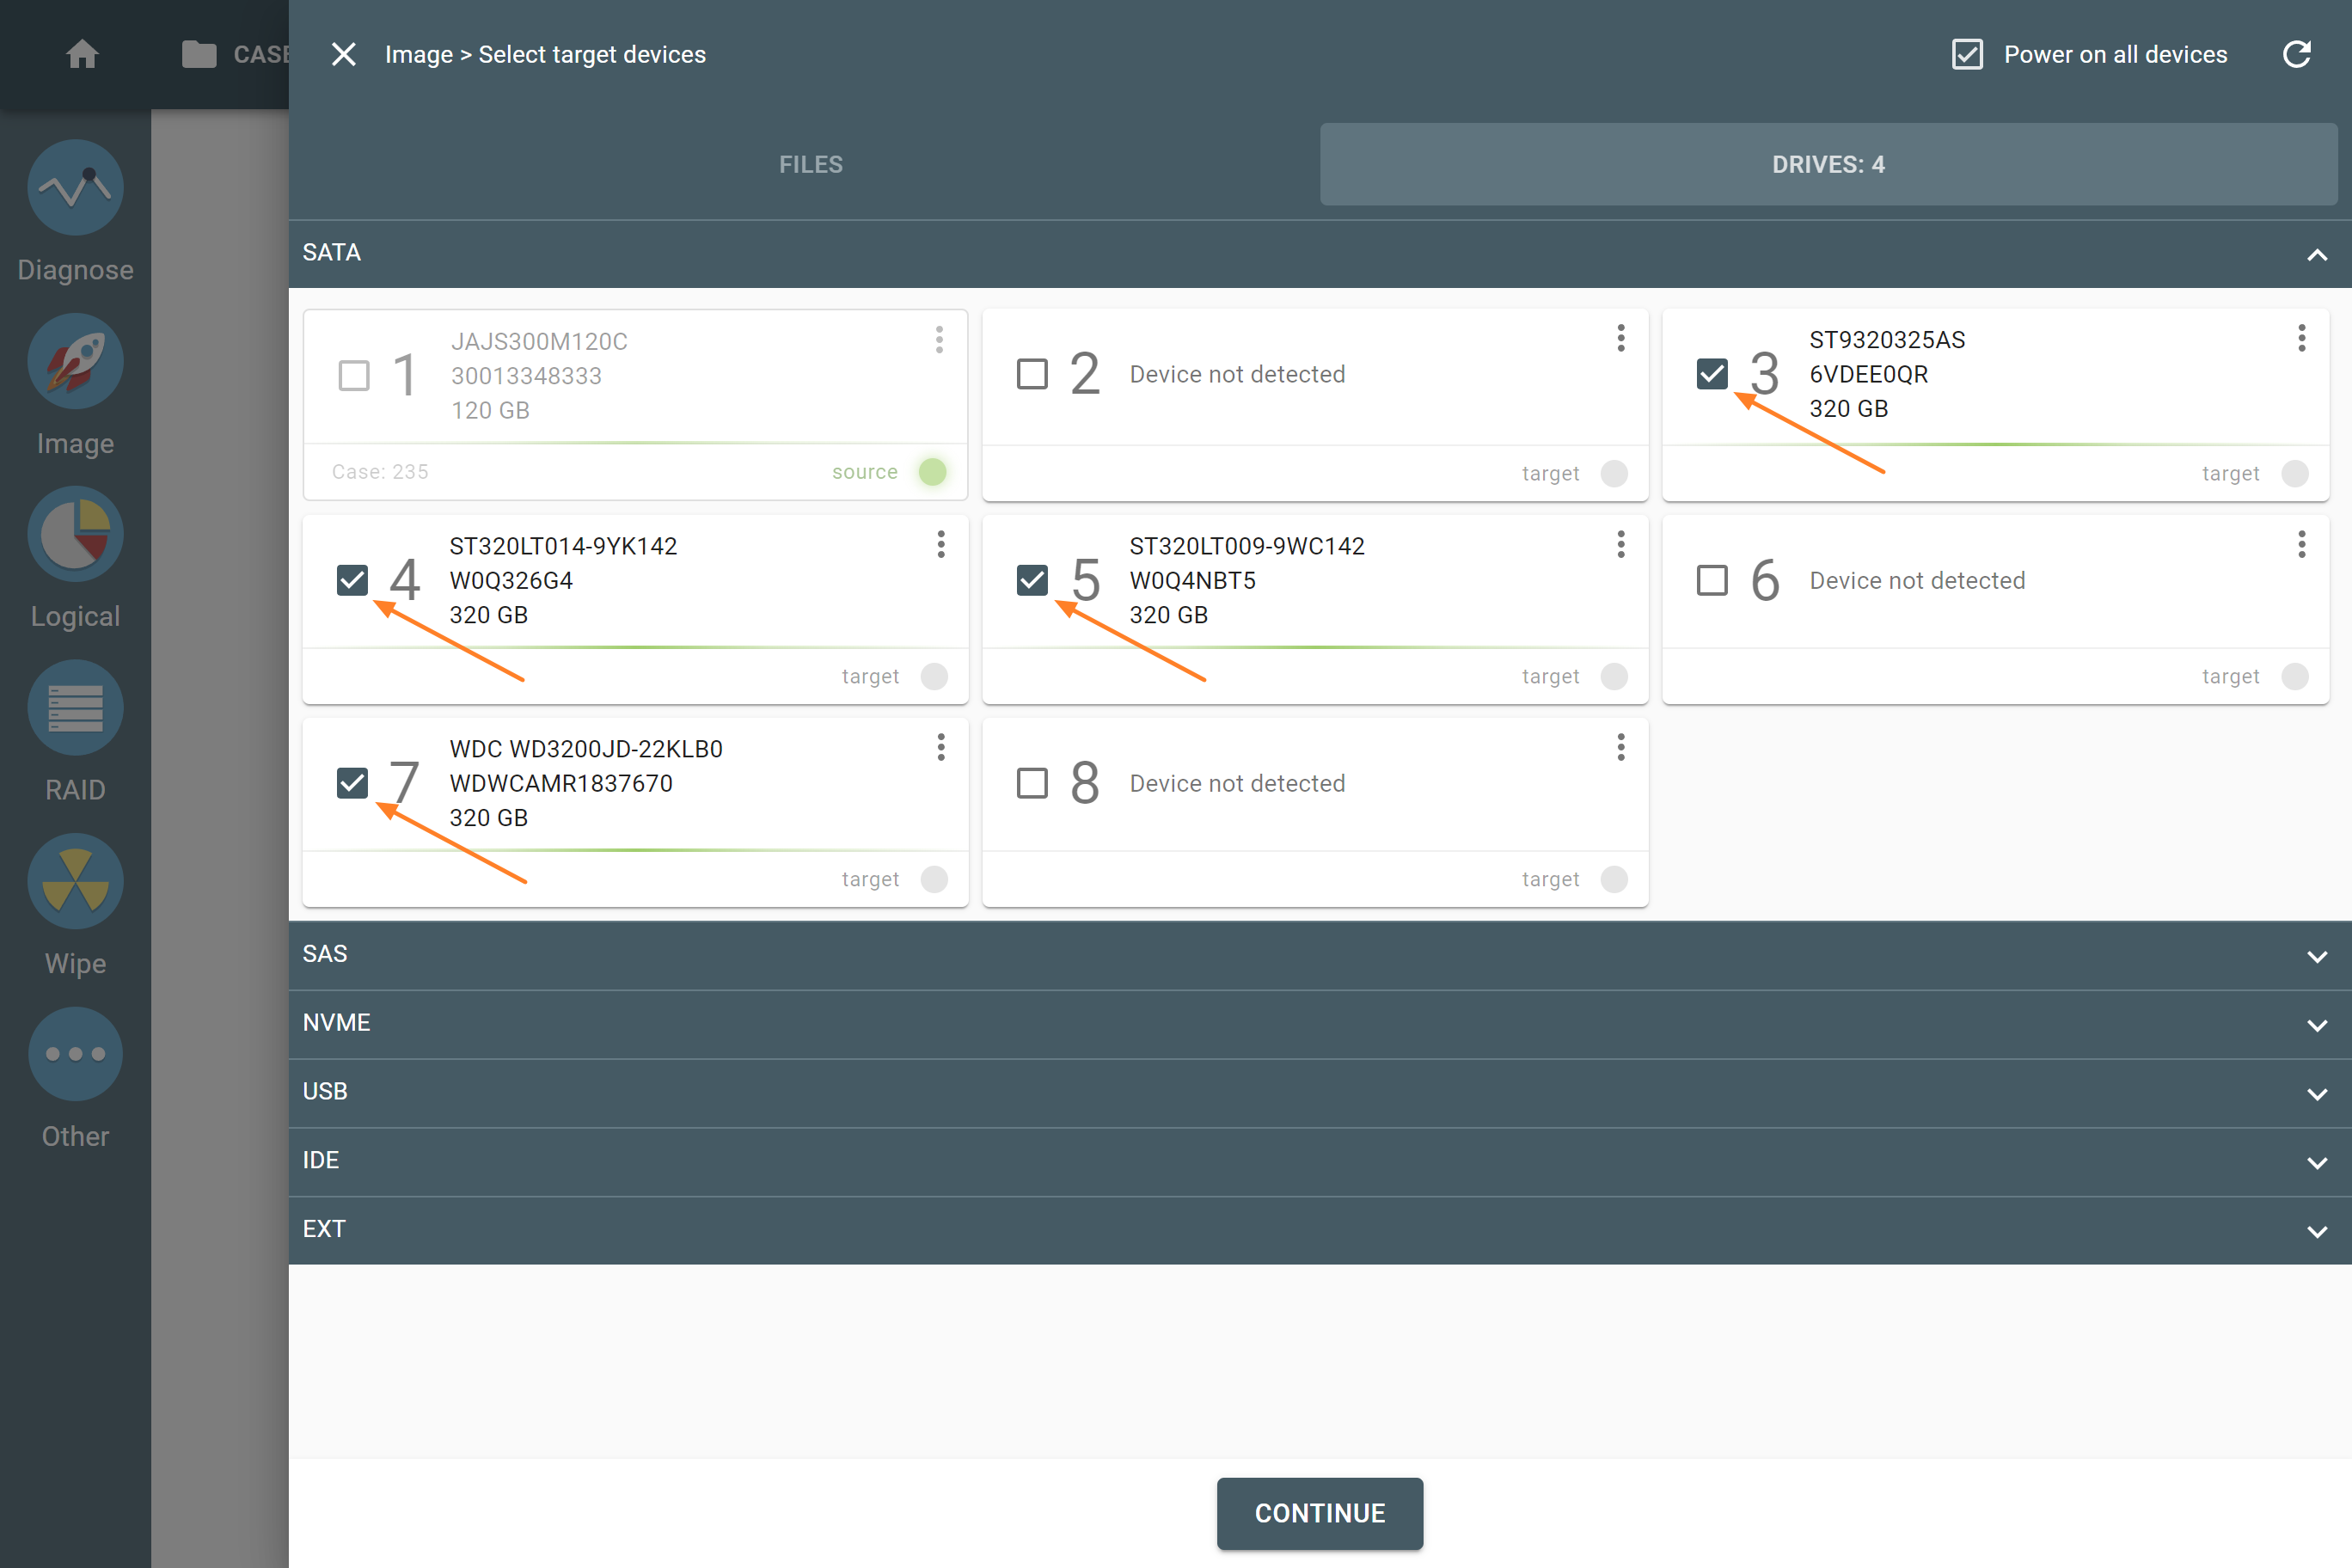
Selecting target devices.
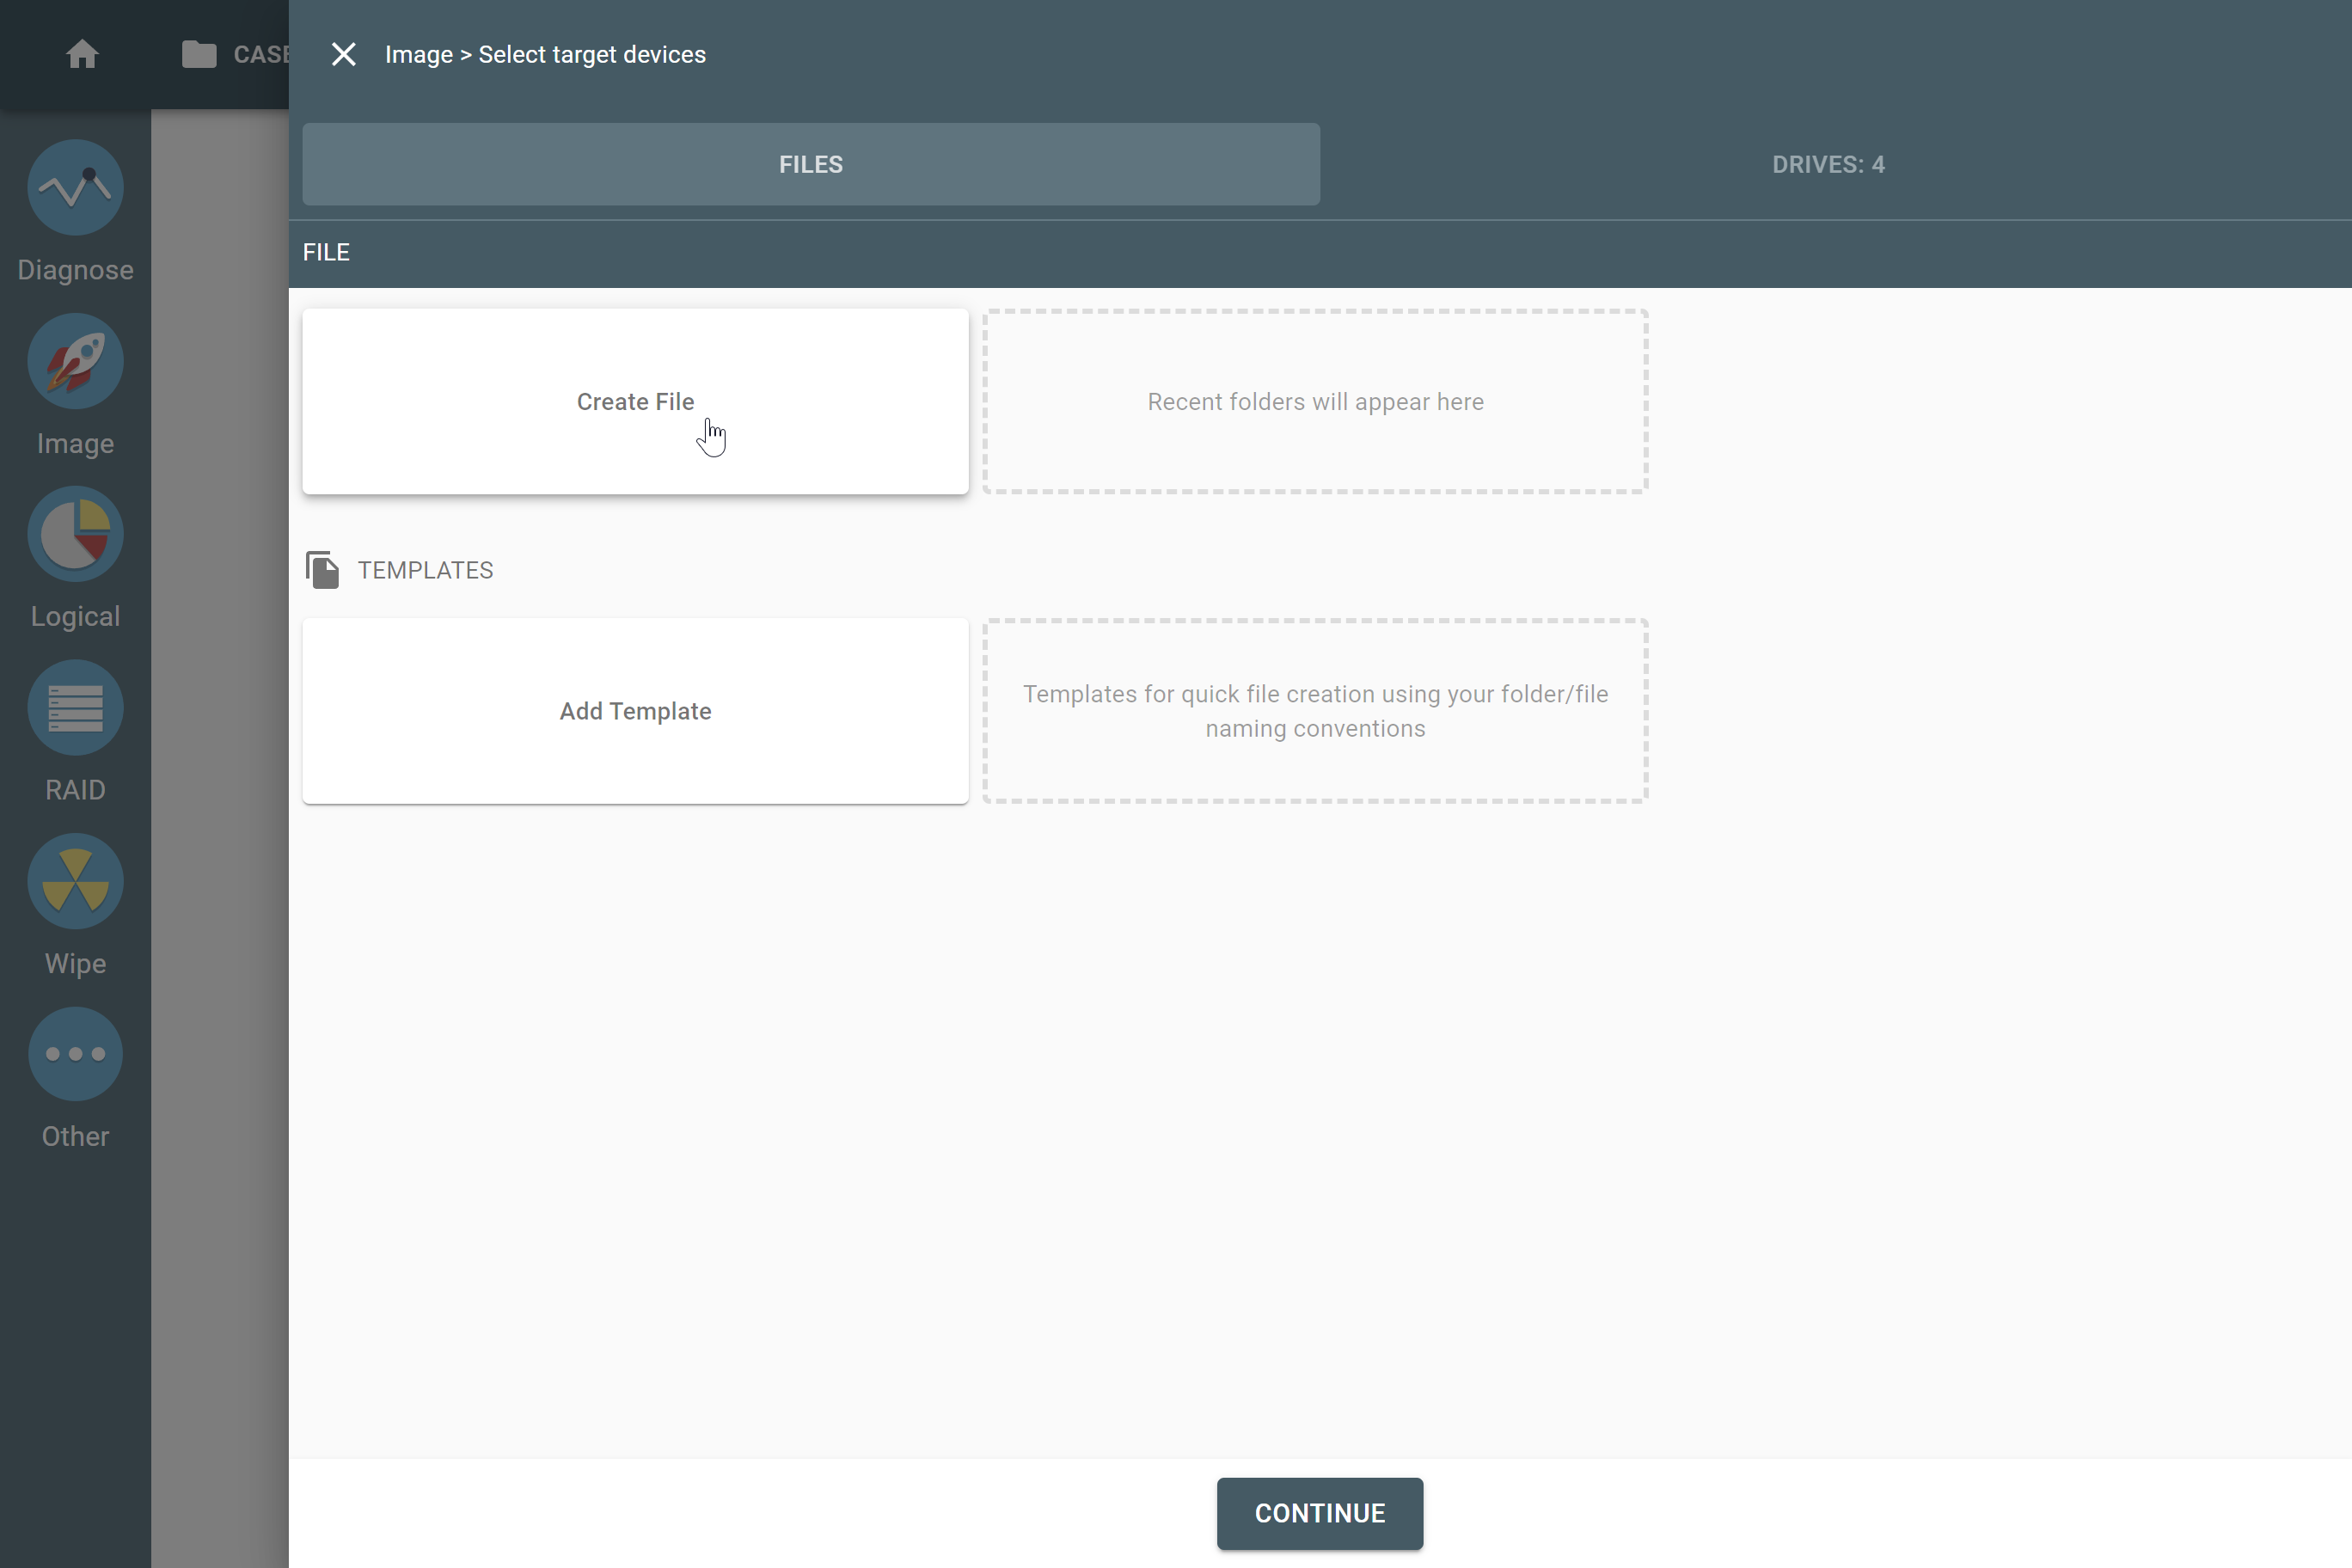
Creating target image file.
- In the Select image file window, open the folder on the server where you want the file to be created and click Create file.
- In the Create image file dialog, enter a name for the file, select its type (E01, aff4, dd, img, or raw), and then click Create.
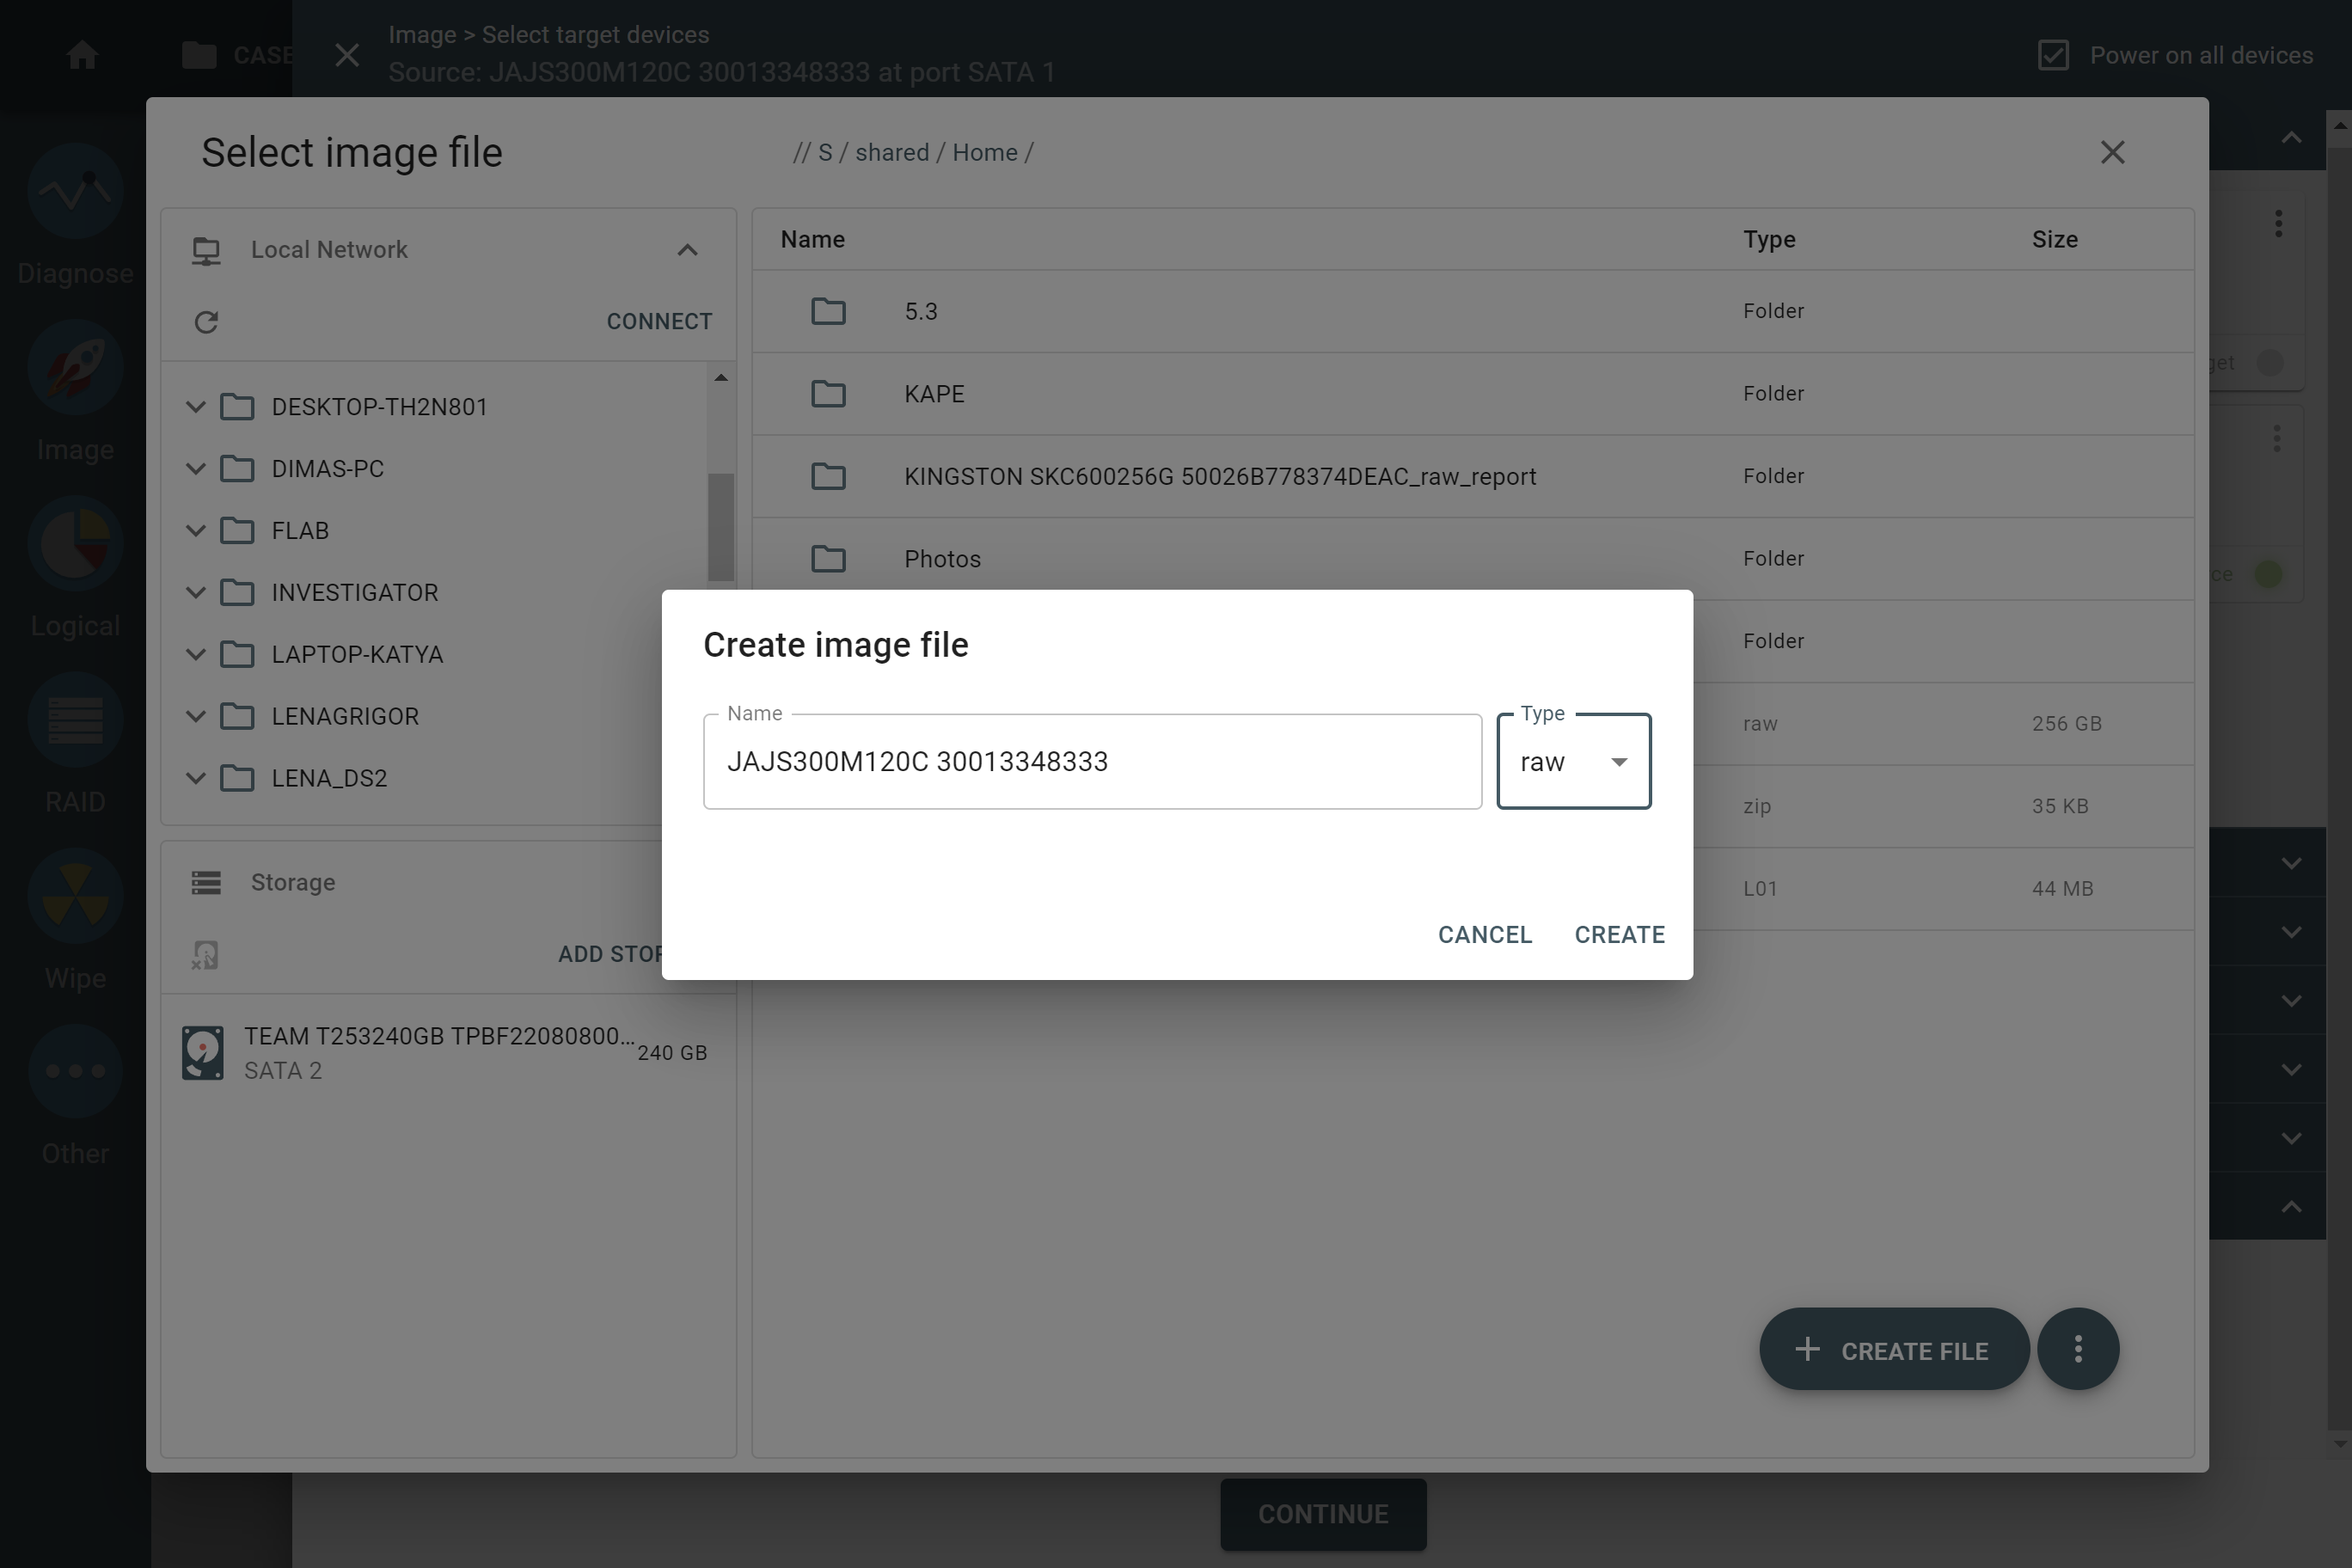
Entering the name of the file.
- On the Select target devices panel, click Continue.
- On the imaging settings page, double-check all settings and the targets selected for the imaging session, and then click Start.
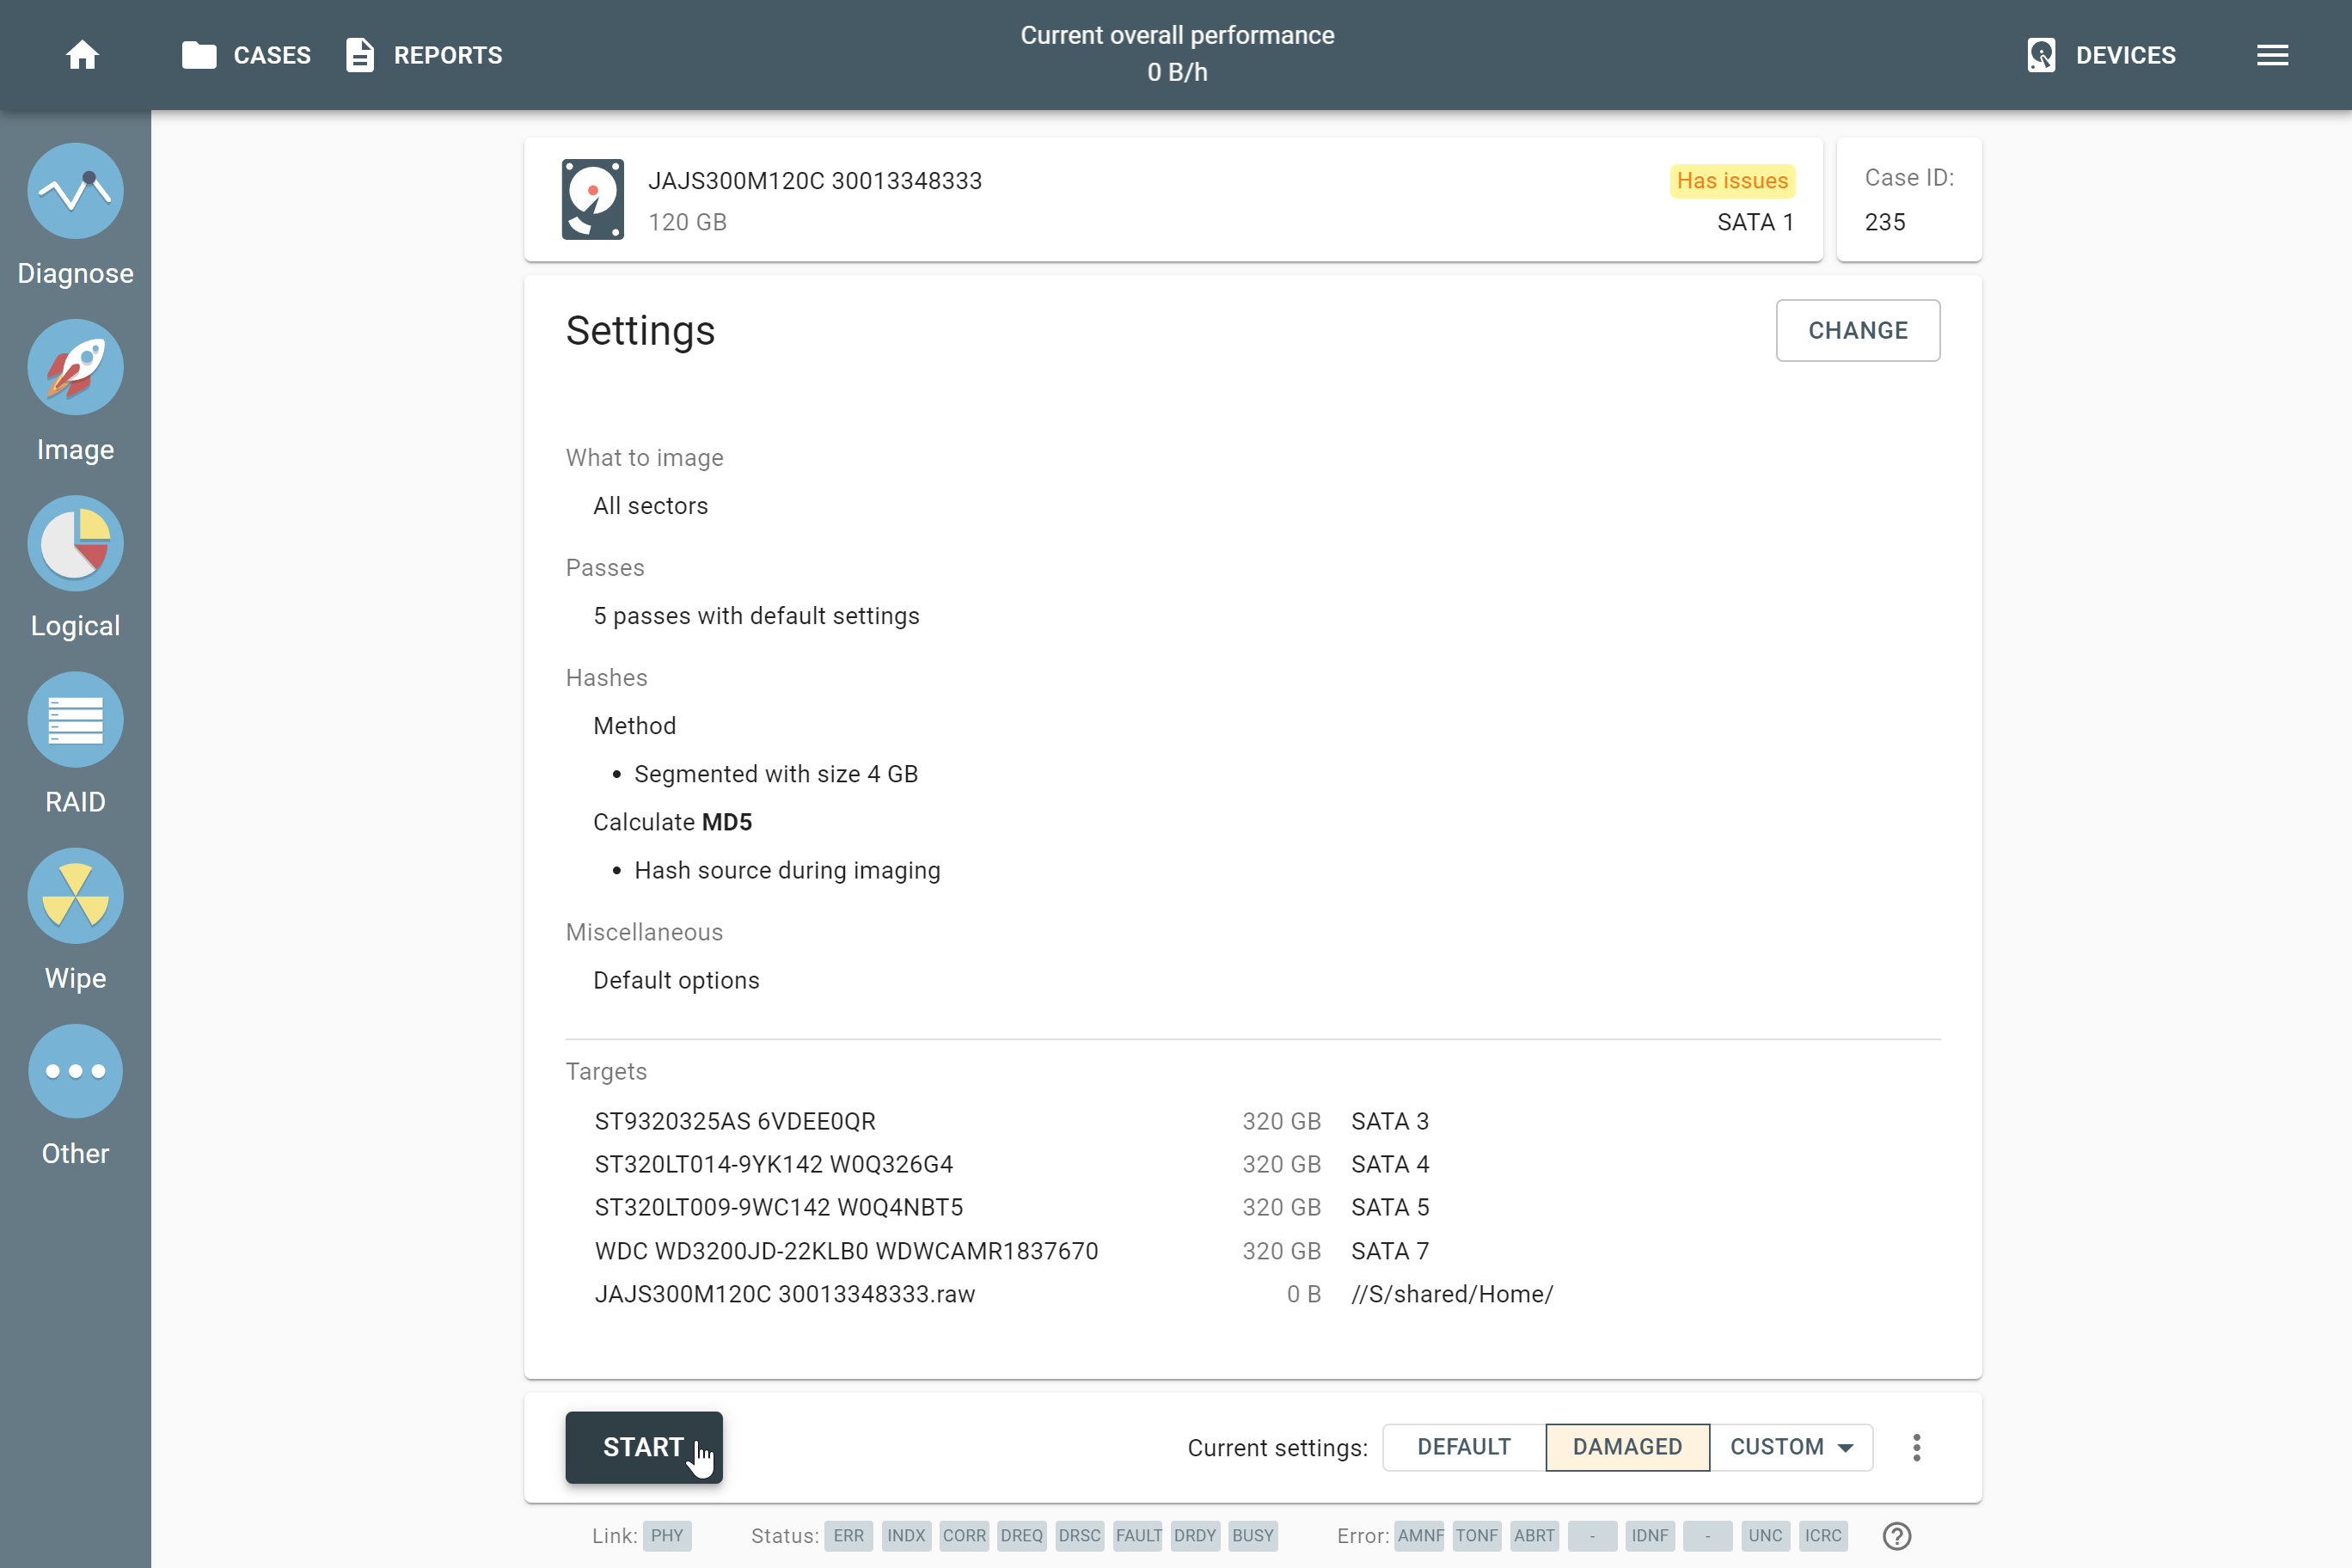
The imaging settings page.
On the imaging page, there are two diagrams that show the progress of imaging. The upper one is called imaging map bar and shows imaging progress throughout the whole drive space (all successfully imaged sectors on the source drive are marked green, all damaged ones are marked red). The lower diagram is called read speed graph and shows the time TaskForce spent reading sectors on the source drive.
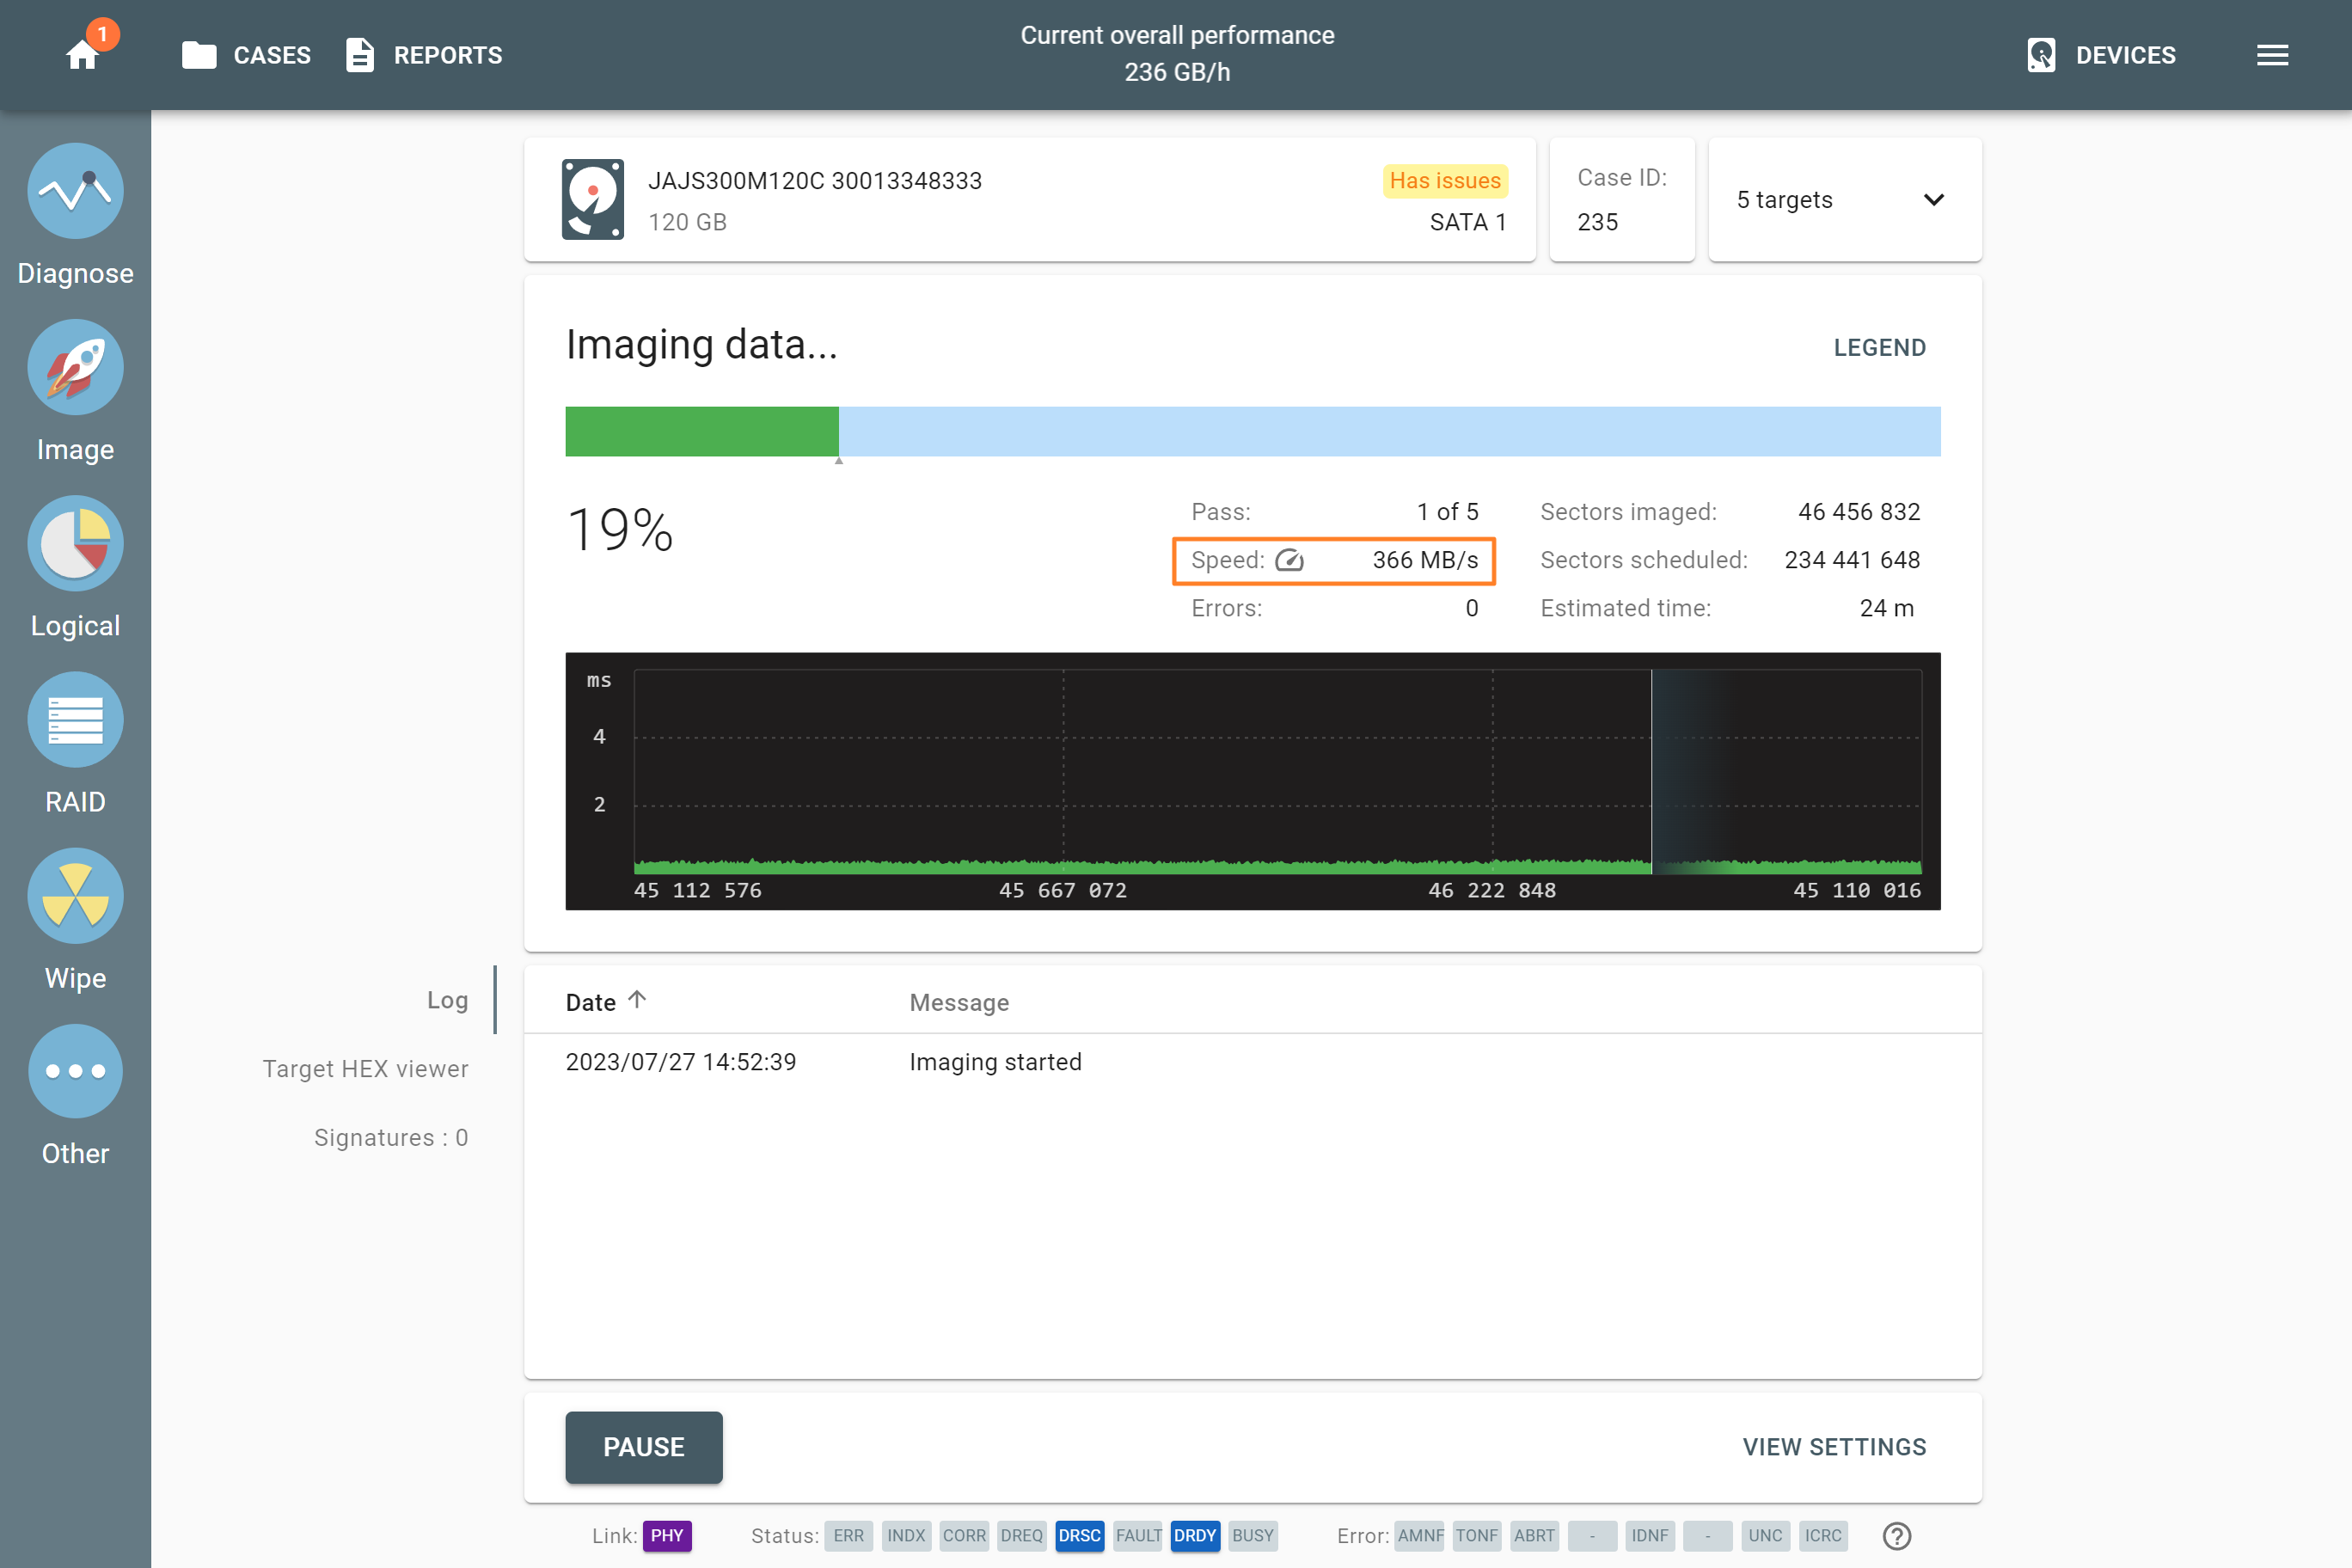
Imaging in progress.
When imaging is completed, you are redirected to the imaging summary page, where you can review the details of the session including source and target drive details, imaging settings, hash values and the time when the imaging session started and when it was completed.
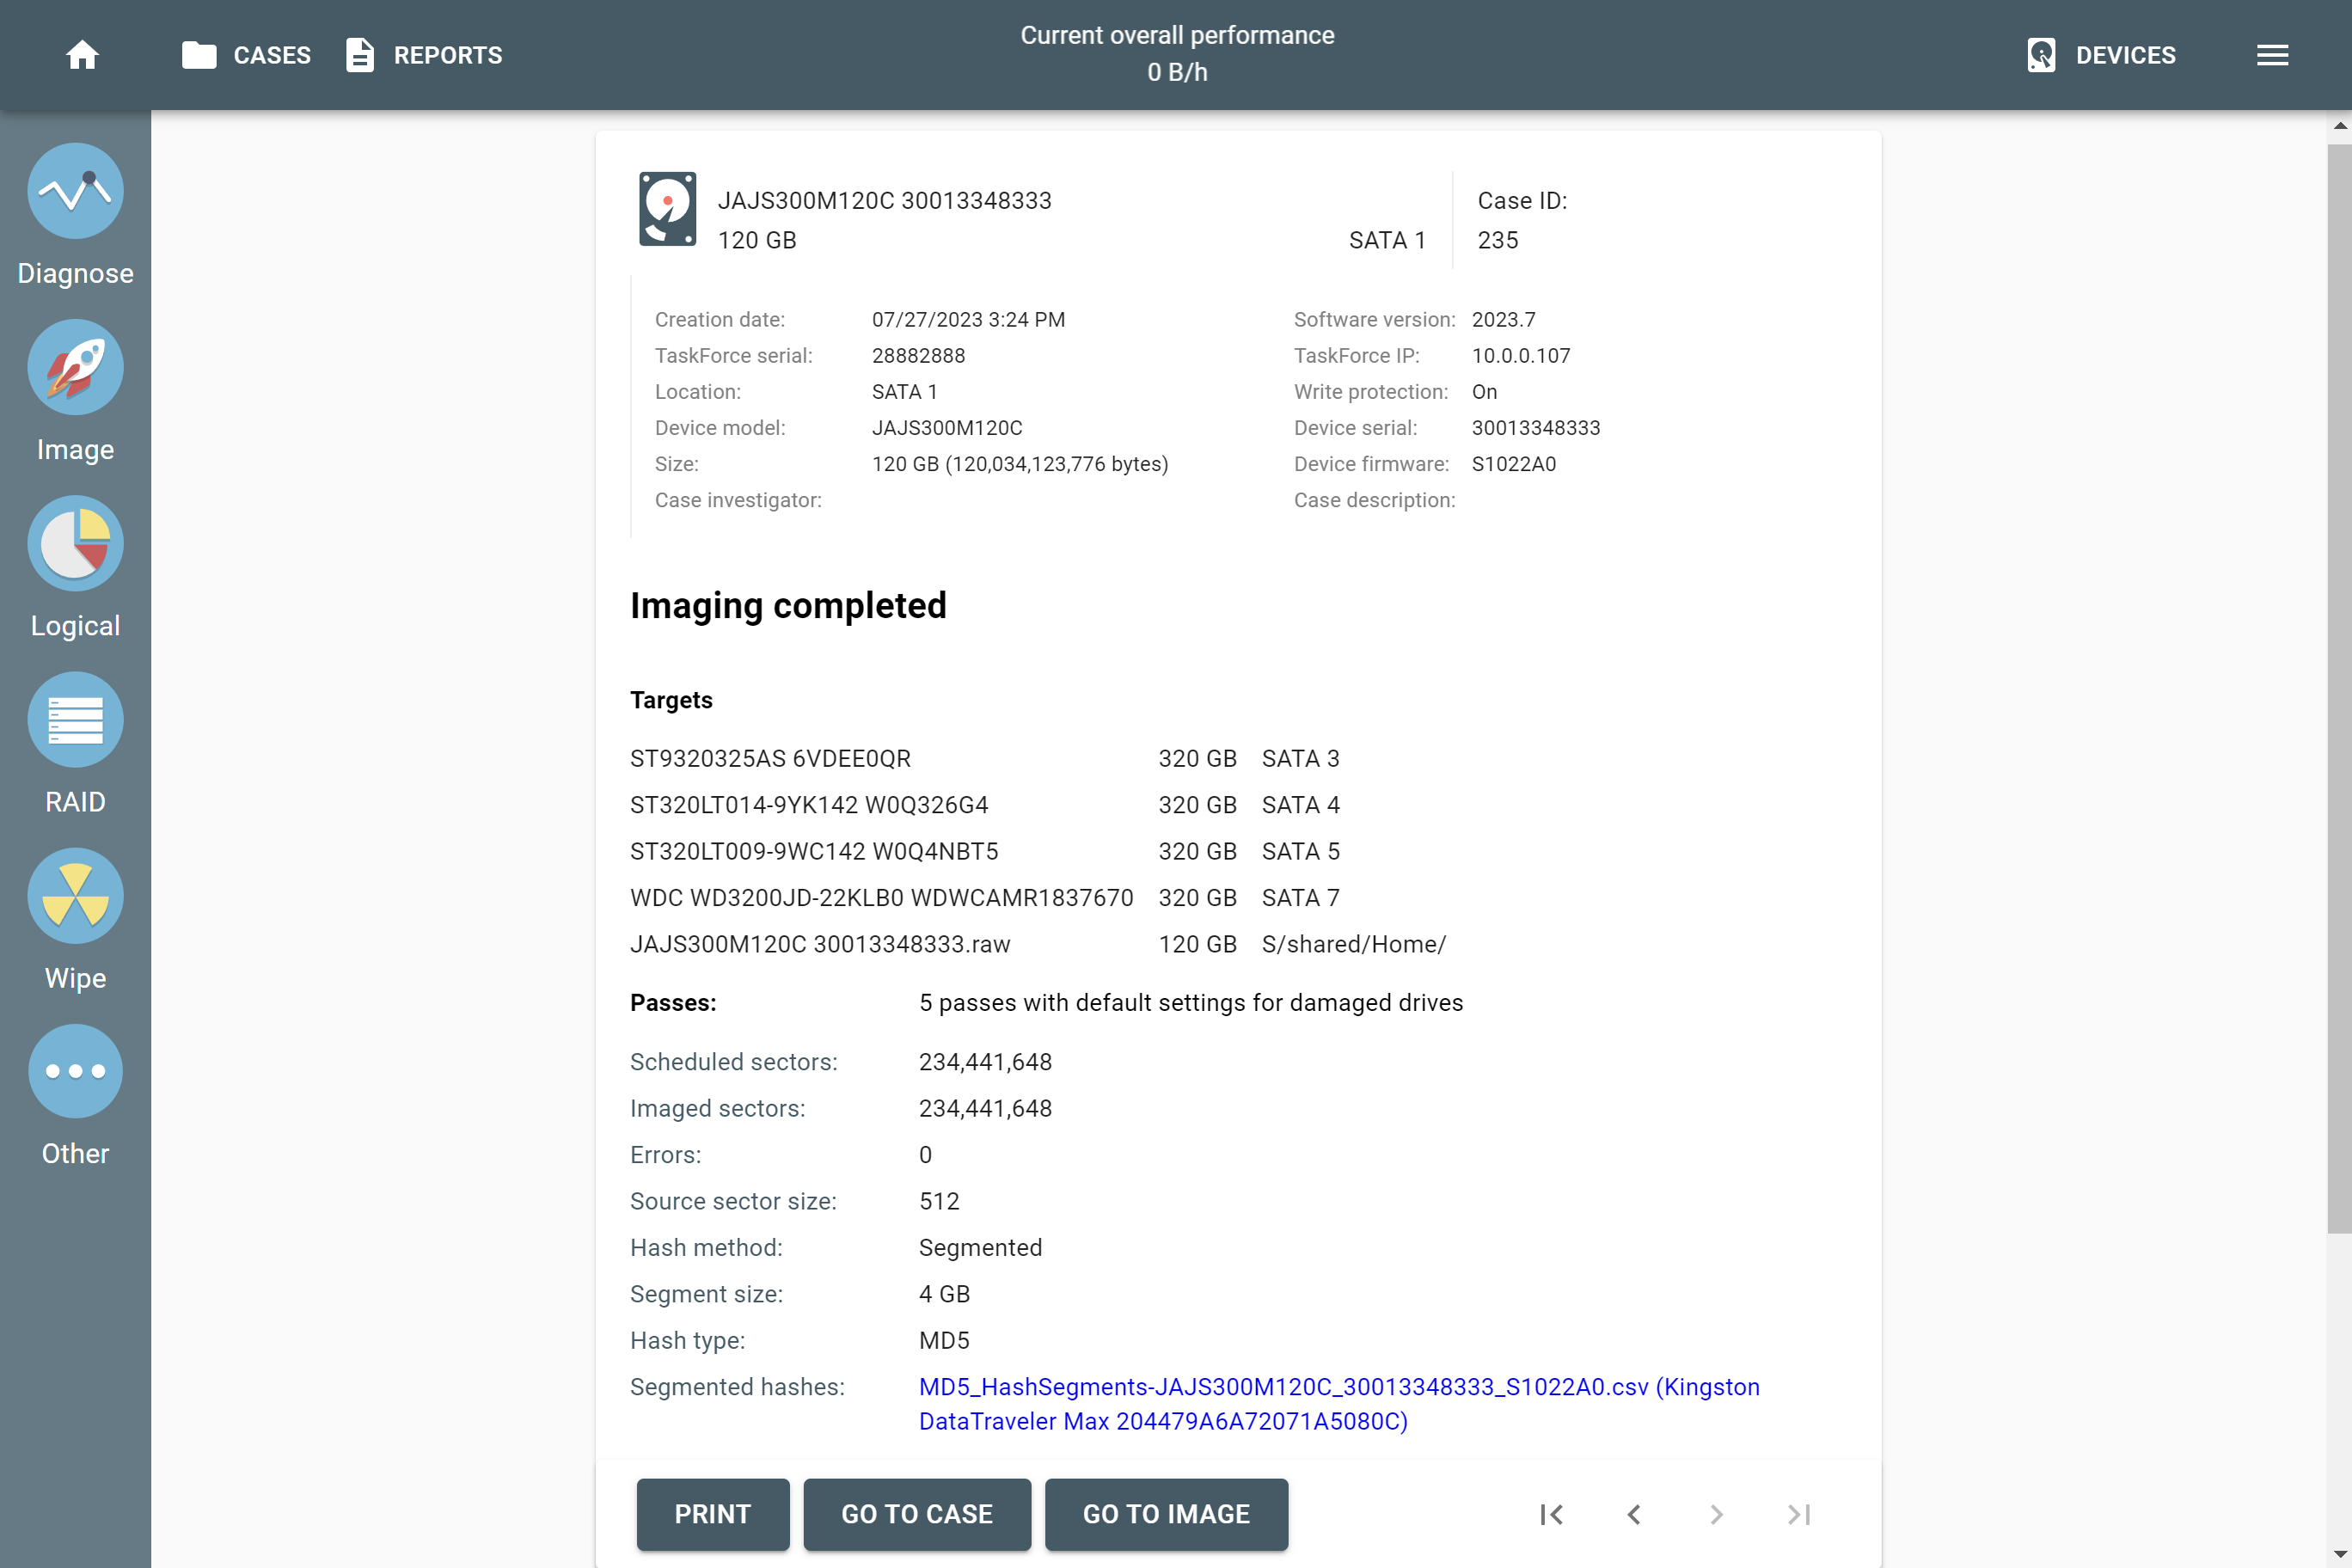
The Imaging completed report.