Imaging a drive to two targets with post-hashing
Atola TaskForce's imaging functionality provides many adjustable settings to help forensic examiners follow the guidelines set by their organizations as well as common-sense evidence handling routines.
When you need to create two images of a source drive and verify that both images are identical to the source drive, you will need to calculate the hashes of both targets after imaging. To optimize the process, post-hashing of both target devices is easily configured in imaging settings.
Here's how to do it:
- Go to Image.
- Select Source and Target devices.
- TaskForce 2 redirects you to the page with the summary of current imaging settings. By default, hashing of source drive during imaging is enabled.
- To adjust the imaging settings, click Change.

Changing default imaging settings.
- In the imaging settings, open the Hashes tab and toggle Post-hash target devices.
- To proceed with imaging, click Start.
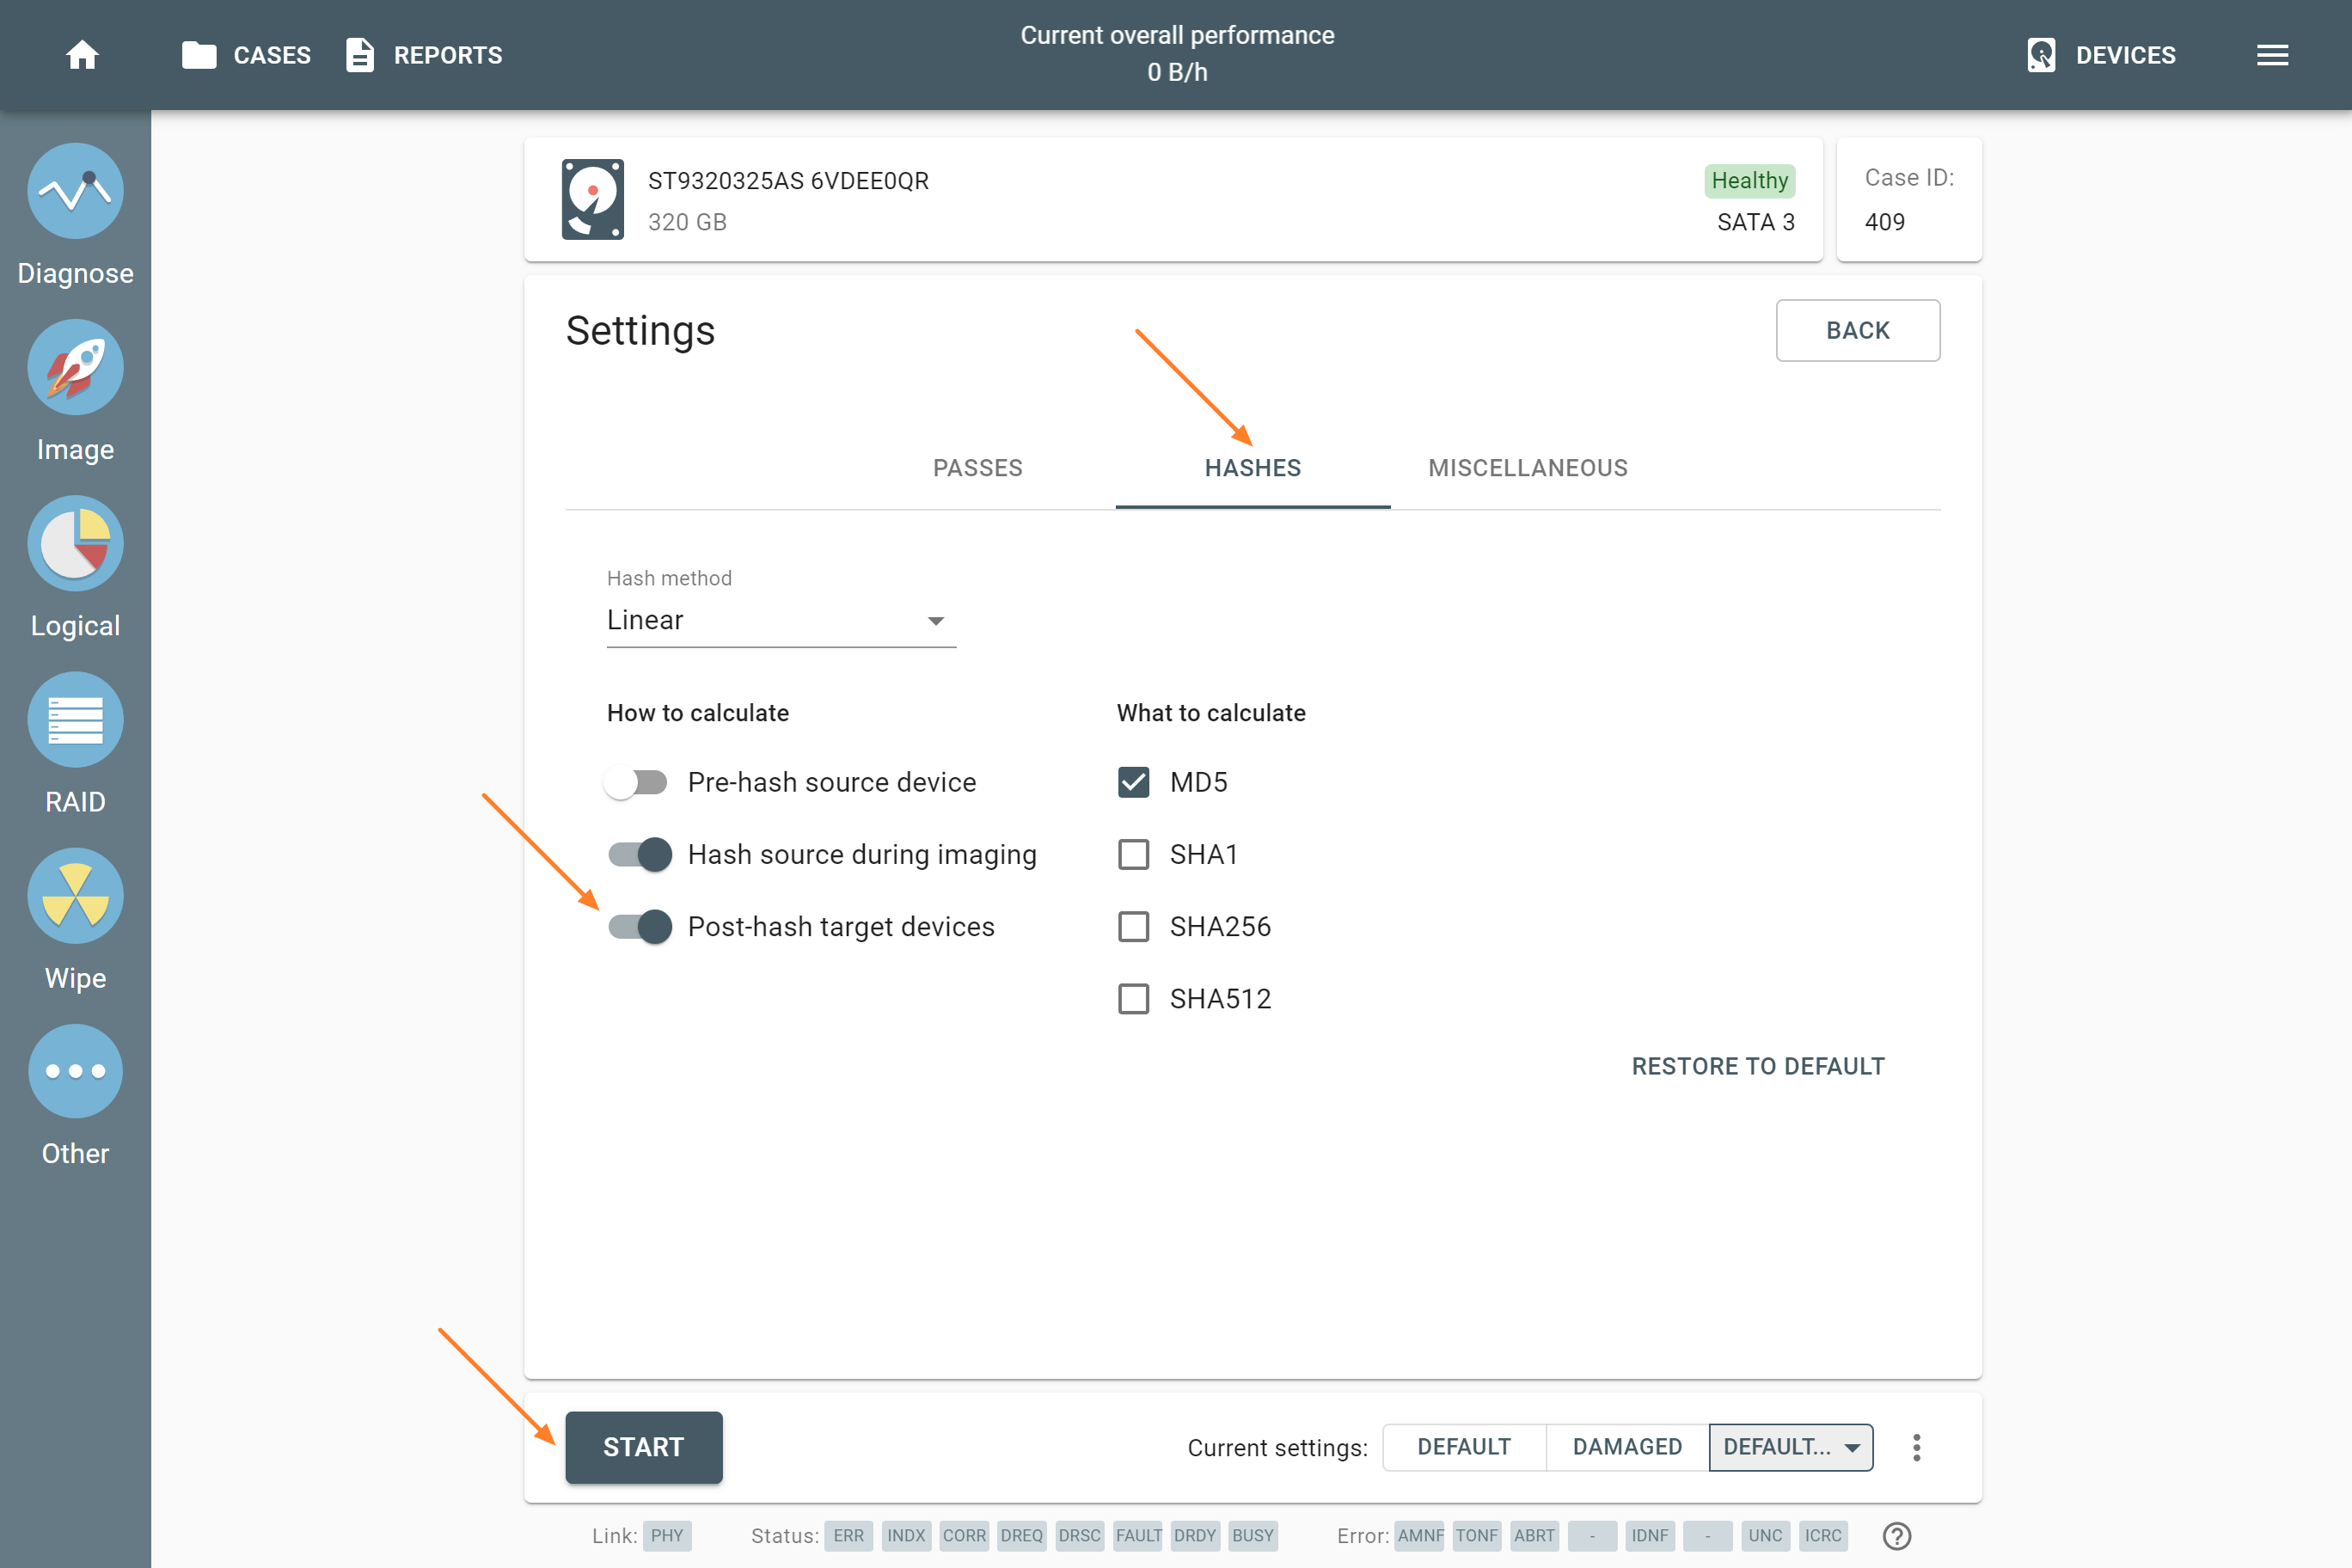
Enabling post-hashing of targets.
Hashing of source drive during imaging is a preferred option because it only requires the data on the evidence drive to be read once, for both imaging and hash calculation. This ensures both a forensically sound process and minimal impact to potentially unstable media. Hashing during imaging does not slow down imaging process.
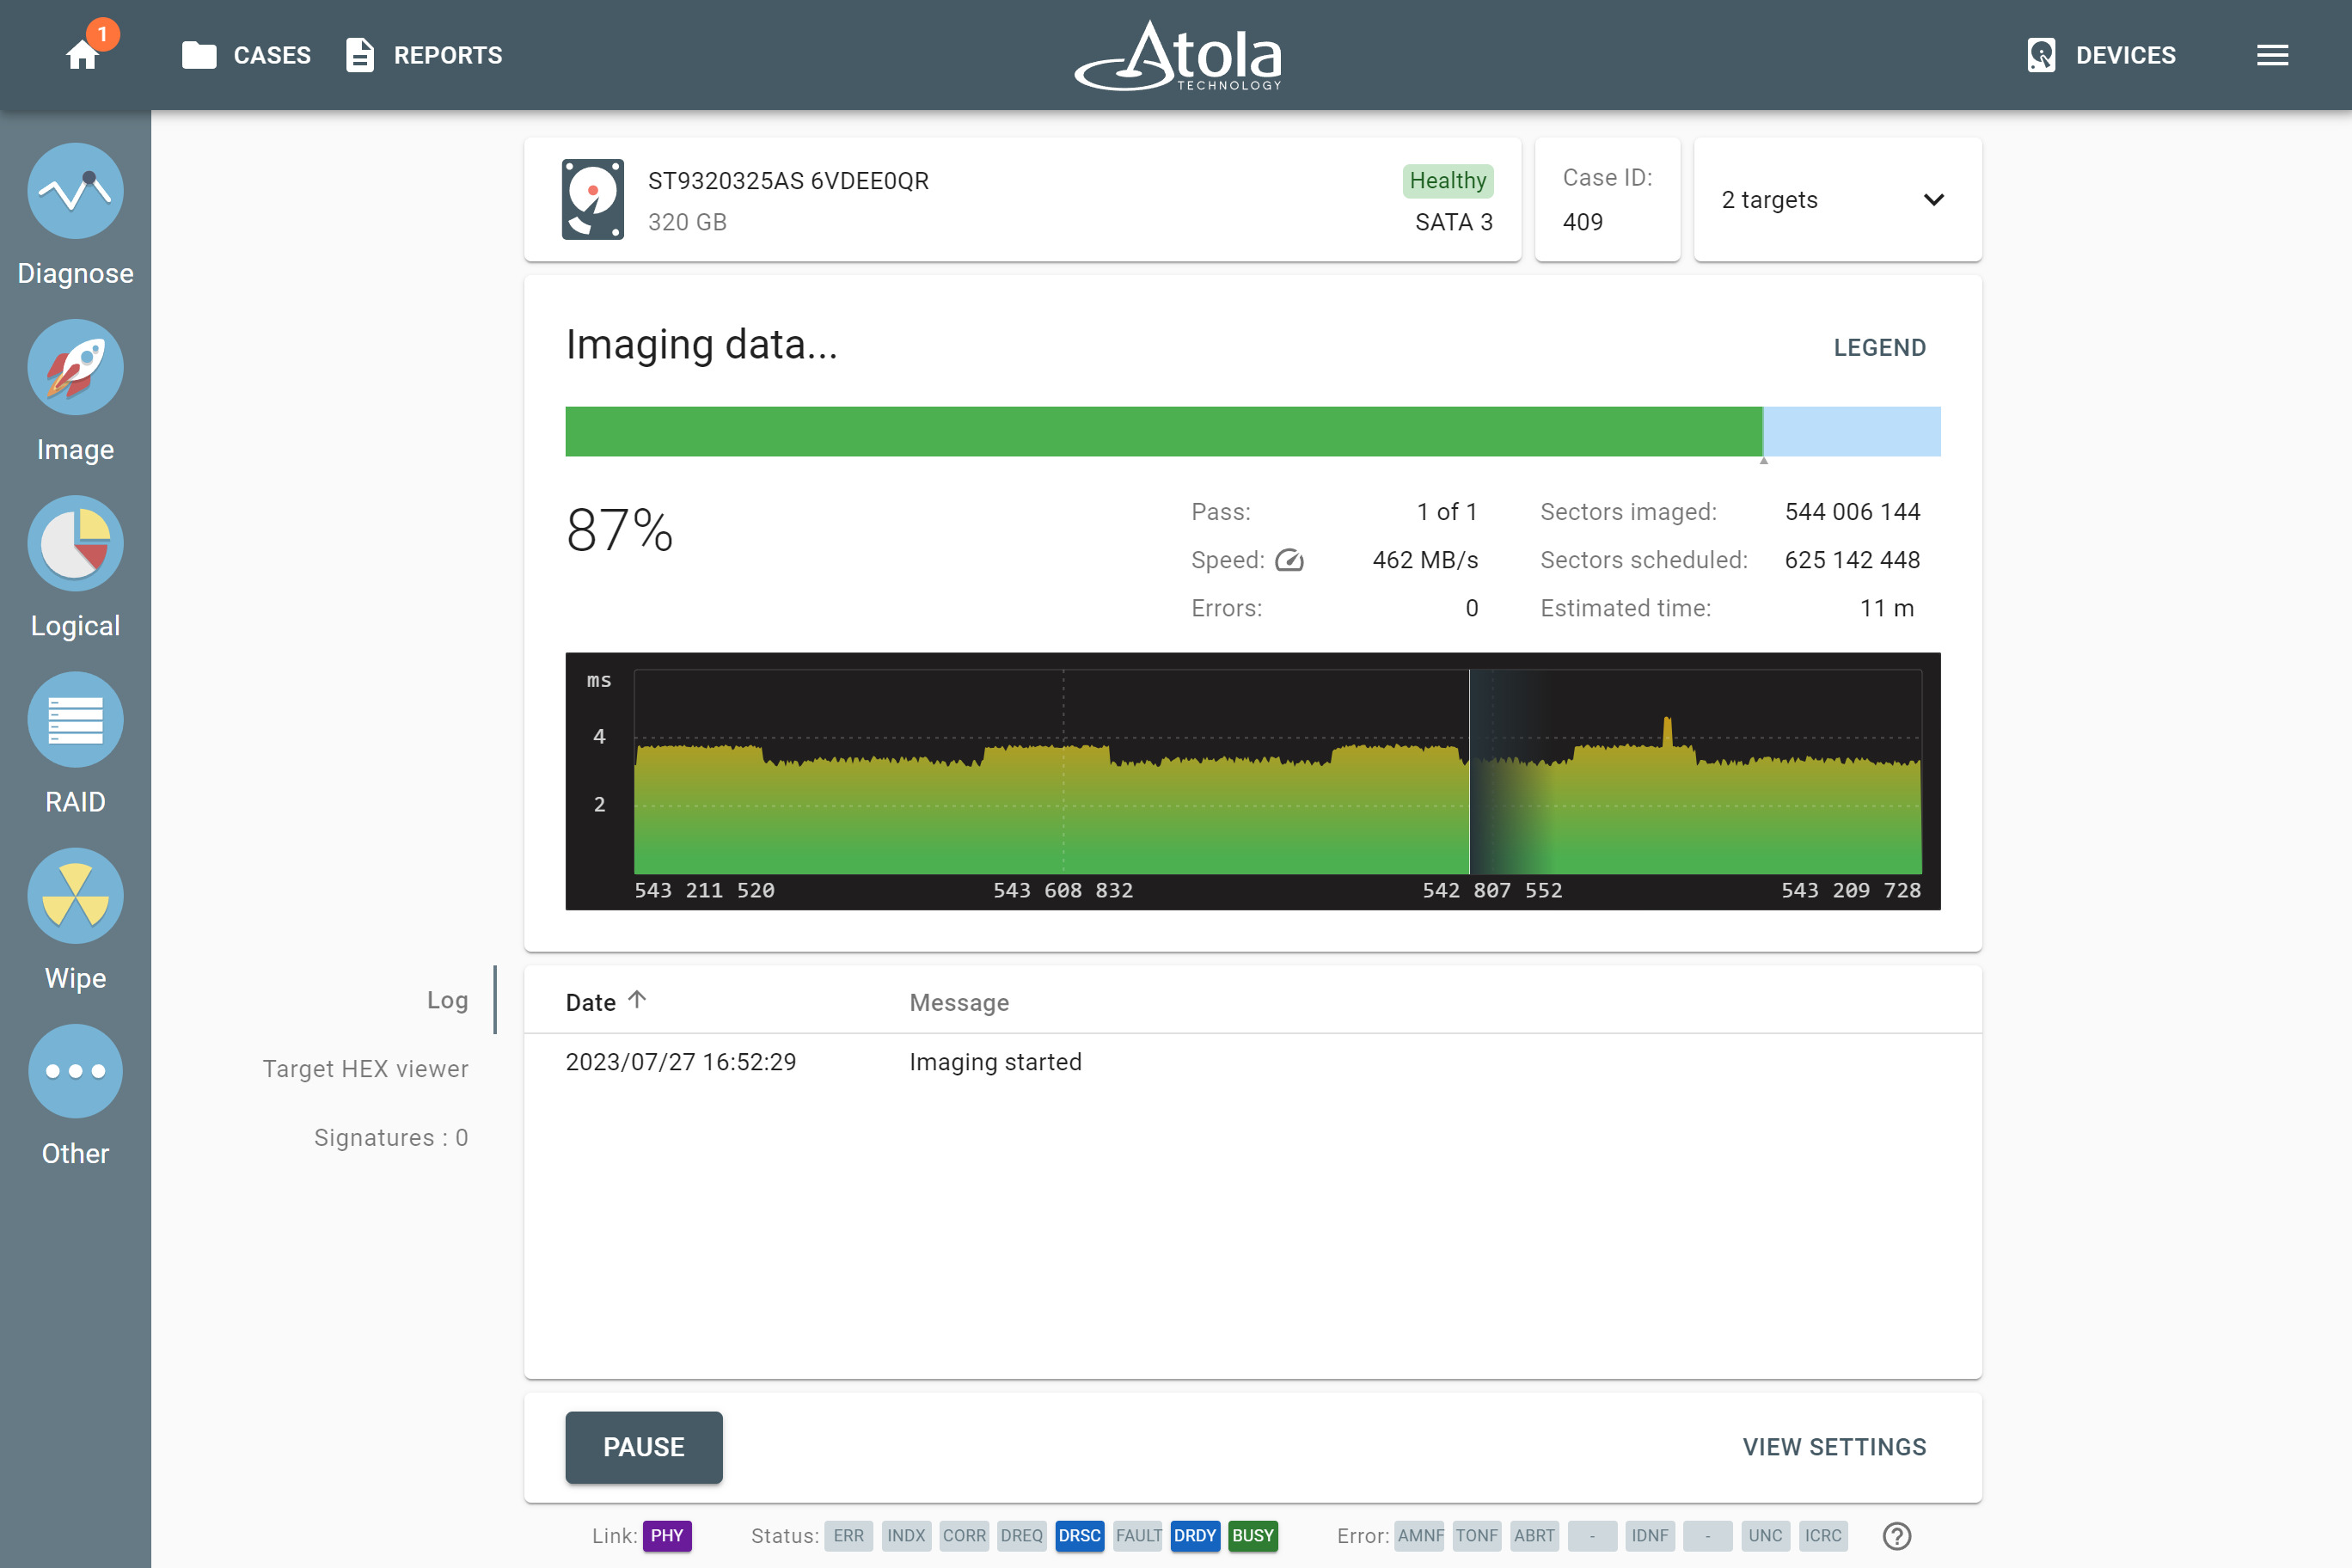
Imaging progress.
Once imaging is completed, post-hashing begins immediately on both target devices:

Post-hashing in progress.
In the end, TaskForce 2 produces a report that documents hashes of both source and target devices:
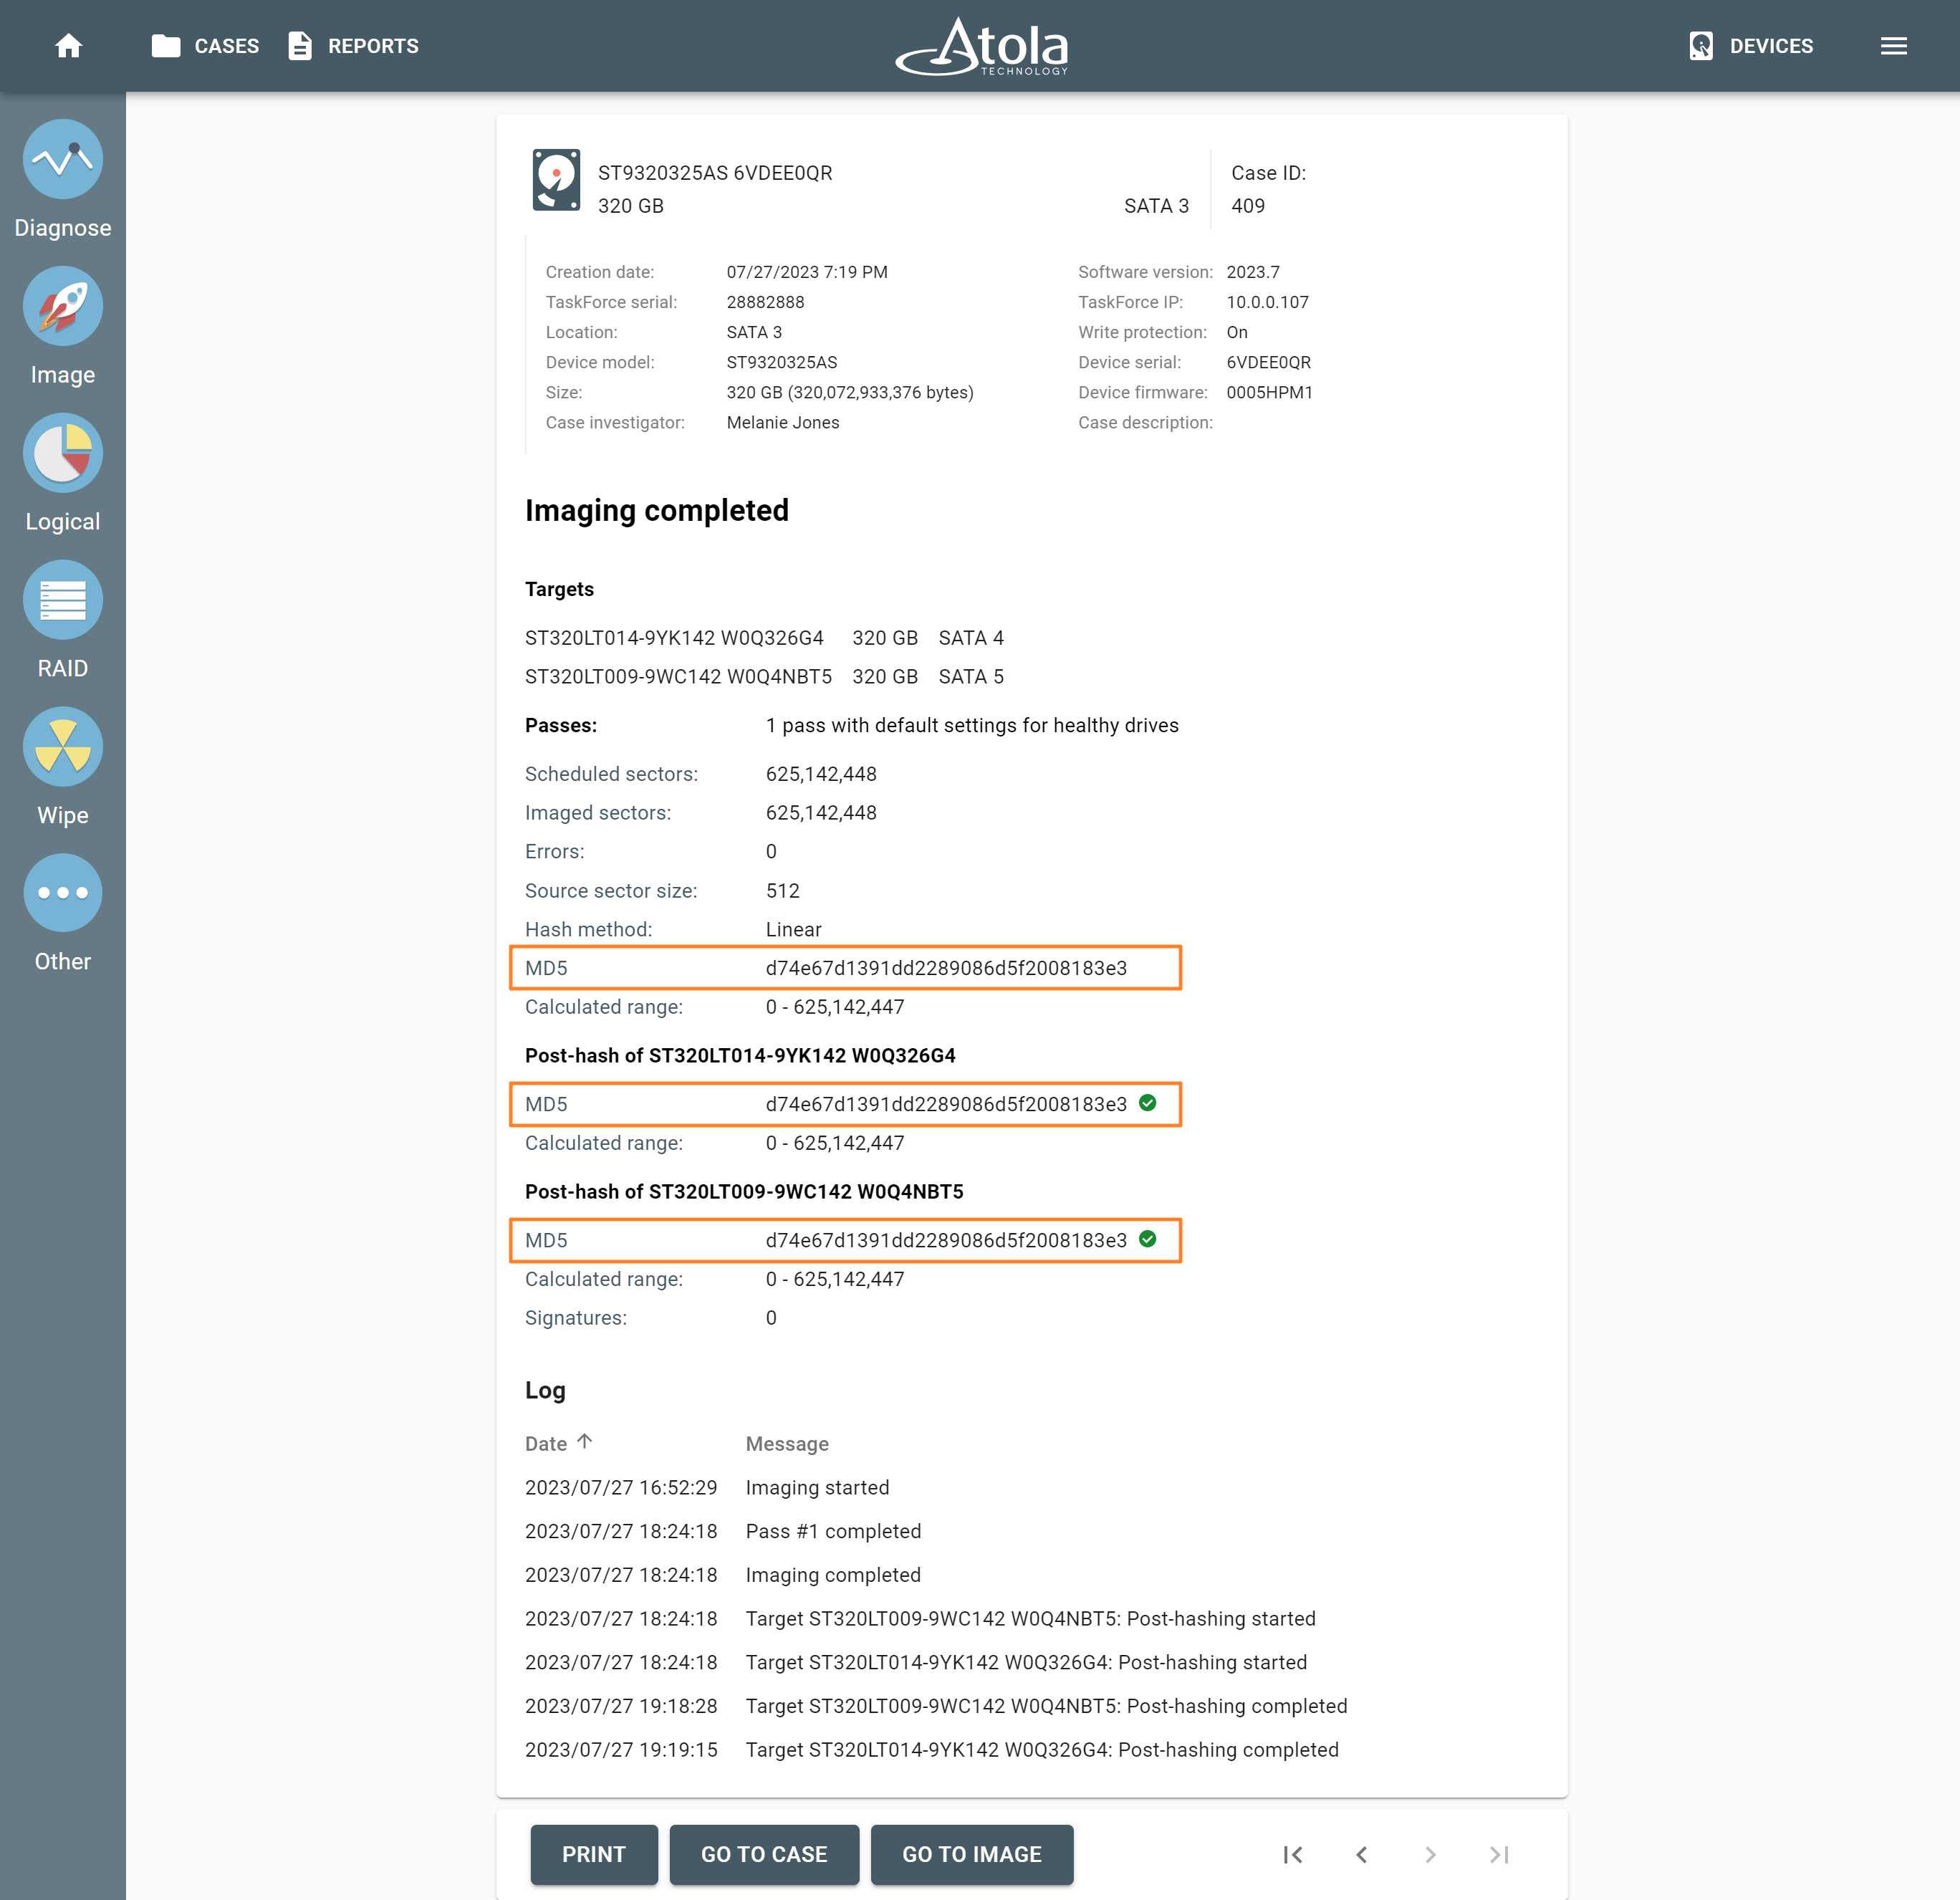
Imaging report with source and target hashes.