Segmented hashing for data verification
Segmented hashing allows verifying data, imaged from damaged media. The image can be verified even if data gets corrupt over time.
Segmented hashing produces a CSV file in the following format:
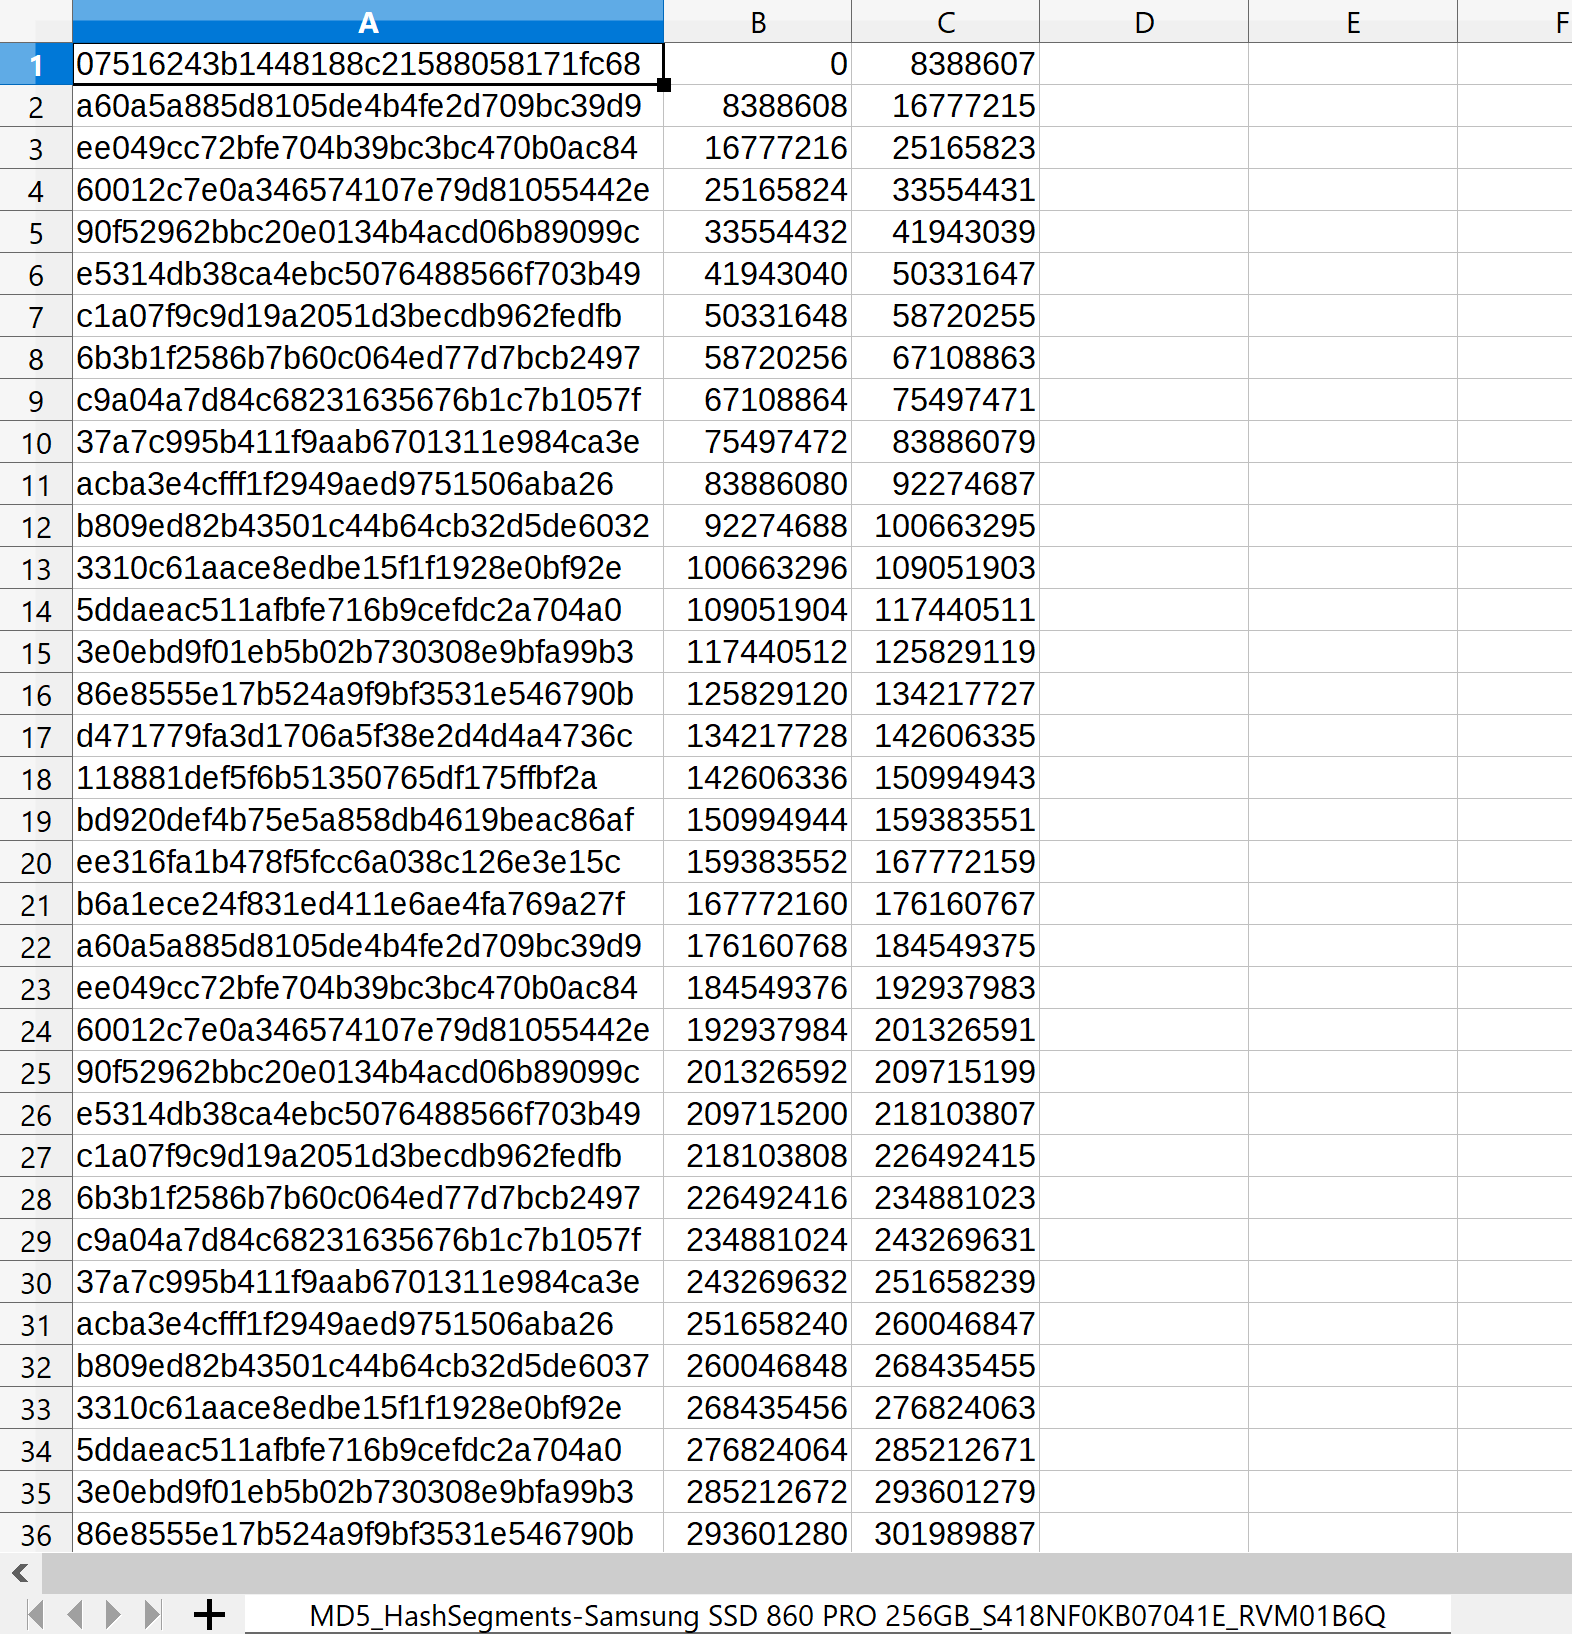
Segmented hashing vs regular hashing
With conventional hashing method you get a single hash for the entire image, while segmented hashing allows getting many hashes of corresponding LBA ranges of the image. The sum LBA ranges represents the entire image.
Verifying all hashes in a set allows you to prove that the entire image has not been modified.
Segmented hashing and post-hashing of the target for immediate image verification
- Go to the imaging Settings.
- On the Hashes tab, select Segmented hashing method.
- To obtain both sets of hashes for the evidence drive and the image, toggle Post-hash target devices.
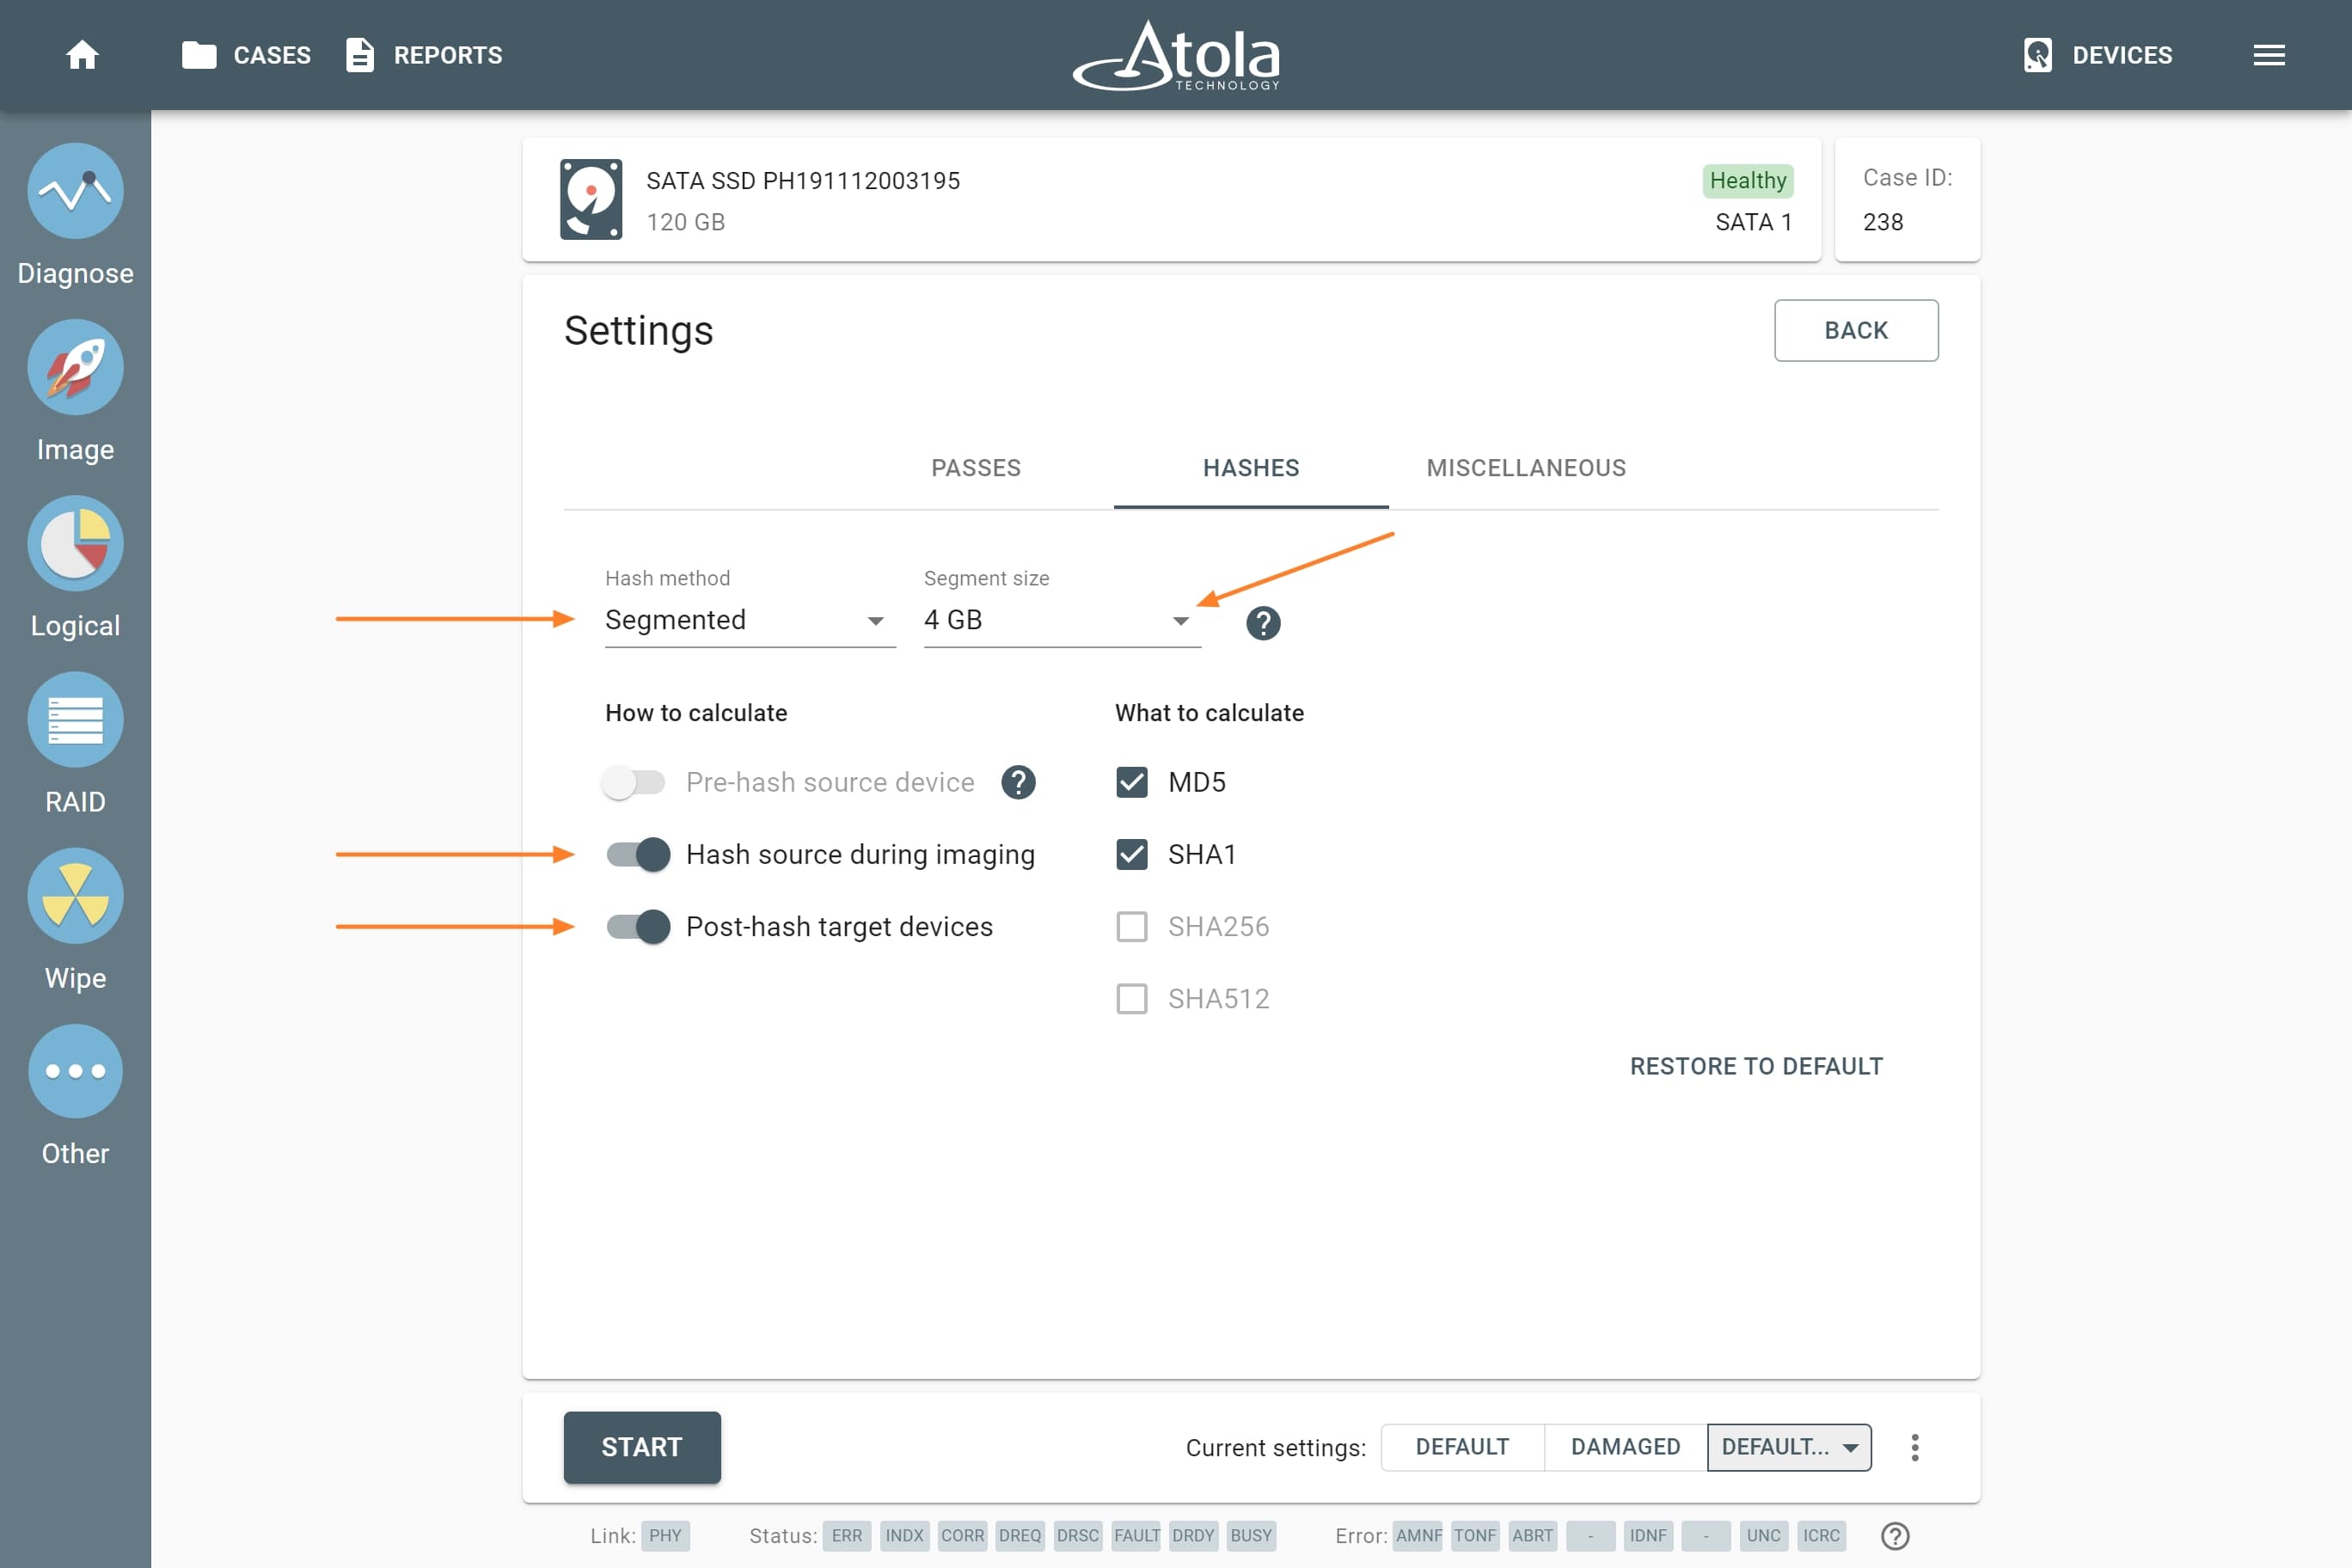
Selecting hashing method.
Hashing while imaging does not slow down the imaging session:

TaskForce 2 imaging session.
Post-hashing will commence as soon as the imaging session is completed:
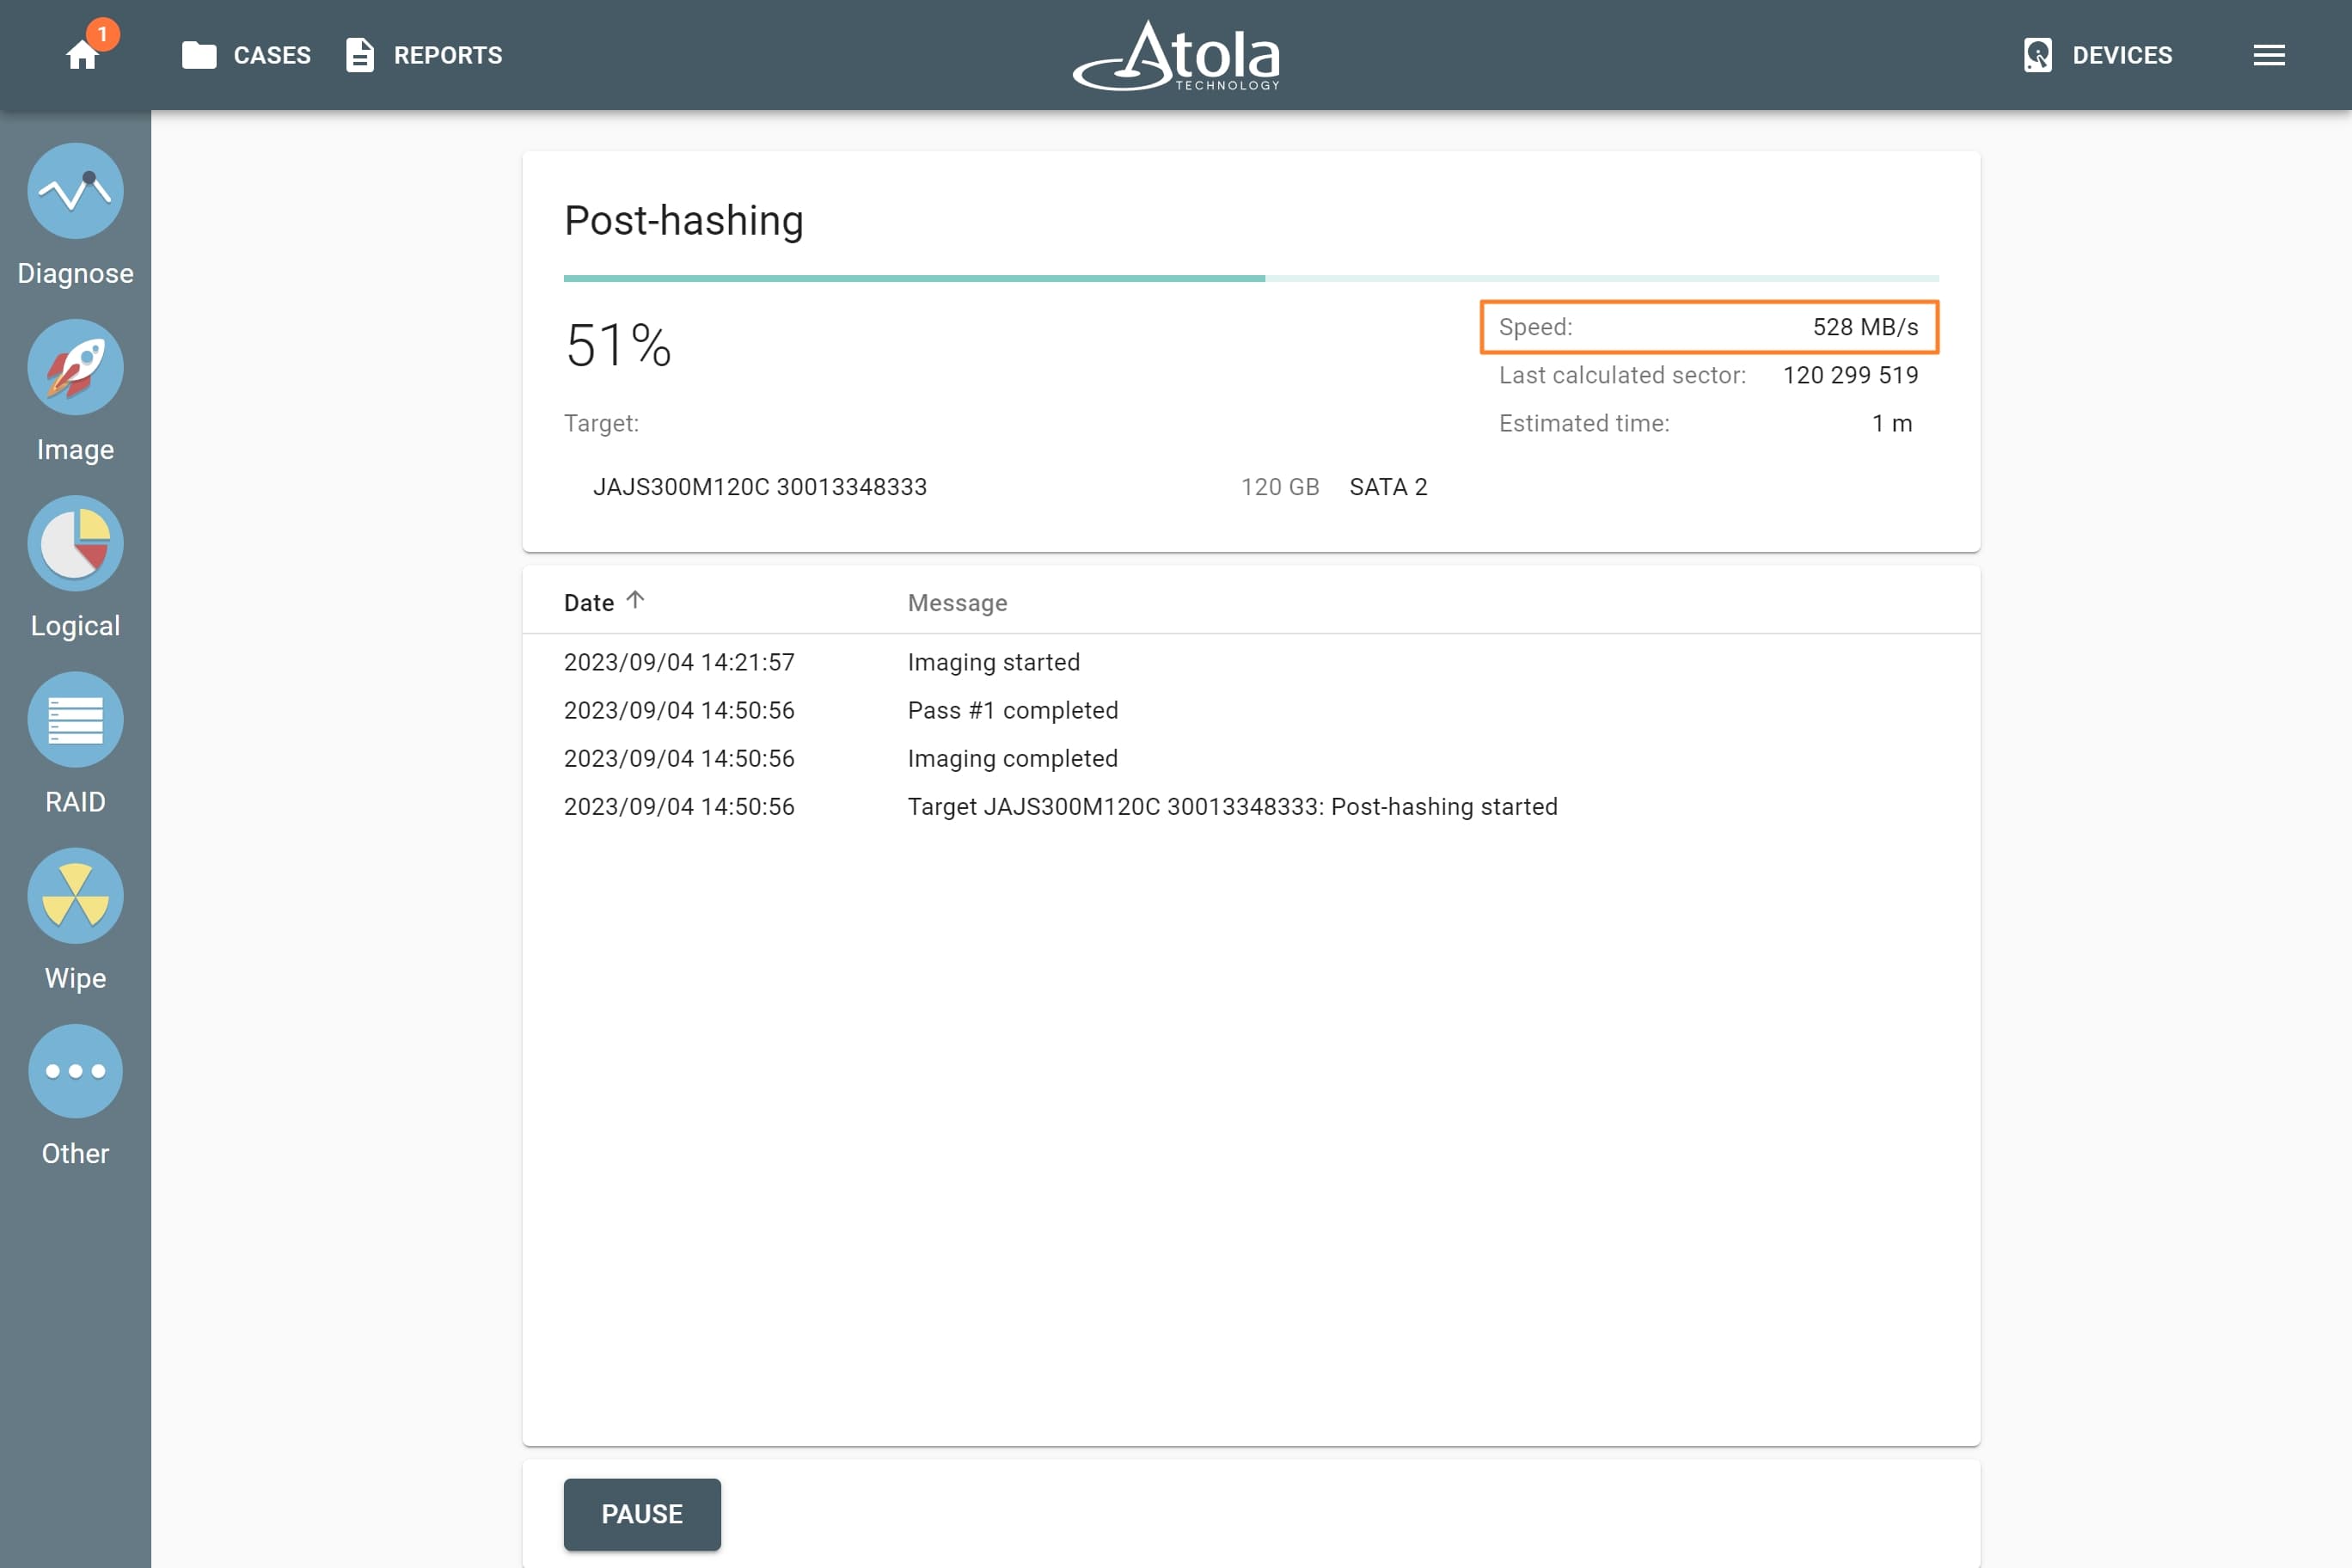
Atola TaskForce 2: Post-hashing.
In the Imaging completed report you can see imaging results with the link to the file with segmented hashes.
In case you select the post-hashing of the target, you also get the results of cross-checking between the hash sets of the evidence drive and the image.
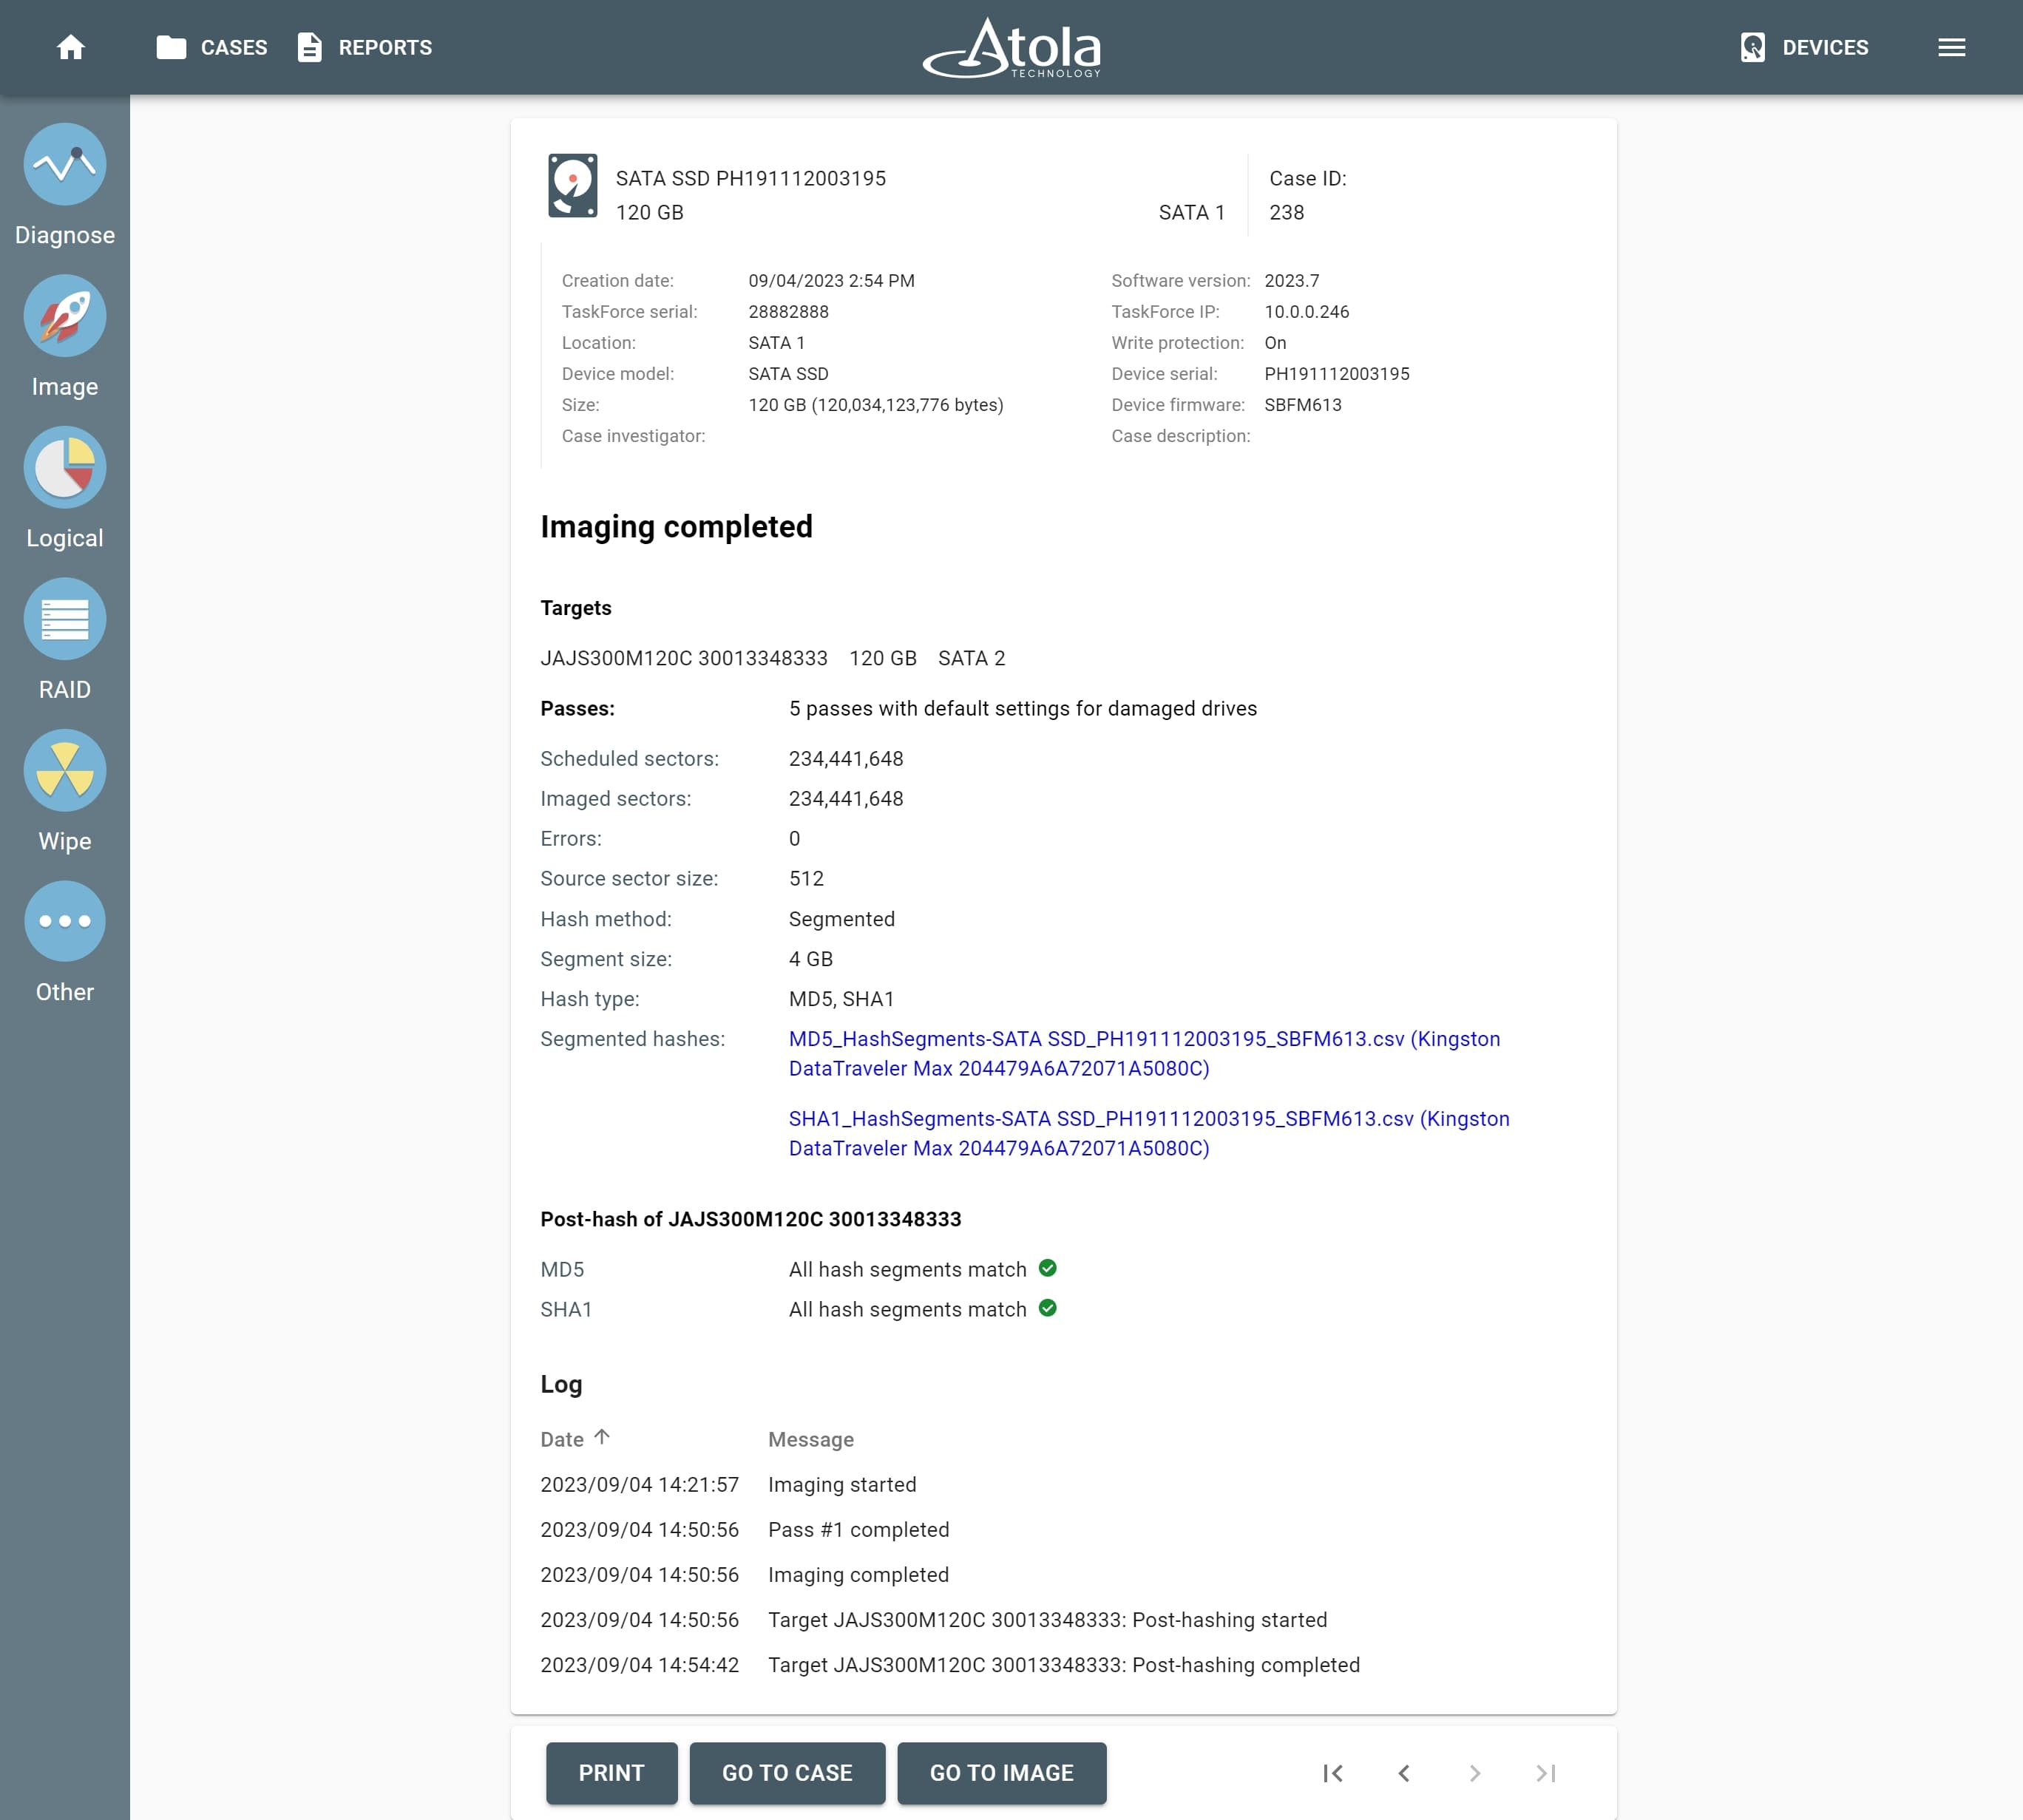
Atola forensic imager: Imaging results