Configuring TaskForce use with Synology or QNAP NAS as a LAN
Here is a guide to configure your NAS to be used with TaskForce 2 for storage of image files.
This manual is indicative and may vary between models and manufacturers. We have tested this setup on Synology DS218 and QNAP TS-431K.
Table of contents
Setting up Synology
Setting up QNAP
Direct connection with a Static IP:
Setting up a Synology NAS
- Install drives in the Synology NAS.
- Use a LAN cable to connect the DiskStation to your switch, router, or hub.
- Press the power button to turn on your Synology NAS.
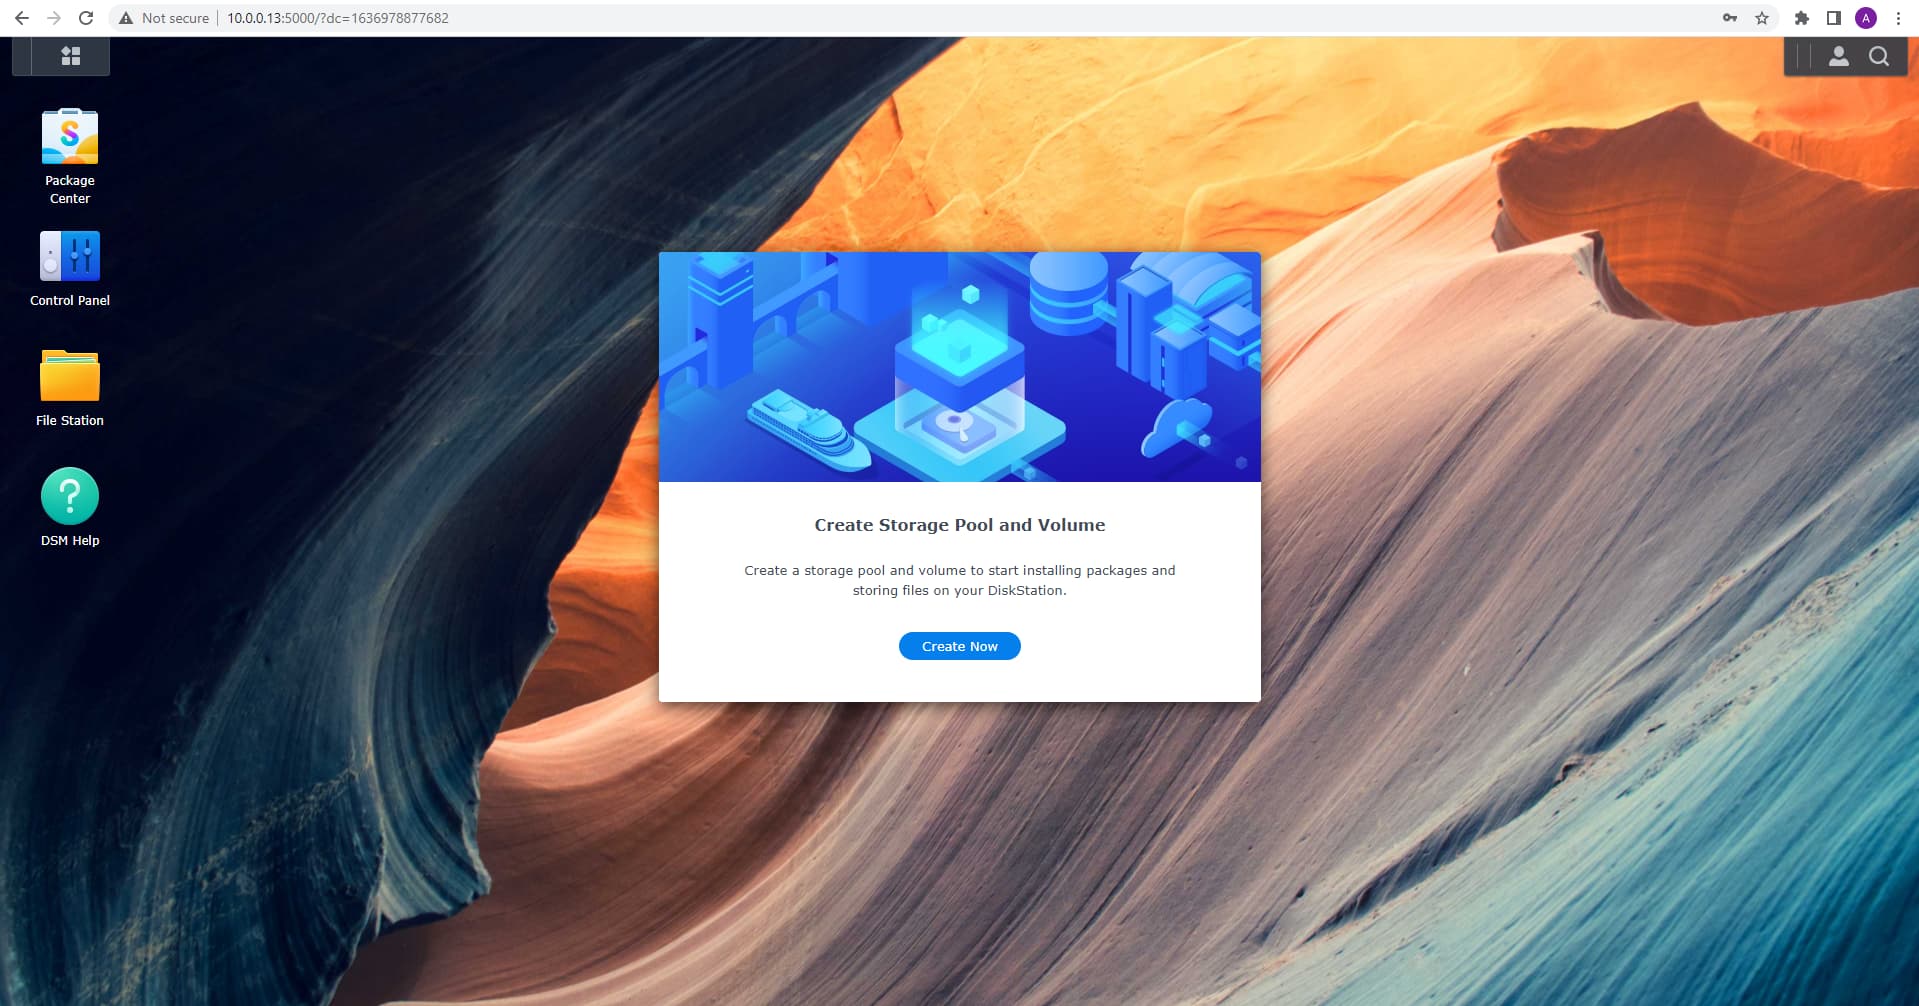
- Install DiskStation Manager (DSM) – Synology’s browser-based operating system – on your DiskStation.
- Follow the instructions to create a RAID volume and a partition with a file system on it.
Enabling SMB3 is highly recommended for the best performance:
- Go to Control panel > File services > SMB > Advanced settings.
- Set Maximum protocol to SMB3.
- Go to Control panel > Shared folder.
- Click Create and specify network folder details.
- Create a Shared folder in the new volume:
Control panel > File sharing > Shared folder > Create > Create Shared Folder
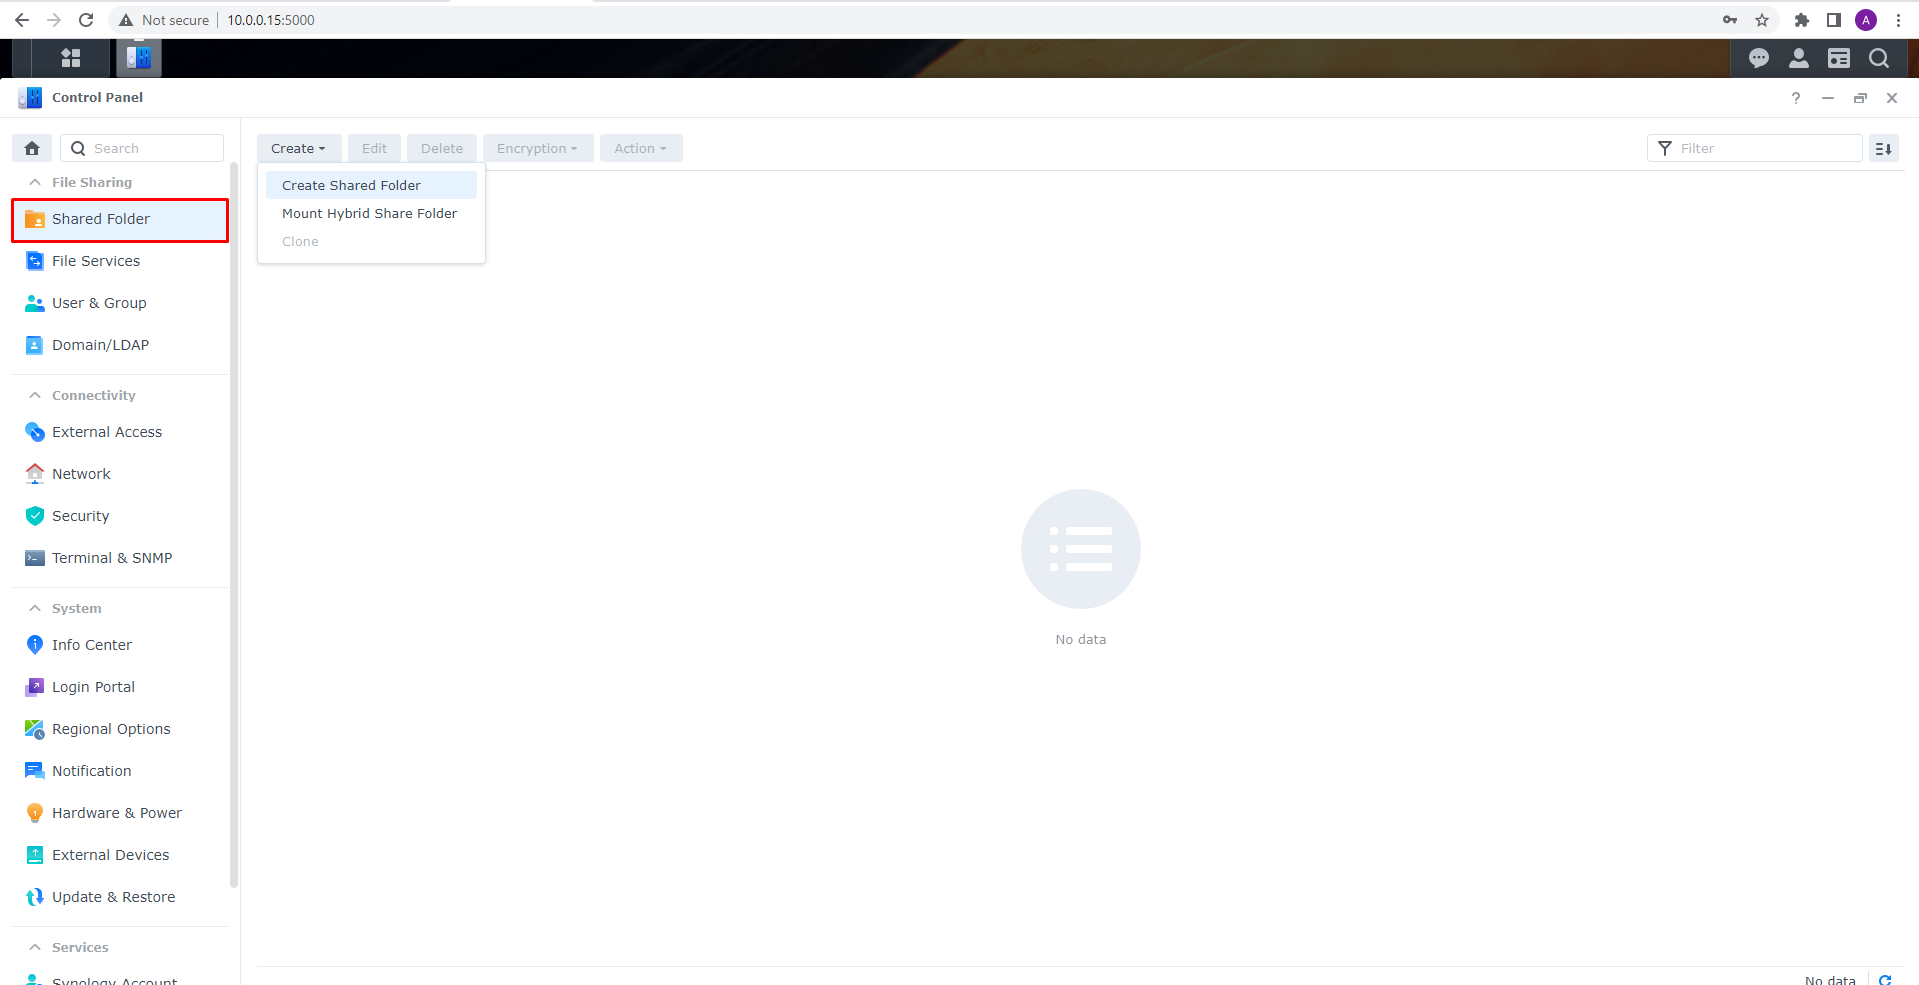
- In the folder creation menu, set the folder name, e.g. Image Files and set access options.
Setting up a QNAP NAS
- Install drives in the QNAP NAS.
- Use a LAN cable to connect the QNAP to your switch, router, or hub.
- Press the power button to turn on your QNAP.
- Install Qfinder Pro for quick find and easy access to QNAP NAS on the same LAN.
- Find your QNAP using Qfinder Pro and go to its page in the browser.
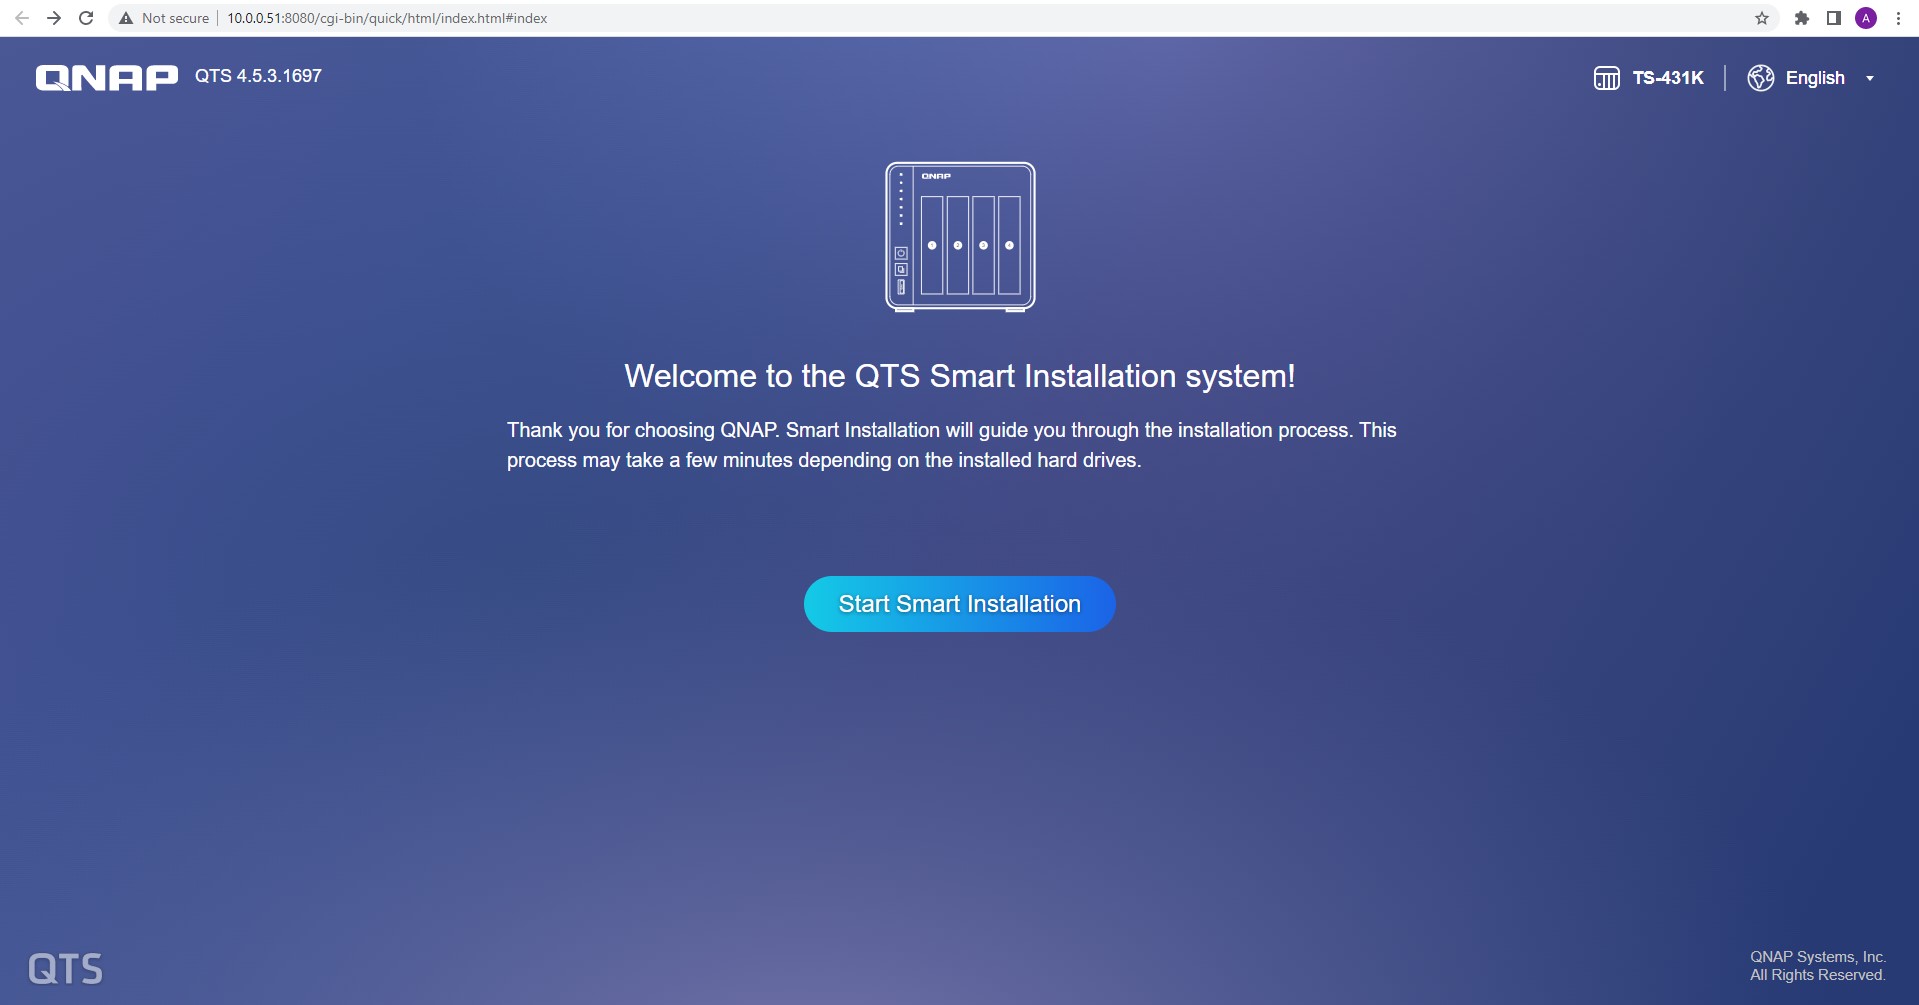
- Follow instructions to complete Smart Installation.
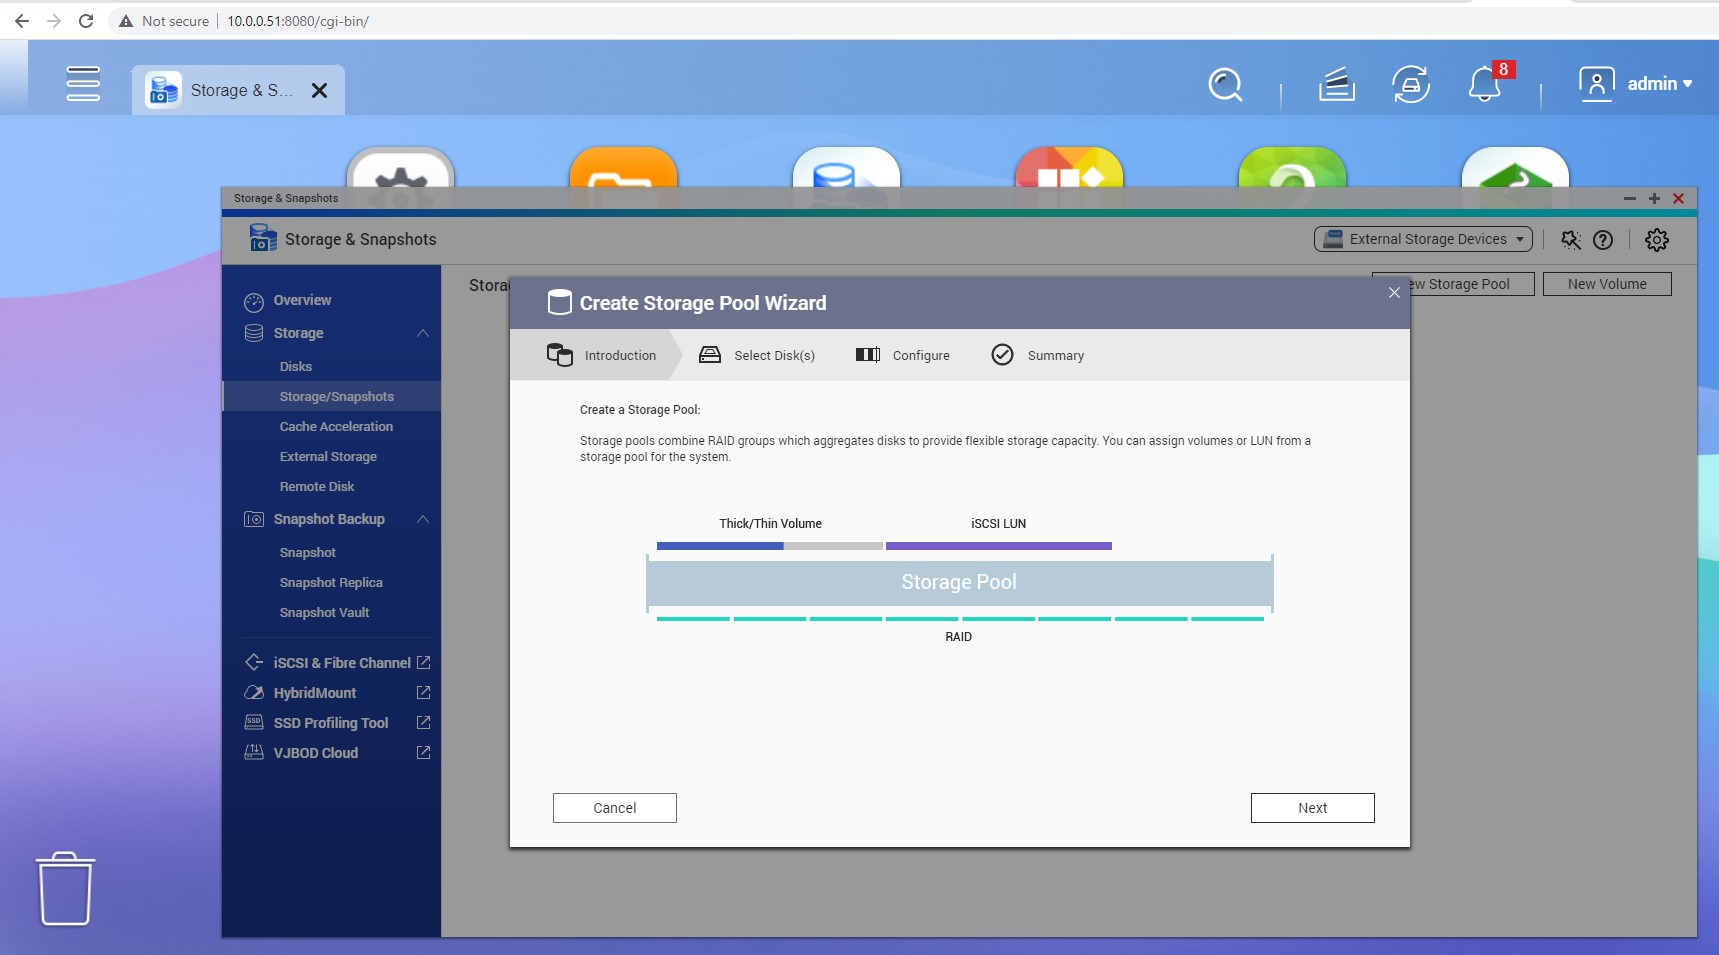
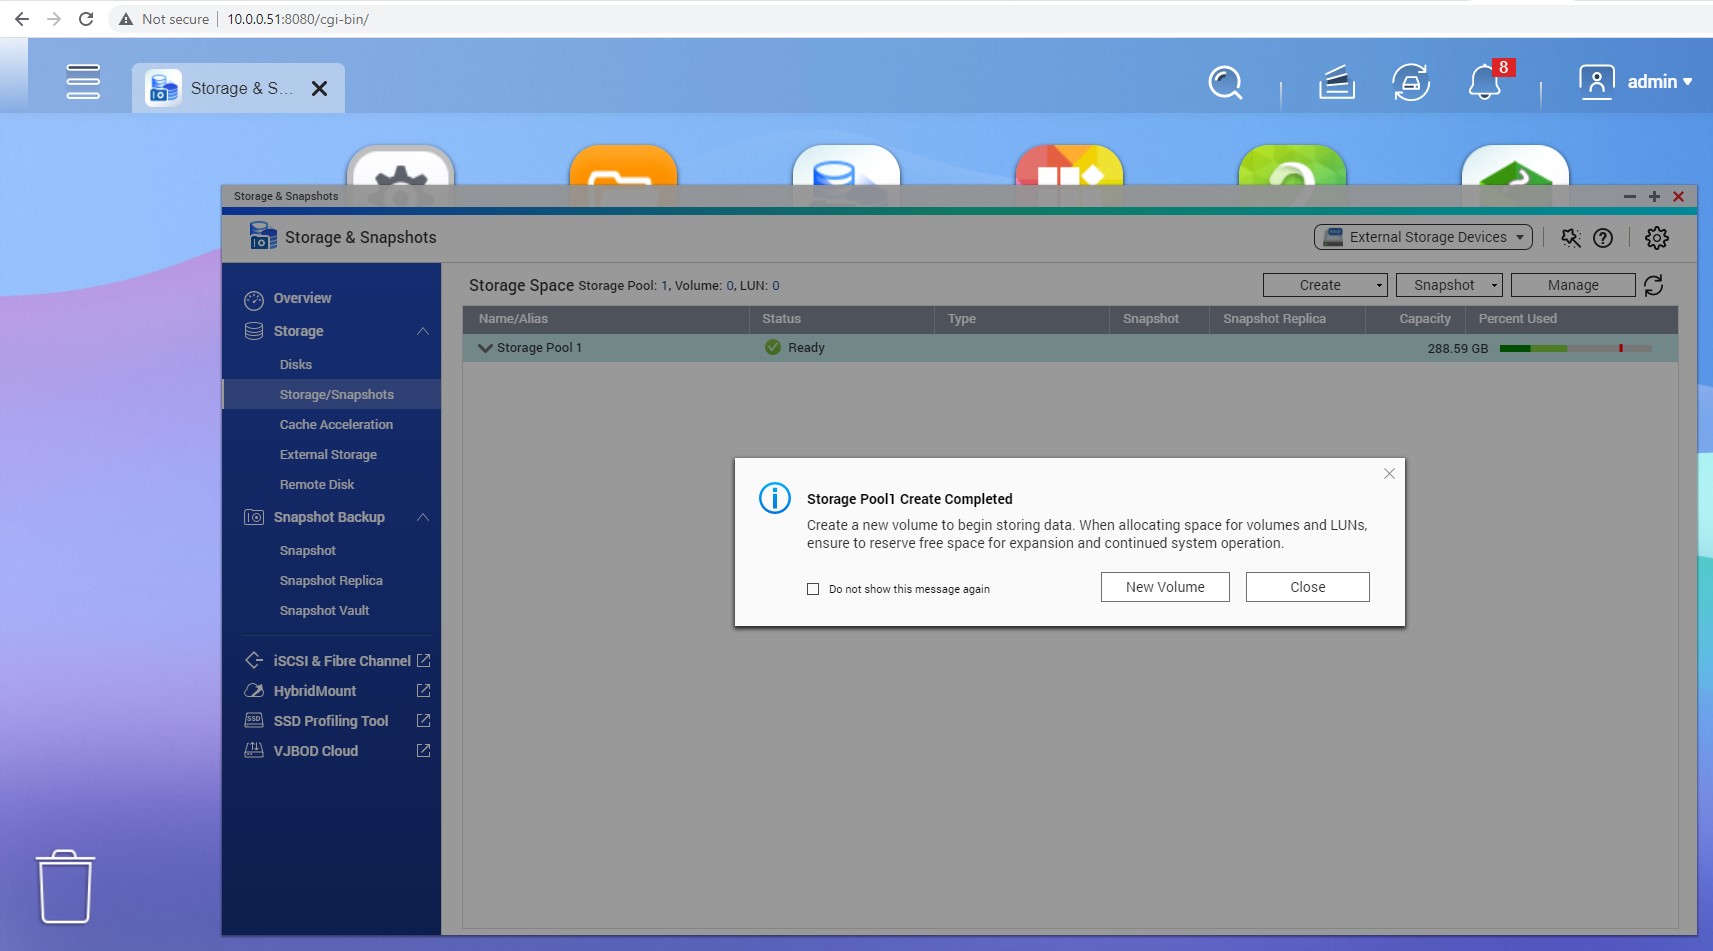
- Create Storage Pool (RAID):
- Storage & Snapshots.
- Storage (left menu).
- Storage/Snapshots.
- New Storage Pool (in the top right corner).
- Follow the instructions to set up the Storage Pool.
- In the final stages of setting up the Storage Pool, create a New Volume.
- In the File Station utility, you can find the new volume: QNAP. In it, there is a Shared Folder created by default called Public.
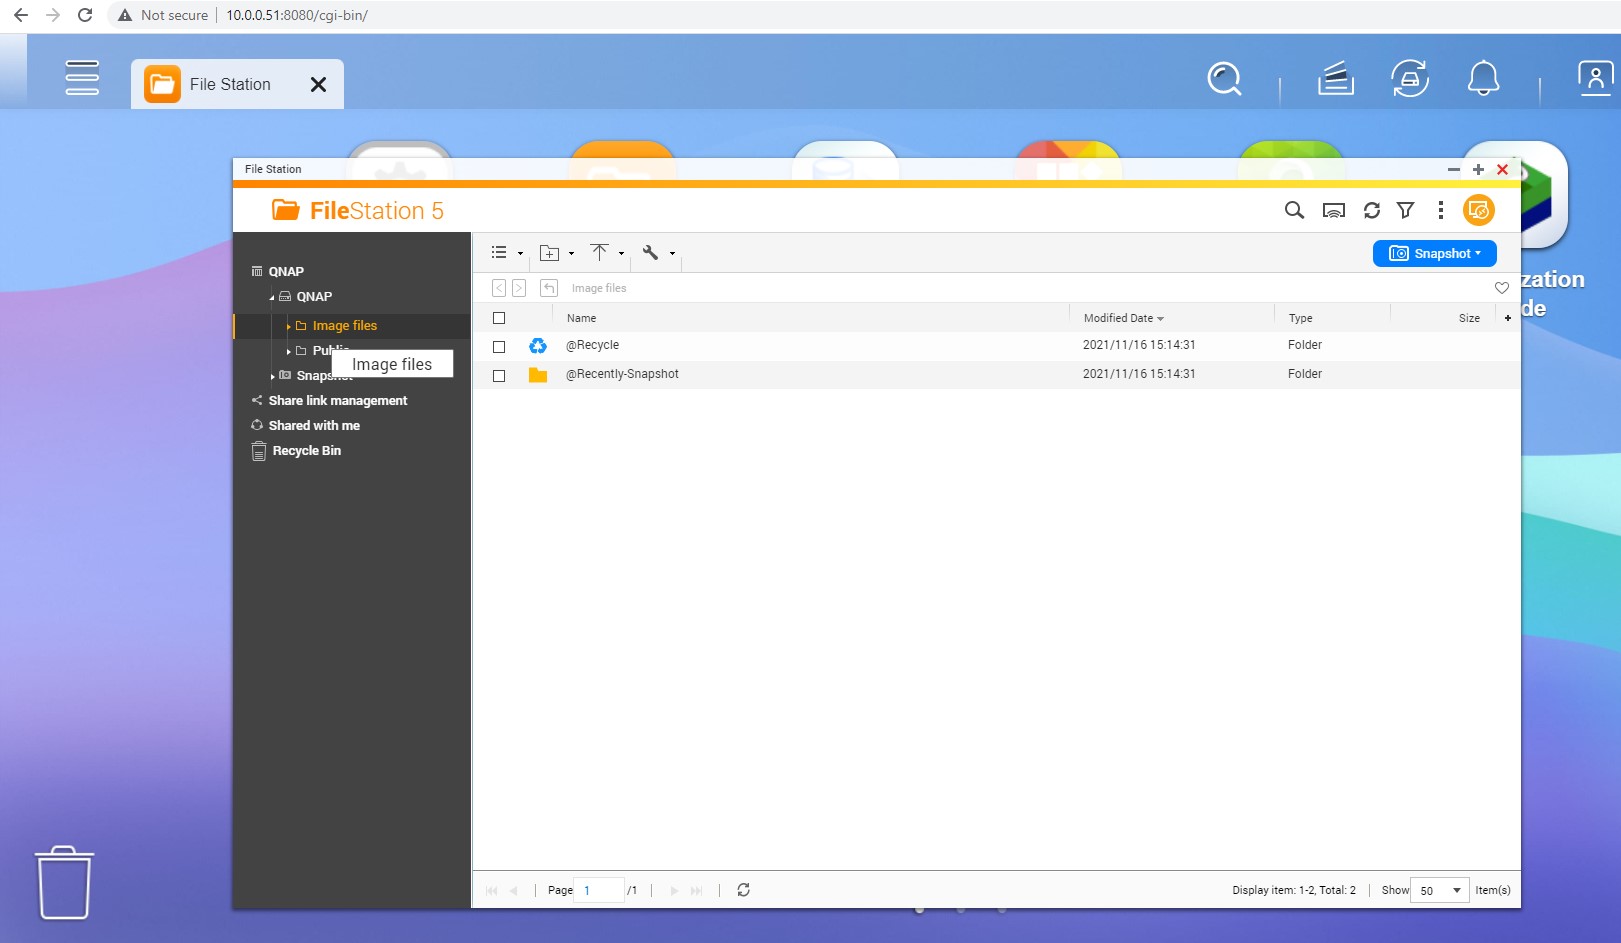
- For a Shared Folder with specific access or encoding settings, create a new one by clicking the icon showing a folder with a + and adjust the configuration.
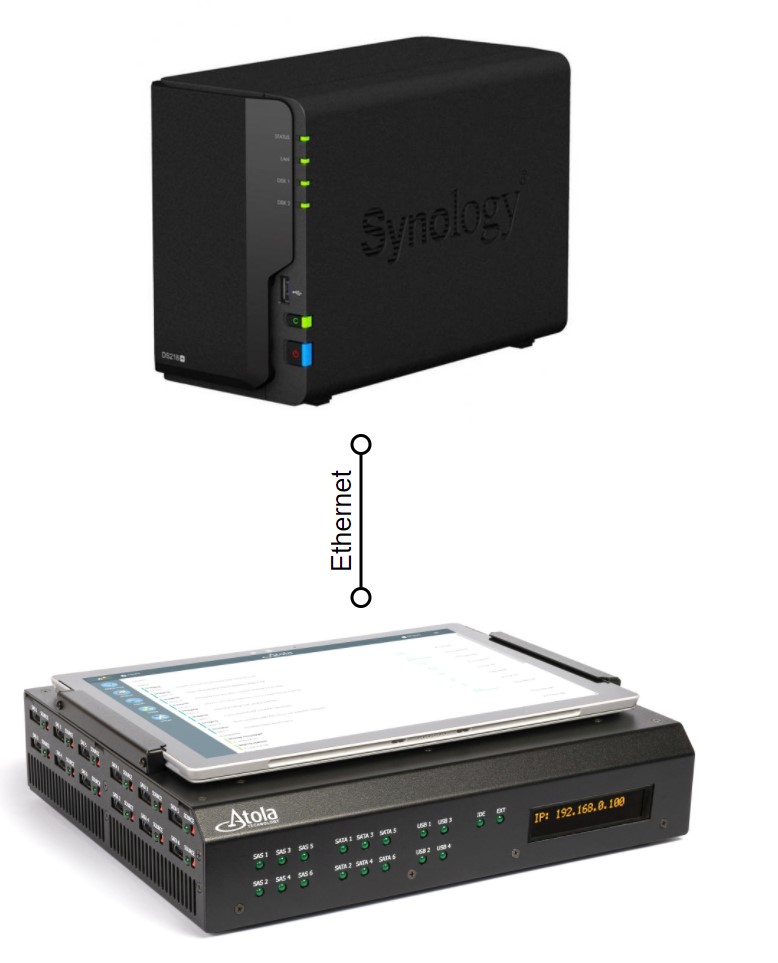
Direct connection with a Static IP:
Since we are not connecting TaskForce and Synology/QNAP NAS to a wider network, it is enough to set up the same Subnet Mask for the NAS and the TaskForce, and configure Static IP addresses that will indicate the same network.
TaskForce 2 configuration
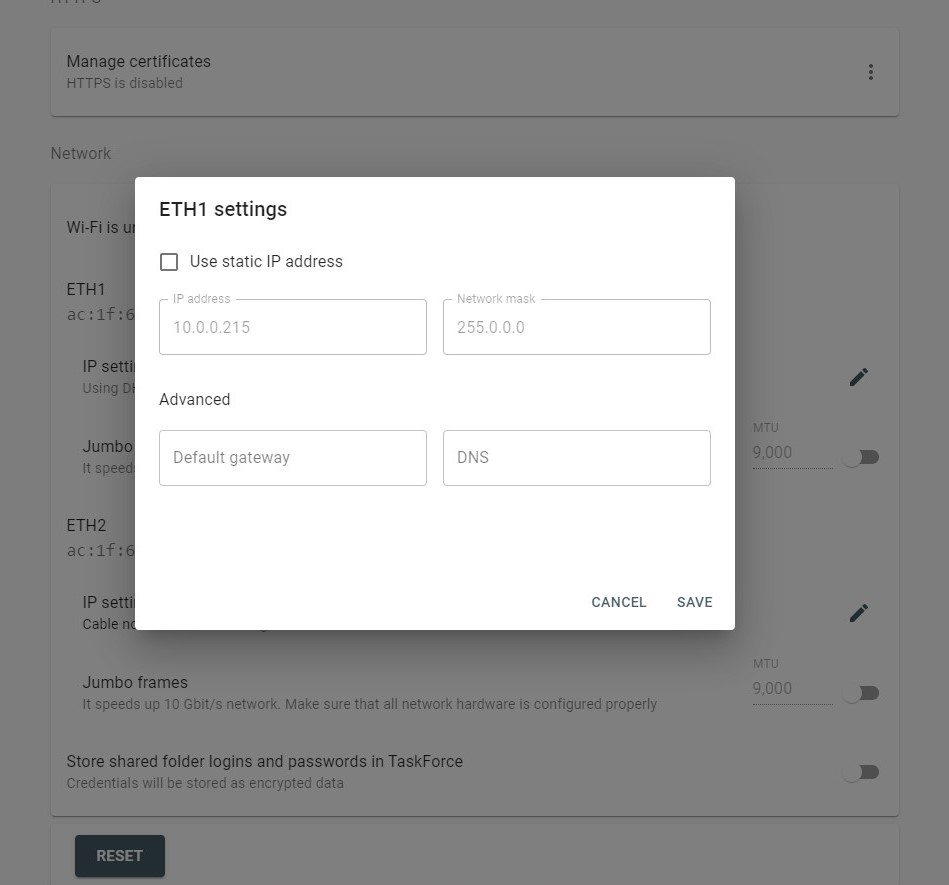
- Go to Menu > Settings > Network section.
- Select the Ethernet port through which Synology is connected (e.g. ETH1).
- Click IP settings’s Edit icon.
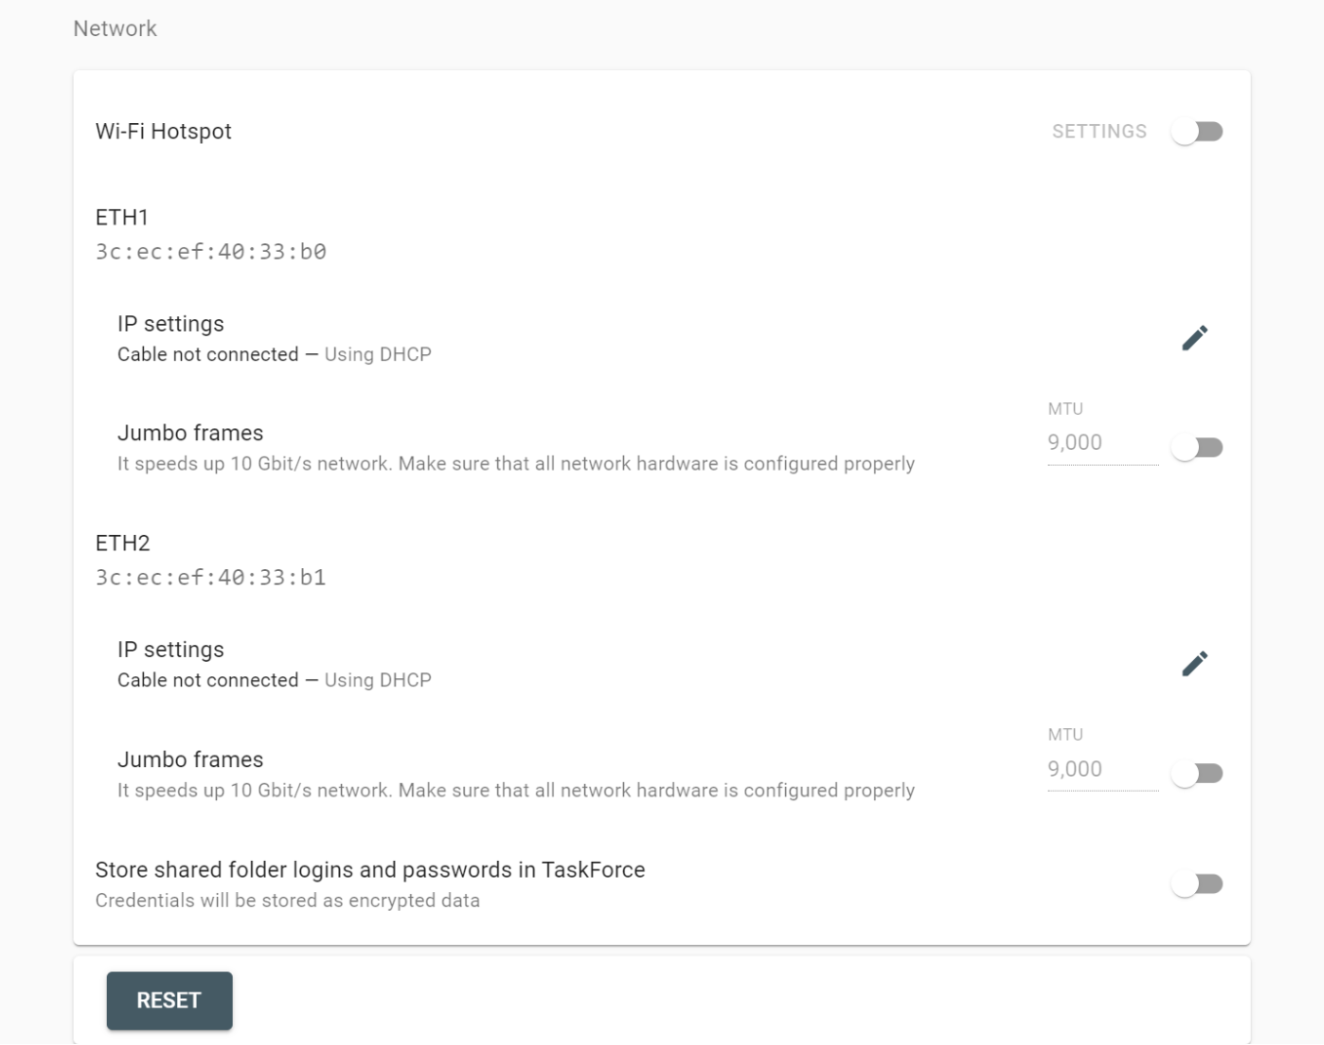
- In the ETH settings dialog, enter the address (e.g. 255.255.0.0) in the Subnet Mask field that is identical to that of Synology.
- Assign an IP address using the Subnet Mask: the first two bytes of TaskForce’s IP must be identical to those of IP Synology (e.g. 10.0.0.15). This will ensure that both TaskForce and Synology belong to the same network. (e.g. 10.0.0.8).
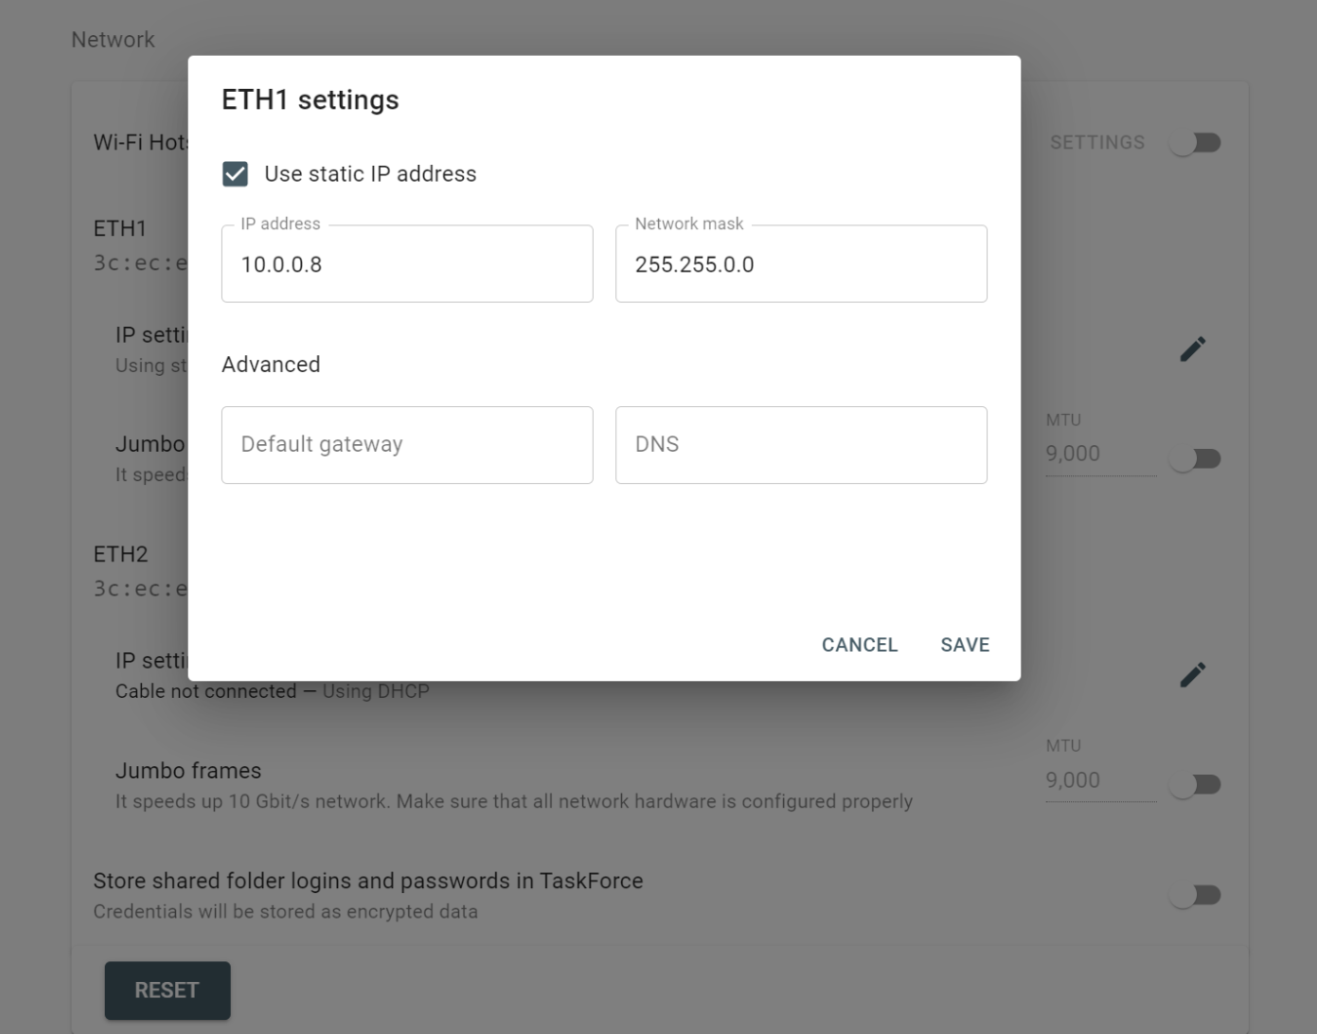
- Click Save.
Setting up a Static IP in Synology
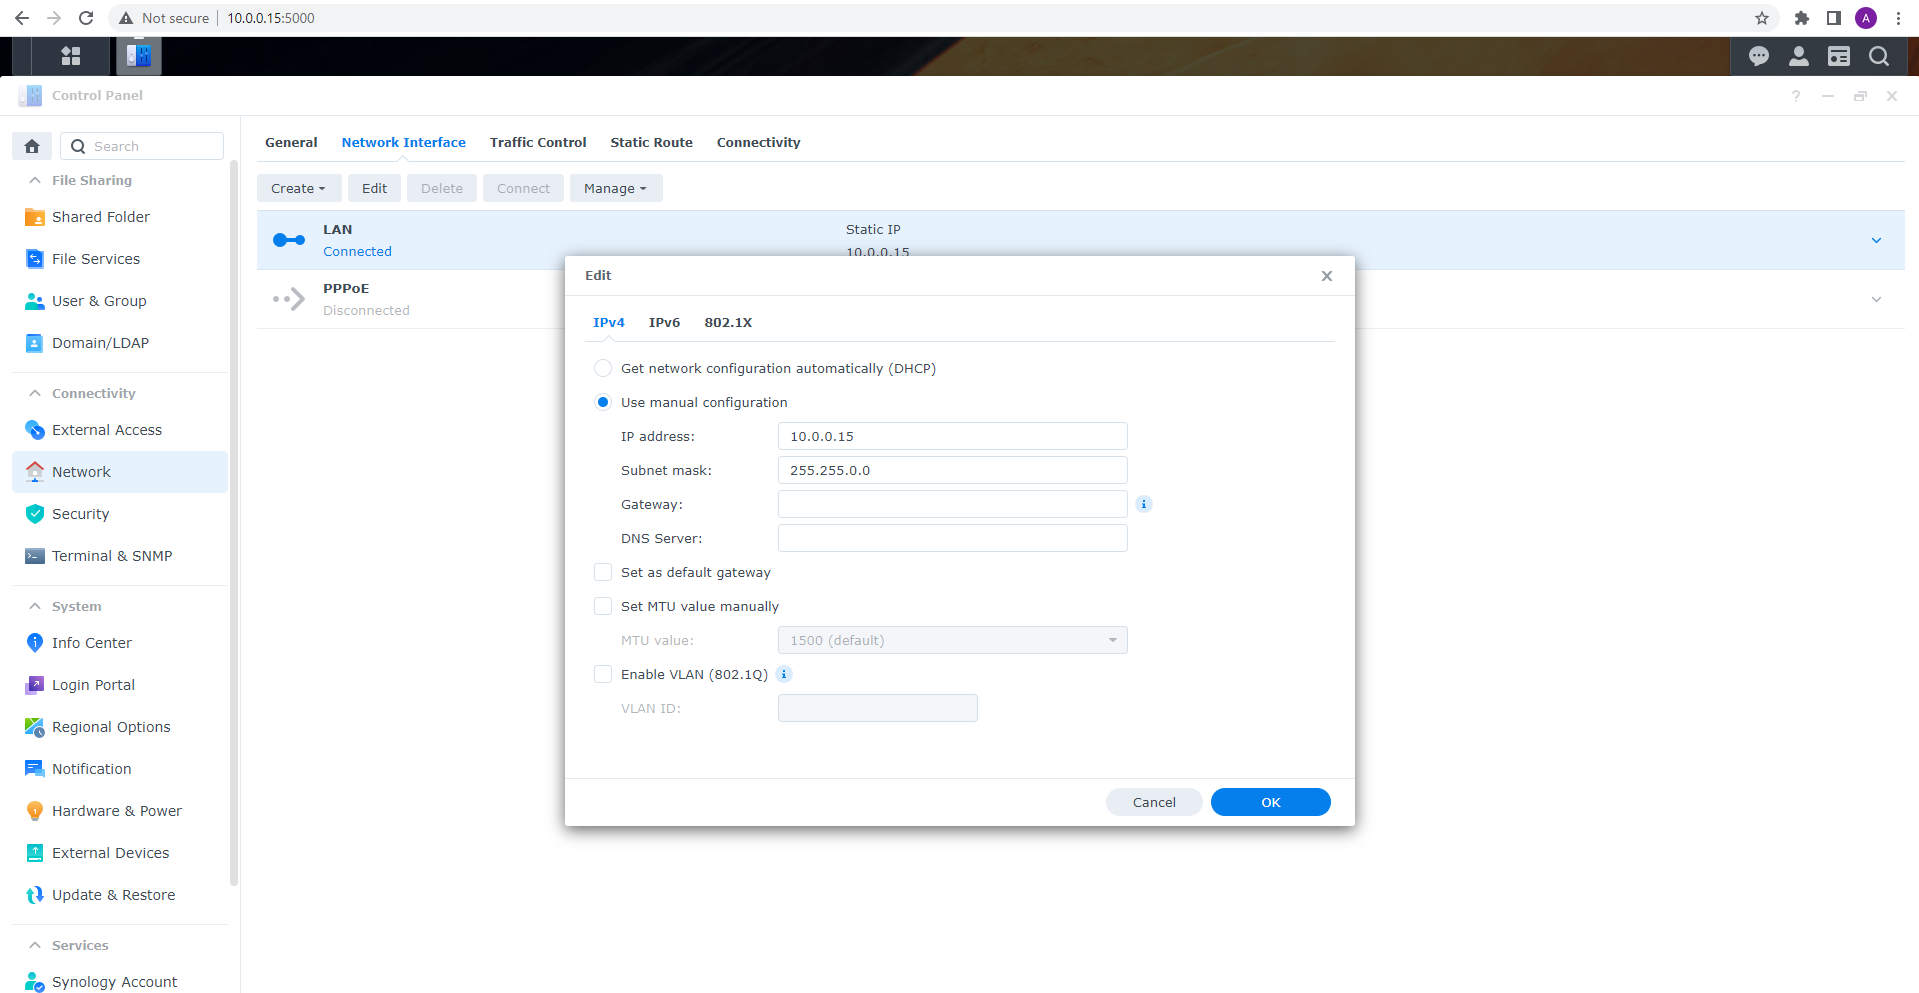
- Go to the Control panel.
- Open Network interface.
- Select the current connection to Synology.
- Click Edit.

- On IPv4 tab, select Use manual configuration.
- Assign Subnet Mask (e.g. 255.255.0.0), which is identical to that of TaskForce.
- Assign IP address (e.g.: 10.0.0.15).
- Click ОК.
- After Synology has changed the settings, it can be disconnected from the current network.
Setting up Static IP in QNAP
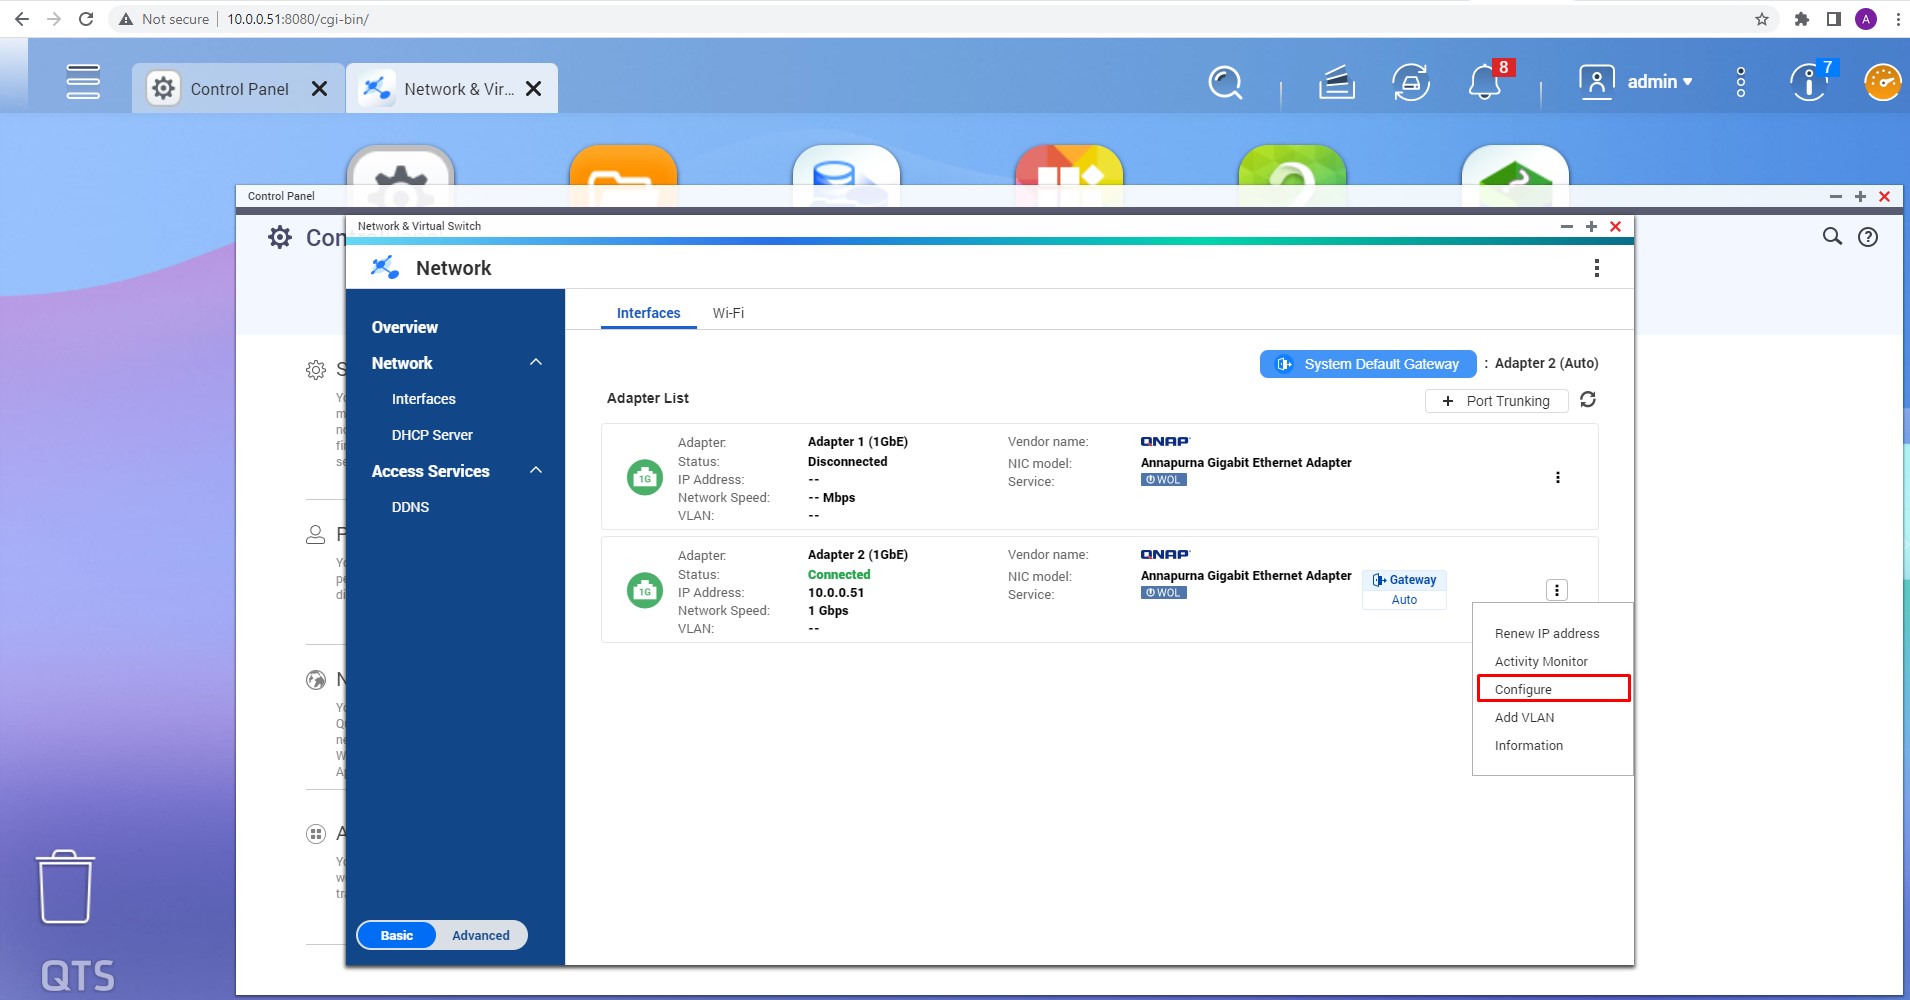
- In the Control panel, go to Network & Virtual Switch.
- Select the current connection to QNAP.
- Open the Menu.
- Click Configure.
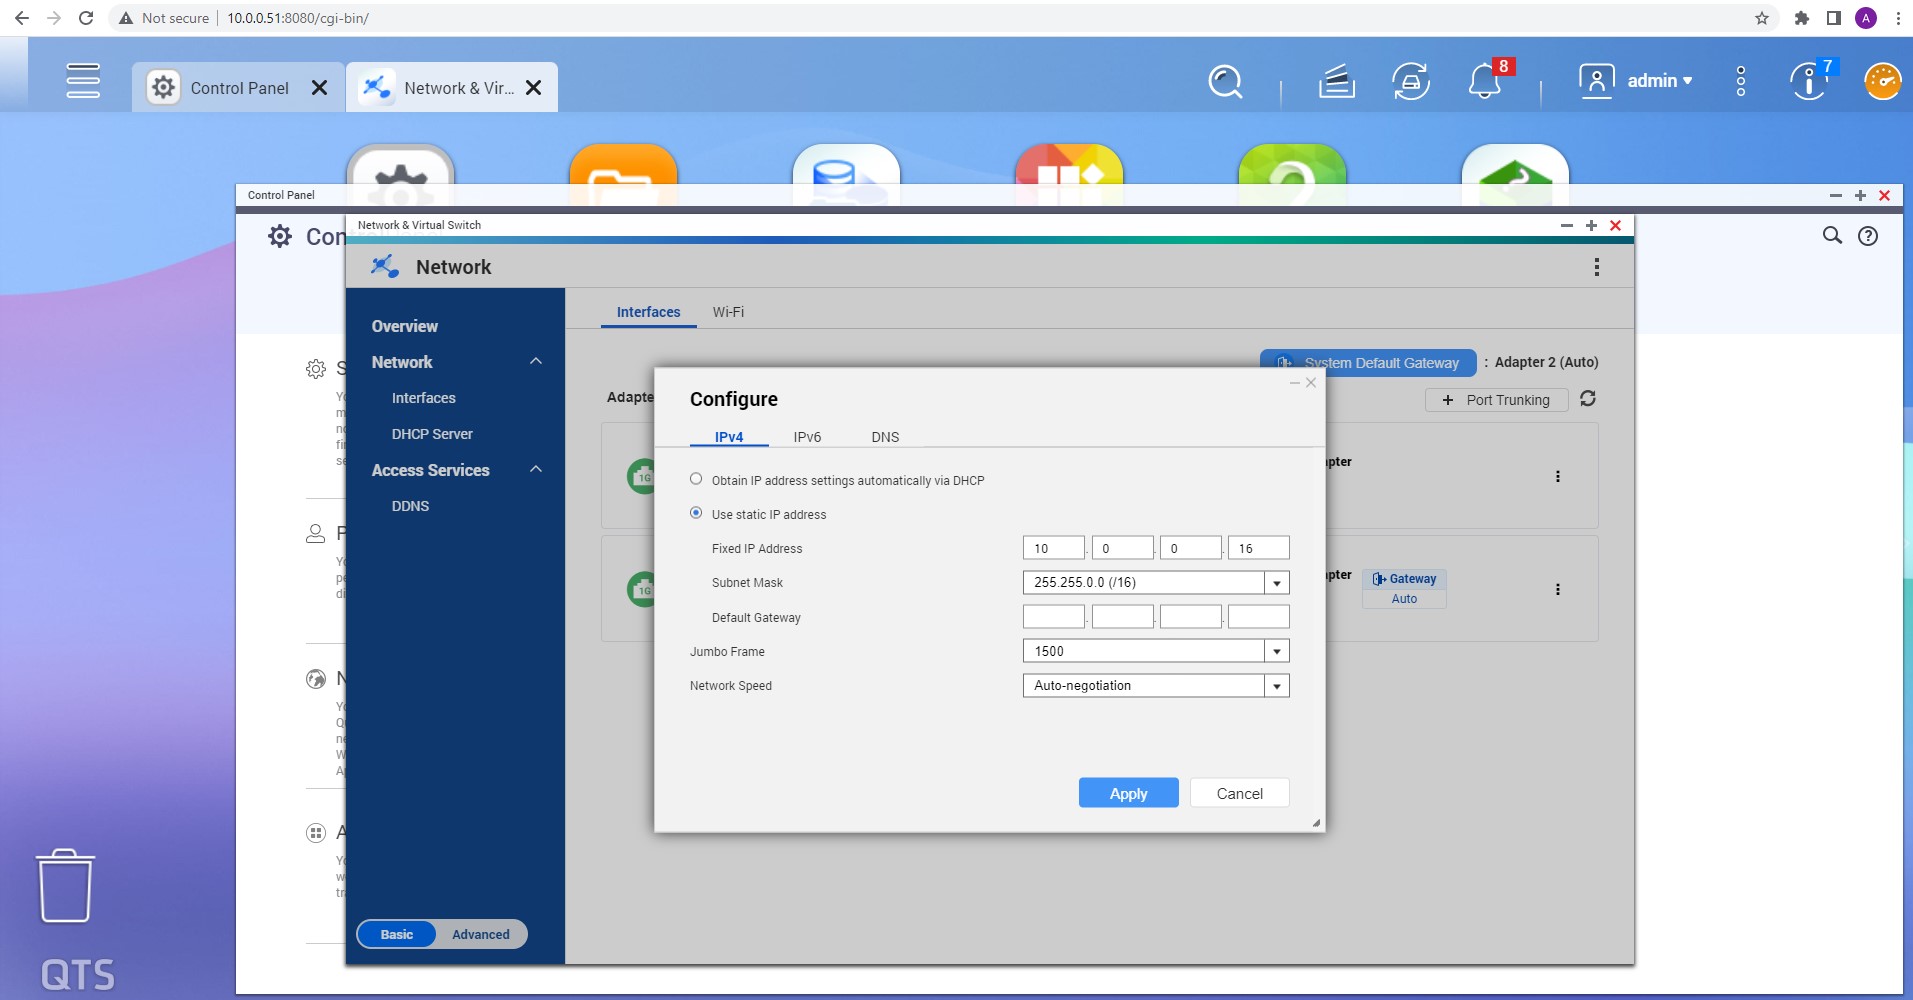
- On the IPv4 tab, select Use static IP address.
- Assign a Subnet Mask (e.g. 255.255.0.0), which is identical to that of TaskForce.
- Assign an IP address (e.g.: 10.0.0.16).
- Gateway field should be left blank because you are configuring a LAN and connecting to other networks is unnecessary.
- Jumbo Frame and Network speed should be left with the default values.
- Click Apply.
- After the QNAP has changed the settings you can disconnect it from the current network.
Connecting to the Shared Folder in TaskForce 2
- Connect the Synology/QNAP NAS to TaskForce’s ETH1 port.
- Click the Devices icon in the upper right corner. Go to the File section and click Select File.
- Click Connect.
- Enter the Server name, Username, Password.
If you do not remember the server name, look it up:
Synology > Control Panel > Info Center > Server name
QNAP > Control Panel > General Setting > Server name - Click Connect.

- TaskForce 2 has connected to Synology and you can open the previously created Shared Folder.
Setting up a LAN using router with DHCP (Dynamic IP)

Setting up router
- Connect the router directly to your PC or laptop via the Ethernet port.
- Log in to the web configurator.
- Turn on the DHCP server in the local network settings.
- Apply changes.
Setting up DHCP in TaskForce 2
- Open Menu > Settings, go to the Network section.
- Select the Ethernet port to which Synology will be connected. (e.g. ETH1).
- Click the Edit icon to adjust the IP settings.
- Clear the Use static IP address checkbox.
- Click Save.
Setting up DHCP in Synology
- Go to Control panel > Network > Network interface.
- Select the current connection to Synology and click Edit.
- On the IPv4 tab, select the Get network configuration automatically (DHCP) option.

Setting up DHCP in QNAP
- In the Control panel, go to the Network & Virtual Switch.
- Select the current connection to QNAP, open the Menu and select Configure.
- On the IPv4 tab, select Obtain IP address settings automatically via DHCP.

Connecting the LAN devices
After all the reconfigurations, connect TaskForce 2, NAS and your PC or laptop to the router using Ethernet ports and connect to the Shared Folder as described above.