Connecting drives & starting Atola TaskForce 2
This page provides information about the startup procedure of Atola TaskForce 2, to ensure the safe and effective operation of the unit.
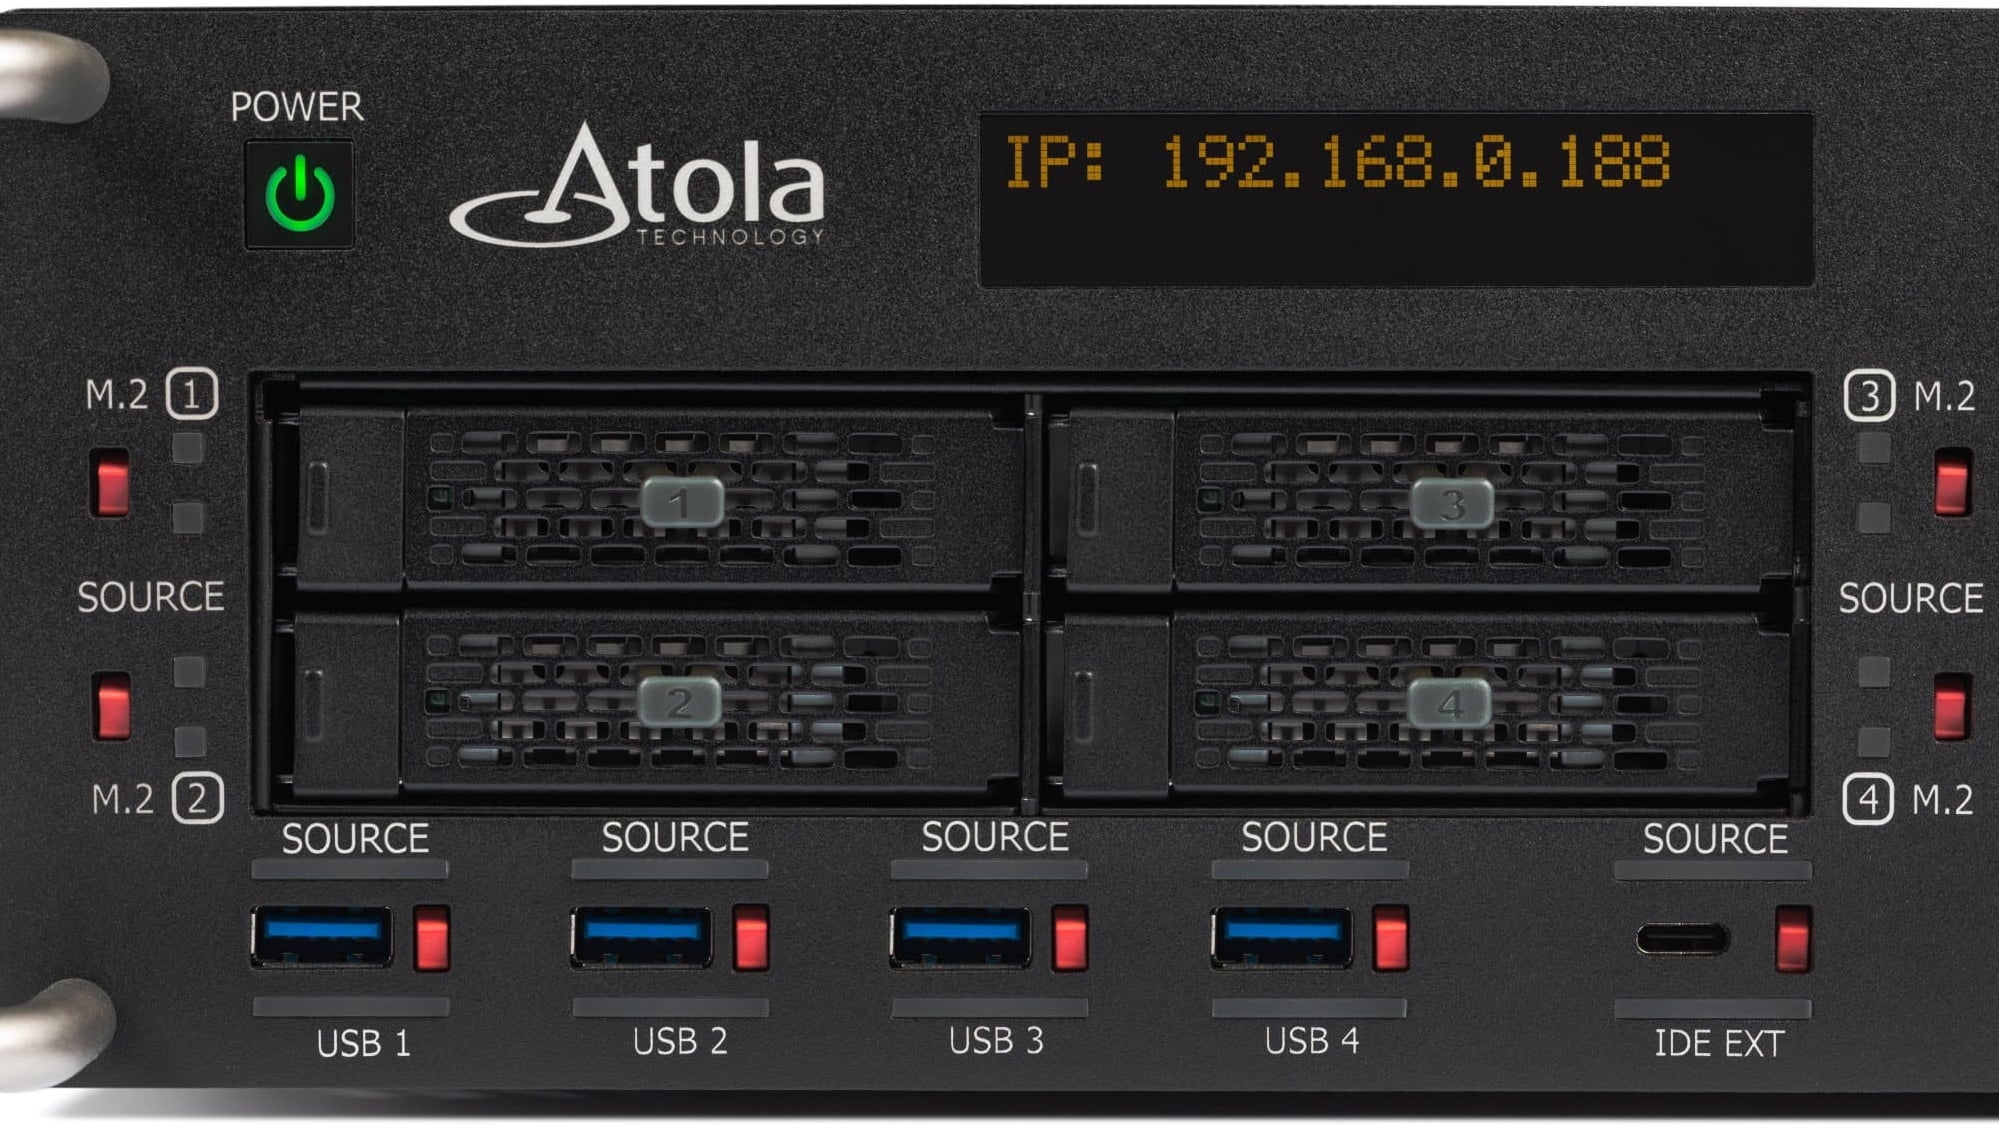
Powering on TaskForce
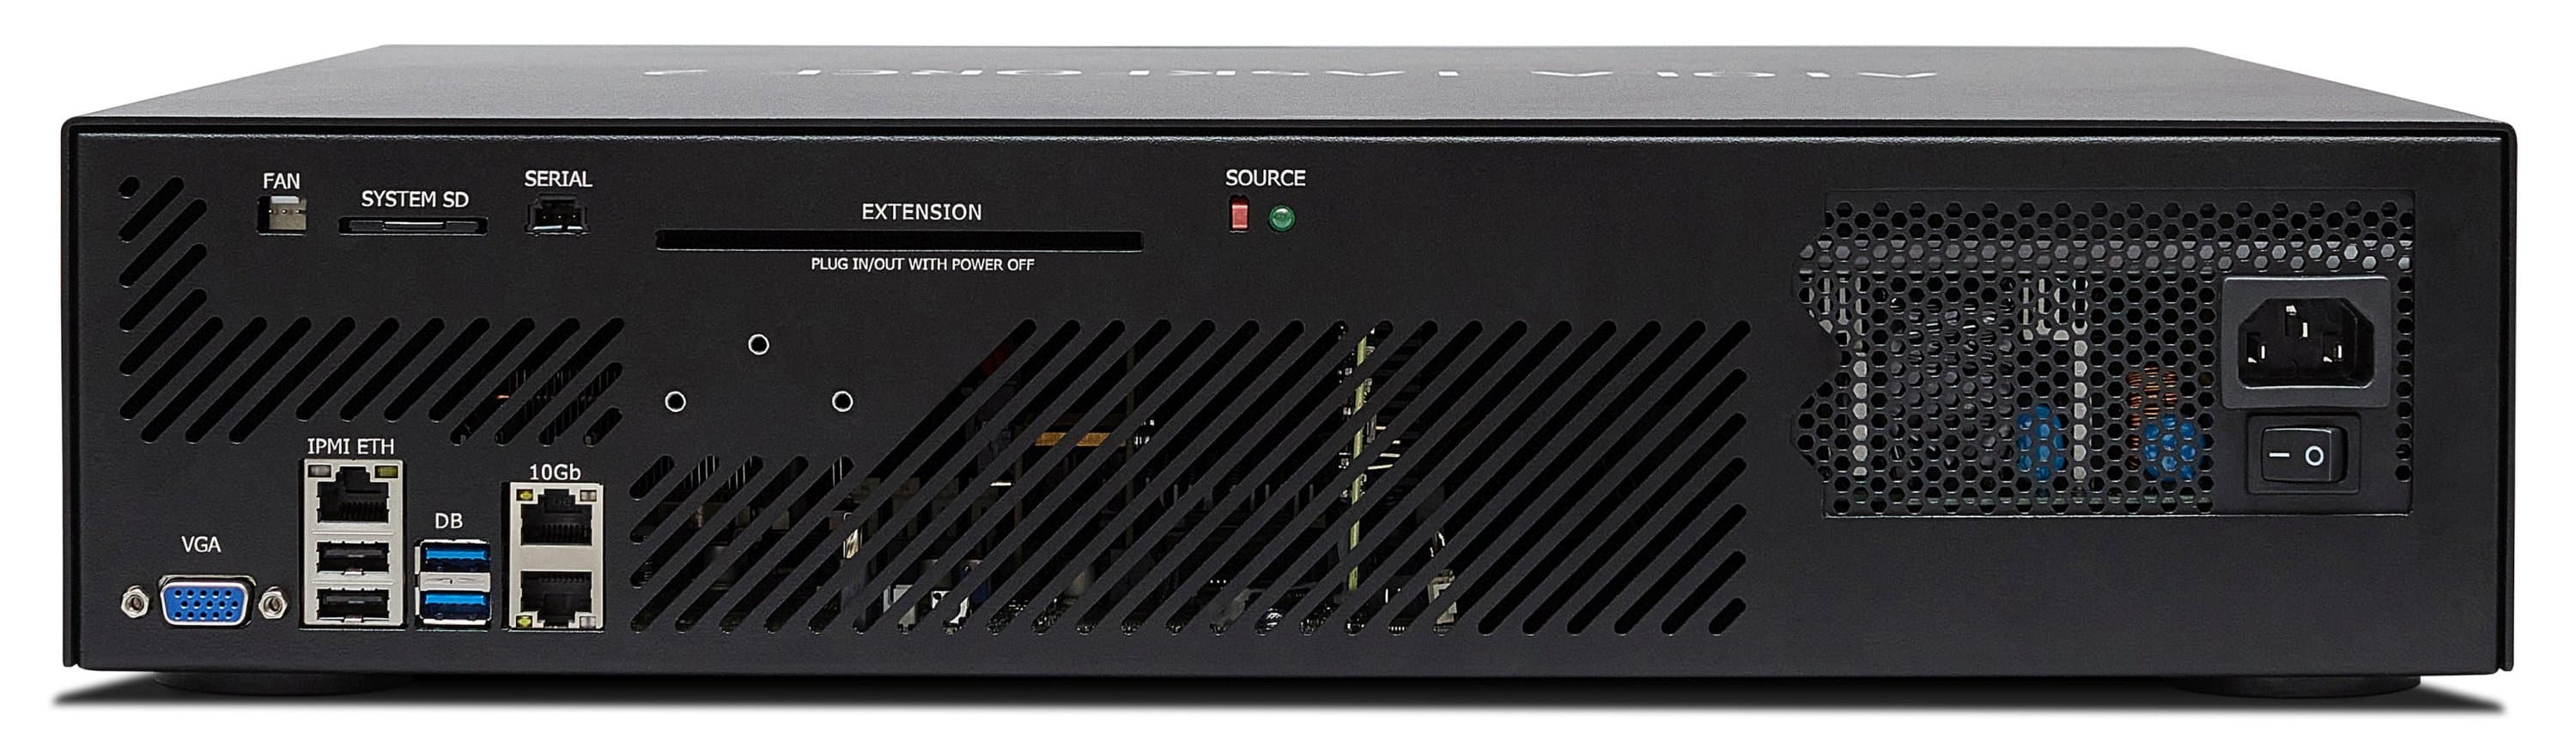
The power button is located on the front panel of the unit. To start TaskForce, press the power button.
Booting
The booting process takes up to 3 minutes.
Once booting is completed, the IP screen on the front panel will display either the "Kiosk mode" message or an IP address if the unit is connected to the local network using an Ethernet cable. At this point, the unit is ready for operation.
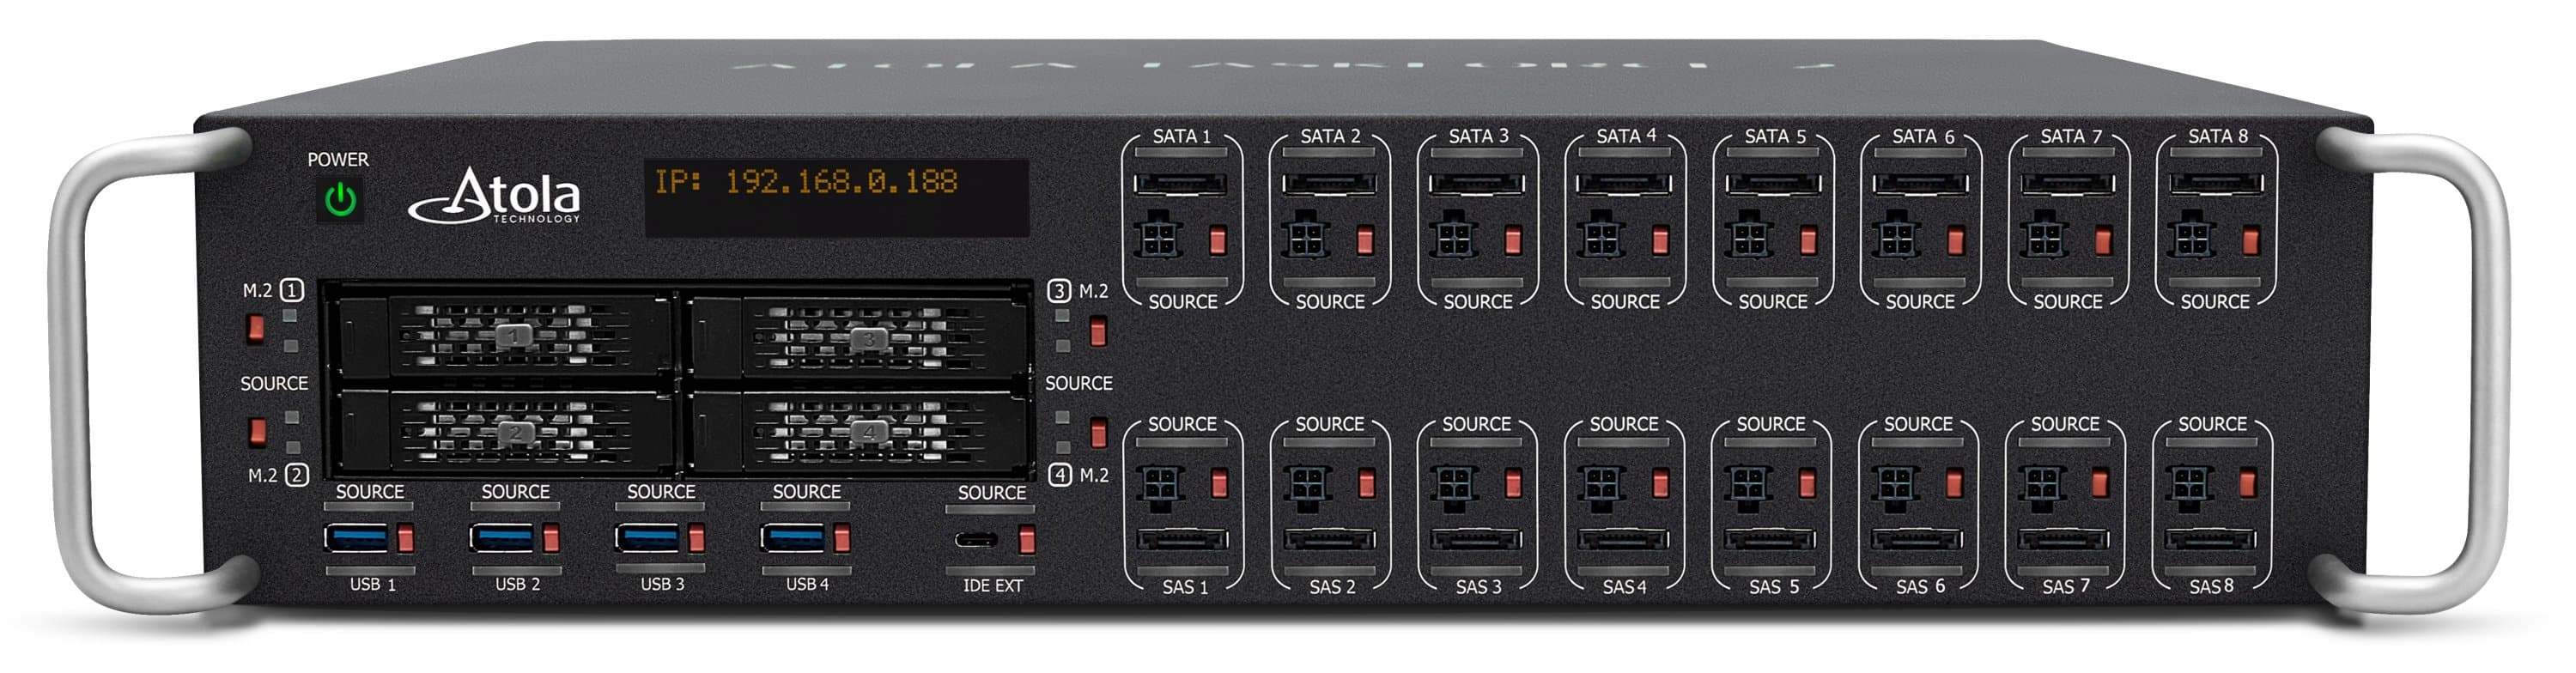
Connecting drives
TaskForce supports SAS, SATA, USB, NVMe M.2/U.2 PCIe, and IDE drives via its 25 ports, as well as other storage devices via Thunderbolt, Apple PCIe, and M.2 SSD extension modules.
To ensure both TaskForce and the devices connected to it are used properly and safely, read the instructions below.
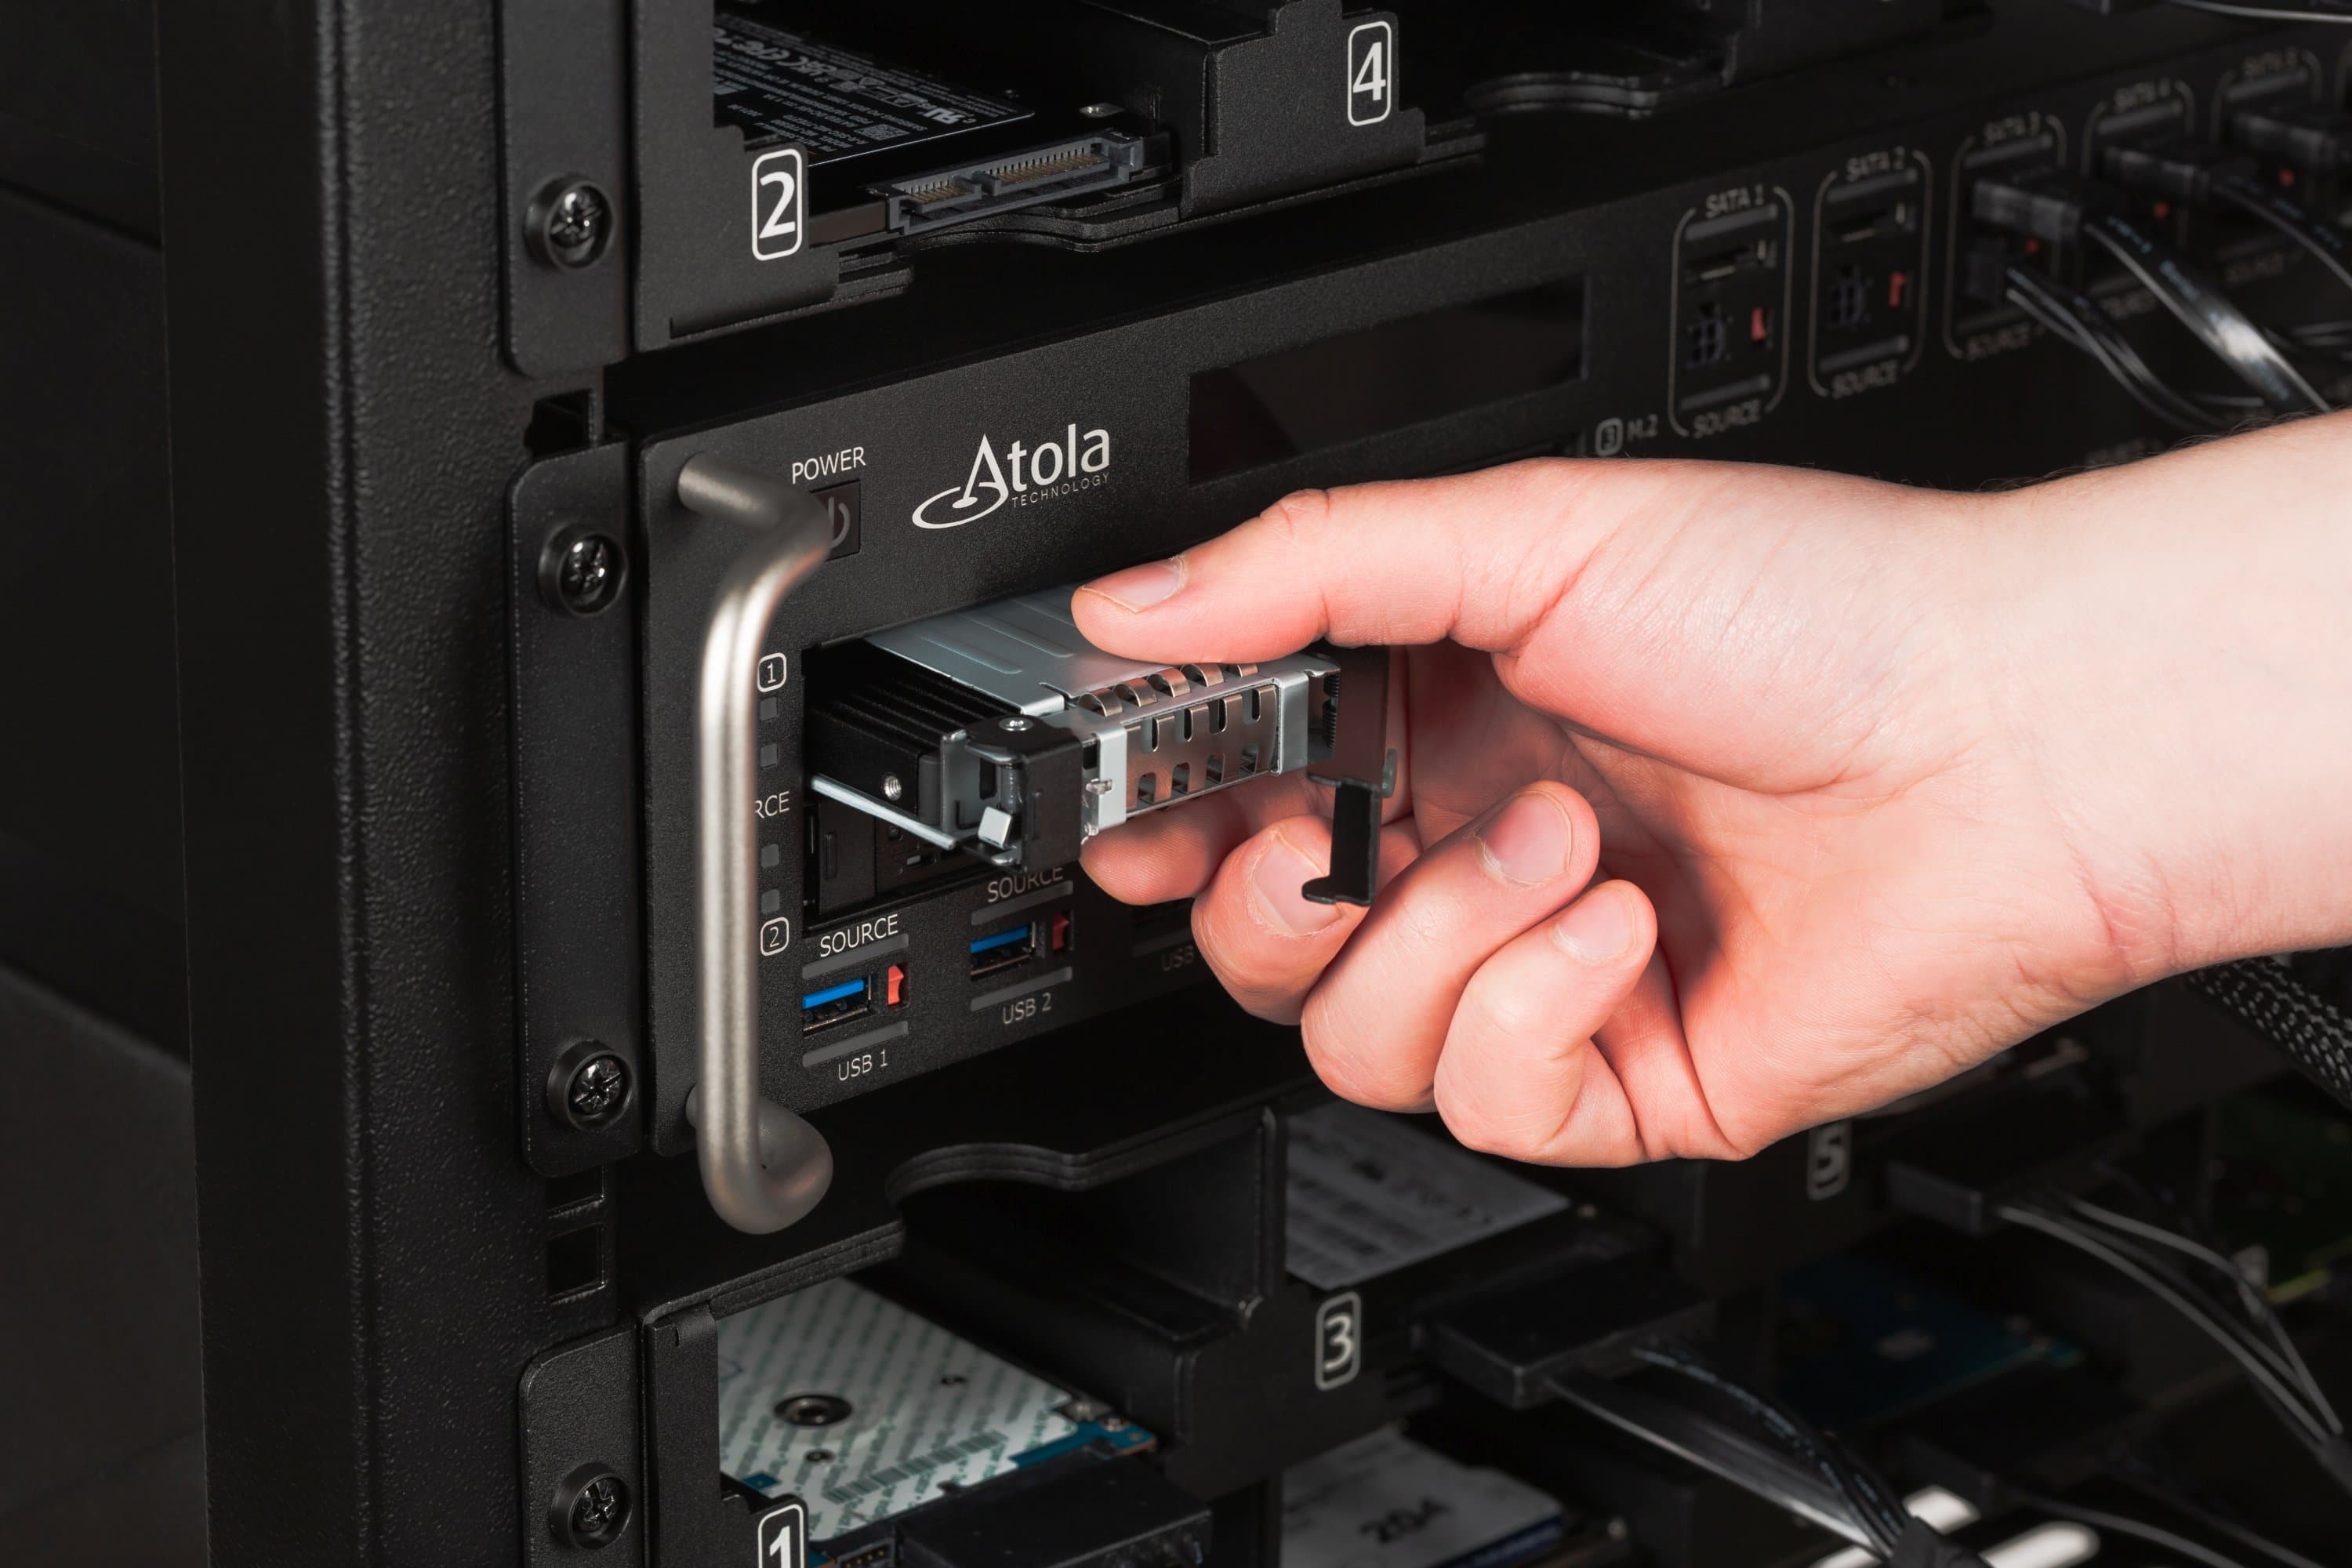
Connecting M.2 devices
M.2 ports support hotplug to allow for drives to be regularly swapped, without restarting the whole system. To connect an M.2 drive to TaskForce 2, do the following:
- Push the tray ejection button located on the left side of an M.2 tray.
- Pull the M.2 tray out from its bay.
- Remove the 4 screws at the bottom side of the M.2 tray with a PH1 screwdriver.
- Slide the black Icy Dock adapter to the side to remove it out of the tray.
- Snap off the heatsink of the Icy Dock adapter by pushing it up from the sides.
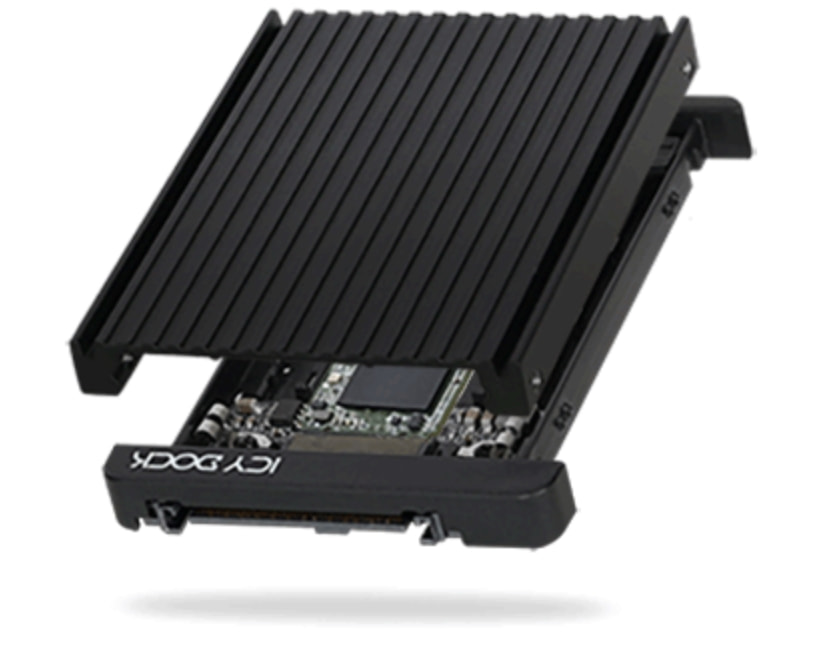
- An adjustable M.2 locker slides to accommodate all the standard M.2 PCIe NVMe SSD drive lengths, including 2230 (30mm), 2242 (42mm), 2260 (60mm), and 2280 (80mm). Adjust the M.2 locker to the drive length.
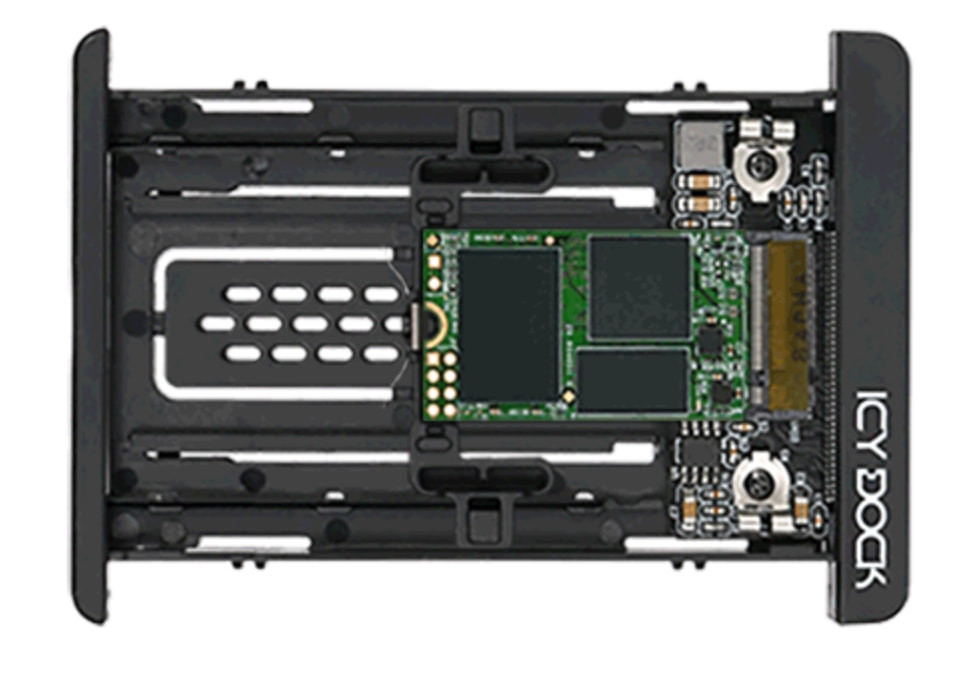
- Insert the M.2 drive into the M.2 connector and then slightly press the drive down. A spring latch locks the drive with a “click” sound. To release the spring latch, slide the locker open by moving the two plastic levers situated on both sides of the drive.

- Once the drive is plugged into a connector and secured with a latch, snap the heat sink lid on.
- Slide the Icy Dock adapter back into the M.2 tray.
- Use at least one screw to secure the adapter onto the tray.
- Important: Make sure that the U.2 connector of the adapter faces the bay and the heatsink with the “Icy Dock” logo faces up.
- Insert the M.2 tray back into the M.2 bay, make sure it is pushed inside all the way, and then close the lock of the tray.
Connecting extensions
Before connecting an extension module, make sure TaskForce is powered off. Plug the extension module into the extension slot located on the back panel of TaskForce and power the unit on.
Hardware write protection
Each port is equipped with an individual Source switch enabling hardware write protection on the port. To make sure data on an evidence drive is not overwritten, check if the port is in the source before connecting the drive.
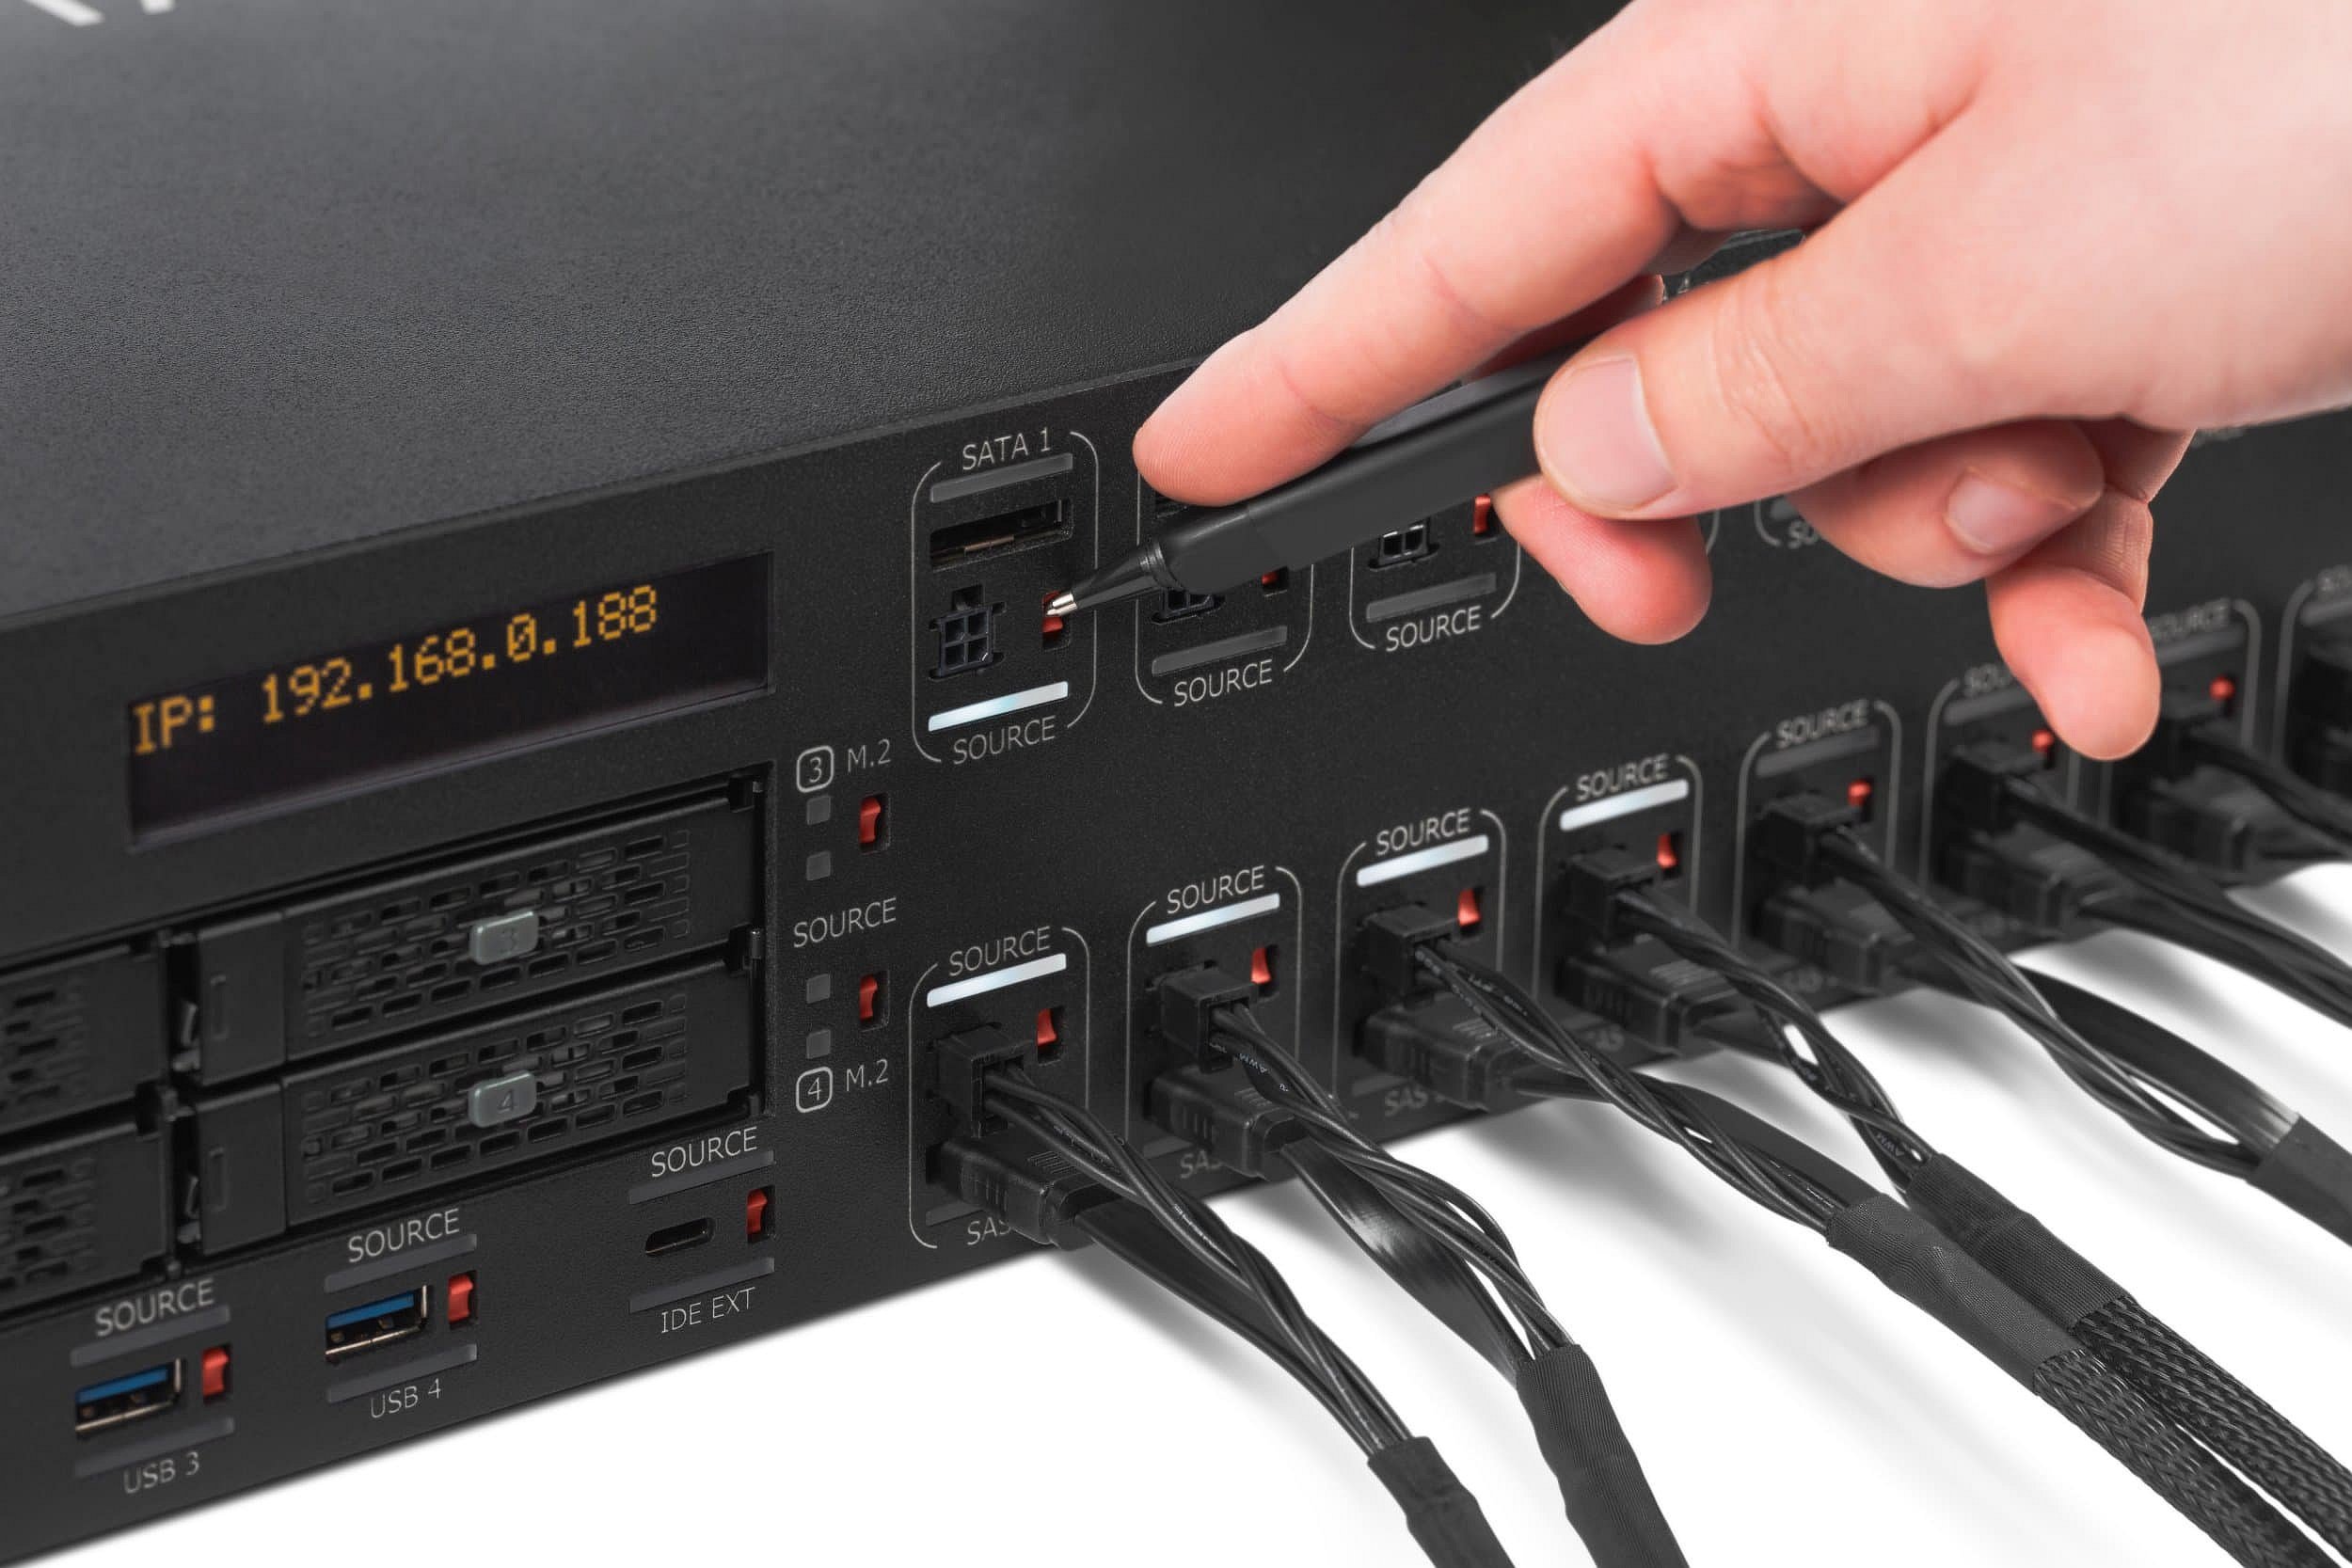
Connecting SATA & SAS drives
TaskForce has 8 SATA and 8 SATA/SAS ports. When a drive is connected to TaskForce, the port is powered off by default, therefore the device is not immediately identified.
To identify the device, click the Devices button in the top panel of the TaskForce interface, and TaskForce will start drive identification process on all ports. The system ensures a sustainable overall power consumption in situations when many drives are plugged in. That's why drives are powered not all at once but sequentially, in a matter of a few seconds.
Powering off TaskForce
To power off the TaskForce hardware unit:
- In TaskForce window, stop all active tasks.
- Press the power button on the front panel of the unit for 5 seconds.