Main window and controls
This page provides information on basic Atola Insight Forensic controls:
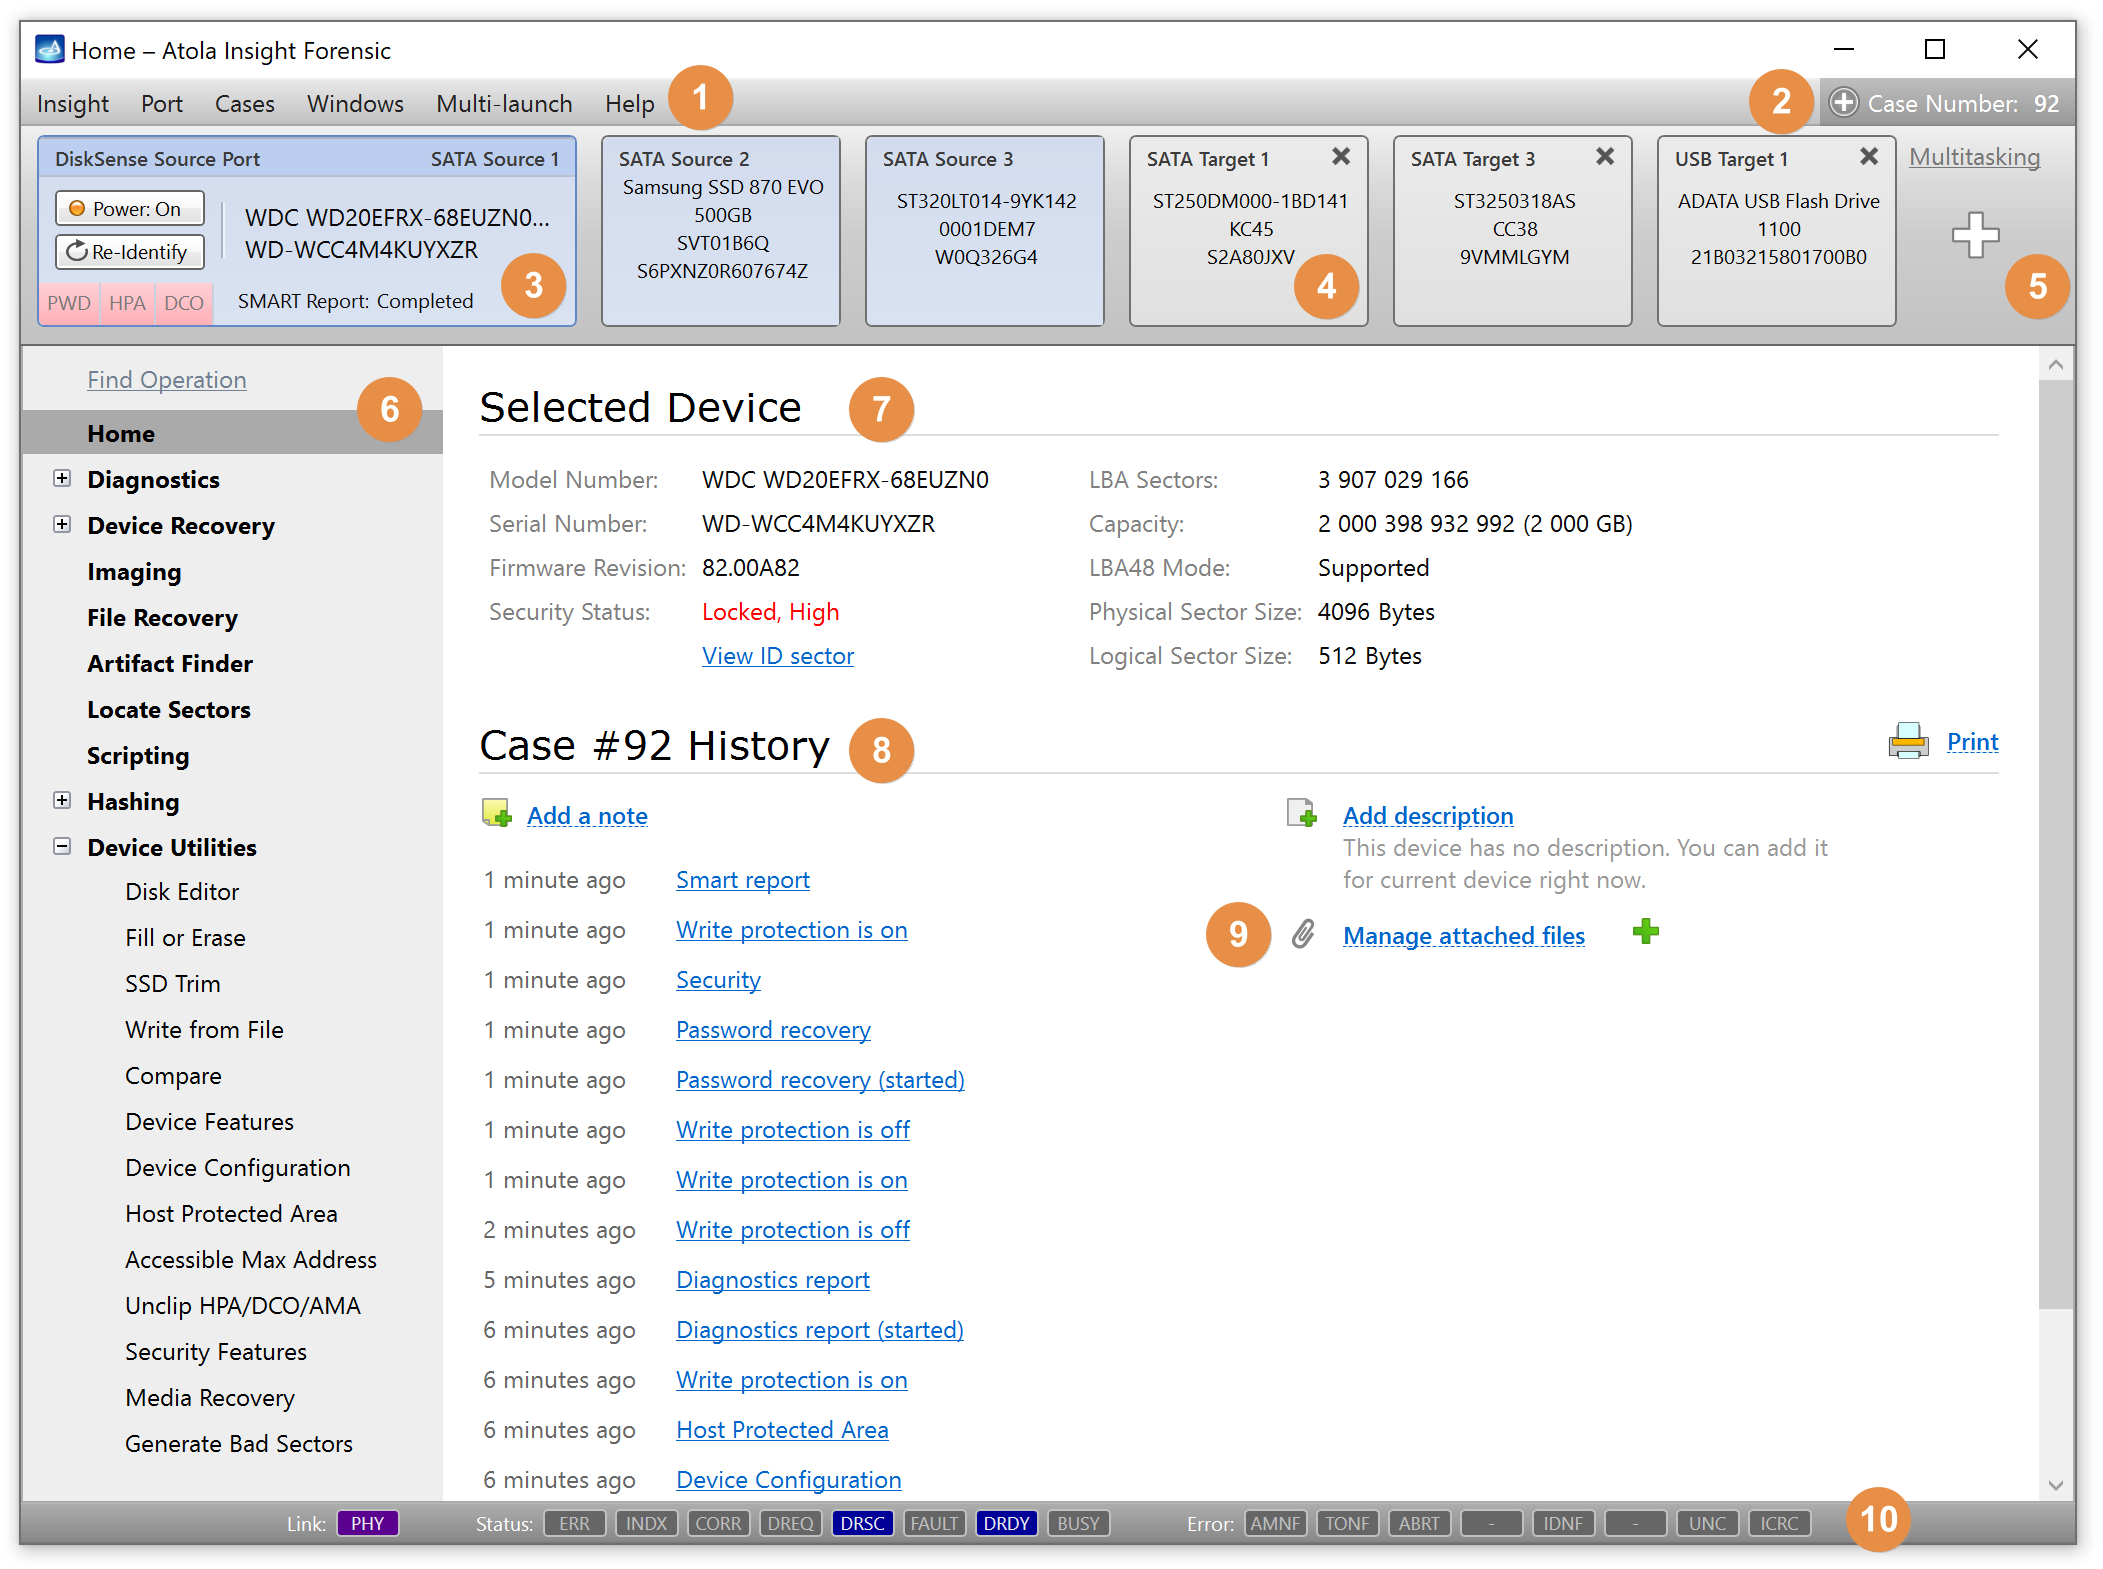
1. Menu bar

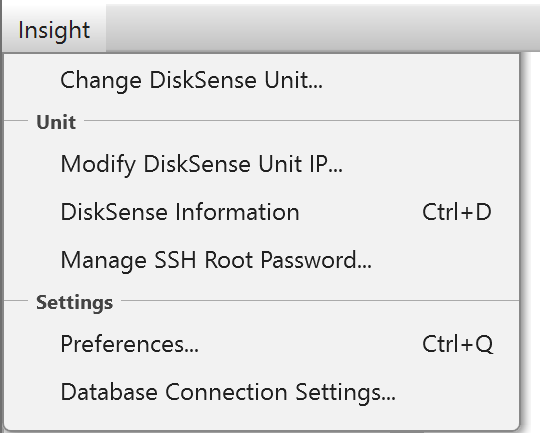
Insight menu
- Change DiskSense Unit: Lets you switch between the different DiskSense hardware units connected to your local network or PC.
- Modify DiscSense Unit IP: Configures a network address and hostname of the DiskSense hardware unit.
- DiskSense Information: Shows unit's serial number, firmware version, IP and MAC address, as well as network speed. Keyboard shortcut: Ctrl+D.
- Manage SSH Root Password: Lets you remotely access the device's operating system for additional maintenance.
- Preferences: Configures system settings, such as work folder path, system language, case management and file recovery settings etc. Keyboard shortcut: Ctrl+Q.
- Database Connection Settings: Sets up server path and database name, authentication method and credentials, as well as the path for backups.
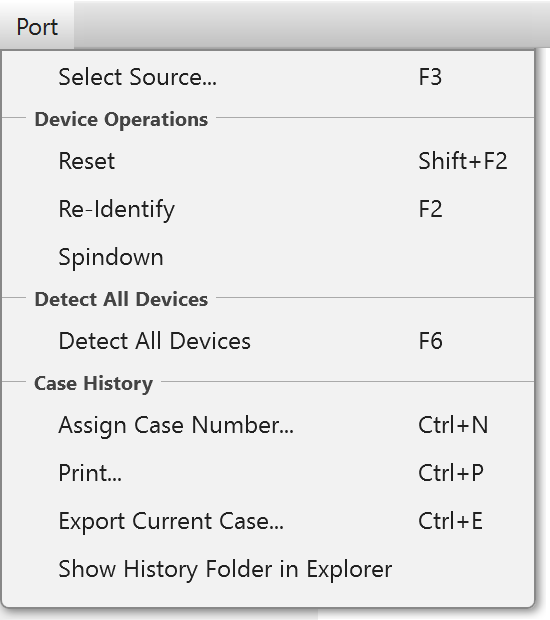
Port menu
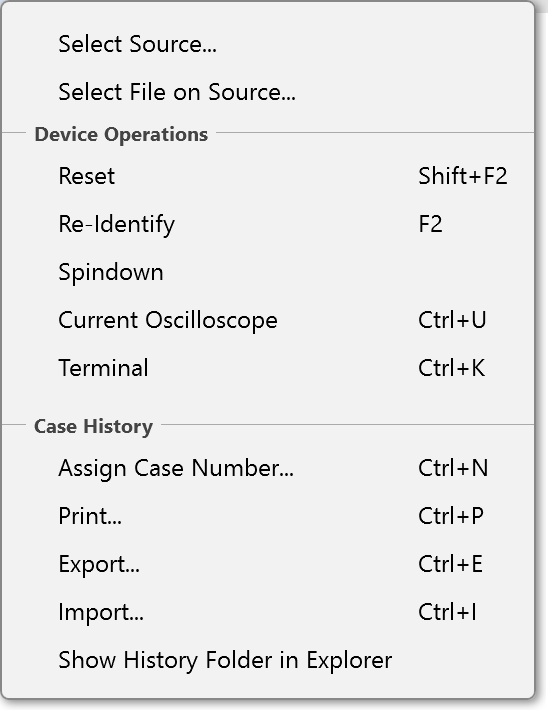
- Select Source: Allows choosing another source device (SATA/IDE/USB). For details, see Working with SATA, USB, IDE drives. Keyboard shortcut: F3.
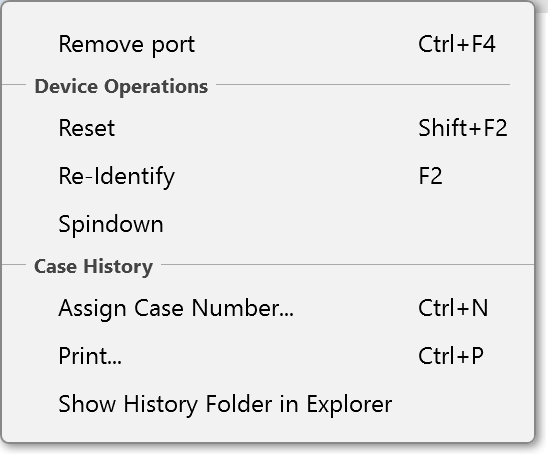
- Reset: Resets a hard drive's interface. Keyboard shortcut: Shift+F2.
- Re-Identify: Should be used after you replace the drive. Keyboard shortcut: F2.
- Spindown: Sends the ‘Spindown Immediate’ ATA command to the drive.
- Detect All Devices: Sends identification commands to all devices connected to the DiskSense 2 hardware unit and displays all detected devices on the Device panel. Keyboard shortcut: F6.
- Assign Case Number: Allows assigning a specific number to the open case. Keyboard shortcut: Ctrl+N.
- Print: Prints or saves to a file the whole case history. For details, see Printing reports in a case. Keyboard shortcut: Ctrl+P.
- Export Current Case: Saves the entire case history into a single file. Keyboard shortcut: Ctrl+E.
- Show History Folder in Explorer: Opens the file folder of the current case in Windows Explorer.
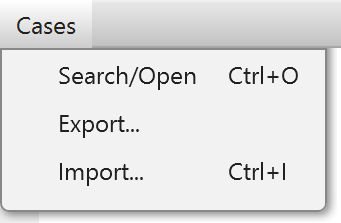
Cases menu
- Search/Open: Lets you find a case according to specific criteria and open it. For details, see Finding and opening a case. Keyboard shortcut: Ctrl+O.
- Export: Brings the window with all available cases, in which you can select cases and export them to a defined folder. For guidance, see Exporting and importing cases.
- Import: Imports a case from another computer into the Insight Forensic database. For guidance, see Exporting and importing cases. Keyboard shortcut: Ctrl+I.
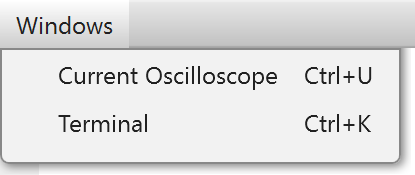
Windows menu
- Current Oscilloscope: Helps to keep track of hard drive power consumption levels and can be especially useful for damaged hard drive diagnostics. Keyboard shortcut: Ctrl+U.
- Terminal: Helps in accessing the firmware area of certain hard drive models for manual firmware recovery. Keyboard shortcut: Ctrl+K.
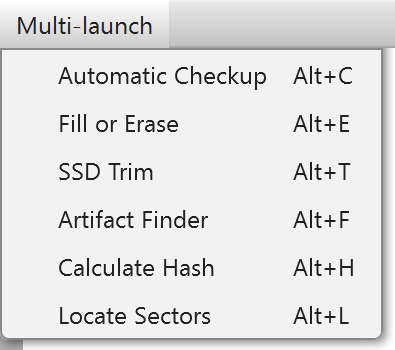
Multi-launch menu
This menu lets you quickly launch the following operations on multiple devices at once:
- Automatic Checkup (drive diagnostics)
- Fill or Erase
- SSD Trim
- Artifact Finder
- Calculate Hash
- Locate Sectors
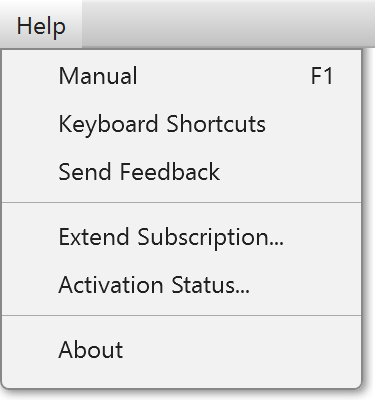
Help menu
- Manual: Opens a single-page user manual for Insight Forensic in your web browser. Keyboard shortcut: F1.
- Keyboard Shortcuts: Opens a PDF file with a list of all keyboard shortcuts used in Insight Forensic.
- Send Feedback: Redirects to a contact form on the Atola Technology website.
- Extend Subscription: Provides variants of extending your software subscription for another period, either offline or online.
- Activation Status: Shows information about your current subscription: subscription ID, activation status, subscription due date.
- About: Provides information about your current Insight Forensic firmware version and the serial number of your DiskSense 2 hardware unit.
2. Case panel
3. Source port controls and indicators
The source port consists of several parts:
-
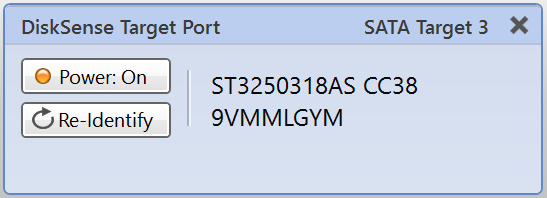
Power button: Allows to manually apply power to the hard drive attached to the DiskSense 2 unit.
- When power is on, a single button click sends a spin-down command first and then performs power-off.
- When power is on, you can click the button a second time during spin-down to instantly power the device off.
- Re-Identify button: Used when you replace the hard drive.
- HDD model, firmware, and serial number: Hard drive identification info.
- Device interface type: Can be SATA, USB, or IDE.
- DCO tag: Indicates whether Device Configuration Overlay (DCO) is activated.
- HPA tag: Indicates whether the Host Protection Area (HPA) is activated.
- PWD tag: Indicates if the hard drive is locked with an ATA password.

Source port context (right-click) menu
- Select Source: Allows choosing another source device (SATA/IDE/USB). For more information, see Working with SATA, USB, IDE drives.
- Select source file: Allows choosing a raw image file located on a source device.
- Reset: Resets a hard drive's interface.
- Re-identify: Should be used after you replace the drive.
- Spindown: Sends ‘Spindown Immediate’ ATA command to the drive.
- Current Oscilloscope: Brings up the oscilloscope window.
- Terminal: Brings up RS-232/serial terminal window.
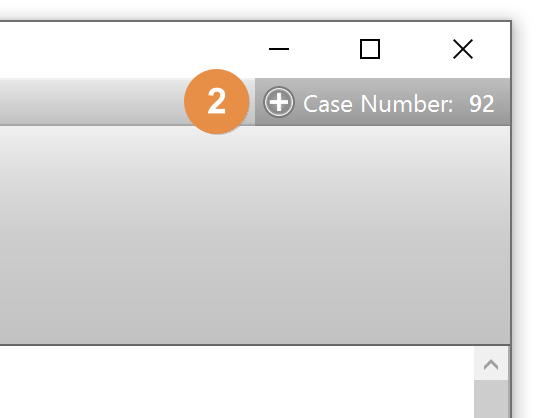
- Assign Case Number: Allows assigning a specific number to the open case.
- Print: Prints or saves the whole case history to a file. For details, see Printing reports in a case.
- Export: Saves the entire case history into a single file.
- Import: Imports case history from a previously exported file.
4. Target port controls and indicators
The Target port has all the features of the Source port. The Target port allows to work with one of the following:
- A device attached to the hardware target port (SATA or USB).
- Image file: Raw, E01, AFF4.
Target port context (right-click) menu
Along with the commands that are identical to the ones in the Source port context menu, the Target port context menu has an additional one:
- Remove port: Powers down the selected port and removes it from the Device panel.
5. Plus icon
To start another operation, add another target drive port for:
- SATA device
- USB device
- Image file
- Image file on target
- Multiple devices of any type
Detect All Devices: Sends identification commands to all devices connected to the DiskSense 2 hardware unit and displays all detected devices on the Device panel.
6. Sidebar
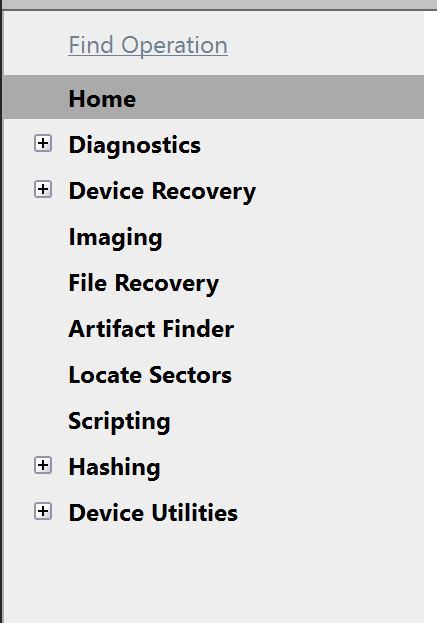
This sidebar helps to navigate through operations and different software modules of Insight Forensic.
7. Selected device information
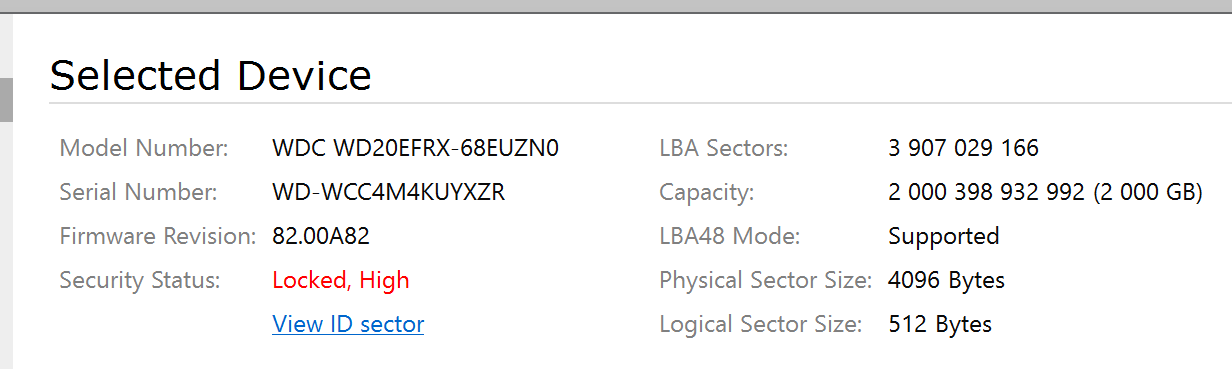
Shows detailed information about the device currently attached to the selected port:
- Model number
- Serial number
- Firmware version
- Security status
- Number of LBA sectors
- Device capacity
- LBA48 mode support
- Physical and logical sector size
The View ID Sector link will open the full information on the ID sector returned by the hard drive.
8. Case history
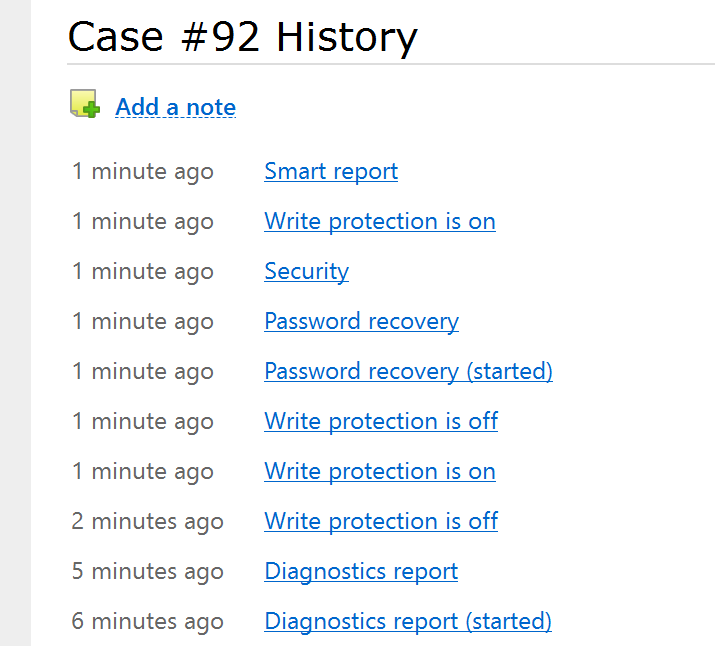
Lists all actions that were done to the selected device. To get a detailed report on an action, click on its name.
9. Attached files
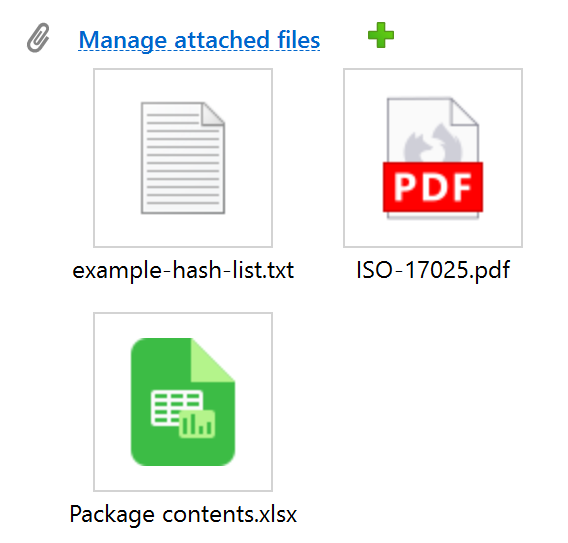
Insight Forensic lets you attach files to the case. Whenever you attach a picture, a thumbnail is added to the Home screen.
To attach an image or file to the current case, click the green plus icon. For details, see Add a document or an image to the case.
10. ATA Registers bar

Displays raw contents of Link, Status, and Error ATA registers in real time. To learn more about each register, see ATA registers: what they mean.