Changing details in a case
Insight’s case management system helps users efficiently keep track of drive-related information.
Even if a drive has already been used for a while, its imaging and hashing have already been performed, it is still possible to open its case and make adjustments to the case details.
Add or change the case number and description
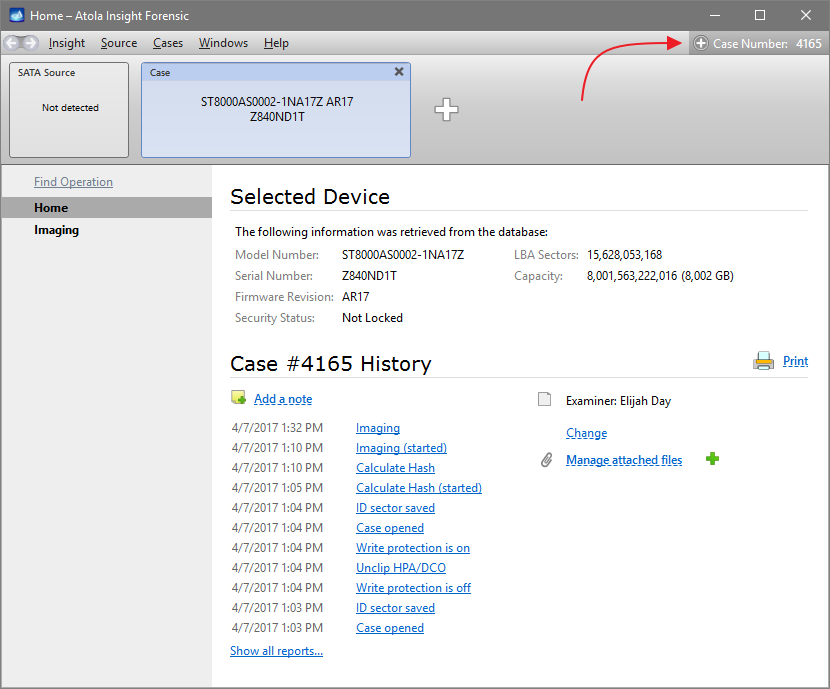
- In the top right, click the Plus icon next to the Case Number.
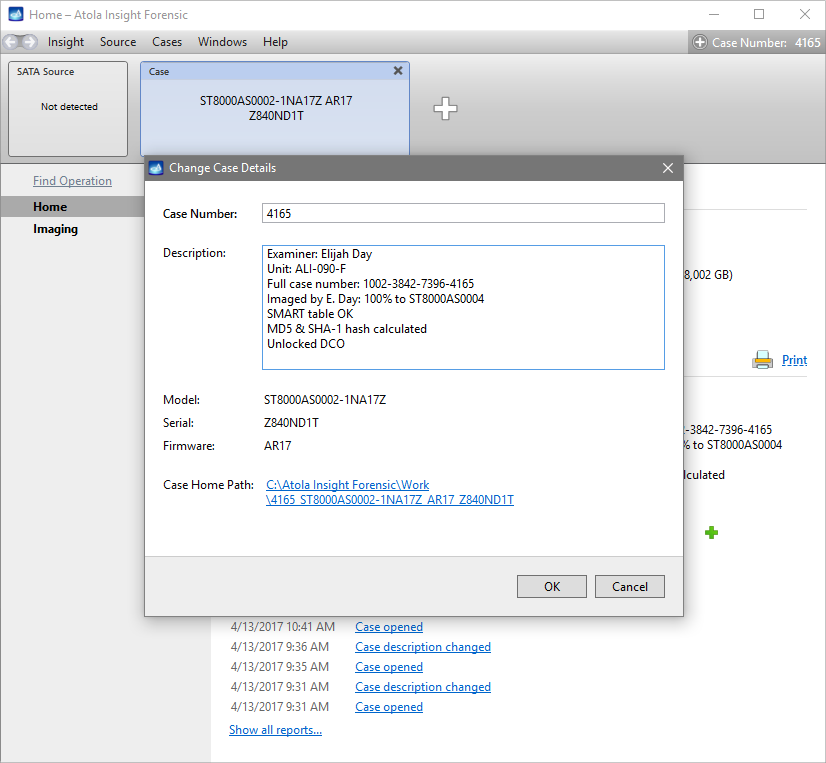
- Enter or change the Case Number and Description.
-
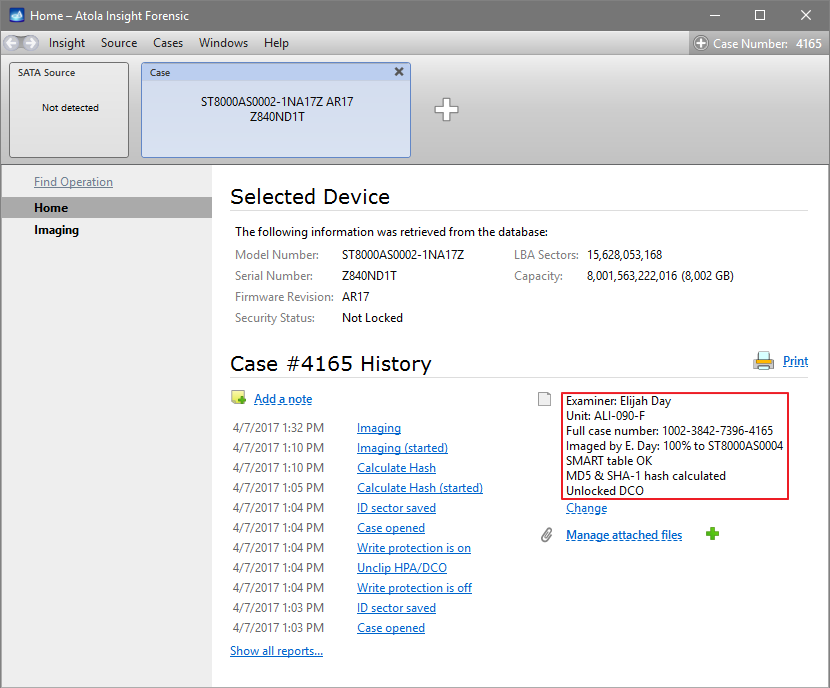
Click OK. The description appears next to the Case History.
For quick changes, you can also click the Change link right below the description.
Add a document or an image to the case
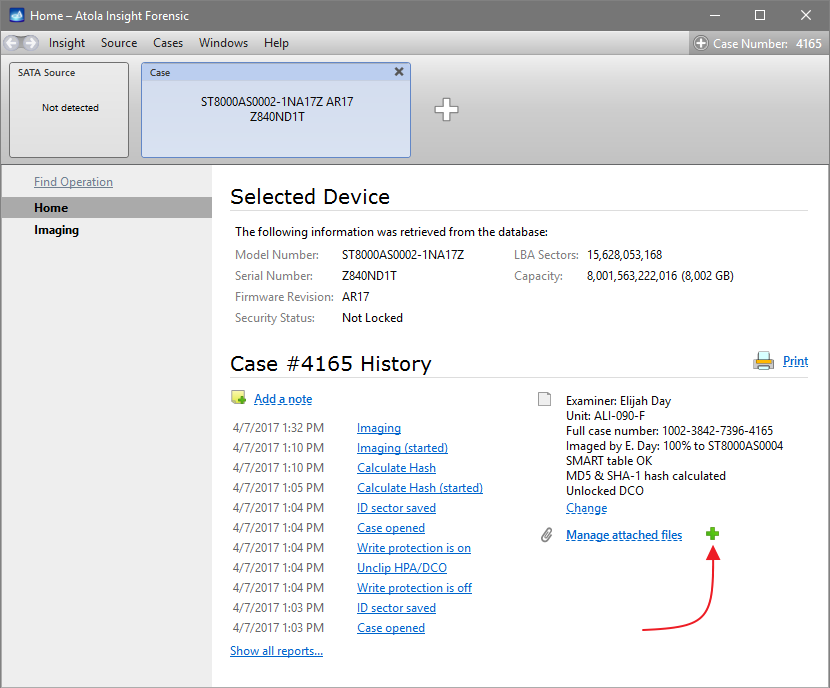
- On the case Home screen, in the Case history section, click the green Plus icon.
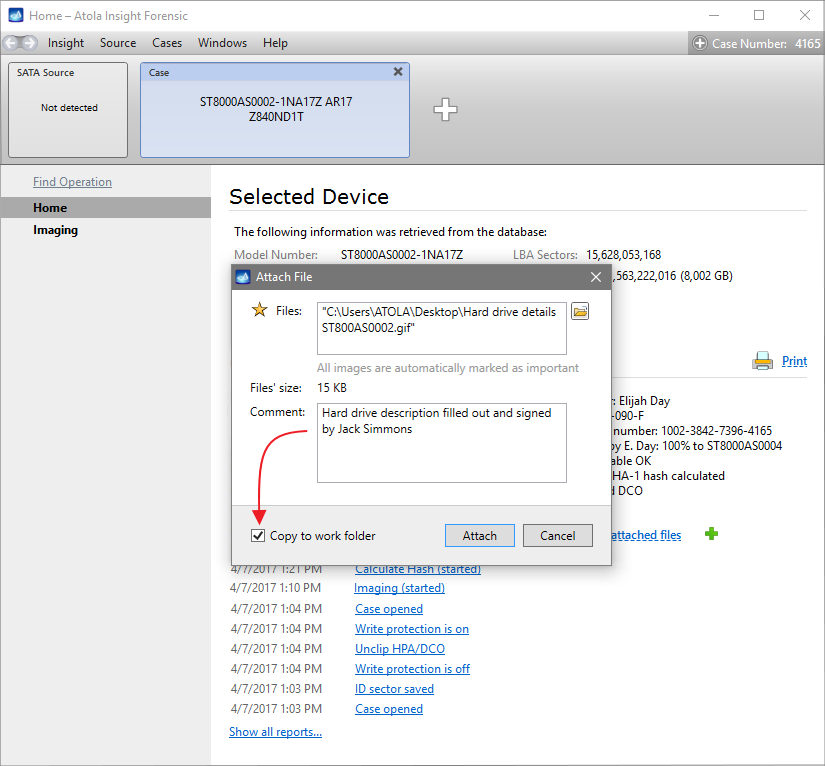
- In the Attach File dialog, enter the path to a file and leave a comment in the corresponding field.
- Optional: Select Copy to work folder to copy the file to the same folder where any other related files are located, for example, tables with segmented hashes, logs, imaging maps, file signature lists and more.
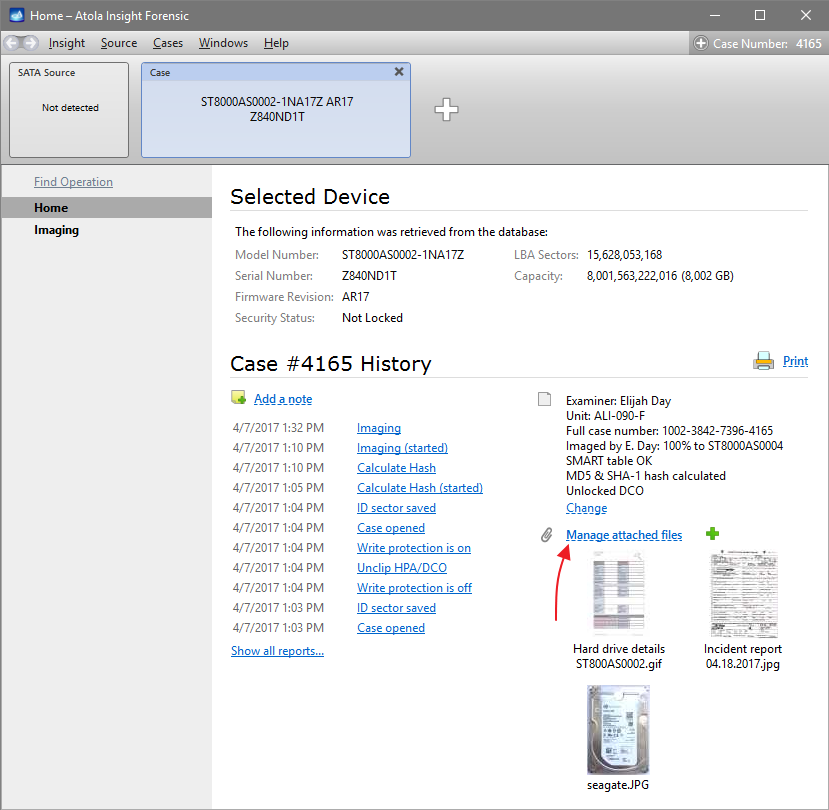
- Click Attach. All the uploaded files appear on the case Home screen below the description.
View or remove the attached files
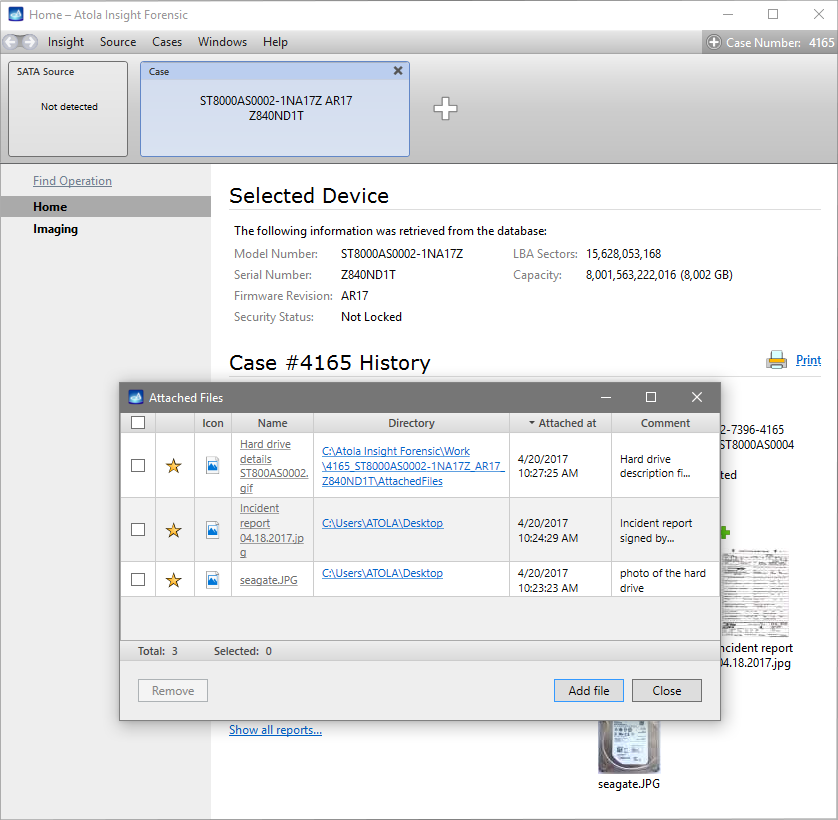
To view all the attached files, change their details, or remove them from the case, click the Manage attached files link.
The Attached files window contains the list of files including
- an icon representing the file type,
- the name,
- the folder where the file is located,
- the date when the file was attached to the case and
- the comment added by the user.
To edit the Comment or copy the file to the case folder, right-click a file and select Edit.
To remove the file from the case, select the file and click Remove.
