Image only files with artifacts
Create a forensically sound logical image containing only the files with artifacts discovered by Insight during full physical drive imaging, or by Artifact Finder.
This is a practical way to start analyzing the files of interest without waiting for a full physical image.
Step 1: Search for artifacts during imaging
When starting a new physical imaging session, enable artifact search in the imaging settings:
- In the Insight Forensic window, click Imaging on the left.
- Click Create New Session.
- In the Target Device Selection dialog, select your target drive or create an image file. Confirm by clicking the Select button.
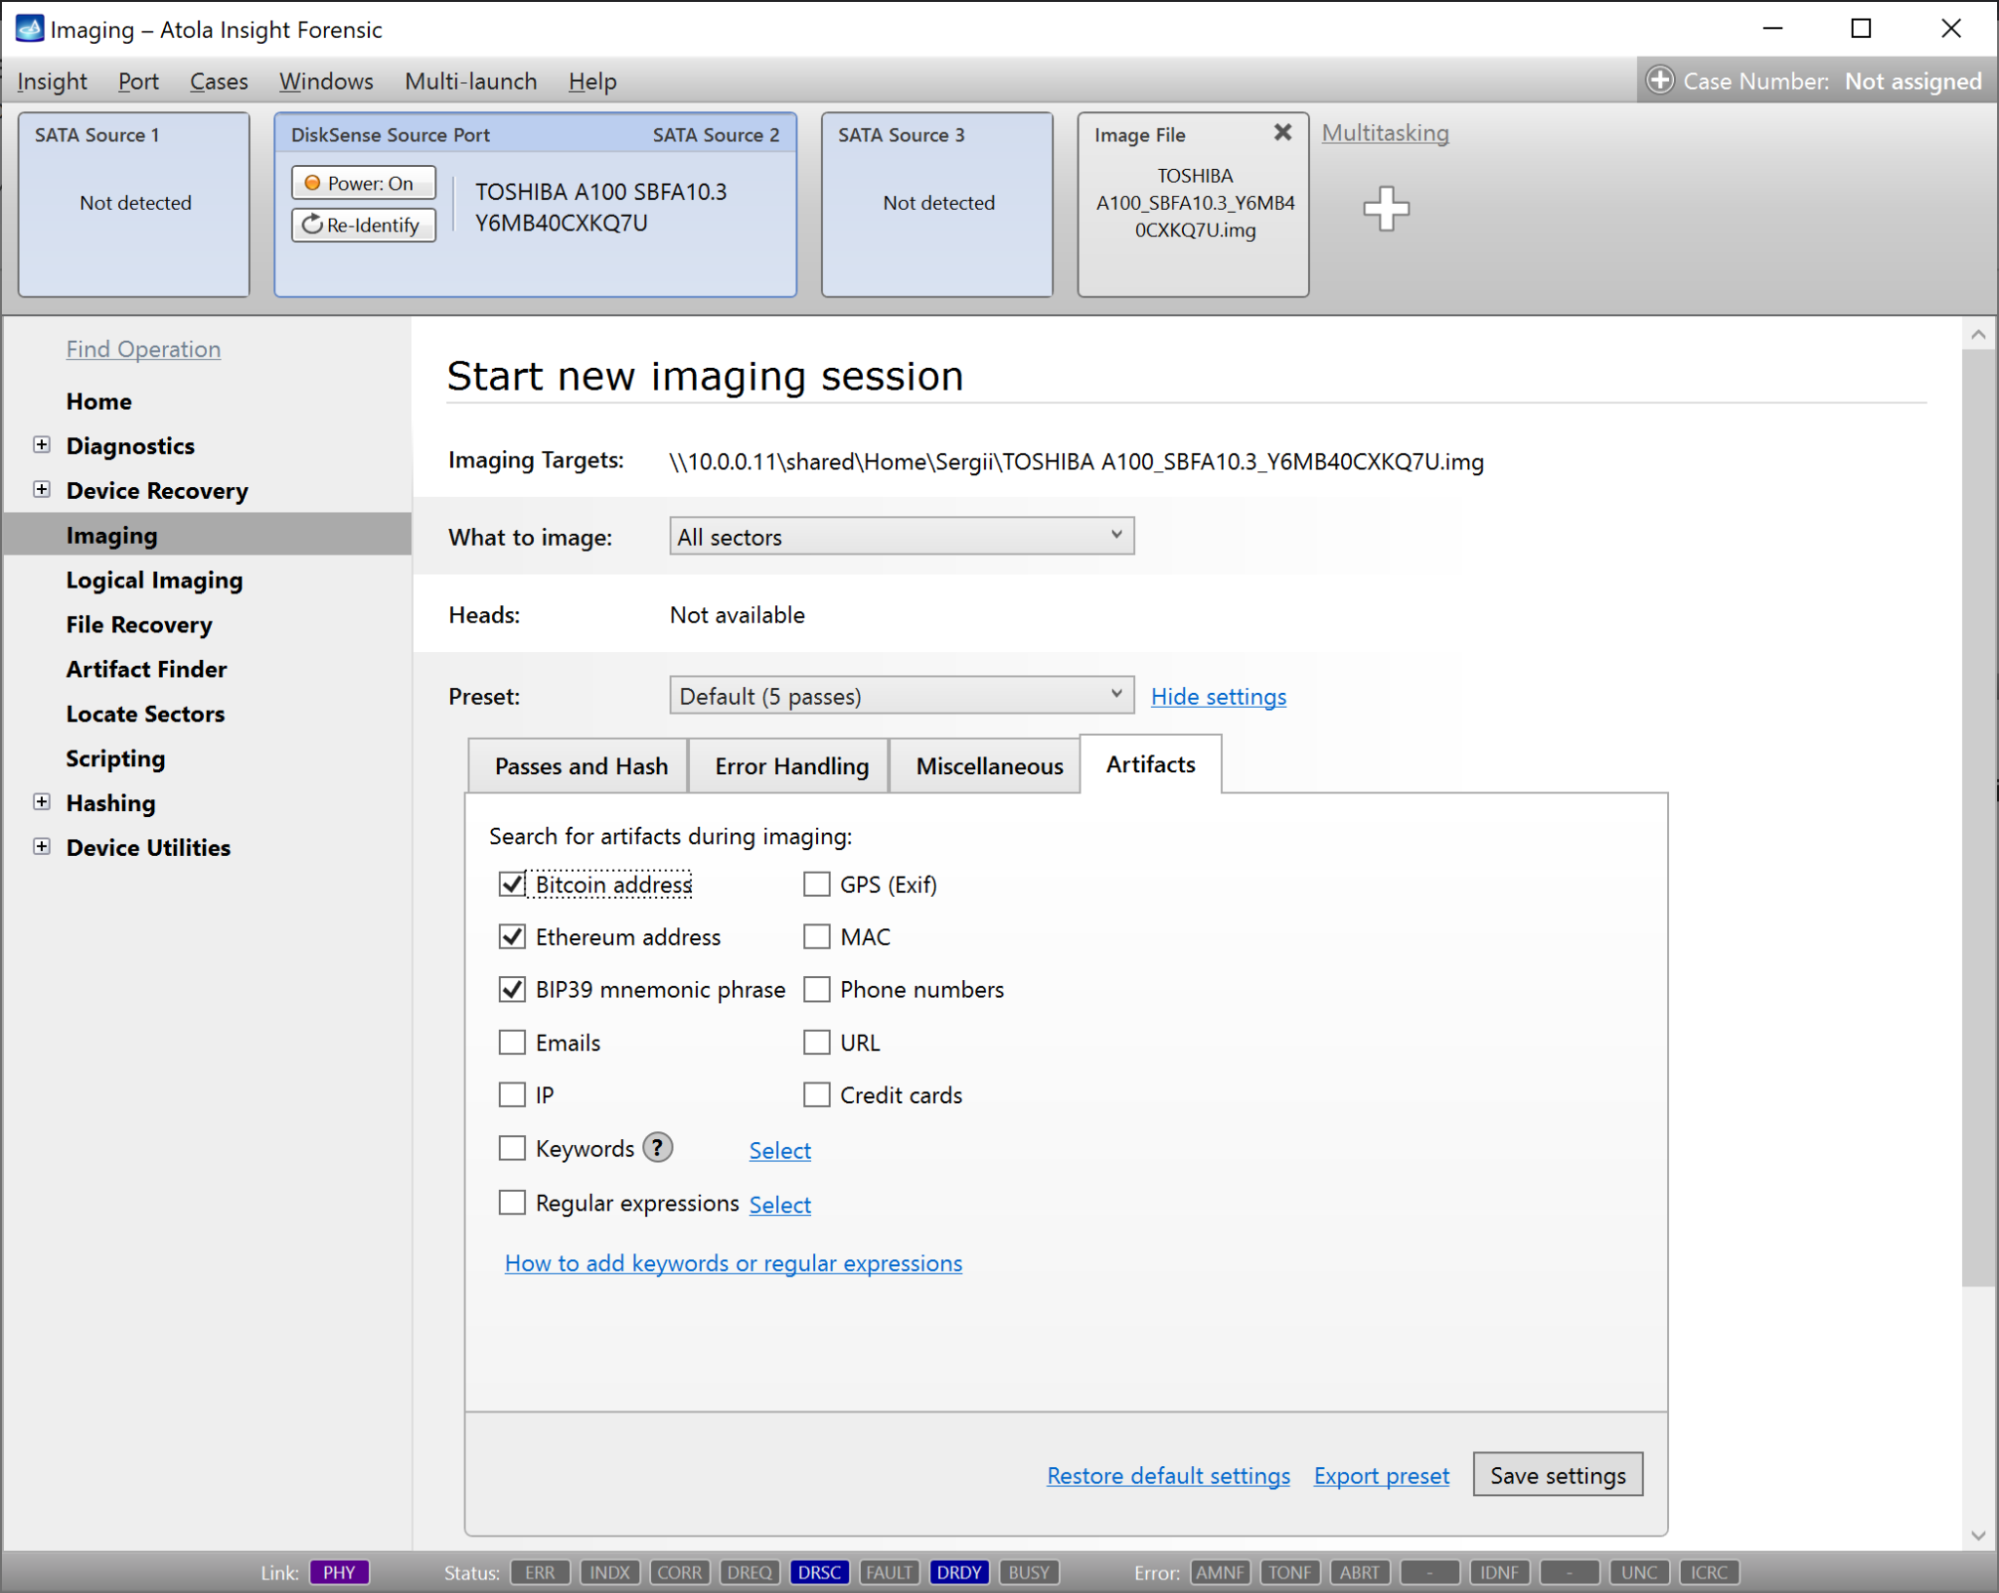
- On the Start new imaging session screen, find the Preset section and click Show settings.
-
Open the Artifacts tab and select all artifact types you want to search for during imaging. Available options include:
- Bitcoin address
- Ethereum address
- BIP39 mnemonic phrase
- Emails
- IP
- GPS (Exif)
- MAC
- Phone numbers
- URL
- Credit cards
- Keywords
- Regular expressions
- Click Save settings.
- Adjust other imaging options, if needed. Then click Start Imaging.
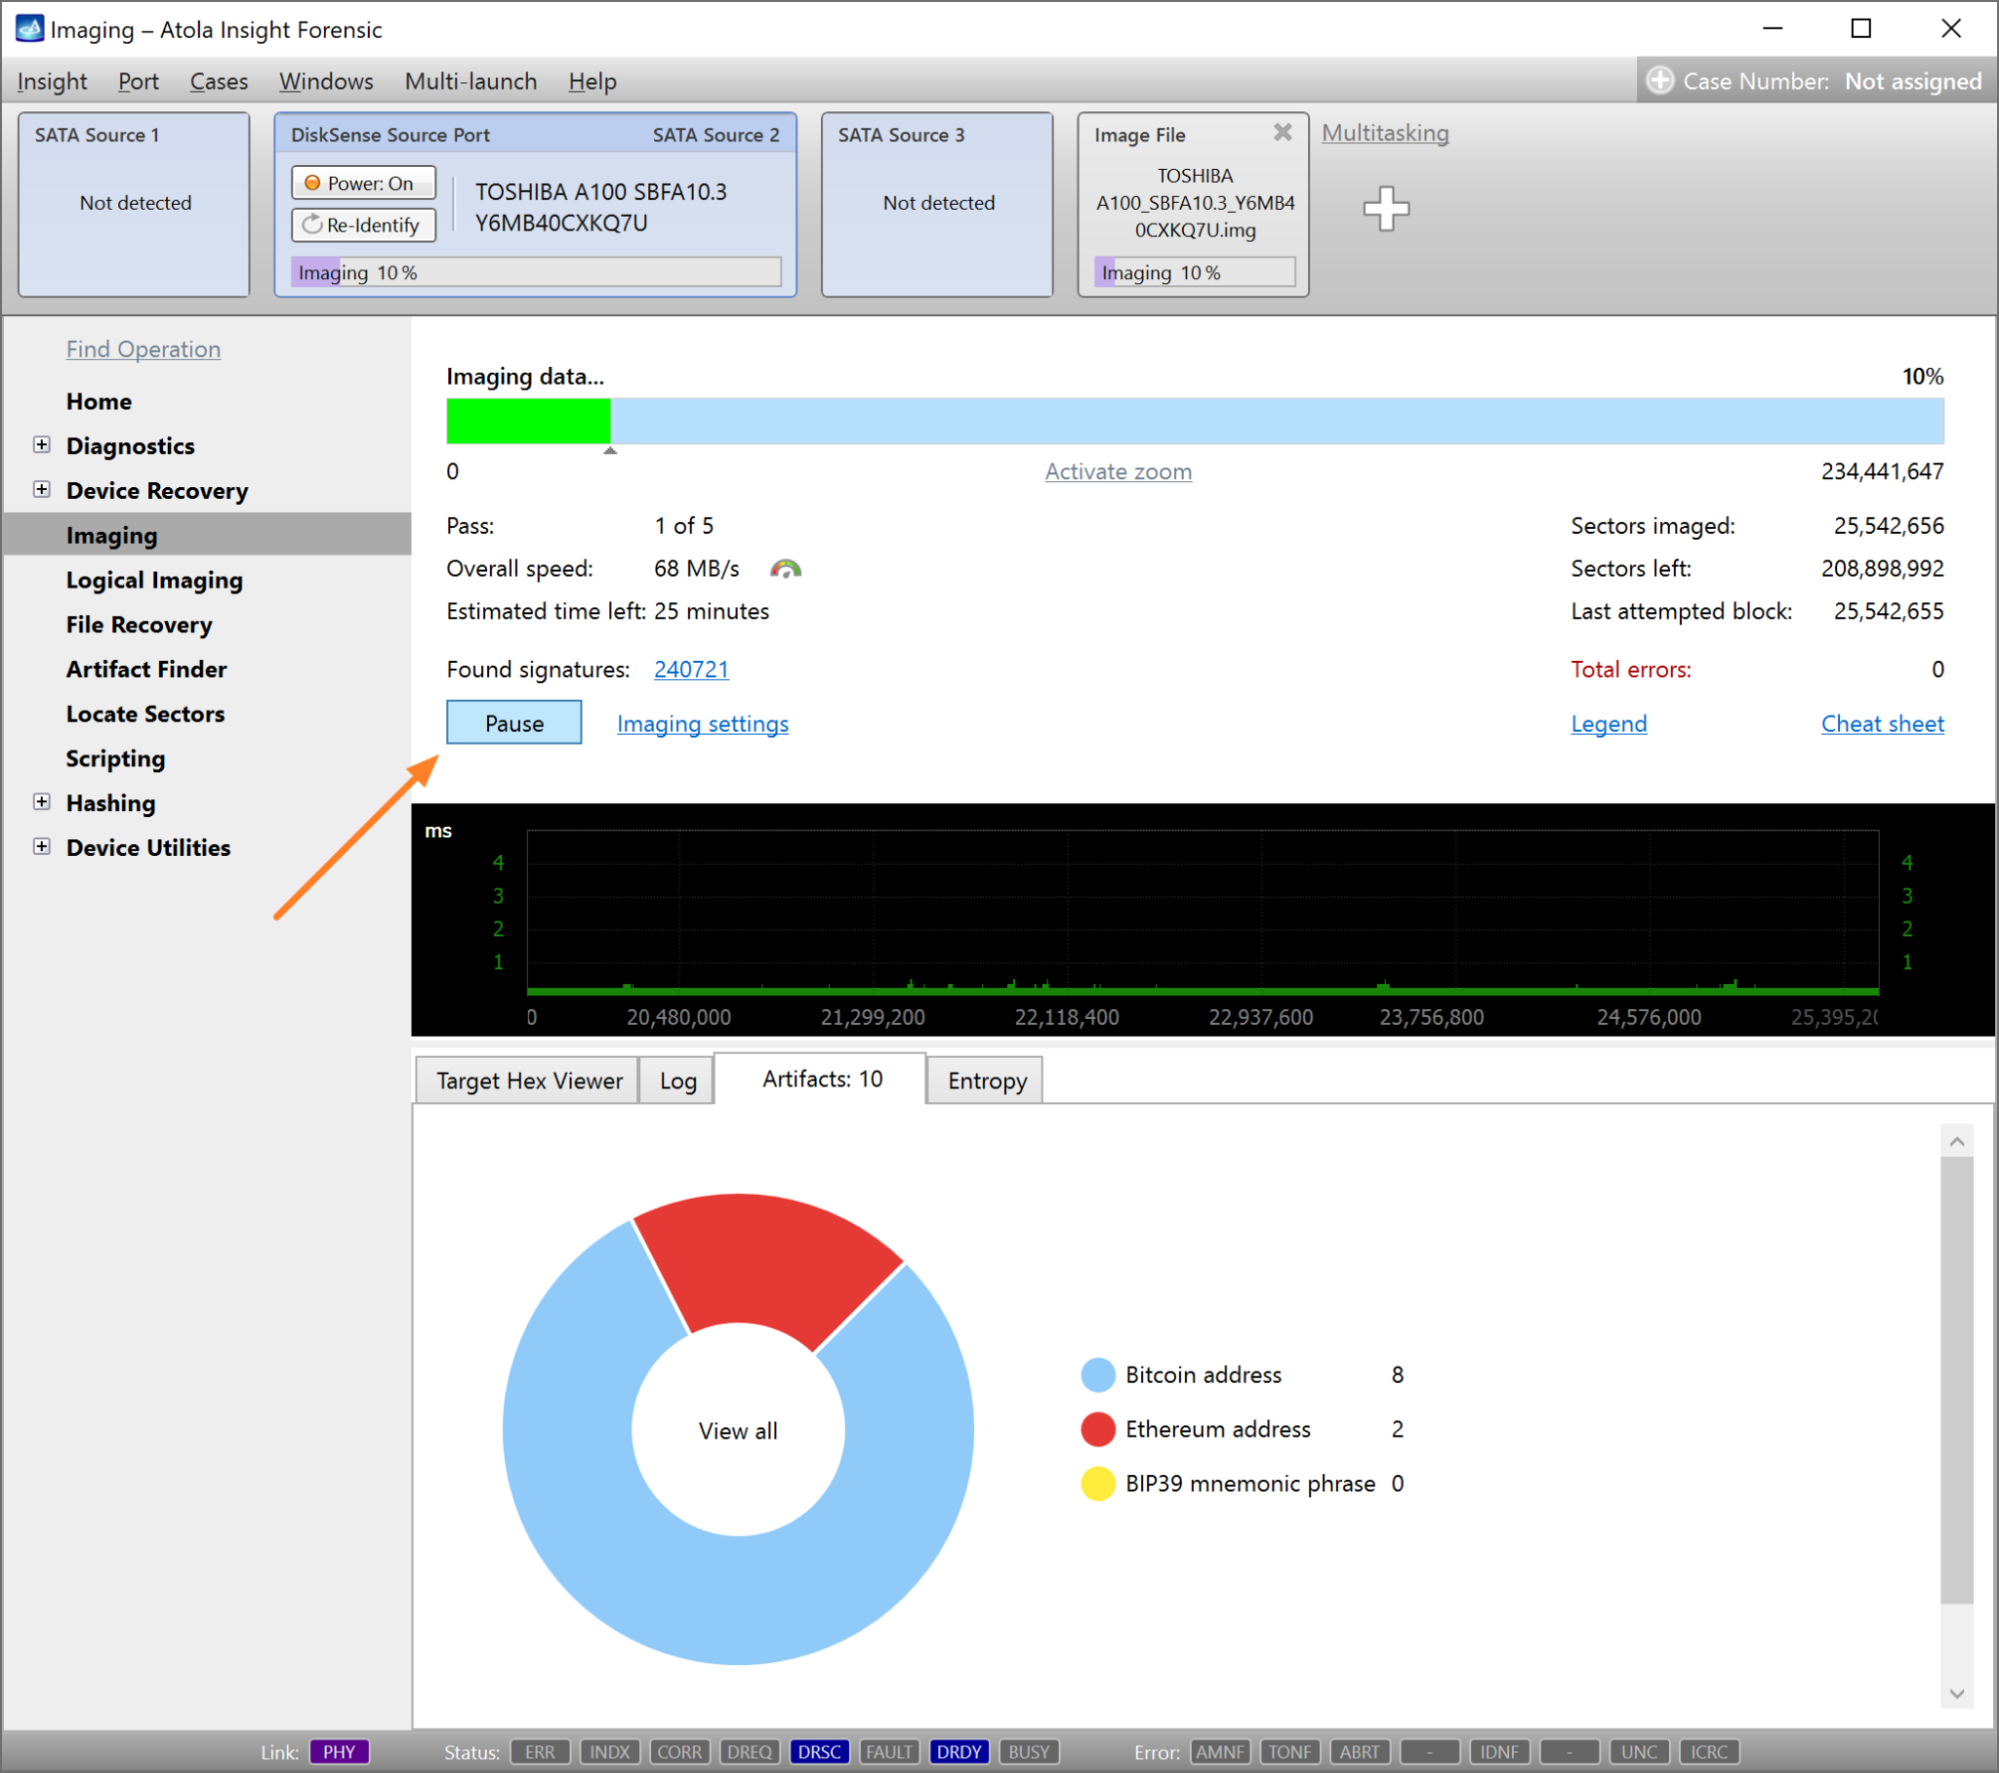
- Insight displays the number of artifacts discovered in the course of imaging on the Artifacts tab.


Step 2: Pause the session and start logical imaging with the artifacts filter
As a result, you’ll have only the selected files with artifacts of interest in a forensically sound L01 container, ready for immediate analysis.
- On the imaging progress screen, click the Pause button.
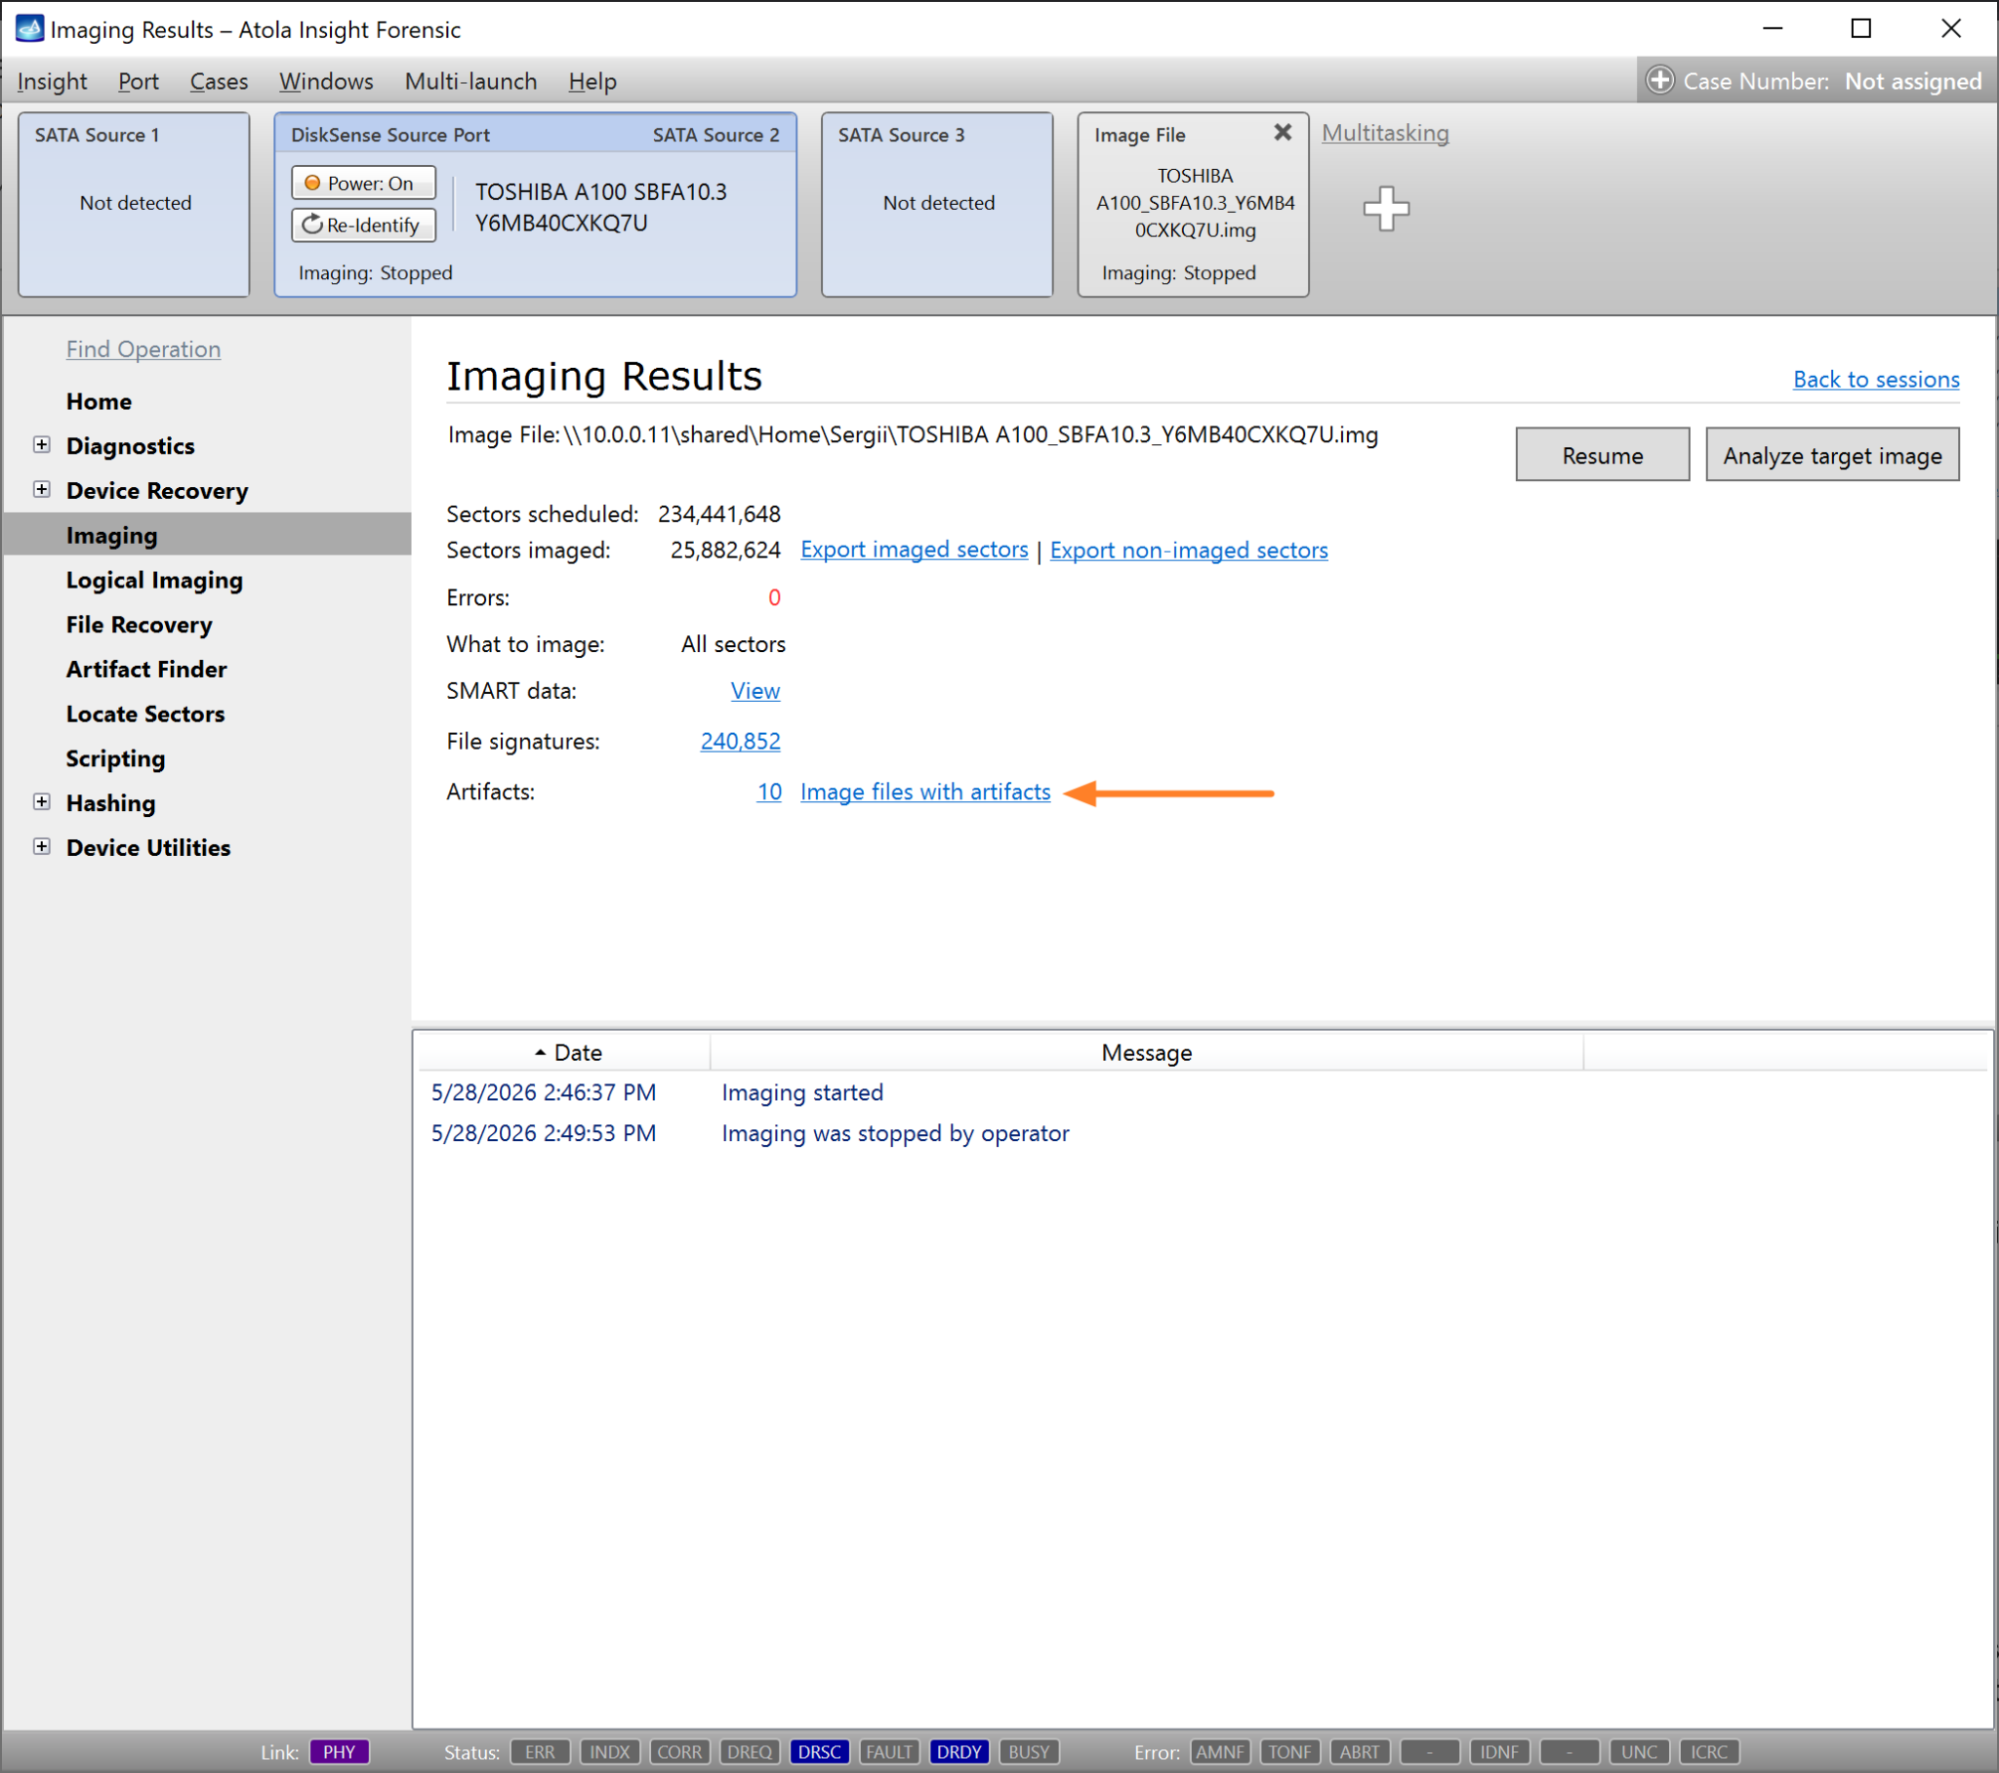
- On the Imaging Results screen, find the Artifacts section and click the Image files with artifacts link.
- Insight takes you to the Logical Imaging module.
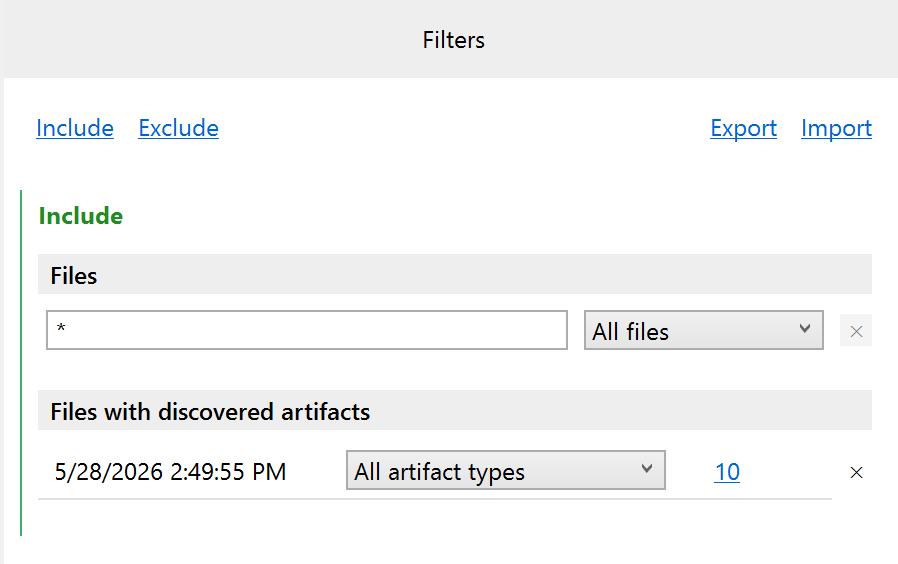
- On the Filters panel on the right, a new Include filter called Files with discovered artifacts is applied.
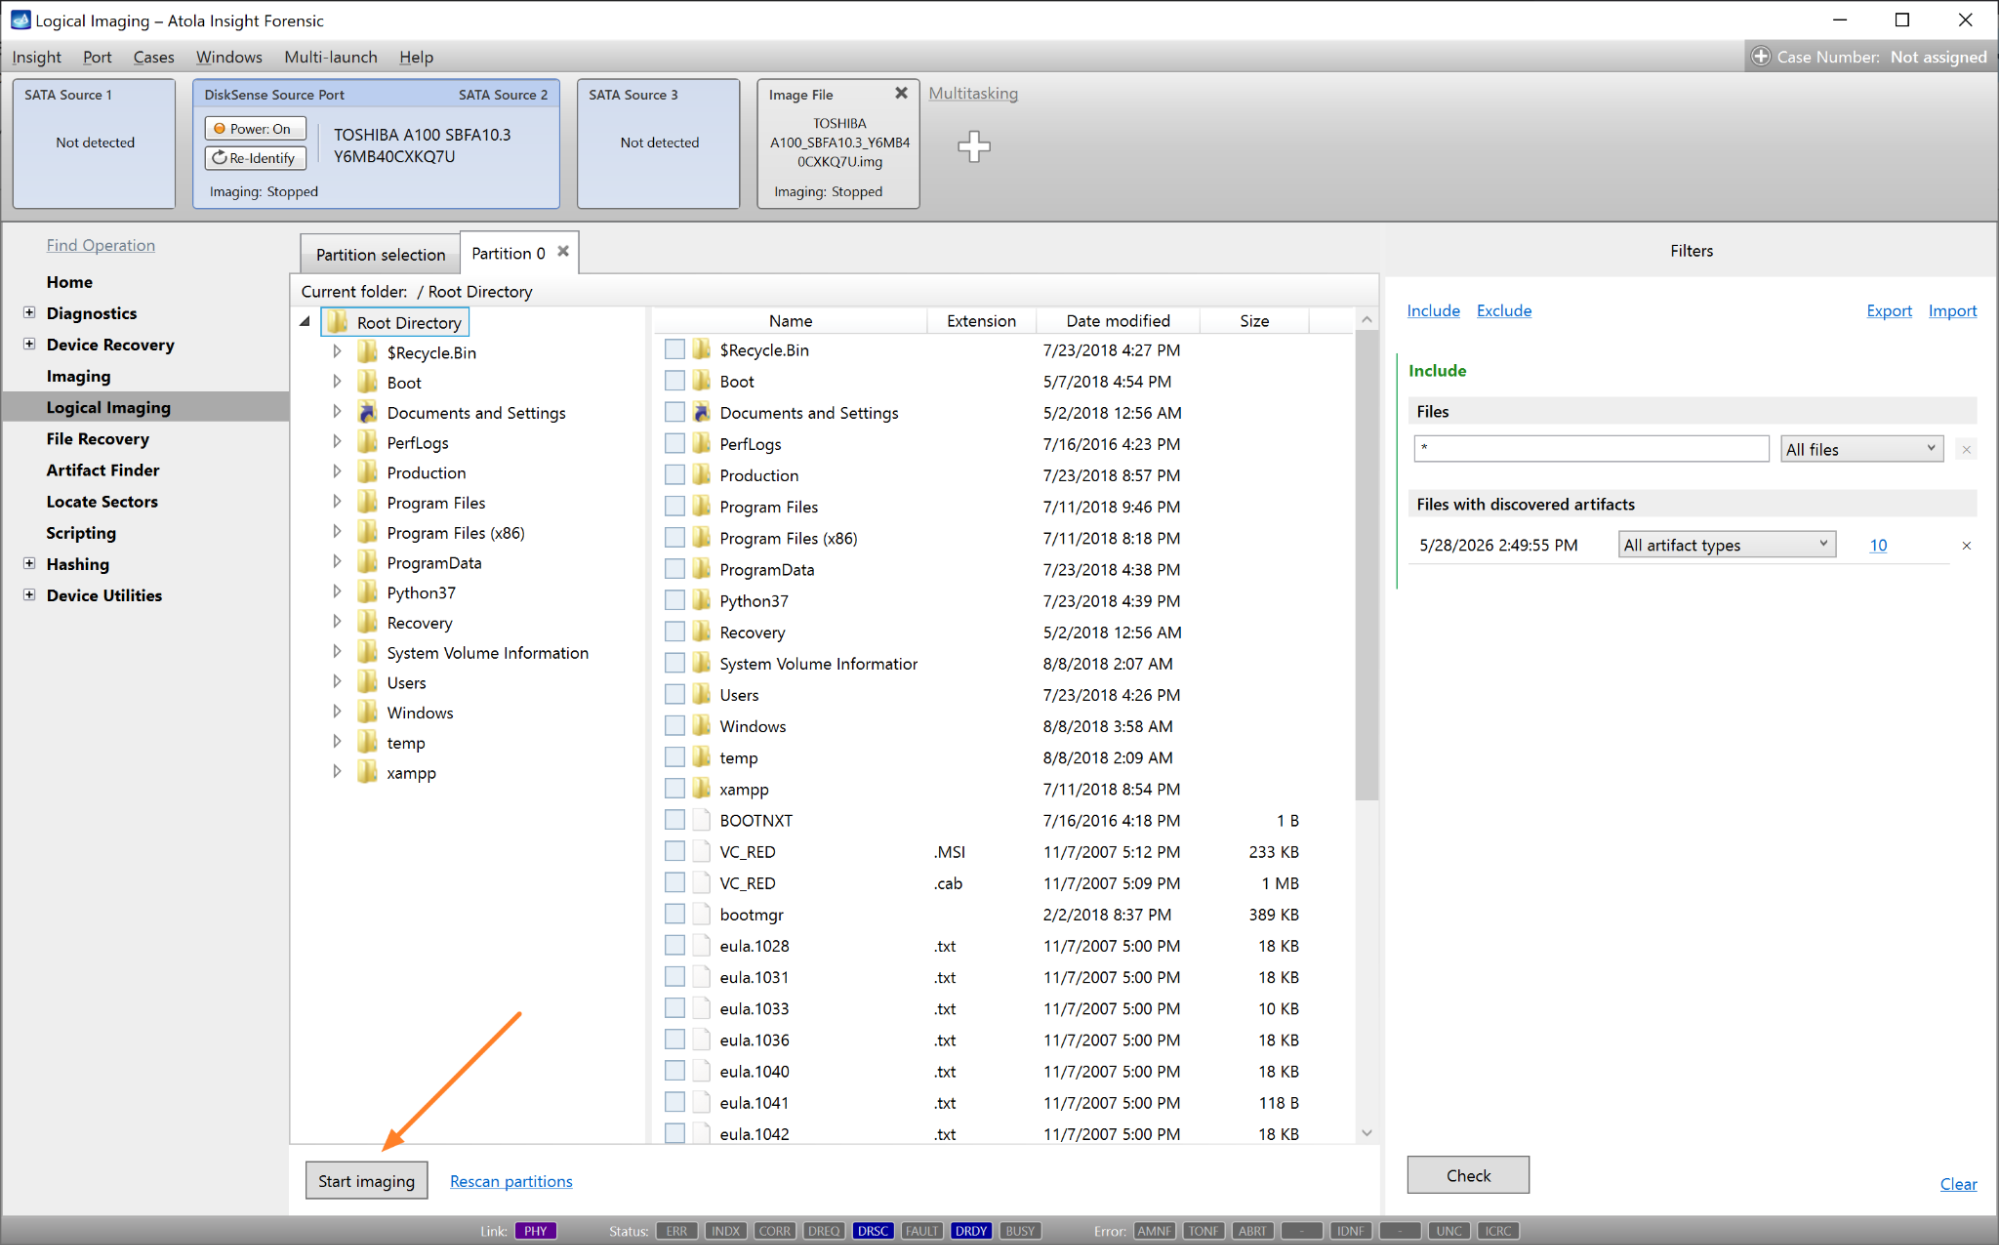
- Click the Start imaging button.
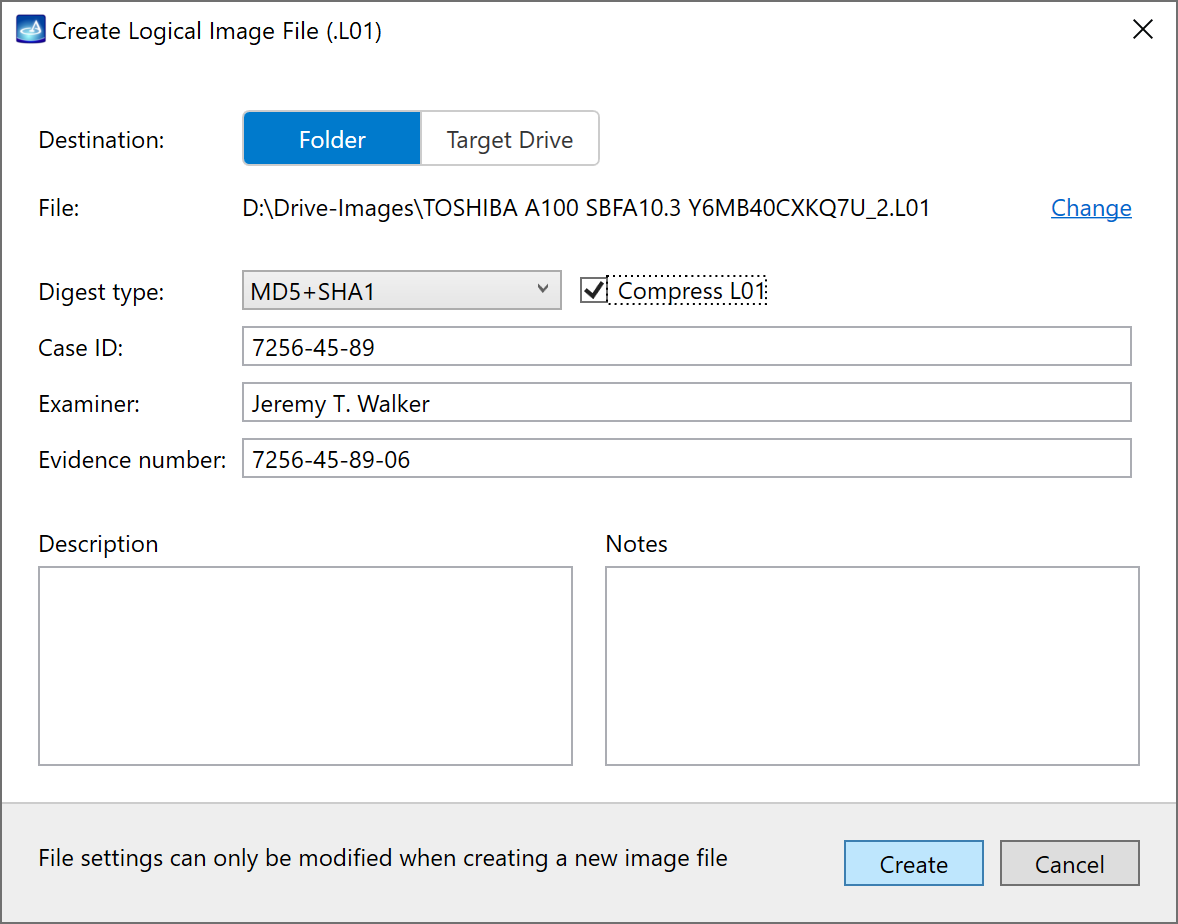
- In the Create Logical Image File dialog, select the target folder or drive, choose hashing method, enable or disable compression, and enter other details. Then click the Create button.
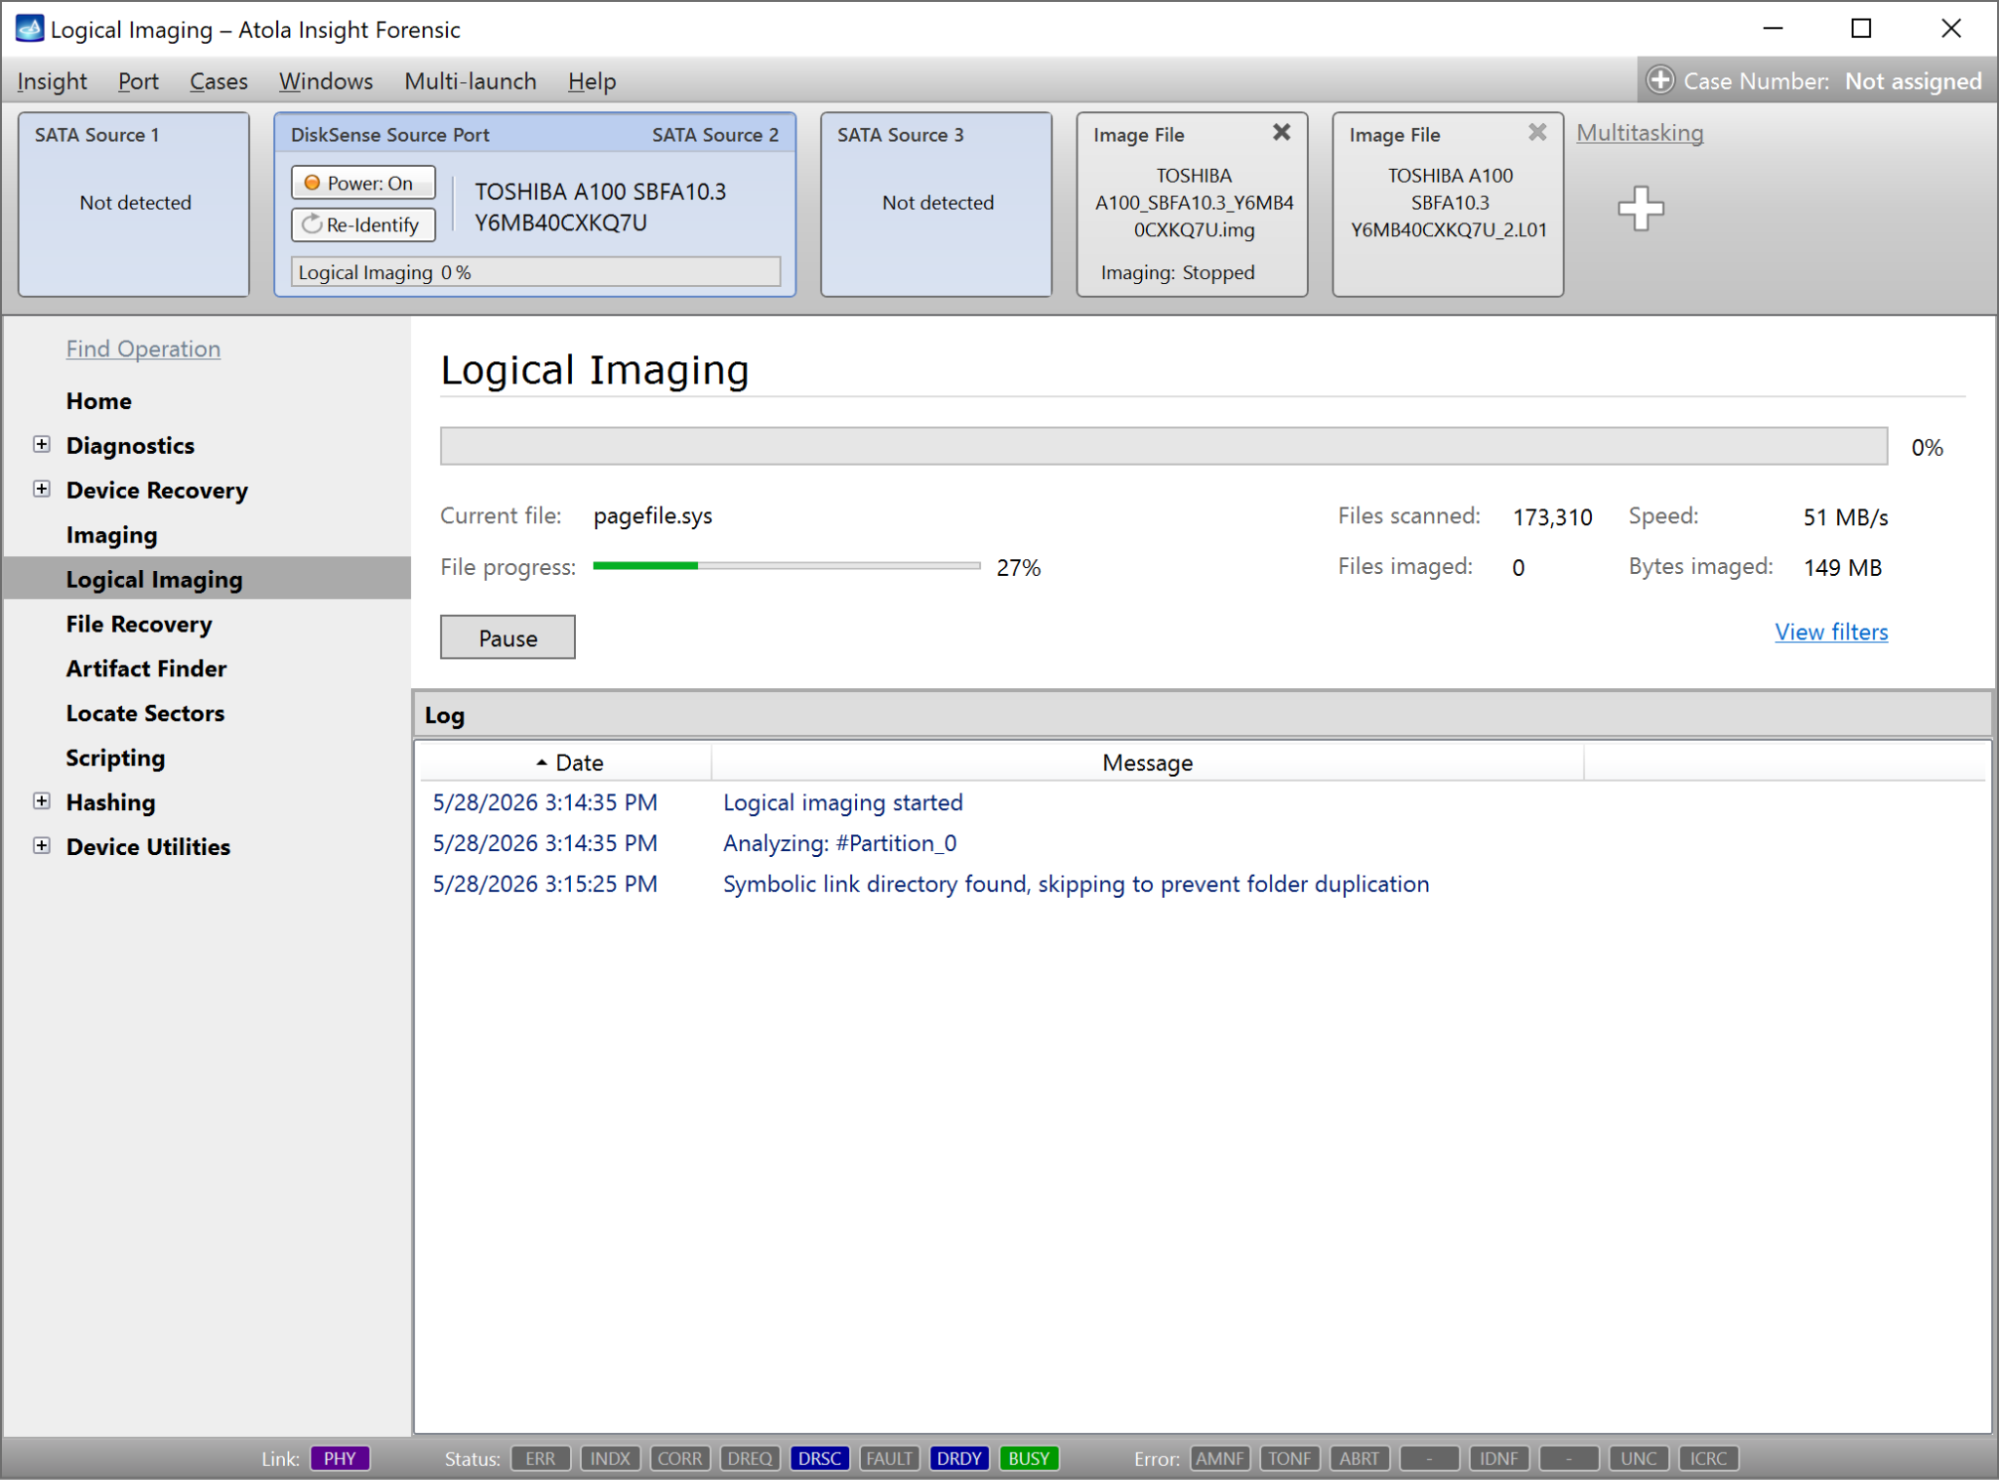
- Insight searches for the files with artifacts discovered in the previous step and saves their bit-for-bit copies in the L01 format.
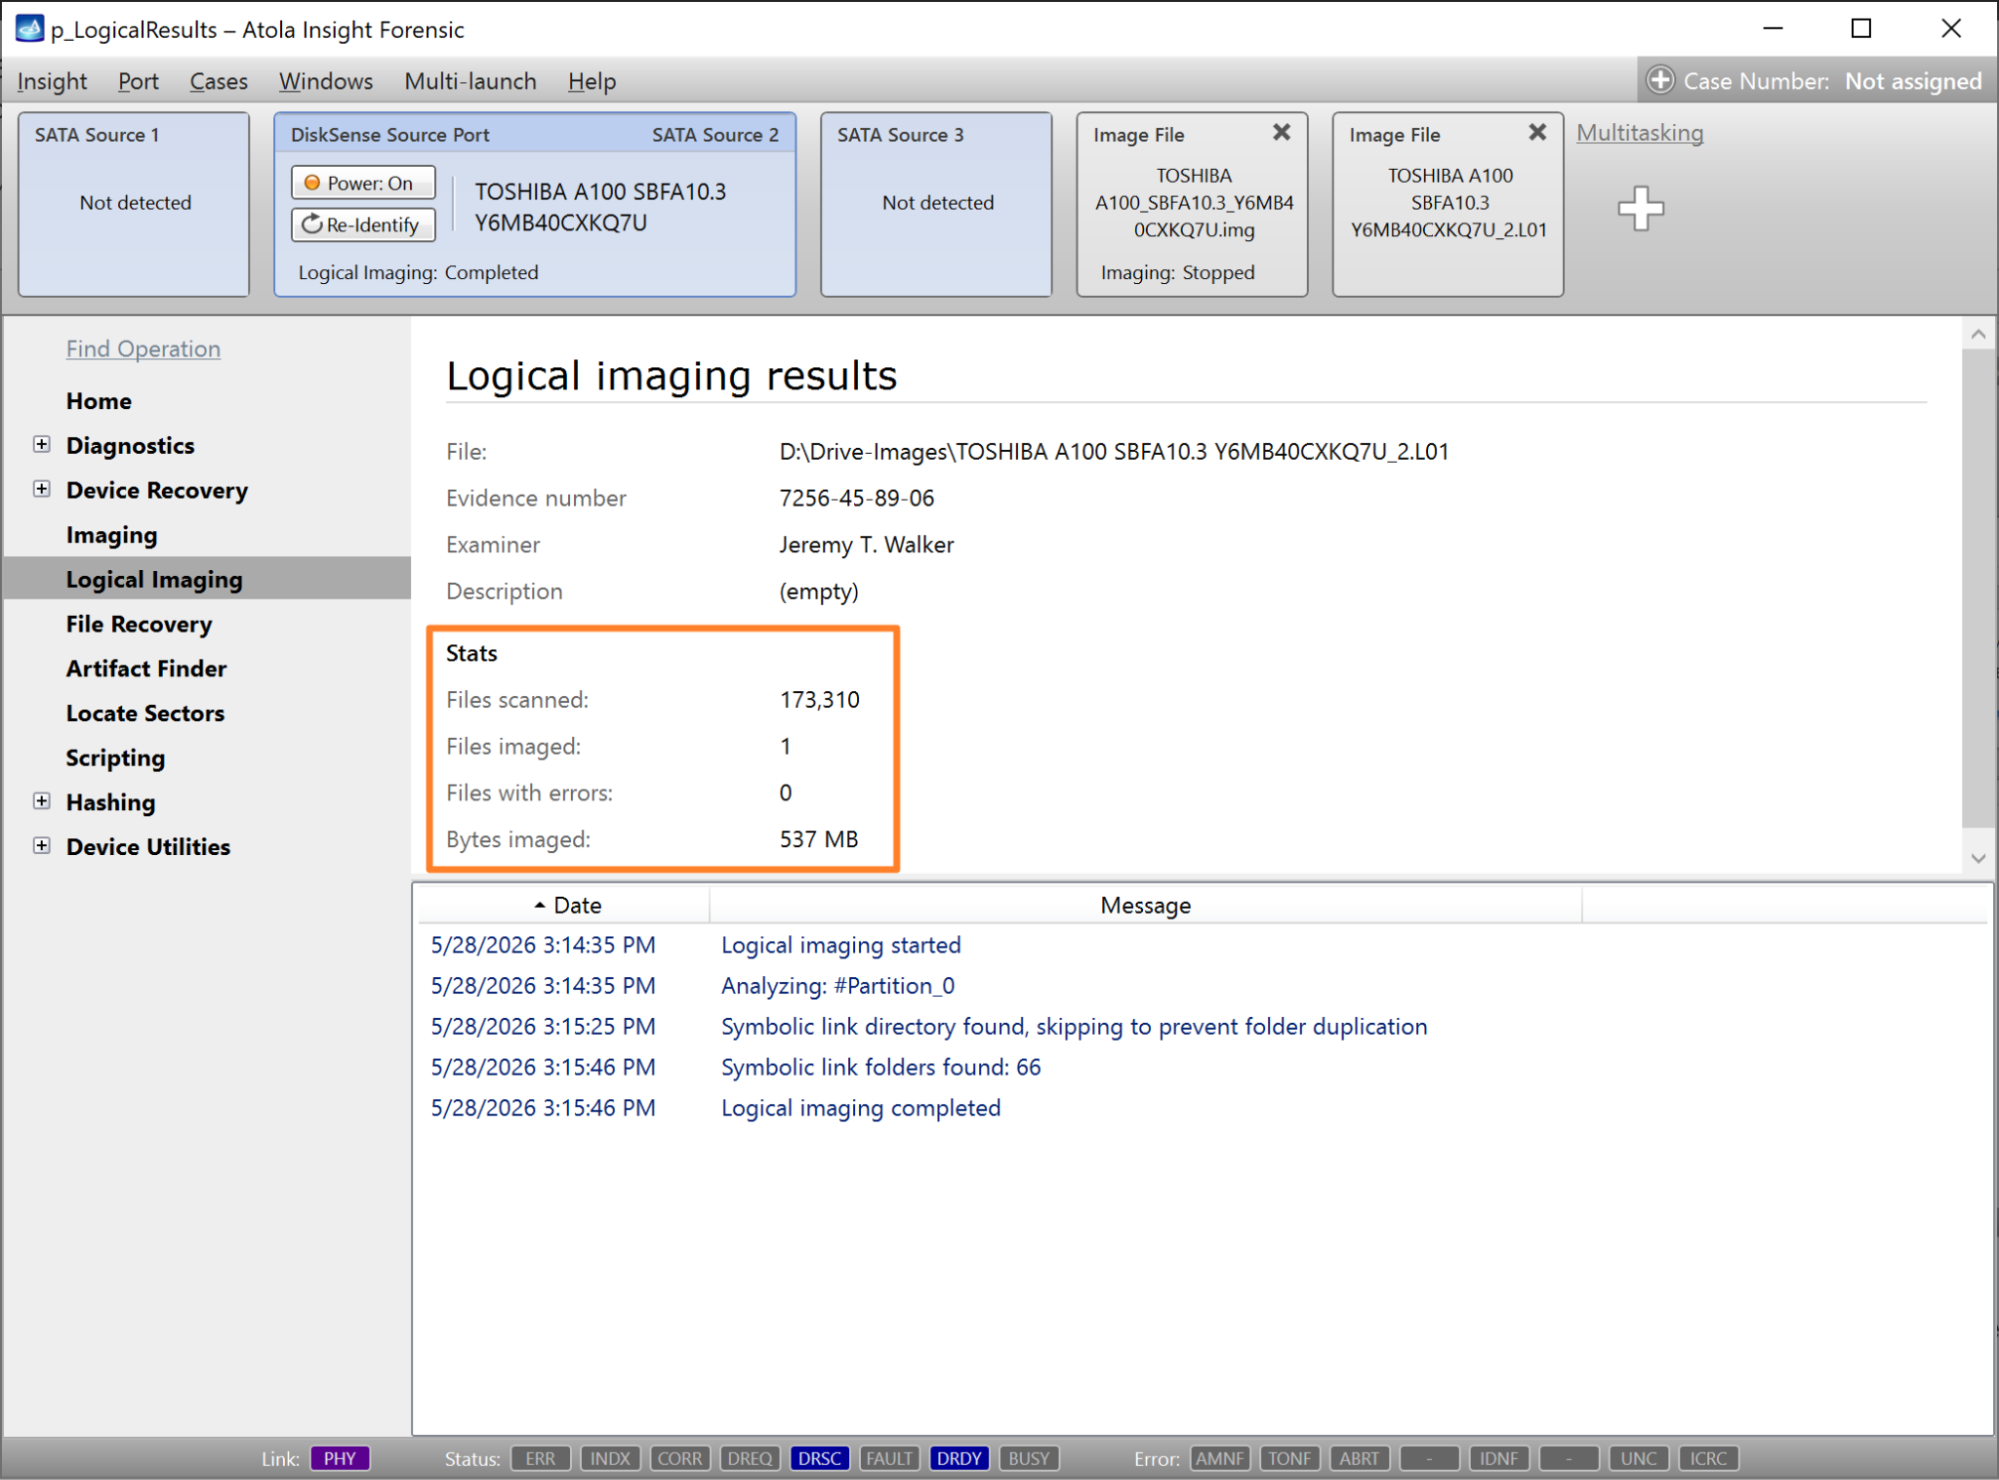
- After logical imaging is completed, Insight displays the Logical imaging results screen with the number of files imaged and other stats.