Automate workflow with Web API
As the number of evidence devices and volume of data in forensic cases constantly grow, digital forensic examiners seek to streamline and automate their workflows. Automation of the acquisition and analysis process becomes relevant and is in high demand.
To help you optimize your workflow, integrate disk imaging into an automated sequence, and reduce downtime between its stages, TaskForce has a built-in Web API (application programming interface).
Using Web API you can launch, track, and stop operations on TaskForce.
Web API is extremely handy as you can use it in scripts, via command-line interface tools like curl, and simply by typing commands in the browser address bar. It also allows external software to communicate with TaskForce, sending and receiving commands, as well as getting completed image files and reports.
What tasks can you automate with TaskForce API?
TaskForce API is based on HTTP GET requests and JSON-encoded responses. For details, see API specification.
Using it, you can automate the following tasks:
- Get available Source drives
- Start imaging
- Start logical imaging
- Check task status
- Stop task
- Download report
Integrate image acquisition into Magnet AUTOMATE
In Magnet AUTOMATE, you can create a sequence of repeatable tasks for every type of examination and save this algorithm for future use. This way you can eliminate downtime between image acquisition, digital evidence analysis, and other tasks of your forensic workflow.
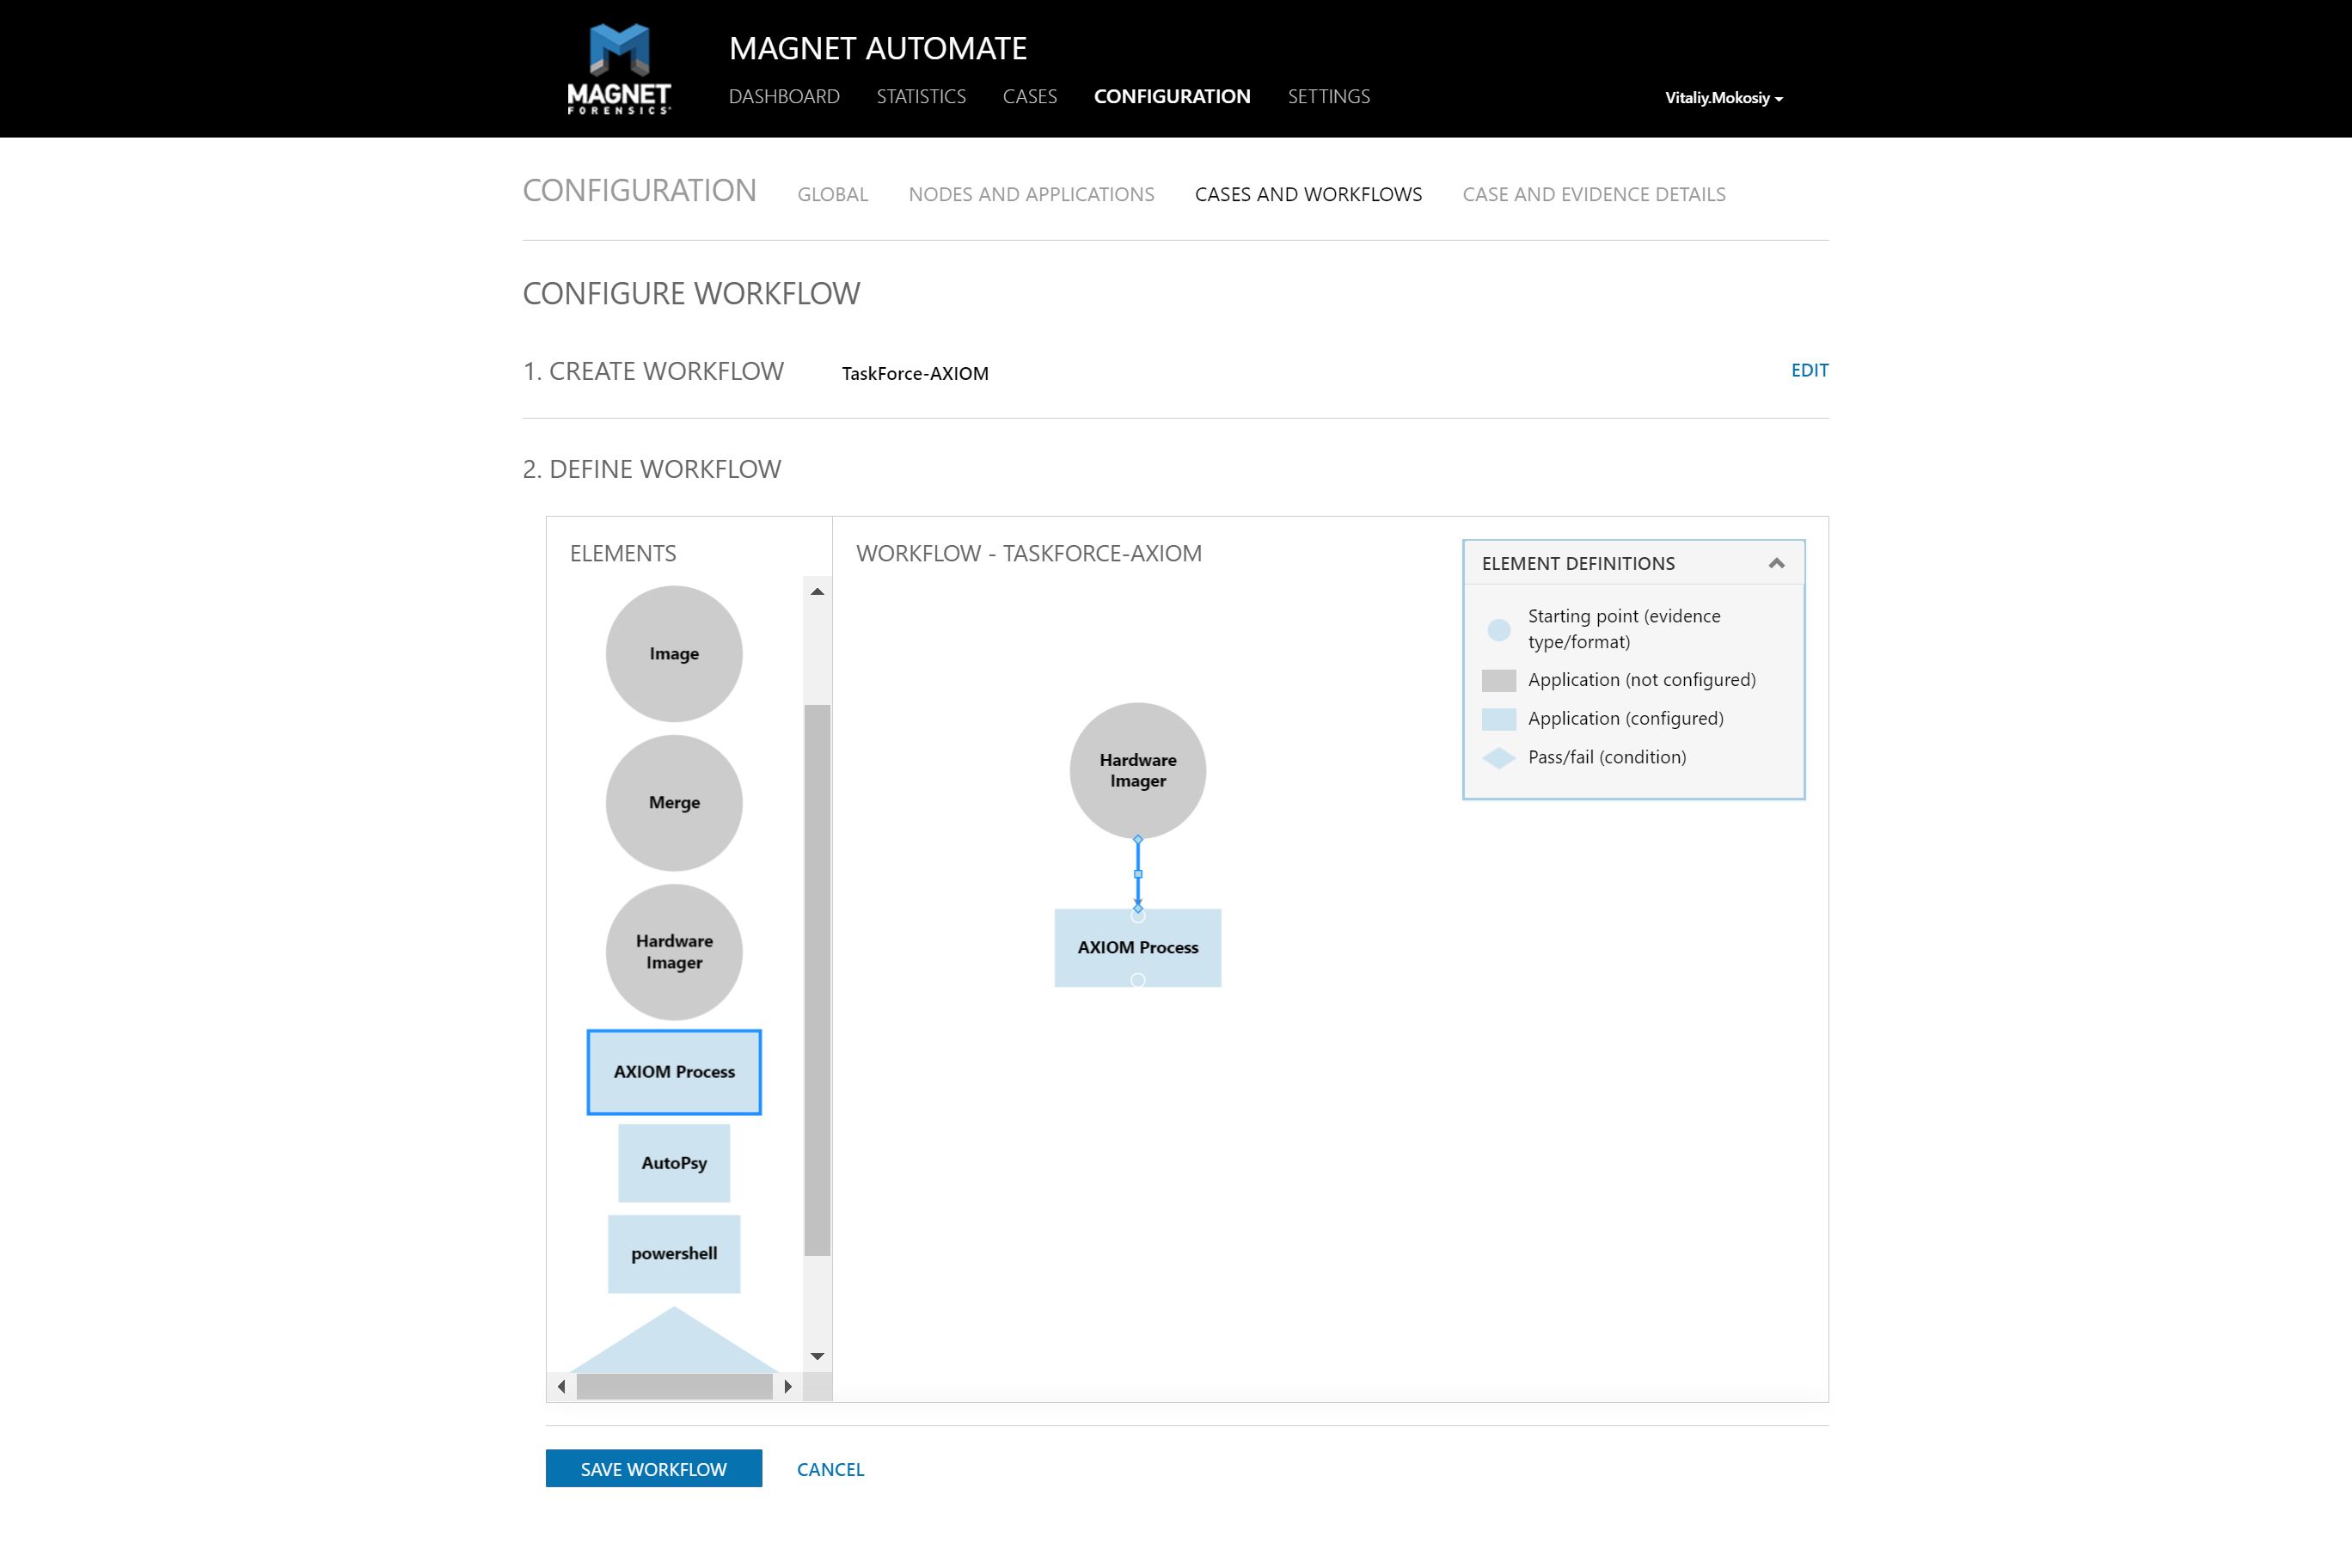
With the help of Web API you can integrate TaskForce into a complex automated sequence created in Magnet AUTOMATE to start simultaneous imaging of multiple drives and, once it is finished, launch the analysis of multiple drive images in parallel.
It helps you significantly increase the speed of evidence processing.
Watch how the integration works
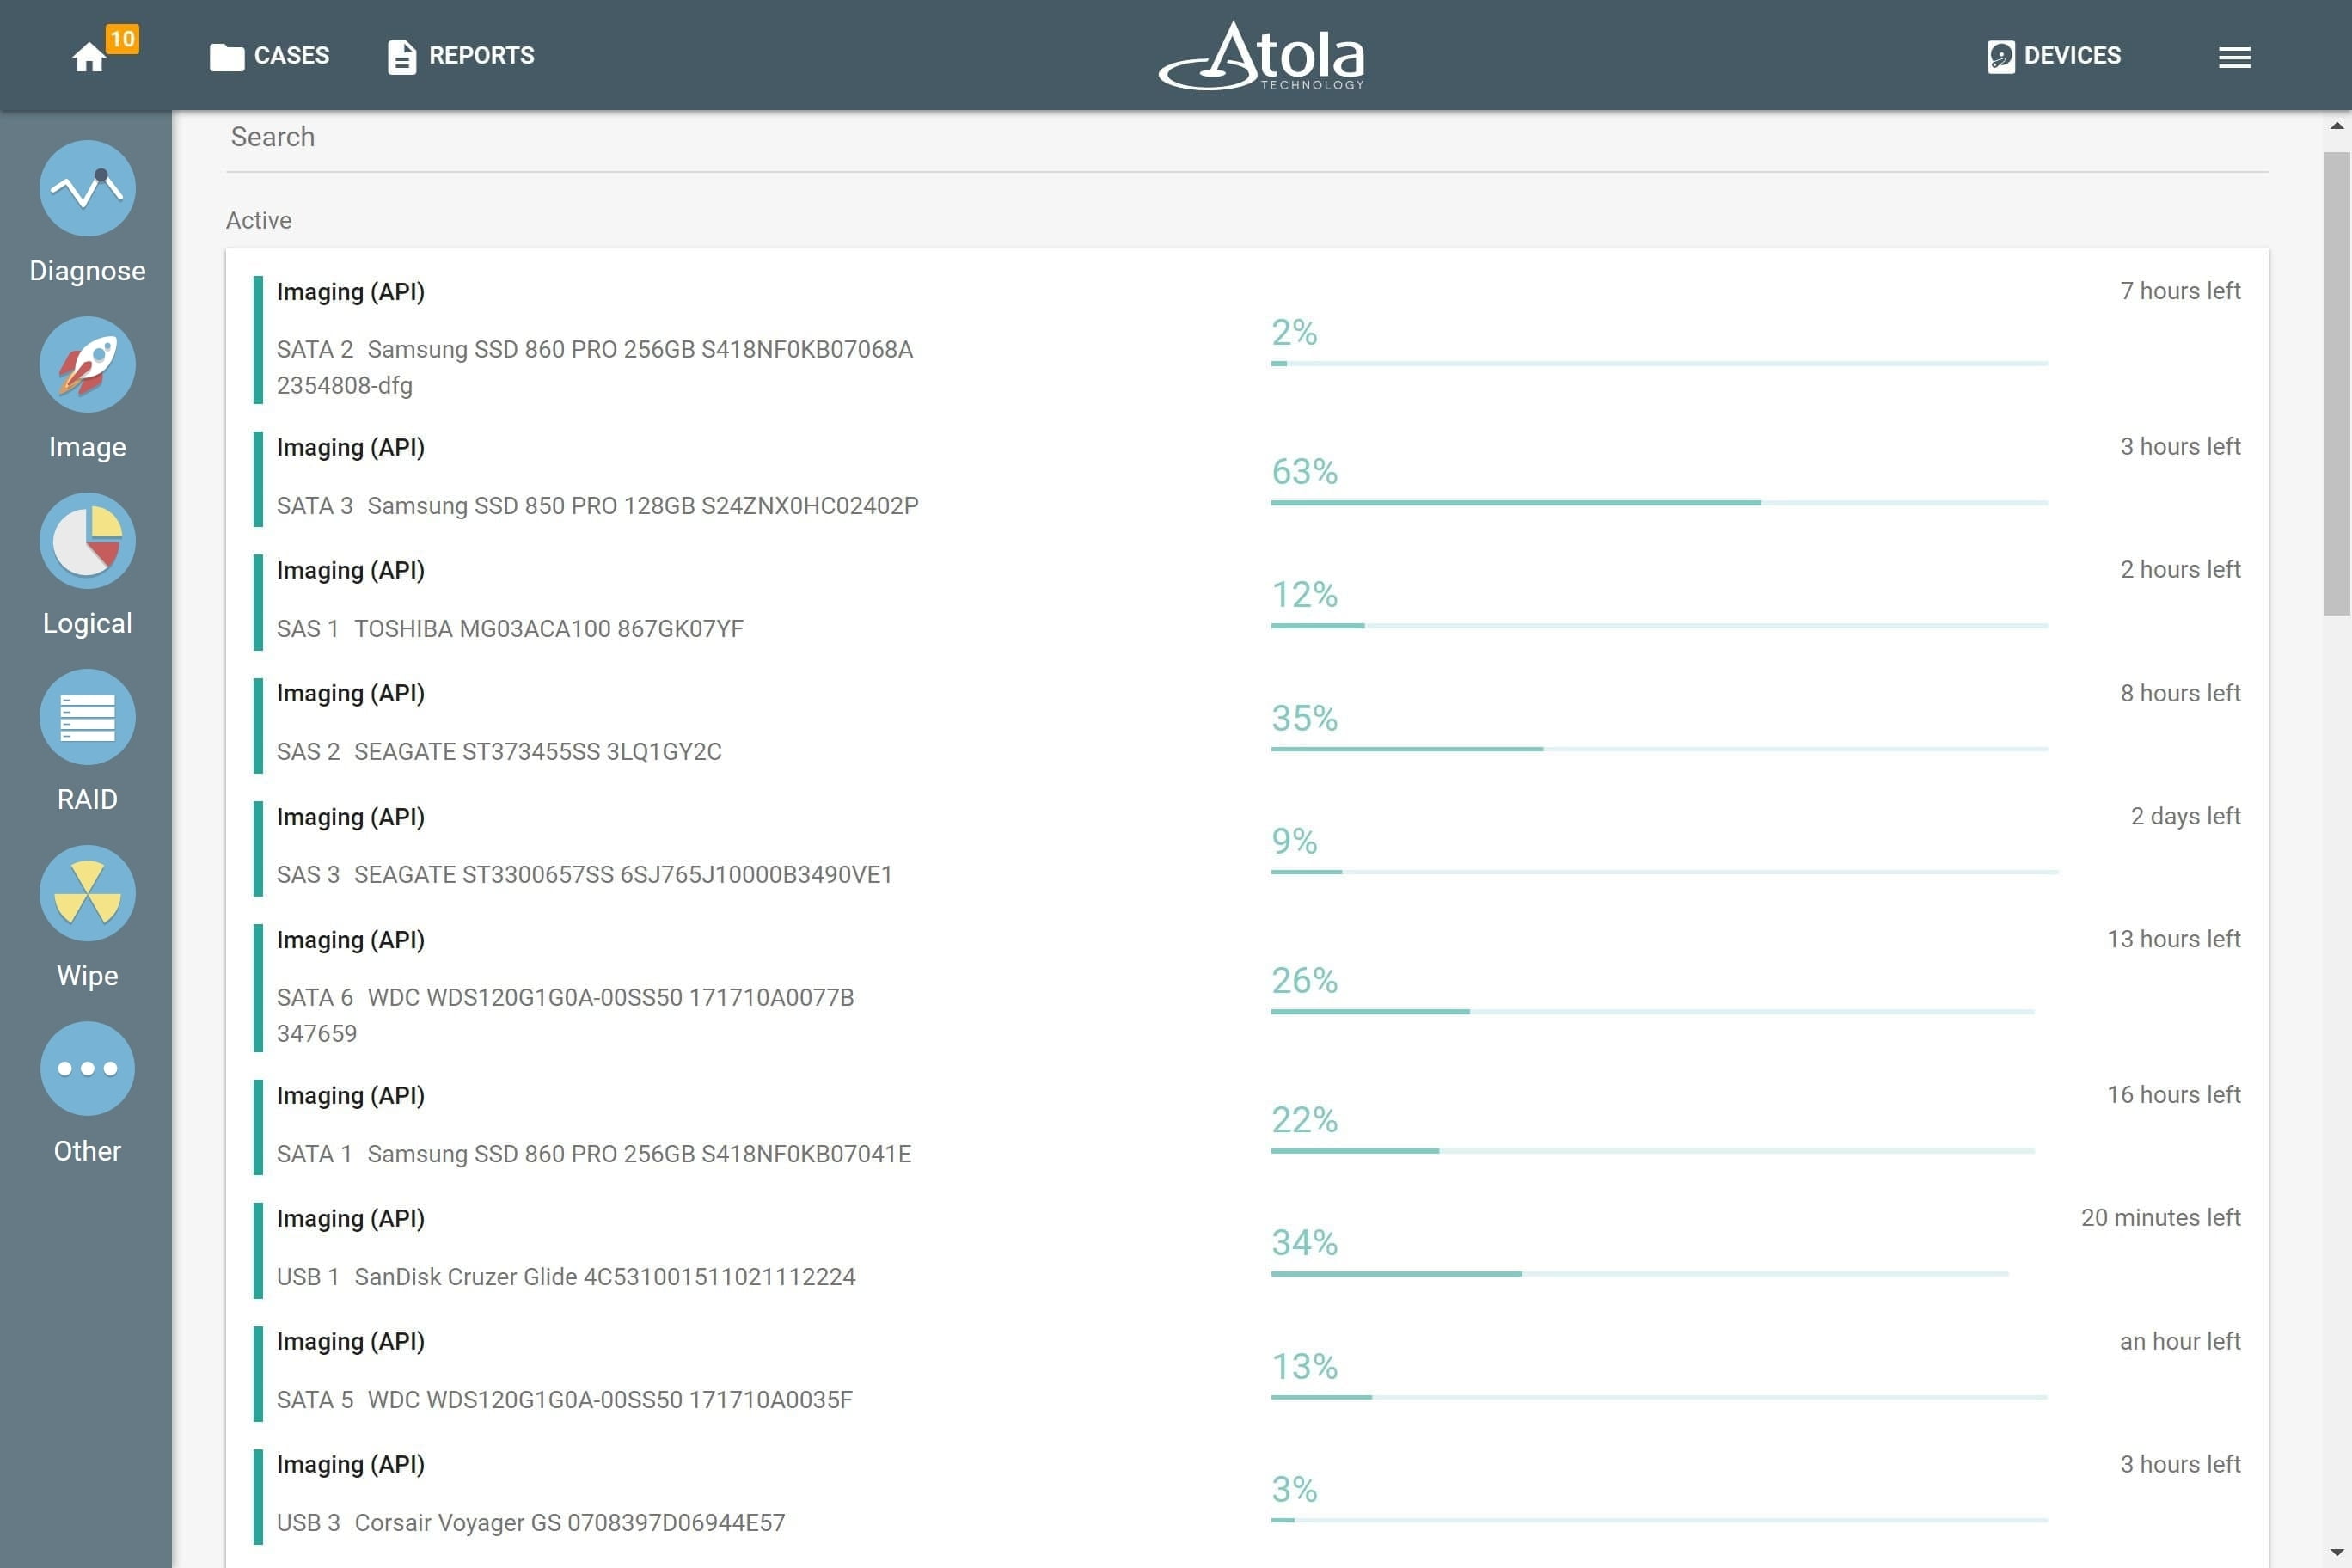
Start imaging of all source drives connected to the TaskForce
In the following example, 12 evidence drives are connected to six SATA and six SAS source ports of TaskForce.
The Python script is used to instantly launch 12 imaging sessions via Web API, like in the Express mode which is already built-in to TaskForce. The script uses /start-image API request and then displays the unique ID (task key) for every running imaging session. This key can be referred to in the next stages of the automated sequence.
    import sys
    if sys.version_info[0] < 3:
        raise Exception("Please use Python 3 to run this script")

    import urllib.request

    ports = ["SATA1", "SATA2", "SATA3", "SATA4", "SATA5", "SATA6", "SAS1", "SAS2", "SAS3", "SAS4", "SAS5", "SAS6"]
    tasks = []
    errors = {}

    for port in ports:
        try:
            res = urllib.request.urlopen("http://10.0.0.4/api/start-image?source=%s&targetFolder=//Vitaliy/Share" % (port))
            tasks.append(res.read().decode('utf-8'))
        except urllib.error.HTTPError as e:
            errors[port] = e.read()

    print("IDs of started imaging tasks:")
    print('\n'.join(tasks))
Automatically analyze an image file after acquisition
To track the status of the running imaging tasks, send /check-task API requests to TaskForce.
In response, TaskForce returns the message that the task is either completed or still running, which can be utilized by your code as a trigger for the following steps.
When the automation tool receives the notification that the task is finished, it launches the forensic analysis of the target image.
The Powershell script below shows an example of this automation flow:
    try {
        $r = Invoke-WebRequest "http://10.0.0.65/api/start-image?source=SATA4&targetFolder=\\Vitaliy\Share"
    }
    catch {
        Write-Output "$($_.Exception.Message)"
        exit $_.Exception.Response.StatusCode
    }
    $taskKey = $r.Content
    do {
        $check = (Invoke-WebRequest "http://10.0.0.65/api/check-task?taskKey=$taskKey").Content | ConvertFrom-Json
        Start-Sleep -s 1
    } while ($check.state -eq "progress")
    $windowsPath = "C:\Share\" + ($check.target -replace '[\/]', '\' | Split-Path -leaf)
    $caseName = "Case123"
    $autopsyArguments = '" --createCase --caseName="' + $caseName + ' --caseBaseDir="C:\Work\Cases"'
                      + ' --addDataSource --dataSourcePath="' + $windowsPath + '" --runIngest --generateReports'
    Start-Process -FilePath "C:\Program Files\Autopsy\bin\autopsy64.exe" -ArgumentList $autopsyArguments