M.2 SSD extension module
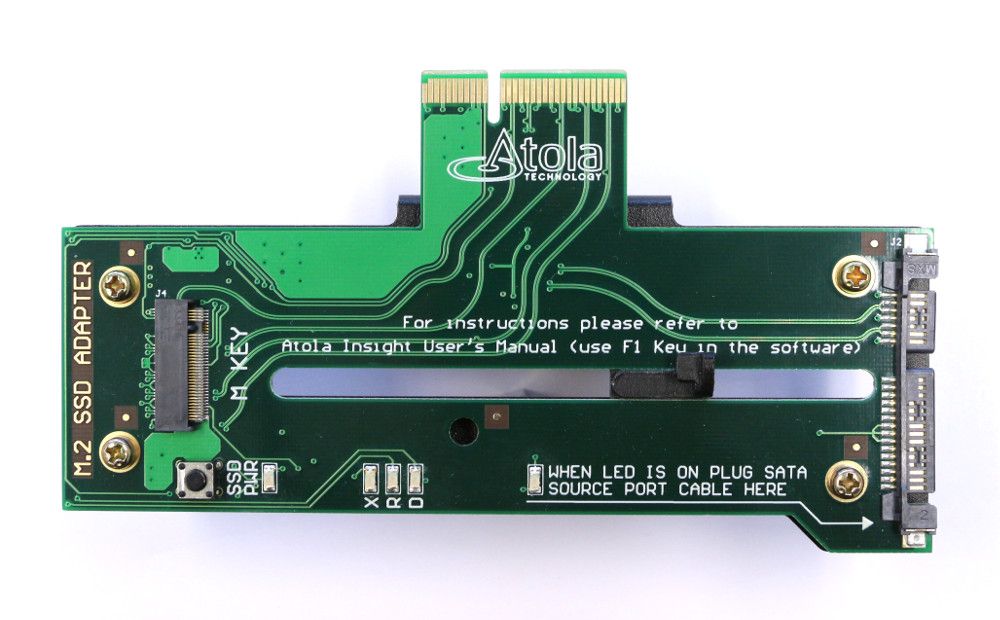
You can connect M.2 PCIe NVMe, M.2 PCIe AHCI, and M.2 SATA solid state drives to Atola TaskForce using the M.2 SSD extension module.
This extension module supports only B & M key and M key interface drives; B key interface drives are NOT supported.

The M.2 SSD extension module works with Atola DiskSense 2 as well.
TaskForce features supported for the M.2 SSD extension
All standard TaskForce operations and features are supported for the M.2 PCIe NVMe, M.2 PCIe AHCI, and M.2 SATA drives, including:
- Max read/write speed: 1300 MB/s
- Drive hotswap (excluding M.2 PCIe AHCI drives)
- Write protection with the physical source/target switch
- Diagnostics
- Physical and logical imaging
- Hash calculation
- Damaged drive support
Plug the M.2 SSD extension module
The TaskForce hardware unit is equipped with the PCI Express port on its back panel, which is referred to as an Extension port. It is used to plug Atola hardware extension modules supported by Atola TaskForce software.

To connect the M.2 SSD extension module to TaskForce, do the following:
- Power off TaskForce.
- Align 3 holes on the extension module and 3 screw holes on the TaskForce back panel. Firmly plug the M.2 SSD extension module into the Extension port and fasten the module with 3 screws.
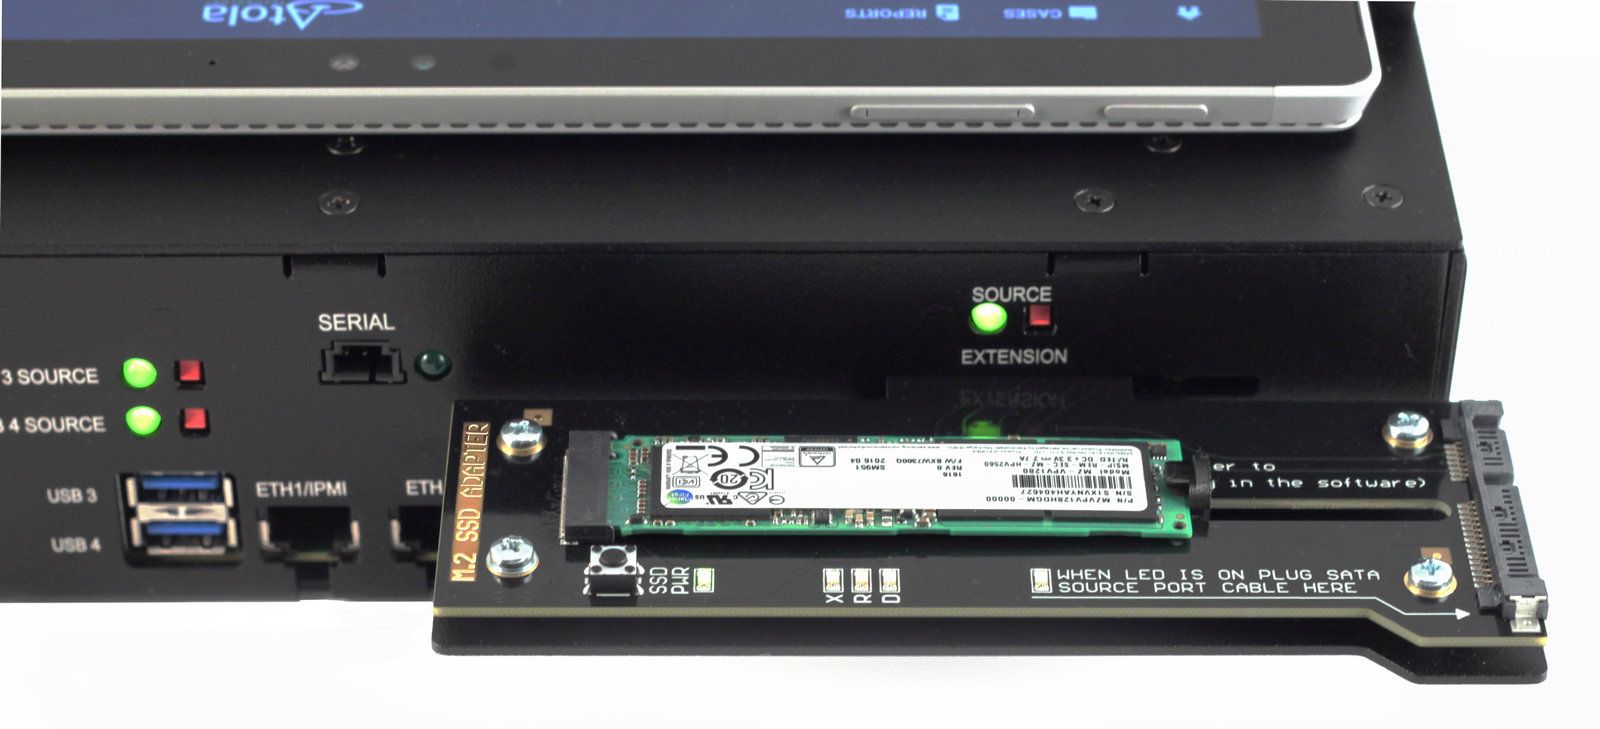
- Plug an M.2 PCIe NVMe, M.2 PCIe AHCI, or M.2 SATA drive into the extension and fasten the drive in place with the black plastic slider.
- Optional: If you plan to work with M.2 SATA drives, connect the extension to one of the SATA ports on TaskForce using a SATA cable. For details, see the Connect and identify an M.2 SATA drive section on this page.
- Power on TaskForce.
Distinguish between M.2 NVMe/M.2 AHCI, and M.2 SATA drives
All solid state drives with M.2 form factor look pretty much the same.
But there are different ways to connect M.2 PCIe NVMe and M.2 PCIe AHCI drives on one hand, and M.2 SATA drives on the other hand to TaskForce using the M.2 SSD extension module.
The easiest way to tell apart M.2 NVMe and M.2 PCIe AHCI drives from M.2 SATA drives – when the extension is connected and TaskForce is powered on – is to look at the LED indicator on the extension module, next to the words "When LED is on, plug SATA source port cable here":
- If the LED is off, the drive connected to the M.2 SSD extension module is either M.2 NVMe or M.2 PCIe AHCI. See Connect and identify an M.2 NVMe or M.2 AHCI drive.
- If the LED is on, the drive is M.2 SATA. See Connect and identify an M.2 SATA drive.
To define the type of the particular M.2 drive before connecting it to TaskForce, check the markings on the drive or refer to the manufacturer’s specifications.

Connect and identify an M.2 NVMe or M.2 AHCI drive
To identify the M.2 PCIe NVMe or M.2 PCIe AHCI drive, TaskForce must be first booted with that particular type of drive connected to the M.2 SSD extension module:
- Power off TaskForce.
- Plug an M.2 PCIe NVMe or M.2 PCIe AHCI drive into the extension and fasten the drive with the black plastic slider.
- Power on TaskForce and wait for the booting to be completed.
- In the TaskForce main window, click Devices.
- Click the port in the EXT section of the Select device panel.
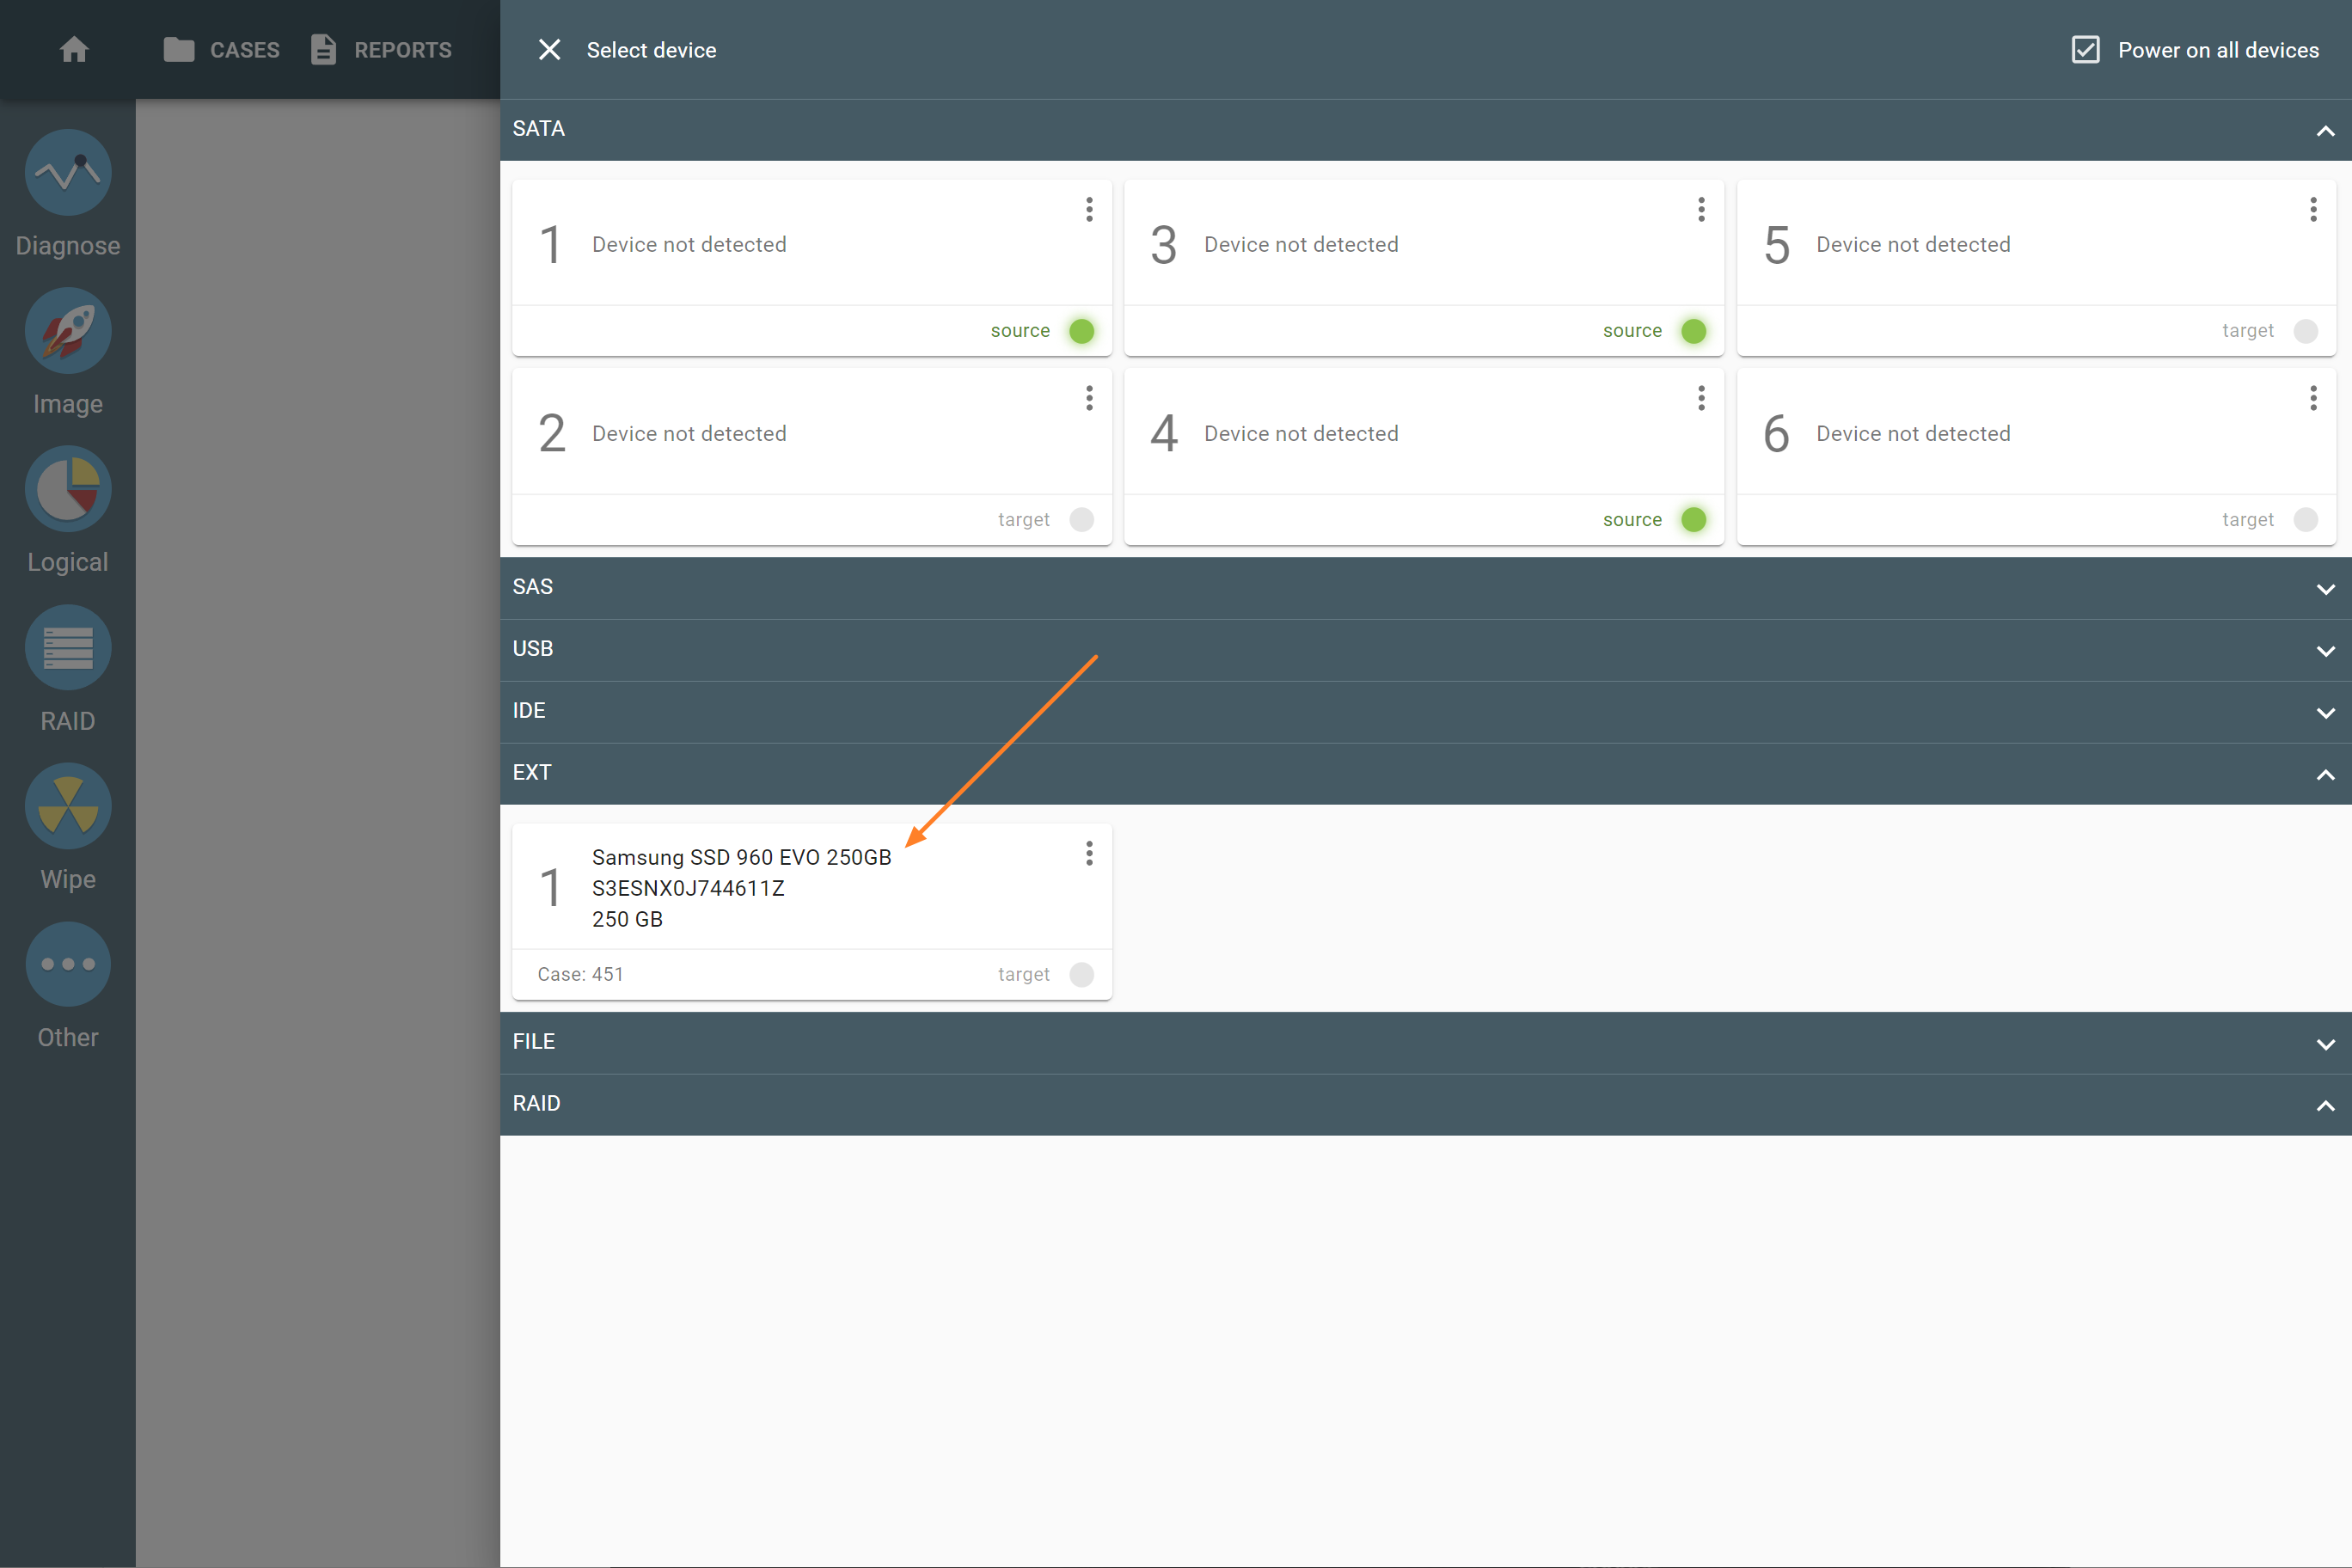
NVMe M.2 drive in the EXT section of the Select device panel.
Work consecutively with several M.2 NVMe drives
Drive hot-swapping is supported for M.2 PCIe NVMe drives, but not for M.2 PCIe AHCI drives. To determine the type of a particular drive, check the markings on it or refer to the manufacturer’s specifications.
You can plug in several M.2 NVMe drives one after another without turning TaskForce off and on.
To identify an M.2 PCIe NVMe drive, TaskForce must first be booted with that particular type of drive connected to the M.2 SSD extension module. After you boot TaskForce with an M.2 NVMe drive connected to the extension module, the system identifies all other M.2 NVMe drives without rebooting the hardware unit.
To swap or remove an NVMe M.2 drive when working with several of them consecutively, do the following:
- On the extension module, press the SSD PWR button. The respective LED indicator turns off.
- Release the black plastic slider and unplug the drive.
- Plug the next drive in and fasten it with the black plastic slider.
- On the extension module, press the SSD PWR button. The respective LED indicator turns on. The drive is connected, powered on, and ready for the next operation.
Connect and identify an M.2 SATA drive
When you plug an M.2 SATA drive into the M.2 SSD extension module, TaskForce lights up the LED indicator on the module, next to the words "When LED is on, plug SATA source port cable here".
M.2 SATA drives appear in the SATA section in the Select device panel, not in the EXT section, as M.2 NVMe or M.2 AHCI drives do. For example, if you connect the M.2 SSD extension with the SATA cable to the SATA 1 port on the TaskForce hardware unit, the drive will appear in the corresponding SATA 1 port in the TaskForce software.
To connect an M.2 SATA drive to TaskForce, do the following steps:
- Using the SATA cable, connect the M.2 SSD extension module to one of the SATA ports on TaskForce.
- In Atola TaskForce software, power off the SATA port.
- Plug an M.2 SATA drive into the extension and fasten it in place with the black plastic slider.
- In Atola TaskForce software, power on the SATA port.
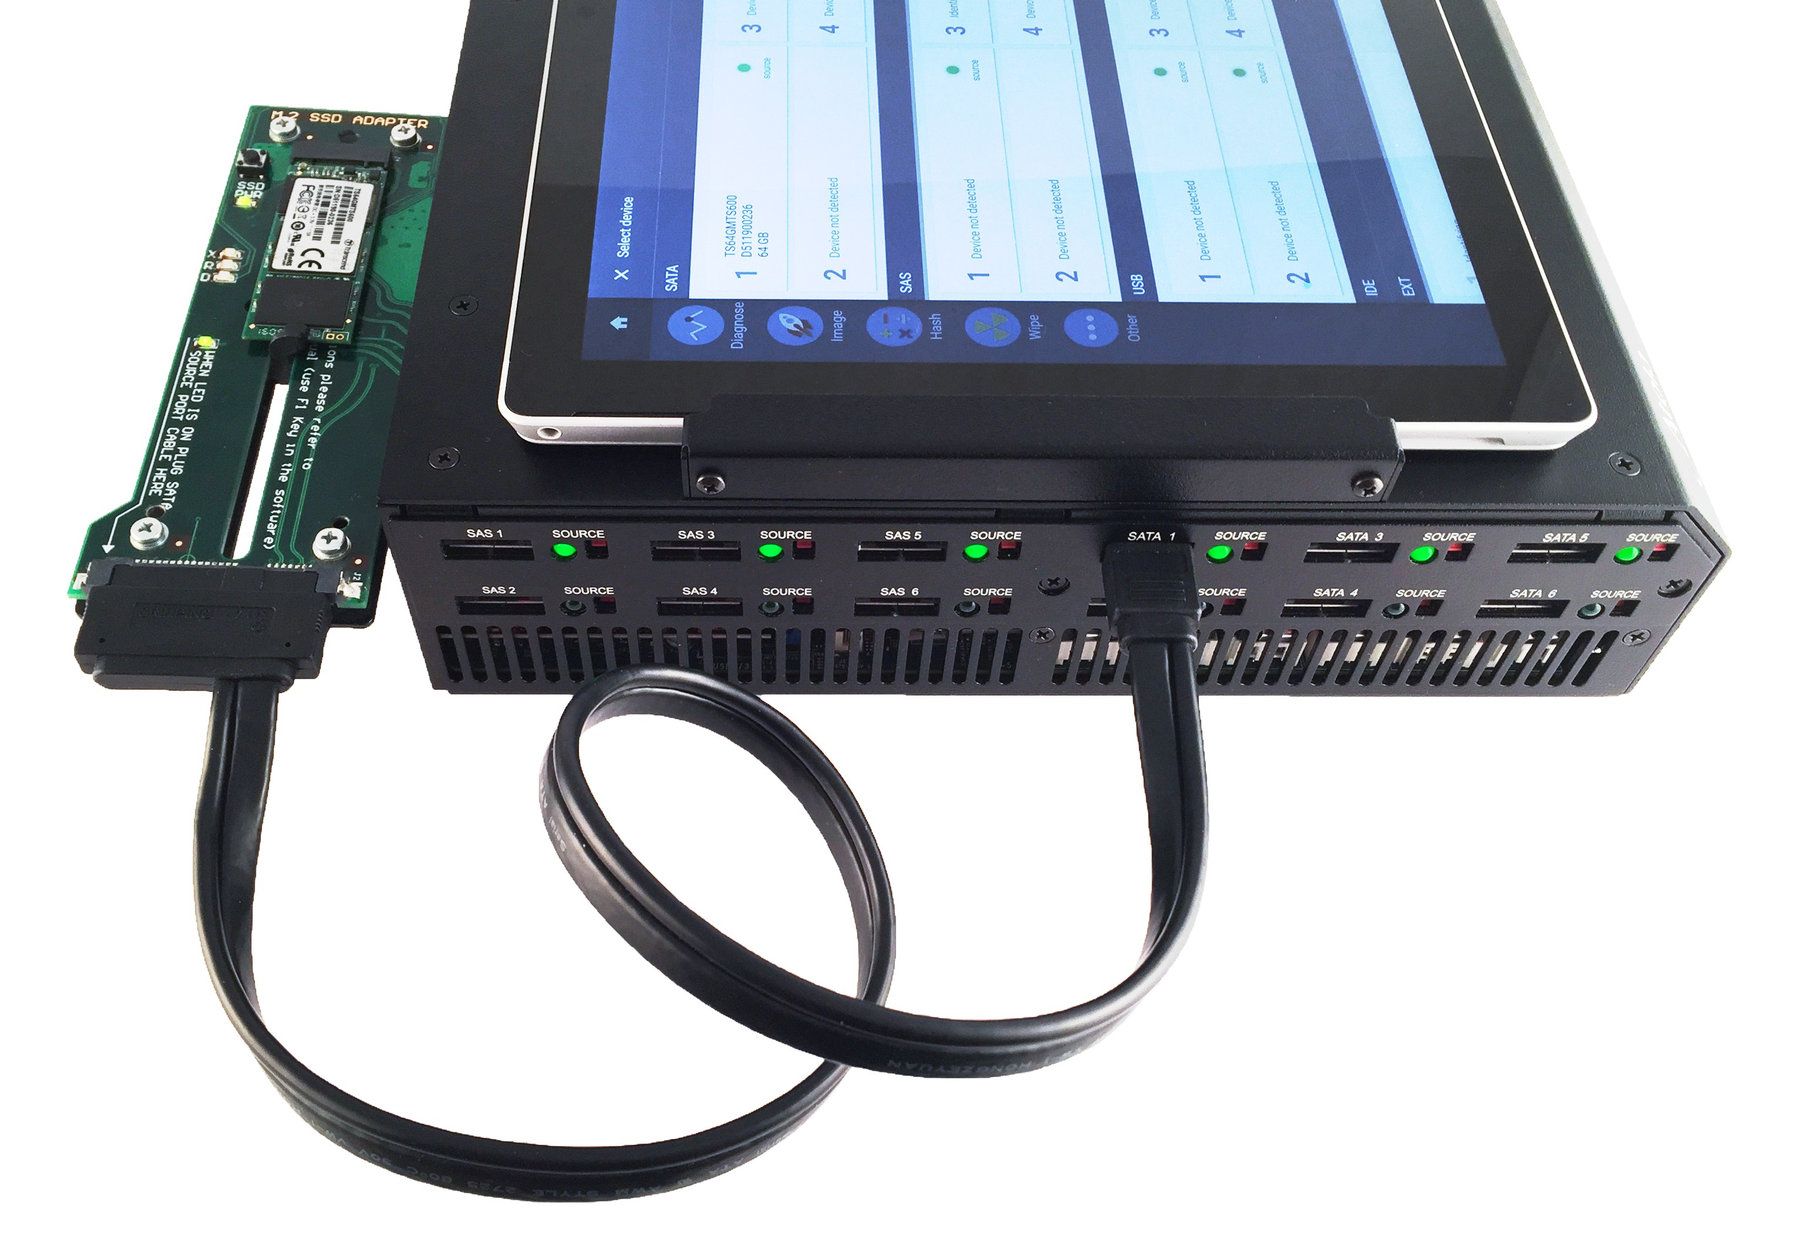
Work consecutively with several M.2 SATA drives
For M.2 SATA, drive hotswap is supported. It allows connecting and replacing M.2 SATA drives without turning TaskForce off and on again.
To determine if a particular M.2 drive is SATA type or not, check the markings on it or refer to the manufacturer’s specifications.
Also, if your drive belongs to the SATA type, TaskForce will light up the LED indicator on the extension module, next to the words "When LED is on, plug SATA source port cable here".
Connect a U.2 NVMe drive using an adapter
To use a drive with U.2 interface, attach the drive to TaskForce with the help of a U.2-to-M.2 adapter and a cable (not included in the package).
To connect a U.2 drive to TaskForce, do the following:
- Plug the U.2 drive into the U.2-to-M.2 adapter using the cable.
- Plug the U.2-to-M.2 adapter into the Atola M.2 SSD extension.
- Plug the extension into TaskForce while the unit is powered off.
Unplug the M.2 SSD extension module
To disconnect the M.2 SSD extension module or replace it with another extension module, do the following steps:
- Power off TaskForce.
- Disconnect the SATA cable from the extension module.
- Release the screws, which hold the module, and unplug it from the Extension port.
- Optional: Plug another extension module into the Extension port and fasten the module with a screw.
- Power on TaskForce.
