Clip target drive to source evidence size
When you image data from an evidence drive, but the target drive is larger than that of the source, the hash values for the source and for the target drives will not be identical. This will happen even if there is no data in the remaining space of the target.
To avoid it, you can limit your SATA target drive's capacity using Host Protected Area (HPA) or Accessible Max Address (AMA). It will make the sectors beyond this limit inaccessible to the hashing tools or the end user. In TaskForce, it only takes one quick adjustment to the imaging settings:
- In the TaskForce main window, click Image.
- Select a source and target device.
- On the Imaging sessions page, click Start new.
- On the Settings page, click Change.
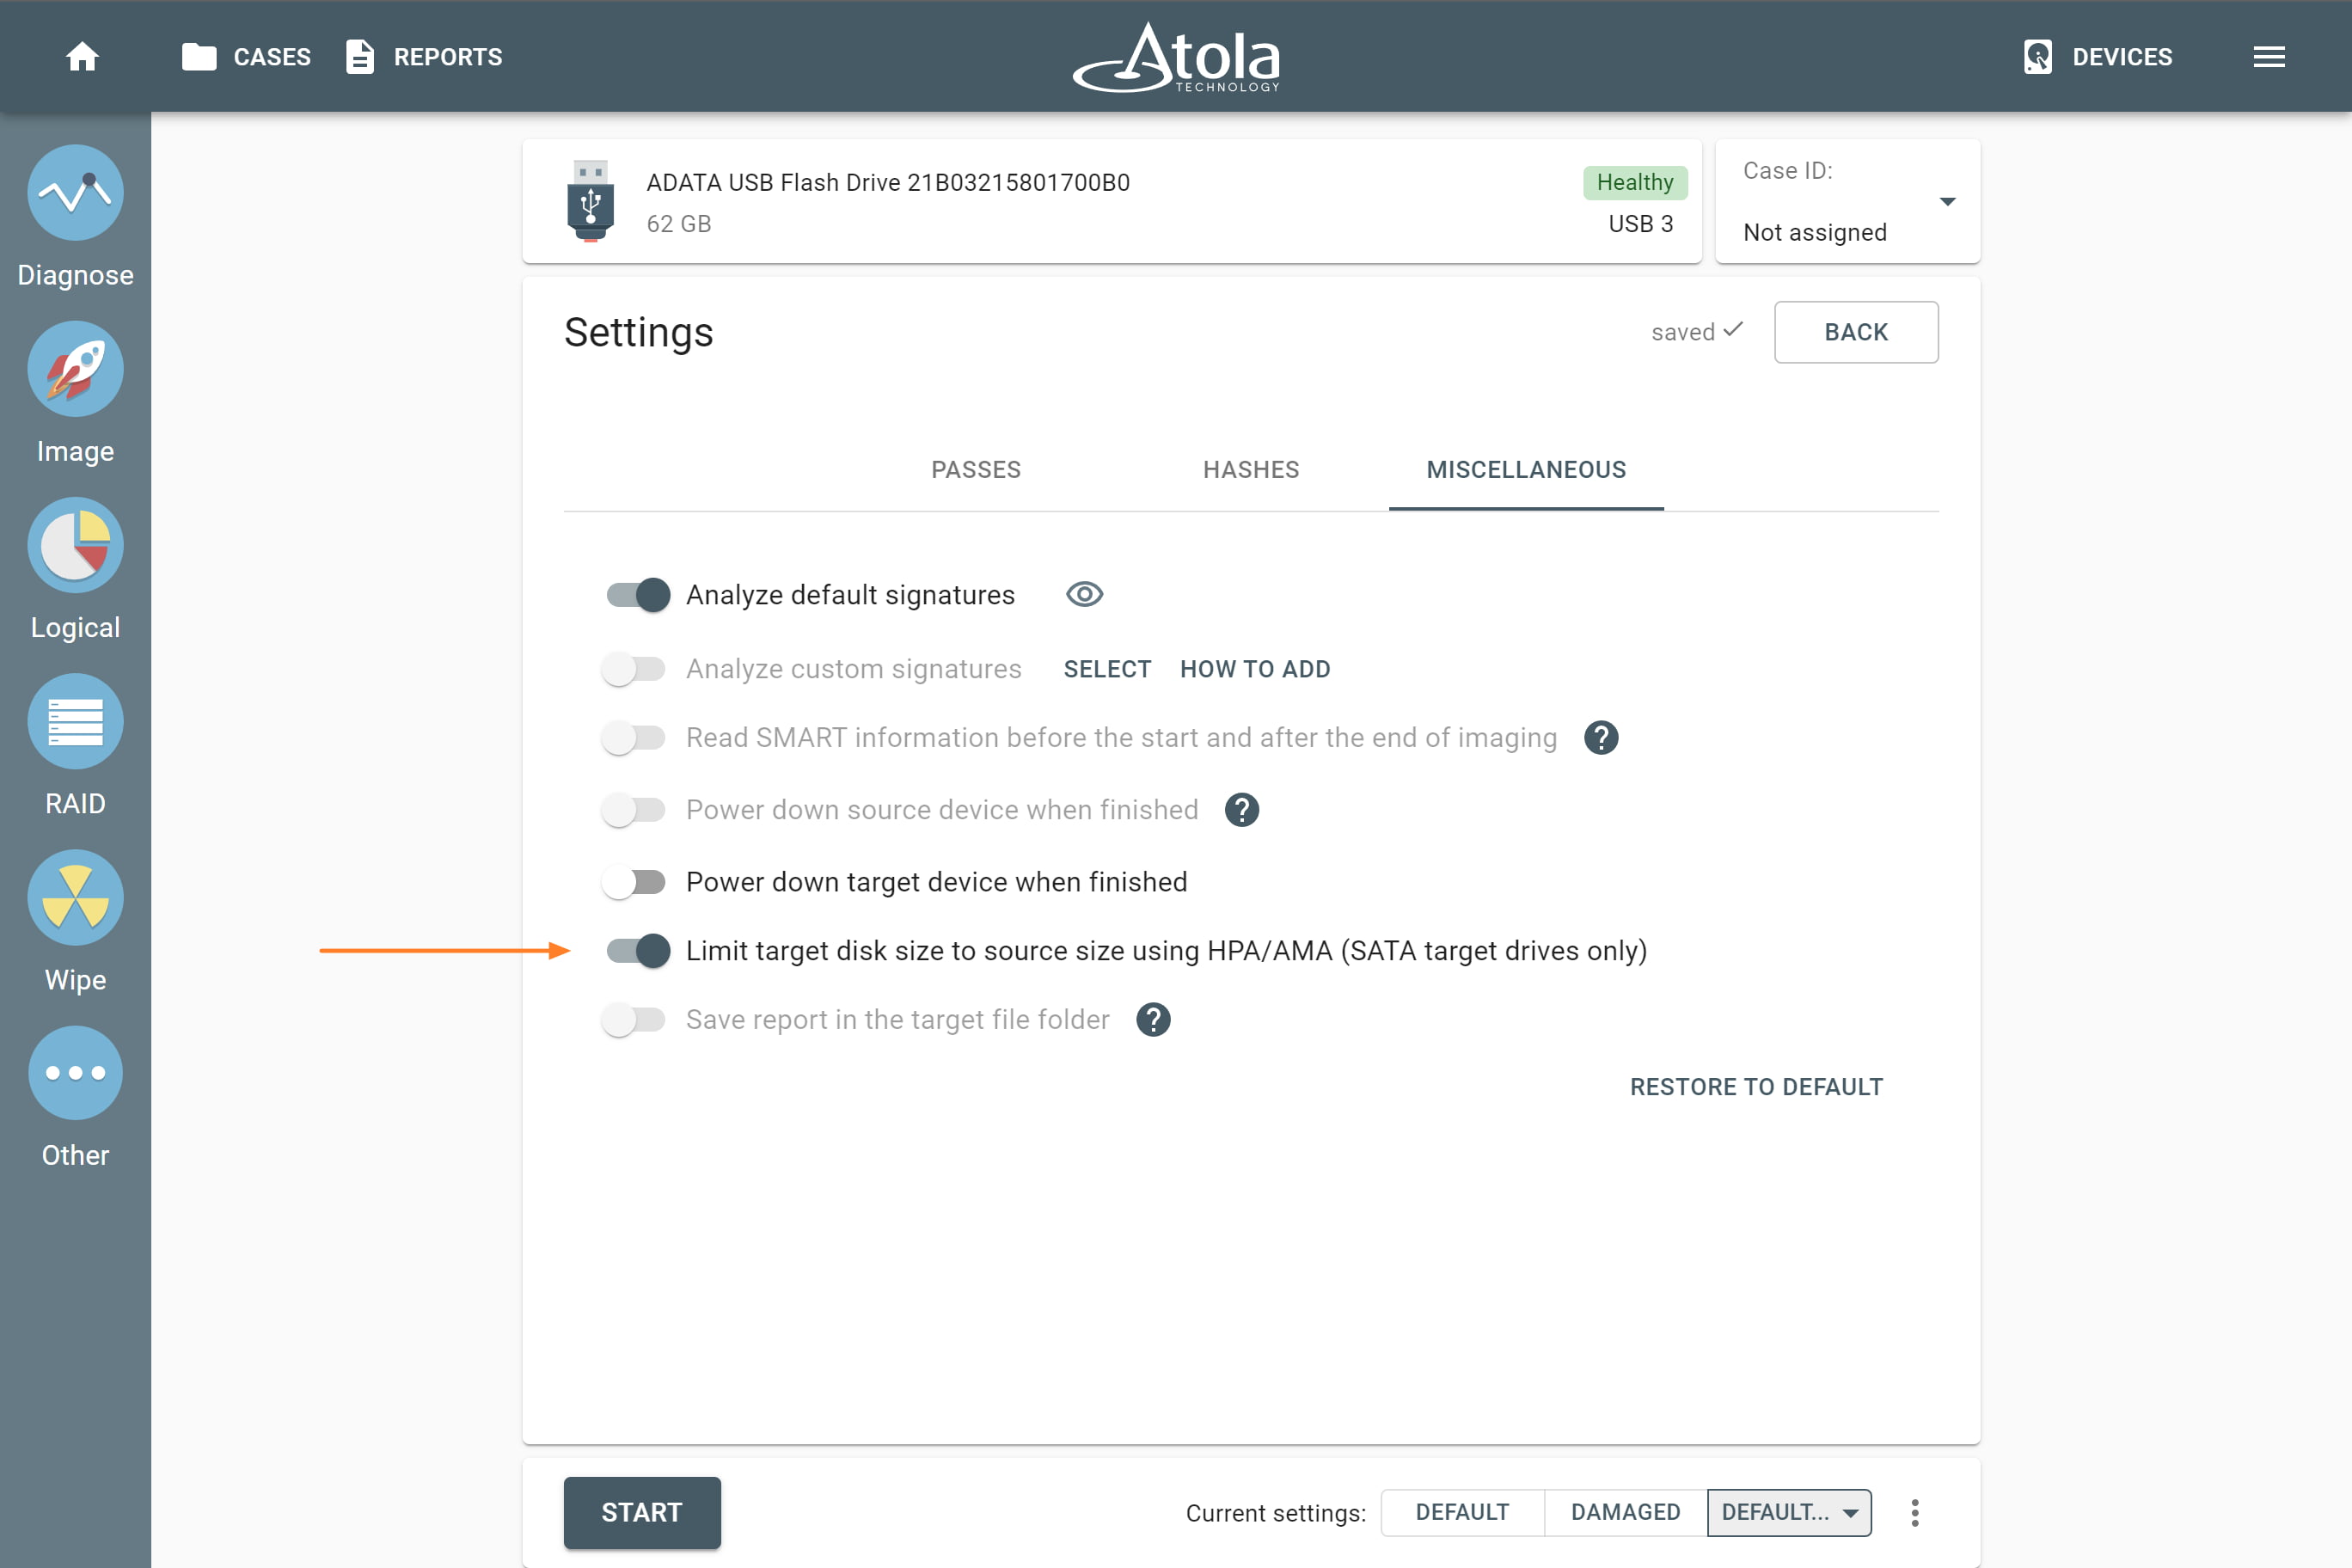
- On the Miscellaneous tab, toggle the Limit target disk size to source size using HPA/AMA (SATA target ports only) option.
You can now proceed with the imaging process by clicking the Start button.
Before the imaging starts, TaskForce looks up the size of the evidence drive and limits the space of the target using HPA/AMA to make its capacity identical to that of the evidence drive.
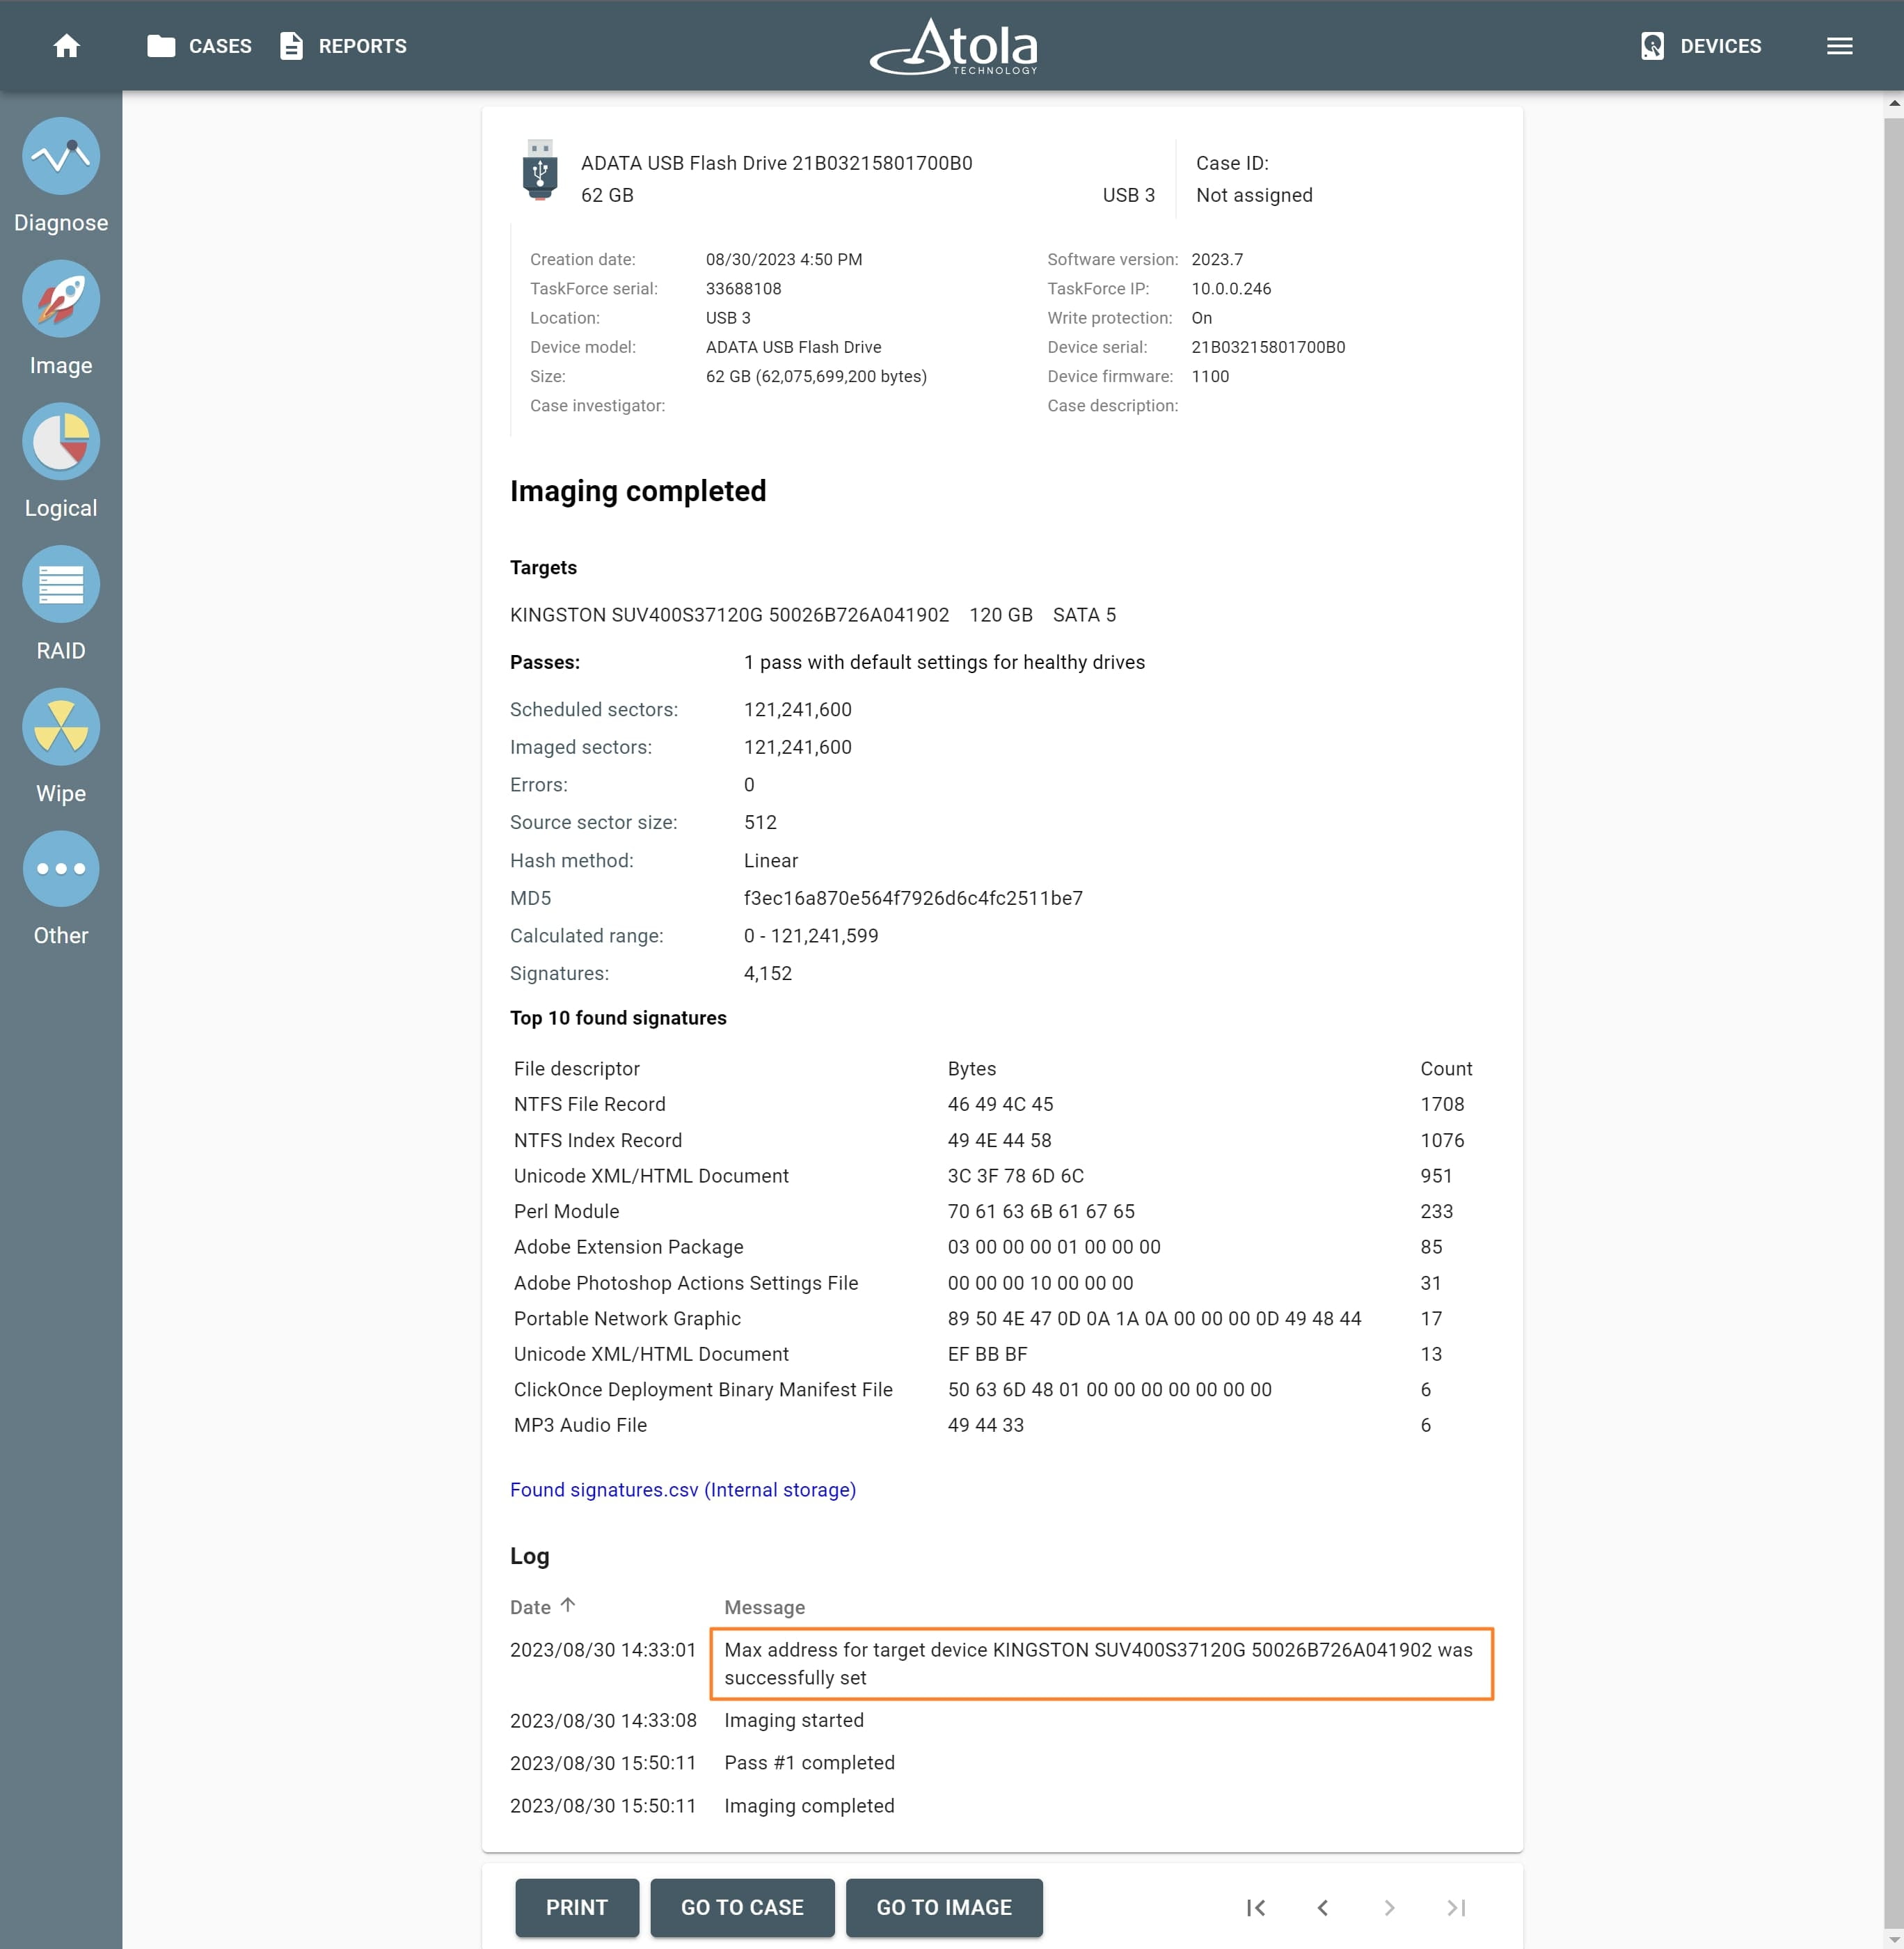
When imaging is complete, the report will contain information about the time when HPA/AMA was enabled.
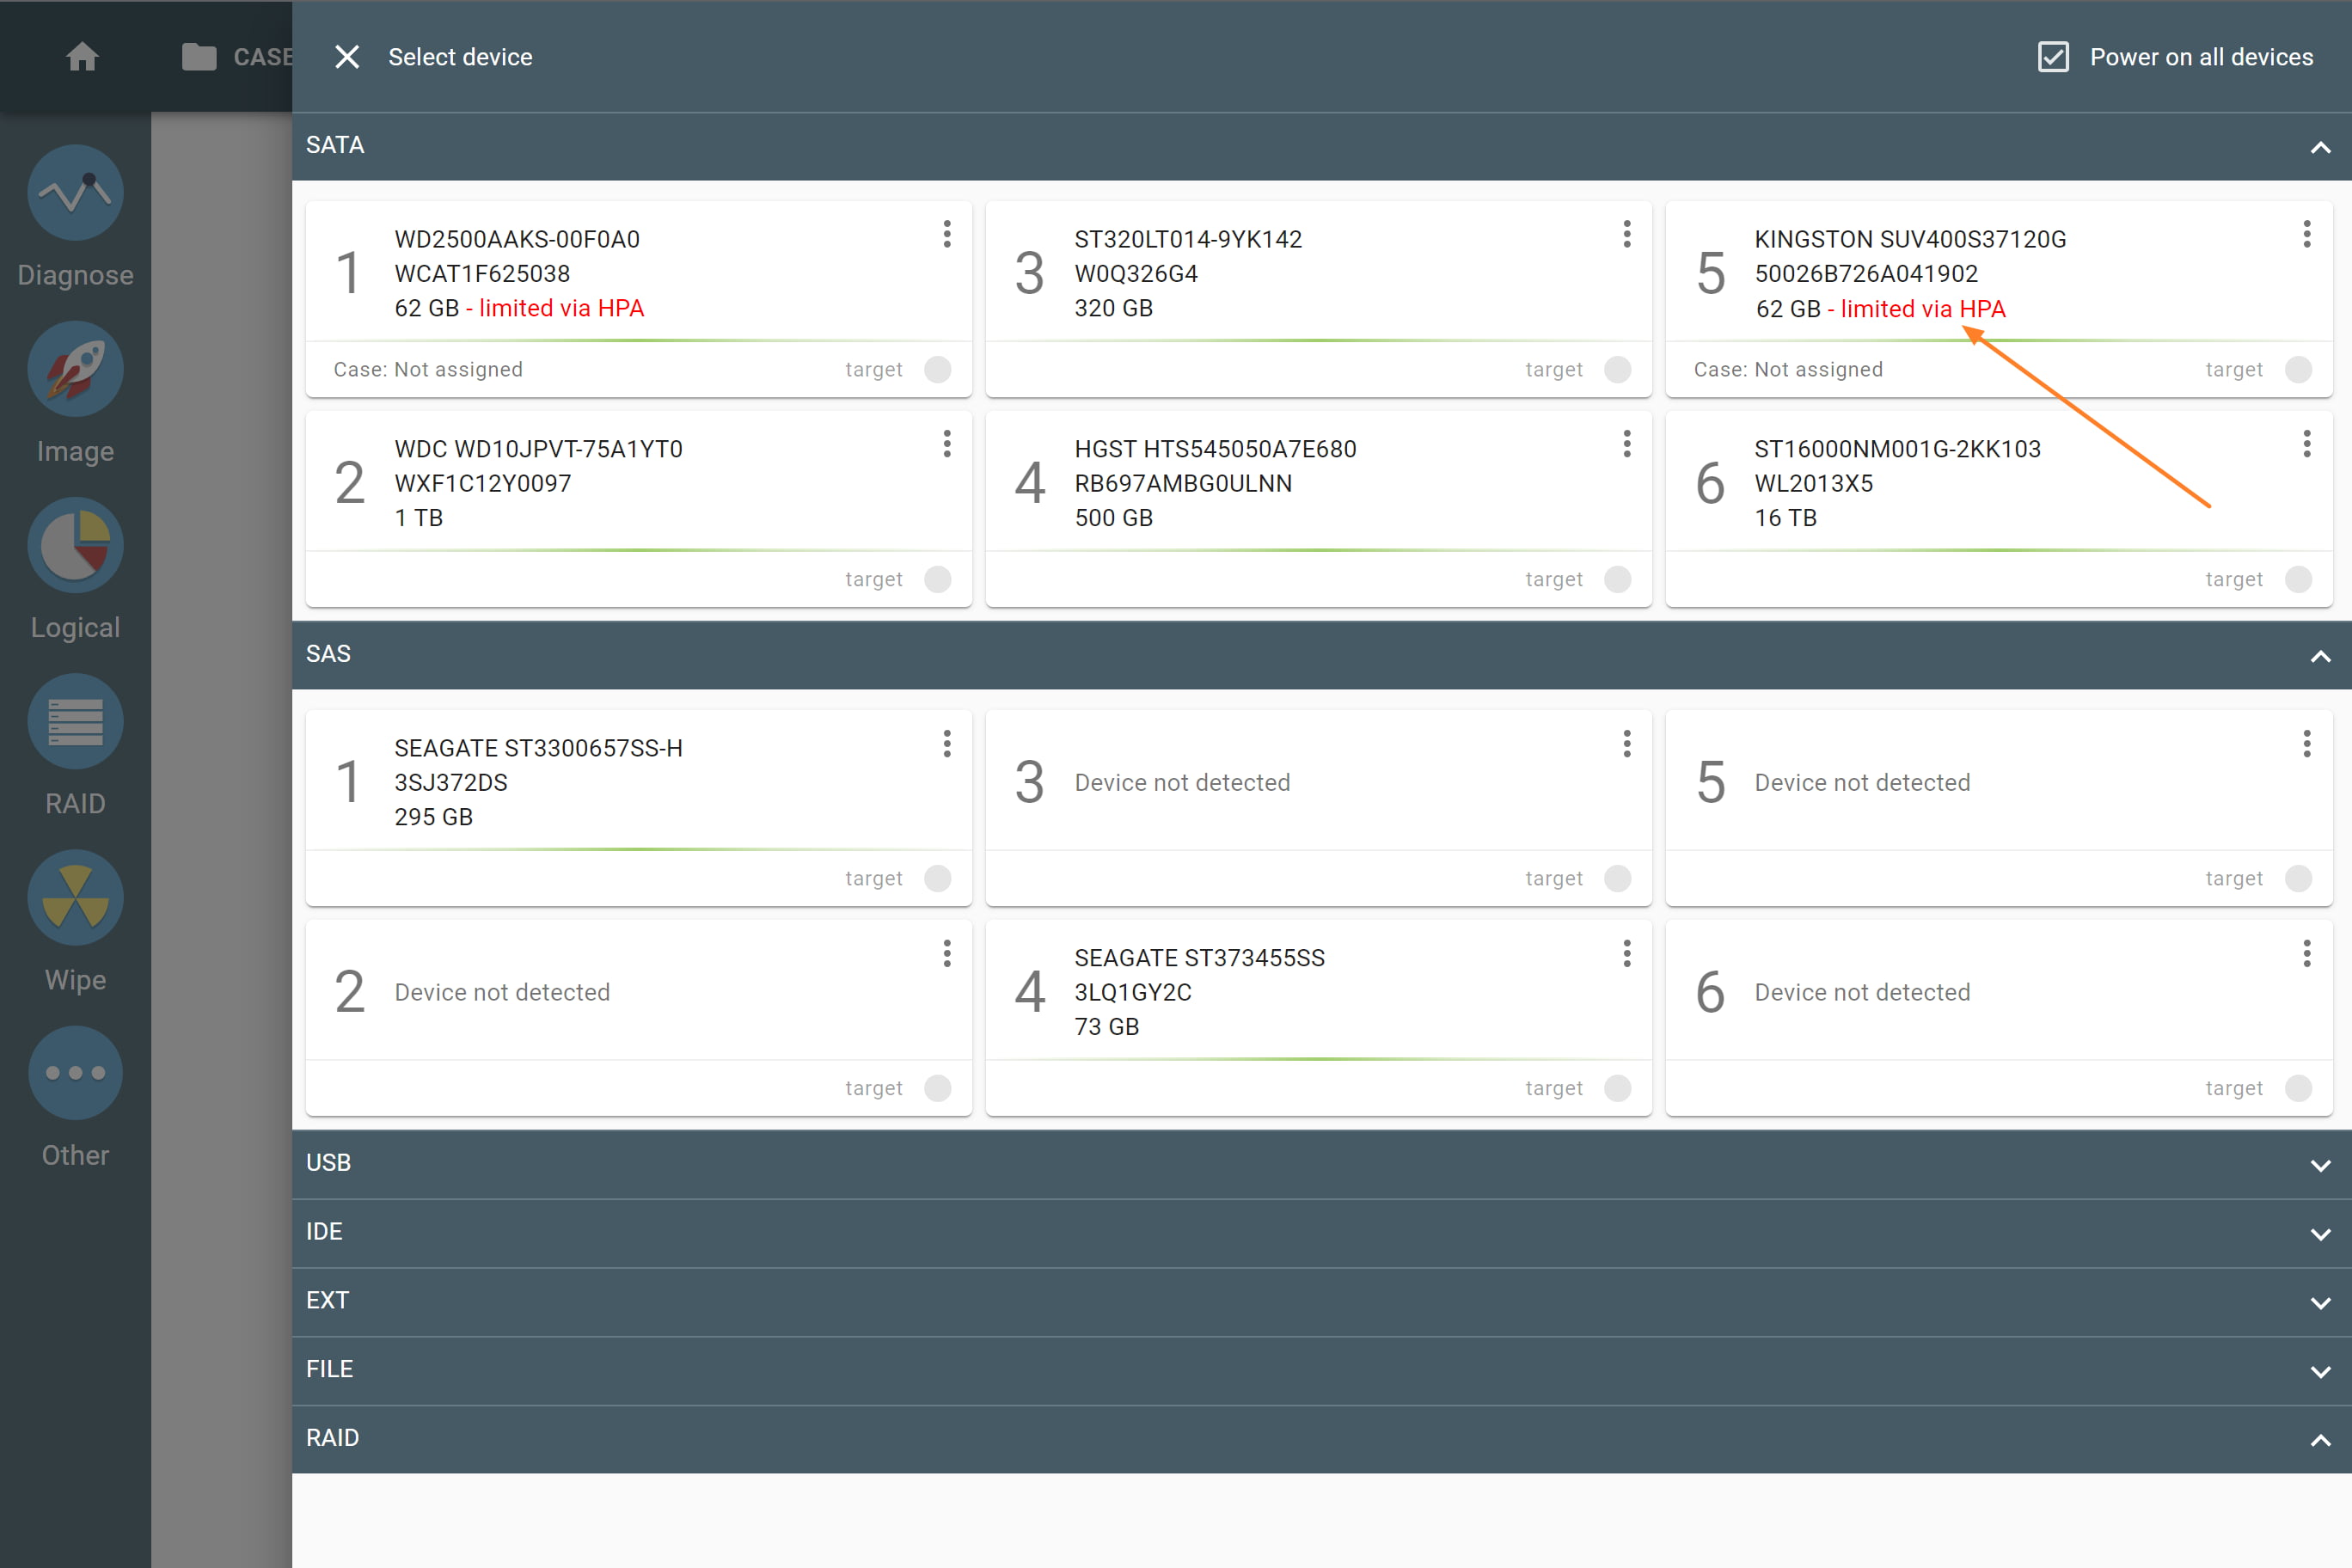
The target disk's port in Devices menu now contains an HPA/AMA indicator, thus informing you that HPA/AMA has been enabled on this drive.
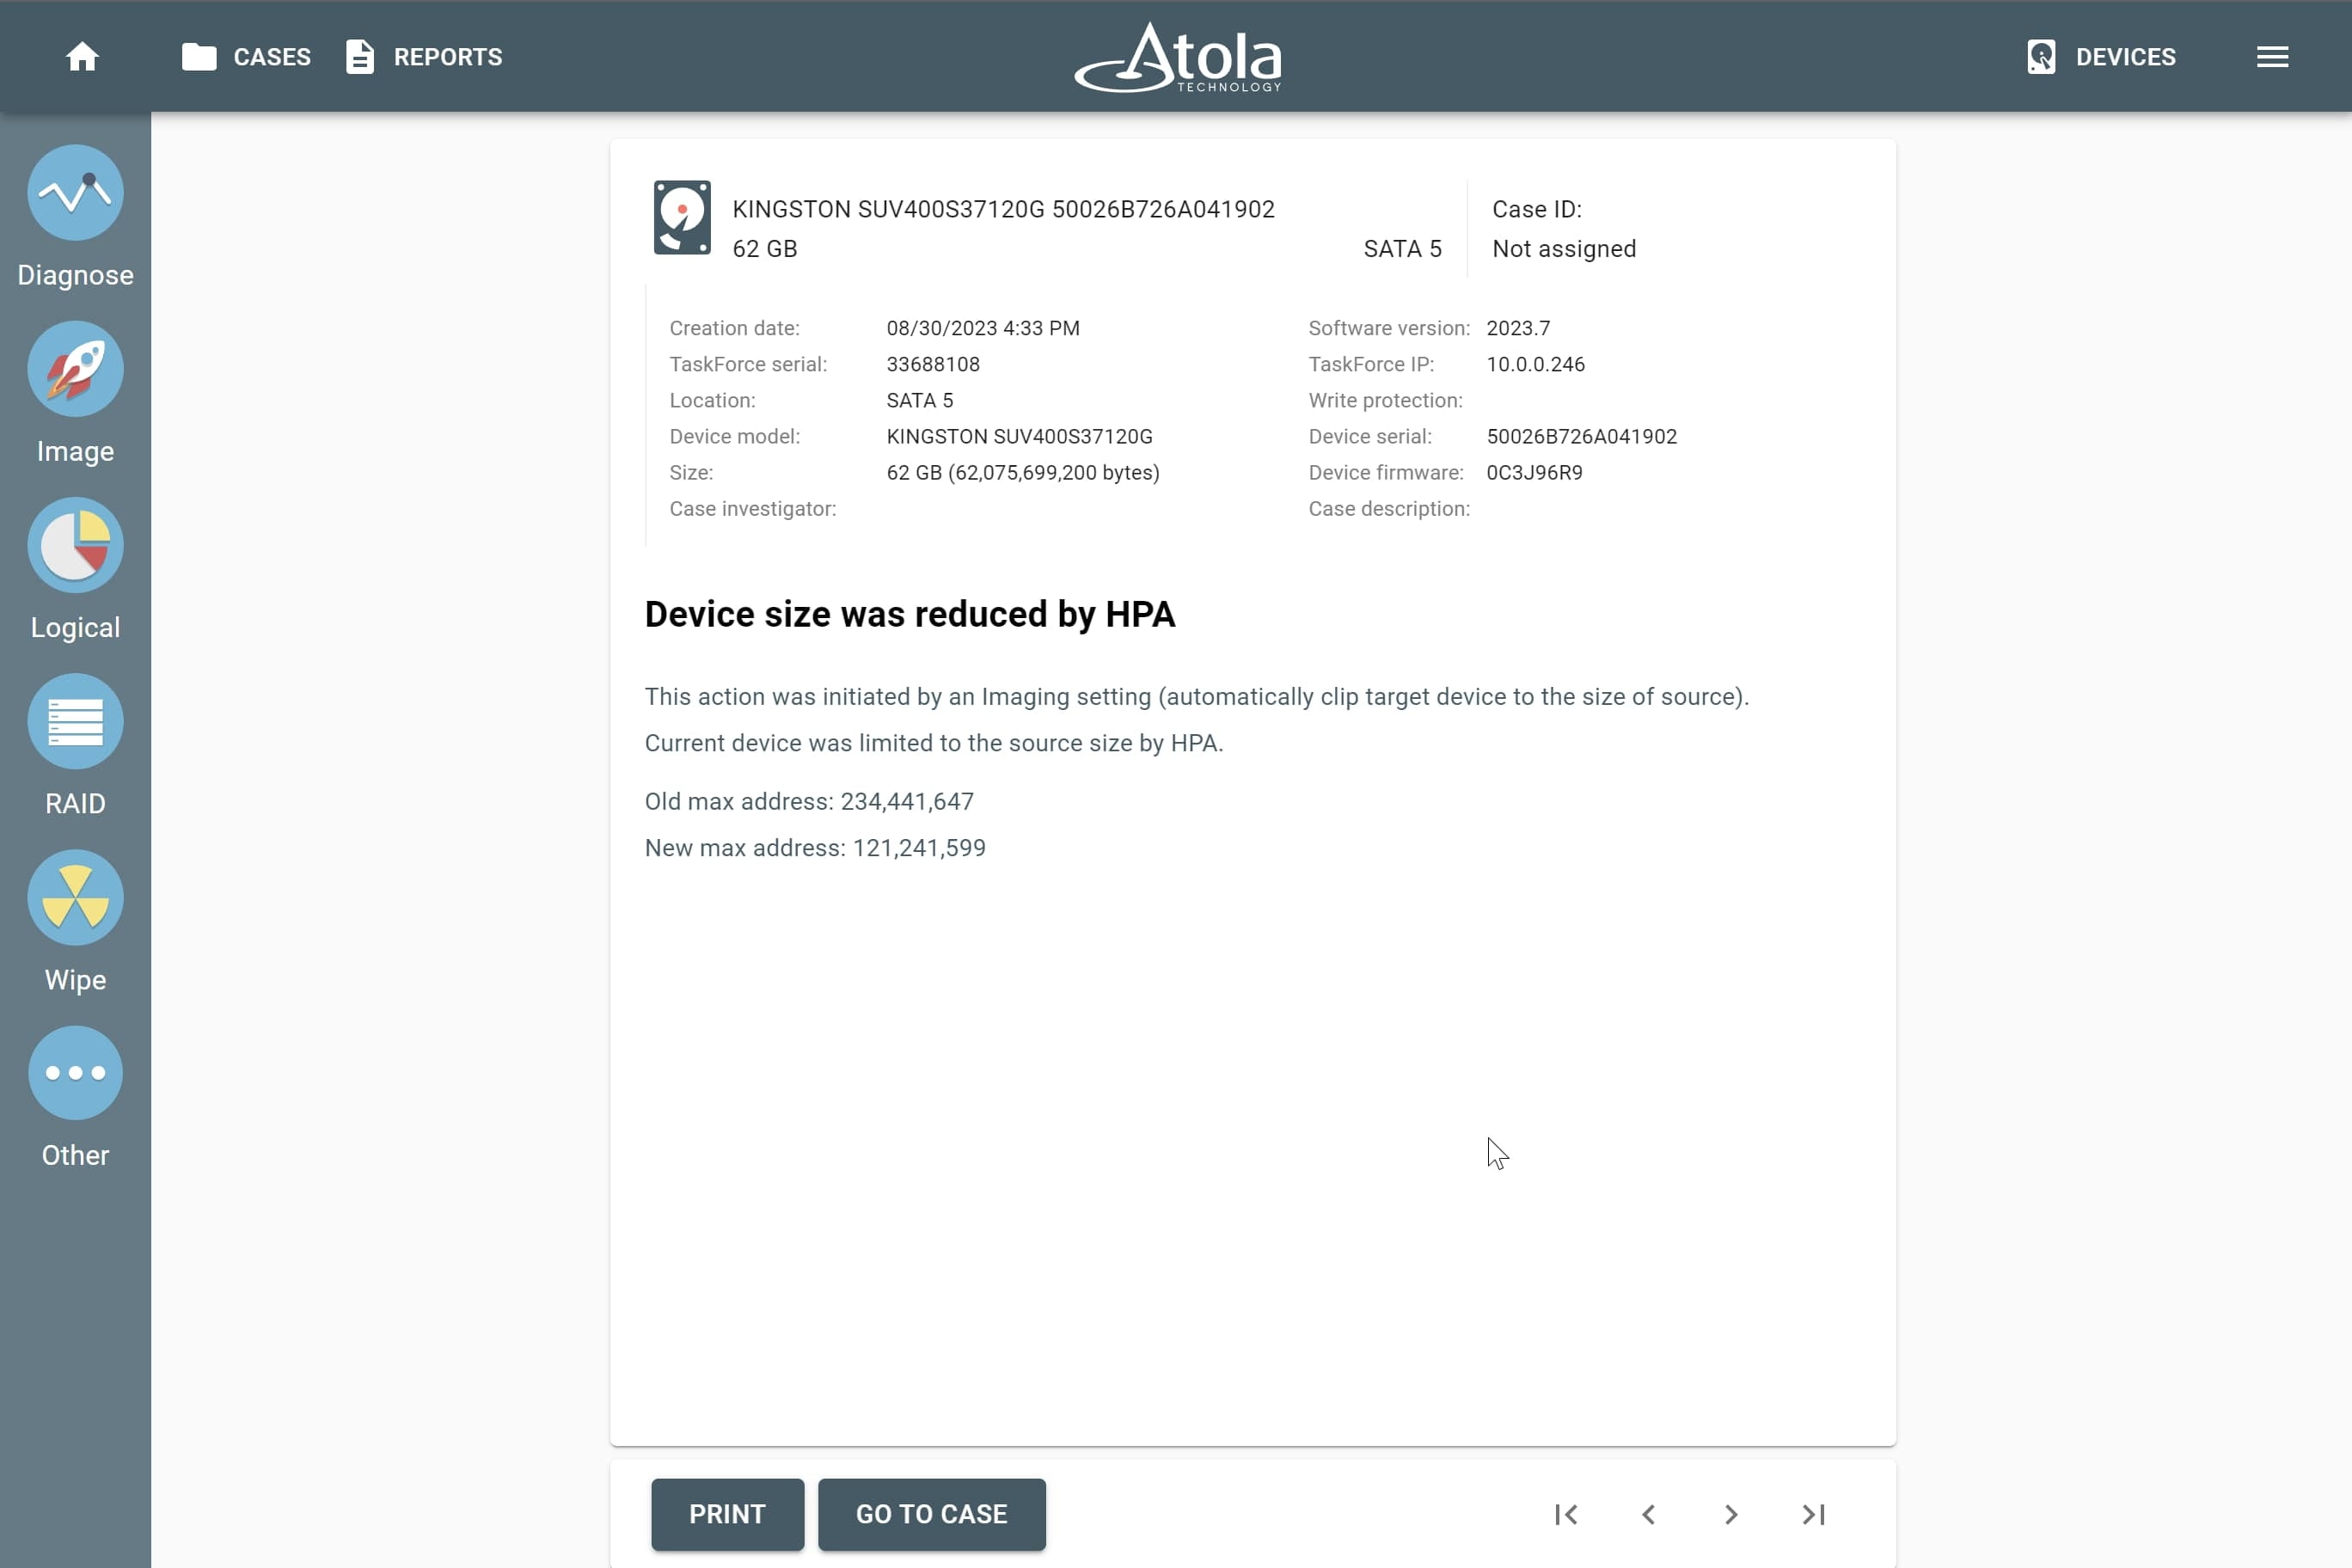
There will also be a report created in the case management system, which indicates the old (native) and the new (as set by HPA/AMA) max address.
Now you can calculate hash on both drives to make sure the hash values are identical.
To learn how to unclip HPA/AMA, read Unclip or change HPA, DCO, AMA limitations in our manual.


