Imaging only selected sectors
While physical imaging involves sector-for-sector copying of the whole evidence drive from the first LBA to the last one, selective acquisition implies bit-for-bit copying of the file structure.
The selective acquisition is handy when time is limited and you need to quickly start working with the file structure. At the same time, the image of only selected sectors does not include remaining fragments of previously deleted files, which makes this imaging method incomplete. On top of that, the hash values of the source and the target drives as a result of such imaging will not be identical. For these reasons, it may be preferable to use a physical image.
This guide will show how Atola Insight Forensic’s flexible imaging functionality enables users to perform selective imaging. As for image verification, this guide will demonstrate how segmented hashing can help you verify such an image.
All sectors
By default, Insight Forensic is set to image all sectors of a drive. With this option selected in the What to image list on the imaging setting screen, the system will create a full physical copy of a source drive.
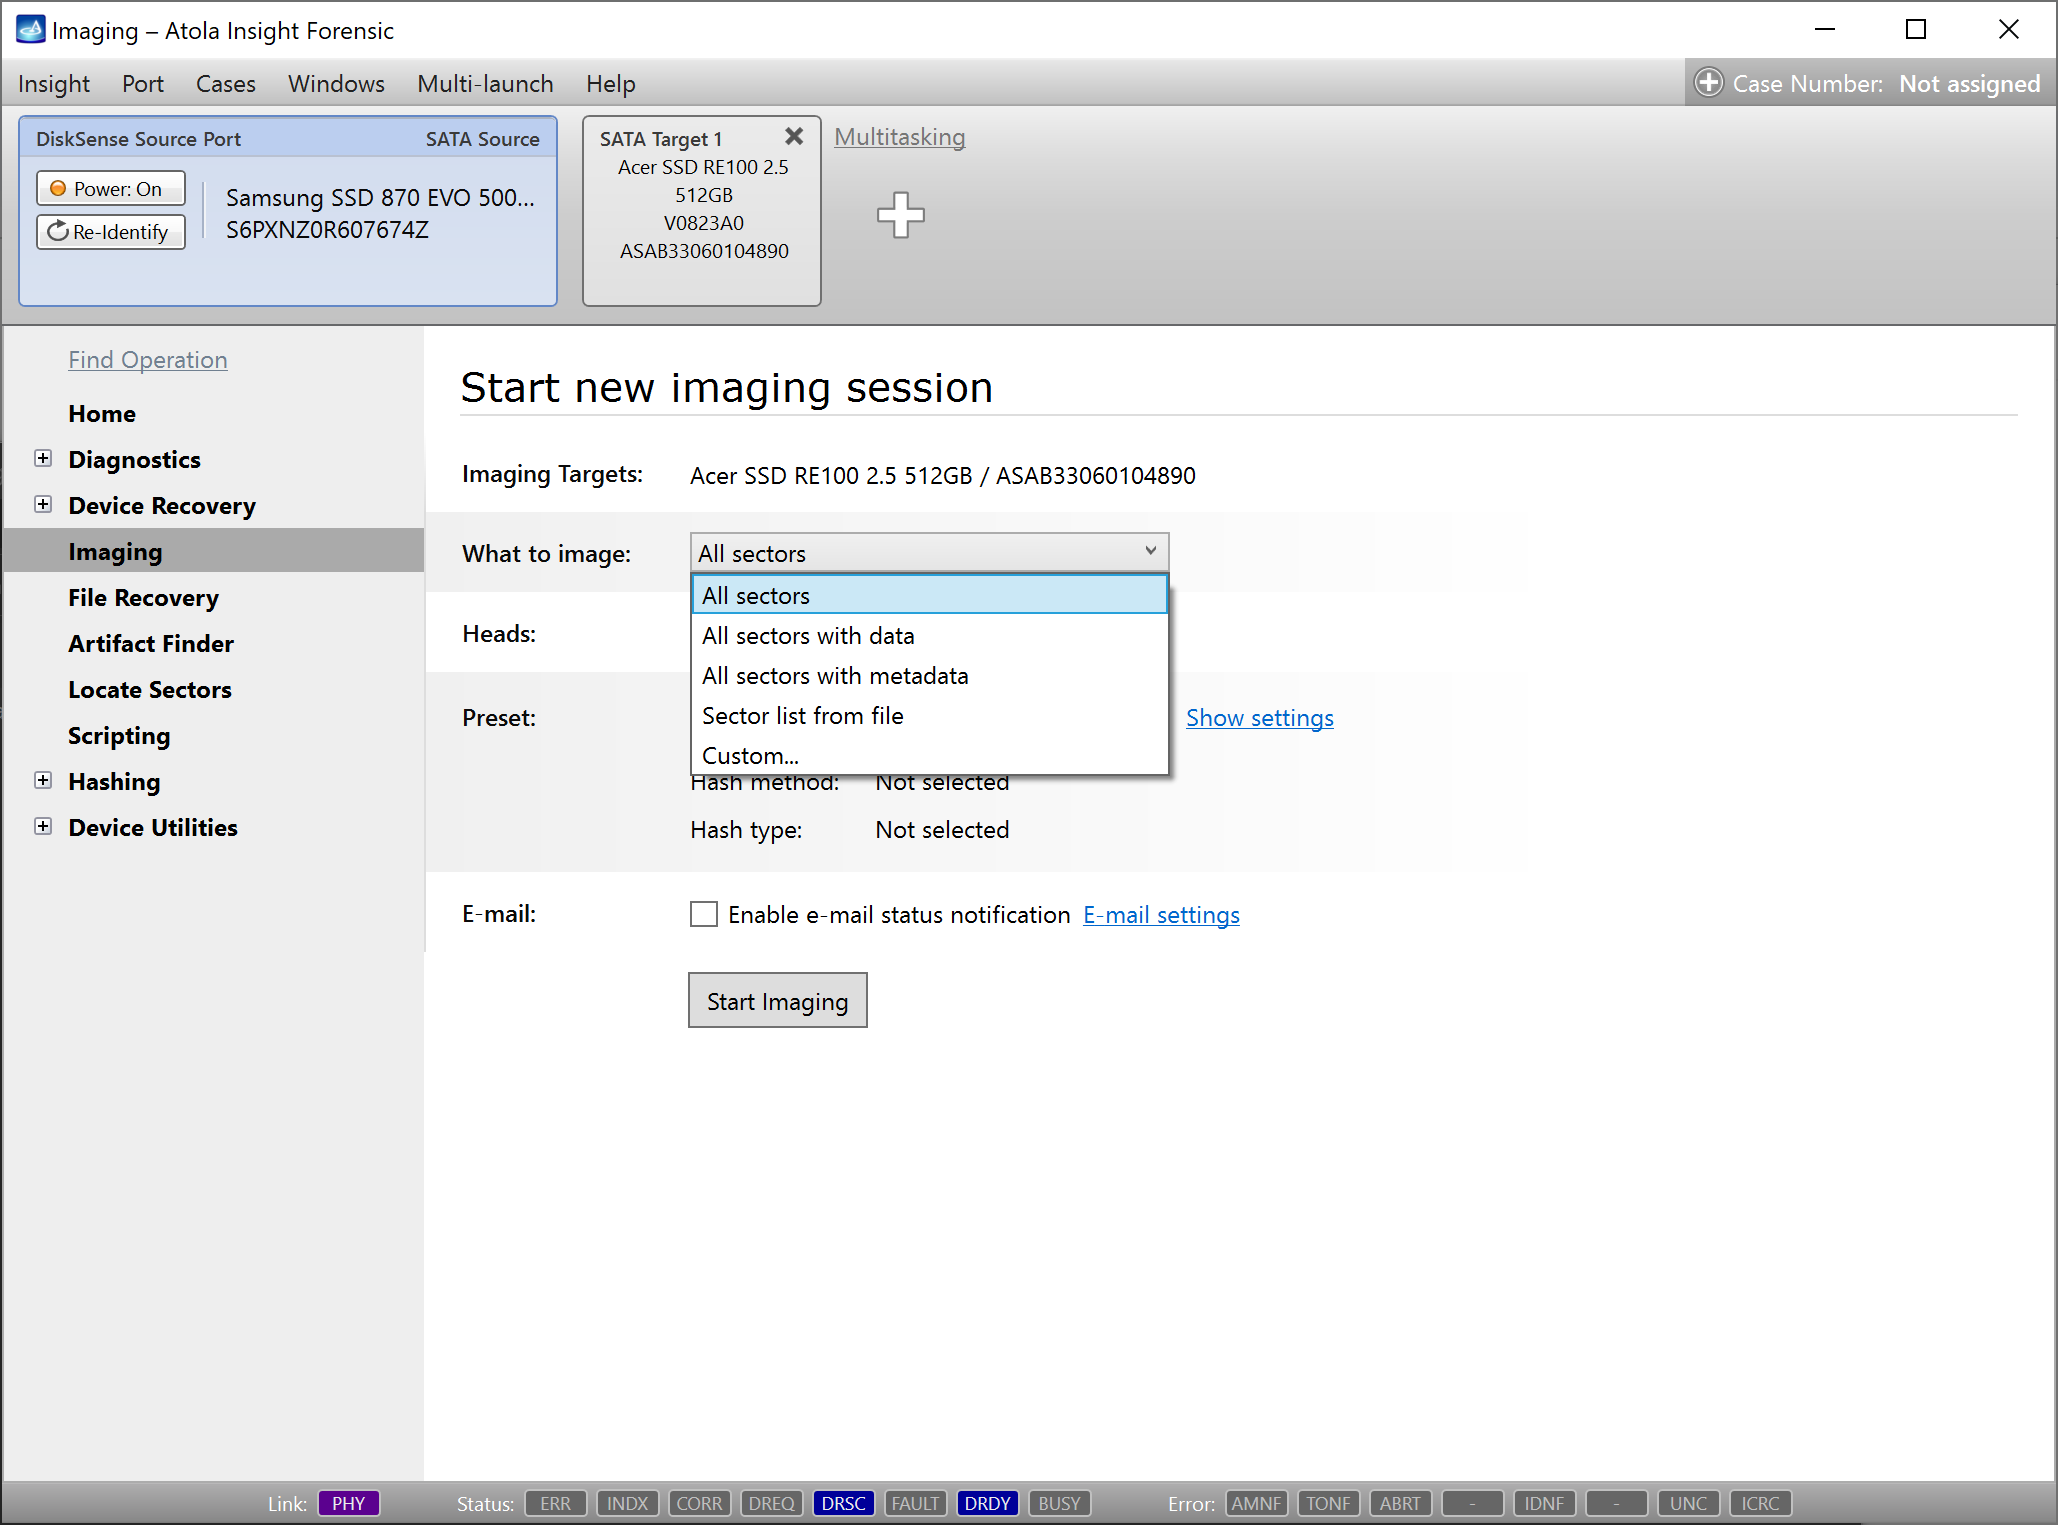
The All sectors option selected in the What to image list.
All sectors with data
To image the whole system structure of the drive including folders and files, while omitting the areas with no data or fragments of previously deleted files, do the following:
- Go to Imaging > Create New Session.
- In the What to image list, select All sectors with data.
-
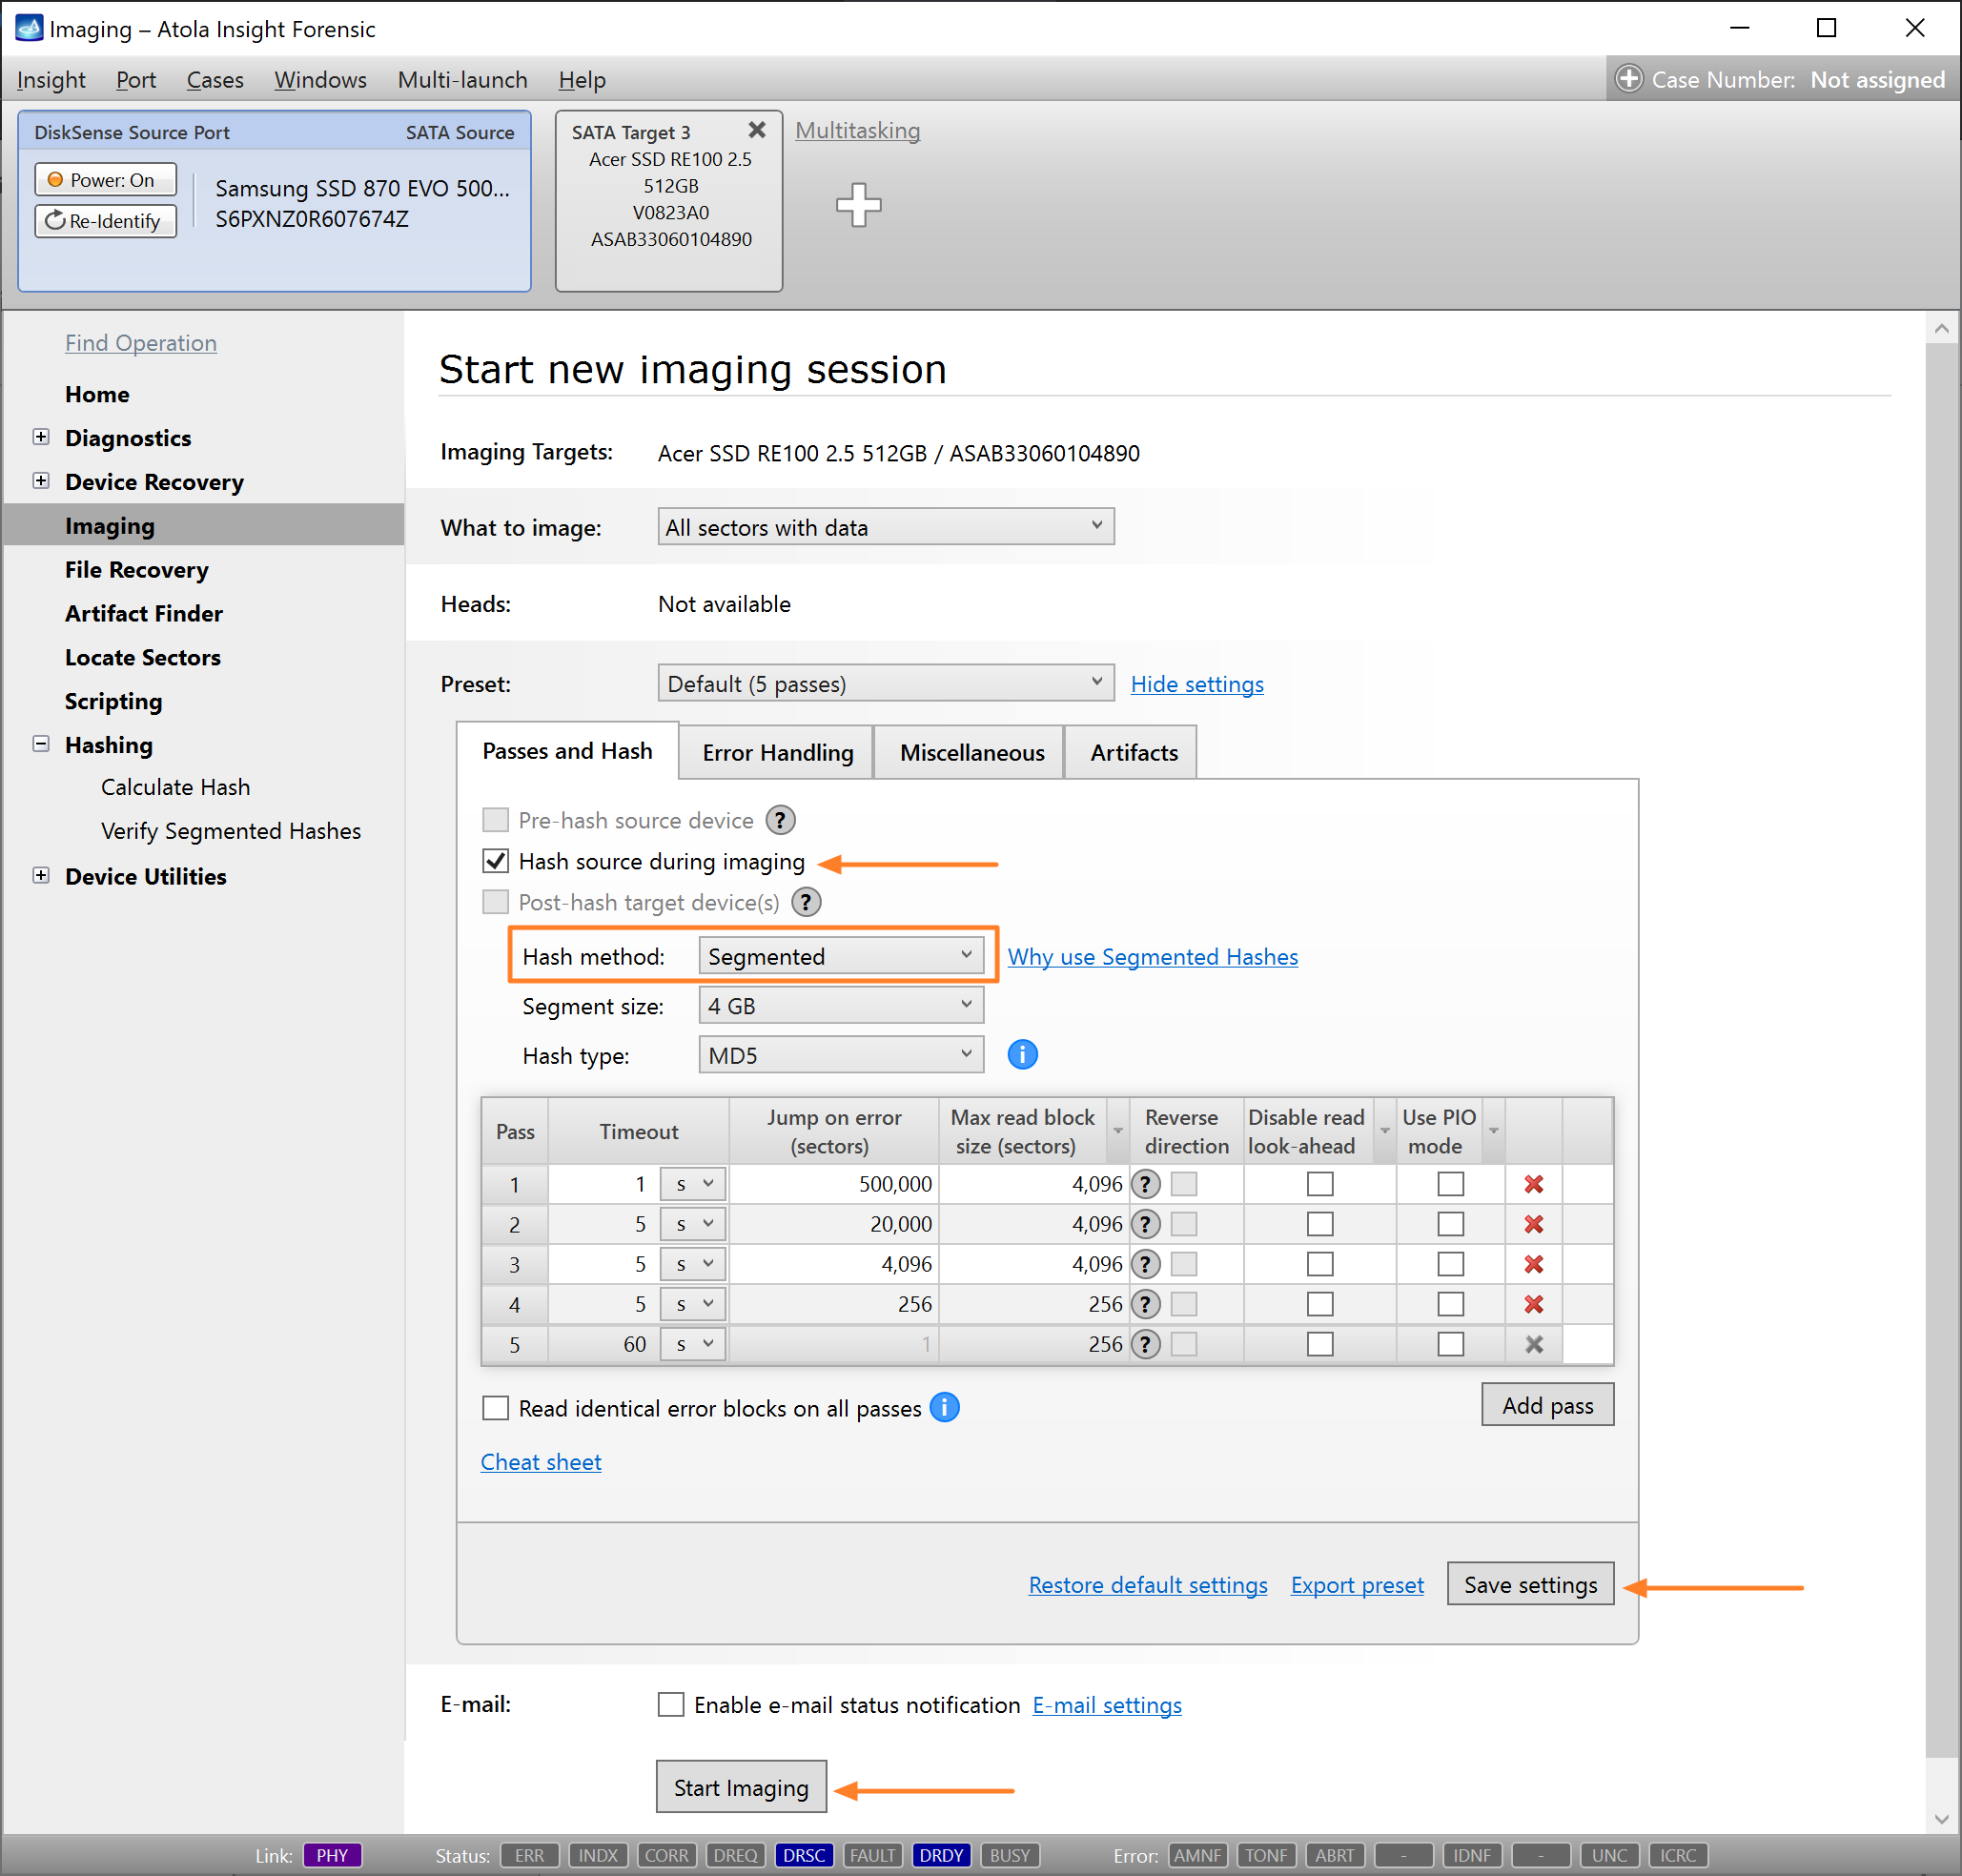
Recommended: Enable segmented hashing for an imaging session:
- In the Preset section, click the Show settings link.
- On the Passes and Hash tab, enable Hash source during imaging.
- Set the Hash method to Segmented.
- Adjust other imaging settings as needed and click Start imaging.
- When you choose to image all sectors with data, the imaging log adds a message about the partitions Insight has been able to find. A link to the file with segmented hashes is included in the Imaging Results report.
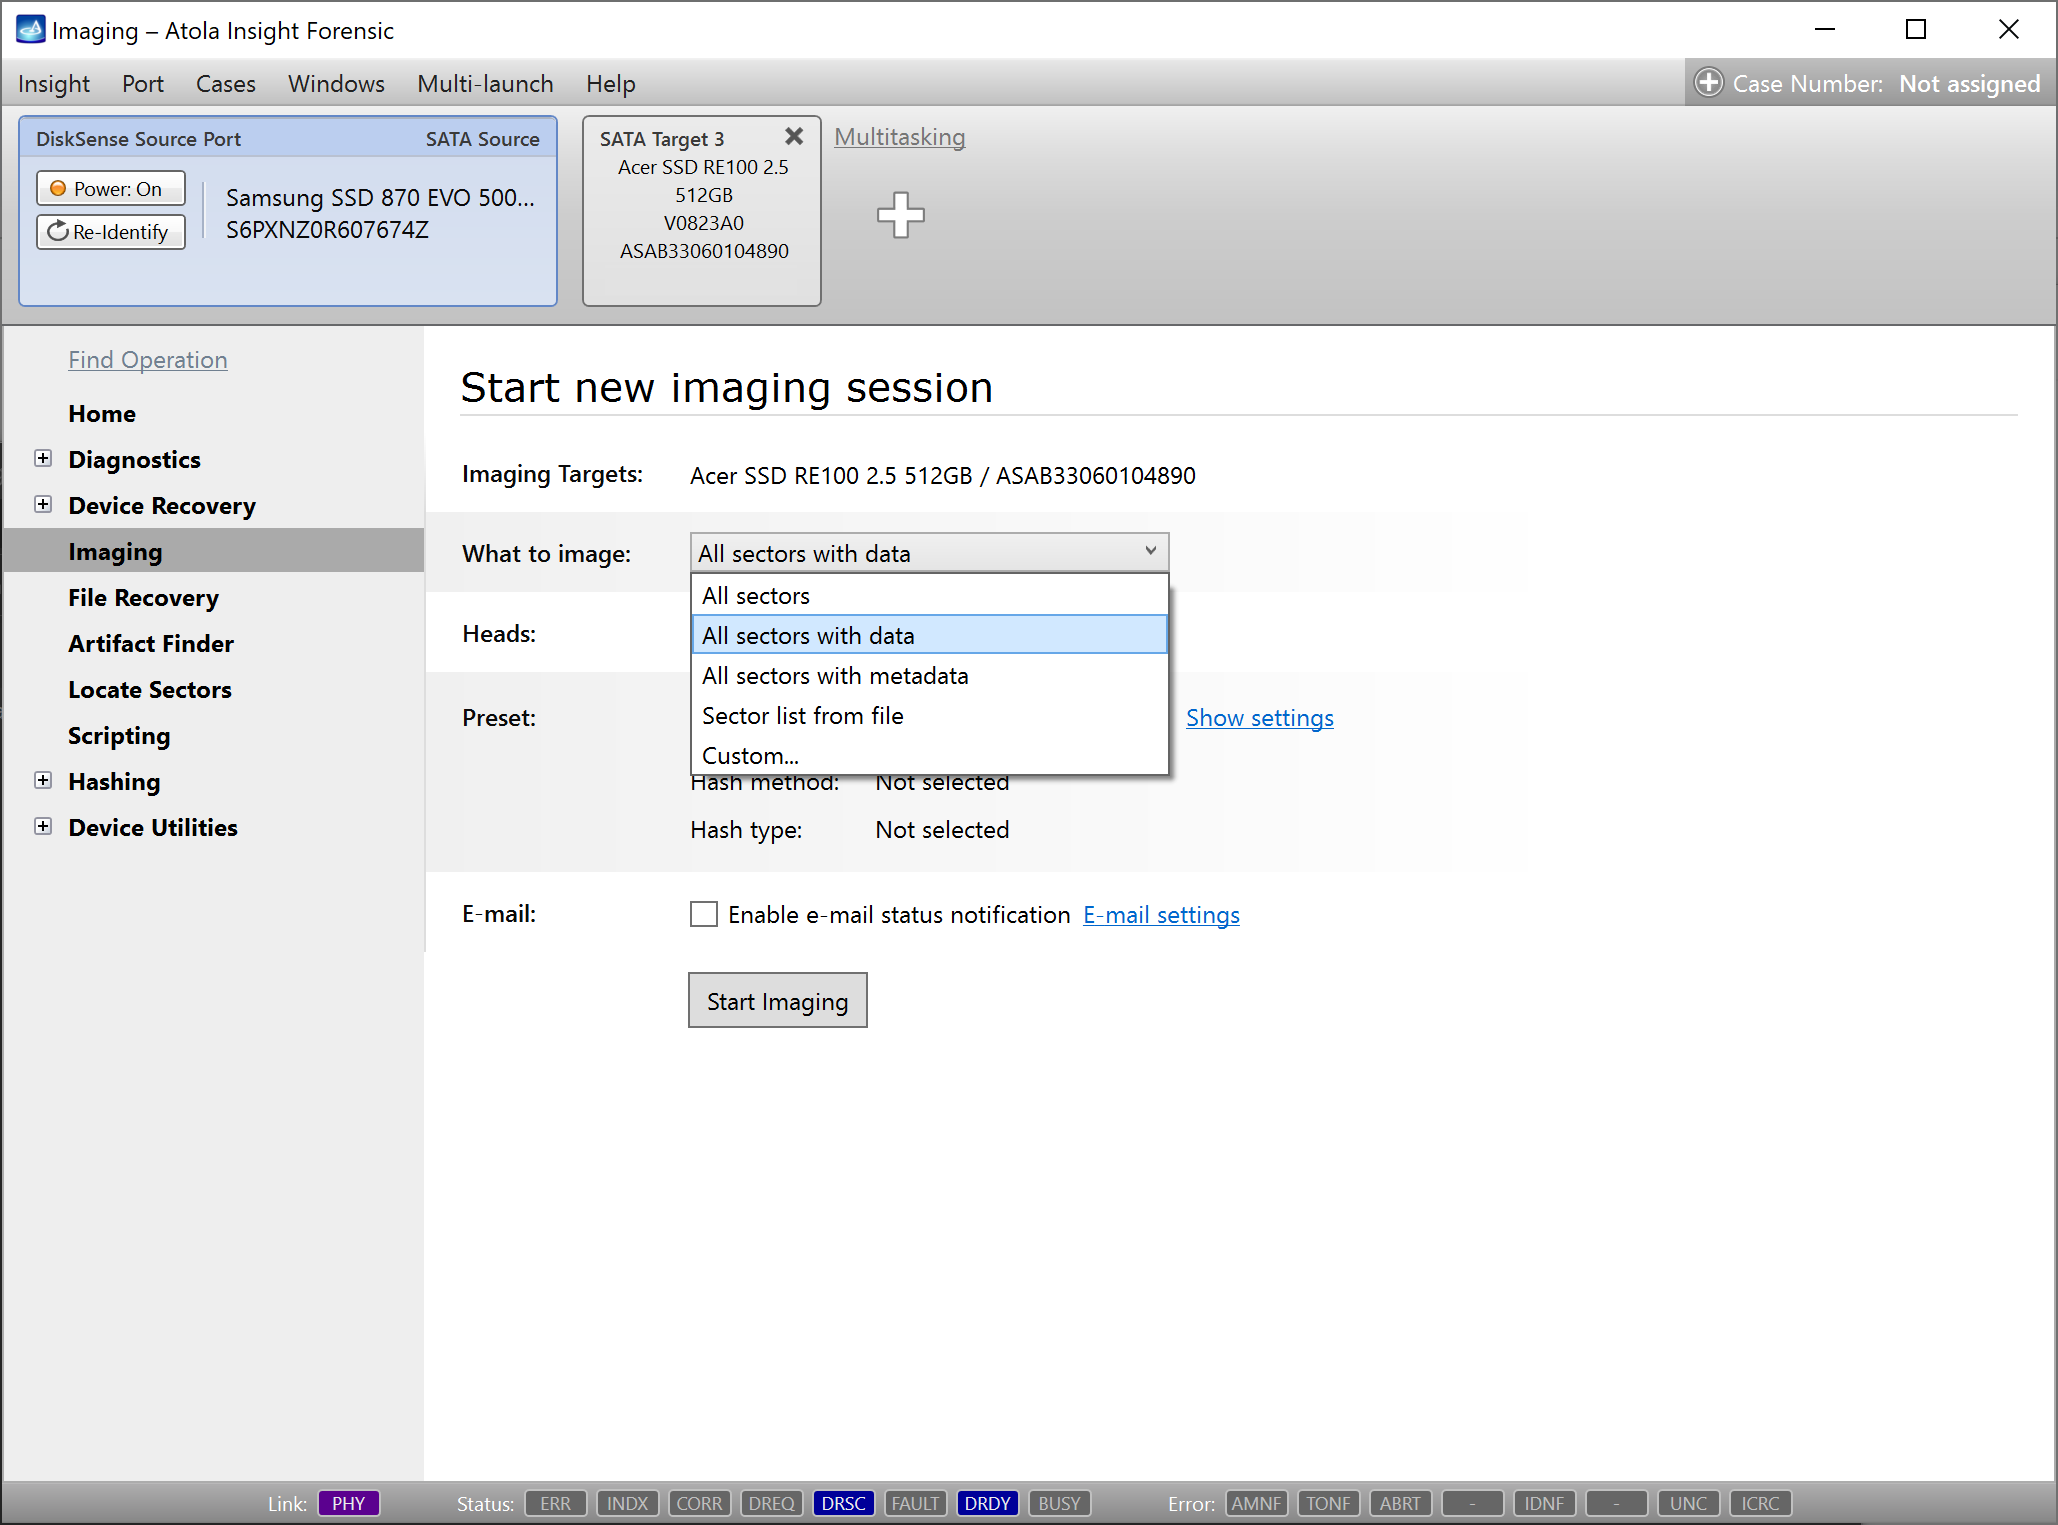
The All sectors with data option selected in the What to image list.
Enabling segmented hashing in the imaging settings.
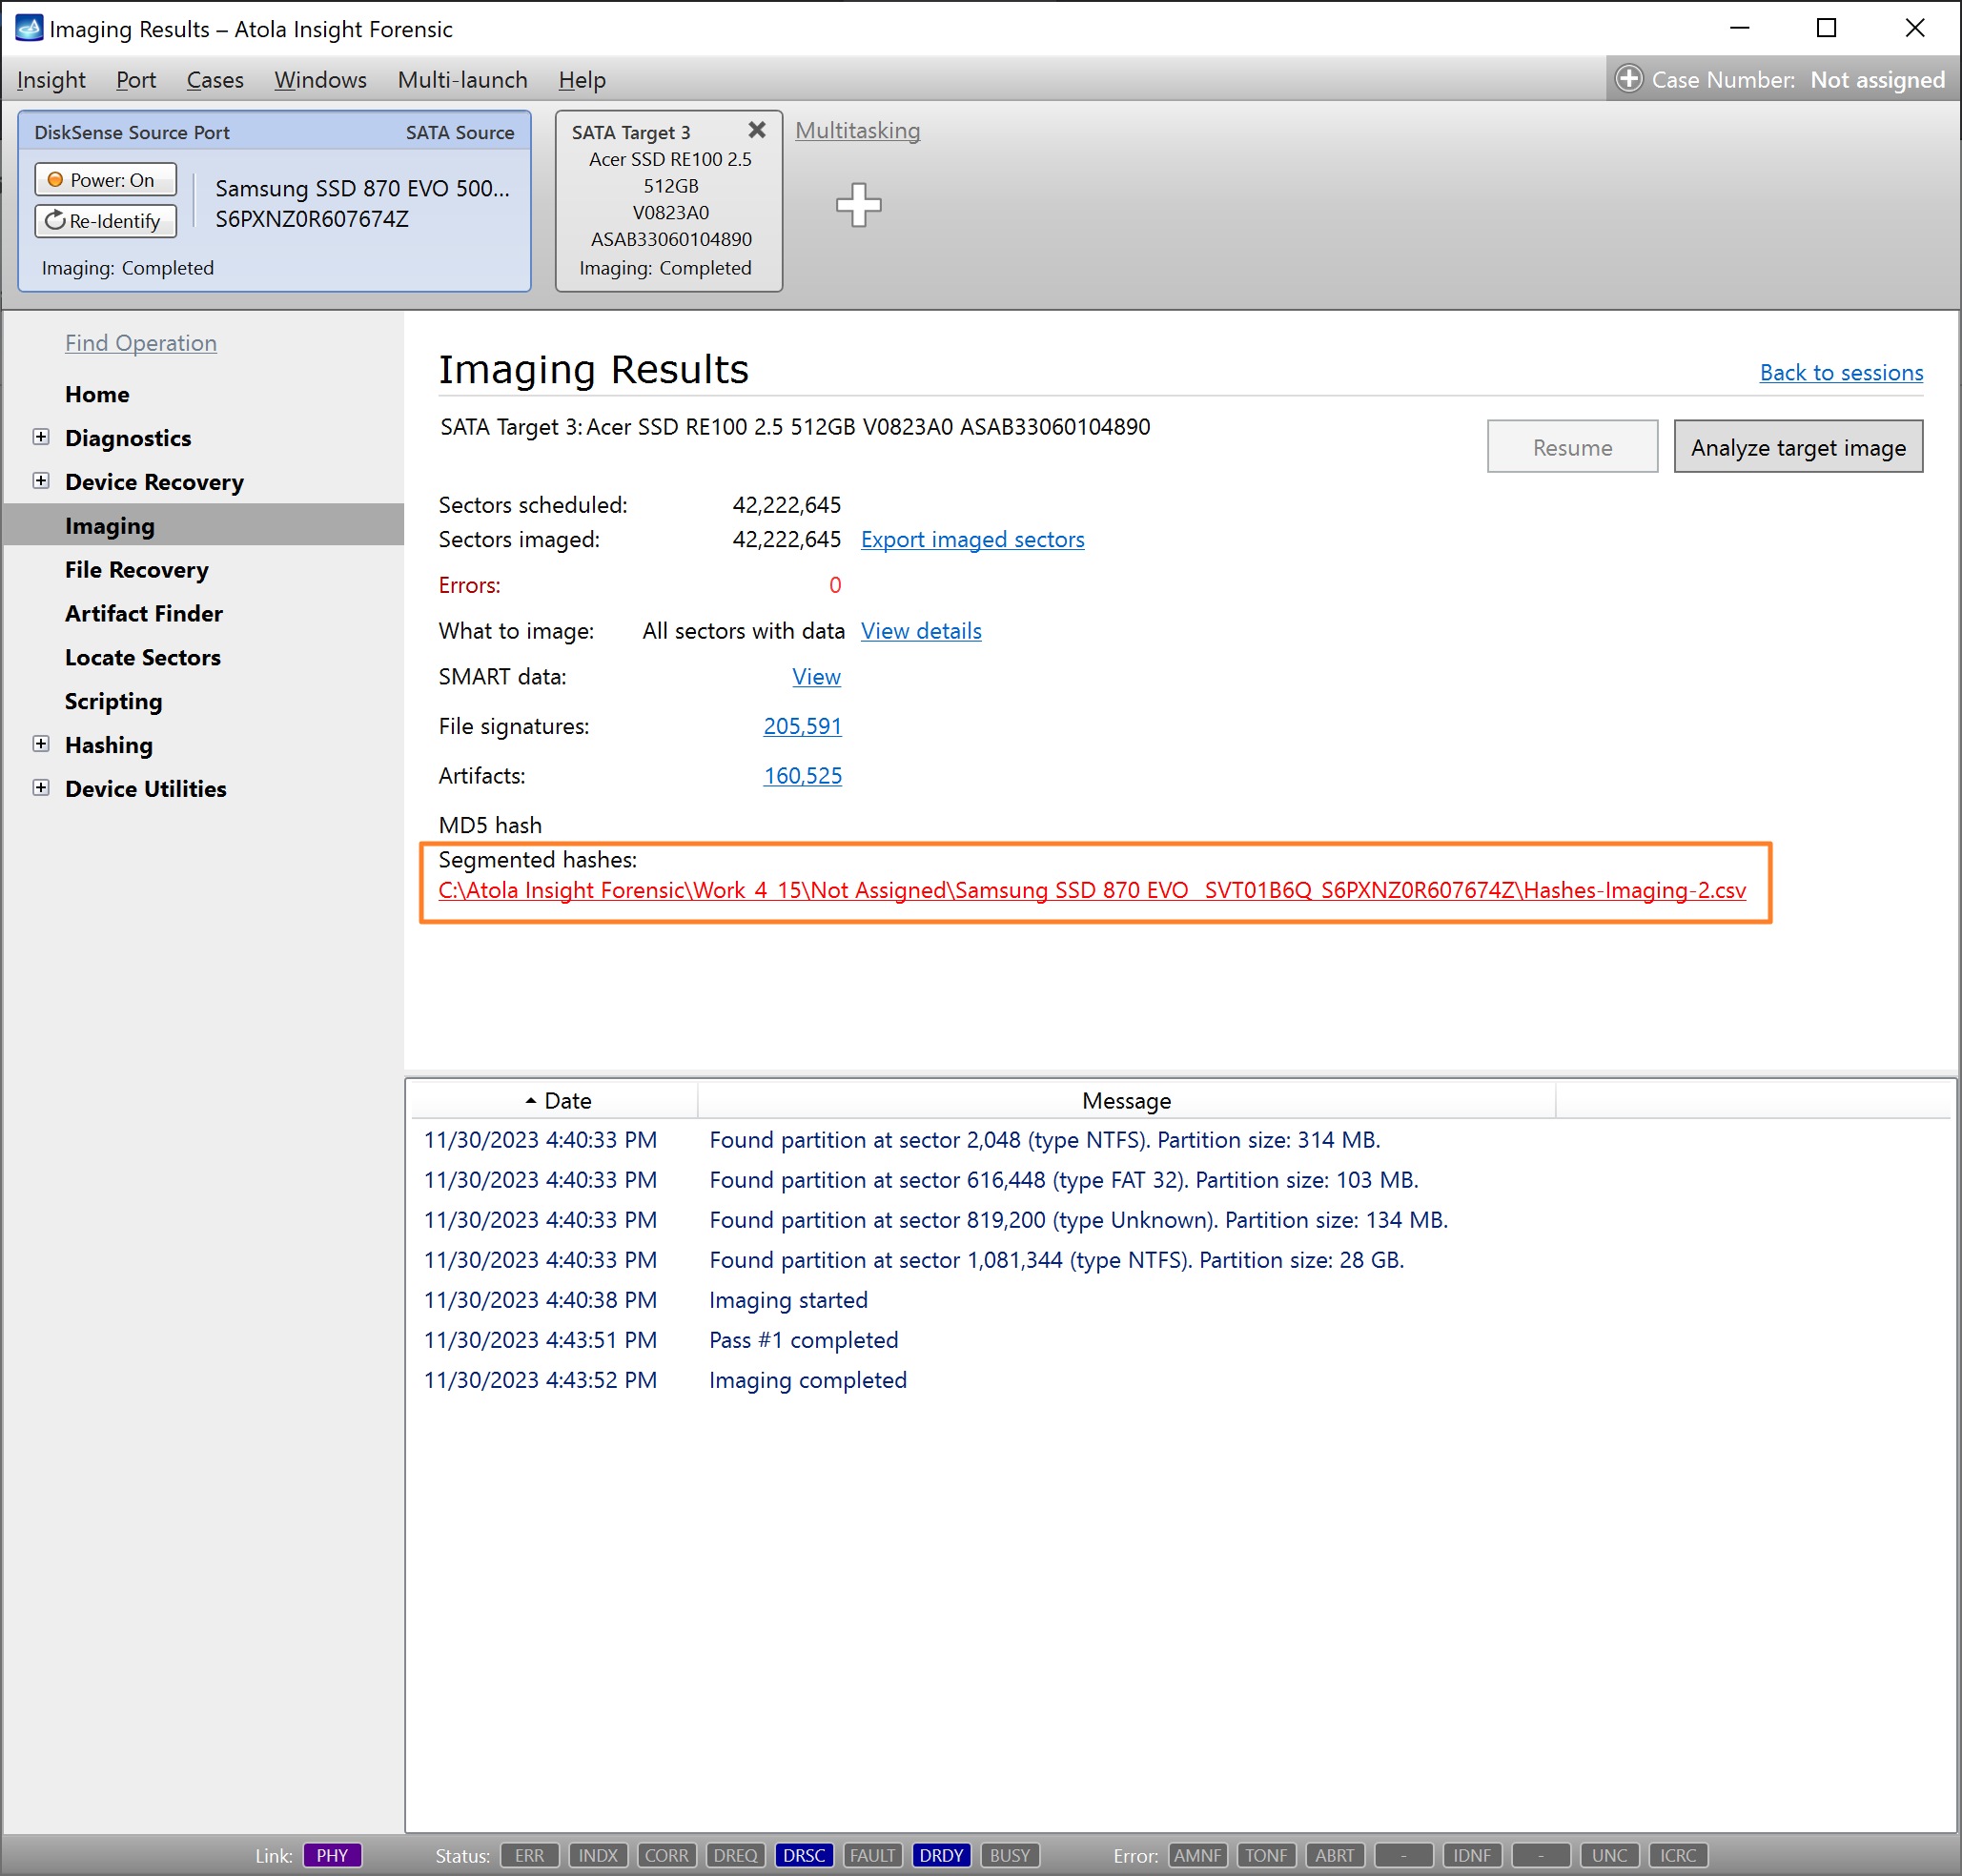
The Imaging Results report with messages about partitions found during imaging all sectors with data.
All sectors with metadata
To image only the system structure of a drive without data within its files (for example, MFT in NTFS), do the following:
- Go to Imaging > Create New Session.
- In the What to image list, select All sectors with metadata.
- Adjust other imaging settings as needed and click Start imaging.
Imaged metadata can be used later to browse through files and select the ones to be imaged in full. For more details, watch this video guide: Benefits of imaging metadata.
When choosing to image all sectors with metadata, the imaging log adds a message about the partitions that Insight has been able to find.
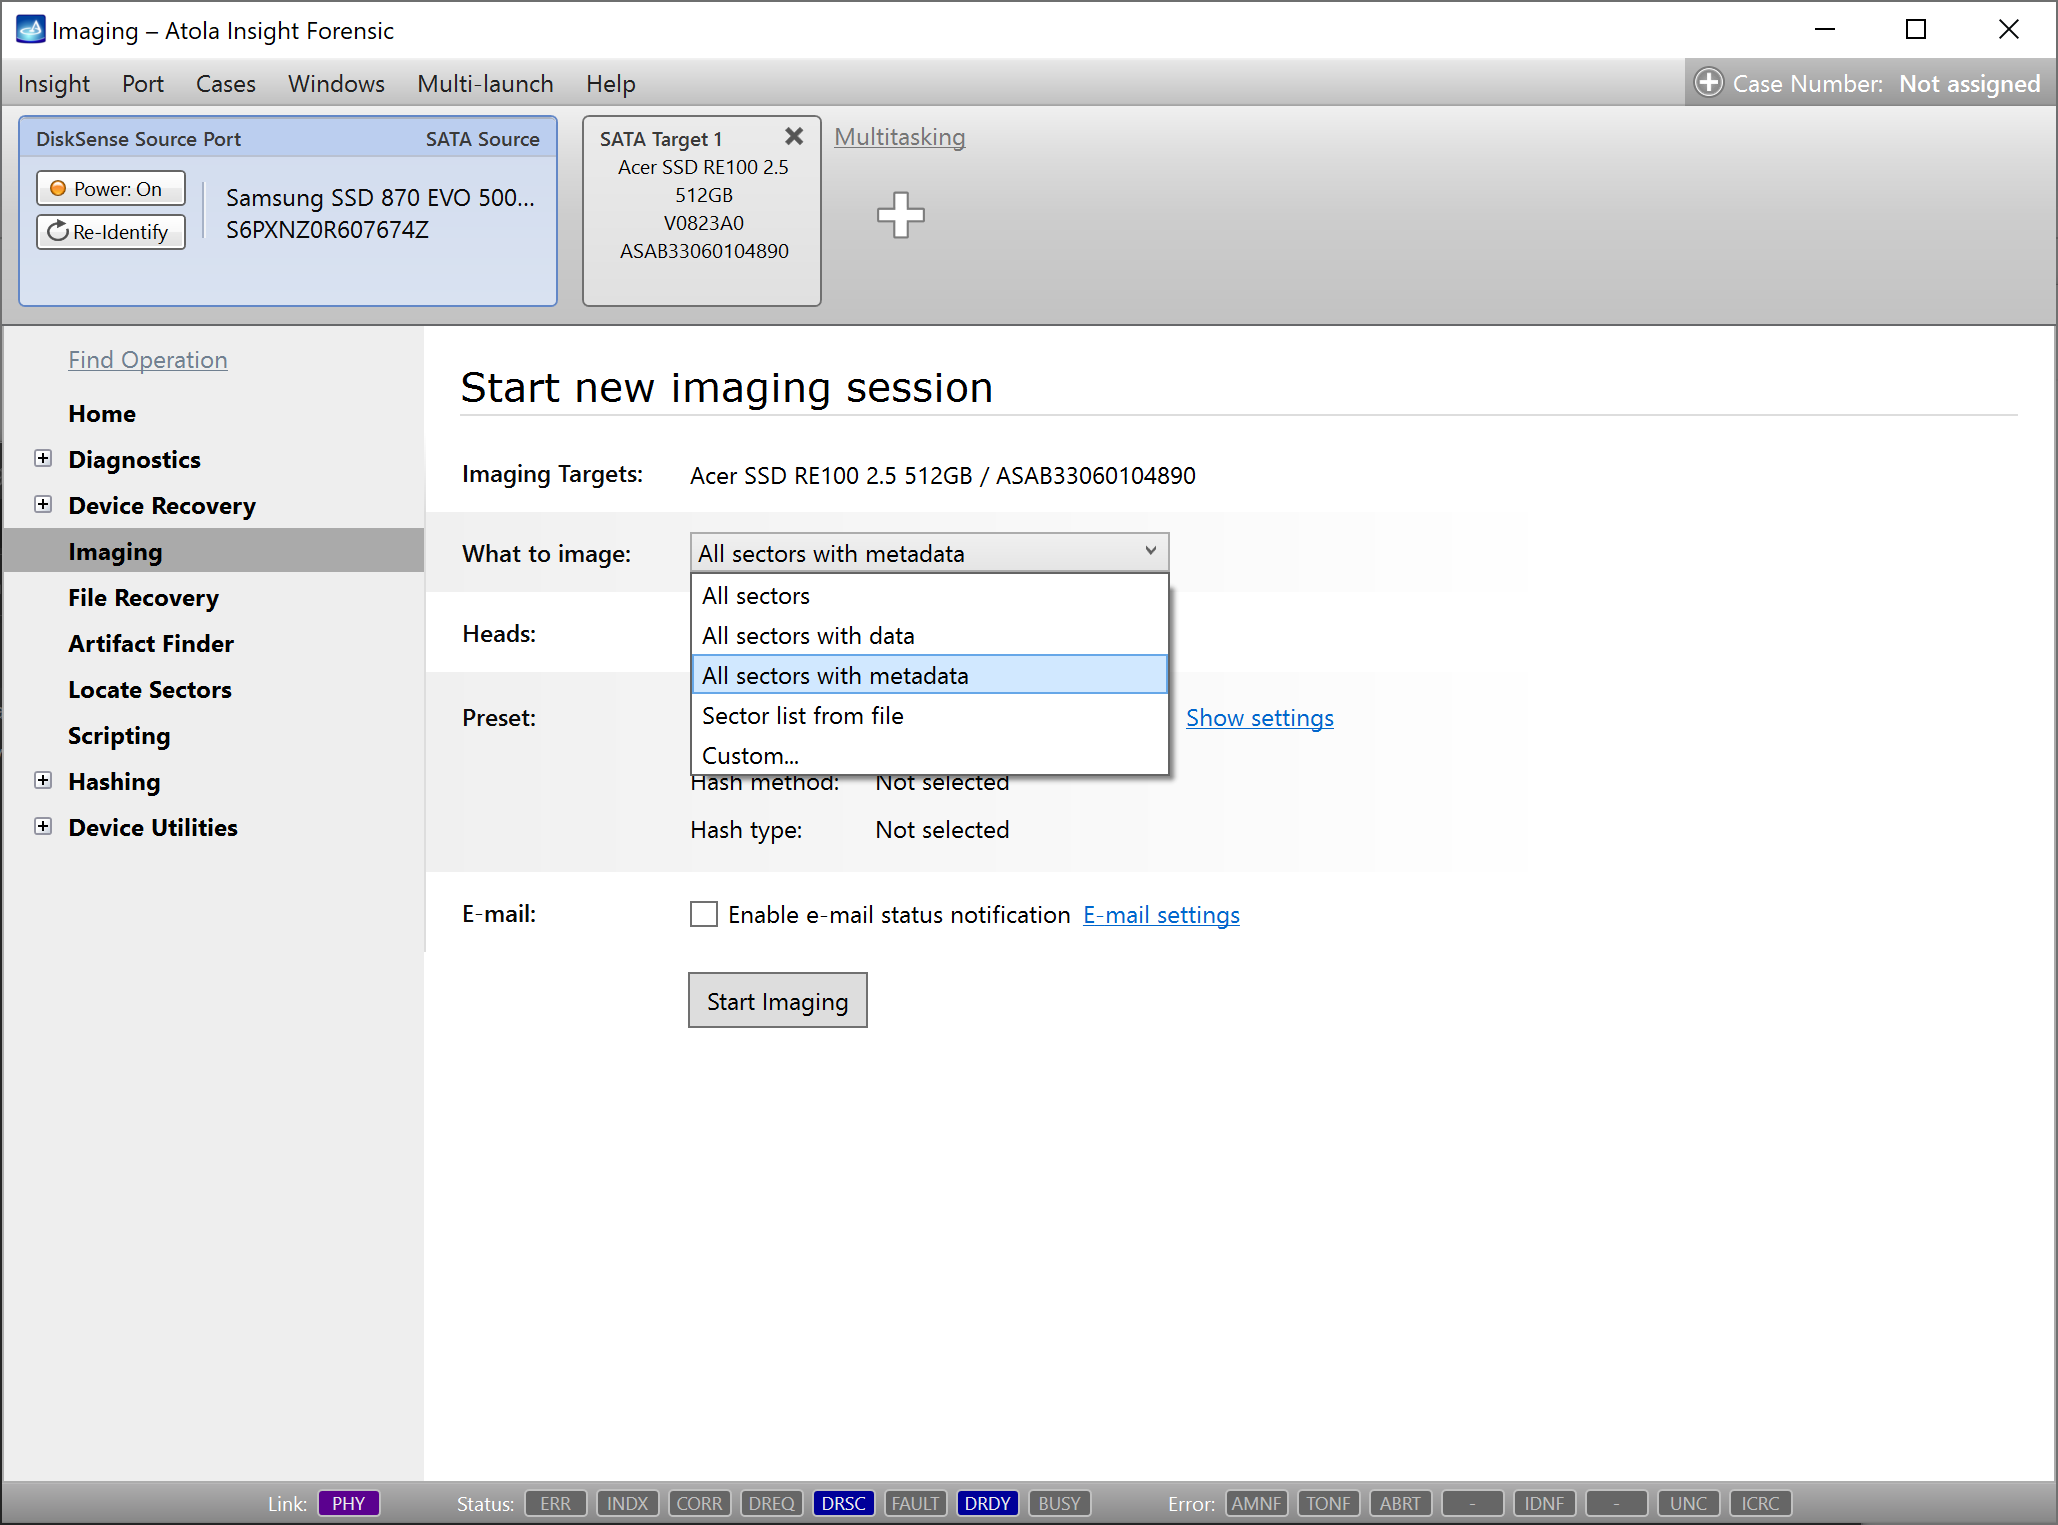
The All sectors with metadata option selected in the What to image list.
Sector list from file
If you have a text or a CSV file with a list of sectors you want to image, you can select the relevant option in the imaging settings, and Insight Forensic will image only the sectors specified in the file you provided:
- Go to Imaging > Create New Session.
- In the What to image list, select Sector list from file.
- Click the Select file link and choose a file with a list of sectors.
- Adjust other imaging settings as needed and click Start imaging.
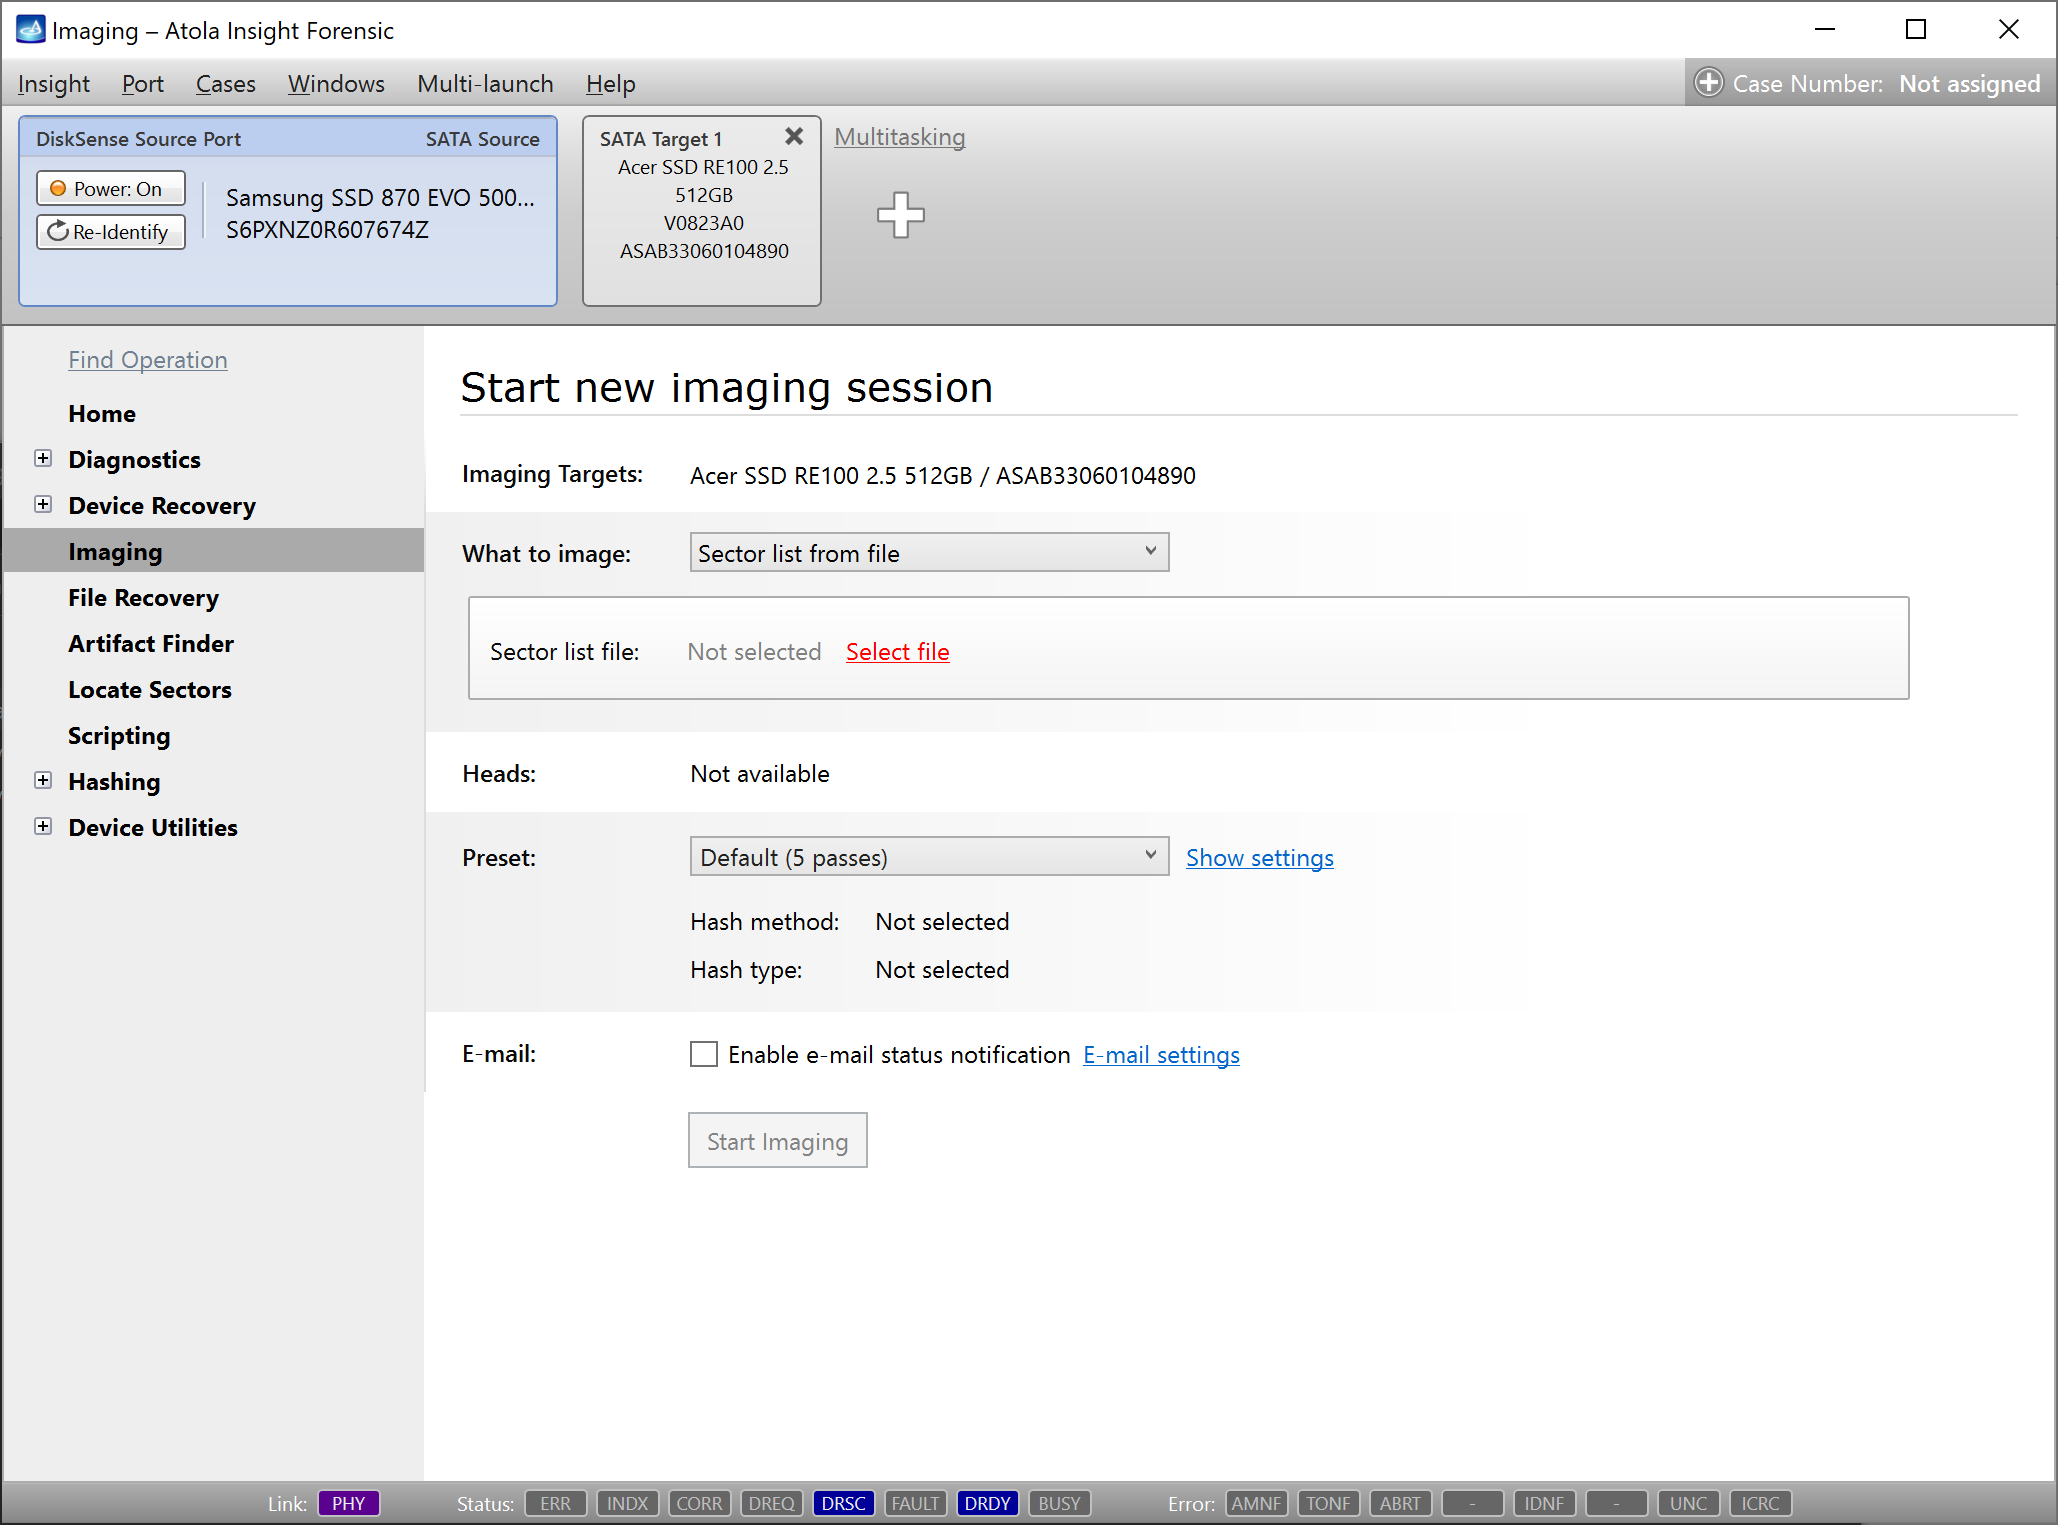
Selecting a file with a sector list to image in the imaging settings.
Custom sector selection
In Insight Forensic, you can fine-tune sector ranges you want to image, specifying start and end LBA, including or excluding certain partitions or sector ranges, or customizing imaging ranges for each partition. Here’s how to do it:
- Go to Imaging > Create New Session.
- In the What to image list, select Custom.
- Optional: To adjust Start and End LBA, enter values in the respective fields or use sliders.
- Click the Create or load media map link.
-
The Media Map Manager window opens. Here are various options to customize the sector ranges for imaging:
-
In the Partition section, you can select partitions to be imaged. Also, you can add a filter for each partition to specify which sectors to image:
- occupied sectors,
- only metadata sectors, or
- sectors without any data.
- In the LBA ranges section, you can add custom sector ranges you want to image, as well as exclude certain sector ranges from imaging. Click the Add range link, choose the Include or Exclude option from a list and enter the start and end LBA for a range.
- As you adjust sector range settings, the Summary section immediately updates information about the number of sectors scheduled for copying and their total size.
-
In the Partition section, you can select partitions to be imaged. Also, you can add a filter for each partition to specify which sectors to image:
- After adjusting sector ranges, click OK.
- Back on the Start new imaging session screen, adjust other imaging settings as needed and click Start imaging.

The Create or load media map link on the imaging settings screen.
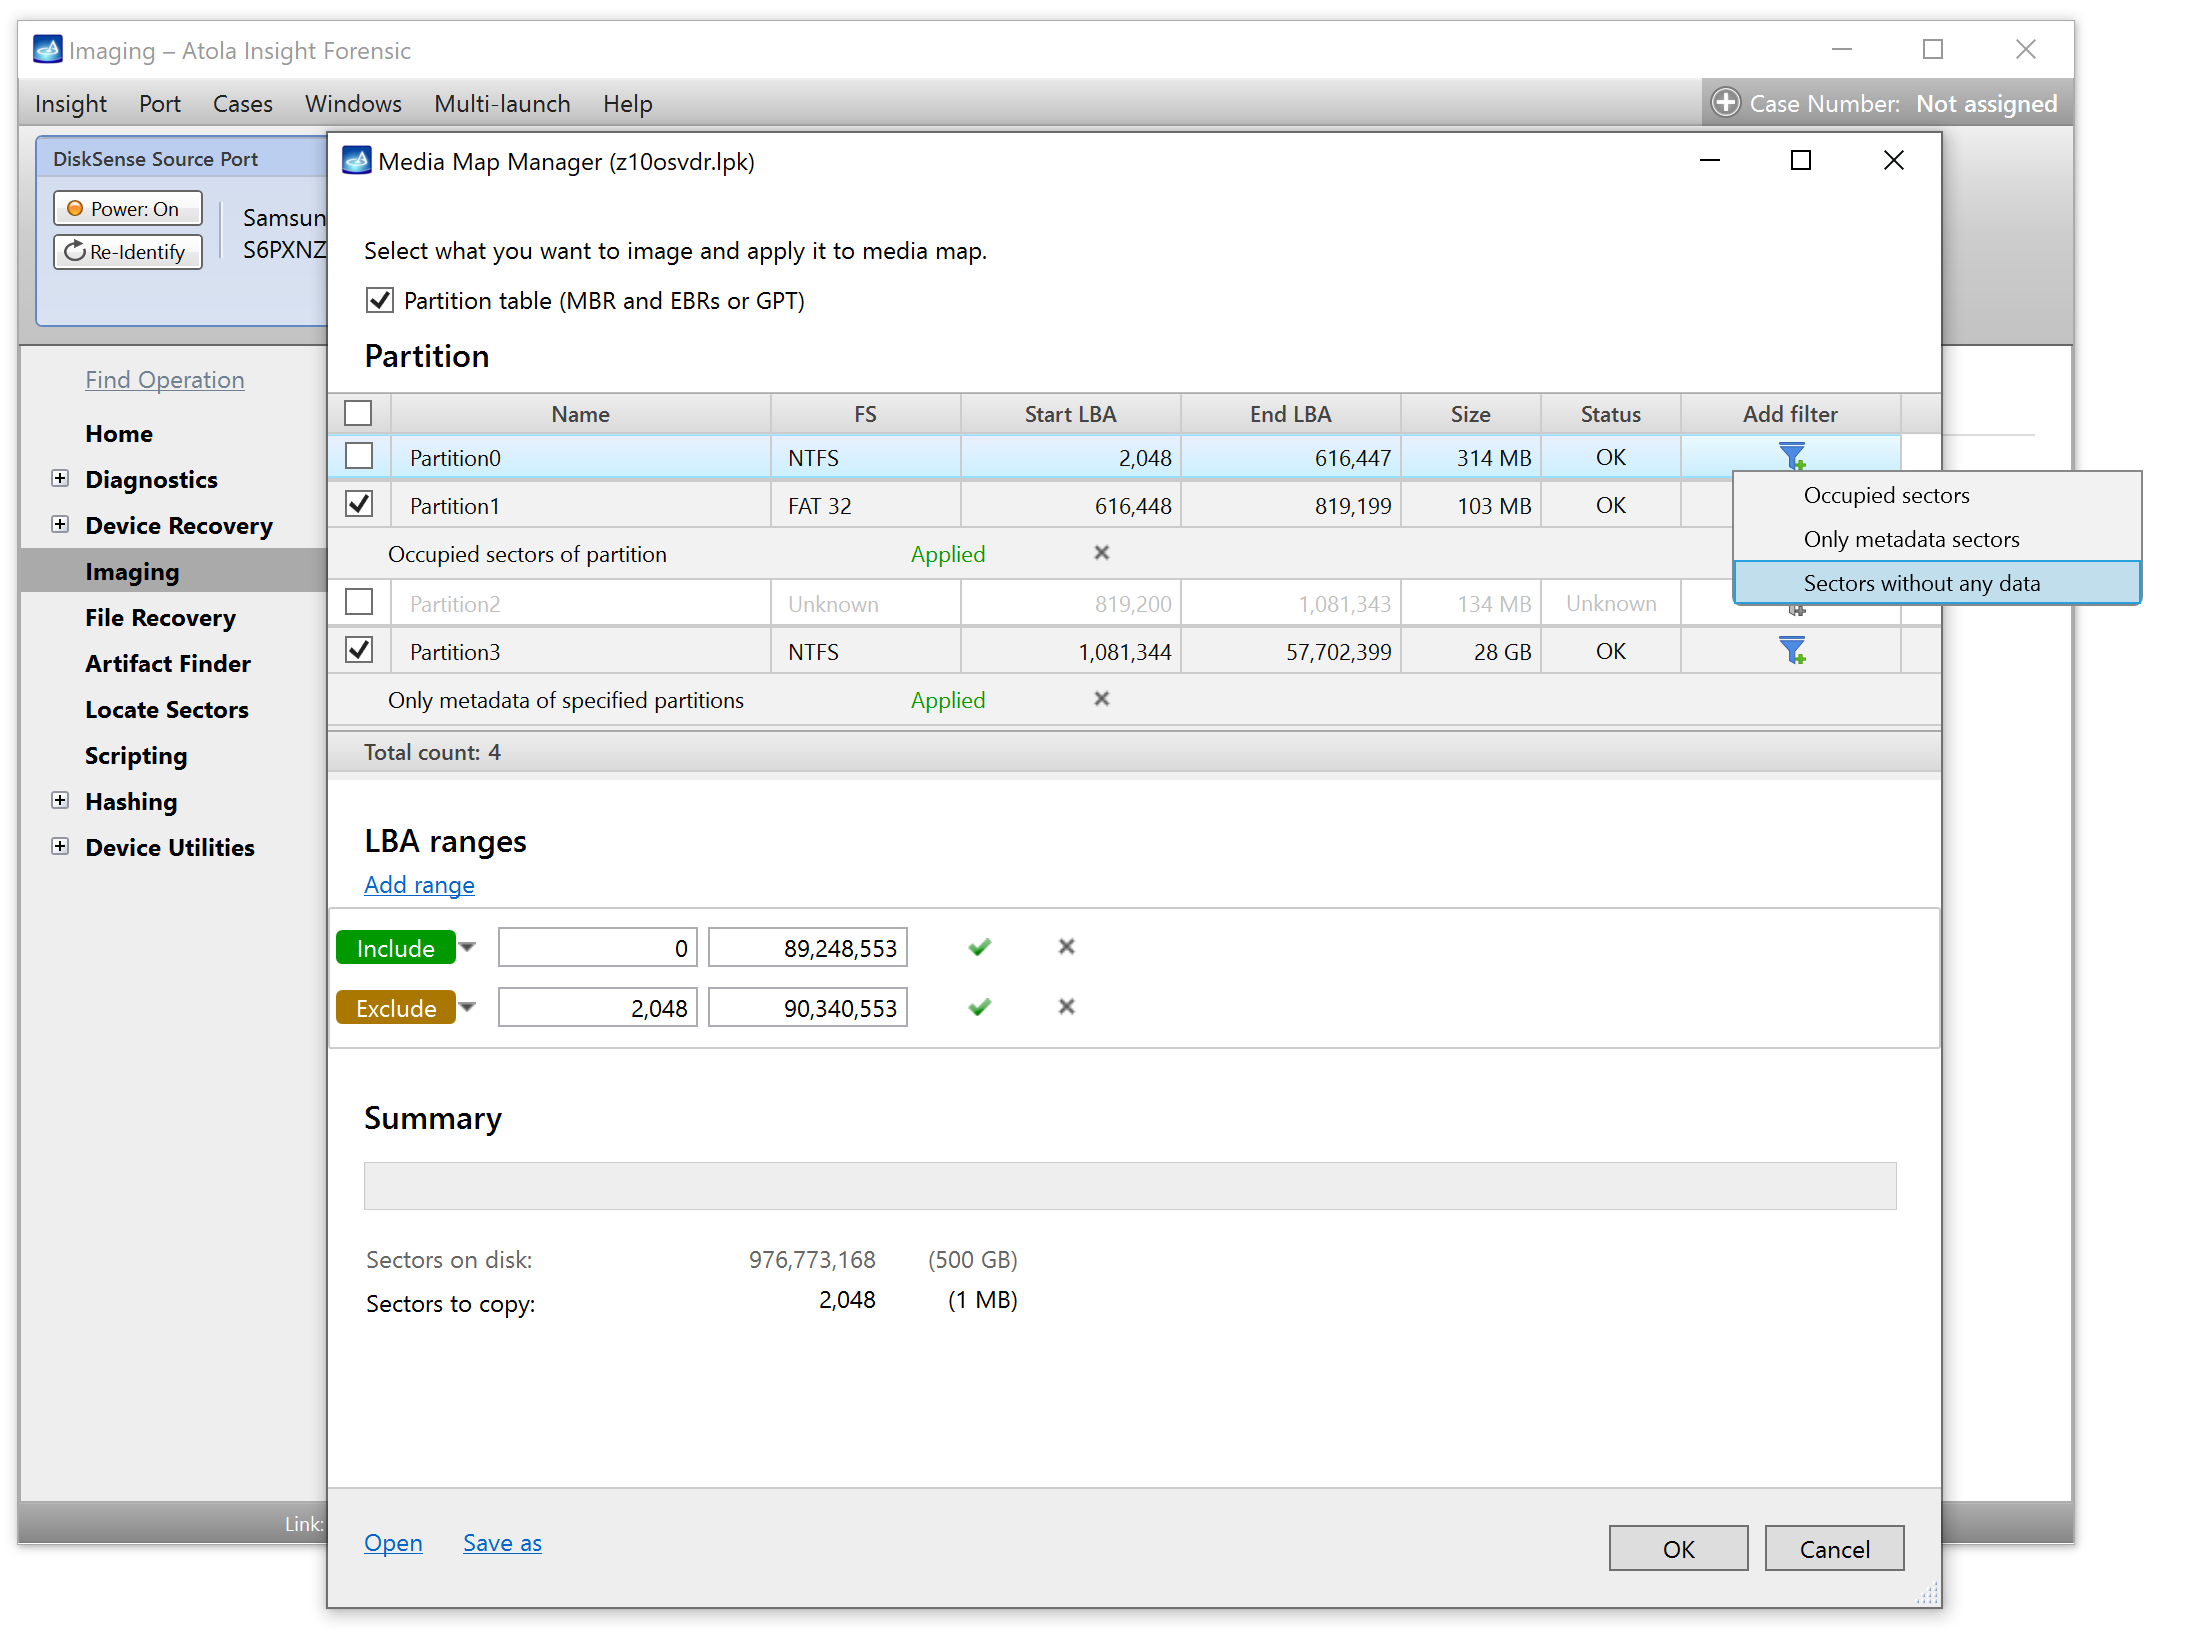
Adjusting sector ranges for imaging in the Media Map Manager window.
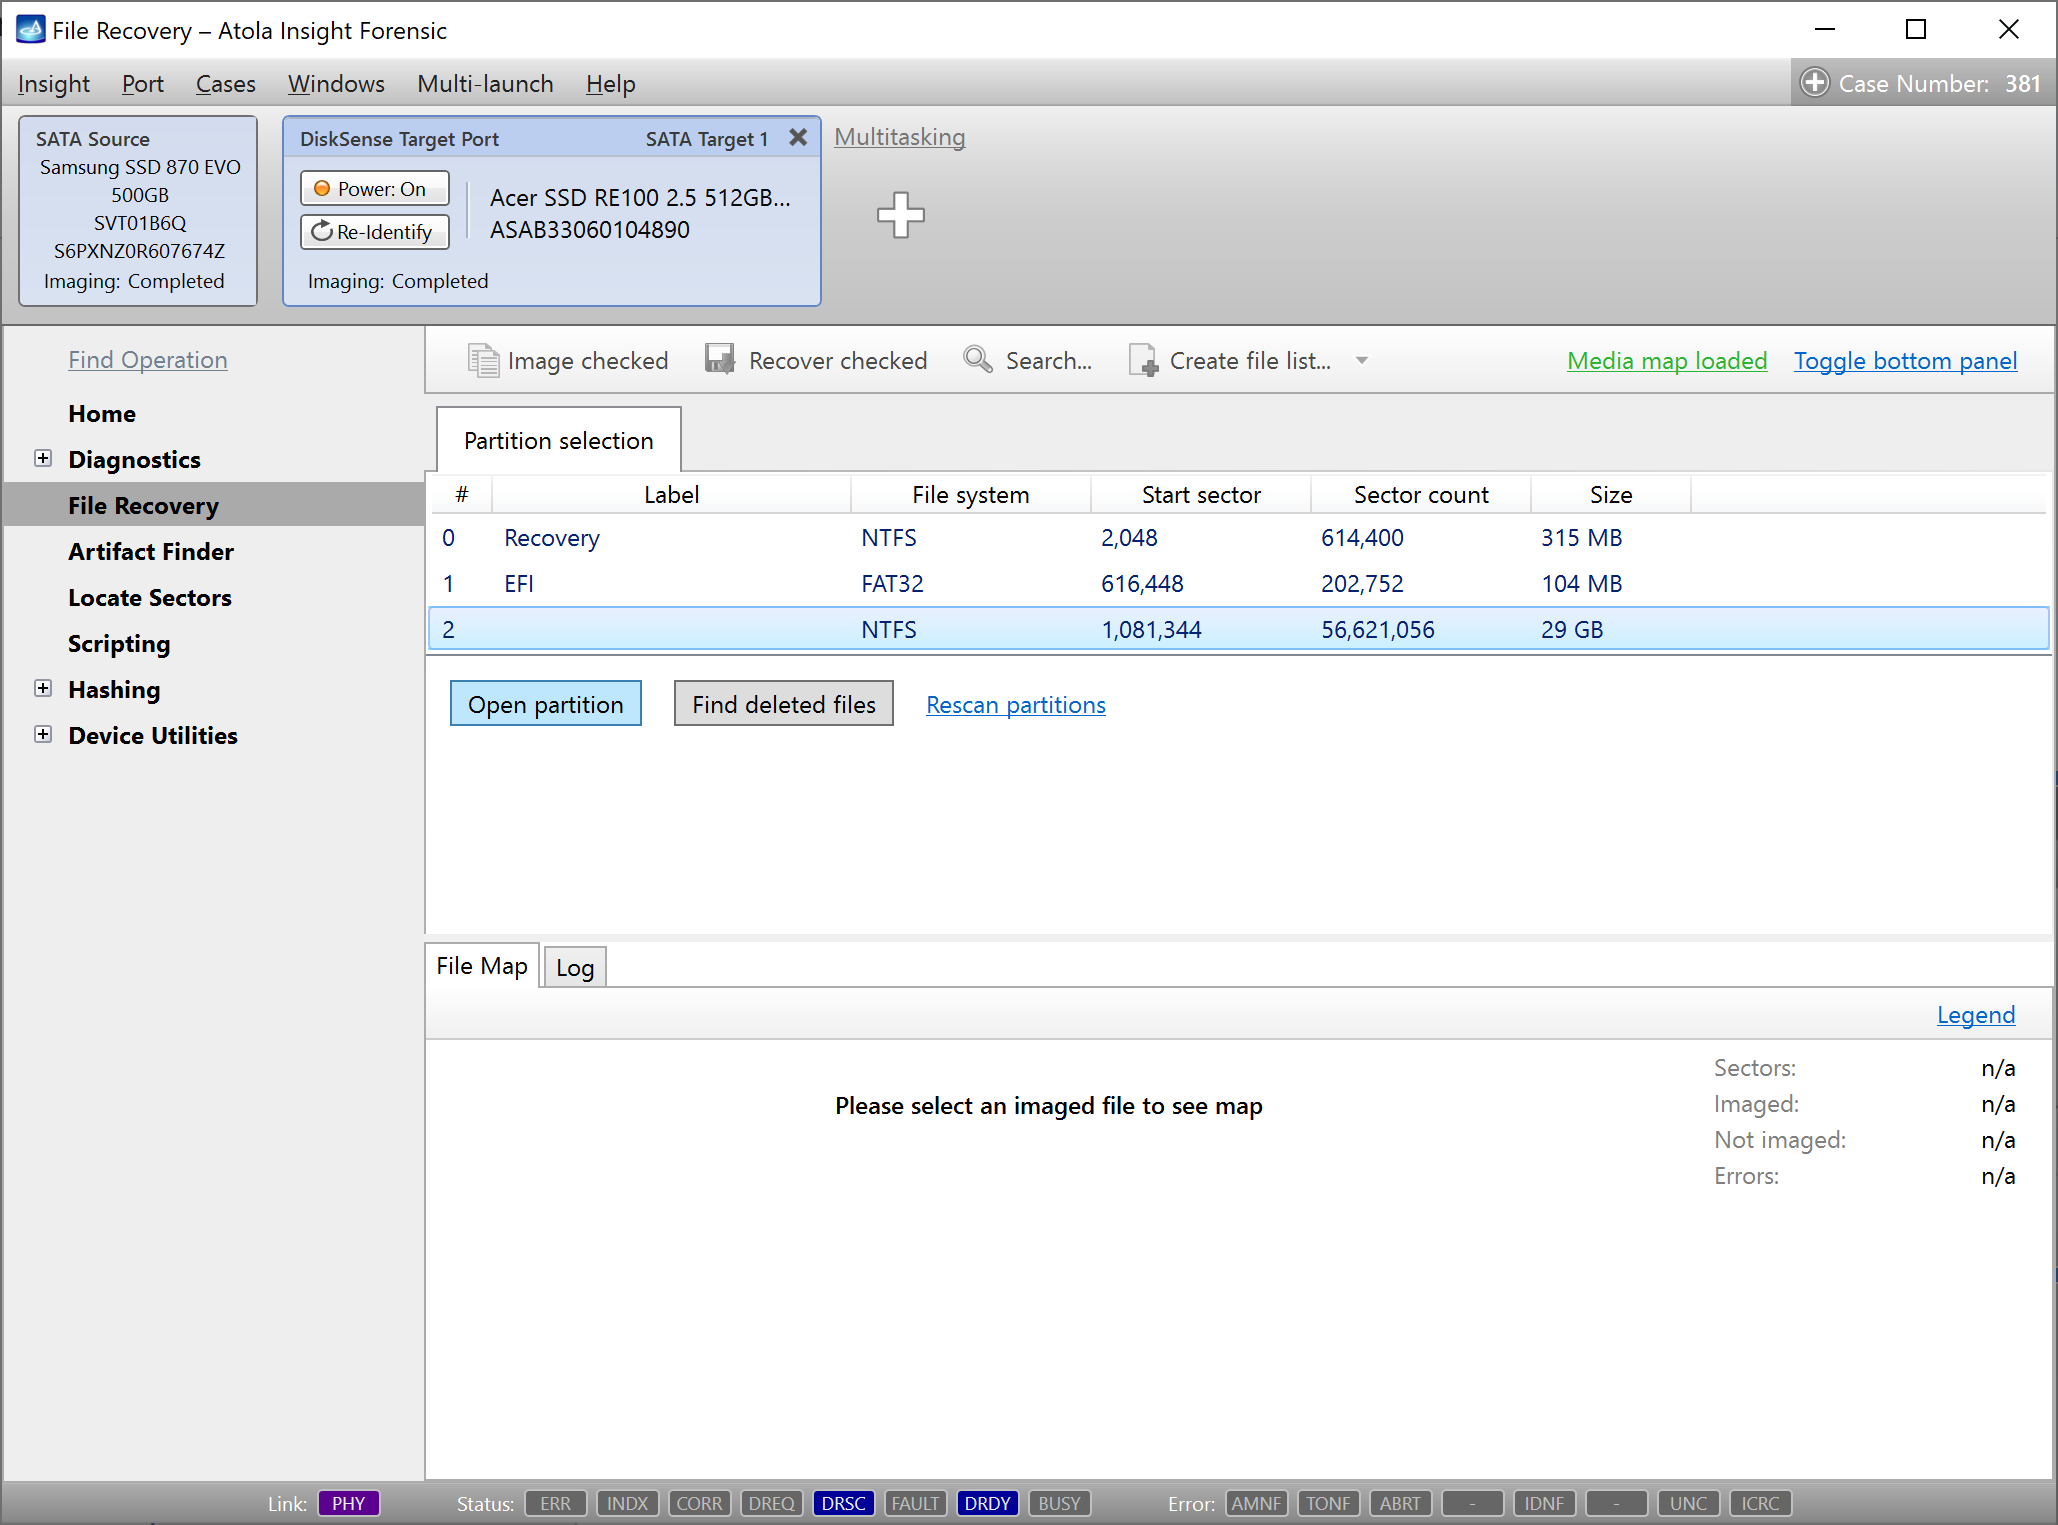
Analyze data from the imaged sector ranges
Once imaging of the selected sector ranges is complete, you can view the structure of the resulting image you have obtained:
- On the Imaging results screen, click Analyze target image.
- The Target port opens. Click the Scan partitions button.
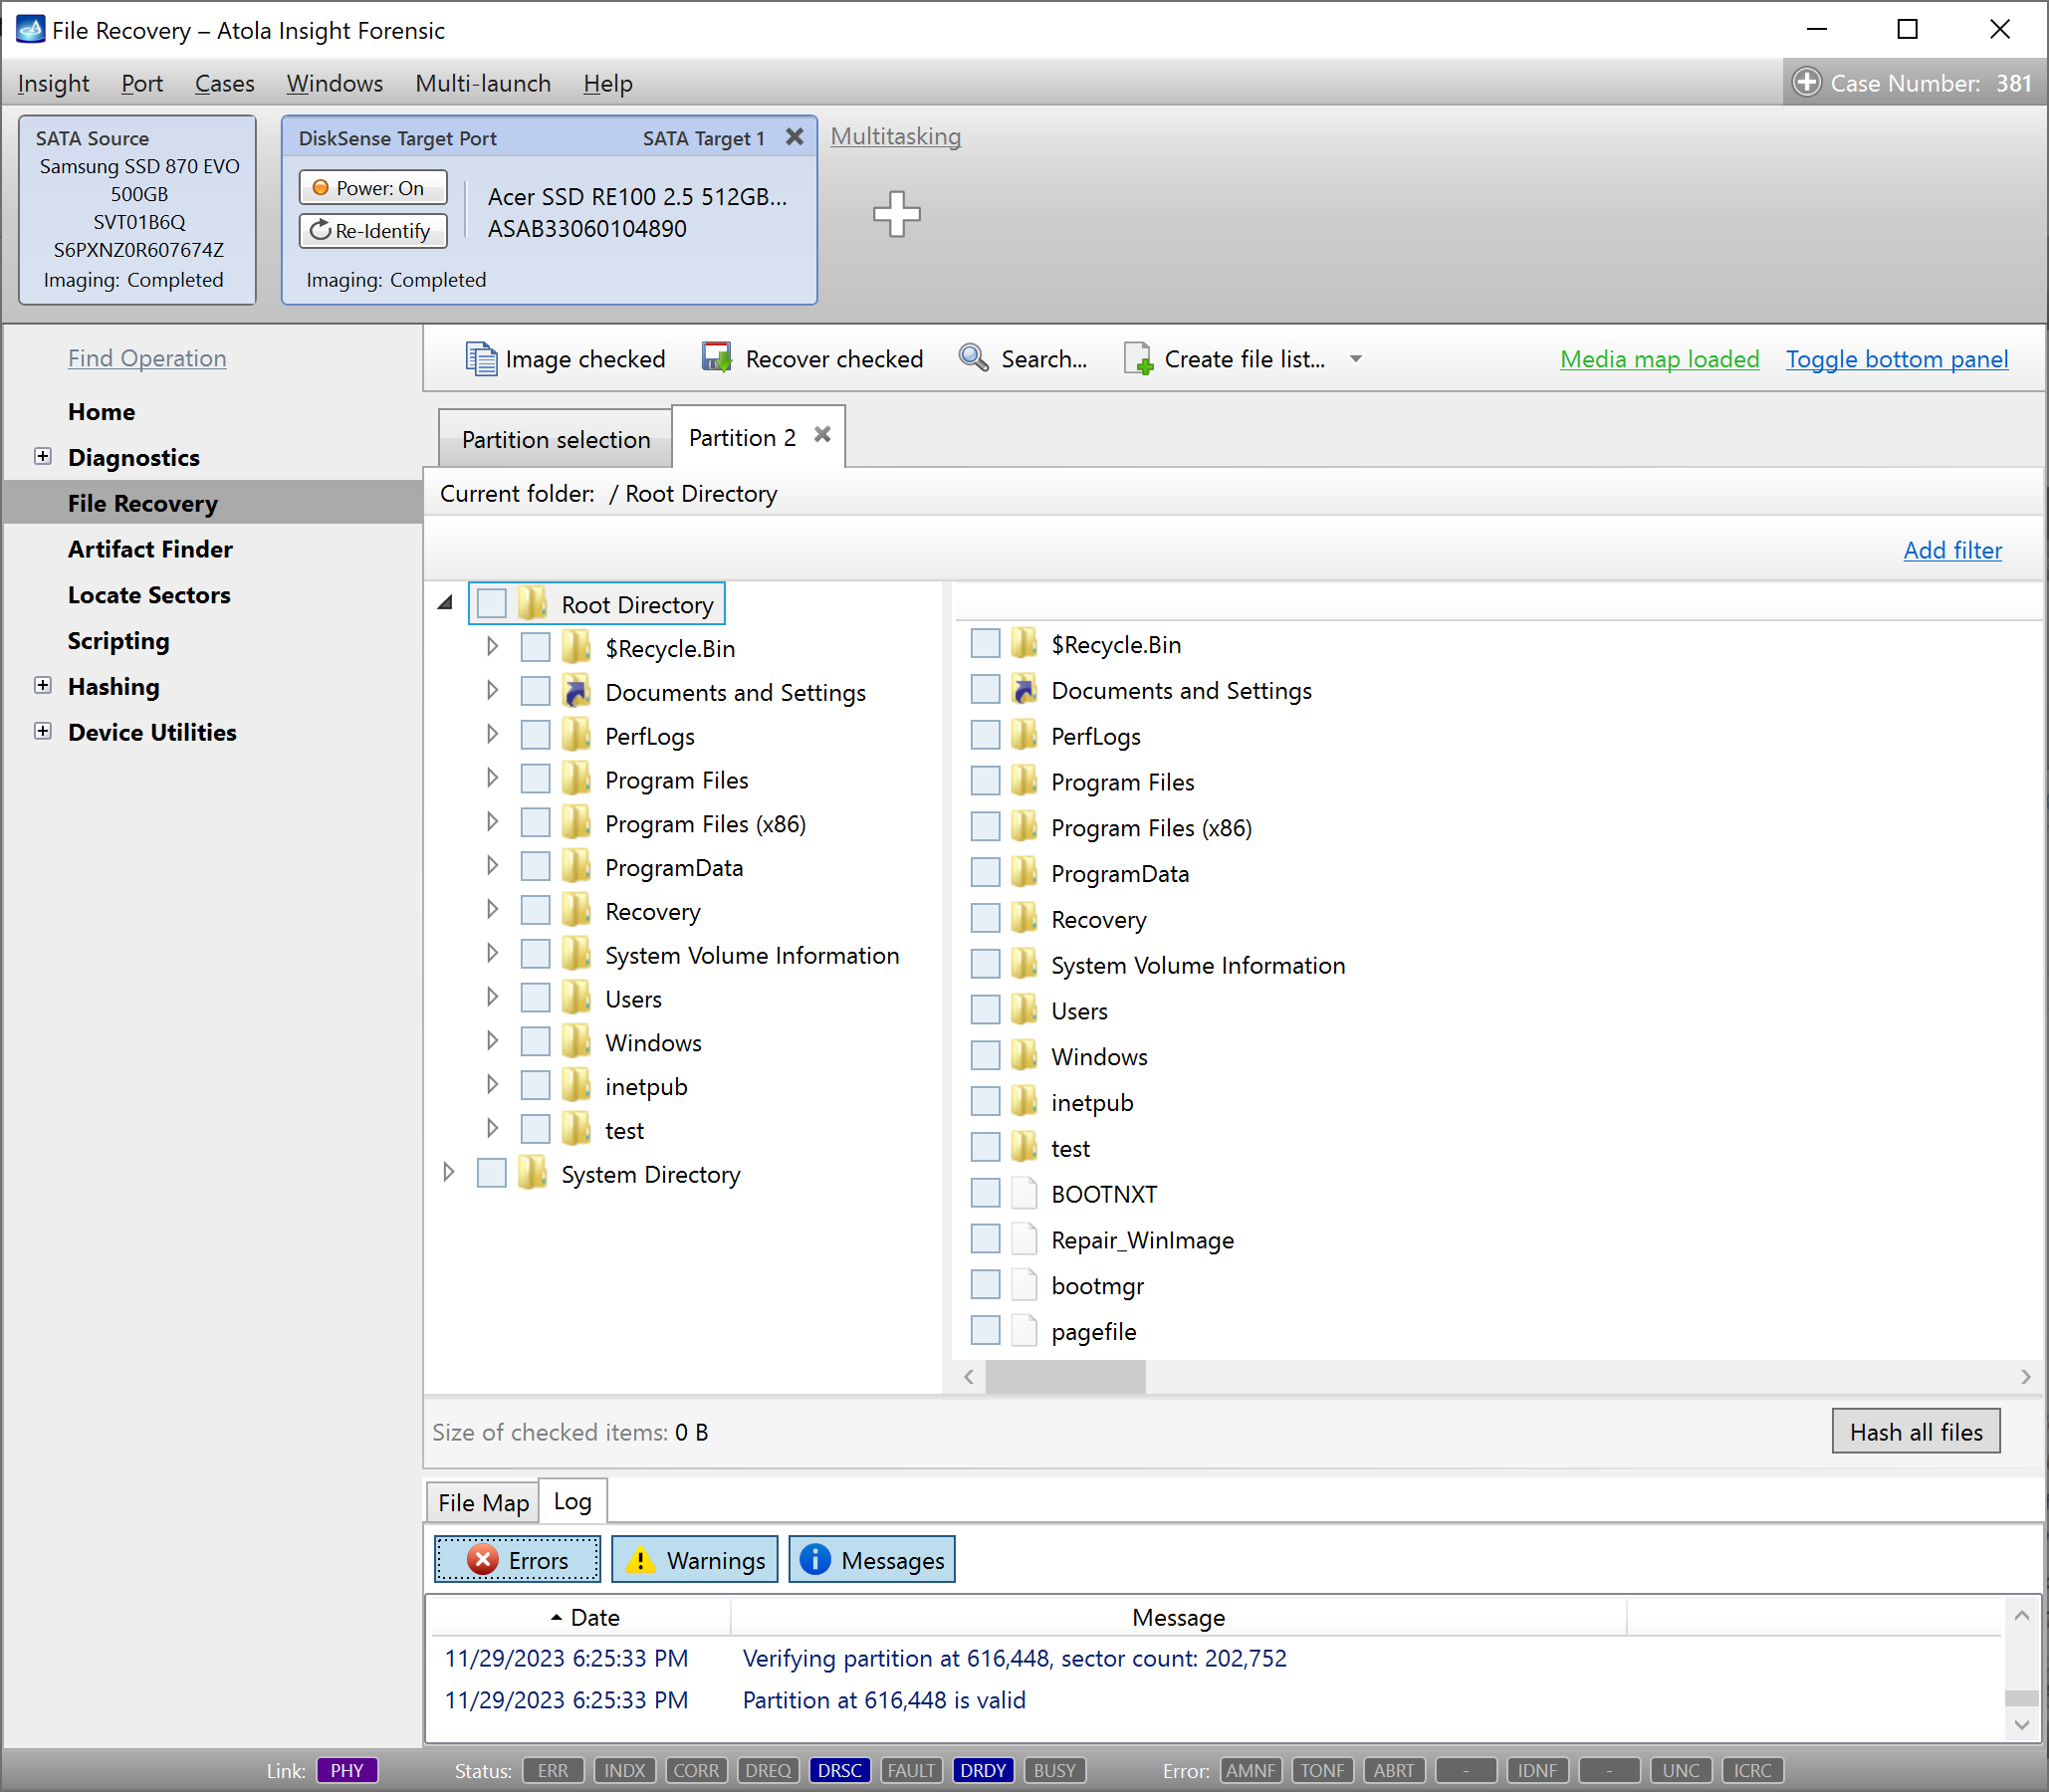
- Select any of the imaged partitions you want to preview and click the Open partition button.
- Browse through the imaged folders and files.