Segmented Hashing
Segmented hashing is no longer a new hashing concept. It was introduced by Atola Technology in November 2016 and has since been successfully utilized by thousands of investigators. Segmented hashing enables the hashing of damaged source drives and prevents losing a target image if part of the data gets corrupted. This hashing method can be used during multipass imaging of damaged drives.
How is segmented hashing different from regular hashing?
With regular hashing, you get a single hash for the entire image.
With segmented hashing, you end up with many hashes of corresponding LBA ranges of the image. The sum of these LBA ranges represents the entire image, though not necessarily in sequential order. You can still prove that the entire image has not been modified by verifying all hashes in a set.
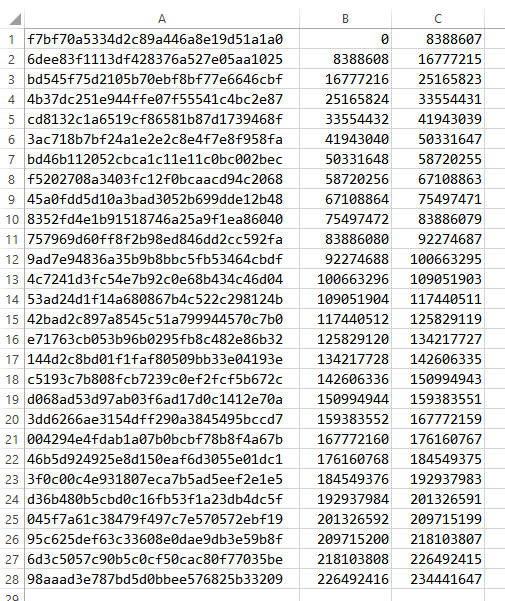
Segmented hashes are saved in a CSV file in this format:
Hash,start LBA,end LBA
Example:
75c92419e86ce82734ef3bbb781e6602 ,0,8388608

e2c7fc5264bae820e46c50b0502236d3 ,8388609,16777216

42718e48b5adb59563c98727cbce0619 ,16777217,25165824

... And so on until the last LBA.
Segmented hashes for multipass imaging
Conventional hashing methods don’t work when imaging an evidence device in a non-linear way, which means no proper hash calculation is possible when imaging damaged evidence drives.
Segmented hashing allows the use of multiple passes and more efficient handling of damaged drives while hashing all the good areas. Hashes are calculated only for the imaged areas, while all bad sectors are excluded from the calculation.
Better resiliency
Another reason to use segmented hashes is to ensure better resiliency against data corruption in the image.
If your acquired evidence image gets damaged in the future, with a regular linear hash you will get a hash mismatch upon verification, and the entire image will become useless. With segmented hashes, only the hash for one segment in the set will become invalid.
Image with segmented hashing
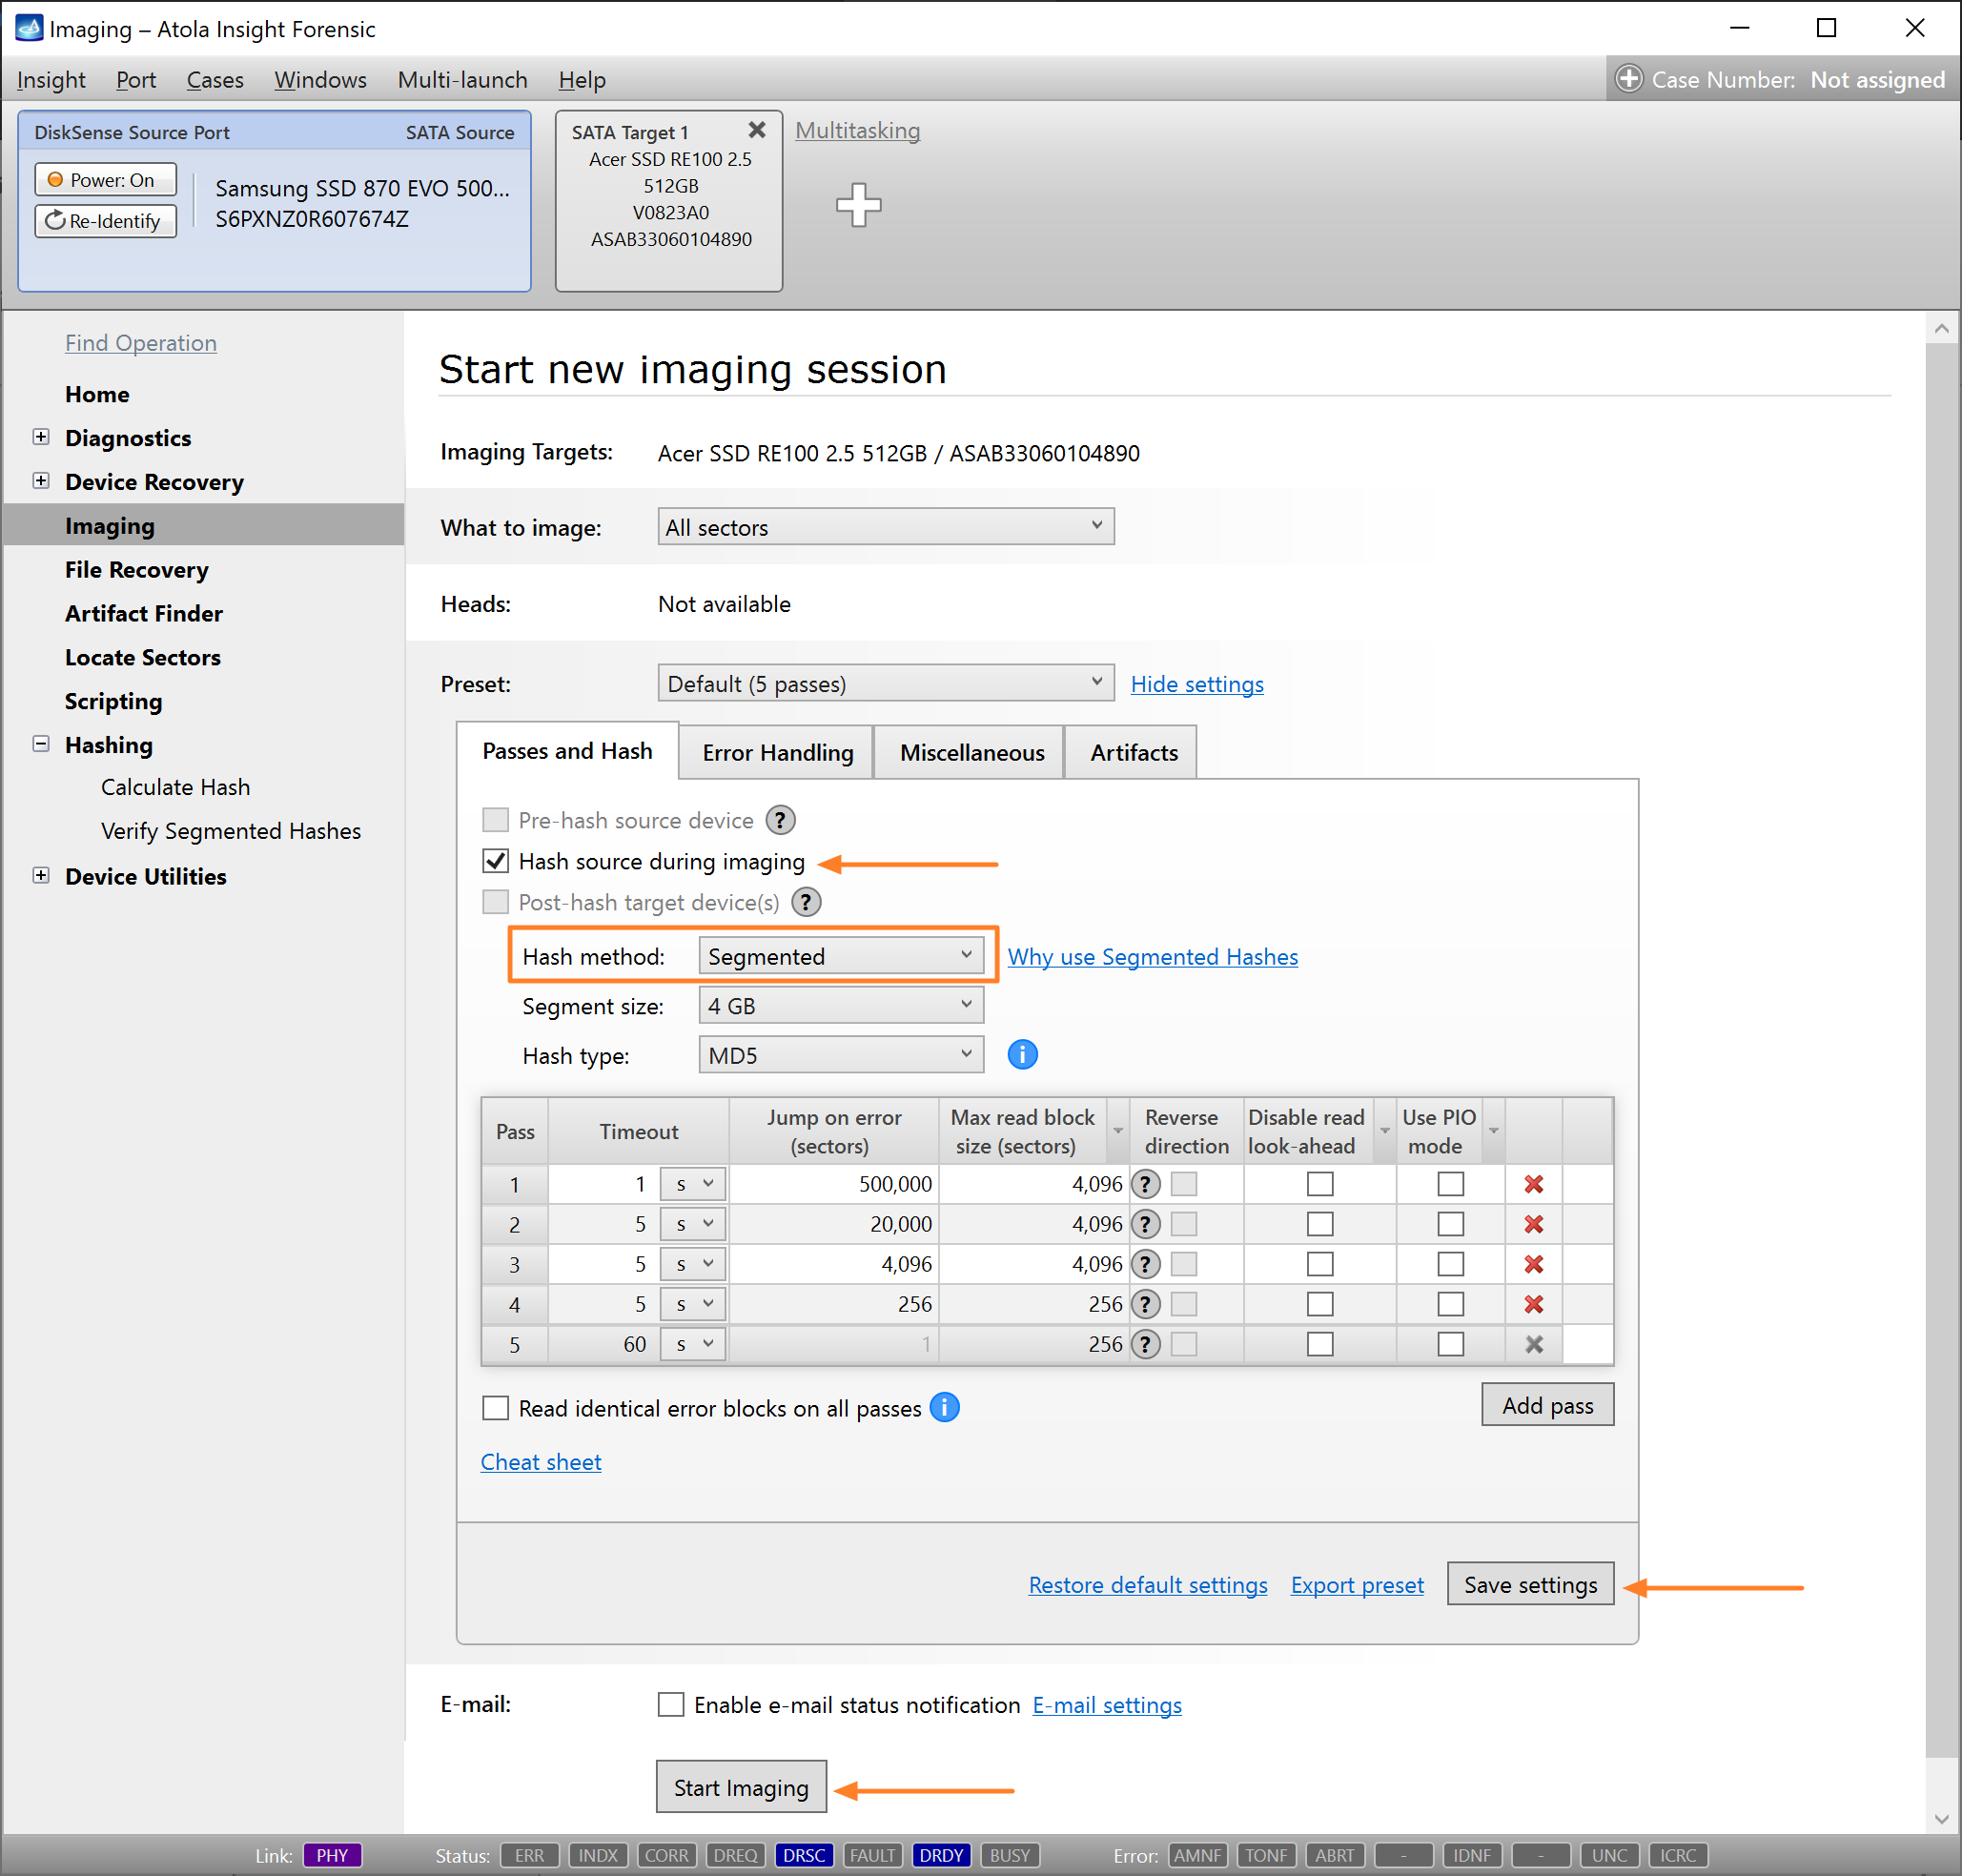
To enable segmented hashing for an imaging session, do the following:
- Go to Imaging > Create New Session.
- In the Preset section, click the Show settings link.
- On the Passes and Hash tab, enable Hash source during imaging.
- Set the Hash method to Segmented.
- Adjust other imaging parameters as needed and click Save settings.
- Click Start imaging.
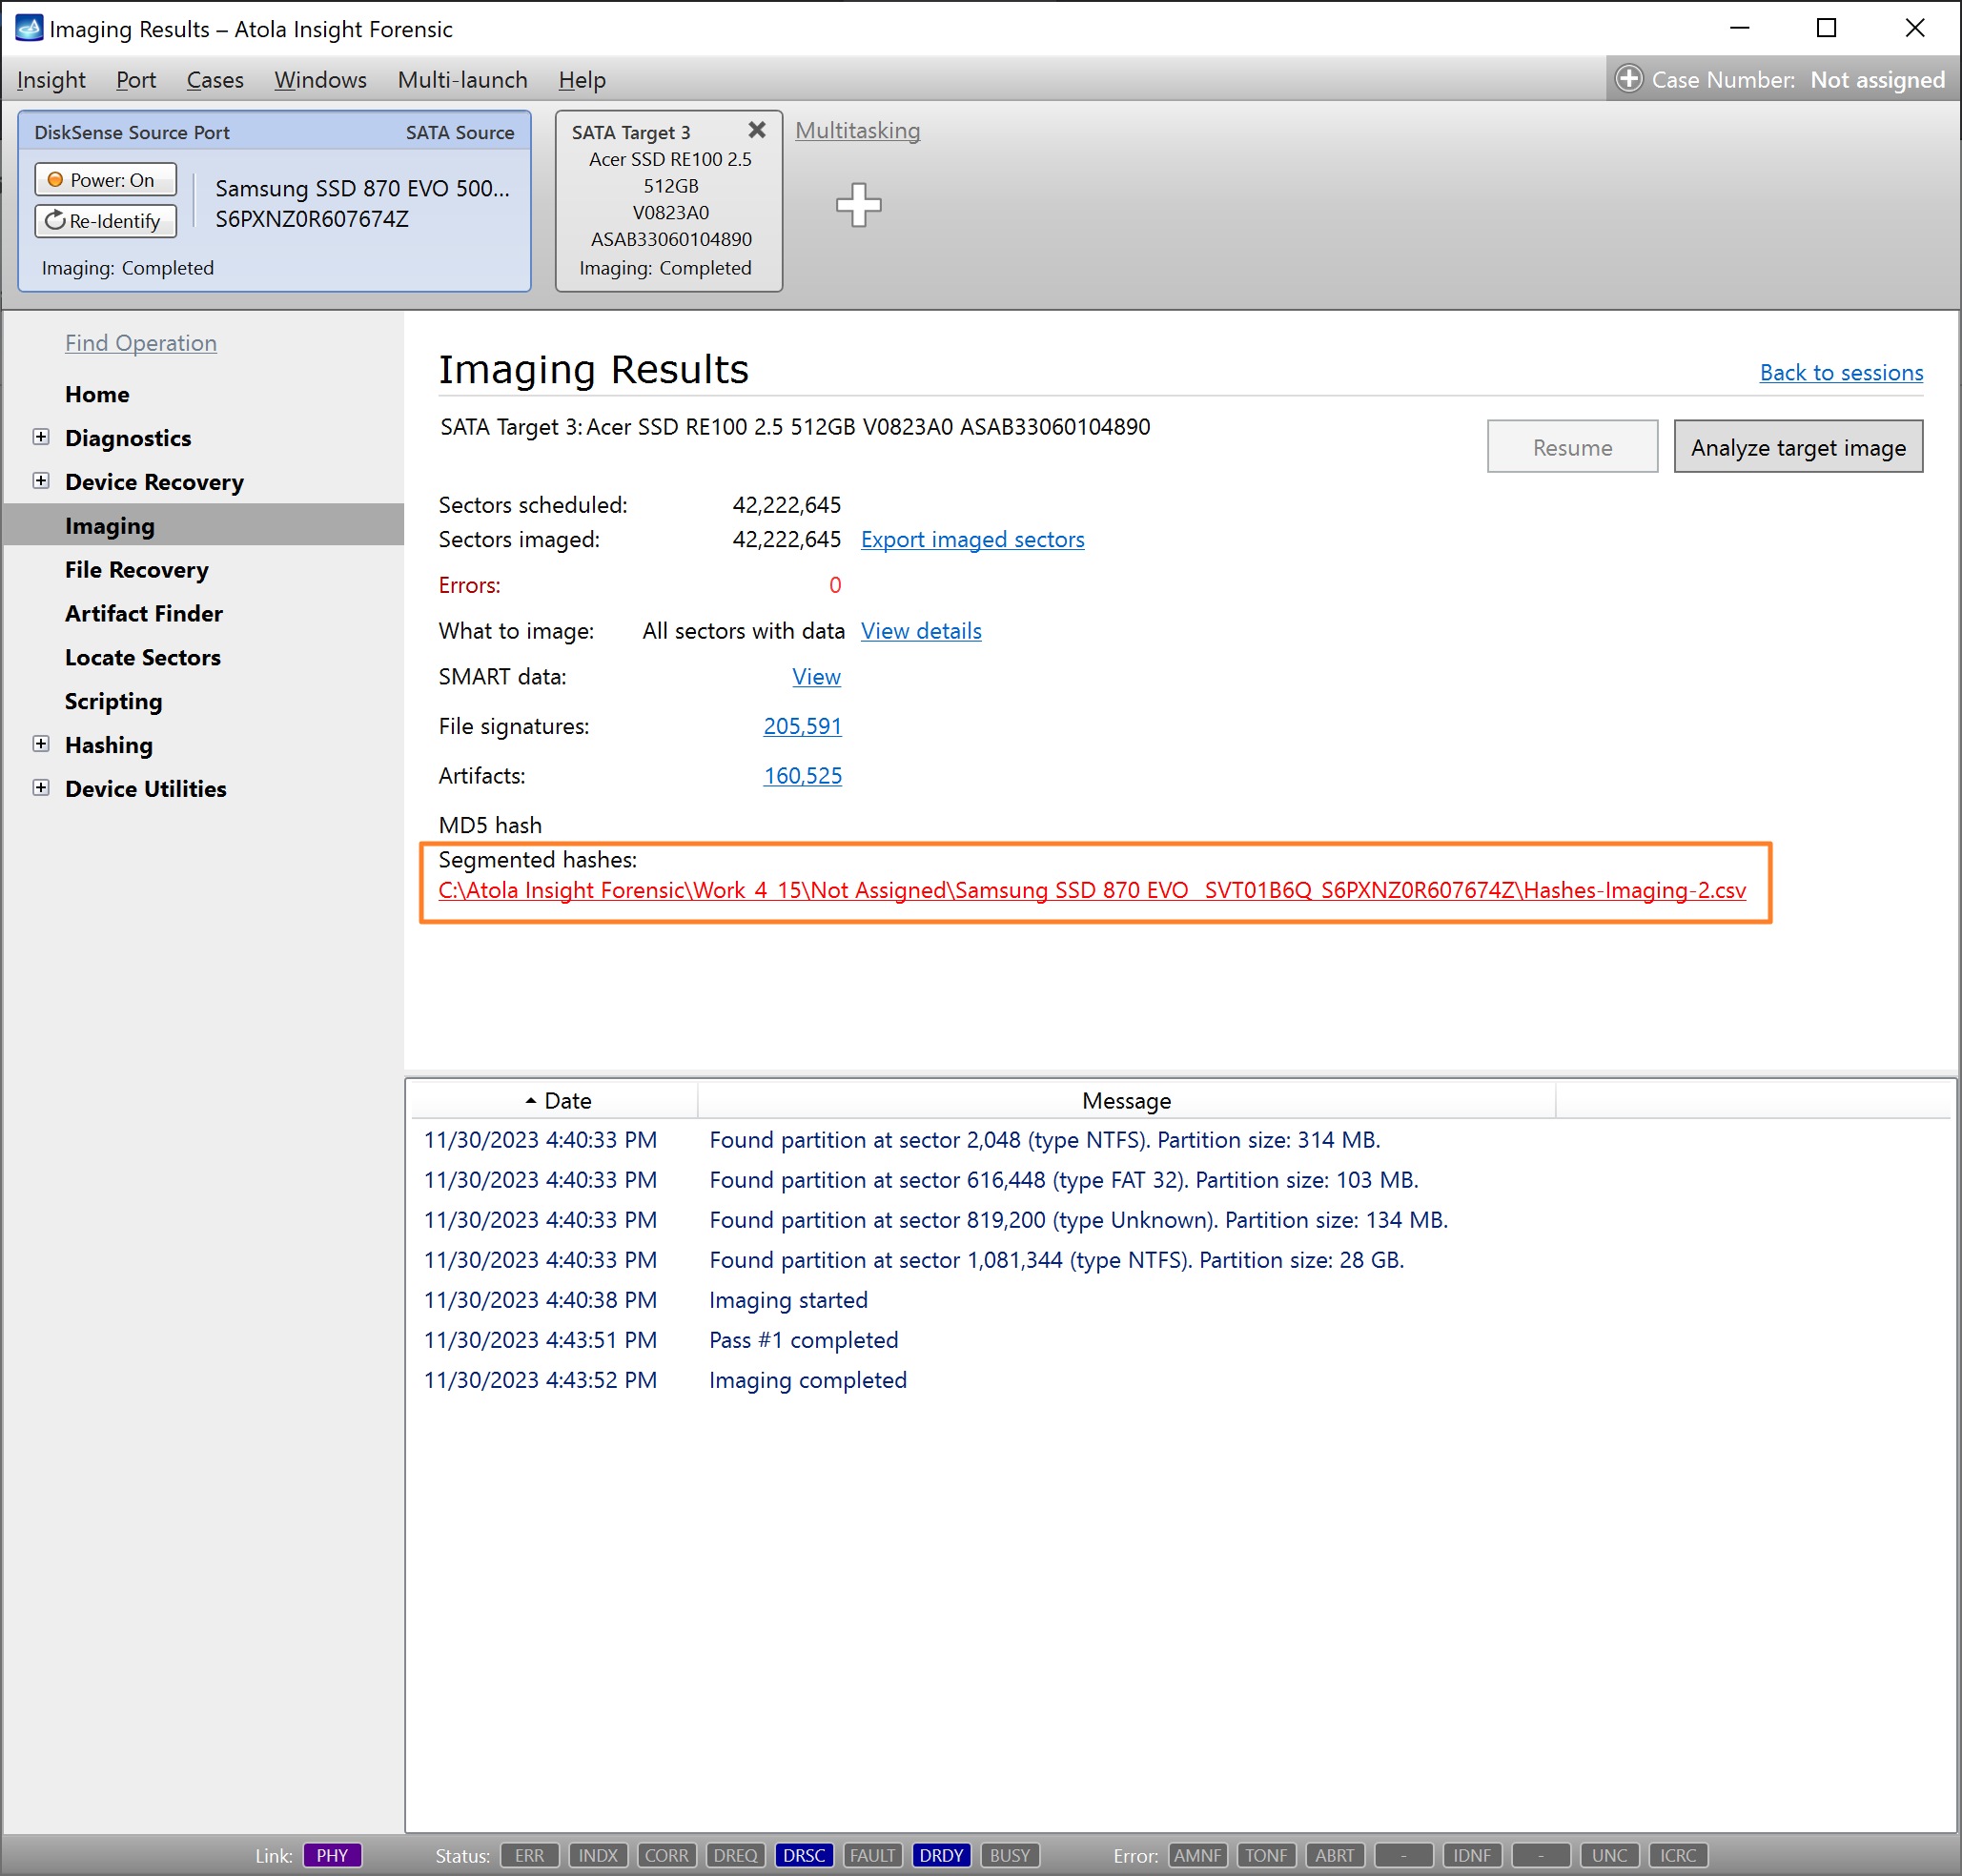
Segmented hashes are saved in a CSV file in "Hash,start LBA,end LBA" format:
A link to the file with segmented hashes is included in the Imaging Results report.