Locate sectors
The Locate Sectors functionality helps find the exact location of specific sectors to determine which files and partitions they belong to.
You can launch the Locate sectors operation from the Sidebar. Alternatively, select it as an option to identify bad sectors belonging to the file system when you get the Imaging Results report which contains errors.
How to quickly locate sectors
To run Locate sectors as a separate operation, follow these steps:
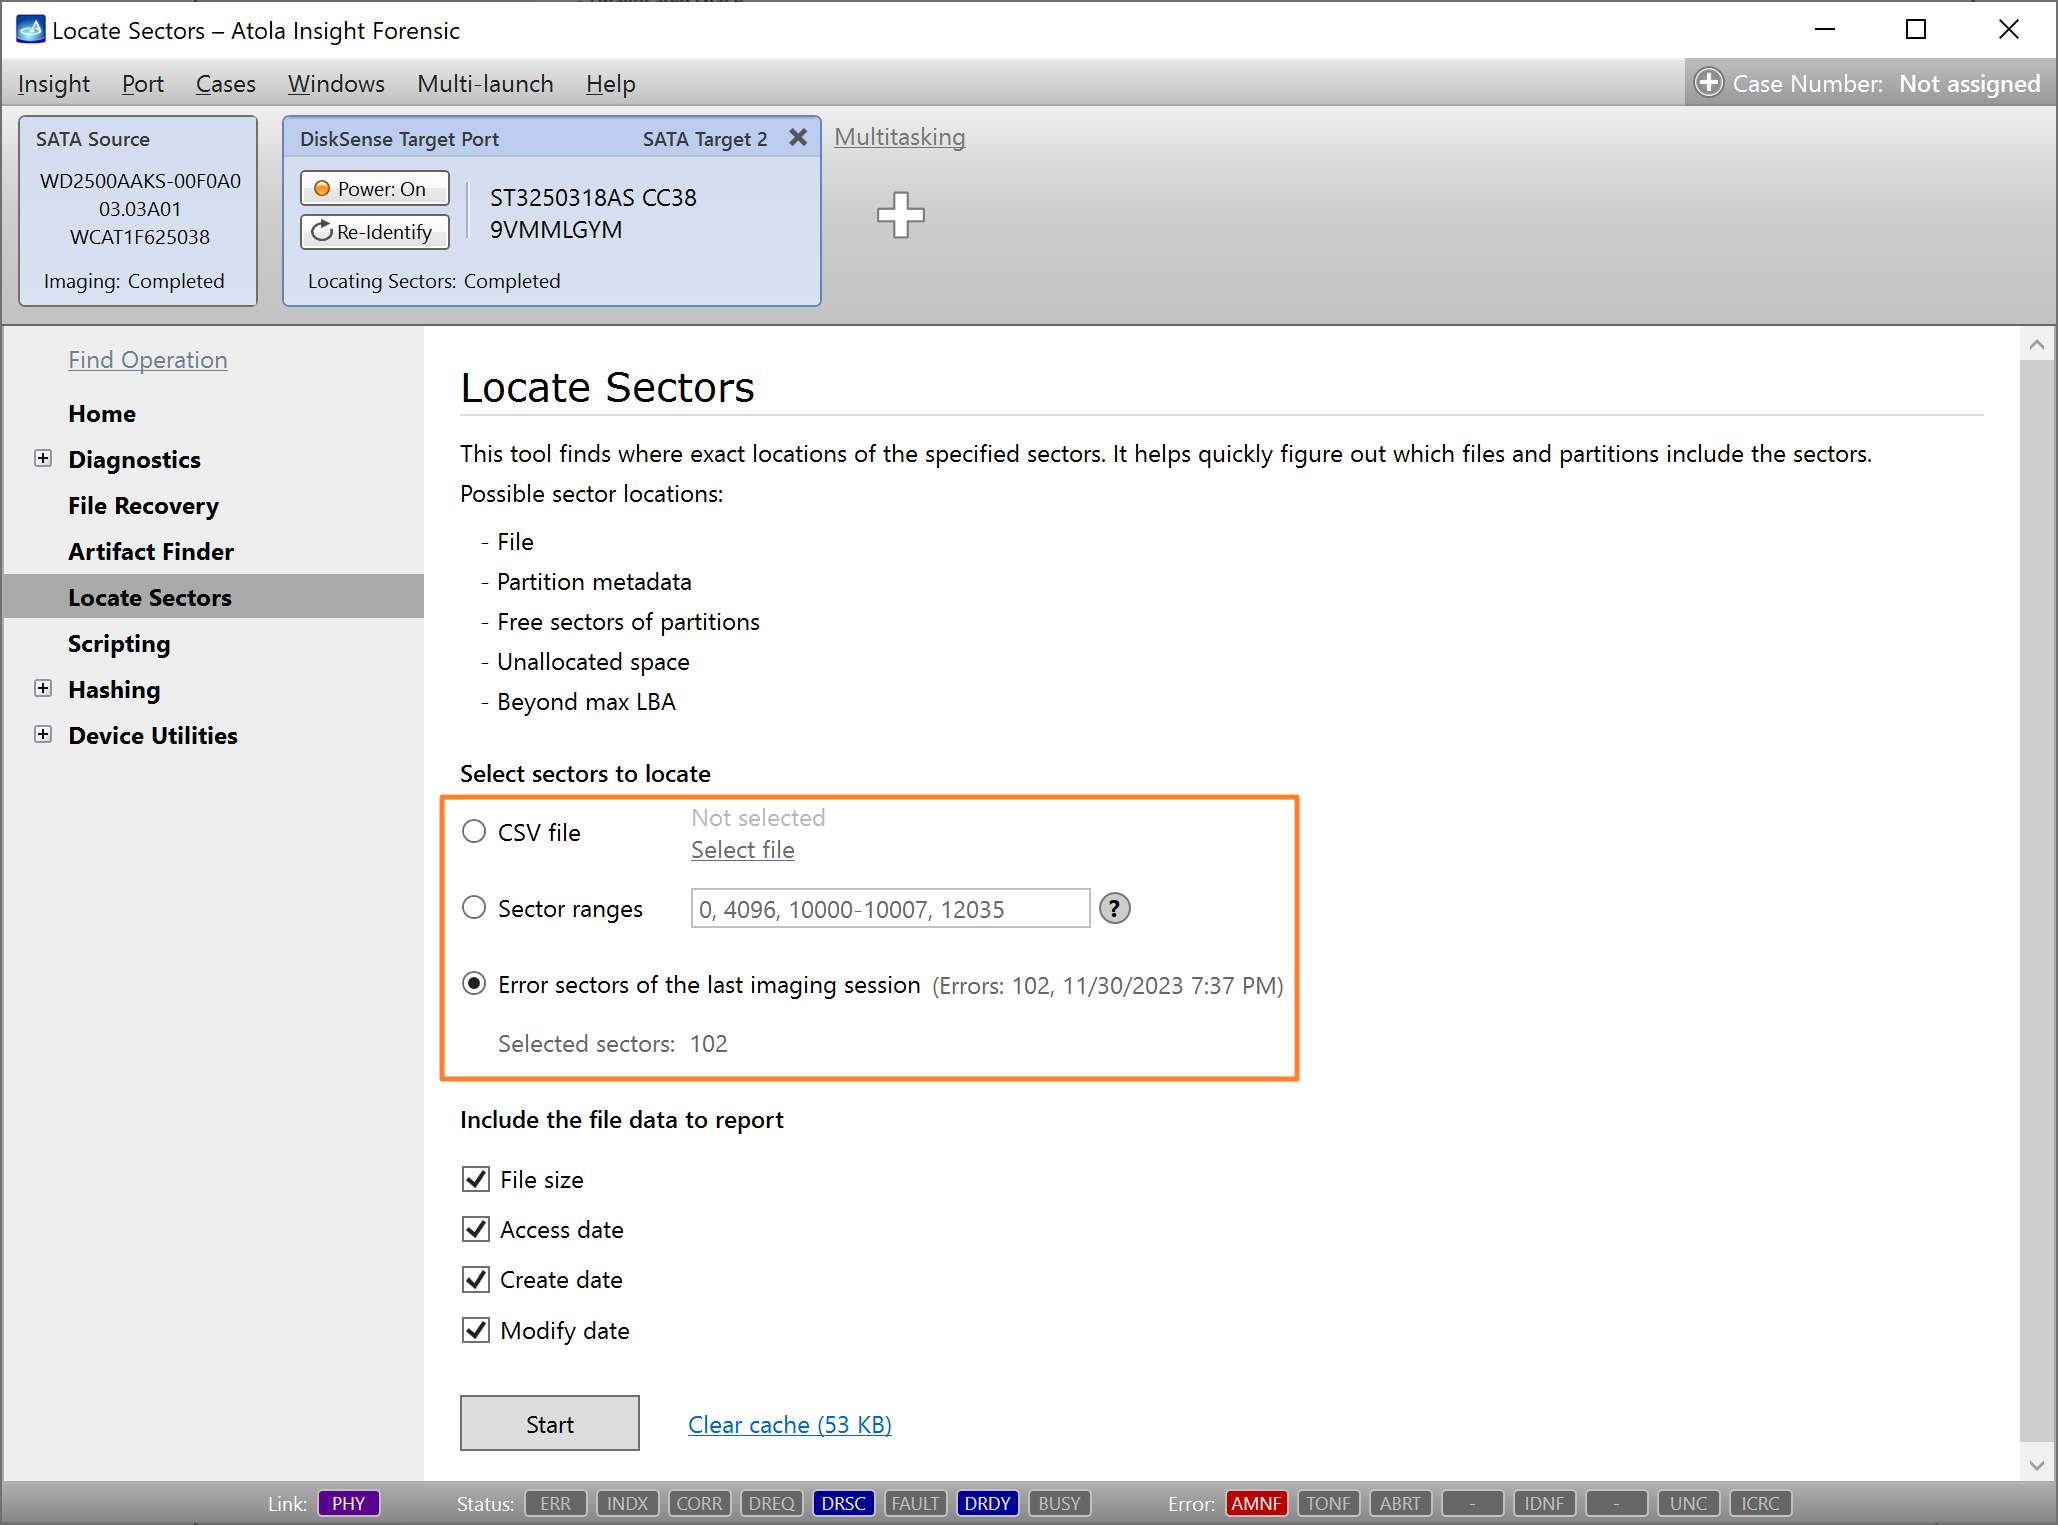
- In the Sidebar, click Locate Sectors.
-
Select sectors to locate, using one of the following options:
- CSV file: select a CSV file, which contains comma-separated sector ranges.
- Sector ranges: enter comma-separated individual sector numbers (for example: 501, 607) or sector ranges (for example: 1000-2000).
- Error sectors of the last imaging session: this option is available if you are locating sectors on a target that contain an image of a drive that had bad sectors.
-
Select the file data you’d like to see in the report:
- File size
- Access date
- Create date
- Modify date
- Optional: Insight caches files to speed up the analysis of the sector location. If the cache takes too much space in your Insight work folder, click the Clear cache link at the bottom.
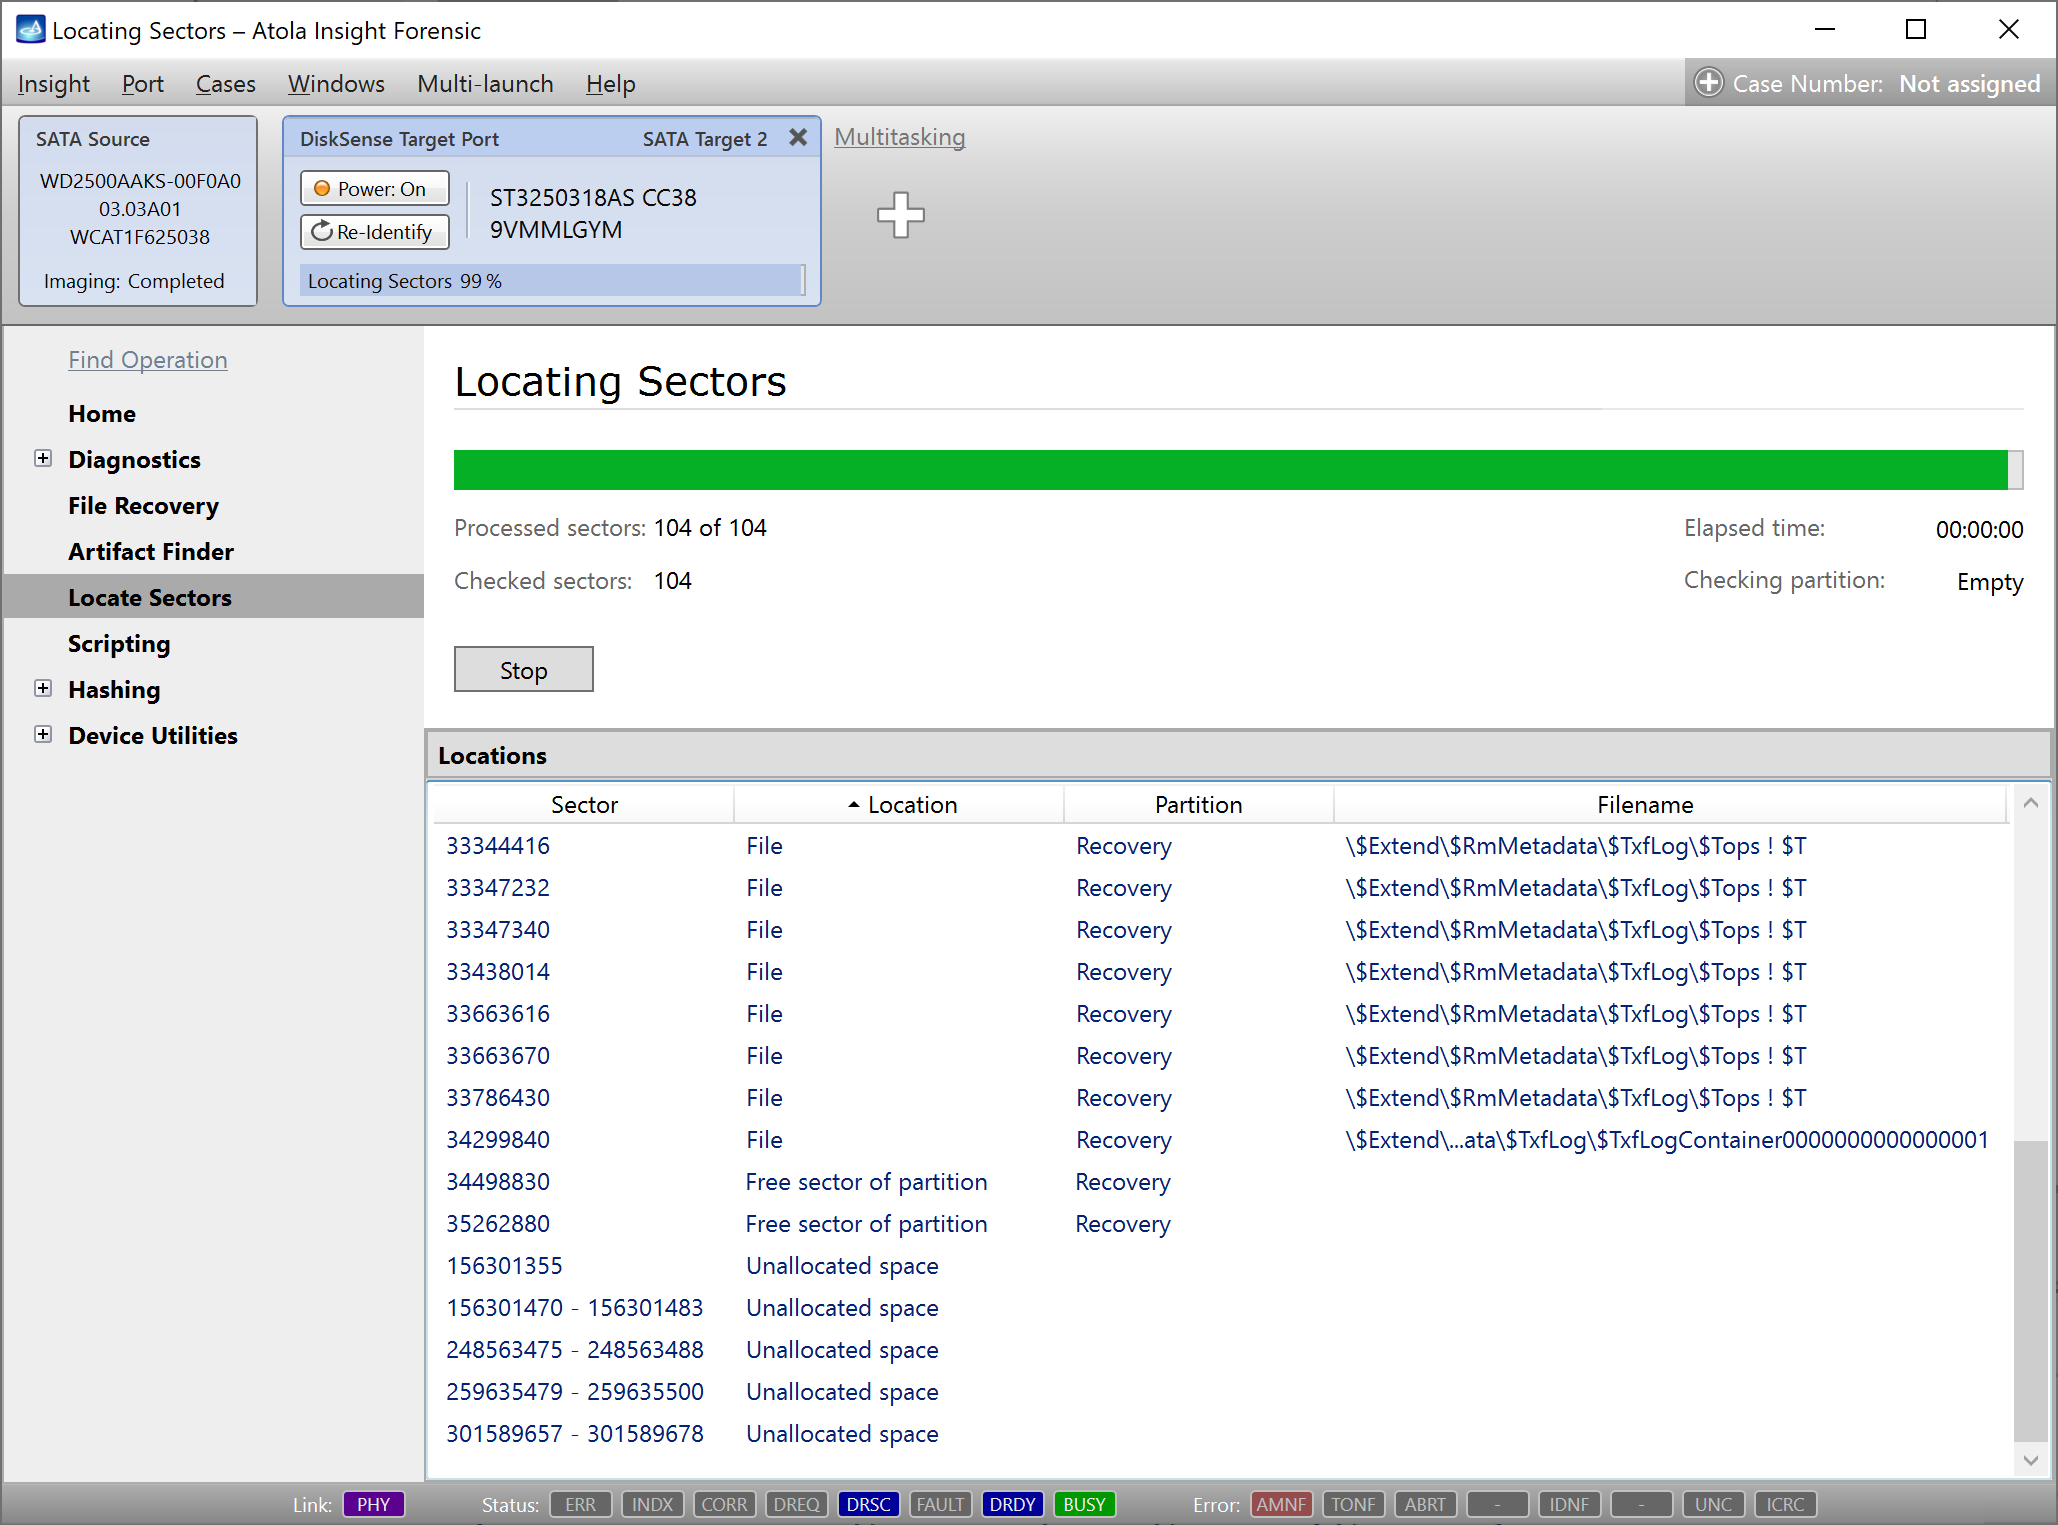
- Click the Start button. Insight immediately begins locating the sectors.
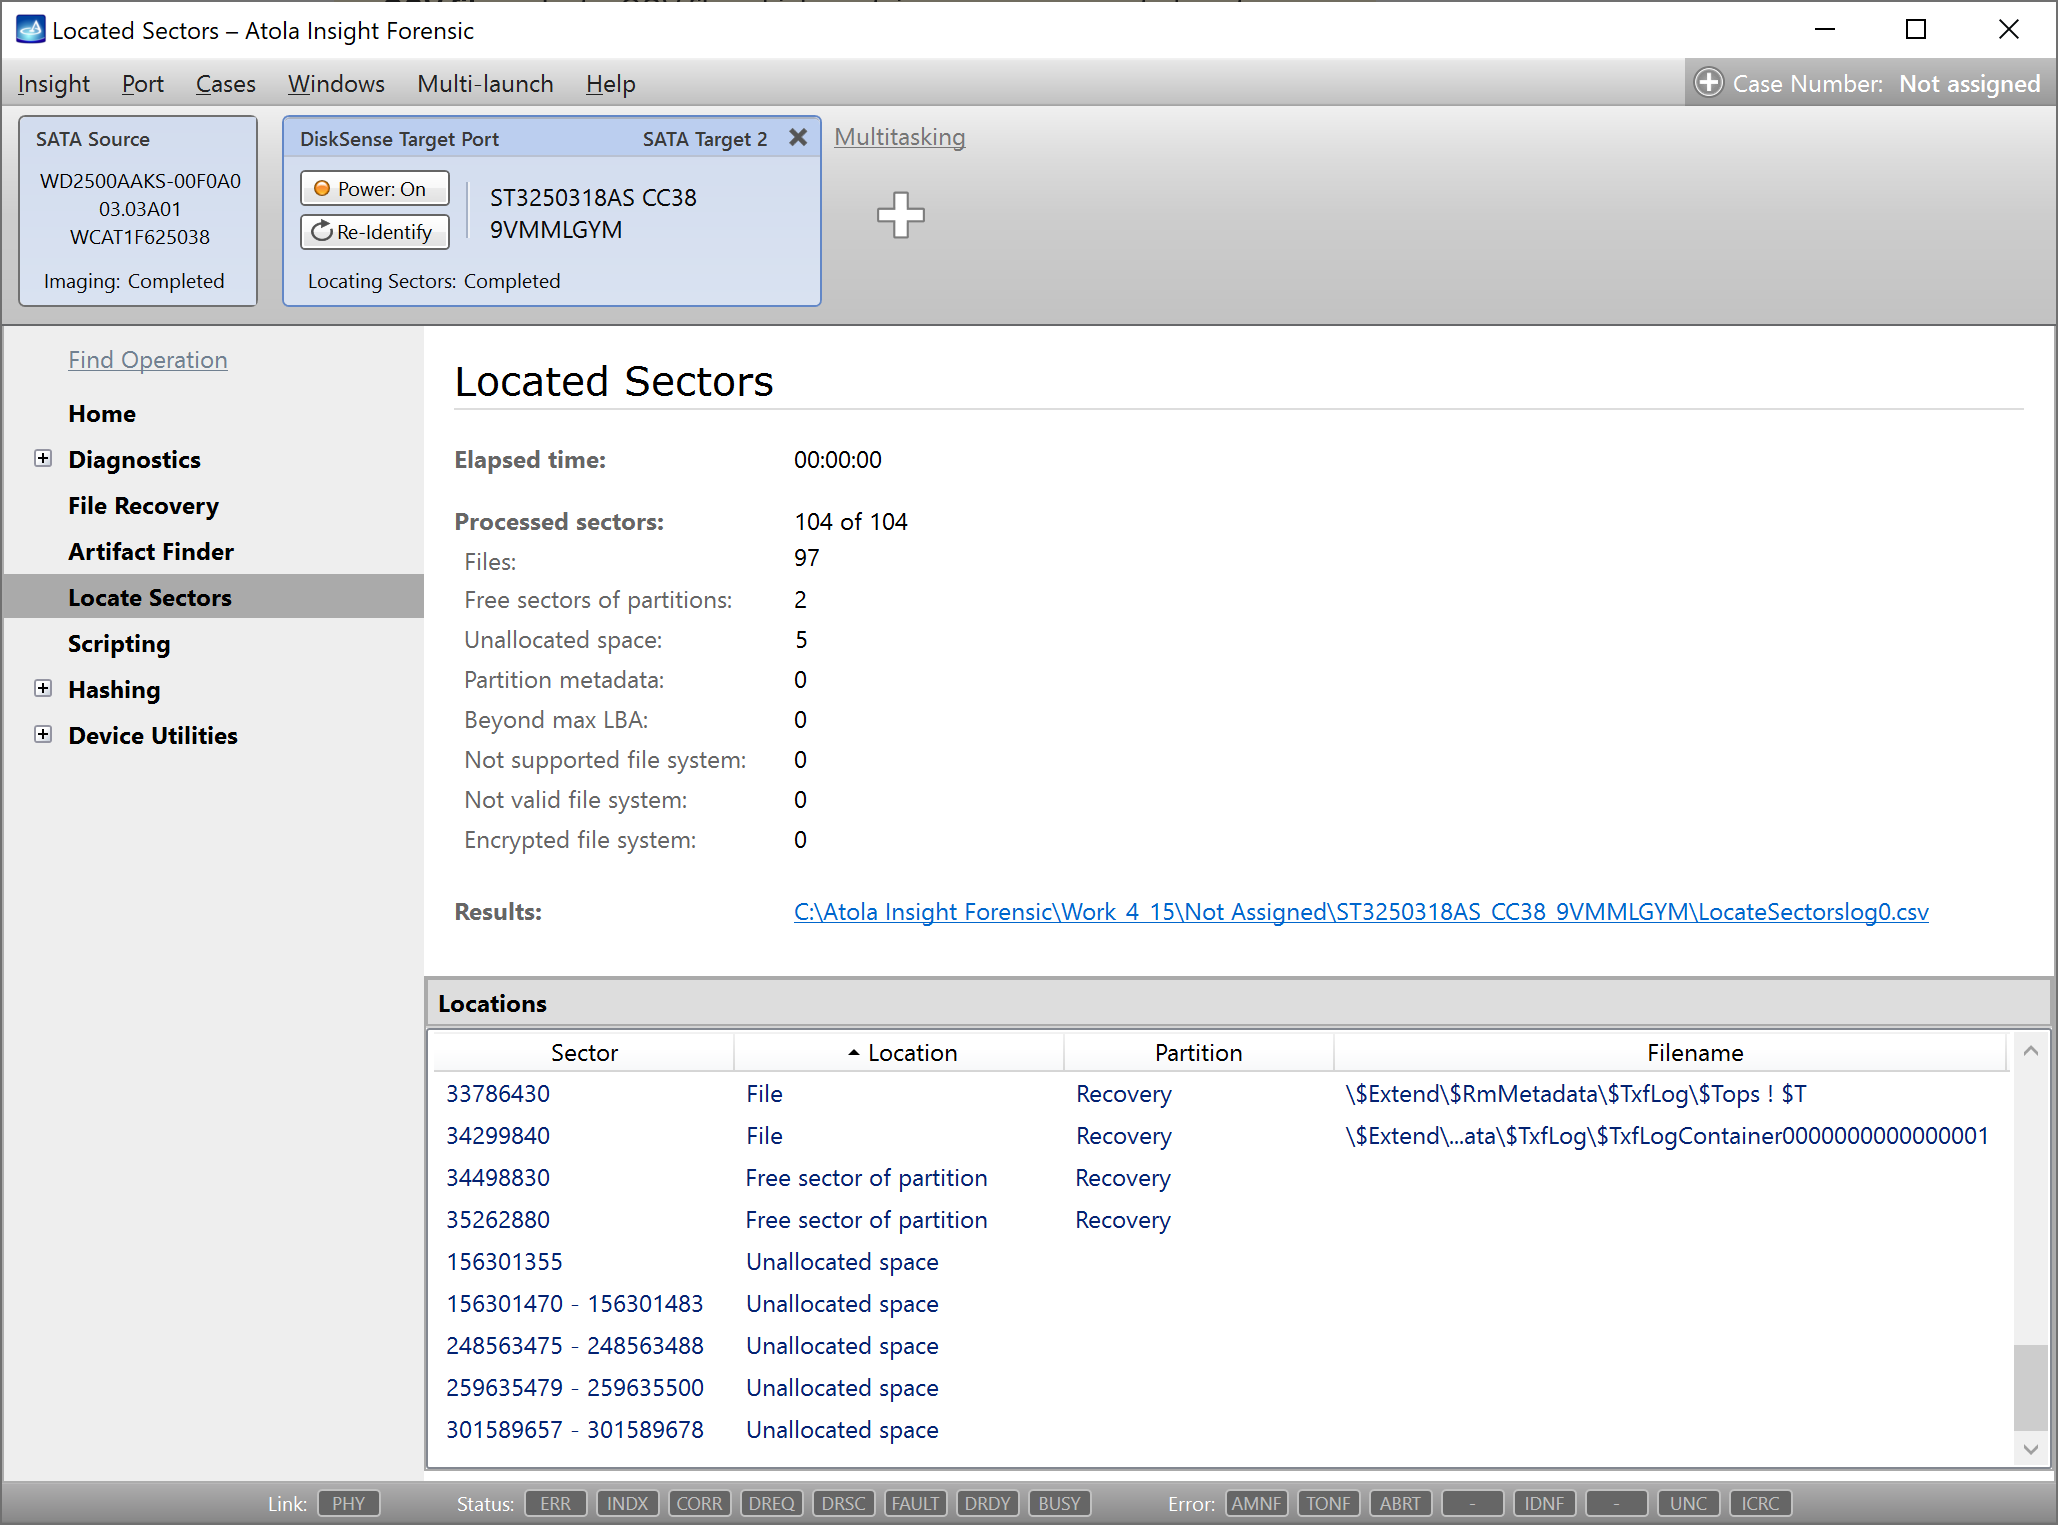
- After processing all the scheduled sectors, Insight generates a report listing where the sectors have landed in relation to individual files and the file system as a whole.
Locate bad sectors in the Imaging Results report
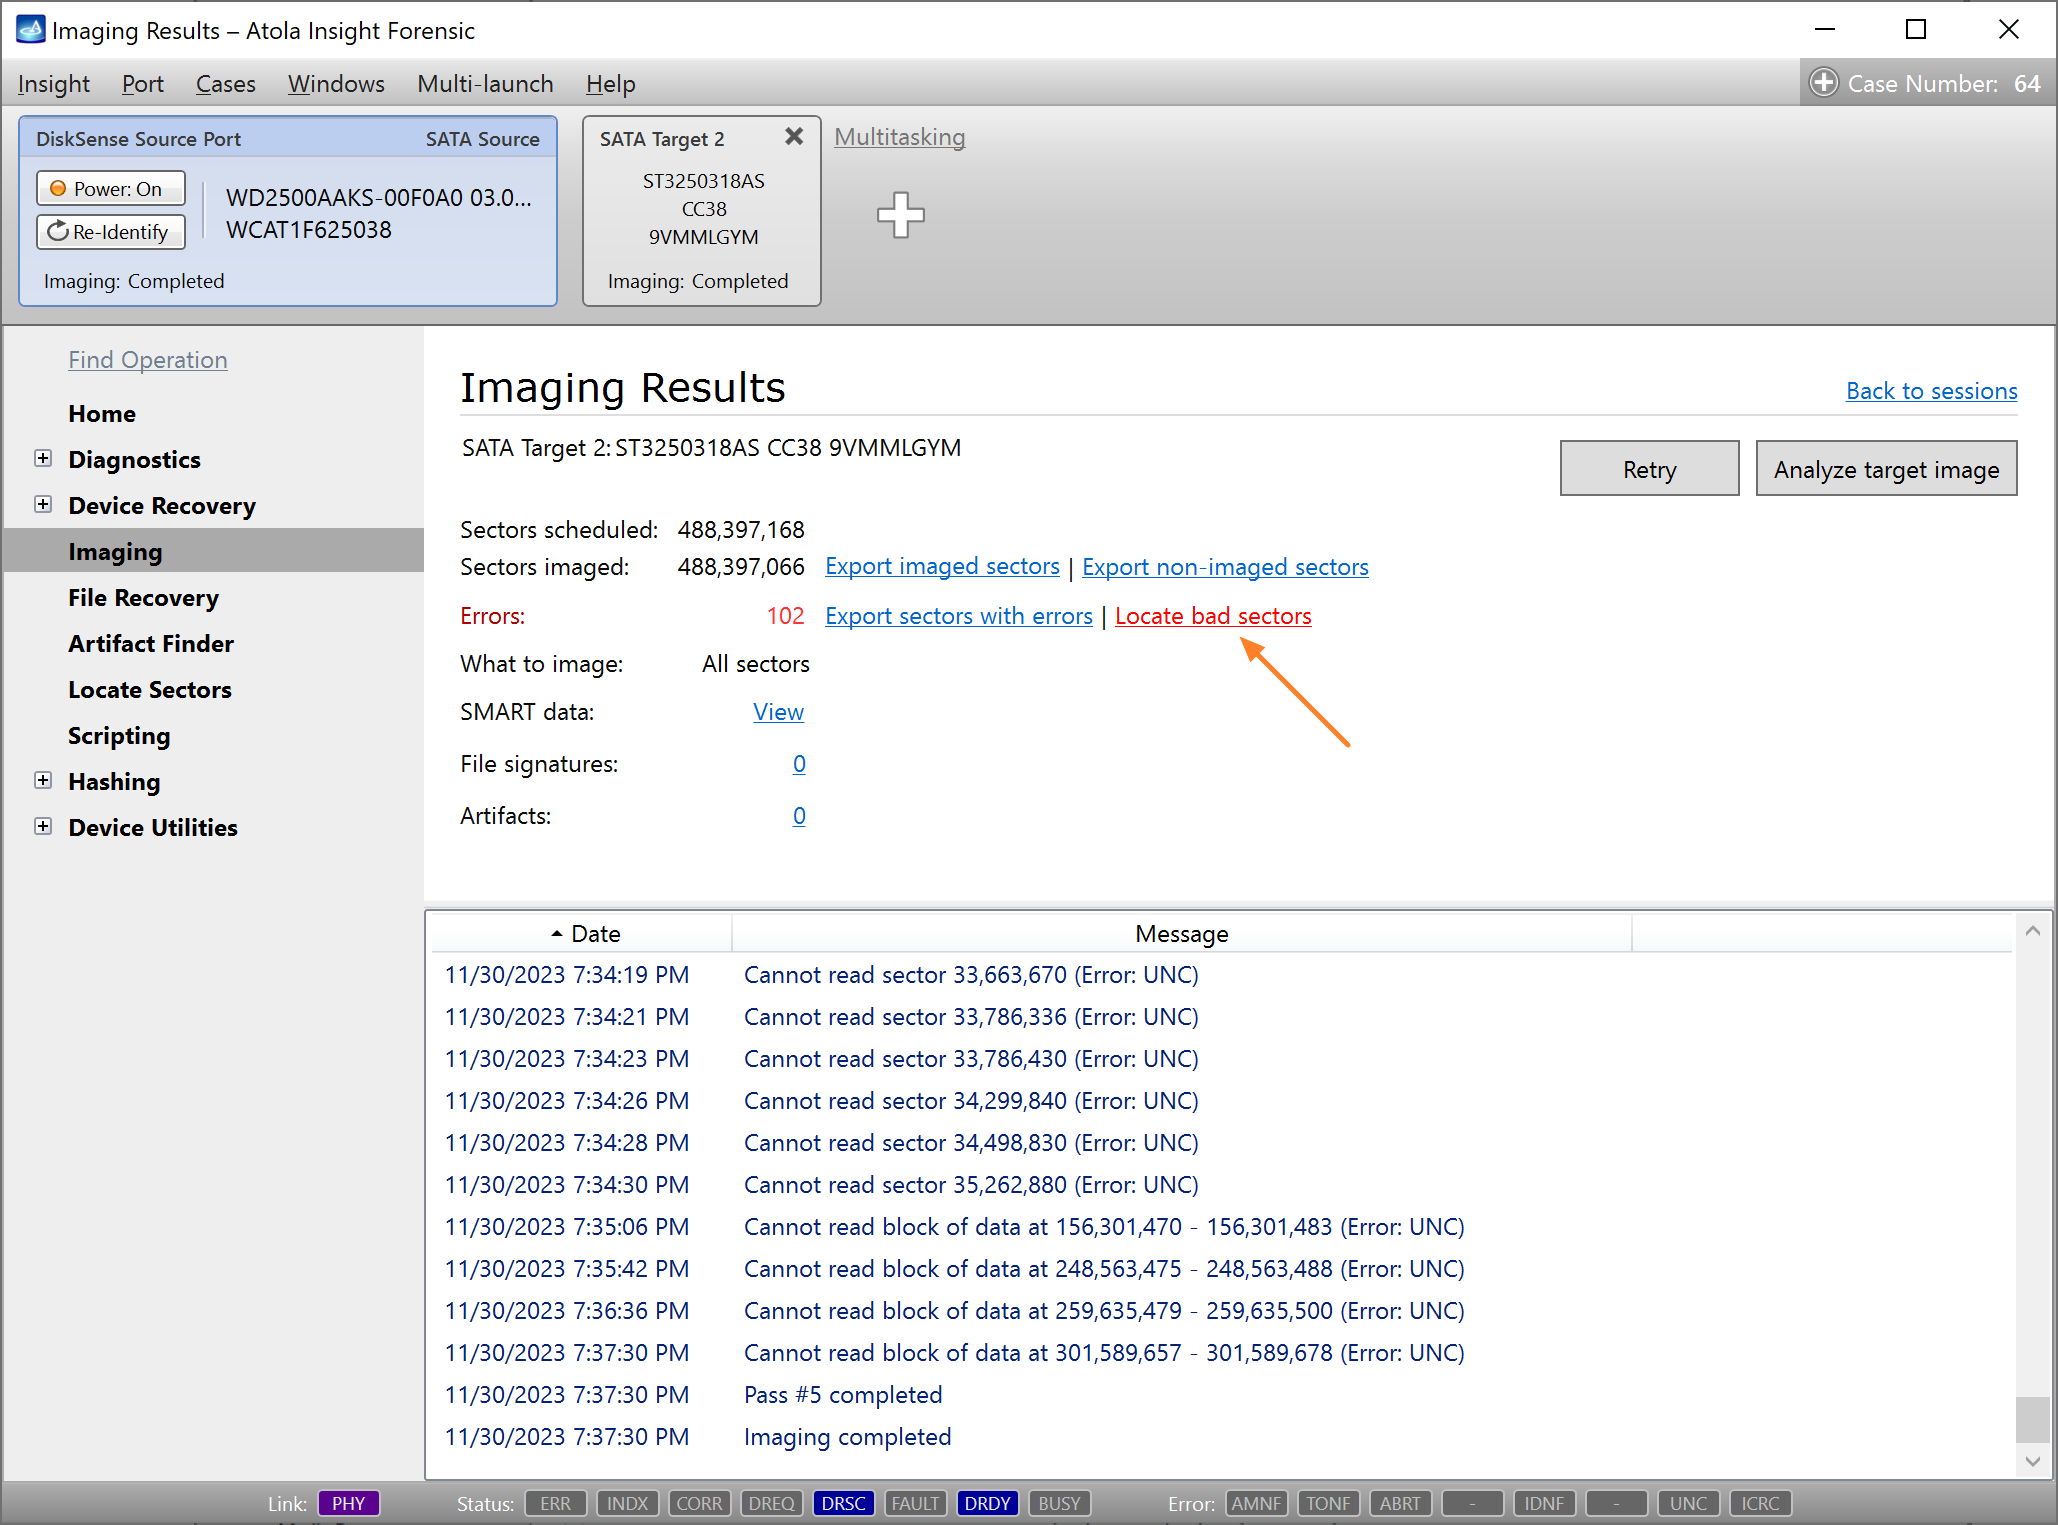
After an imaging session is completed, Insight generates the Imaging Results report. If Insight runs across bad sectors, it reflects them in the report and the operator is offered a few options for working with bad sectors.
To detect which files and partitions these bad sectors belong to, launch the Locate sectors operation by clicking the Locate bad sectors link.
Locate sectors in the HEX viewer
The HEX viewer is integrated into a few modules of Insight: Artifact Finder, Disk Editor and File Signatures.
To use the HEX viewer to analyze which file on the drive a found artifact belongs to, do the following:
- In the Sidebar, click Artifact Finder.
- Set the parameters of your search and start the process. For guidance, see Search for artifacts.
- Whether the search is ongoing or finished, you can start examining the output of the found artifacts in the table: filter, sort, and search for individual artifacts.
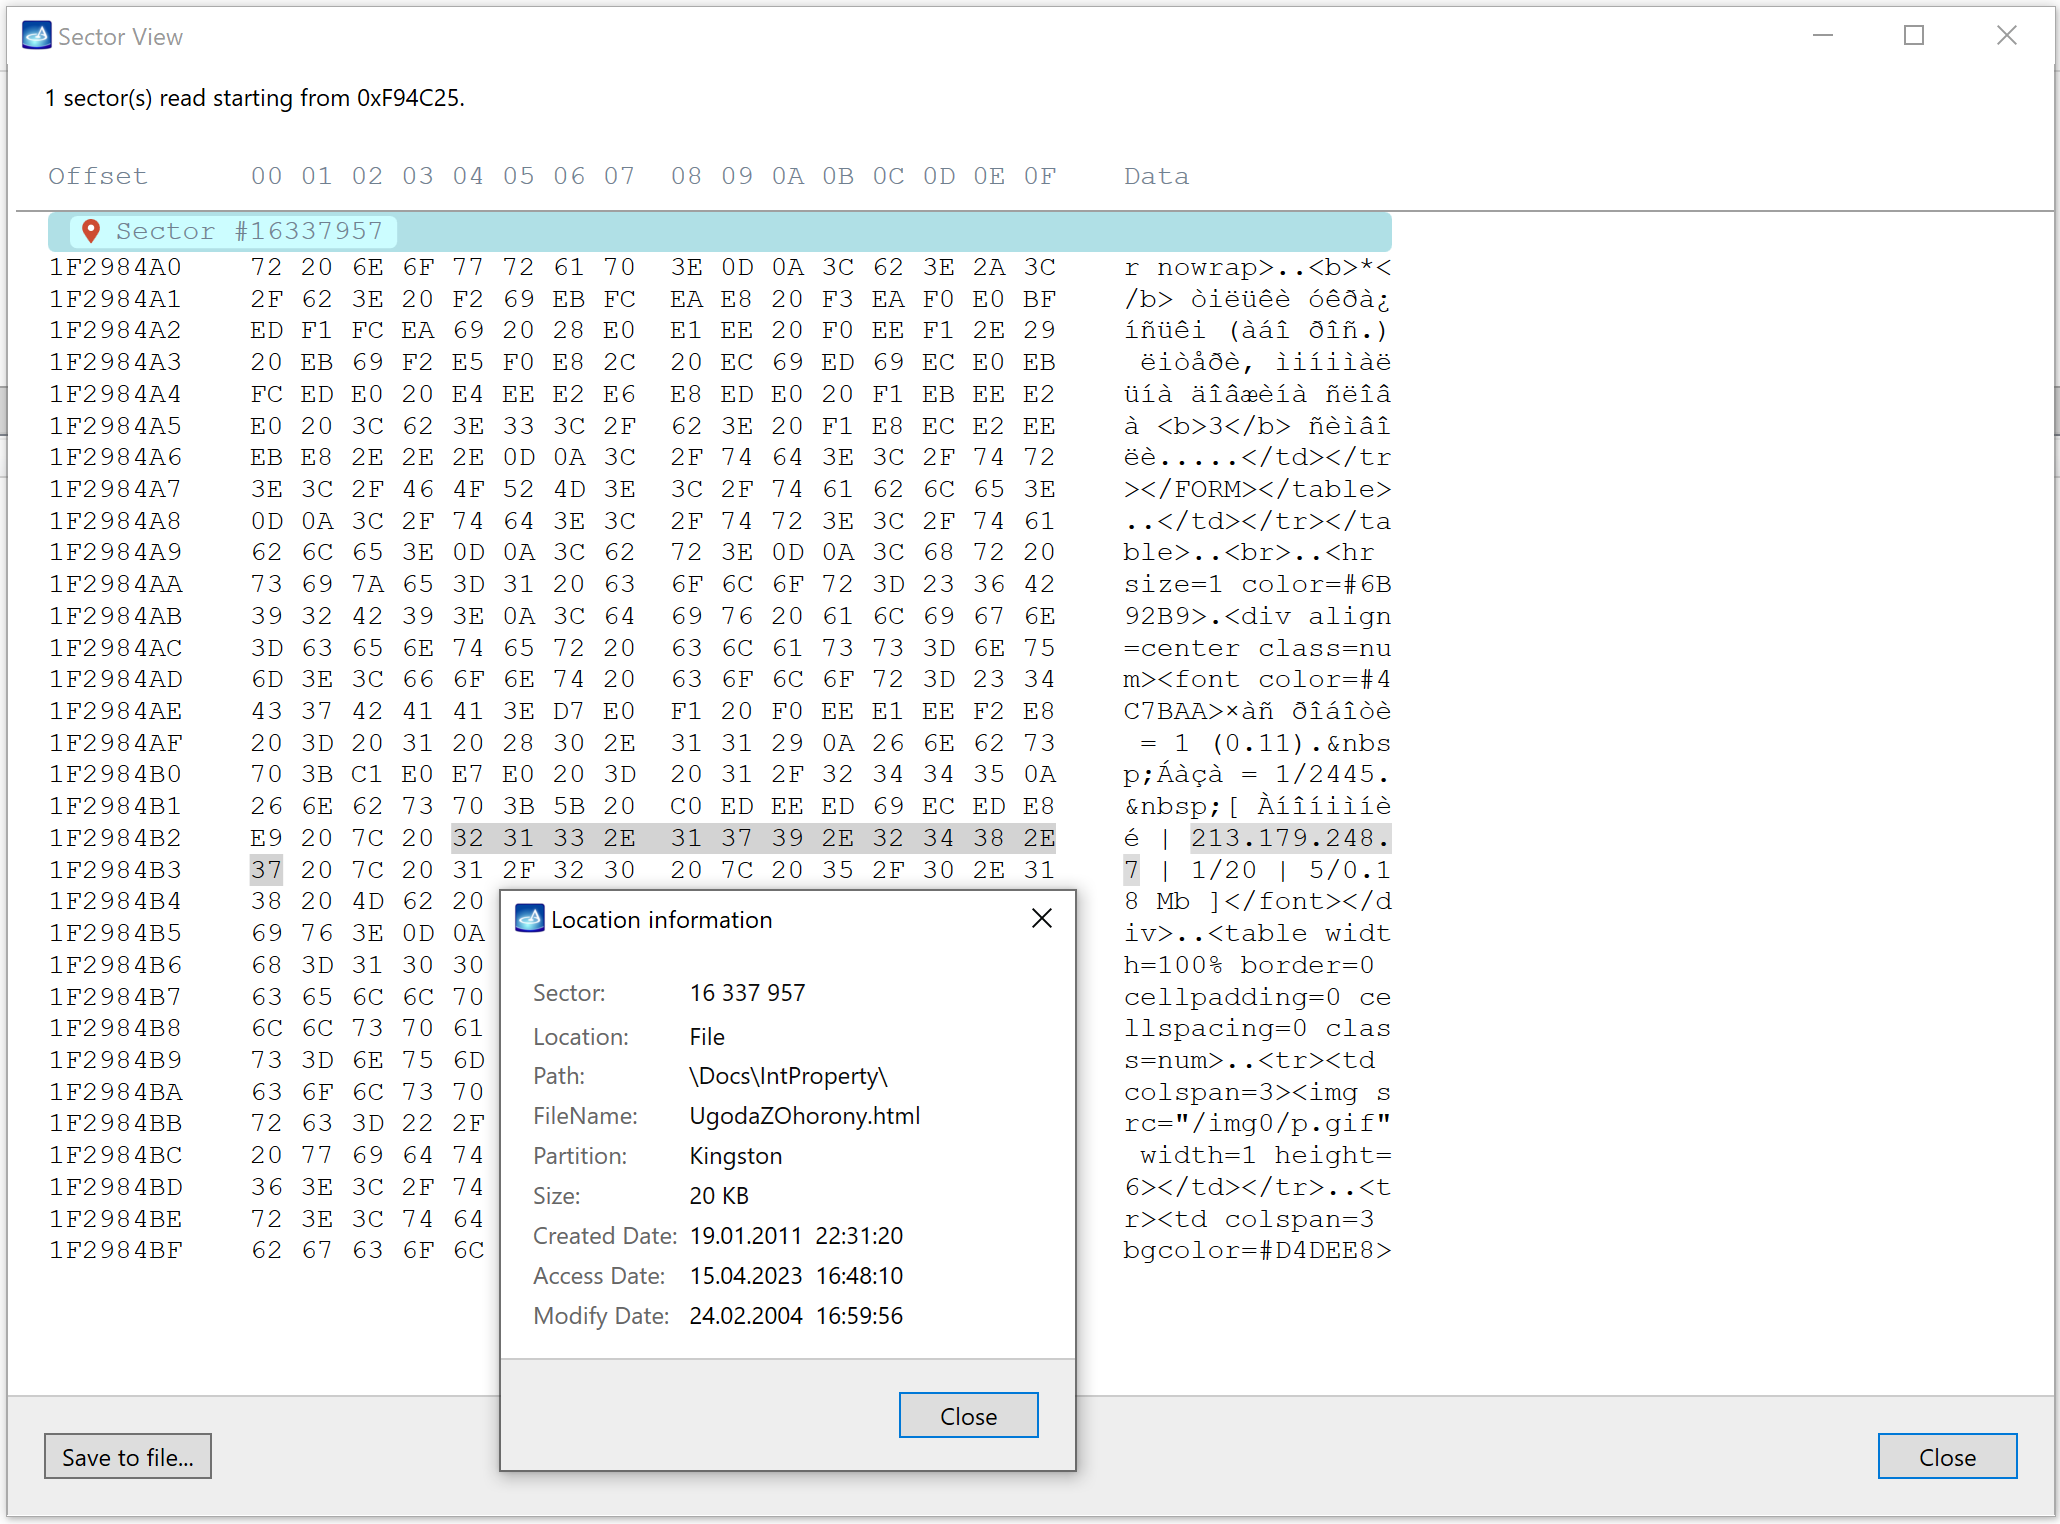
- By double-clicking on an artifact, you open the Hex viewer window/tab, which shows the artifact within the sector where it was found.
- To find the file to which this sector belongs, click the red pin icon next to the sector number.
Similarly, you can look up how a signature encountered during imaging relates to the file system.
If imaging has been completed, look up the signature list in the imaging report and click an individual signature. This opens the HEX viewer window. By clicking the red pin icon in the sector view, you will see which file the found signature belongs to.
If the artifact does not belong to a file, it may be remnants of the data of a file deleted by the user.