Image a remote drive using the iSCSI protocol
The iSCSI network protocol lets you access devices remotely. With its help, you can also image drives that can't be plugged into the DiskSense hardware unit. These could be drives soldered into a motherboard, servers that can't be turned off, or devices you have legal access to but not the right to seize.
Up to 3 remote network drives can be imaged in parallel via iSCSI.
The recommended way to expose drives on the remote machine is the free Atola Boot Image. For custom Linux environments, you can use the standalone iscsi-targets script instead.
Recommended: Use Atola Boot Image
Boot the remote PC or server from a USB stick with the Atola Boot Image. It automatically:
- Write-protects all internal drives, including soldered eMMC storage, except the boot device
- Exposes those drives as iSCSI targets on the network
- Displays the system IP address on the screen
Then connect to that IP from Insight Forensic and image the remote drives as described below.
For custom Linux environments, use the standalone iscsi-targets script
To expose a physical or logical drive via iSCSI on a network in a custom Linux setup, you can use the Python script named iscsi-targets that automatically creates iSCSI targets for all drives except for a boot device.
Download iscsi-targets from GitHub →
Features of the ‘iscsi-targets’ script
- Automatically creates iSCSI targets for all drives except for a boot device.
- Ensures that the iSCSI Qualified Name (IQN) of every iSCSI target includes the drive model and serial number. When you add such an iSCSI target in Atola imagers as a source drive, the imager’s software pulls the drive model and serial number from IQN into a case.
- Supports soldered eMMC storage (/dev/mmcblk*) in addition to SATA, NVMe, and USB drives.
- Lets you specify a block device as a script argument to create an iSCSI target only for it.
What you need to run the ‘iscsi-targets’ script
The script runs on Linux only. It was tested on various flavors of Linux like Ubuntu, Fedora, CentOS, and RHEL, including DFIR boot images: Paladin, Caine, and Tsurugi.
- Python 3.6+ must be installed.
-
The script will also check for and install two dependencies the first time it is run:
- targetcli
- python3-rtslib
How to use the ‘iscsi-targets’ script
Here are some examples of using the ‘iscsi-targets’ script.
-
Create iSCSI targets for all drives except for a boot device:
`sudo python3 iscsi-targets.py` -
Create a single iSCSI target for the specified /dev/sdb1 partition:
`sudo python3 iscsi-targets.py /dev/sdb1`
The example below shows the first run of iscsi-targets.py on Paladin. It has added 3 iSCSI targets for SATA and USB drives.
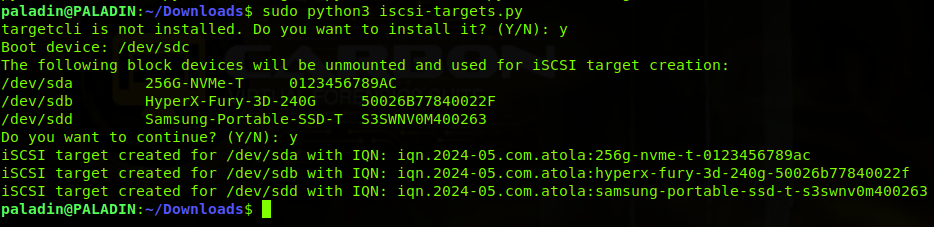
Automated iSCSI target creation in Paladin.
Image up to 3 remote drives in parallel using iSCSI
Here’s how to image a remote drive in Insight Forensic using the iSCSI protocol:
- Expose a physical or logical drive via iSCSI on a network (recommended: boot image; alternative: iscsi-targets script).
-
Go to Port > Select Source and then click the Add iSCSI device link.
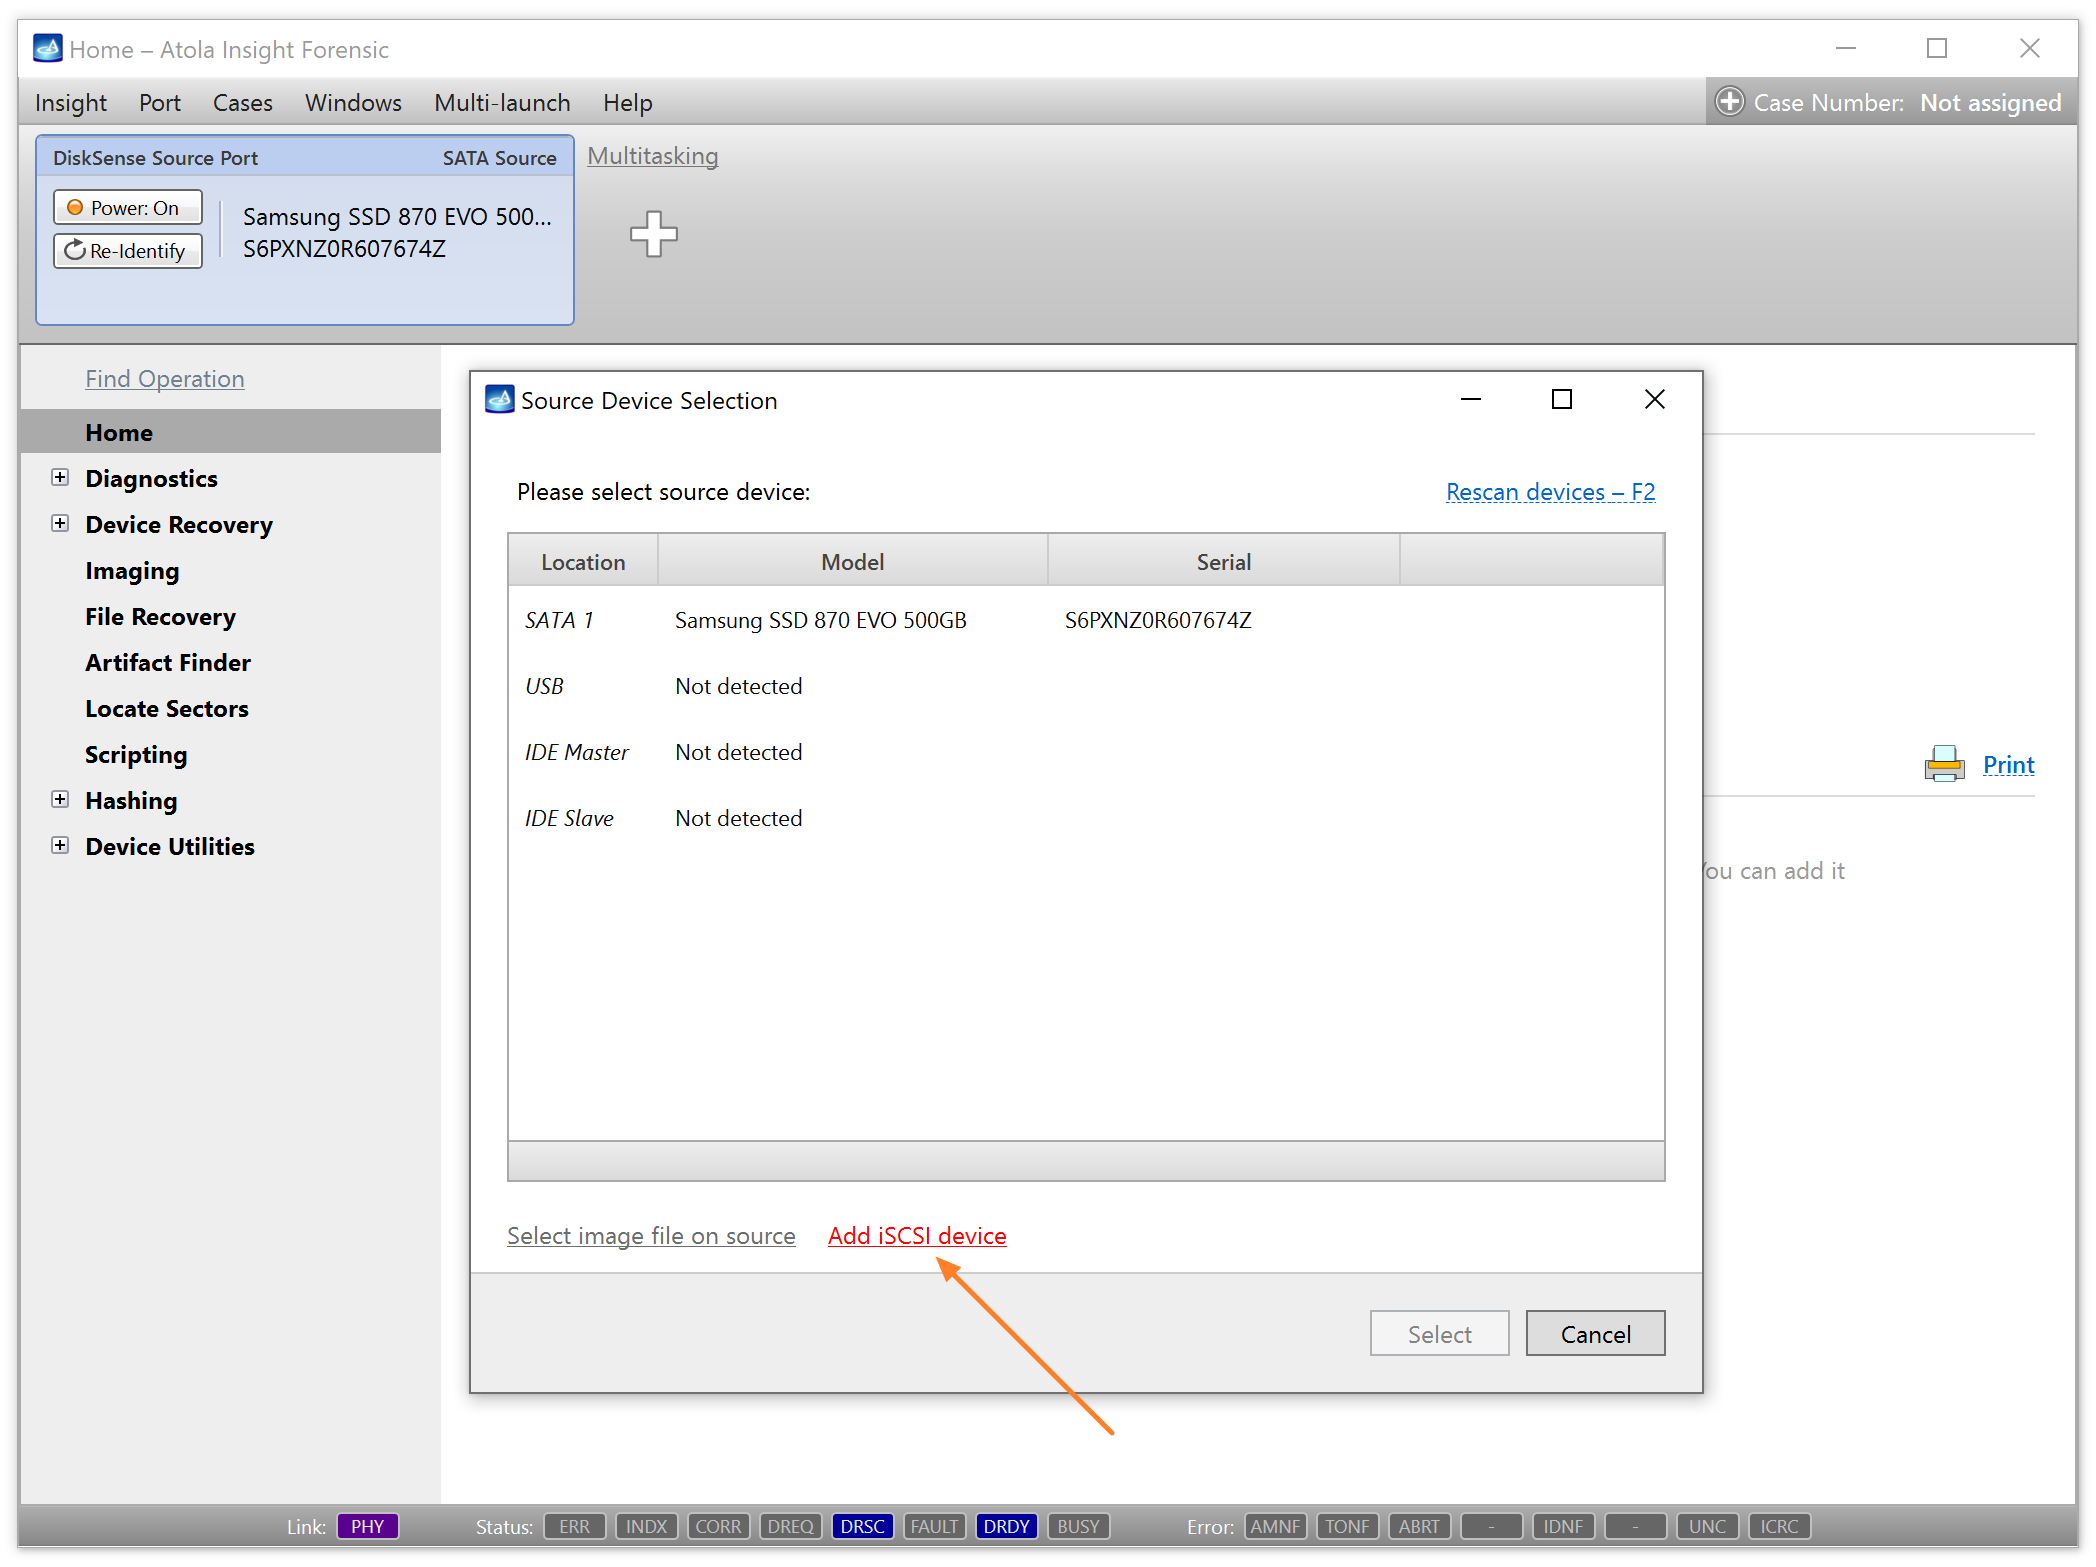
Alternatively, click the Plus icon at the top and in the Add Source menu select iSCSI Device.
-
Enter the IP address and Port of a remote storage device. If needed, also enter a user name and password for remote authentication.
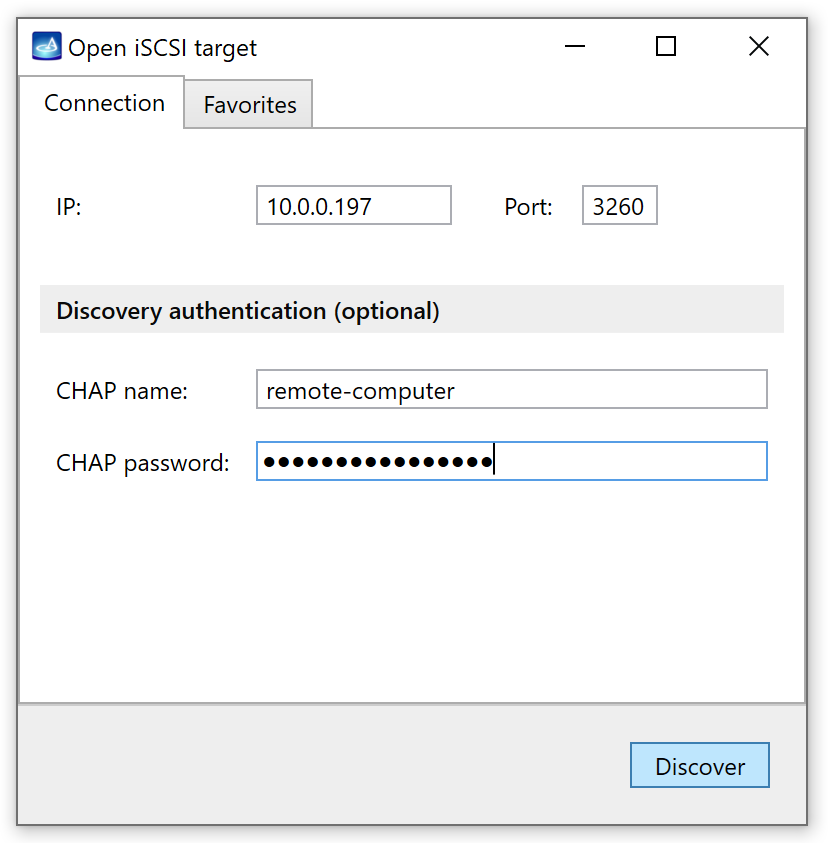
- Click Discover.
-
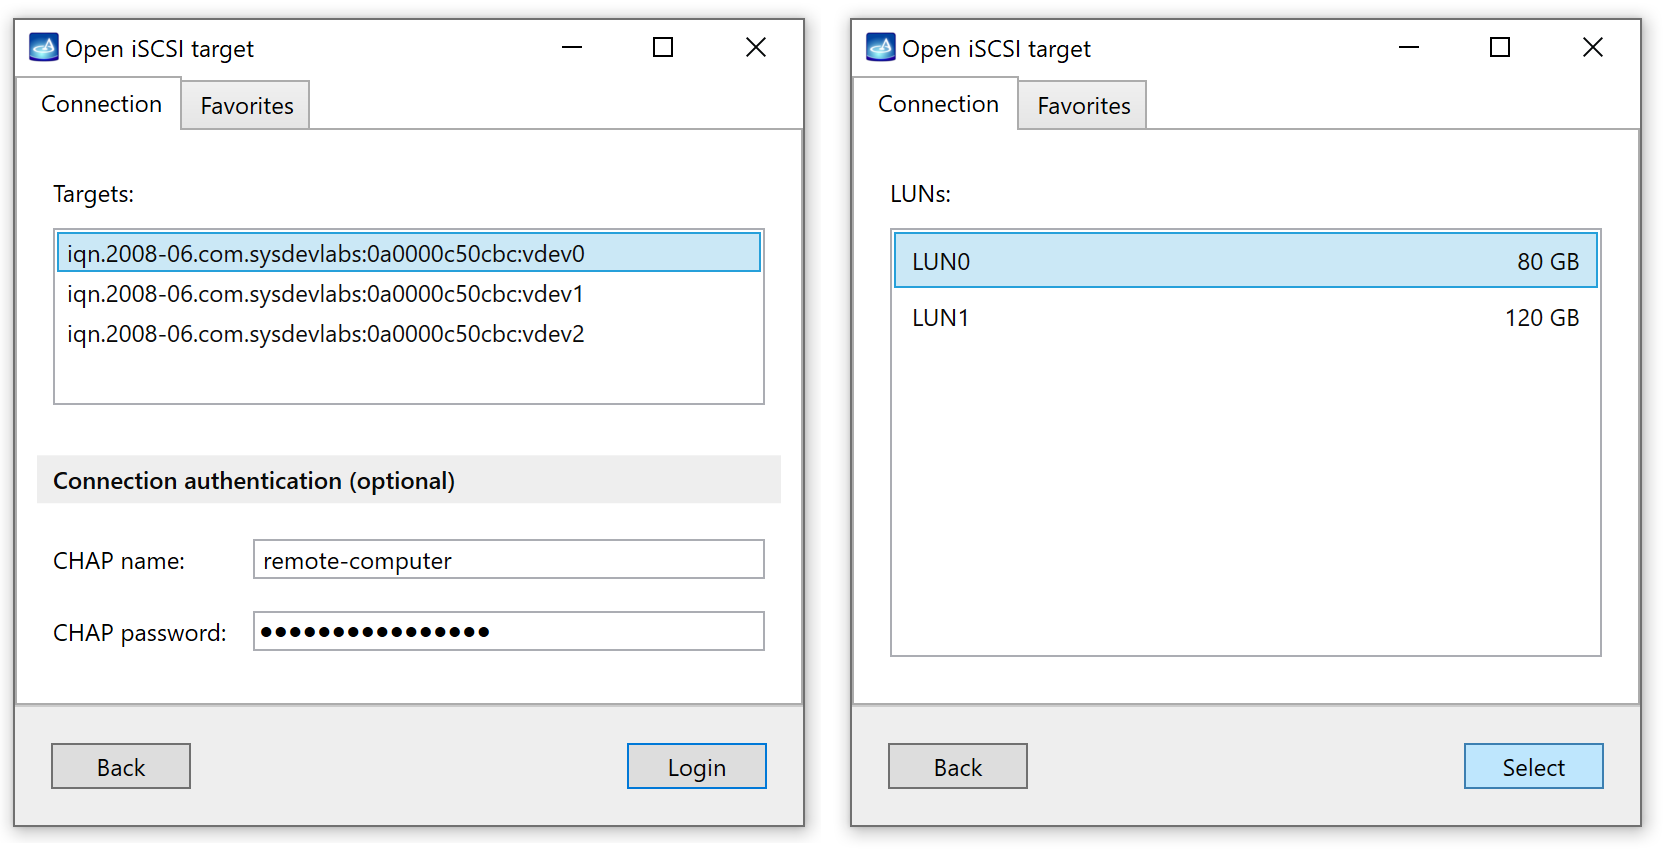
Insight Forensic searches and shows all the iSCSI devices available at the IP and port address you provided. Select your device.
-
Create a new case for an iSCSI device or select an existing one.
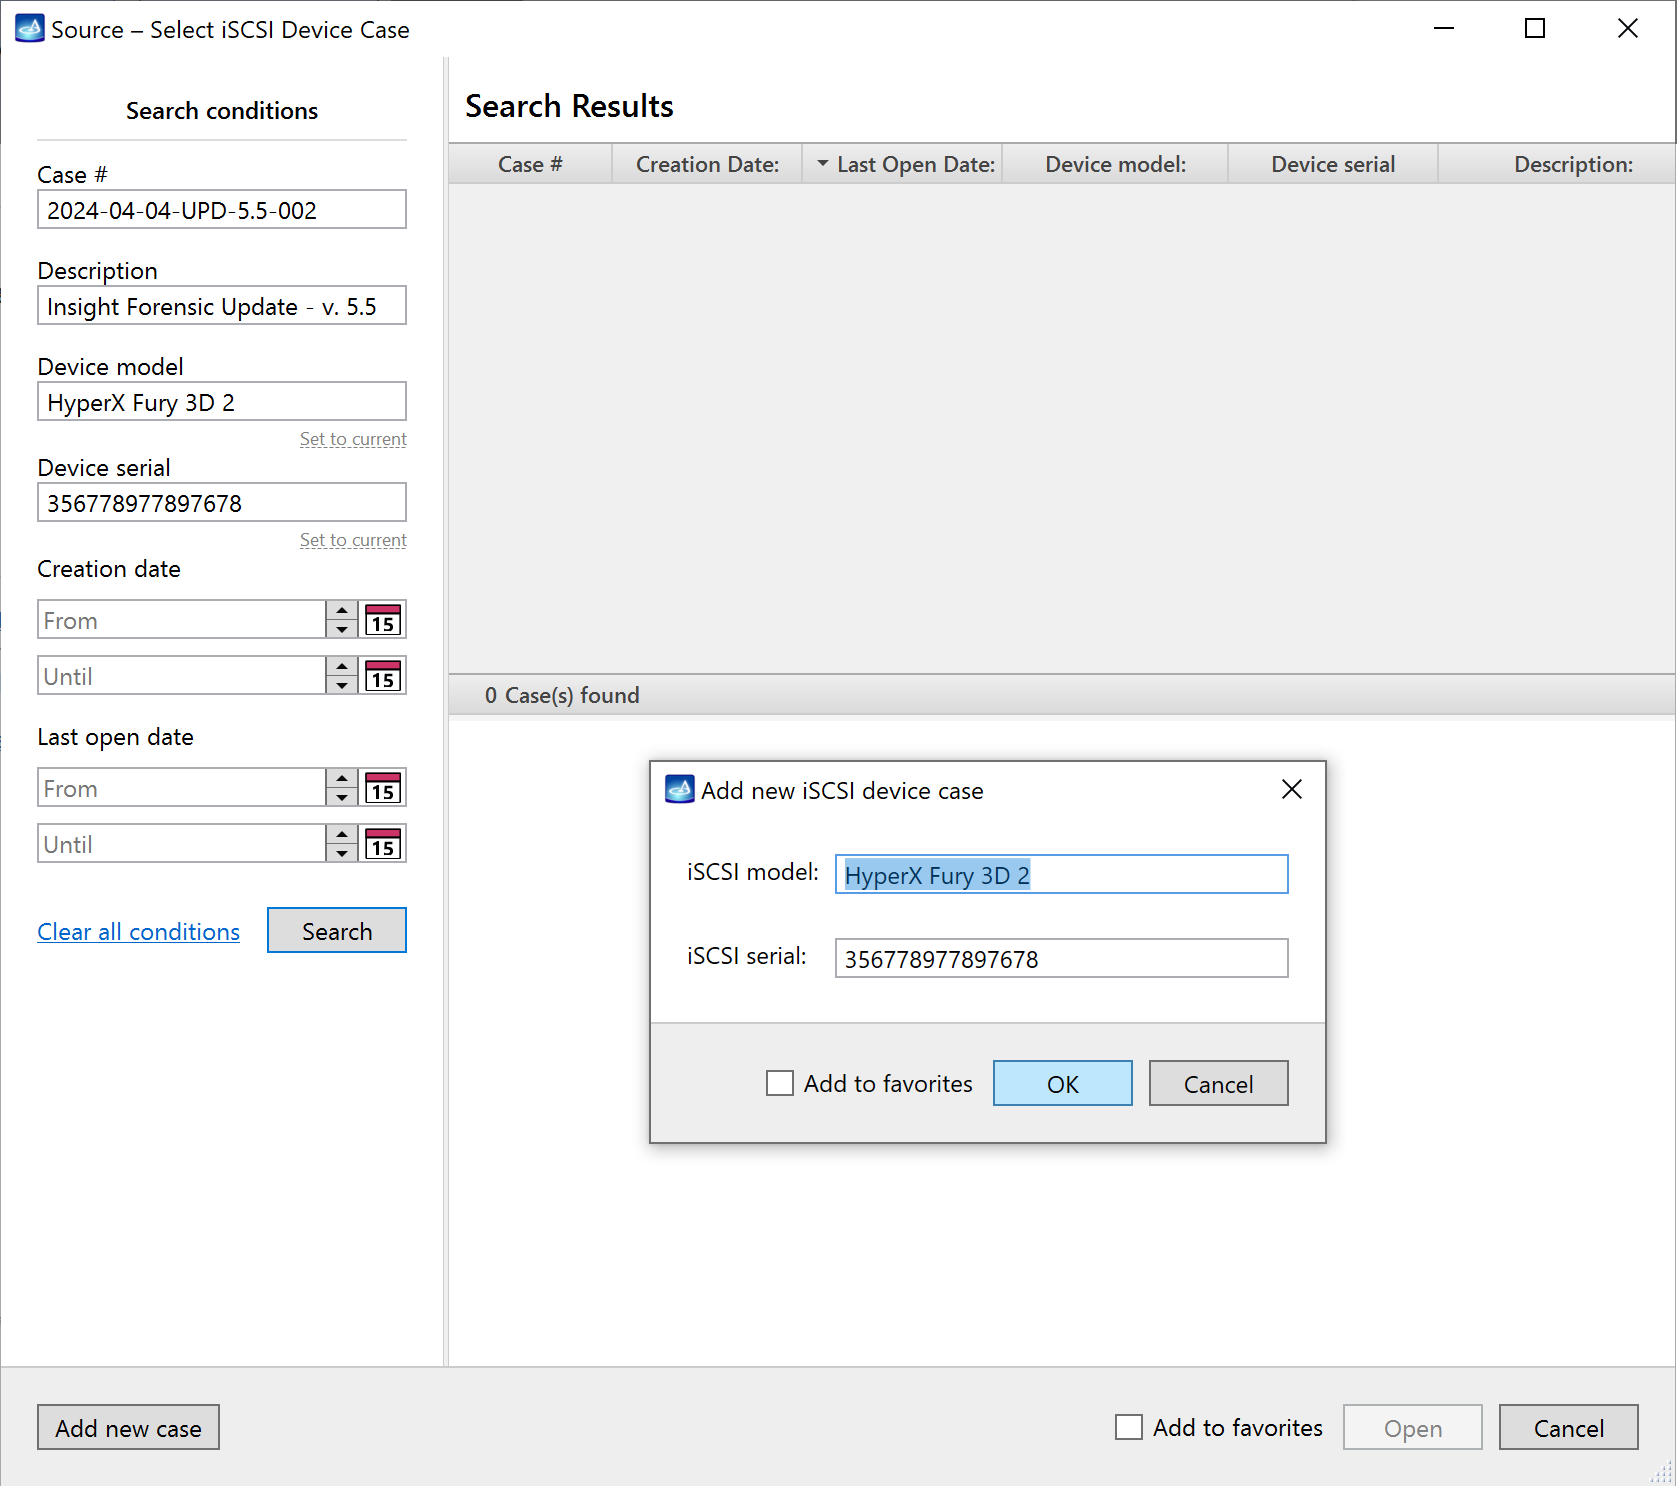
-
Insight Forensic opens the selected iSCSI device as a separate port.

Now, you can image this device as usual or launch other operations, such as:
- File recovery
- Artifact finder
- Locate sectors
- Calculate hash
- Disk editor (in read-only mode)
