NVMe drive imaging via NVMe-to-USB adapter
Atola Insight Forensic with the older DiskSense unit (2014) supports NVMe drive imaging via NVMe-to-USB adapter, based on the JMS583 chip.
Connect an NVMe drive
To start working with an NVMe drive:
- Power on your DiskSense unit.
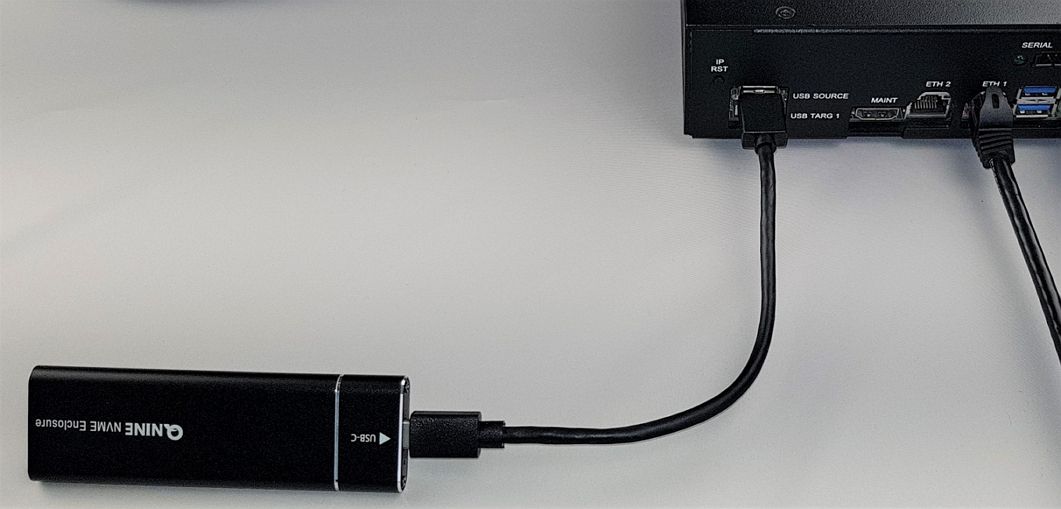
- Plug an NVMe drive into the NVMe-to-USB adapter.
- Connect the adapter to the USB source port.
In case the unit is booted with a device plugged into its USB port, the booting will not be completed correctly.
Identify the source drive
To identify the source drive:
- On the Home screen, click the Identify device link or press the F2 button on your keyboard.
- In the Source Device Selection dialog, select the NVMe device connected to the USB source port.
- If the same drive had been connected and identified with your Insight before, select a previously created case or click the Add new case button.
- To create a new NVMe device case, in the Add new NVMe device case dialog, enter the NVMe model and serial number.


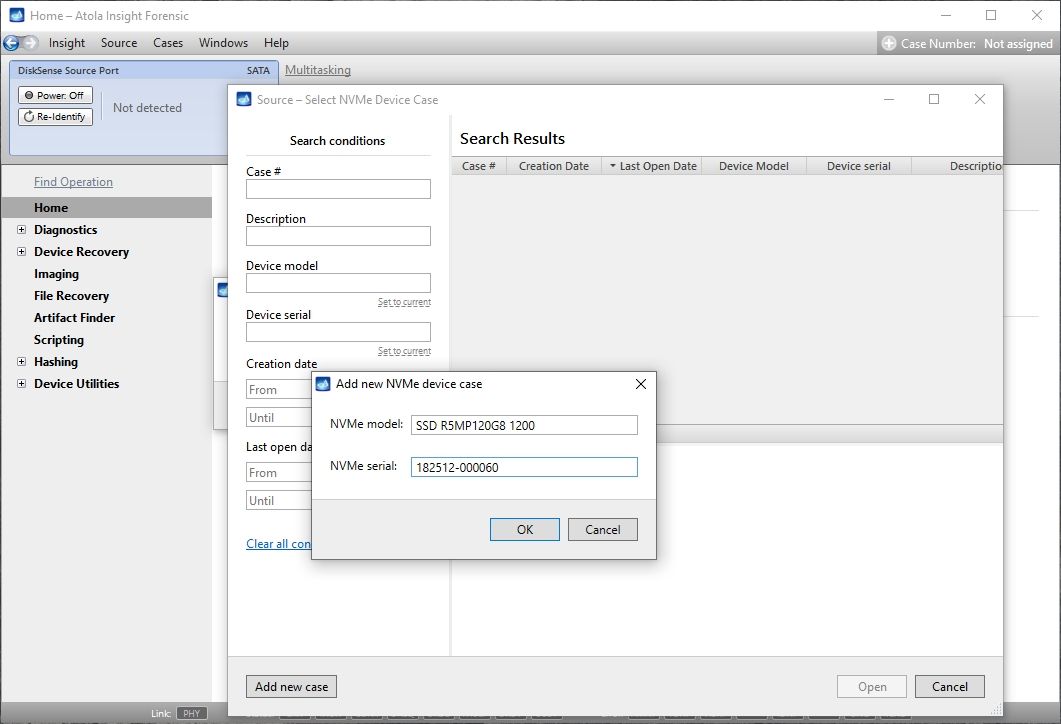
NVMe model and serial number can be found on the device’s label:

Image an NVMe drive
To launch an imaging session:
- In the sidebar, click Imaging.
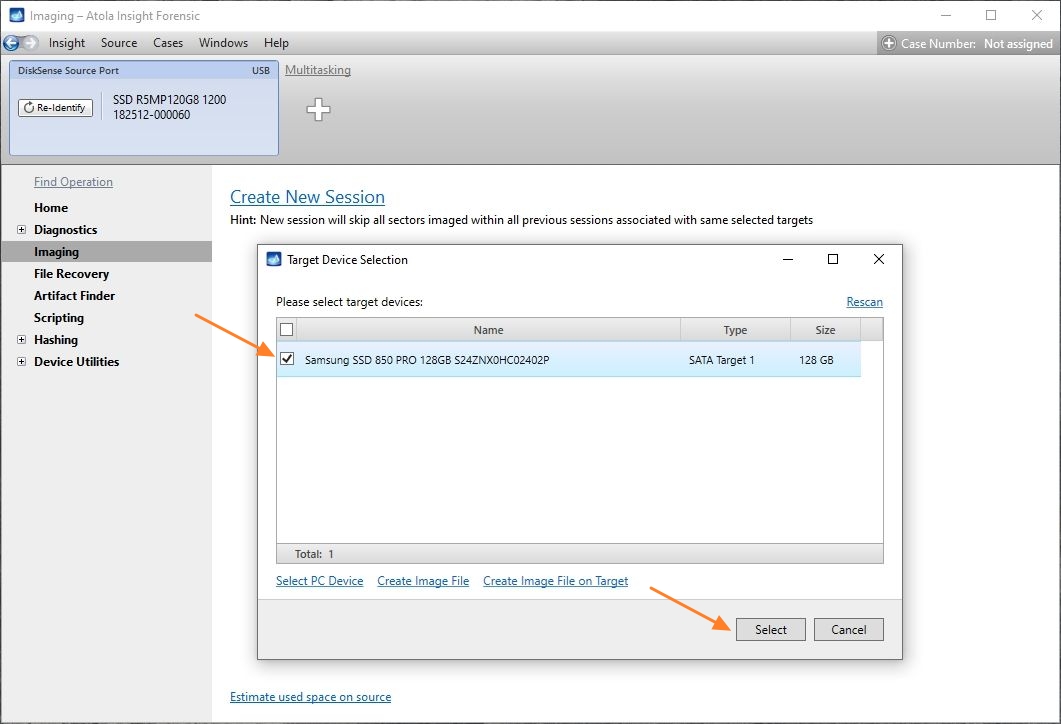
- Click the Create New Session link.
- Select the target device and confirm by clicking the Select button.
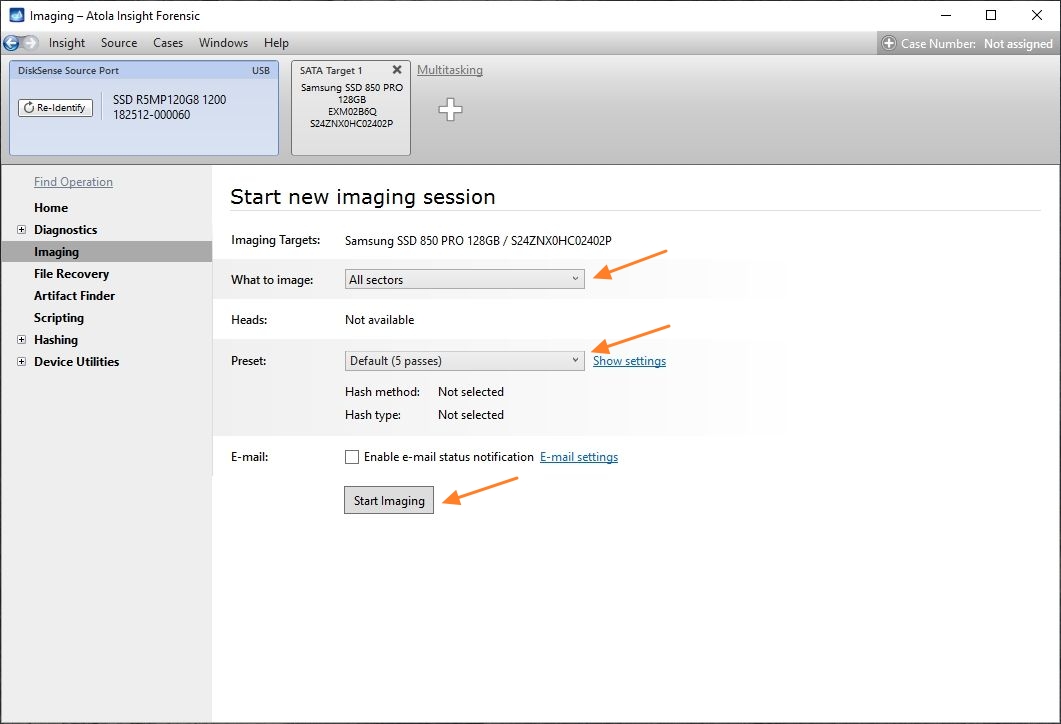
- In Imaging settings, specify the parameters for the imaging session.
- Click the Start Imaging button.
- Insight starts imaging the NVMe drive.