Hash lists to filter good & bad files
To quickly detect and mark known "good" or "bad" files in Atola Insight Forensic, you can import lists of hashes of known white or black files:
- White hash belongs to a known good file created by known software.
- Black hash indicates a known bad file, which could be malware, a hacking script, a hidden illicit data file and more.
You can then use the imported hash lists in the File Recovery module to analyze each calculated file hash and filter files based on which hash list they belong to.
Add a hash list
To import a hash list from a file, do the following:
-
Prepare a CSV or text file with a hash list, with one hash per line. For example, a file with two MD5 hashes looks like this:
- 1777f831255b7f6fa5869acddc2e2c93
- f6e0fcac265d3e139dd510be0eecb0b1
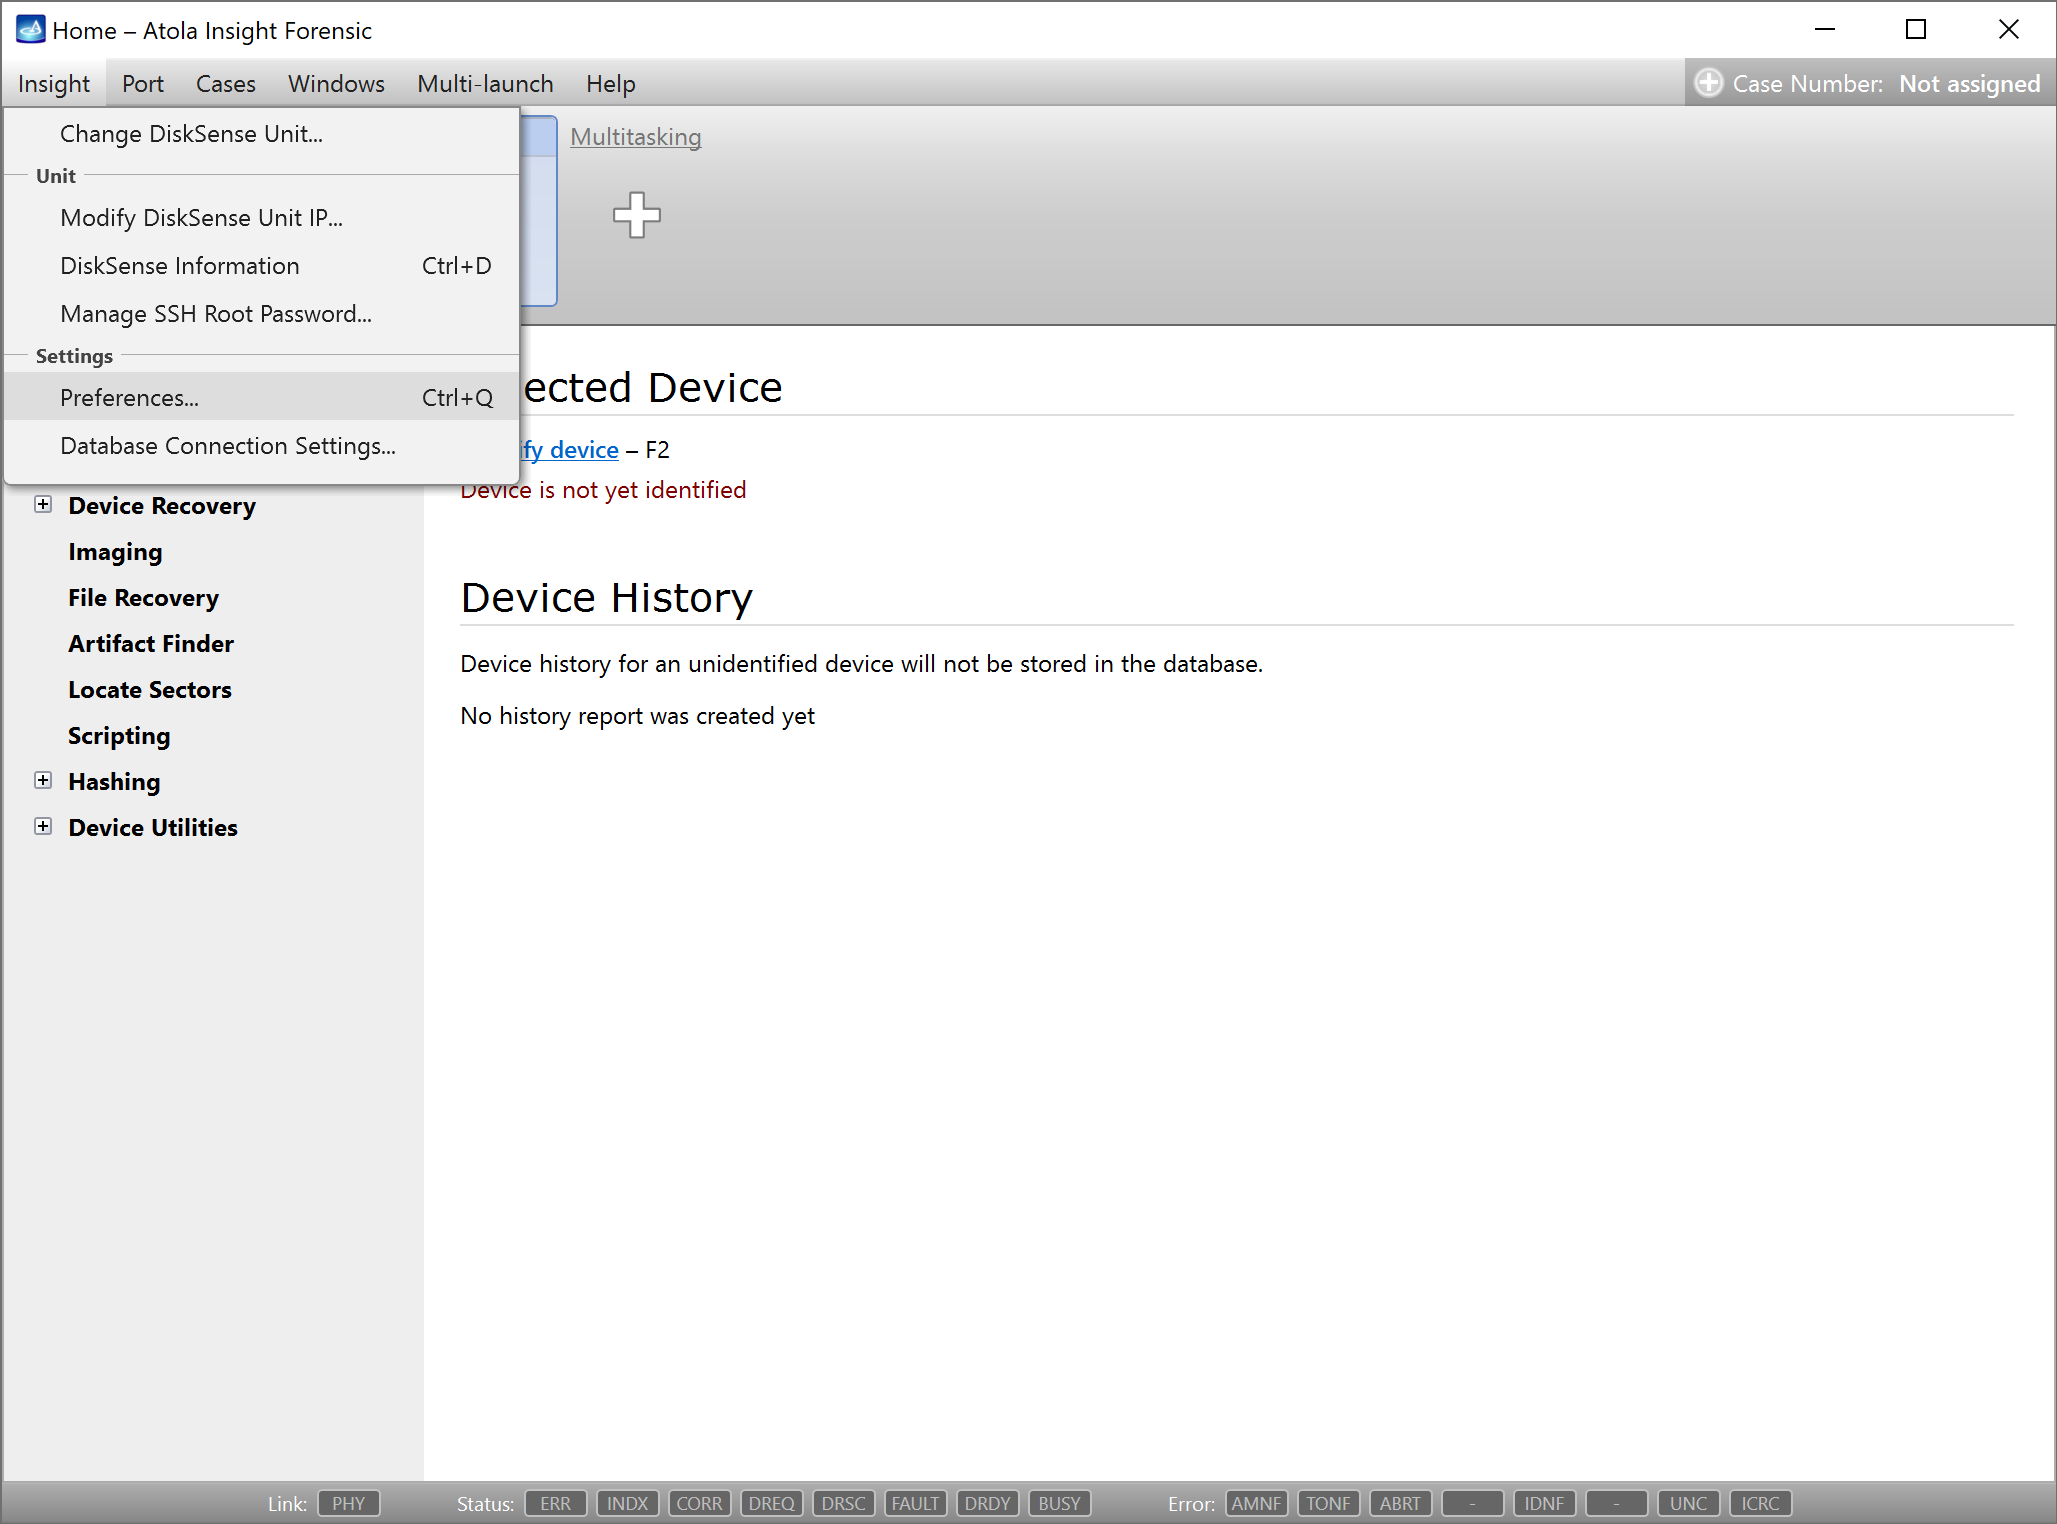
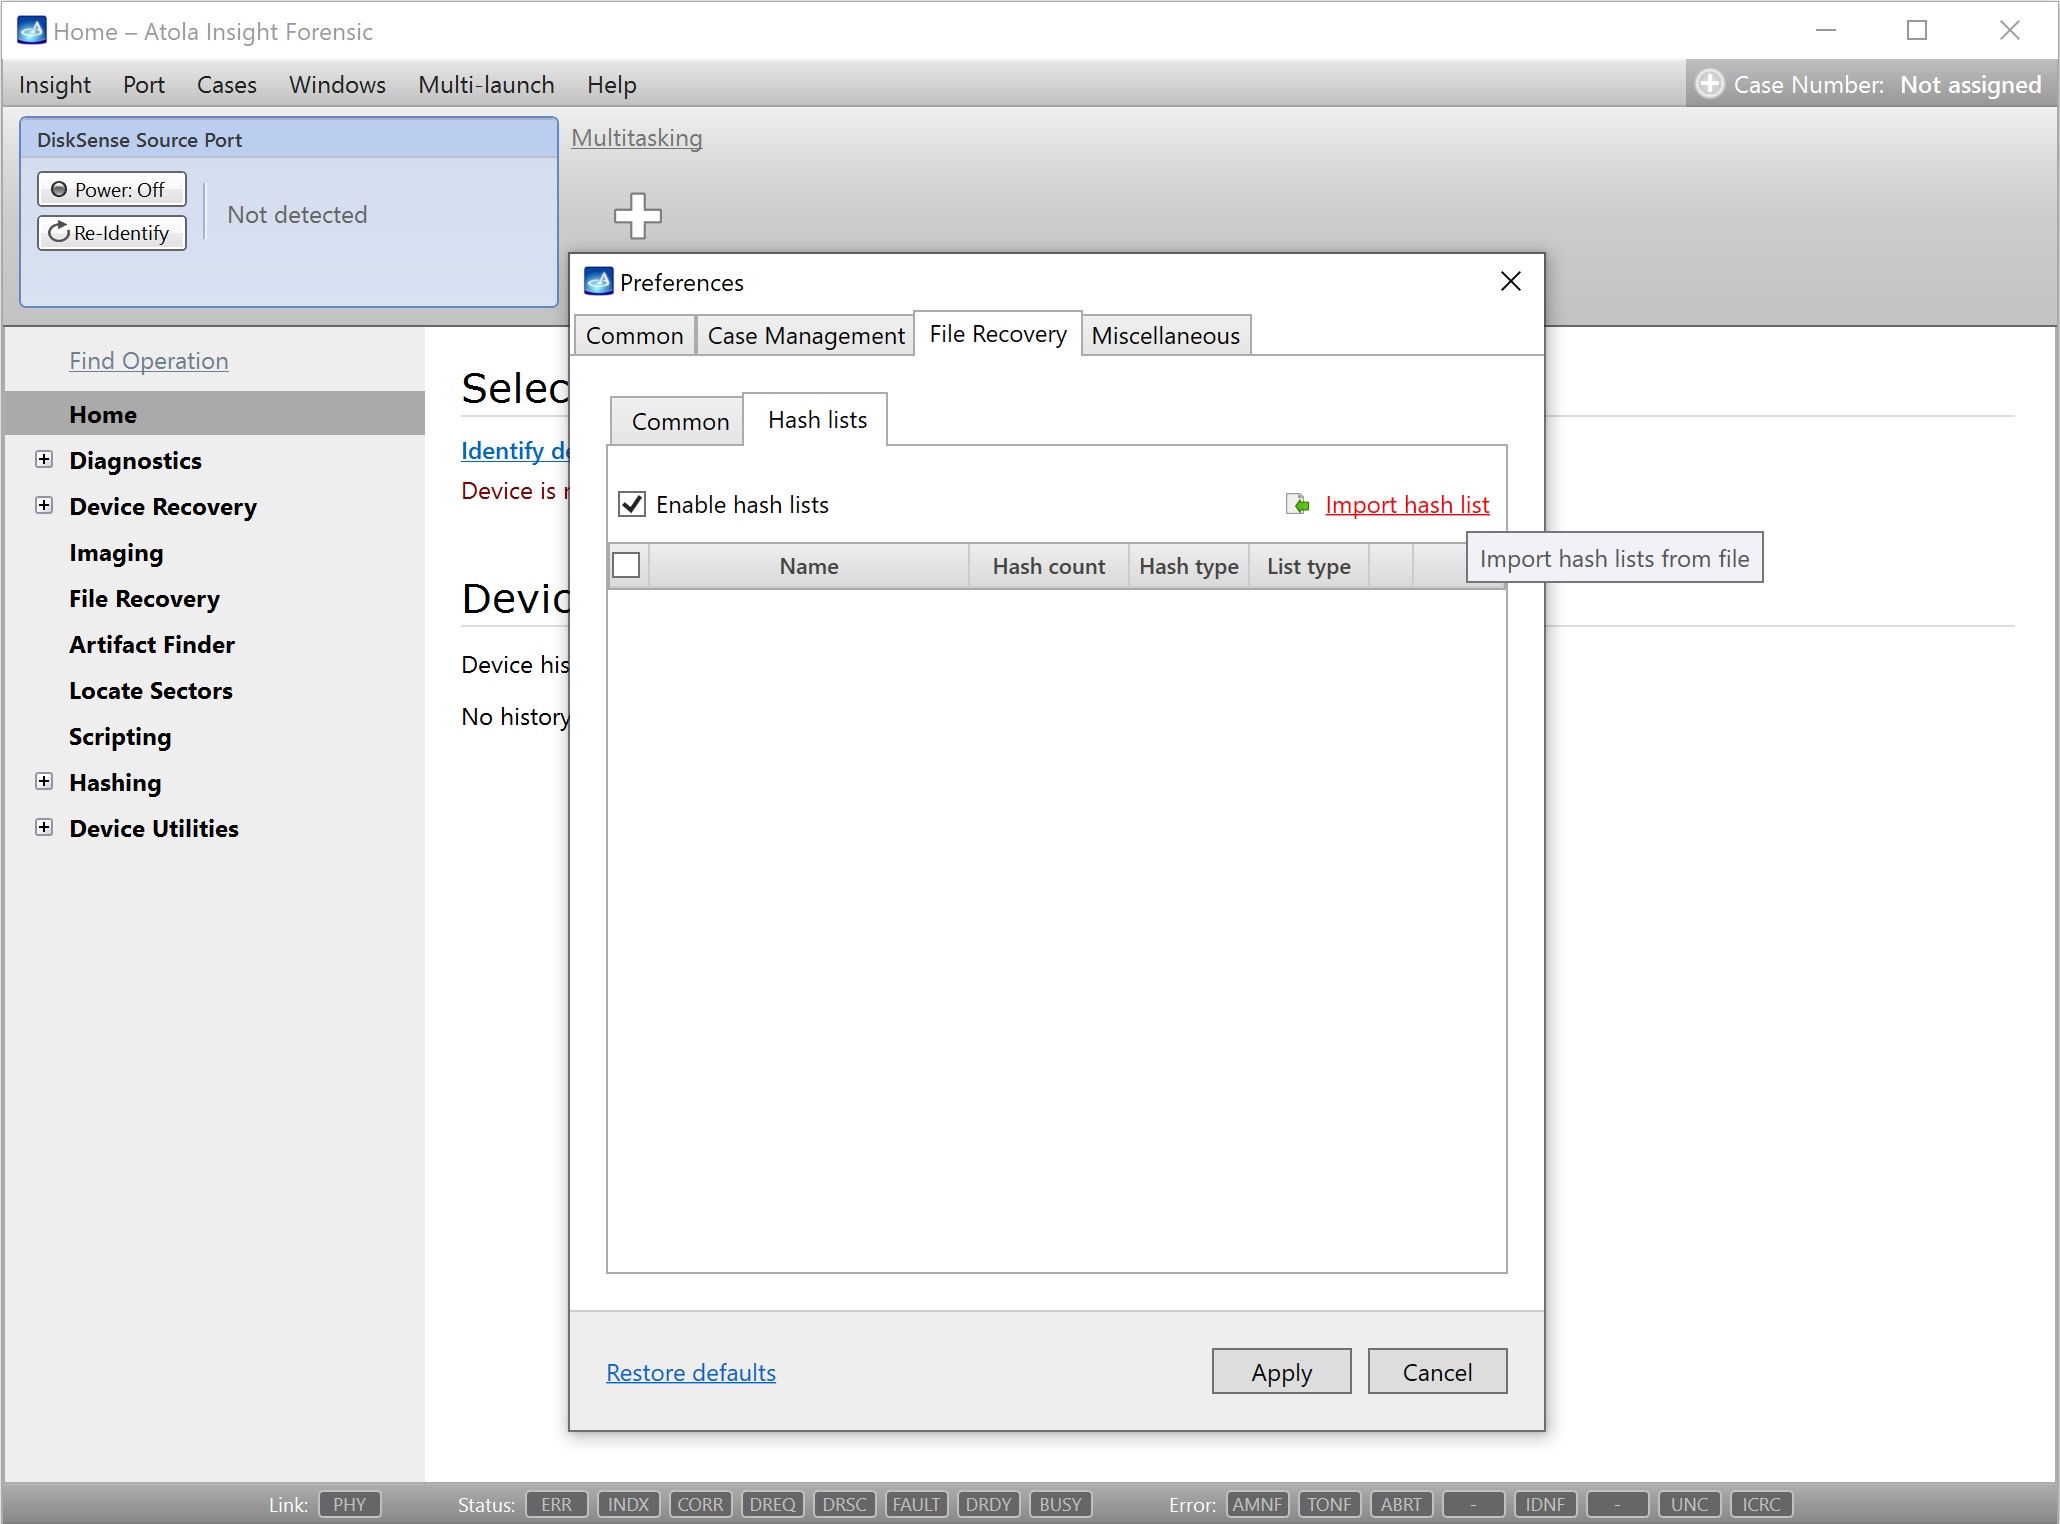
- In the Insight Forensic menu bar, select Insight > Preferences or press Ctrl + Q.
- In the Preferences window, go to the File Recovery tab.
- On the Hash lists subtab, click the Import hash list link.
-
In the Import hash list dialog, select the file with hashes, enter the hash list name, and select hash list type:
- White for hashes that belong to the known good files.
- Black for hashes of the known bad files, such as malware, hacking scripts, hidden illicit data files and more.
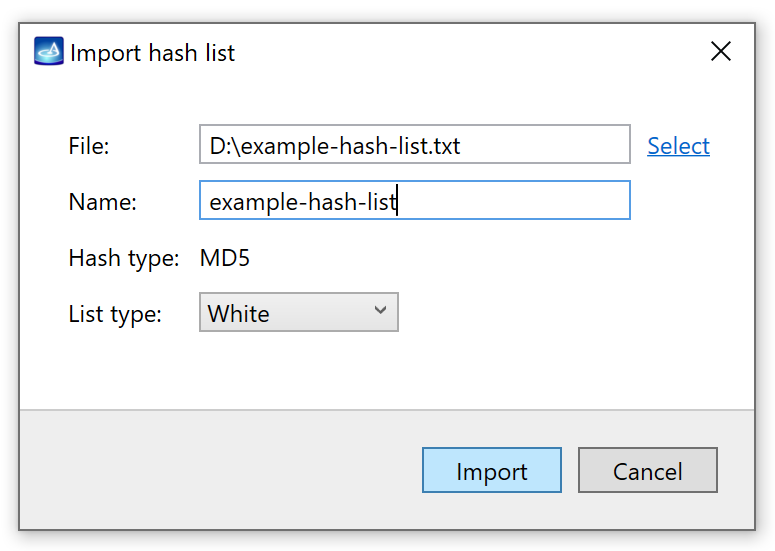
- Click Import.
- Click Apply.
Filter files using hash lists
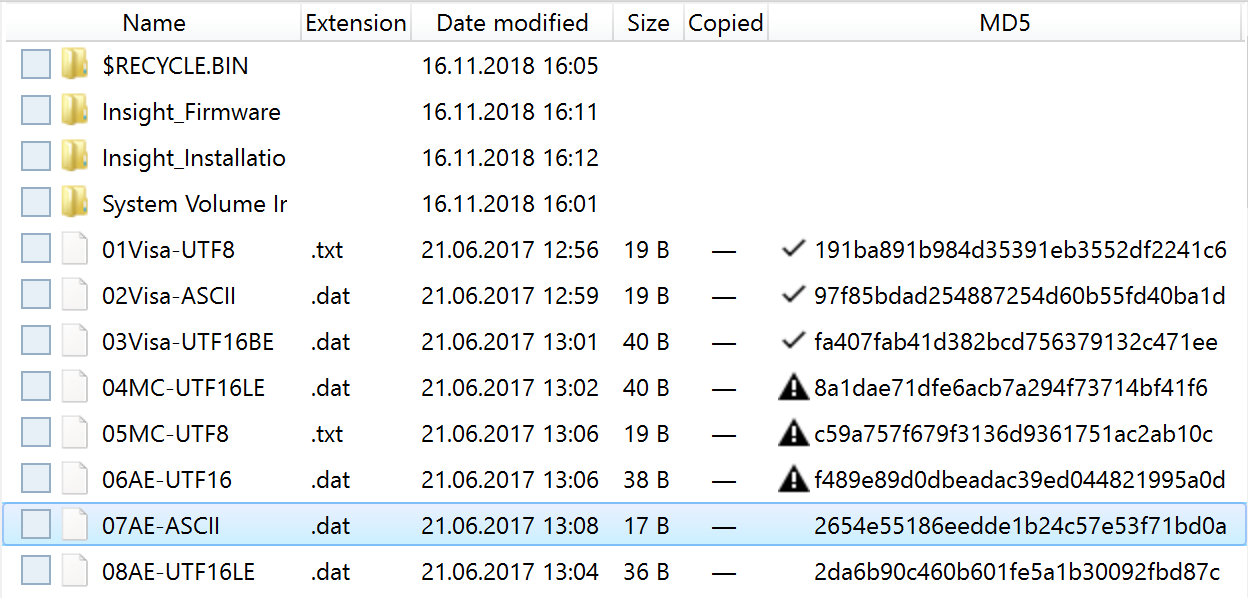
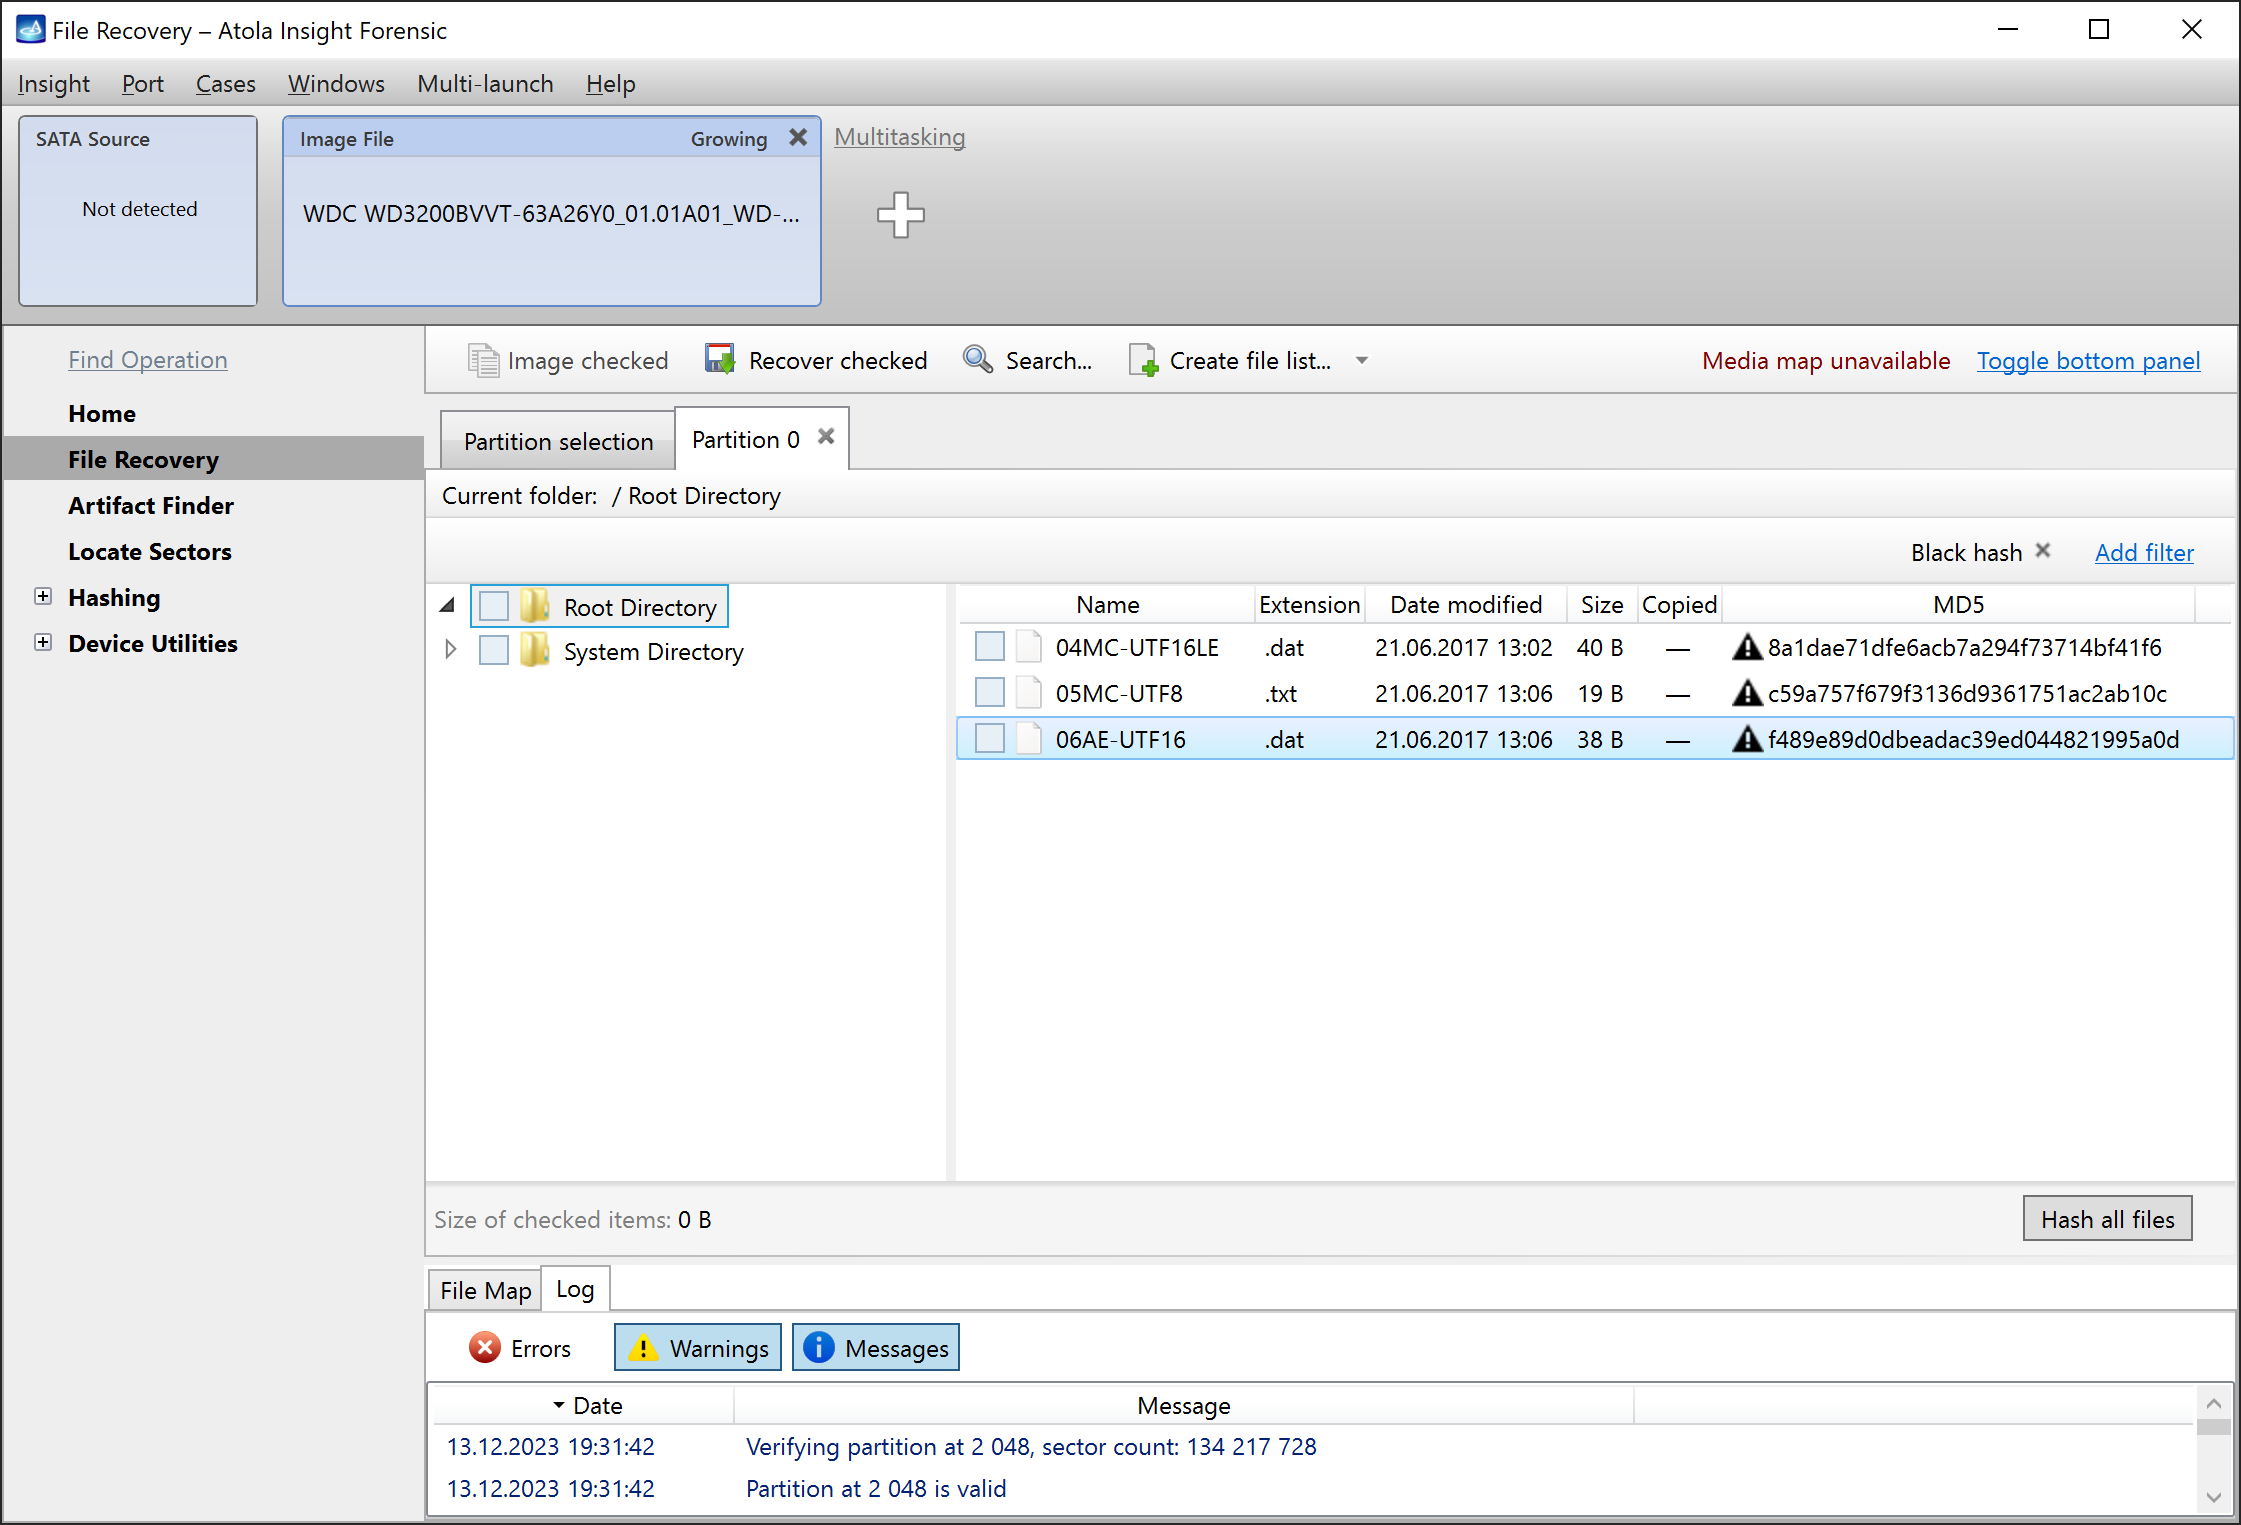
Once imaging of an evidence drive is finished, you can open its copy in the File Recovery module for a quick analysis. If the file hash belongs to the previously imported white or black hash list, Insight Forensic displays special marks on the left of file hash values:
- ✓ Checkmarks for the files found in the white hash list.
- ⚠ Warning triangles for the files found in the black hash list.
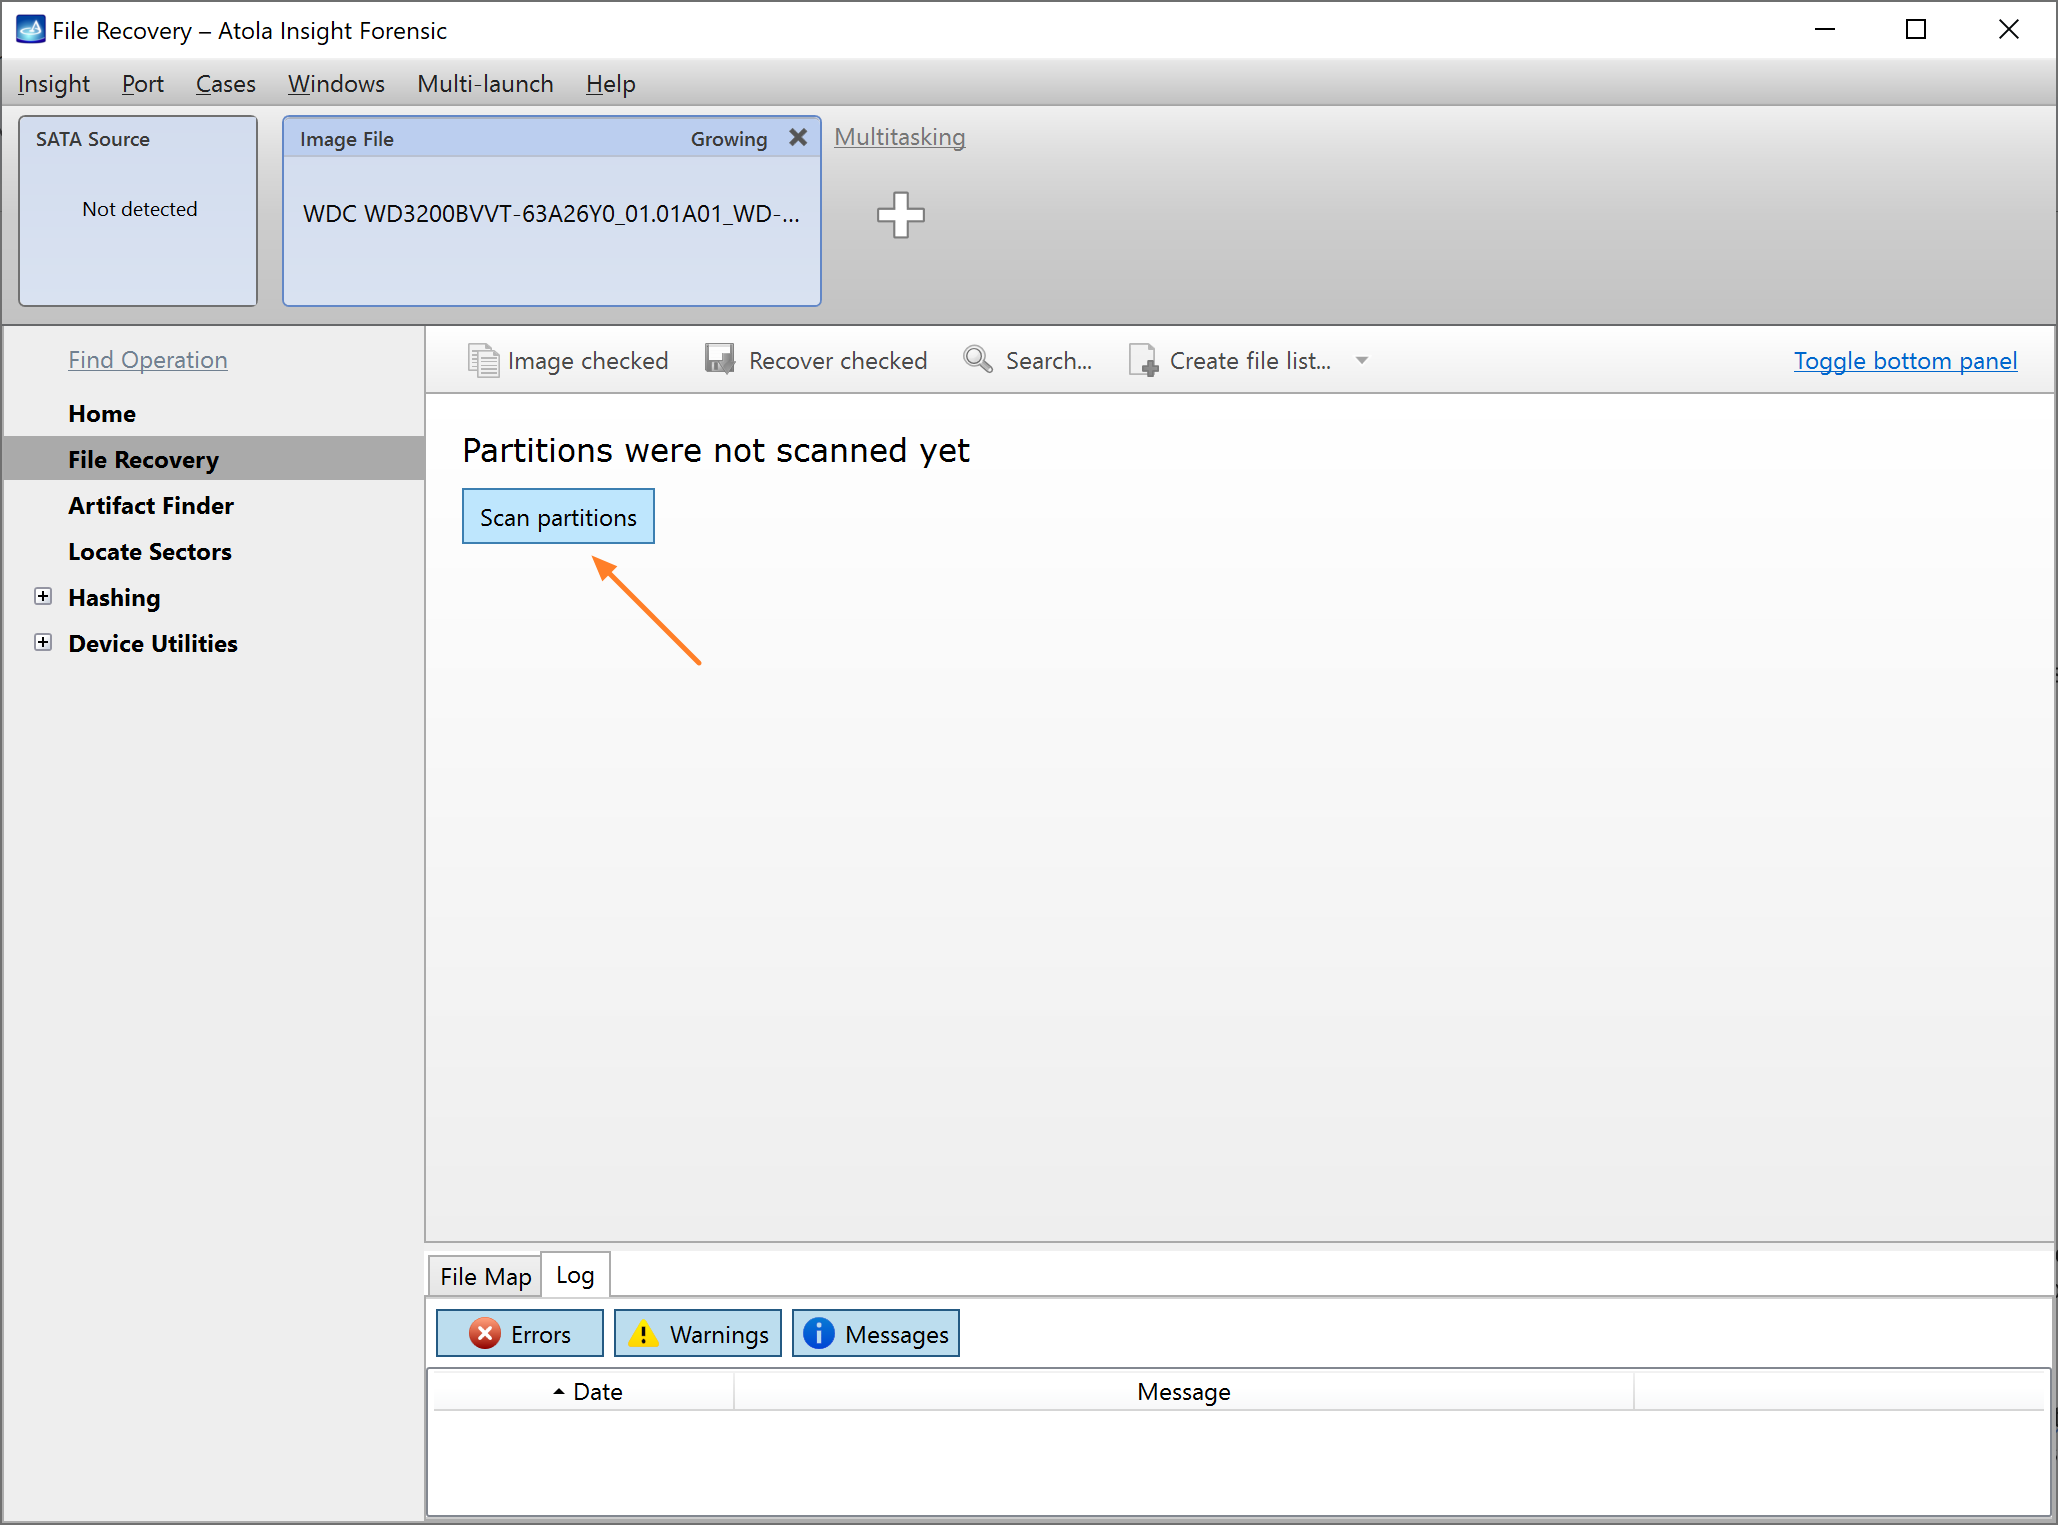
The File Recovery engine can filter files on a target device based on the imported white and black hash lists. To display only the files, which have either white or black hashes, do the following:
- Select the Target port.
- In the sidebar, click File Recovery.
- Click the Scan partitions button.
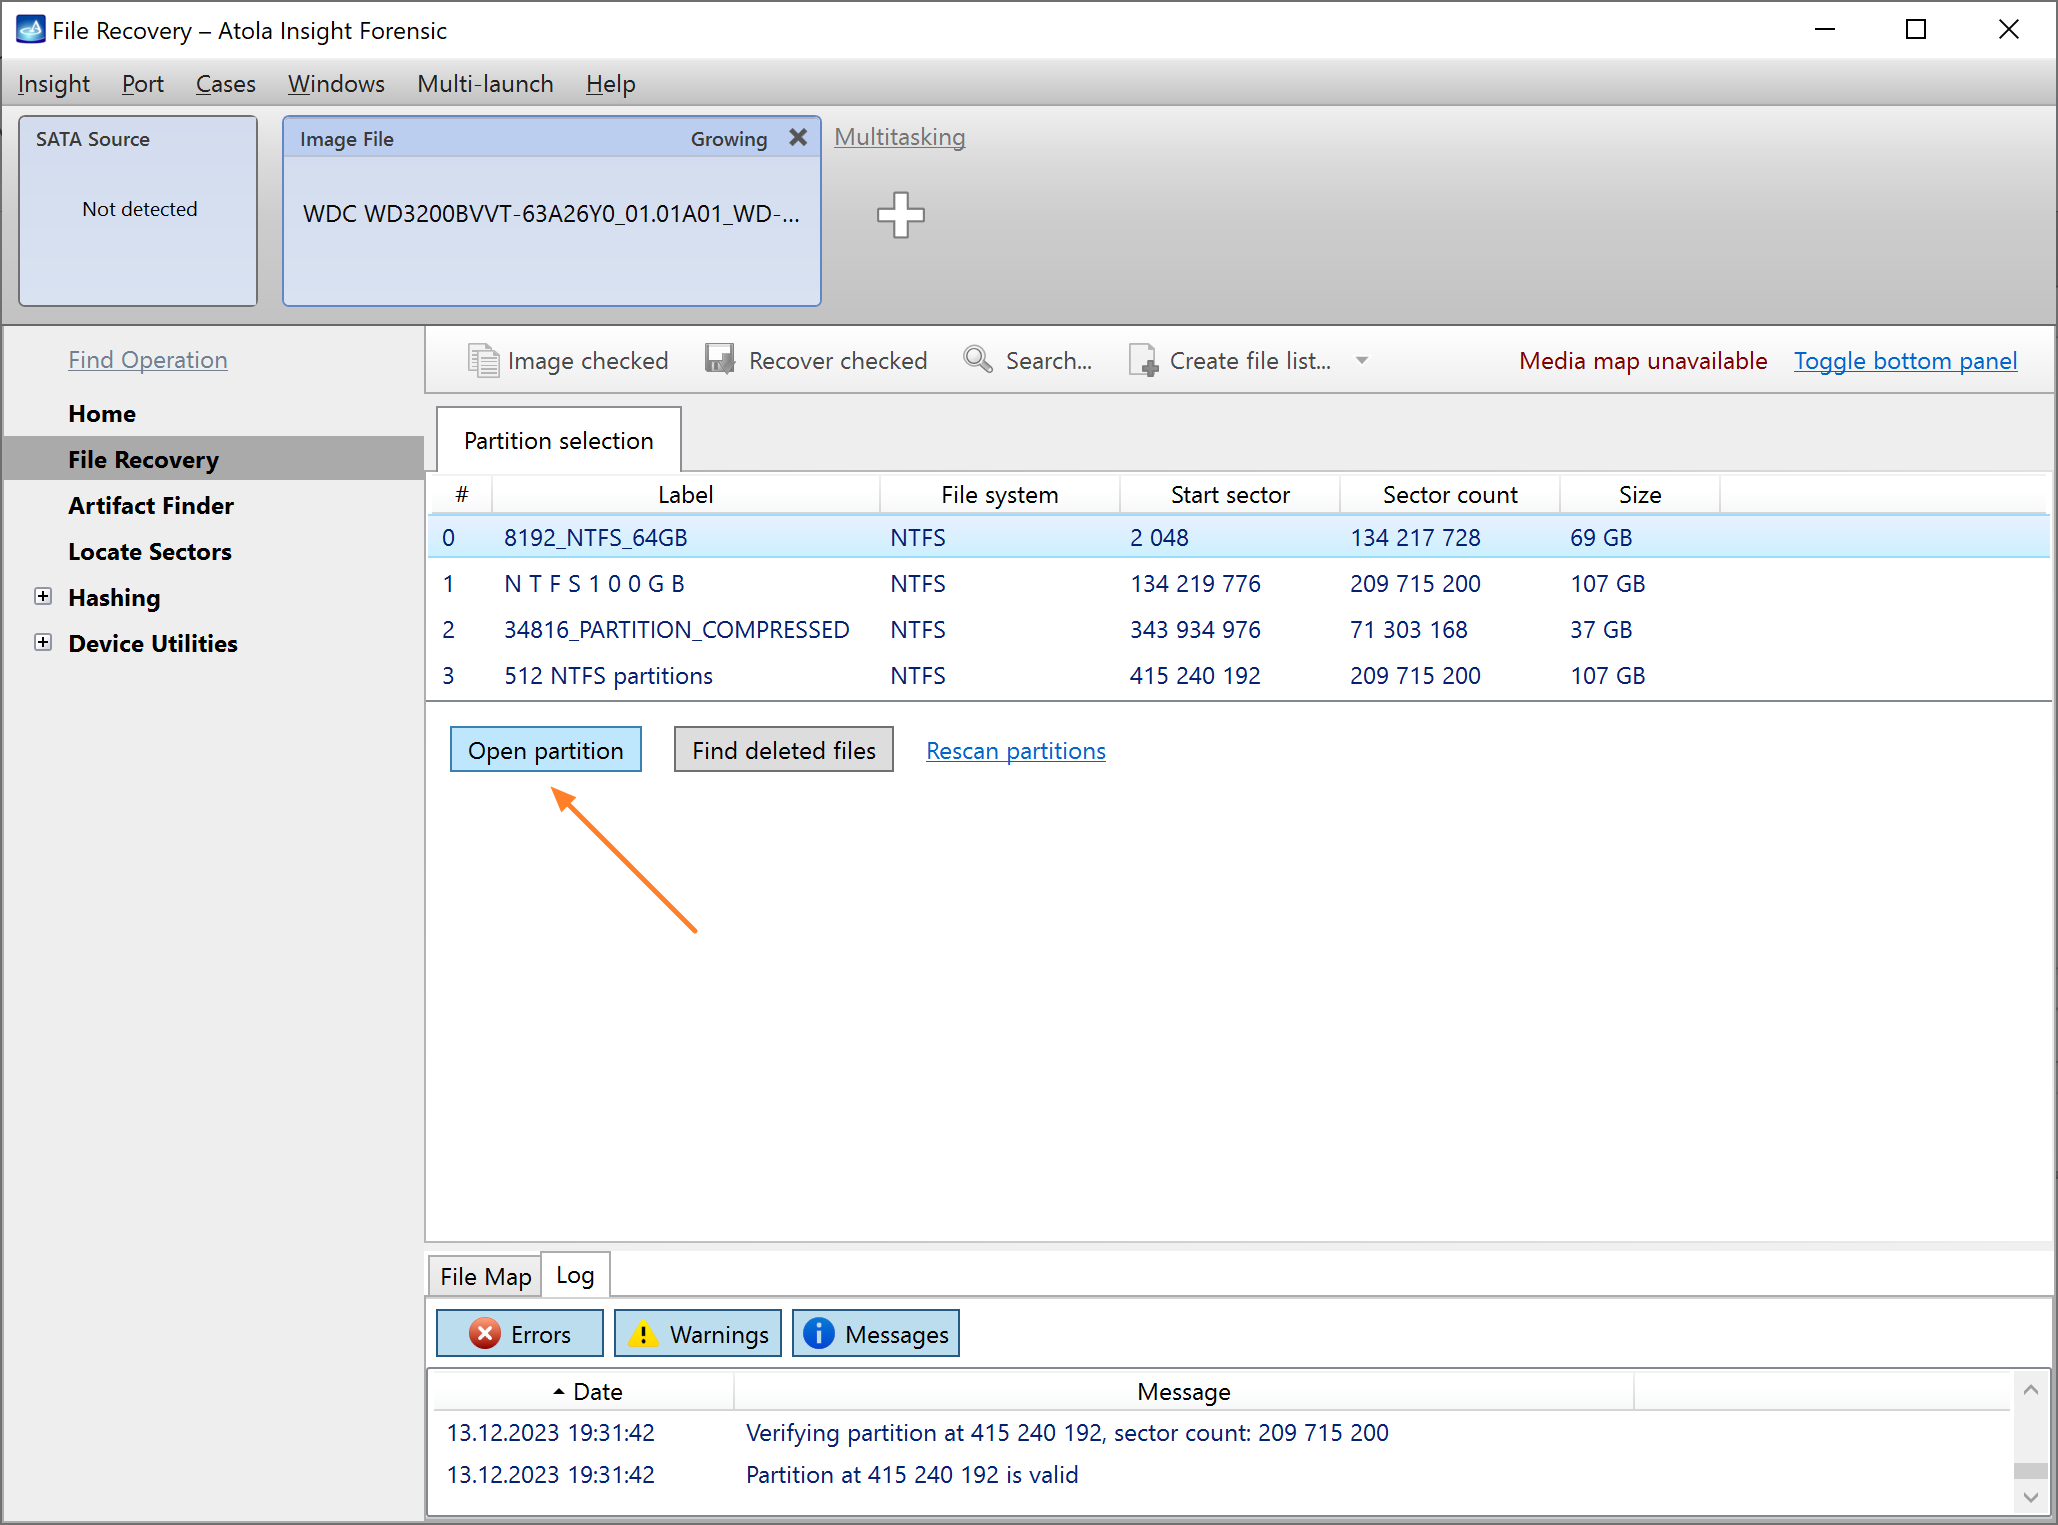
- On the Partition selection tab, choose the partition you want to examine and click Open partition.
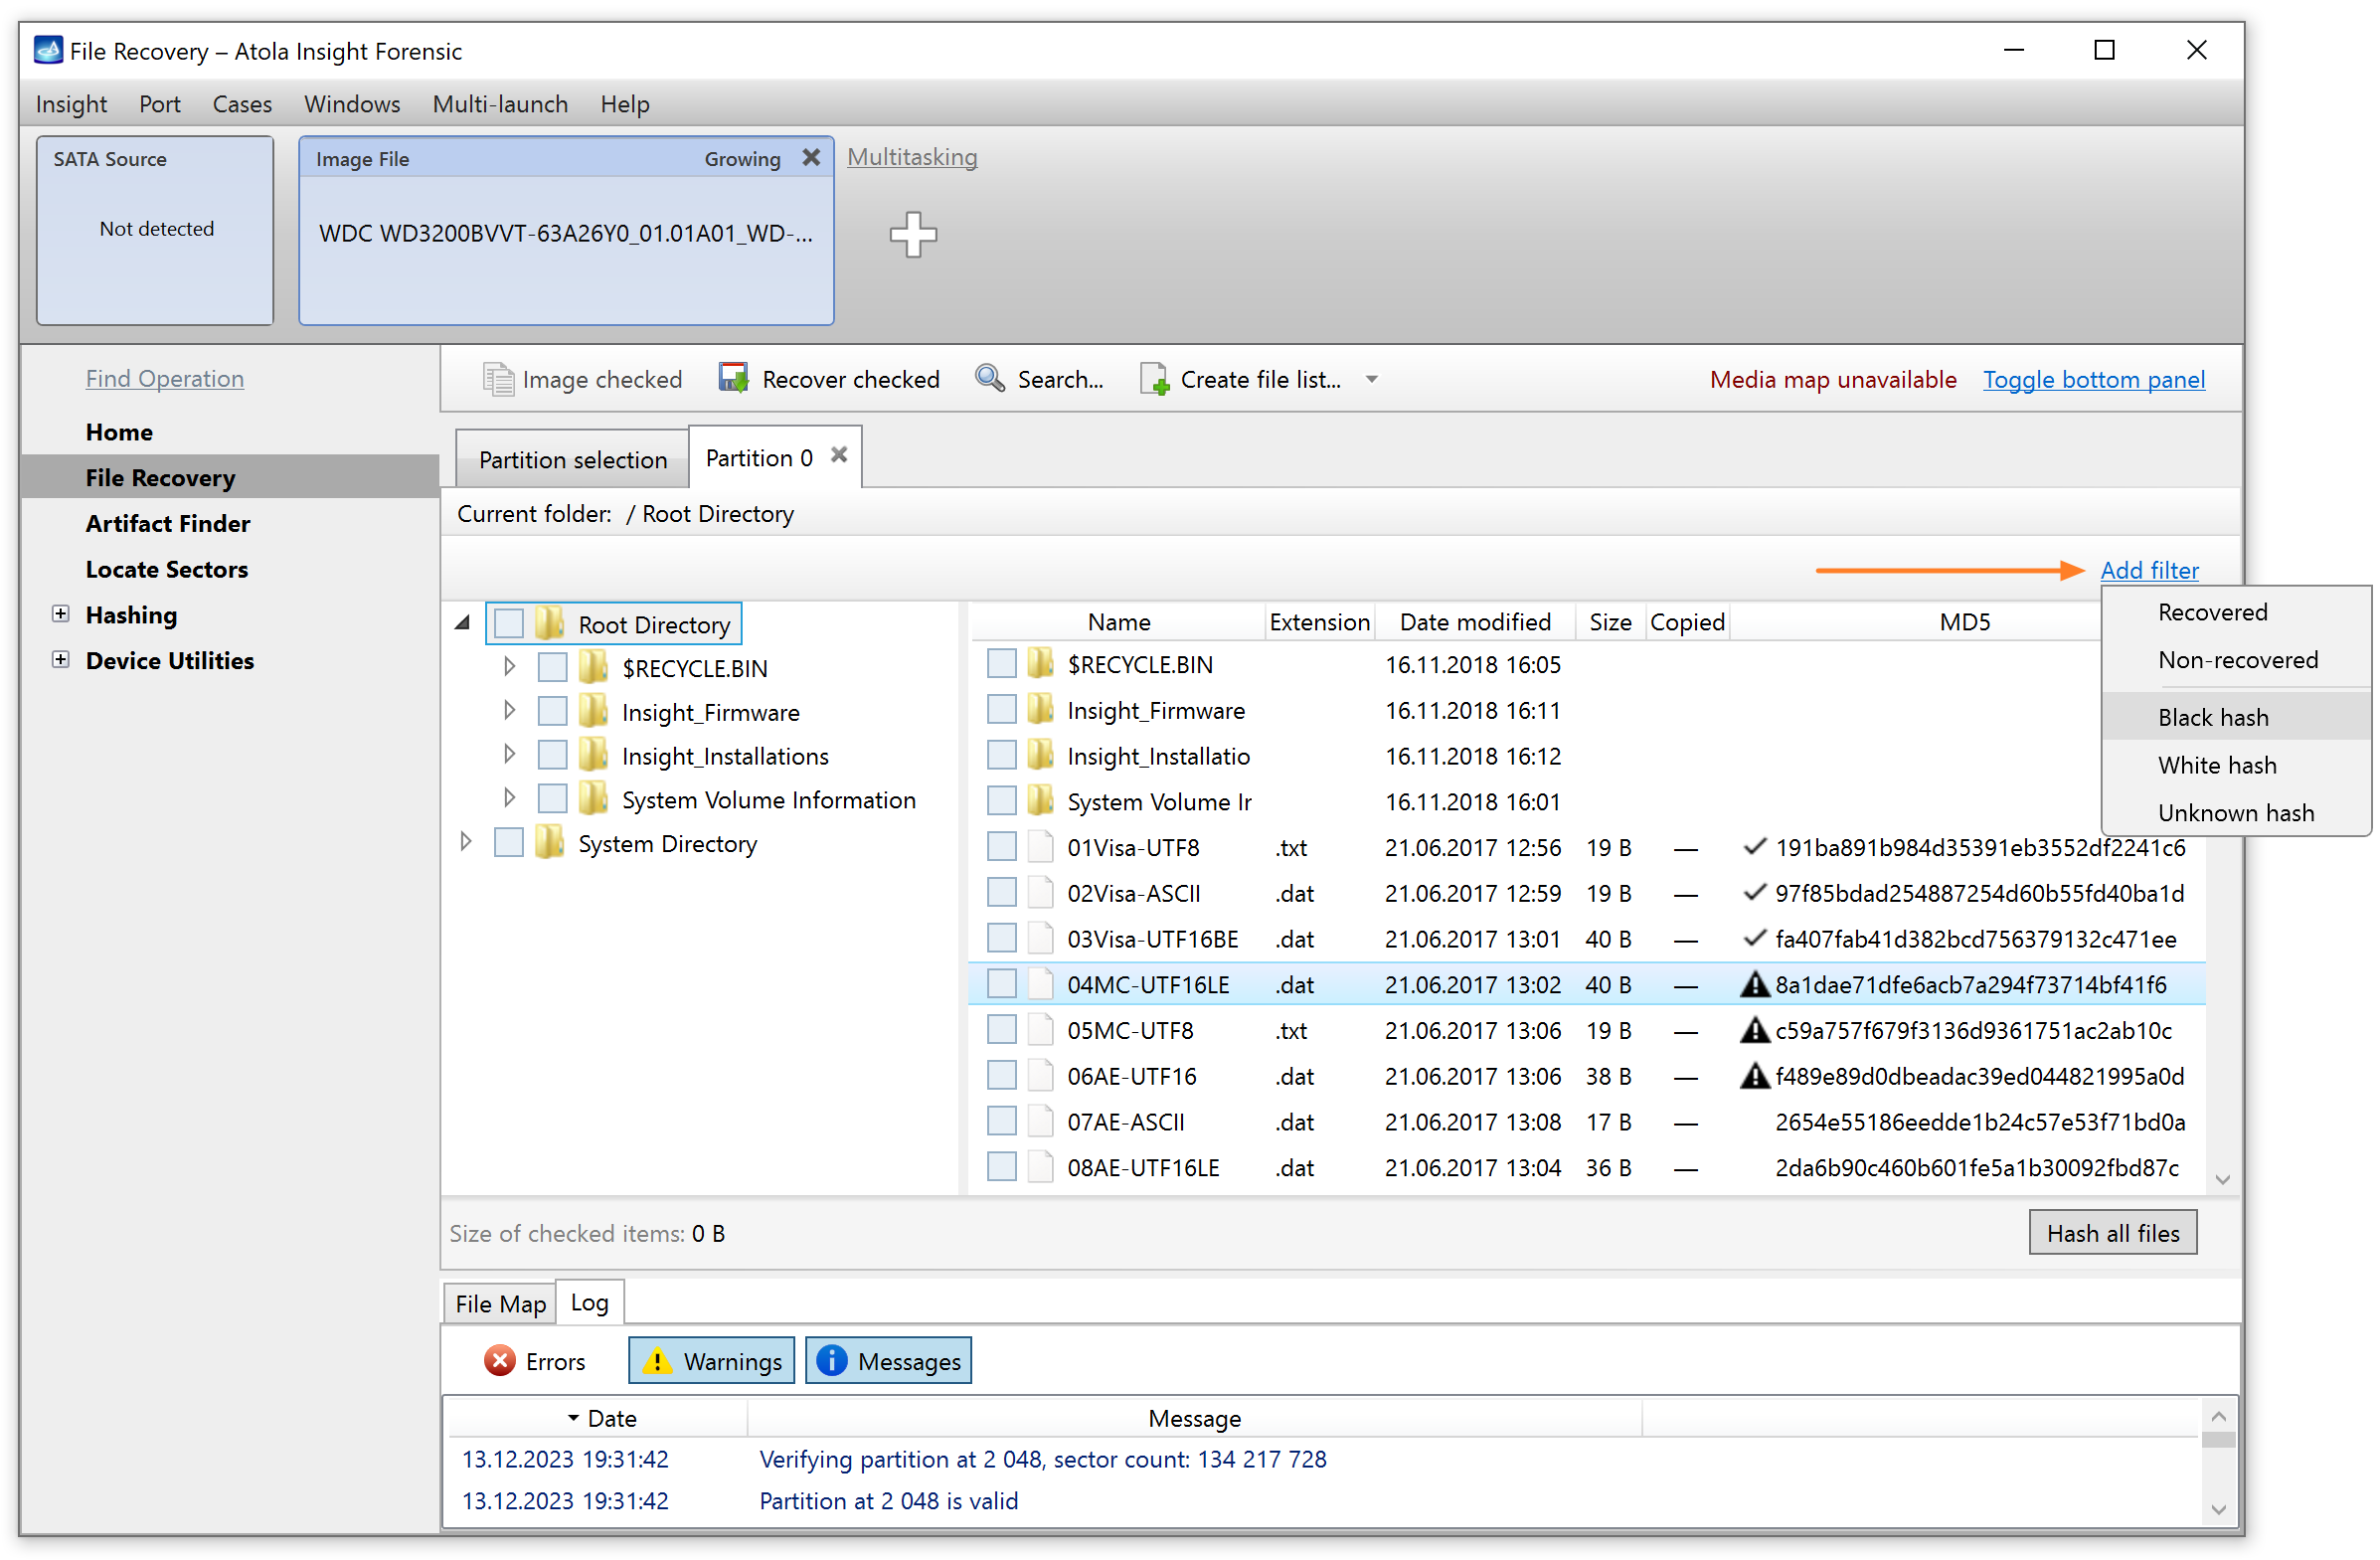
- On the top right of the Partition tab, click the Add filter link.
- Select either Black hash or White hash.
- Insight Forensic compares every calculated file hash against the selected hash list and displays only the files whose hashes are found in this list.
To learn more about file extraction capabilities for both good and damaged drives, see File Recovery.
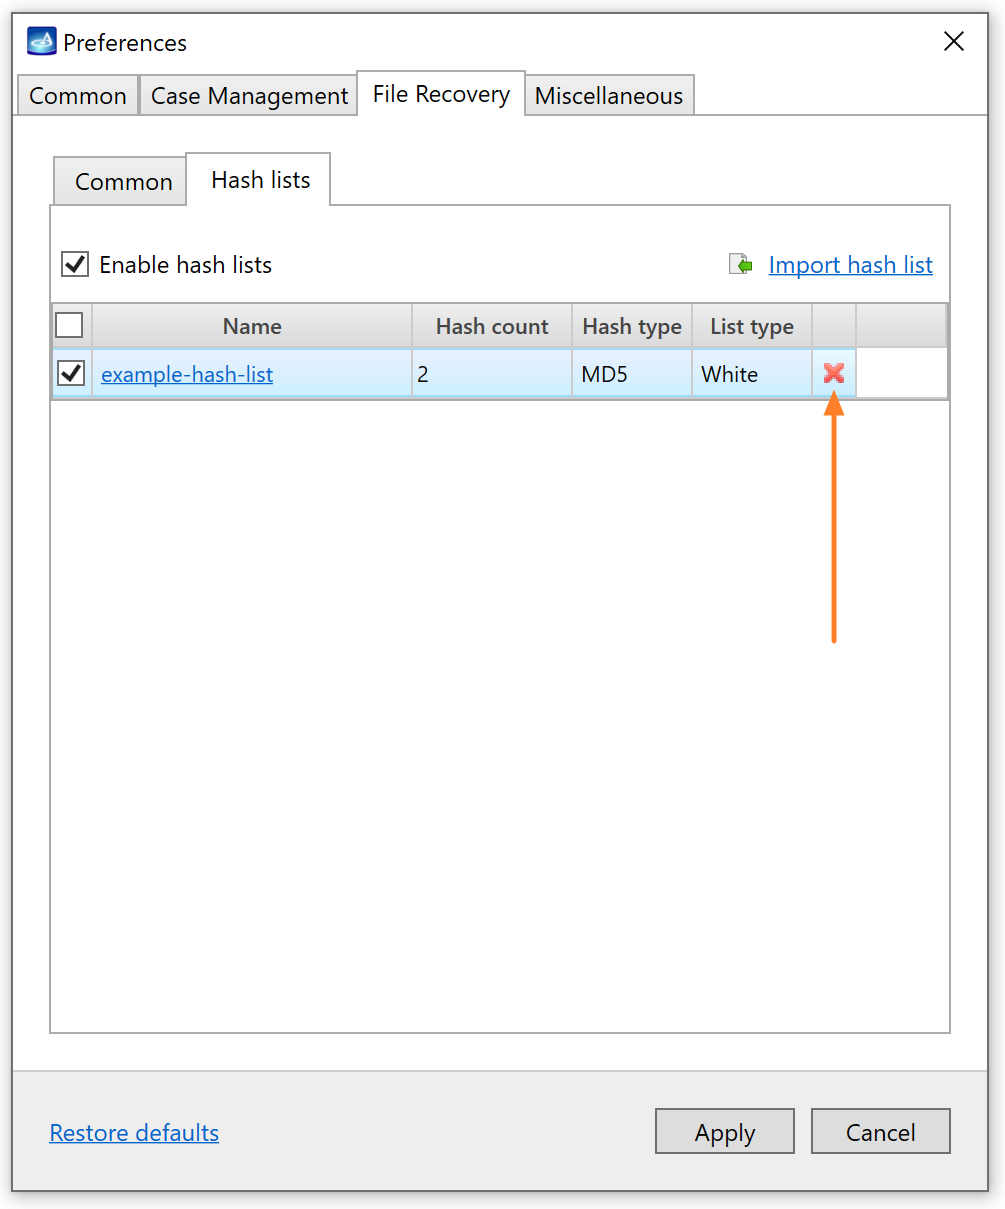
Delete a hash list
To delete an existing hash list from Insight Forensic, do the following:
- In the Insight Forensic menu, select Insight > Preferences or press Ctrl + Q.
- In the Preferences window, go to the File Recovery tab, and then to the Hash lists subtab.
- Select the hash list you want to delete, click the Delete icon and confirm your decision.