Imaging into a file on an encrypted target
Atola Insight Forensic supports imaging into a file on an encrypted target drive, using VeraCrypt for data encryption.
Create an encrypted target volume
After your source drive is identified by the system perform these steps:
- In the sidebar, go to Imaging.
- Click Create New Session.
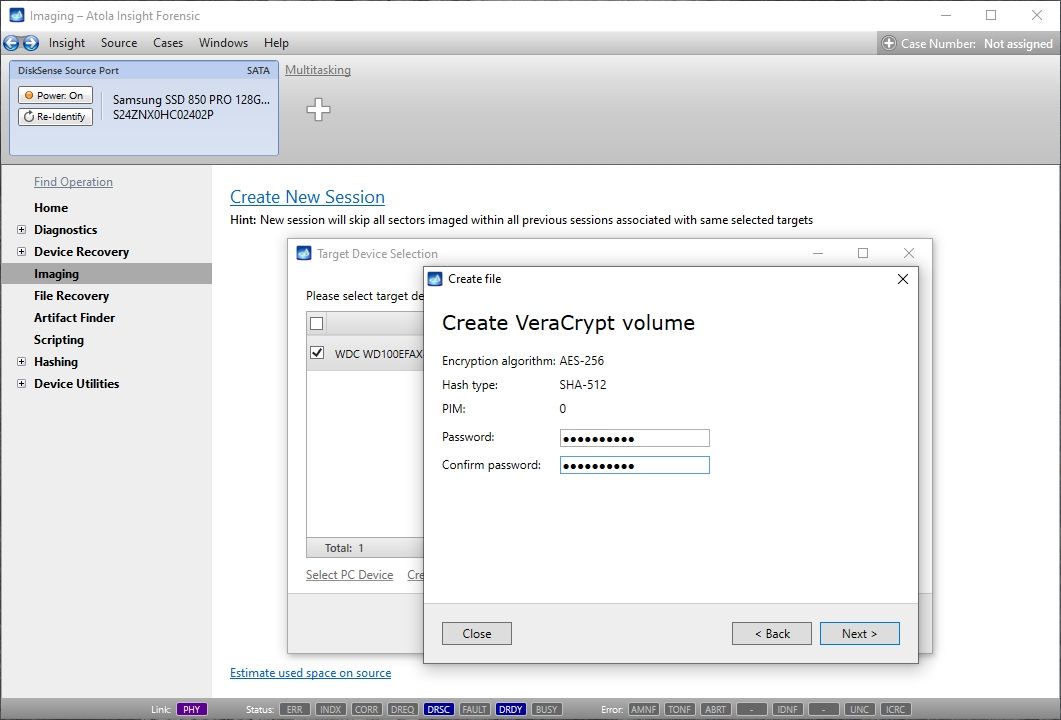
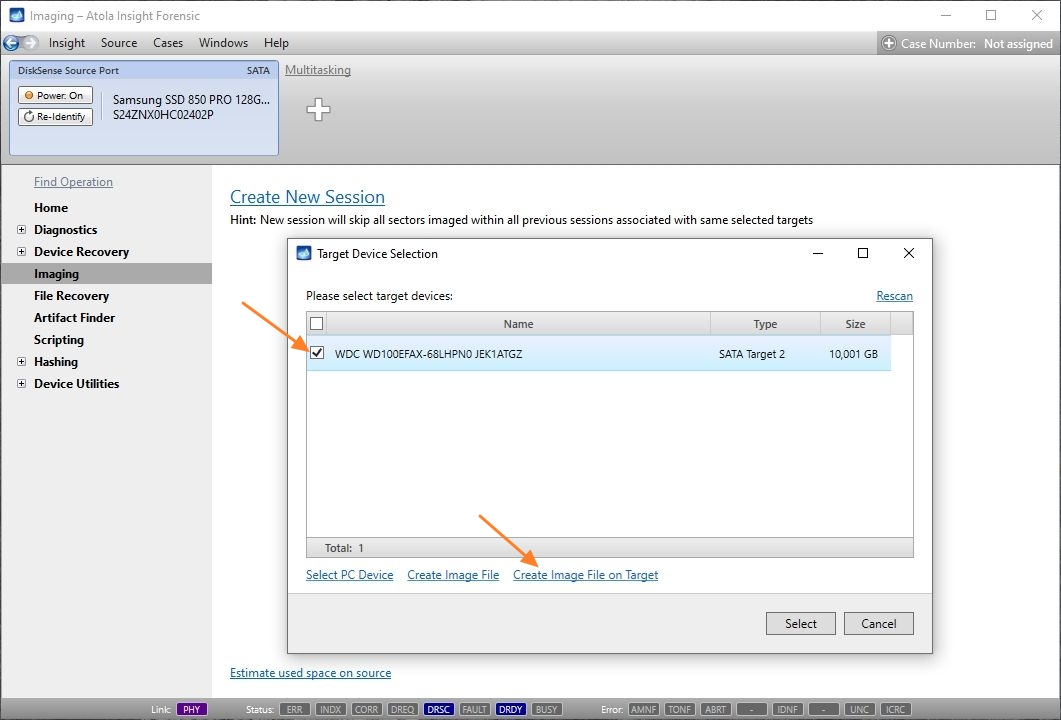
- In the Target Device Selection dialog, select target device and then click Create Image File on Target link.
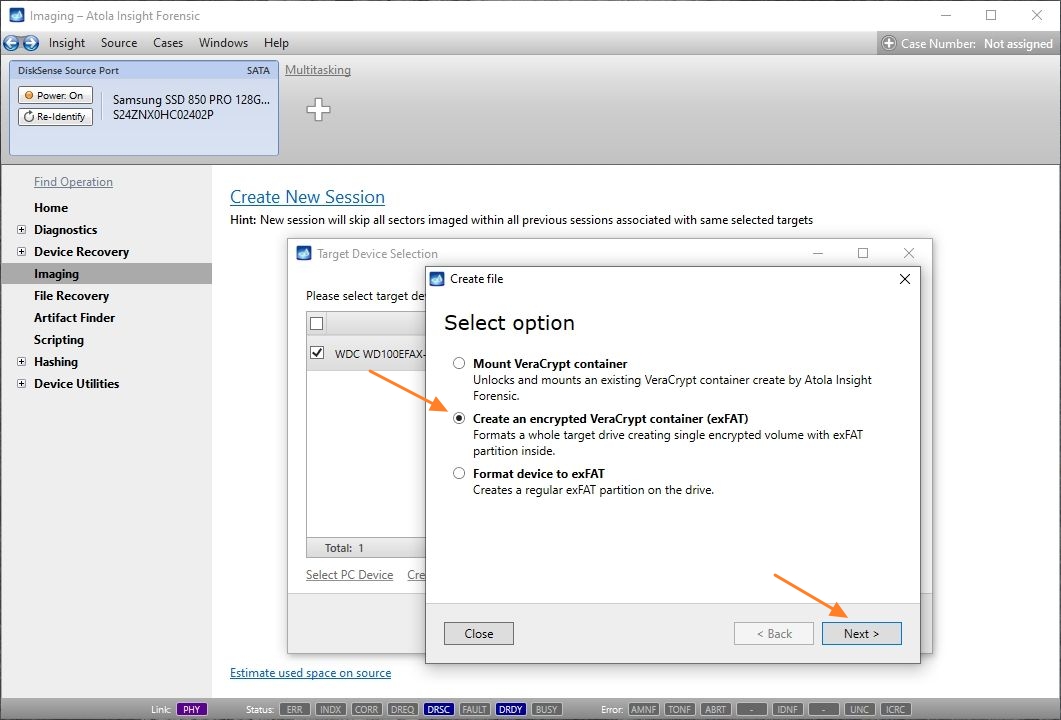
- In the Create file dialog, select Create an encrypted VeraCrypt container (exFAT) and click Next.
- To complete the creation of a VeraCrypt volume, enter the password and click Next.
- To confirm formatting the drive to create the encrypted partition, enter YES and then click Format.
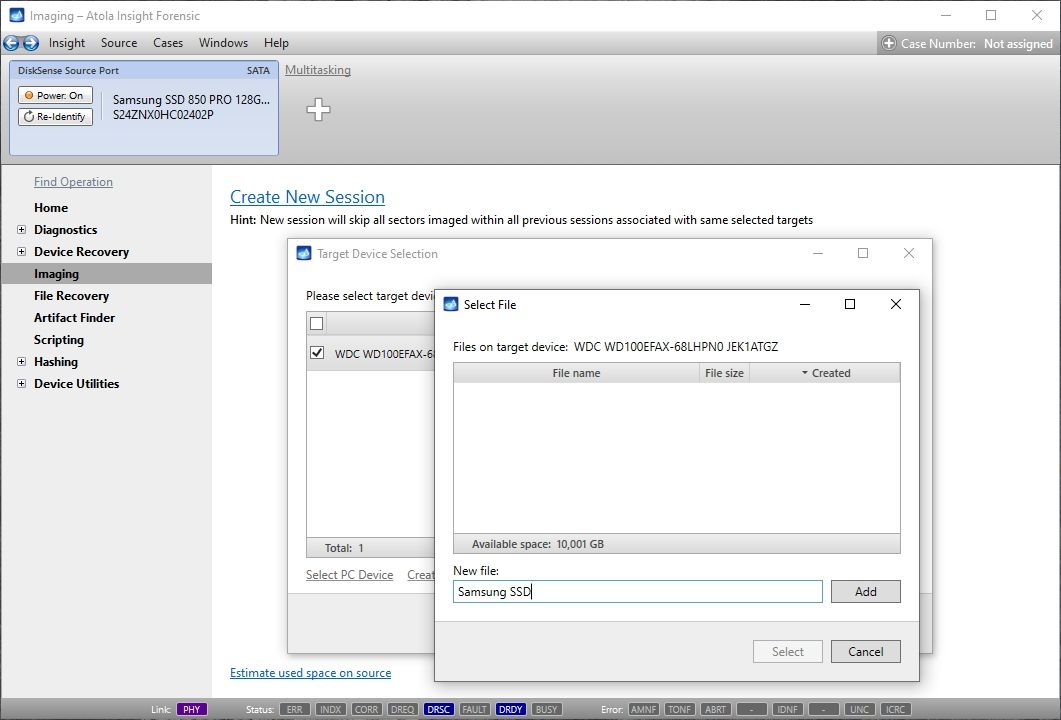
- Enter a name for a new image file, click Add and then click Select.
- Specify the settings for this imaging session and click the Start Imaging button.

Formatting takes a few seconds.


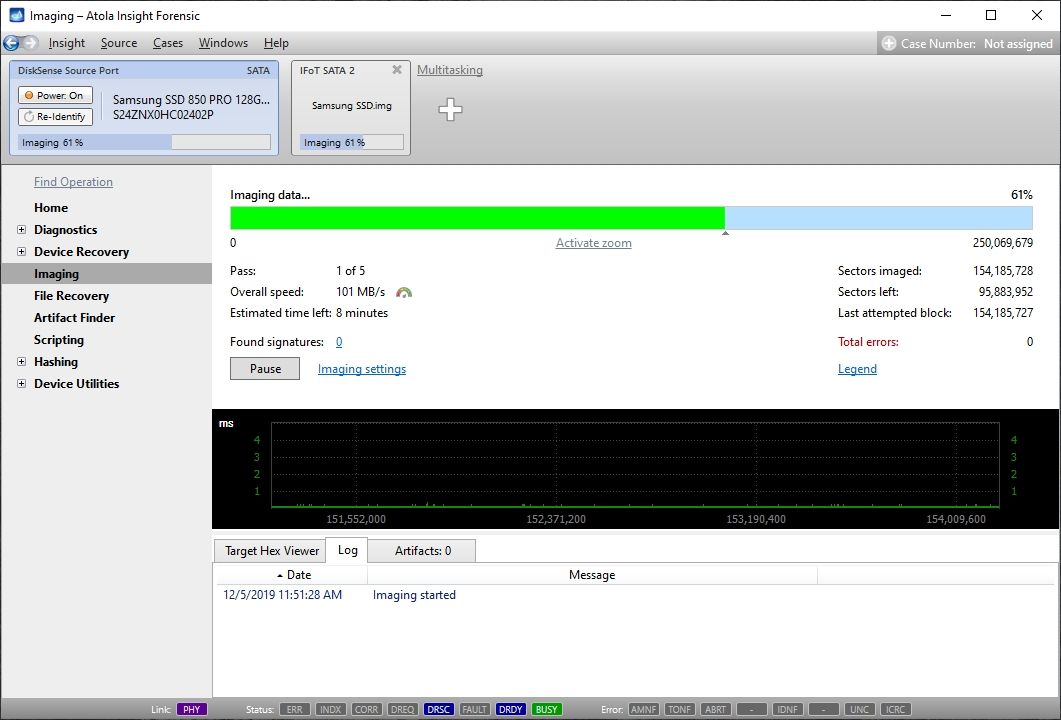
After you click the Start Imaging button, Insight begins imaging data into the file on your encrypted target.
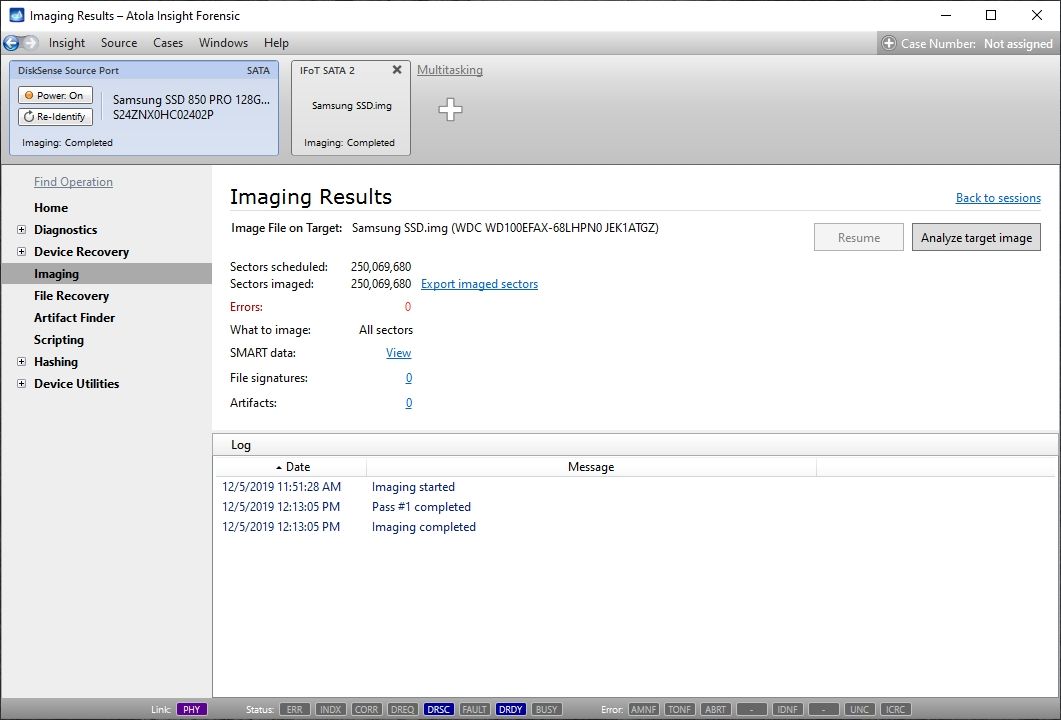
Upon completion of the imaging session, check the Imaging results screen.
Extract data from your encrypted VeraCrypt volume
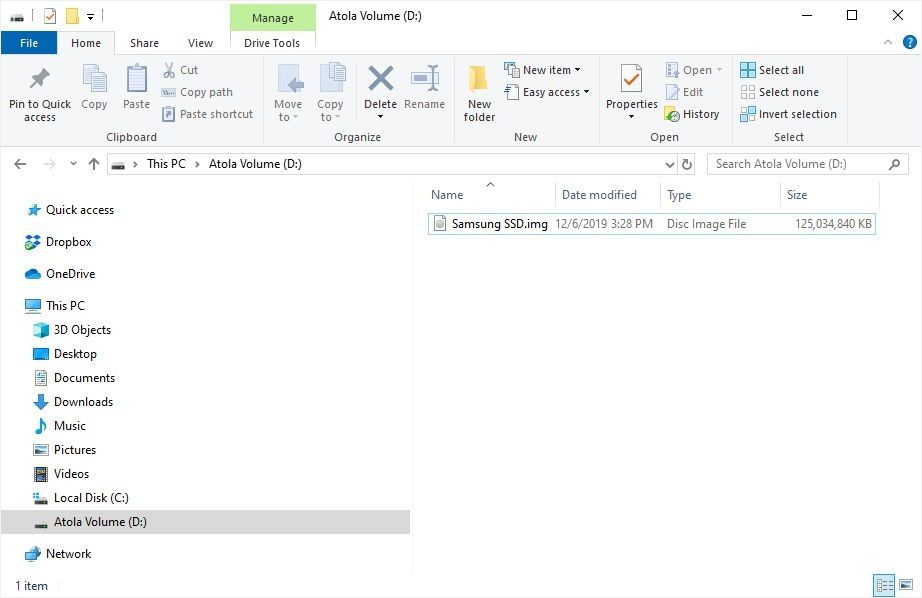
- To find the VeraCrypt volume and the imaged file, plug the target drive into your computer.
- Use VeraCrypt software to safely access encrypted data from your drive.
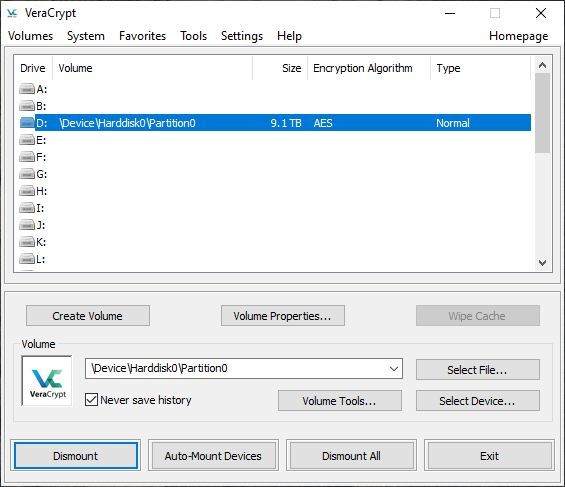
- Select the drive label (A, B, C, etc.) on which you want the volume to be mounted.
- Click the Select device button.
- In the pop-up window, select your encrypted volume.
- Click the Mount button. Now you can view the partition name, size and encryption algorithm.
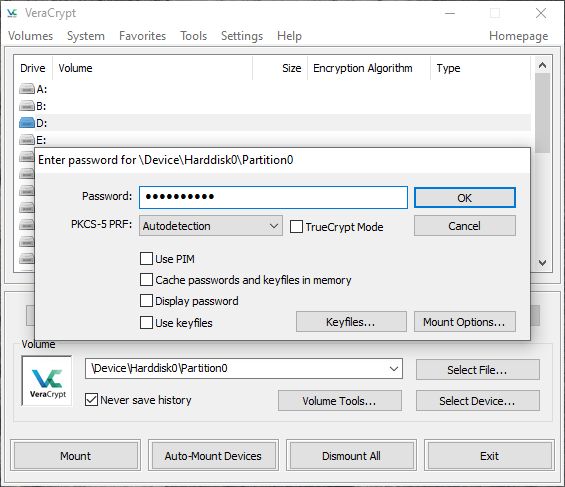
- To get access to the encrypted volume, use the password set prior to the imaging session.
- Once you have entered the password, the volume will be mounted and you can access it from Windows Explorer and use the image for subsequent operations.