Unlocking Hitachi hard drives
PLEASE MAKE SURE THAT YOUR PC AND ATOLA DISKSENSE UNIT ARE PLUGGED VIA A UPS (Uninterruptible Power Supply). PLEASE ALSO MAKE SURE YOU DO NOT HAVE ANY OTHER PROGRAMS RUNNING. INTERRUPTION OF THE UNLOCKING PROCESS MAY RENDER THE HARD DRIVE INOPERABLE.
BEFORE YOU PROCEED WITH UNLOCKING, PLEASE LOOK THROUGH FOLLOWING INFORMATION. IF YOU ARE NOT COMFORTABLE WITH THE PROVIDED INFORMATION, PLEASE DO NOT PROCEED.
Password extraction on Hitachi SATA drives
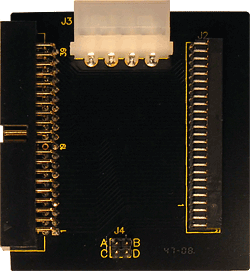
Hitachi drives require the use of the password extraction adapter which is included in the product package. The adapter plugs straight into the IDE port located on the front side of the DiskSense Forensic unit.
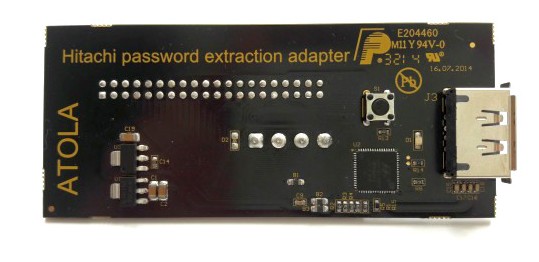
Atola Hitachi password extraction adapter
2.5-inch SATA hard drives (HGST models)
The following actions can only be performed if your SATA drive is attached to DiskSense unit via Hitachi password extraction adapter.
1. Connect Hitachi password extraction adapter to the IDE Source port of DiskSense unit.
2. Connect the source Hitachi HDD to Hitachi password extraction adapter.
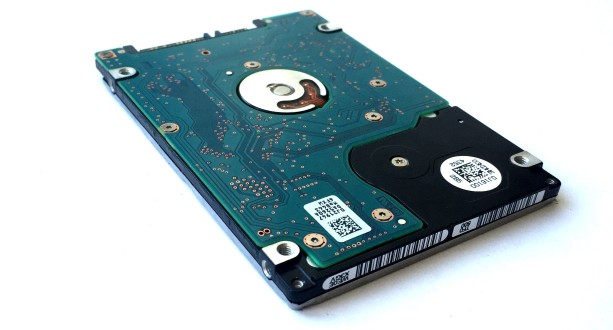
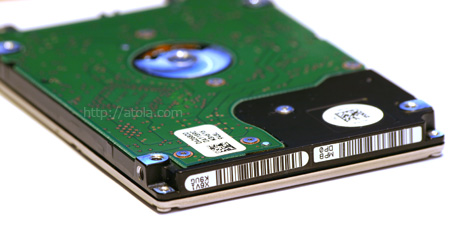
3. Place the hard drive as shown on the picture (no need to disconnect any cables):
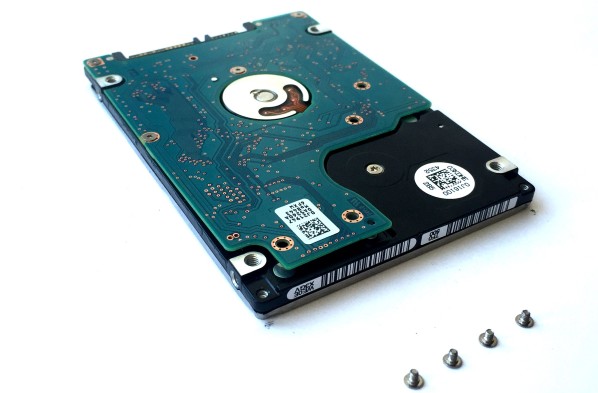
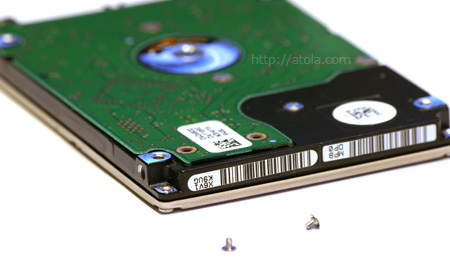
4. Use a T4 screwdriver to remove four screws as shown below:
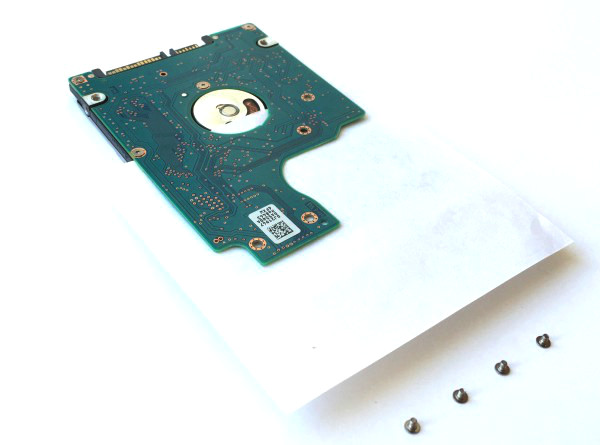
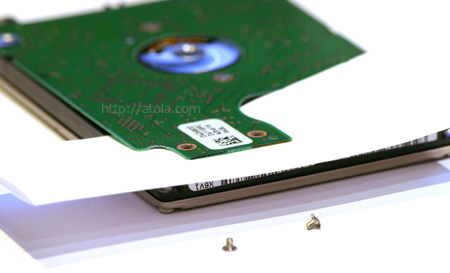
5. Put a piece of paper between the circuit board and the hard drive assembly:
6. Do not remove paper; proceed with unlocking.
7. Remove the paper and then put all screws back:
8. Continue with the unlocking process.
2.5-inch SATA hard drives (old models)
The following actions can only be performed if your SATA drive is attached to DiskSense unit via Hitachi password extraction adapter.
1. Connect Hitachi password extraction adapter to the IDE Source port of DiskSense unit.
2. Connect the source Hitachi HDD to Hitachi password extraction adapter.
3. Place the hard drive as shown on the picture (no need to disconnect any cables):
4. Use a T4 screwdriver to remove two screws as shown below:
5. Put a piece of paper between the circuit board and the hard drive assembly:
6. Do not remove paper; proceed with unlocking.
7. Remove the paper and then put all screws back:
8. Continue with the unlocking process.
3.5-inch SATA hard drives
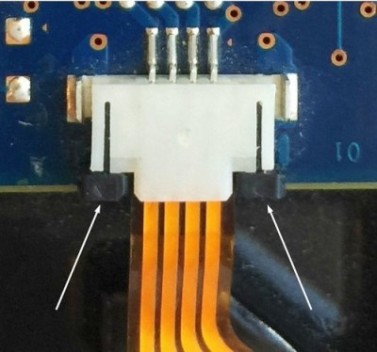
The following actions can only be performed if your SATA drive is attached to DiskSense unit via Hitachi password extraction adapter.1. Place the hard drive as shown on the picture (no need to disconnect any cables):
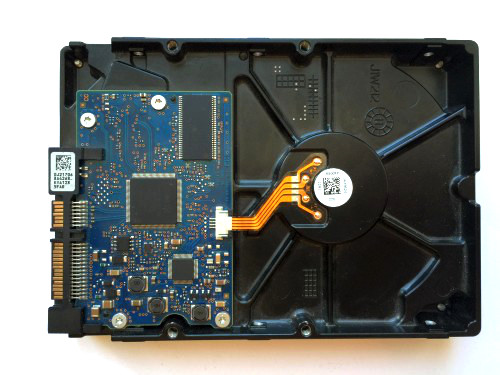
You may see the orange cable connected to the PCB being fastened by the latch.
2. Important: Power off the drive.
3. Unlock the latch as it is shown below:
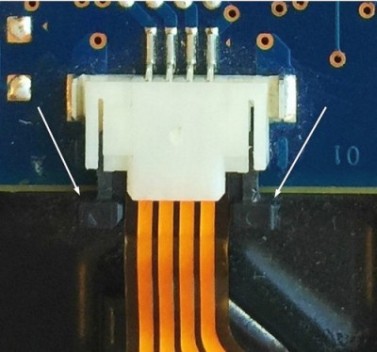
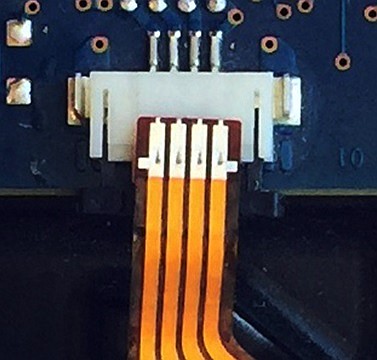
4. Disconnect the cable.
5. Proceed following Atola Insight instructions.
6. Important: Power off the drive.
7. Plug the orange connector into the PCB socket and fasten it with the latch.
8. Follow Atola Insight instructions.
IDE hard drives
1. You will need Atola 2.5-inch to 3.5-inch adapter:
If you have such an adapter, please skip to step 4.
2. Disconnect the drive and place it as shown on the picture:
You do not need to perform this step if you have Atola 2.5-inch to 3.5-inch adapter (see step 1).
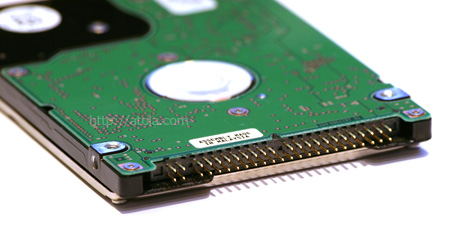
3. Locate a jumper that fits 2.5-inch HDD jumper pins:

And then install the jumper into position as shown below:
You do not need to perform this step if you have Atola 2.5-inch to 3.5-inch adapter (see step 1).
4. If you're using Atola 2.5-inch to 3.5-inch adapter, then install a jumper between pins A and C (on the adapter).
5. Attach the hard drive back to Atola DiskSense unit and proceed with unlocking.
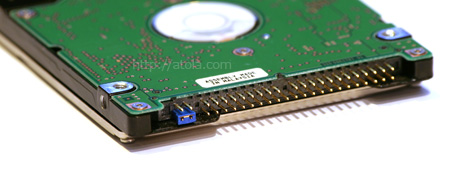
6. Remove the jumper:

7. Plug the hard drive back to Atola DiskSense unit and continue with unlocking.