Unclip or change HPA, DCO, AMA limitations
DCO (device configuration overlay), HPA (host protected area), or AMA (accessible max address) features were created by hard drive manufacturers as hidden areas reserved for storing vendor utilities or simply to make a drive appear to have a certain number of sectors (smaller than the actual drive capacity).
But it is many years ago that end users learned to modify and write to these areas of hard drives with the help of open source and freely available tools. For digital forensics specialists, it means that without the ability to identify such hidden areas of a drive and image the full physical image including data in these areas, the evidence they get may be incomplete and lead to inaccurate investigative conclusions.
Atola TaskForce 2 helps you detect, unclip, or change HPA, DCO, AMA limitations.
Detect DCO, HPA, or AMA limitations
When you connect a hard drive to the TaskForce 2 unit, in addition to the standard Identify device command, TaskForce software automatically sends two commands to look up the drive size as set in drive’s firmware: Read native max address and Device configuration identify. If drive size has been limited by DCO, HPA, or AMA, TaskForce 2 will draw your attention to these changes by adding the note in red color in the device menu.
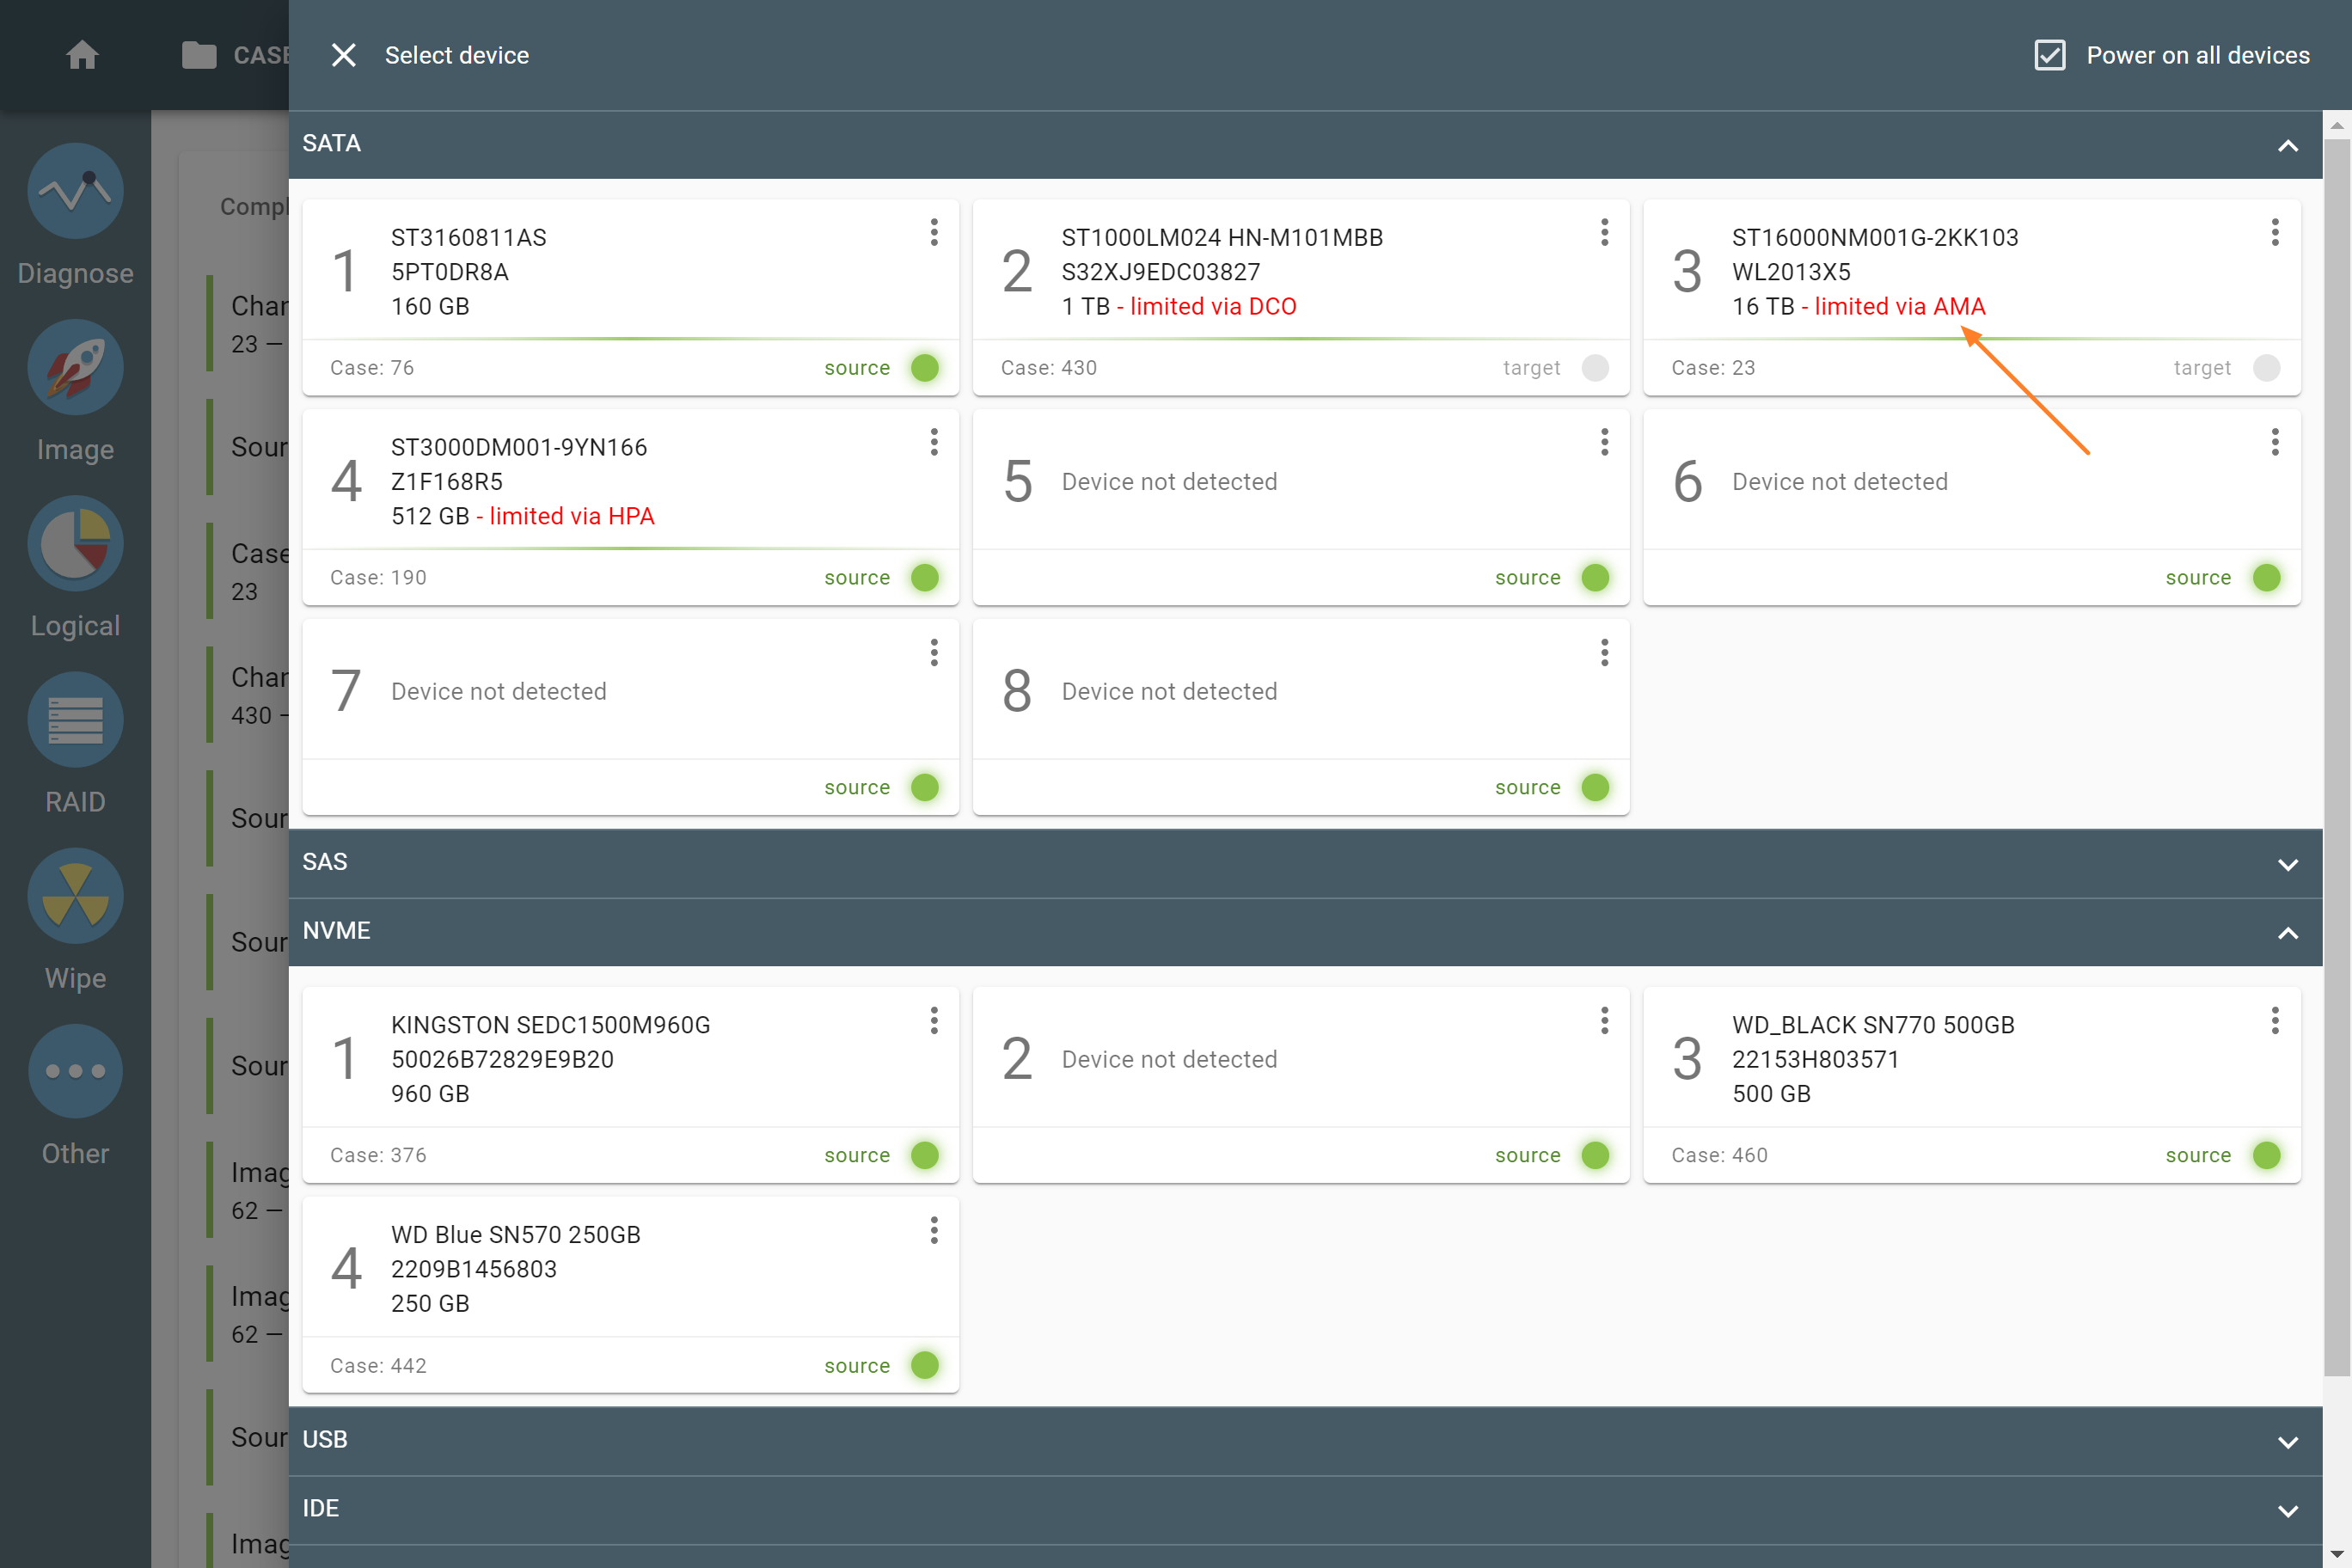
Notification about HPA, DCO, and AMA in device menu.
To get more details about the modifications that have been made to the drive’s firmware, run Diagnose and see the Firmware section of the Diagnostics report.
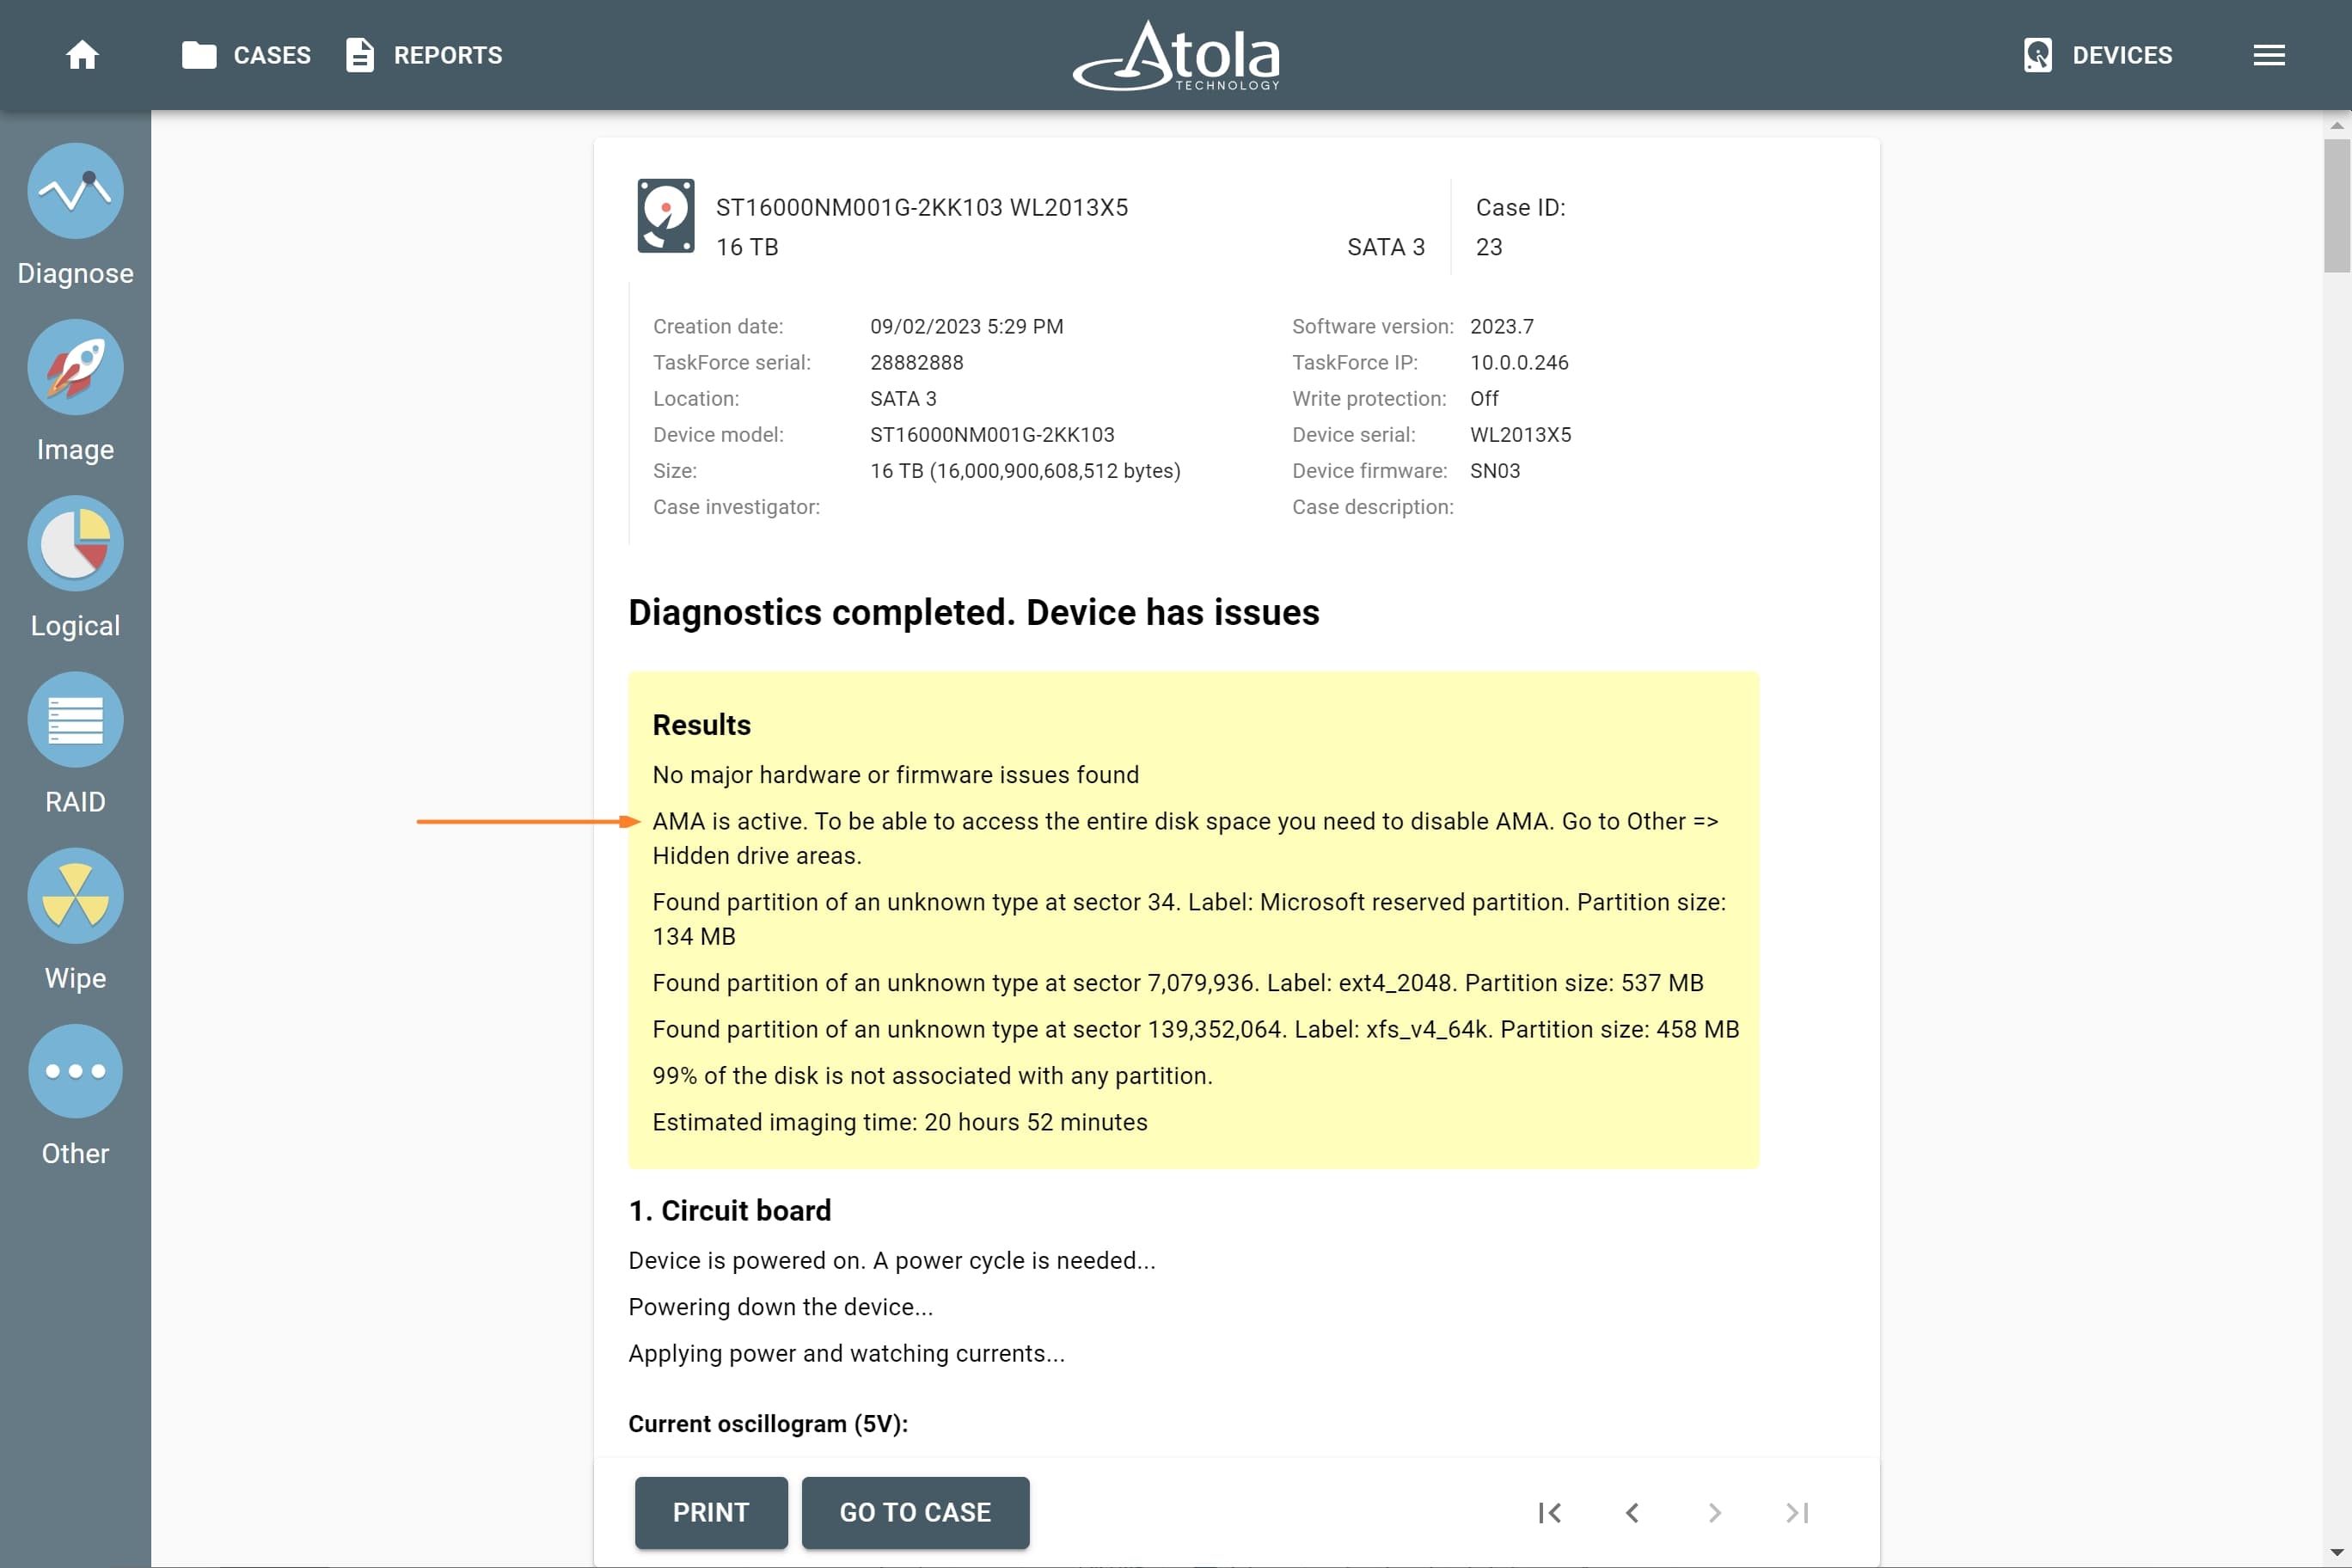
AMA limitation is indicated in the Diagnostics summary.
There you will see three lines indicating the drive’s Max Address according to different records in the drive’s firmware:
- The Max Address according to device ID line shows the max address from the ID sector, affected by DCO and HPA/AMA restrictions if those are applied.
- Native Max Address indicates max address ignoring HPA/AMA limitation that may have been enabled, yet affected by DCO restriction.
- Max Address from DCO is the line that gives you the actual drive size.
A Diagnostics report of a drive that does not have HPA/AMA or DCO activated will have the same value in all three lines.
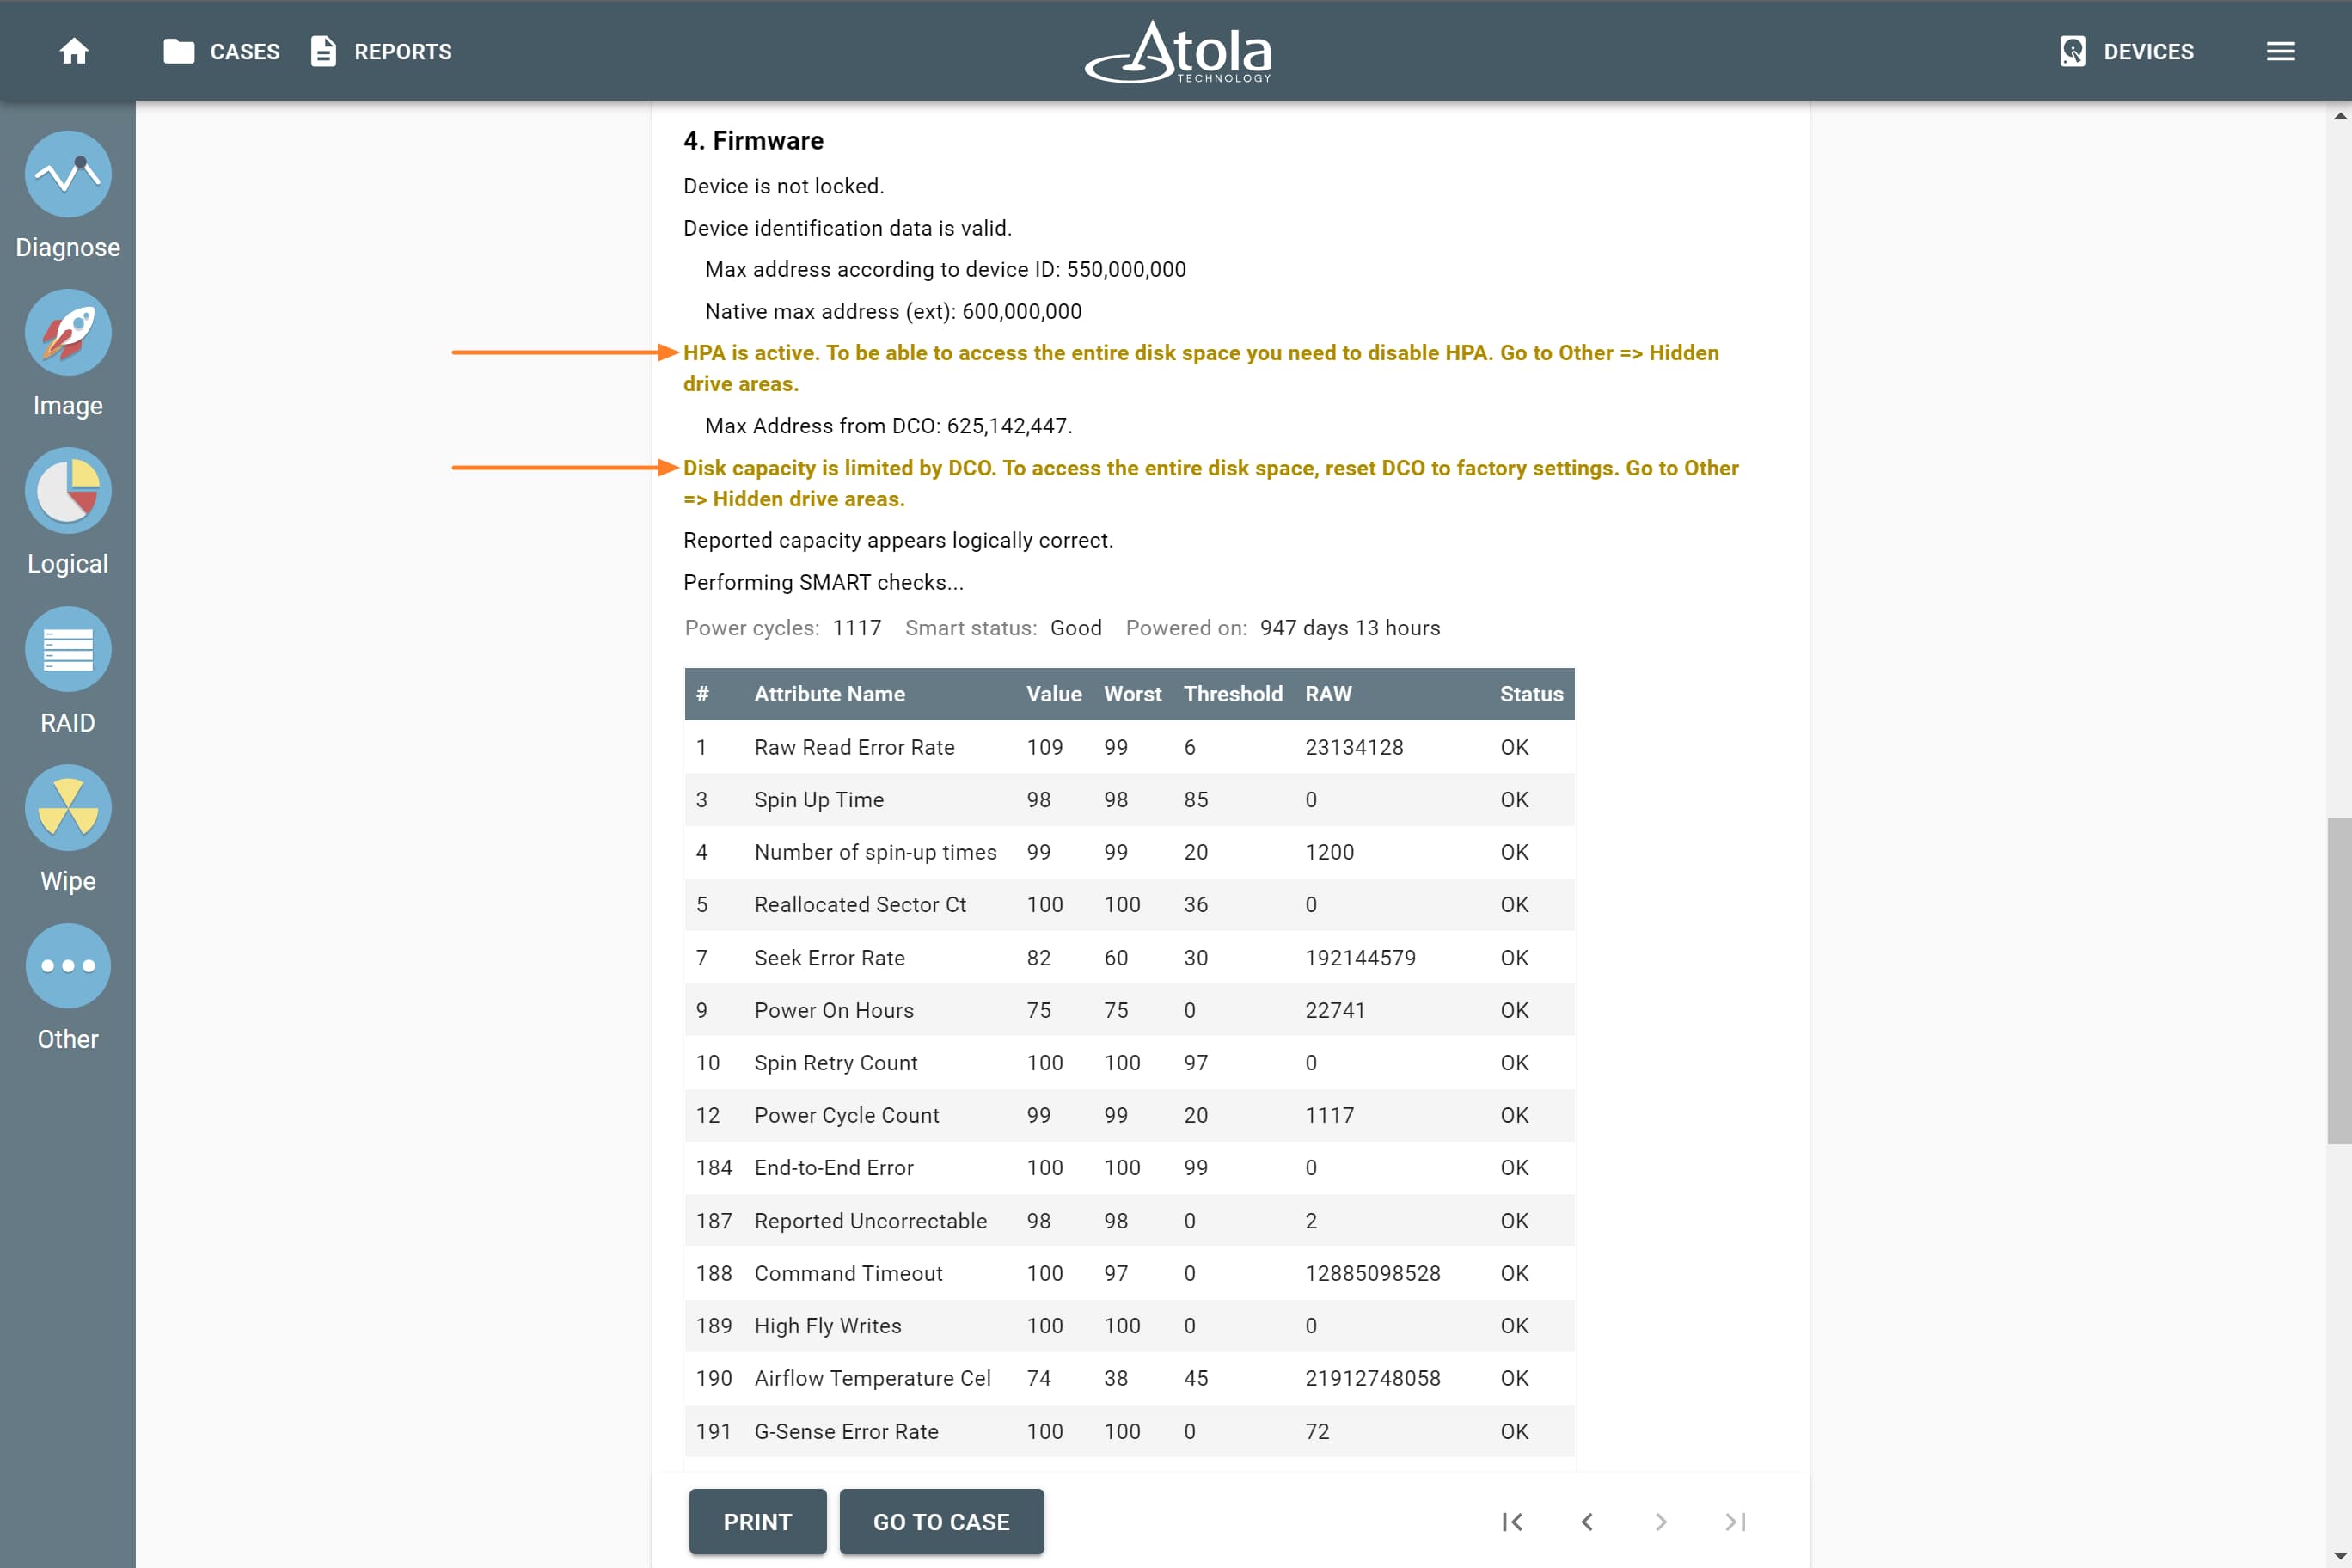
HPA and DCO restriction details in the Firmware section of the Diagnostics report.
Unclip HPA, DCO, AMA limitations
To disable HPA, DCO, AMA limitations that have been applied to the drive’s firmware:
- On the left, click Other and then Hidden drive areas.
- Select device.
- Click Unclip.
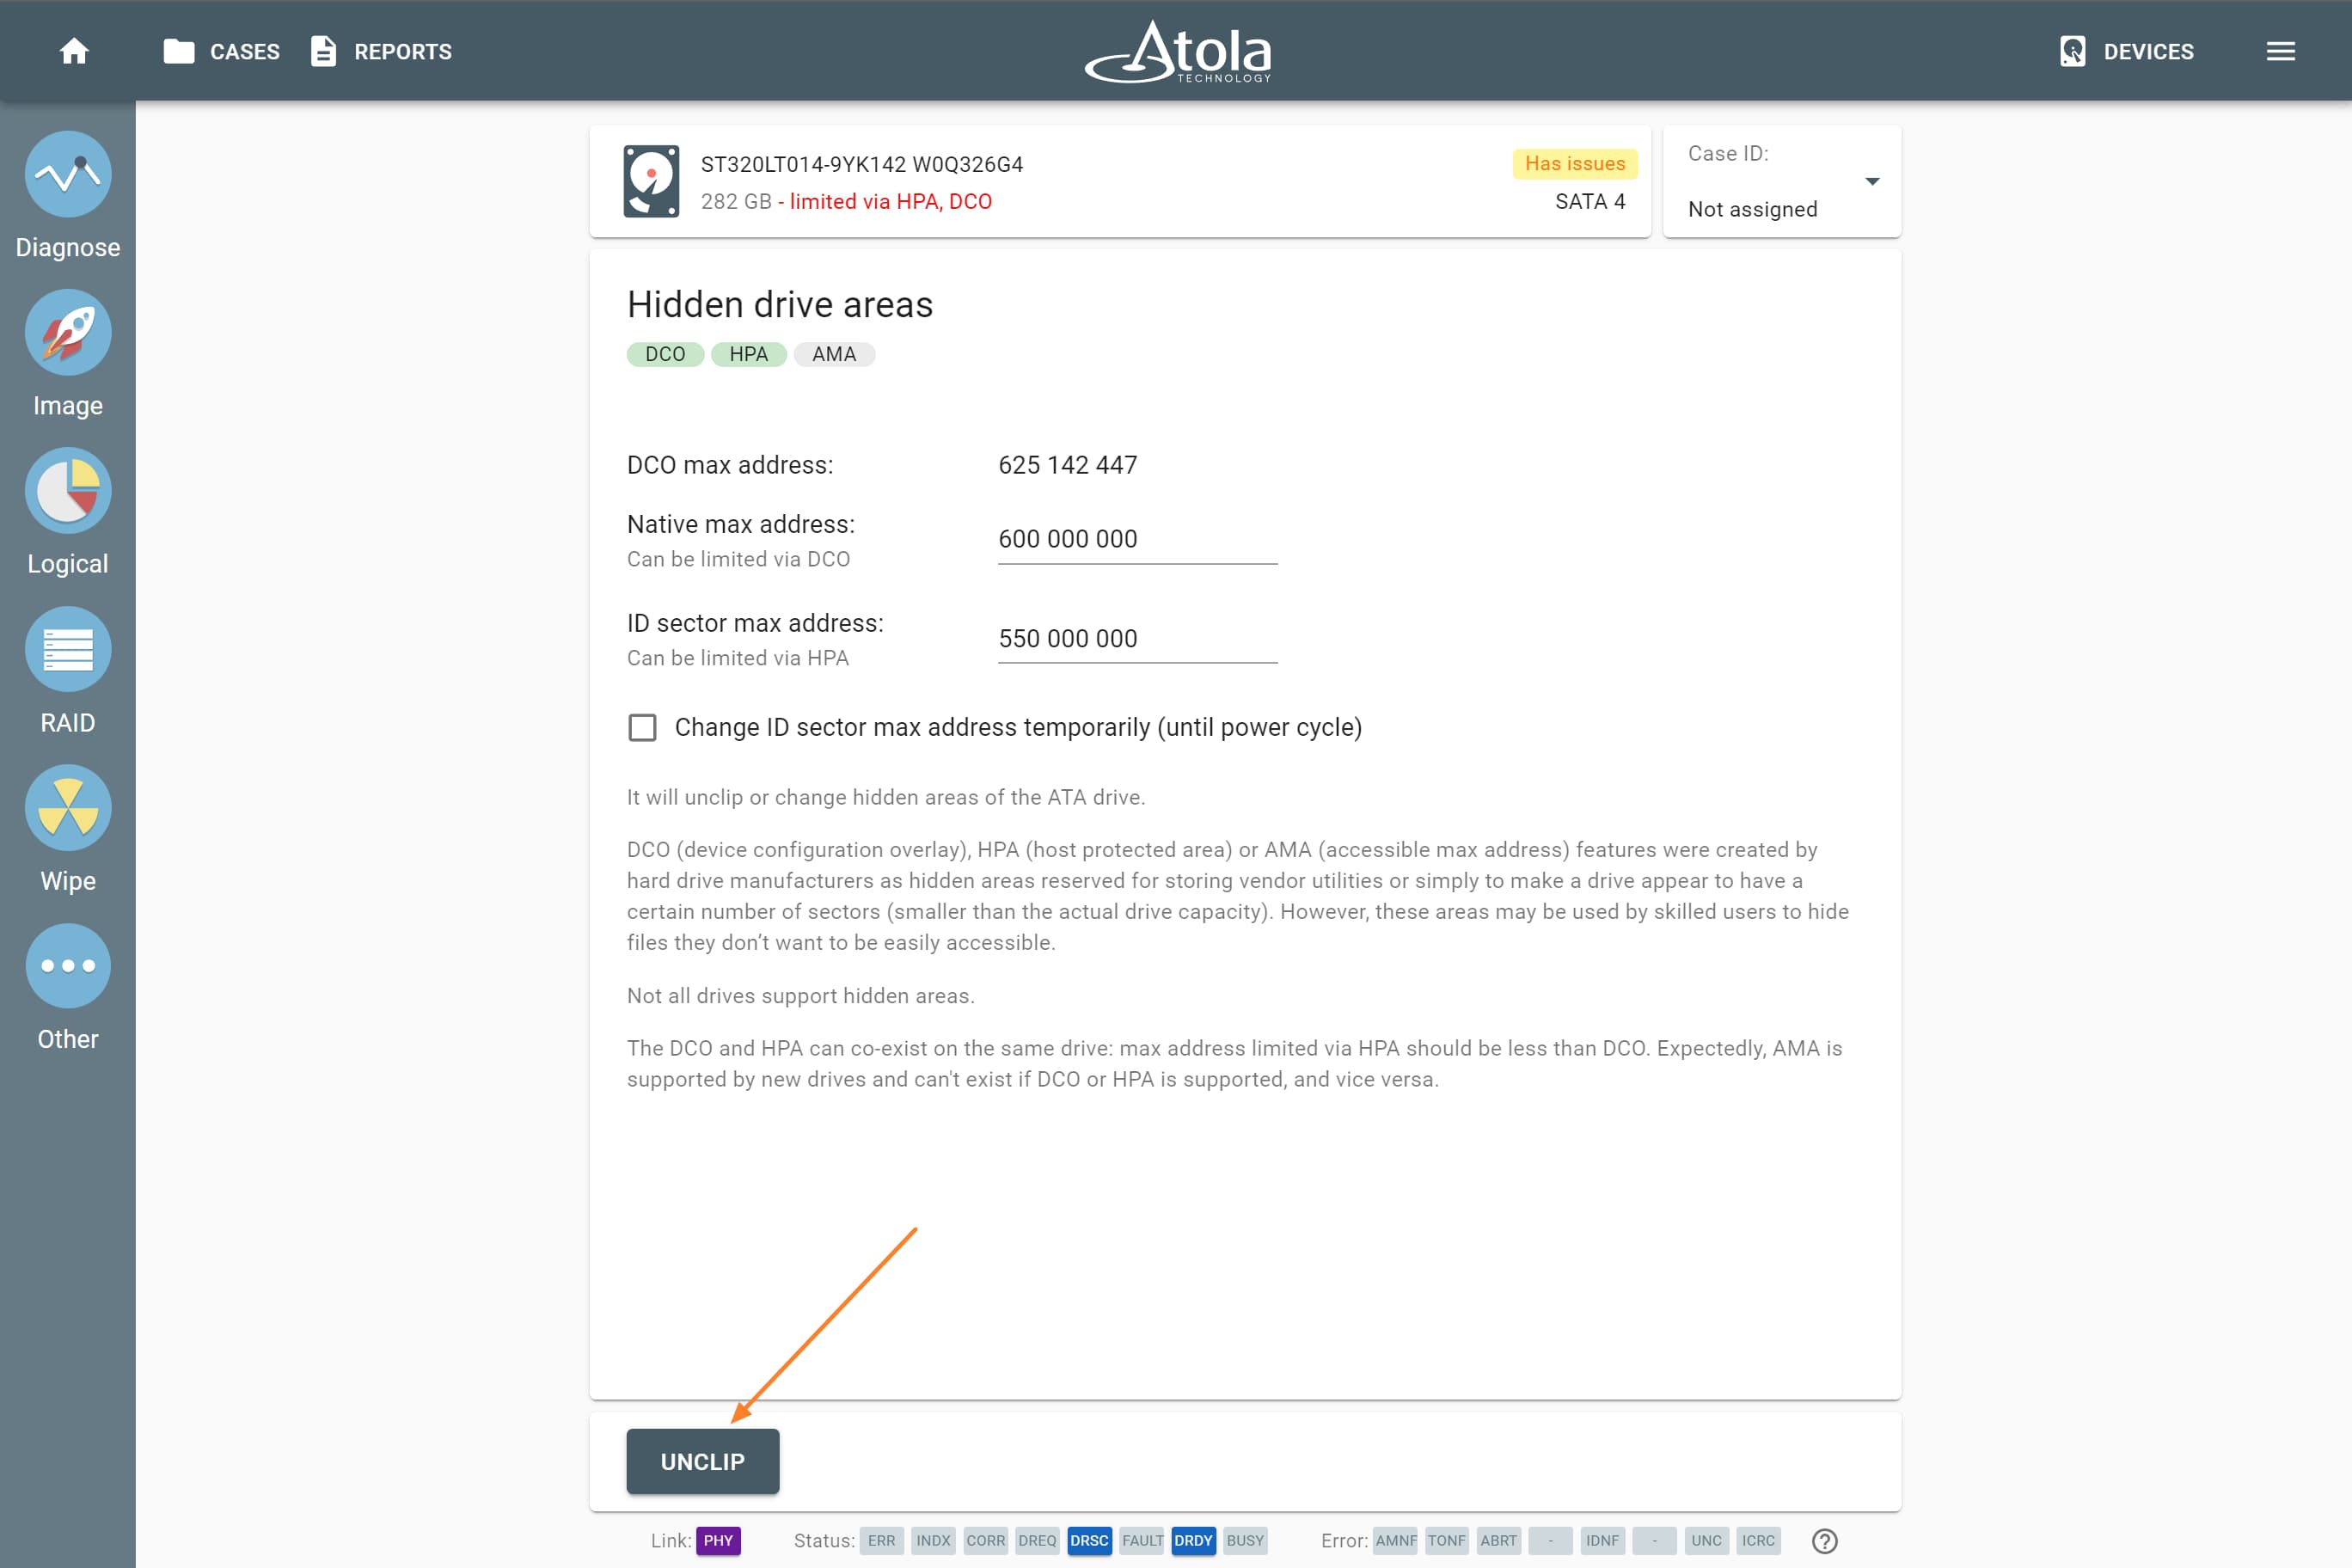
Remove HPA and DCO by clicking the Unclip button.
TaskForce 2 lifts HPA/AMA and DCO restrictions in a matter of seconds and enables access to all data on the drive.
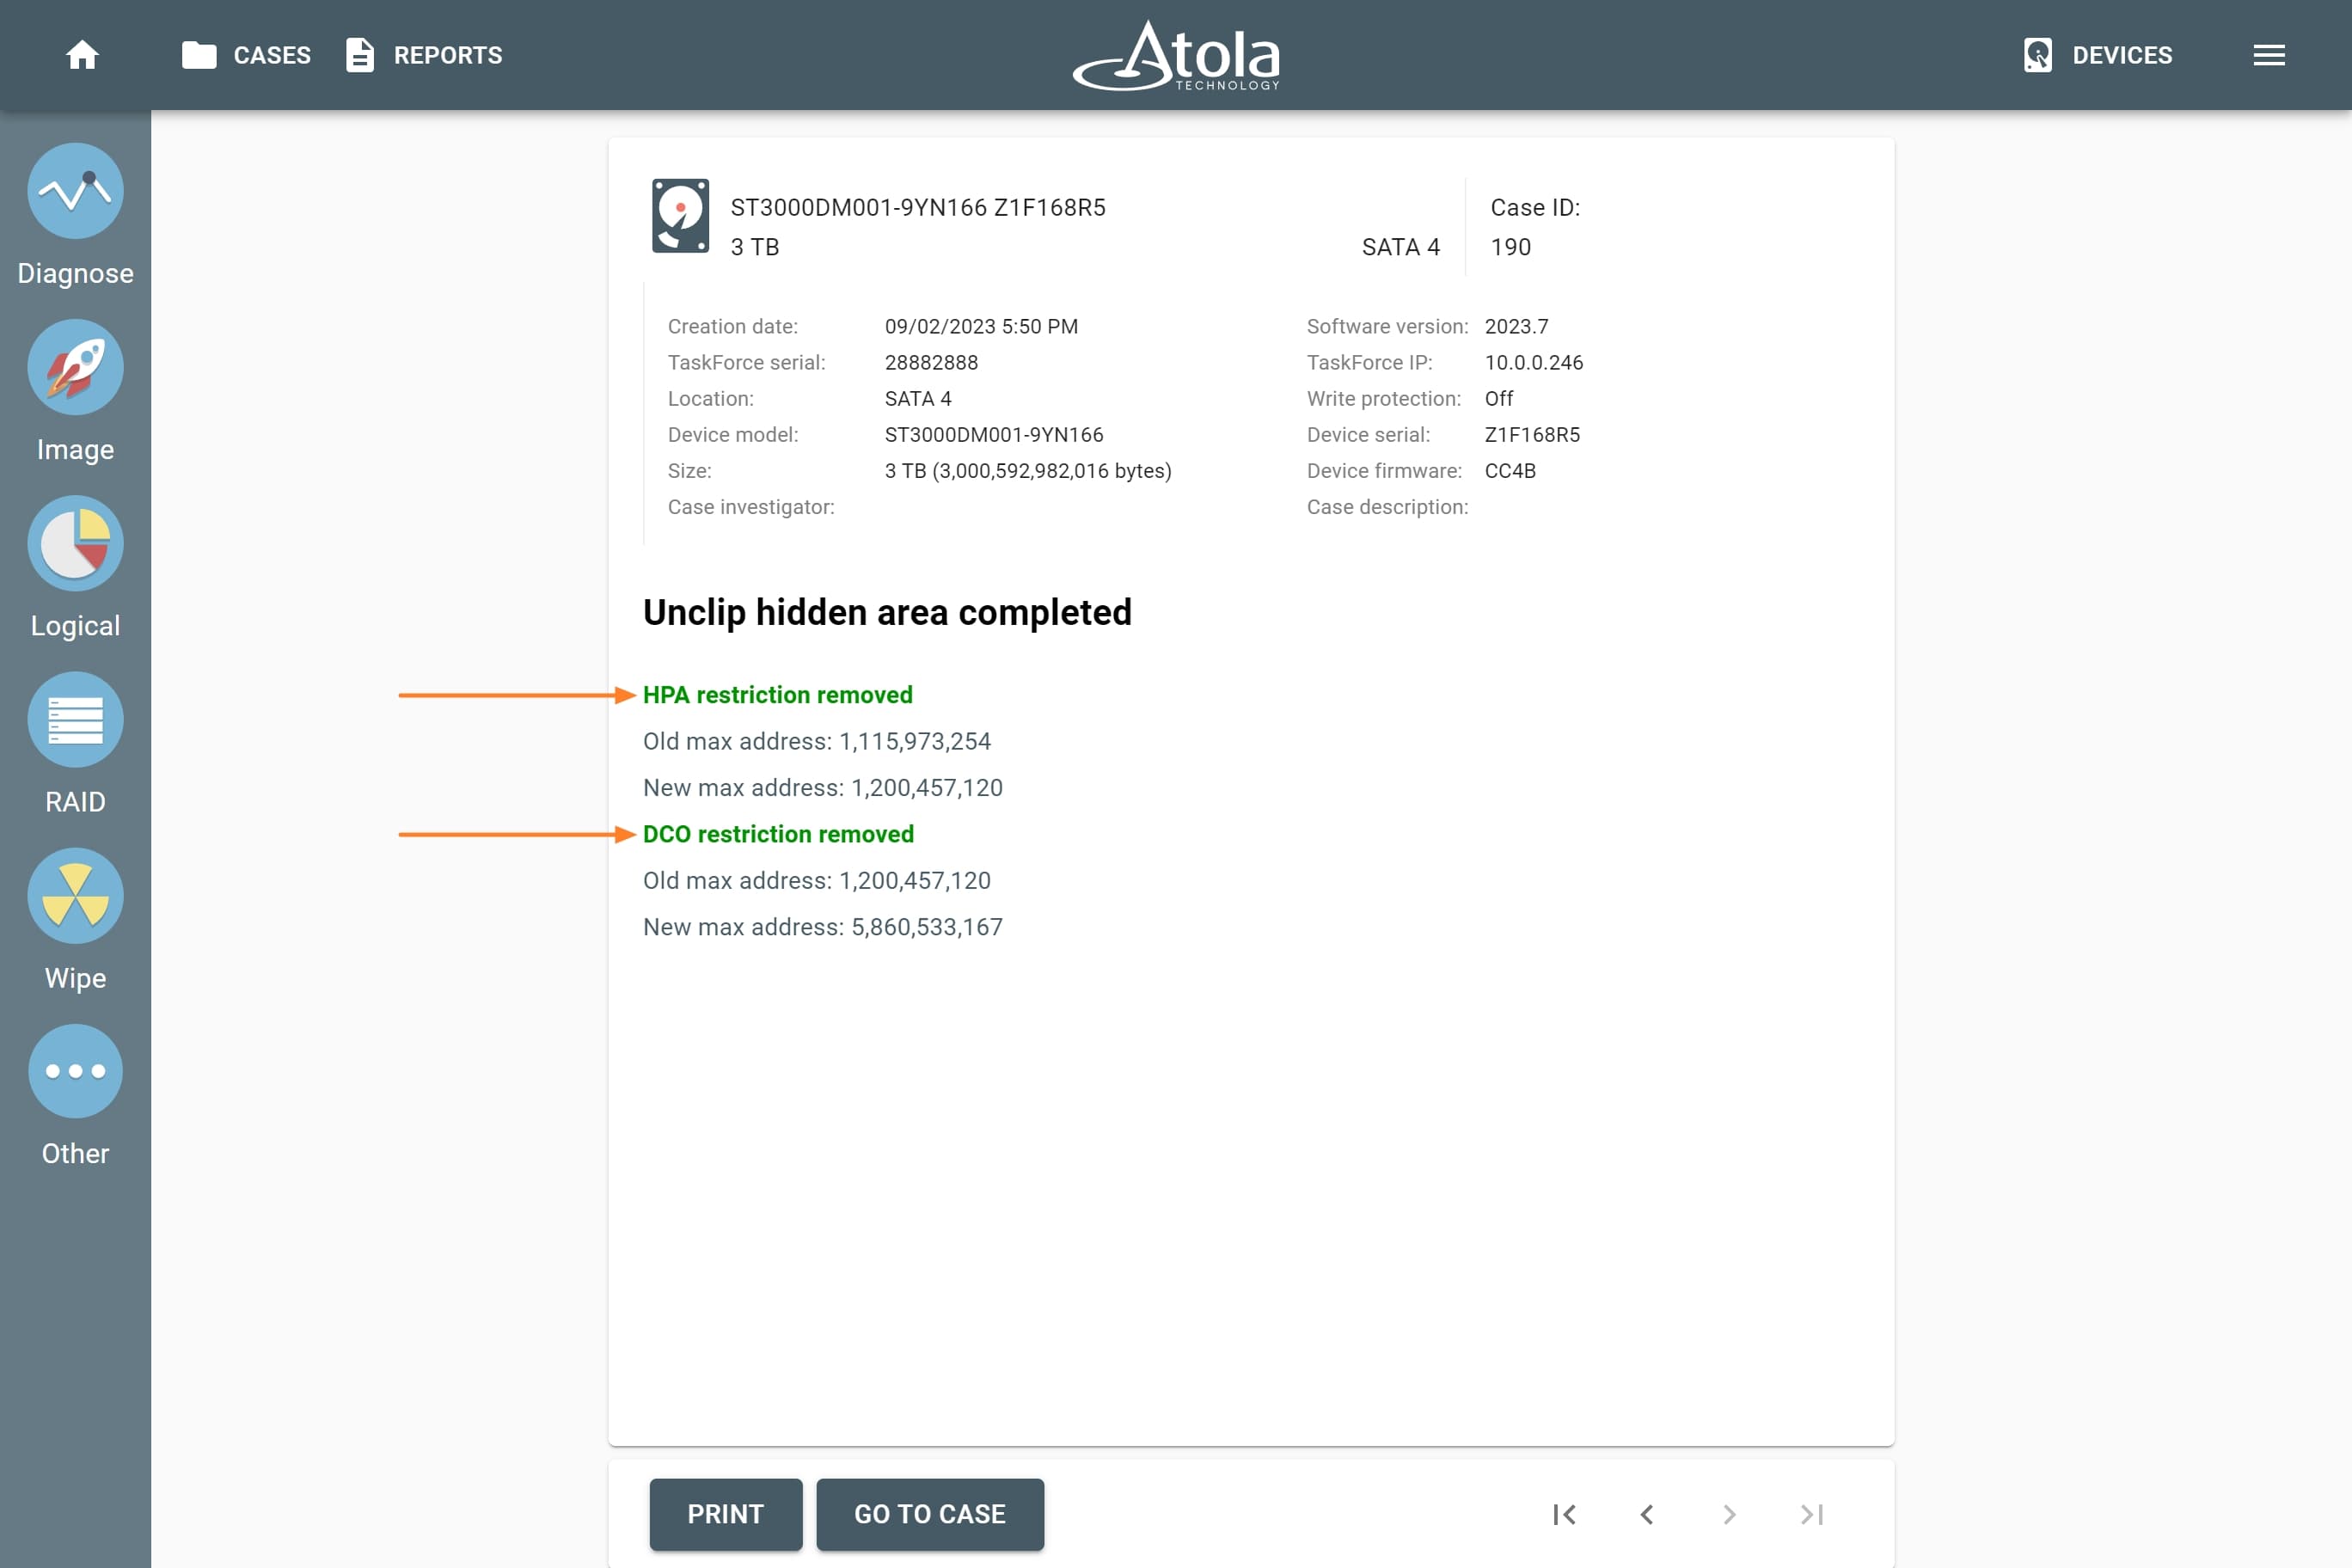
HPA and DCO unclip report.
Unclip HPA temporarily (until power cycle)
To ensure the forensically sound process, it can be necessary to avoid making any changes to the drive. Therefore it is prohibited to disable HPA and DCO restrictions and access data in the hidden areas. With TaskForce 2 it is possible to lift HPA restriction until the next power cycle. This helps avoid permanent changes to the drive.
To unclip HPA on the source drive until power cycle before imaging:
- Go to Image.
- Select source device.
- Select target devices and click Continue.
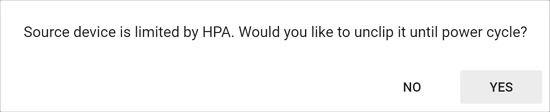
- In Confirmation dialog, suggesting you unclip the drive until power cycle, click Yes.
This will allow temporary access to the data in HPA-protected area, but as soon as you power off or unplug the drive, the HPA will be back again.
After you confirm unclipping HPA until power cycle, the imaging process starts and the following message appears in the imaging log: Source device HPA was set to native max address until power cycle.
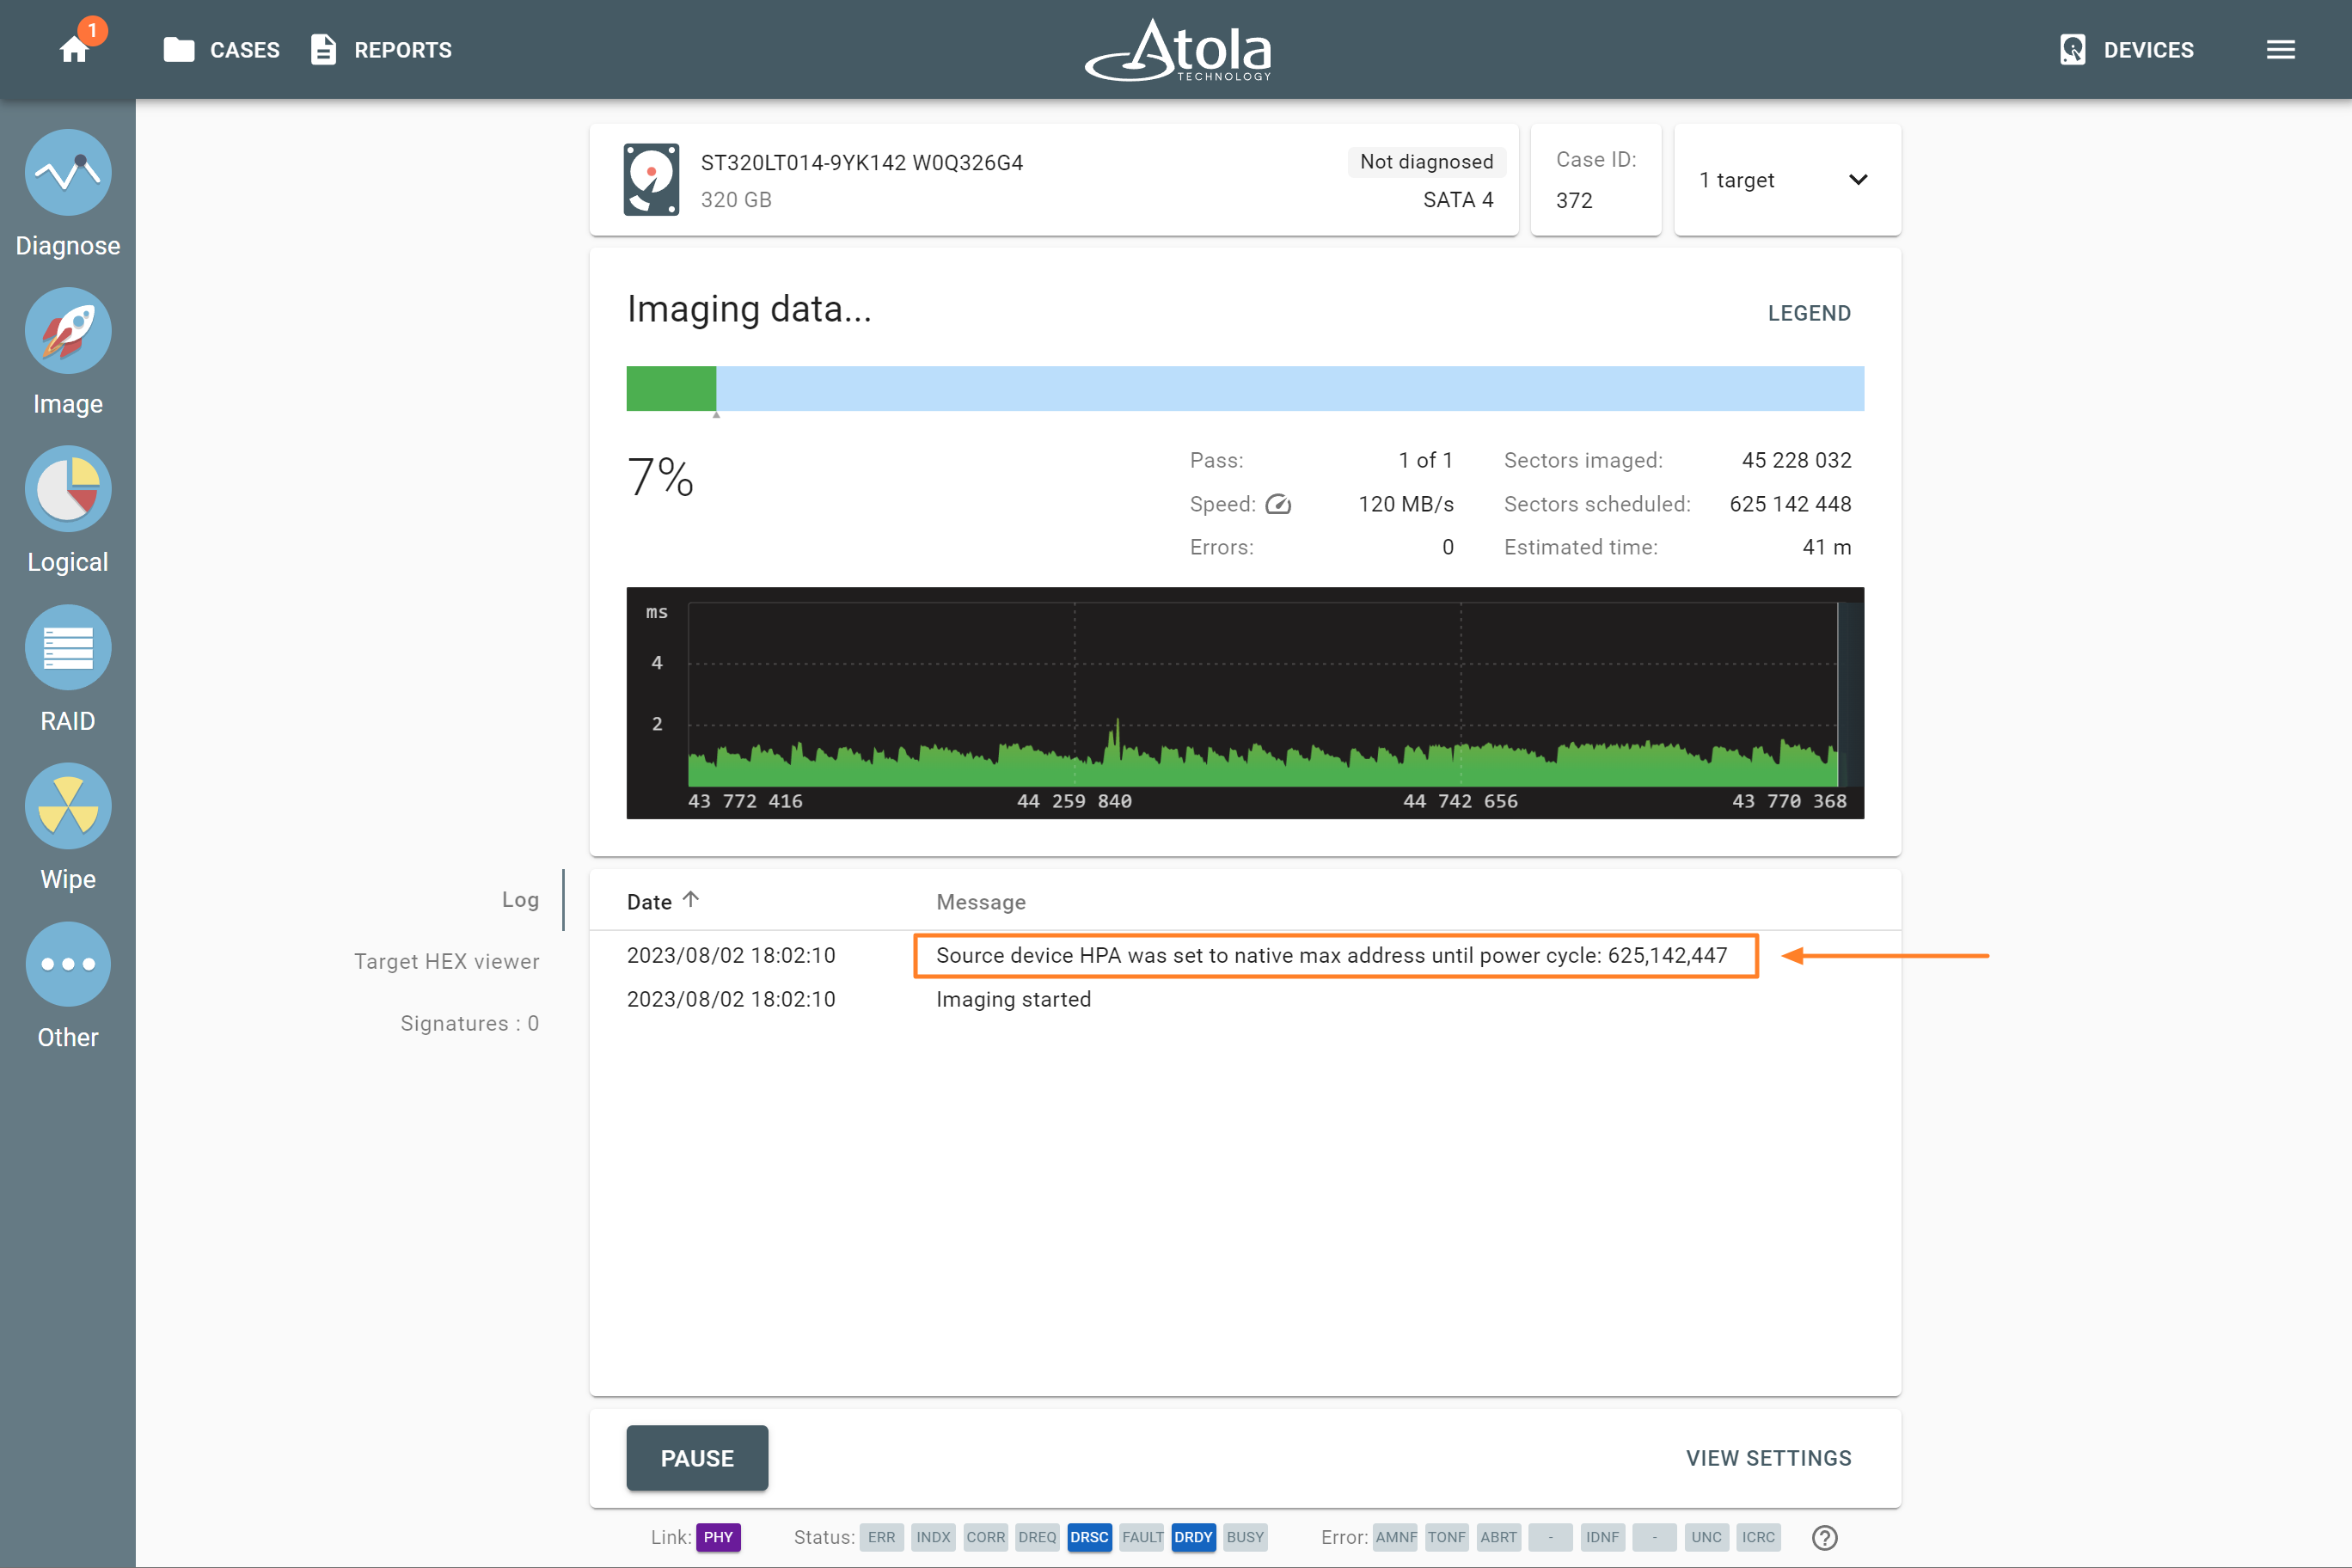
The message in the imaging log informs that source device HPA was set to native max address until power cycle.
Set or change HPA, DCO, AMA limitations
Not all drives support hidden areas. Limitation type supported by the particular drive will be shown in green on the Hidden drive areas page.
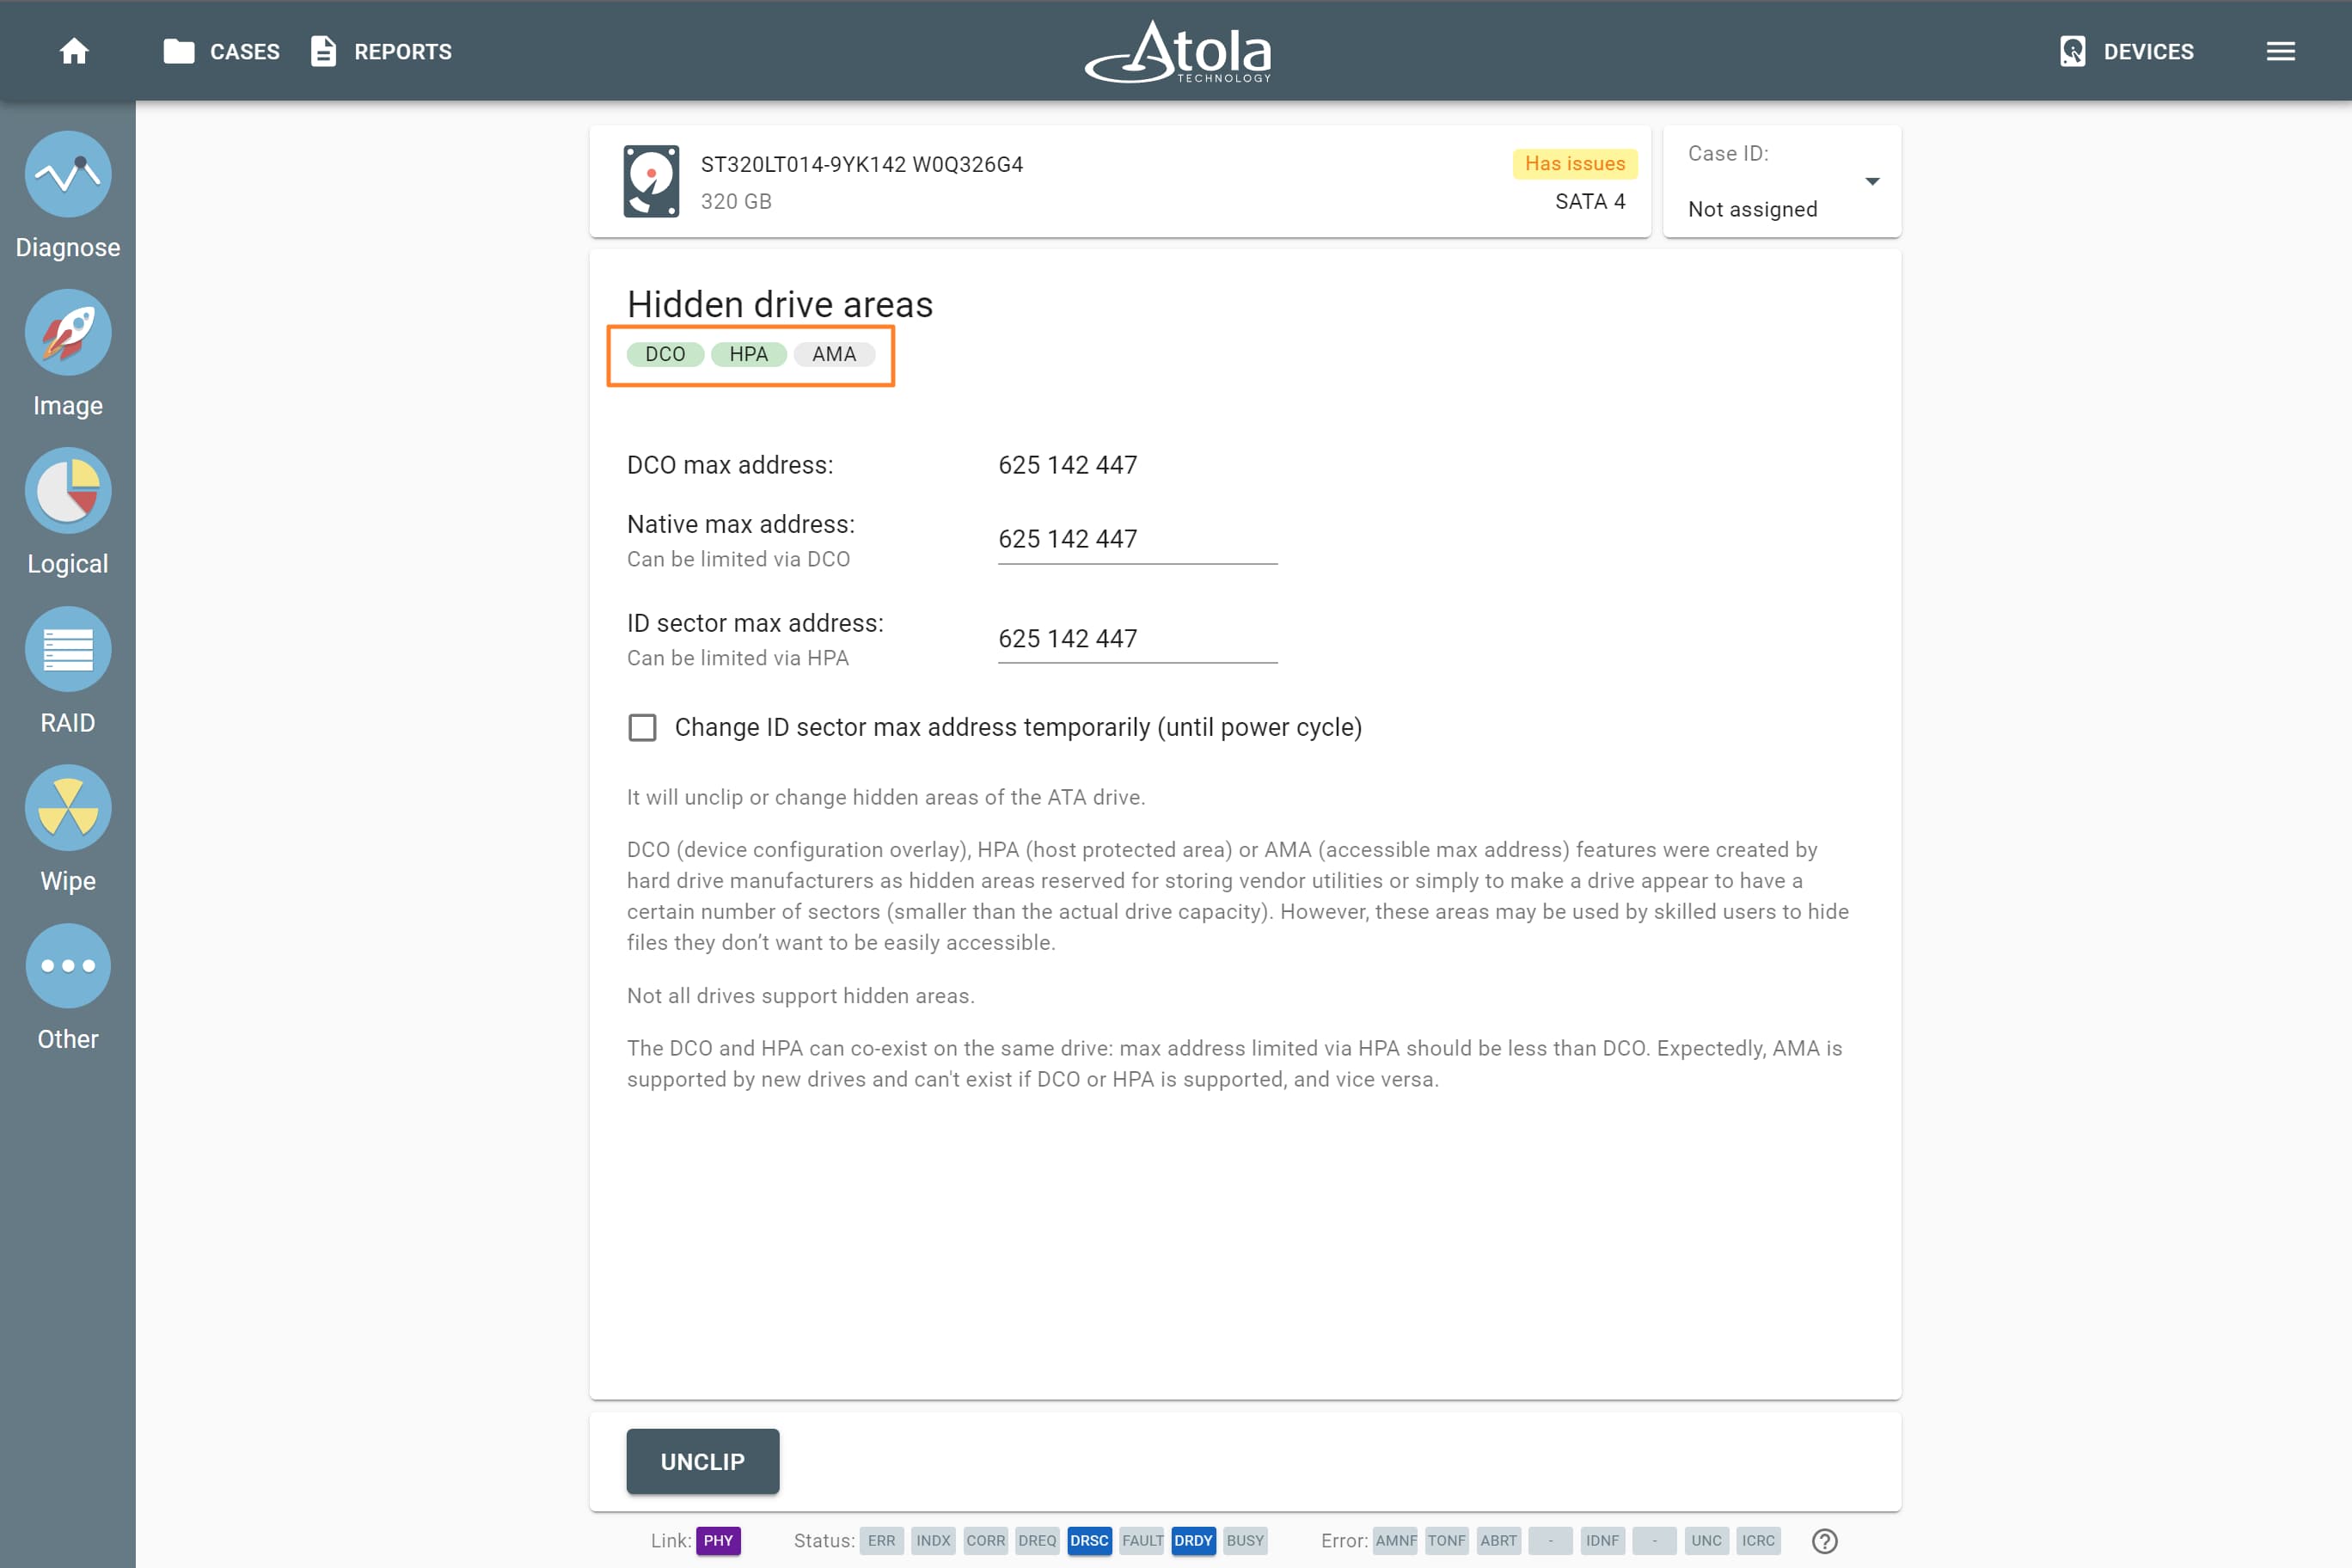
The drive supports DCO and HPA limitations, but does not support AMA.
The DCO and HPA can co-exist on the same drive: max address limited via HPA should be less than DCO.
Expectedly, AMA is supported by new drives and can't exist if DCO or HPA is supported, and vice versa.
If your target device is larger than your source device, but you need hash values for the source and for the target devices to be identical, see Clip target drive to source evidence size.
To set or change DCO limitation:
- Make sure that the drive is in the Target mode.
- On the left, click Other and then Hidden drive areas.
- Select device.
- Enter new Native max address. Notice that ID sector max address changes accordingly.
- Click Change.

Setting new DCO limitation.
To set or change HPA limitation:
- Make sure that the drive is in the Target mode.
- On the left, click Other and then Hidden drive areas.
- Select device.
- Enter new ID sector max address.
- Optional: Check Change ID sector max address temporarily (until power cycle) if needed.
- Click Change.
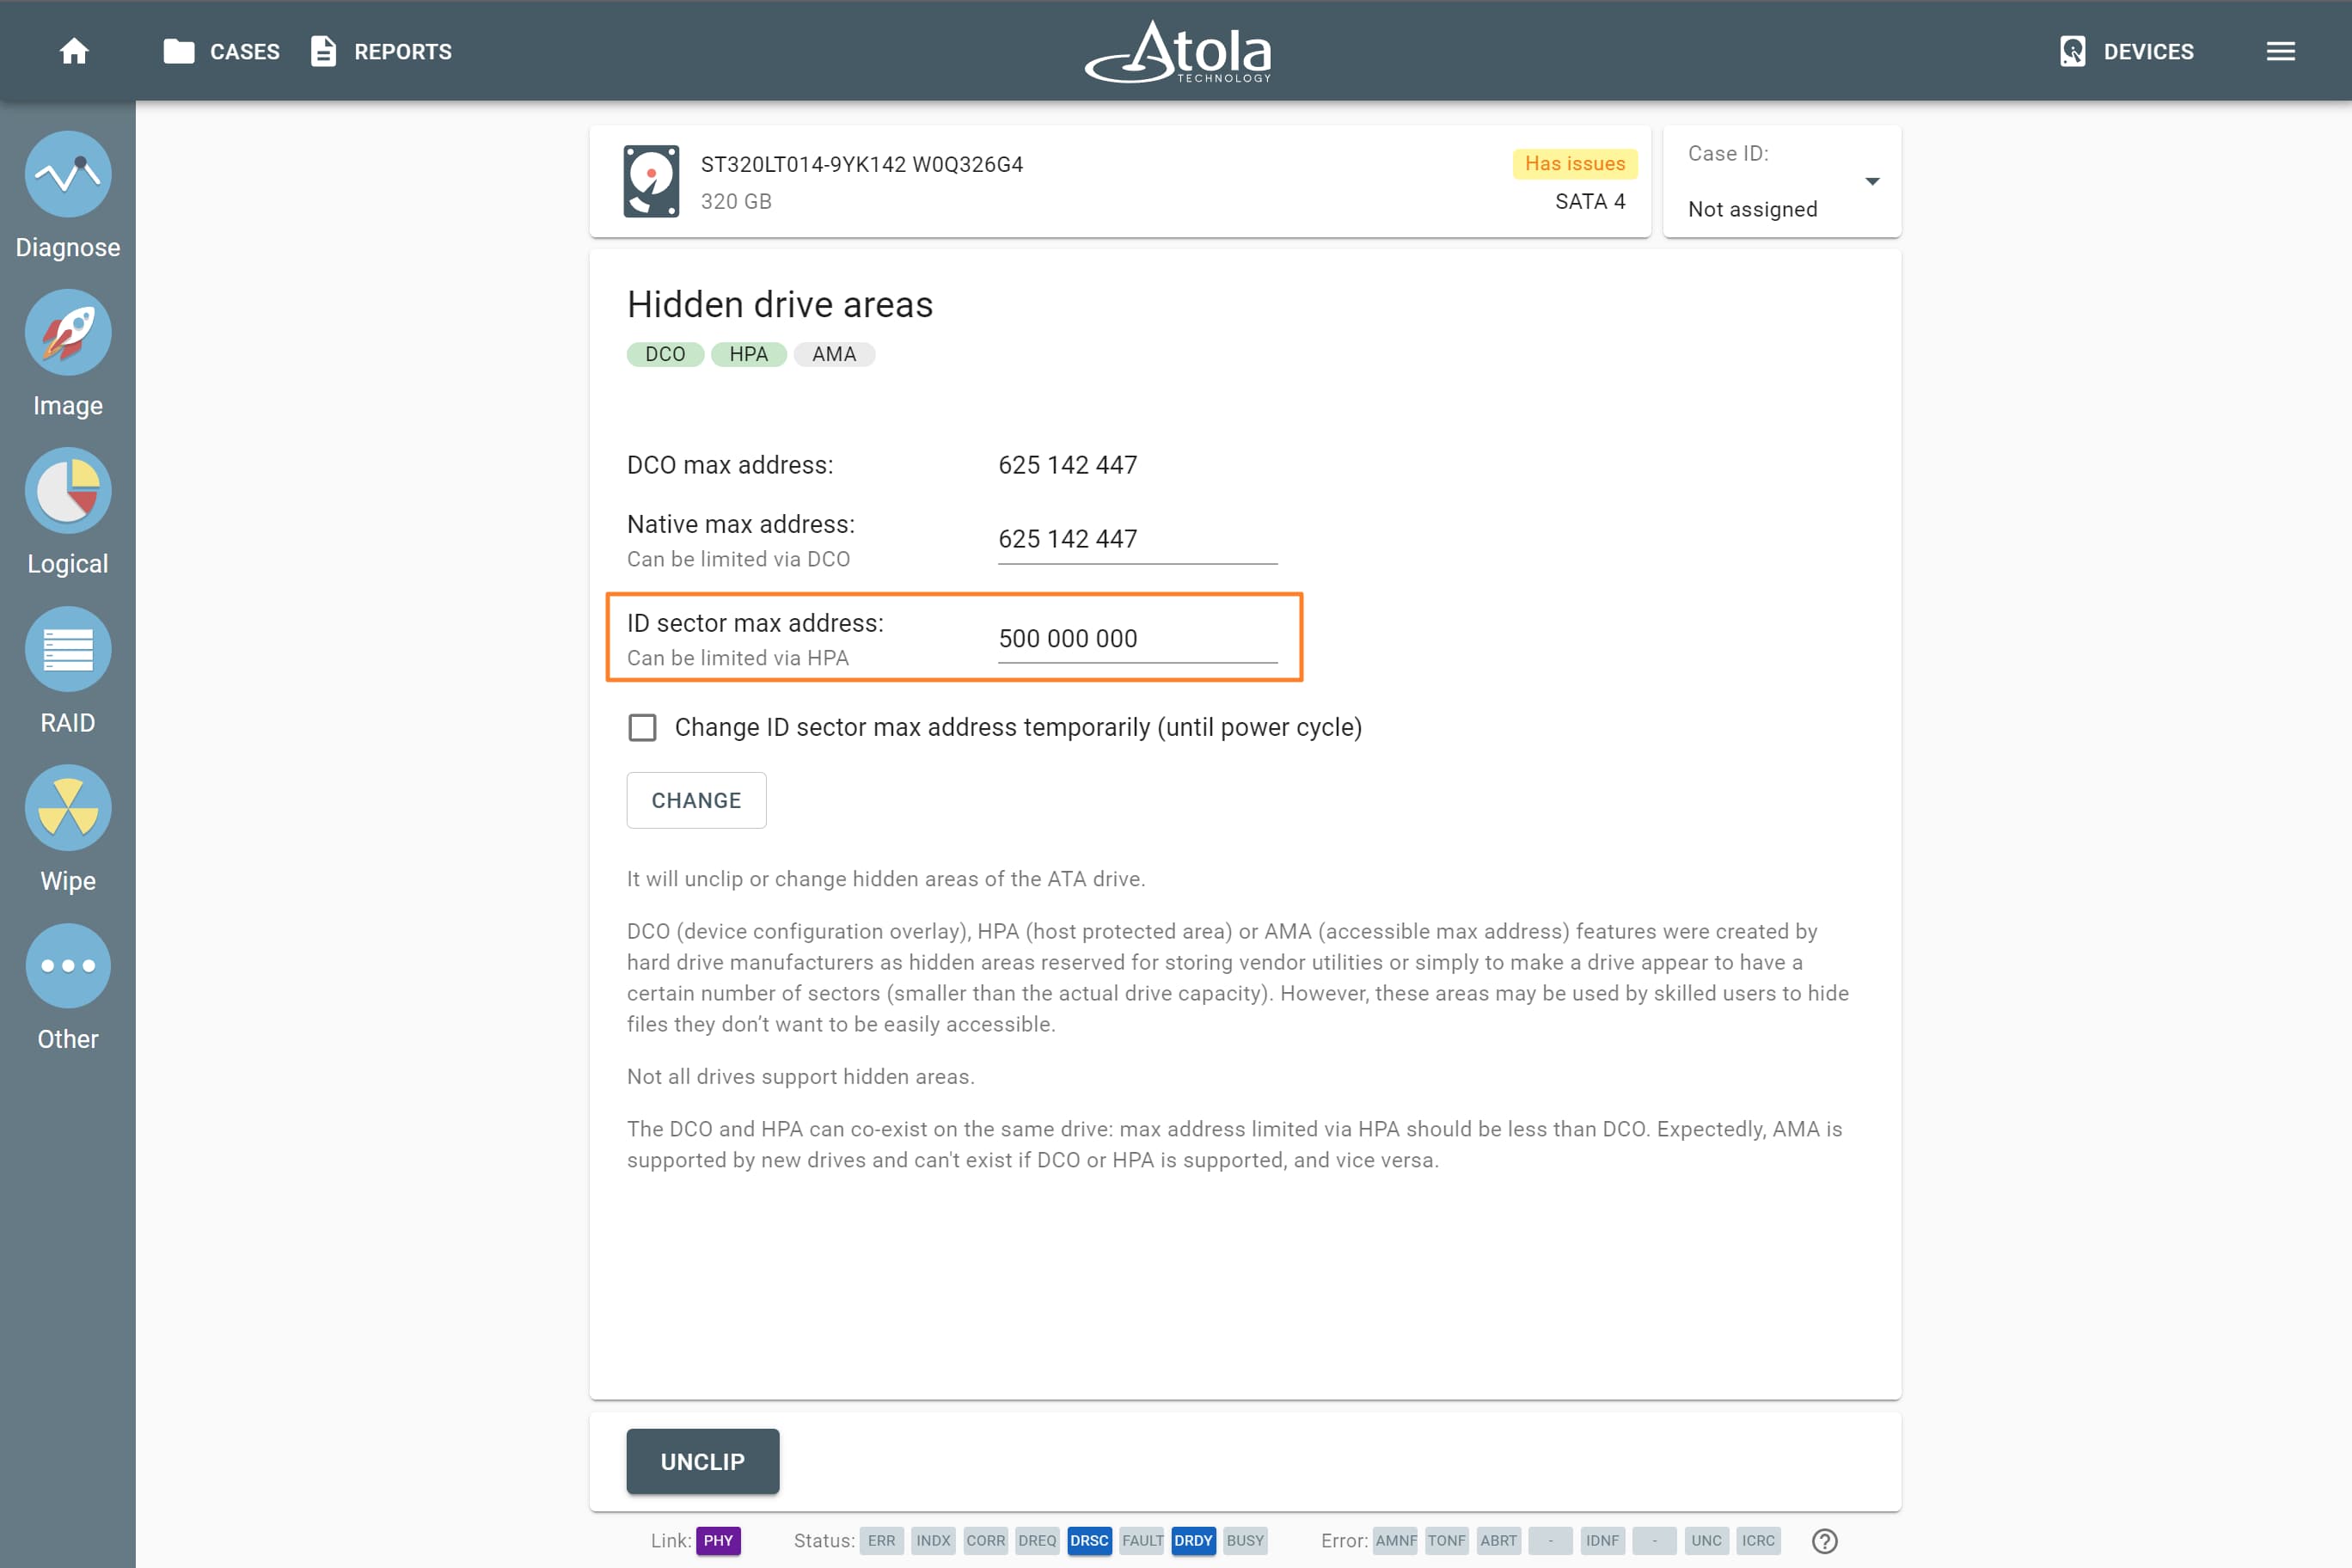
Setting new HPA limitation.
To set or change AMA limitation:
- Make sure that the drive is in the Target mode.
- On the left, click Other and then Hidden drive areas.
- Select device.
- Enter new ID sector max address.
- Click Change.
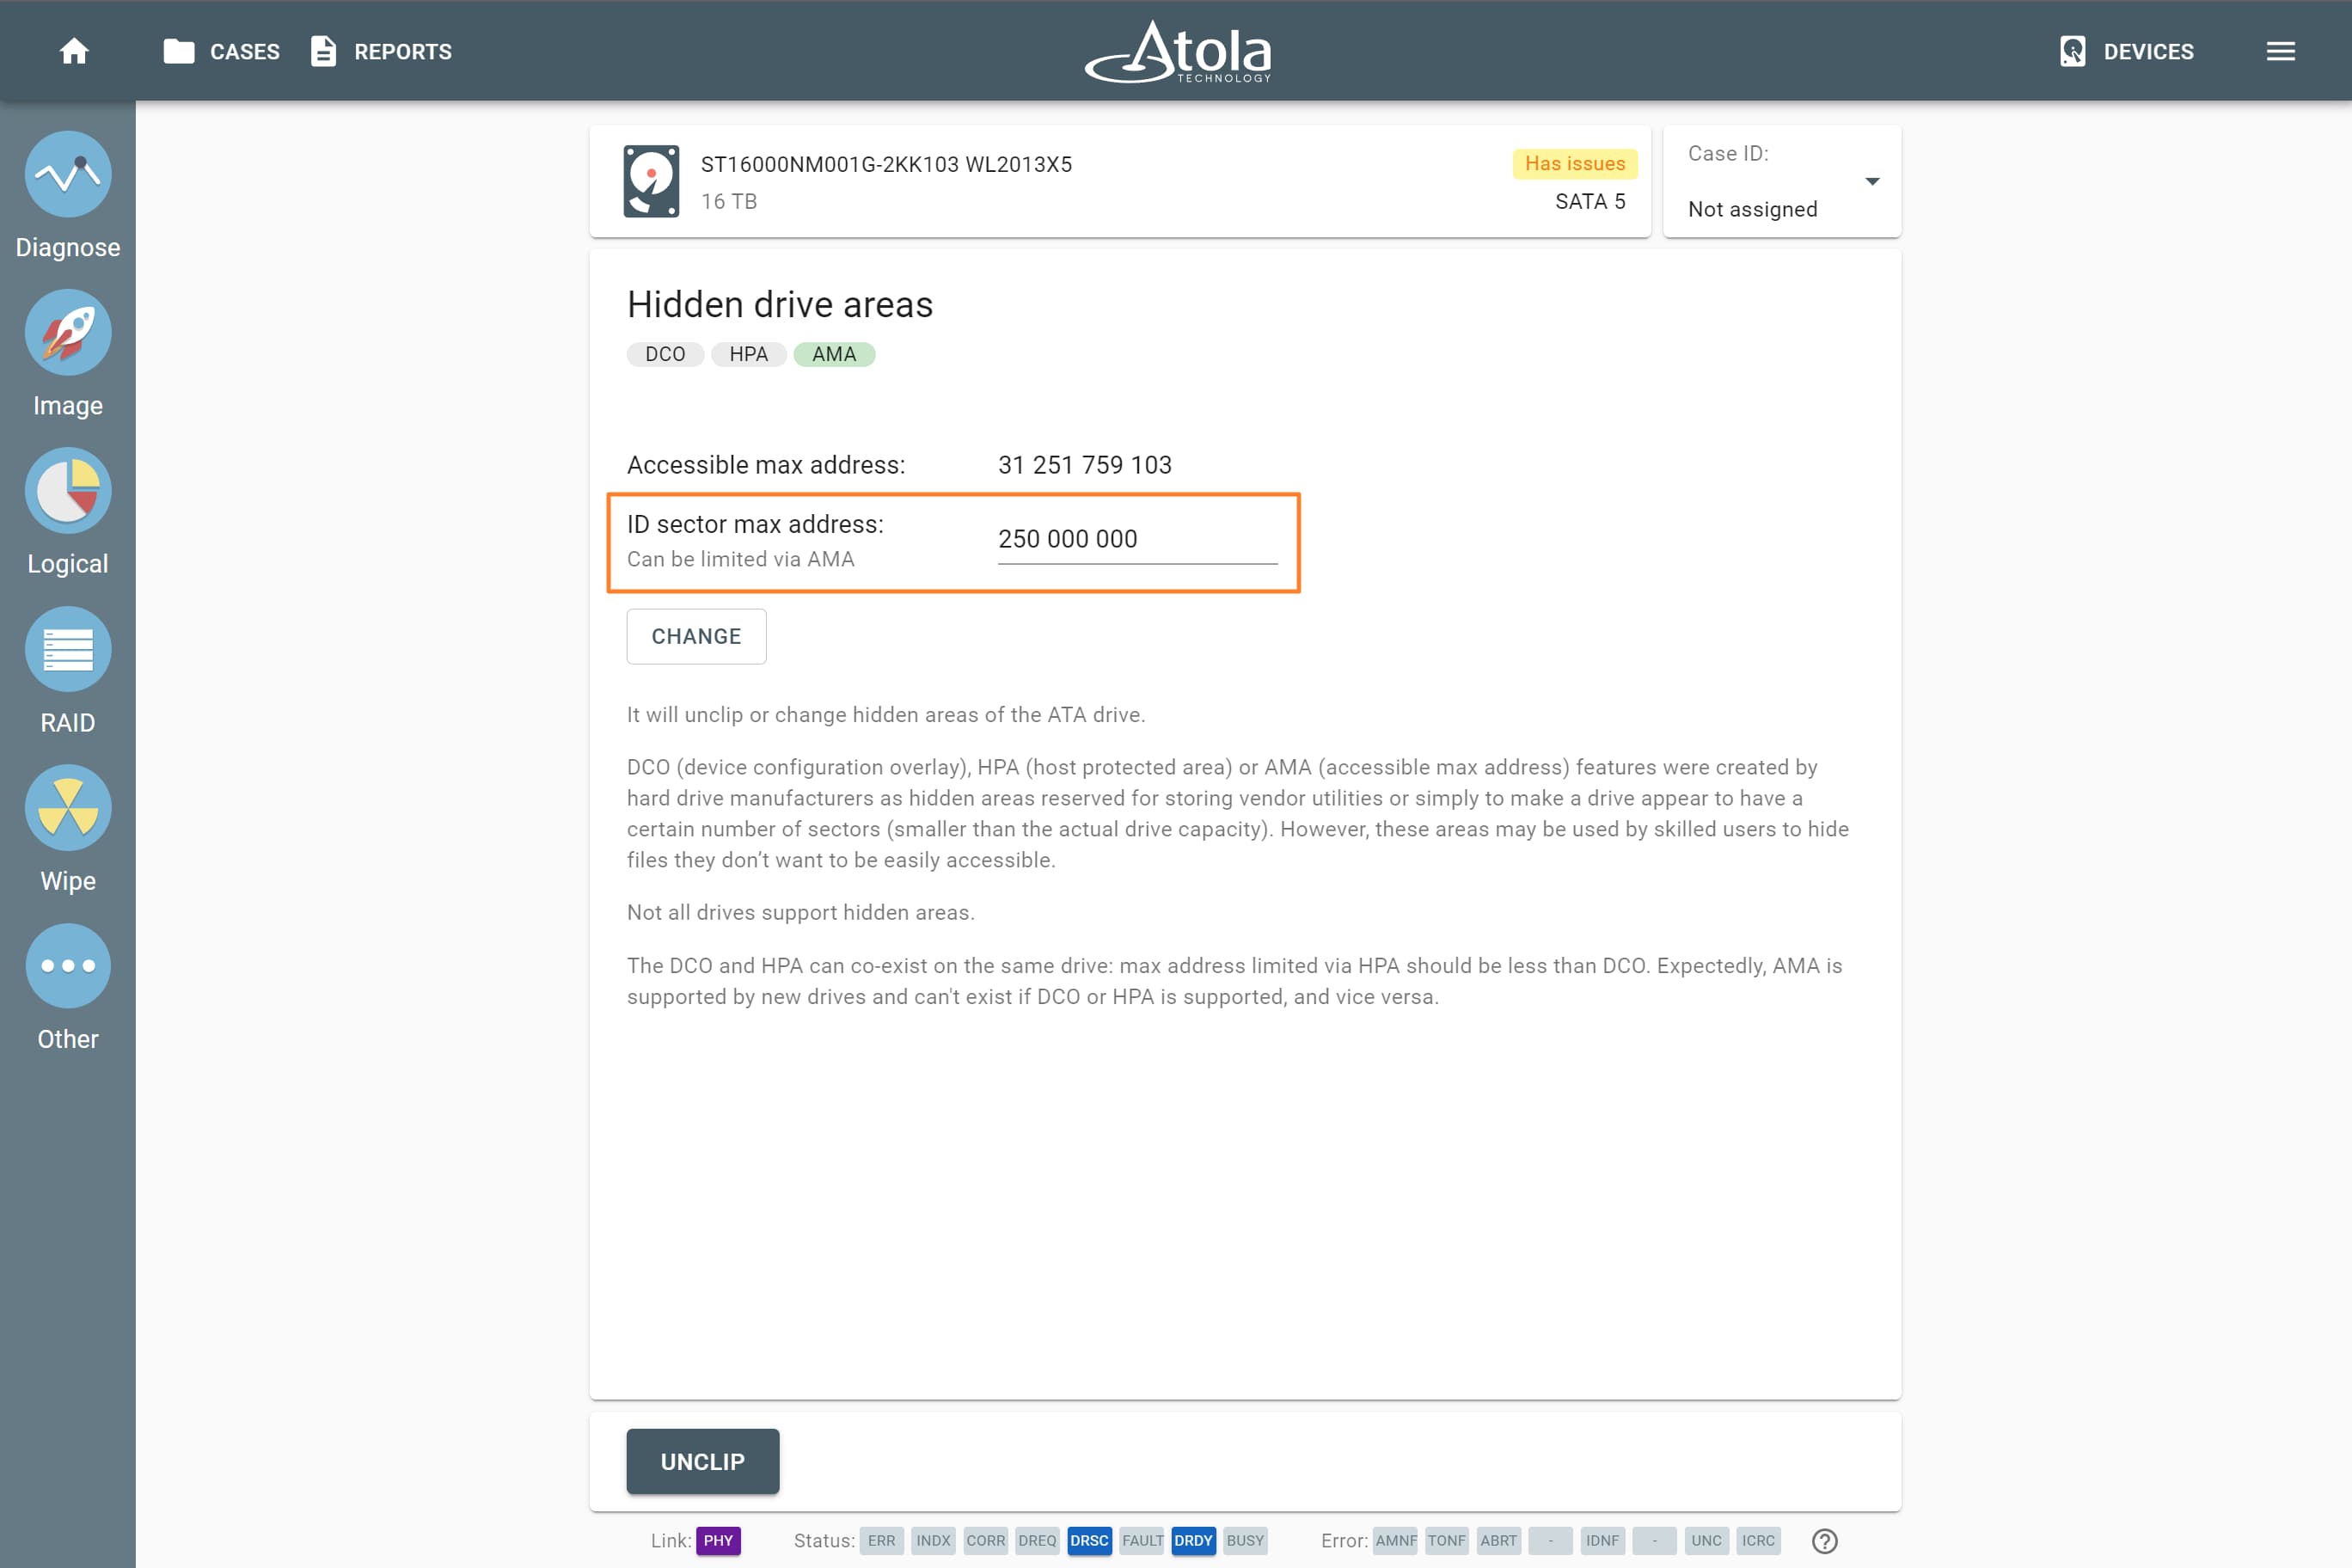
Setting new AMA limitation.